Making and canning tomato sauce… with a food mill!

What do you do with a Saturday in the middle of tomato season? Can some tomato sauce!

For today’s Craft School Saturday, I’ll show you my latest adventures in canning… yielding 7 quarts of yummy pasta sauce!

The old-school way of making sauce

Every year, I can tomato sauce (which, despite being called ‘canning’, it usually means putting stuff into glass jars). Since no one in my family cans, I learned everything I know about canning from the Ball Company’s Blue Book Guide to Preserving. (Although, I’m very happy to report that I’ve since taught my mom!)

Photo from last year’s canning
So, every year, I make tomato sauce, which requires the following steps: acquire large amounts of tomatoes, peel the skin off the tomatoes, boil the tomatoes down (adding spices) until it’s sauce, then put the sauce into jars and can. Previously, I’ve blanched the tomatoes and peeled the skin off each one… a very time consuming process.

This year’s innovation

You may recall that earlier this year, I was on the local news modeling for the book Craft Activism. Also on the show was the chef from an Italian restaurant. One of the perks of following a cooking segment is that you get to eat the food cooked during the show!

The chef told me that they make all of the sauce for their restaurant. I asked if he had any tips for speedy-sauce making, and he told me that they use a food mill. I had never heard of such a thing… but it’s changed my sauce-making life!

Food mills magically remove the skin and peels from the tomatoes, and leave behind a nice, smooth sauce. What an invention!

So this year… I got a food mill! What a great investment! It wasn’t very expensive and it really sped up the process!

Making the sauce

Warning: it’s messy… but pretty fun, too! My two bushels of tomatoes (about 50 lbs) made 7 quarts of sauce. This is less than my average crop, partially because I threw in some non-sauce tomatoes.

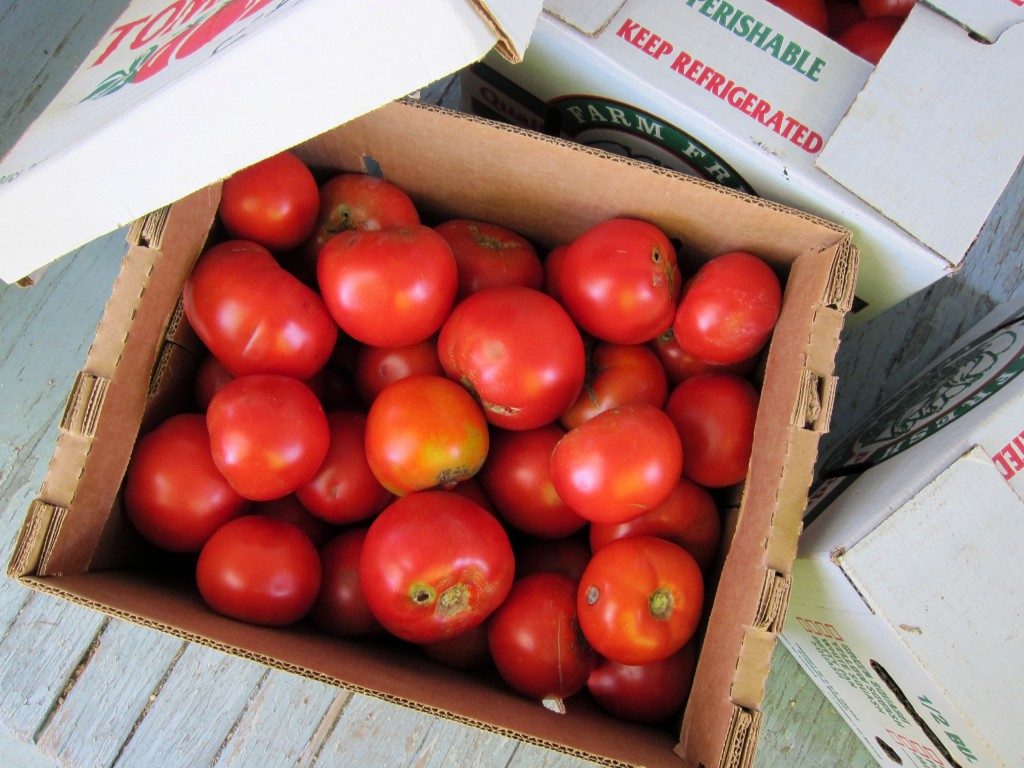
Step 1: get tomatoes

If you have a local farmer’s market, then that’s the place you’ll want to go to get your tomatoes. Ask if they have ‘seconds’, which is code for ‘tomatoes with a bump or bruise’. They’re too damaged to be sold at full price, but they’re great for sauce!

I bought 2 bushels. Ideally, you want ‘sauce’ tomatoes (a variety with more fleshy-bits on the inside), but some of the ones I got this year were heirlooms, and they worked just fine. Non-sauce varieties taste just as yummy, they just might need some extra boiling time (when making the sauce) because of their extra water content.

Step 2: Cut out icky parts and run through food mill

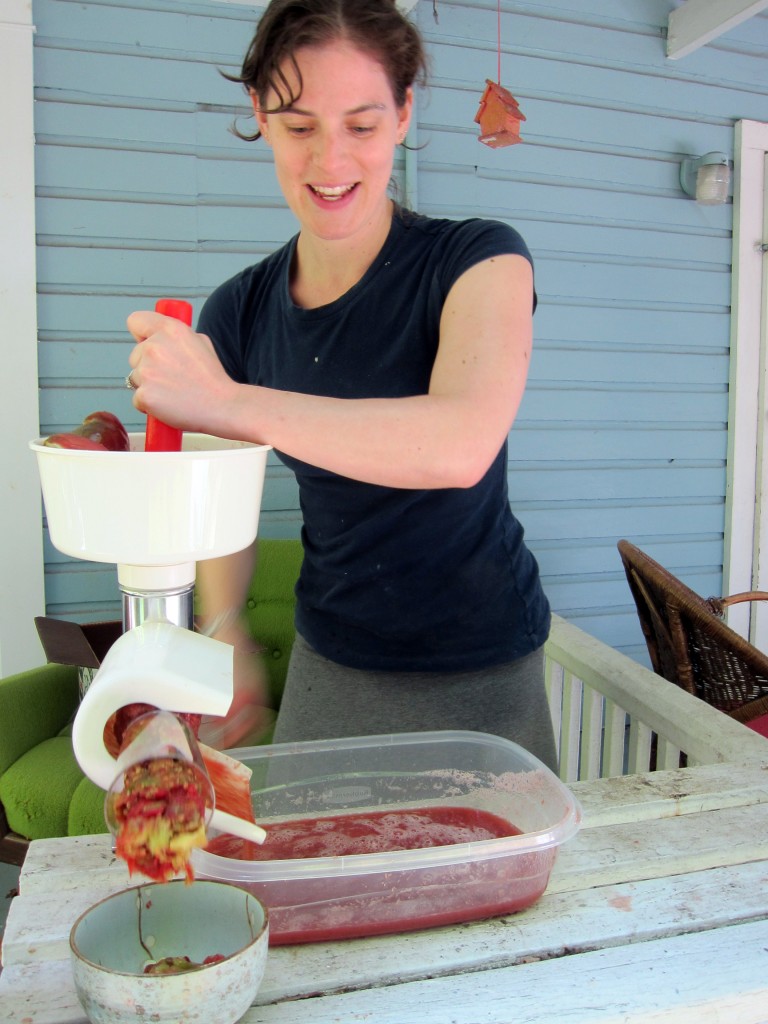
Cut out any severely bruised or moldy/icky parts of the tomato… you don’t want that in your sauce! Then, cut the tomatoes into quarters (or whatever size you need to so that they fit through your mill), and start cranking!

Oh yeah… and set up the food mill according to the instructions on the box… but you probably knew to do that!

Look at me go!

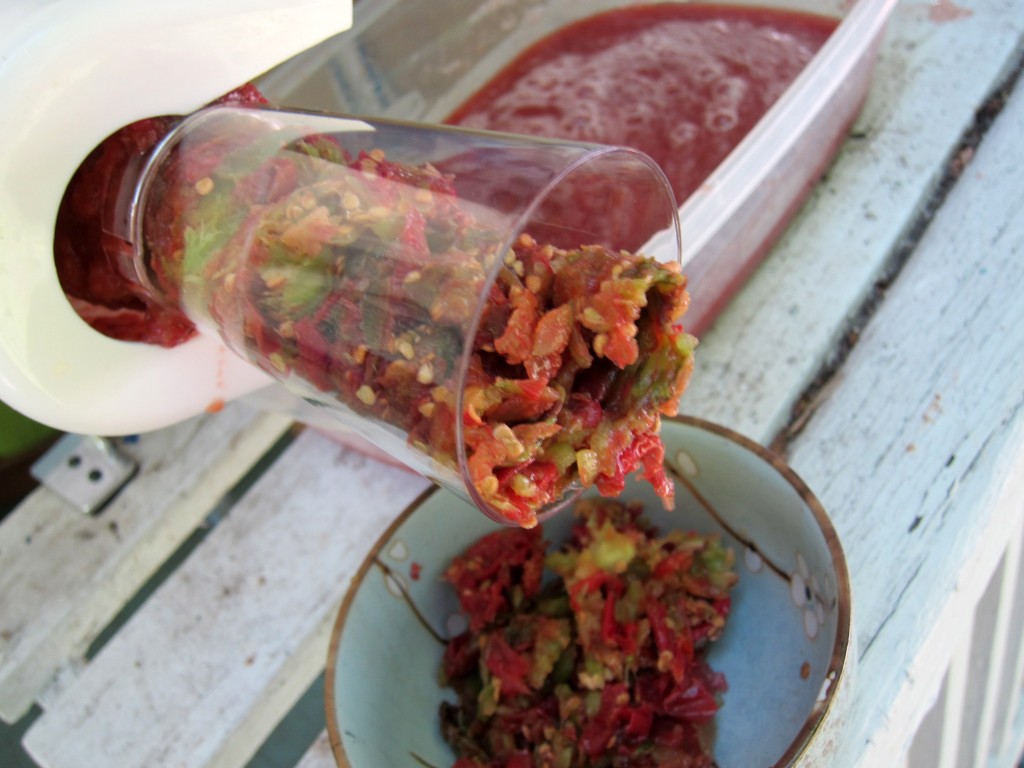
The food mill pours yummy sauce down one chute, and all the seeds and skin comes out another:

Man… this was WAY faster than blanching and peeling the skins!

Step 3: make sauce

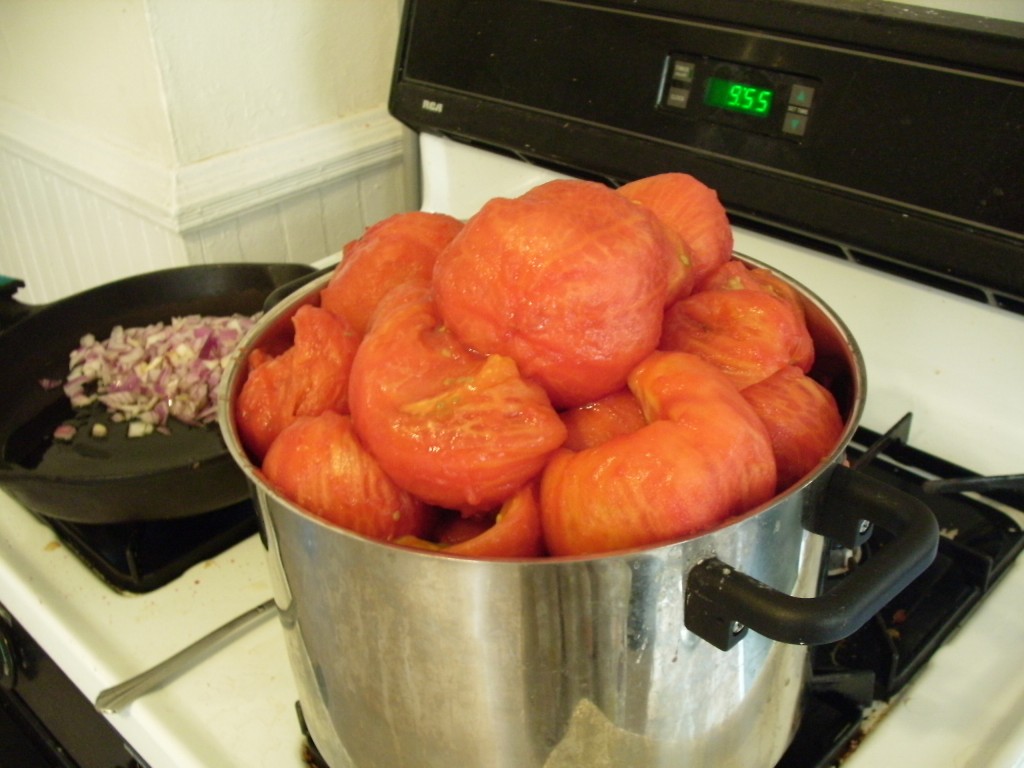
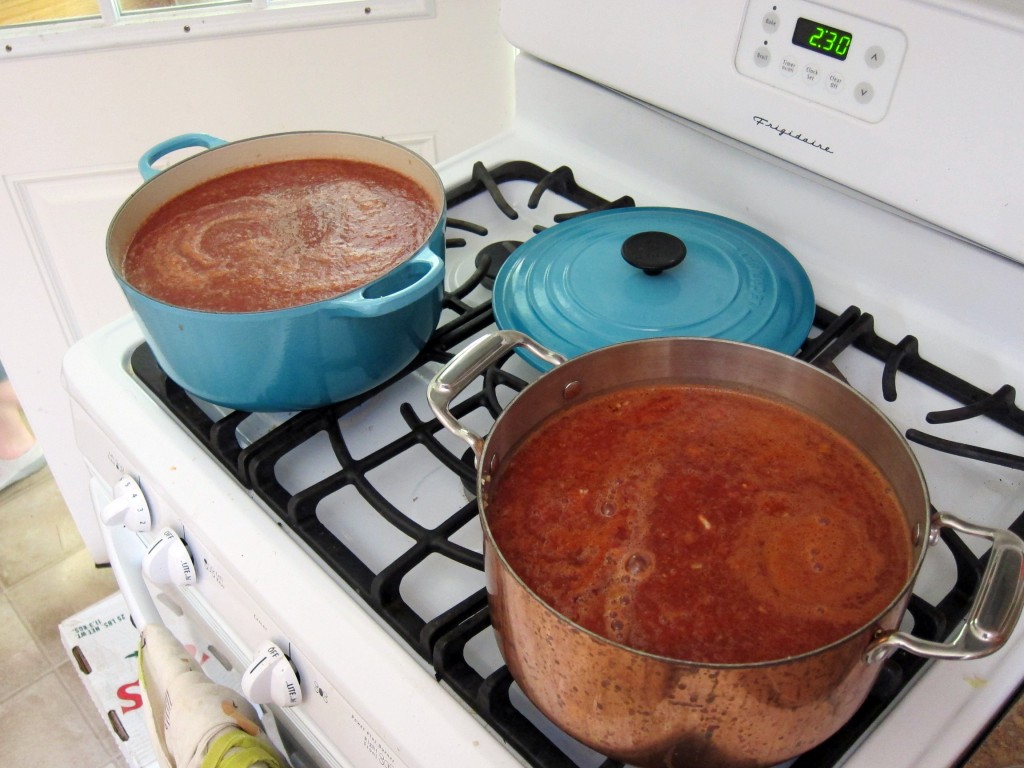
So, the next thing you do is take all that sauce that’s been pouring out of the sauce chute and put it in a pot on your stove… or, if you have as many tomatoes as me, a few pots:

Add in whatever you think would be yummy. I added (pre-sauteed) garlic and onions, plus some basil, oregano and salt.

Then, just keep cooking until it’s the consistency of sauce you buy in the store!

Step 4: put sauce into cans and process

Once you have your sauce, it’s time to can it! Basically, you pour the hot sauce into the jars (leaving a little room at the top), put the lid on, and then dunk the jar in boiling water for 15 minutes. (If you’re a newbie to canning, definitely read up on detailed instructions!)

Step 5: stare proudly at your sauce!

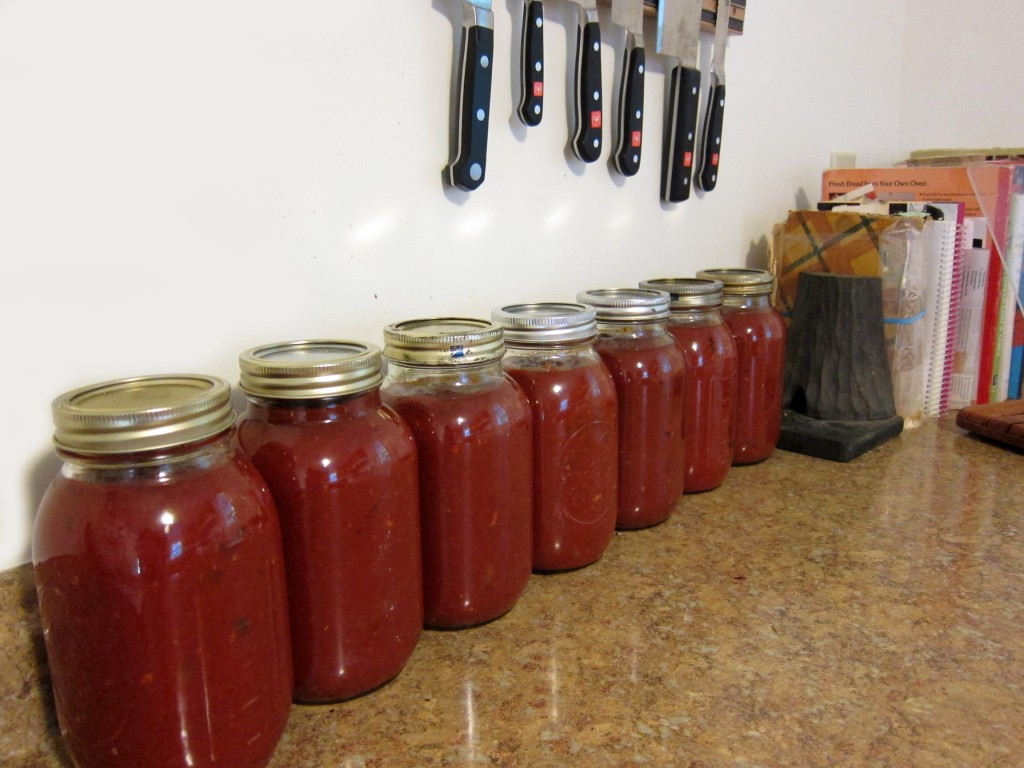
There’s nothing I love more than looking at my beautiful jars of sauce, all lined up and waiting for winter!

Aren’t they pretty?

Step 5: Hire a clean-up crew

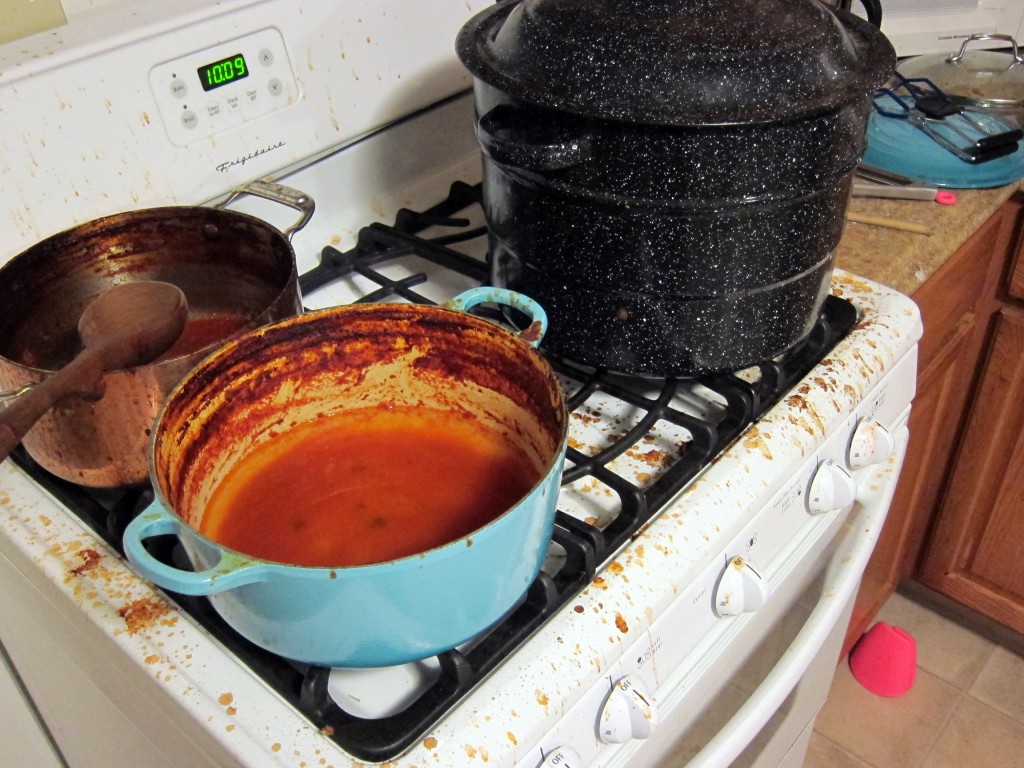
Just kidding! Well… sorta. Your kitchen, if you’re at all like me, probably looks like a disaster zone by the end:

I’m not gonna lie… you’re going to have to break out your elbow grease. I recommend baking soda: cleans wonders! And really, isn’t it all worth it to have that beautiful sauce?

Have a happy Labor Day Weekend!

I hope you’ve enjoyed this peek into my sauce-making adventures, and that you have a fabulous weekend!

Learning Bead Crochet

Goals for Bead Crochet

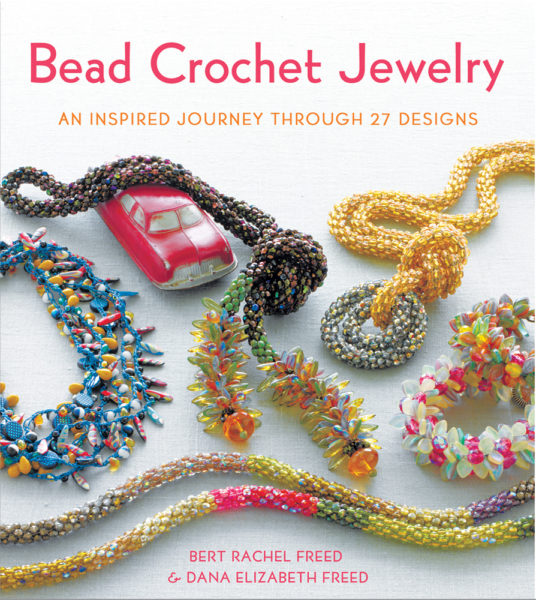
I got a copy of Bead Crochet Jewelry, and the jewelry looks amazing!


Bead crochet is a little different than regular crochet, and gives you a piece with a totally unique look. To bead crochet, you pre-string a lot of beads, and then (basically) slip stitch around a 4 stitch round (or more stitches, if you’d like). While slip stitching, there’s a certain technique for incorporating the bead appropriately into the stitch.

My long-term goal is to make myself a few fabulous necklaces! But, that’s a bit much for one Saturday! So, my goal this week was to:

  • select beads and thread appropriate for a starter project
  • string beads (you need to pre-string a LOT of beads!)… and see whether it would drive me bonkers
  • learn the basic technique for bead crochet
  • fasten off my work

My Resource

Now that I’ve completed my first (albeit, small) bead crochet project, I have to tell you: this book is fabulous! Bead Crochet Jewelry is written by a mother and daughter (who I had the good fortune of meeting at TNNA), and it’s completely obvious throughout the book that this duo has a passion for bead crochet and are skilled teachers!

The book is organized by difficulty level (really helpful for us newbies!), and choc-full of helpful tips and step-by-step photos. I’m not going to fib: bead crochet is pretty different from regular crochet, and I had some trouble manipulating such thin thread early on. But, I persevered because of the great instructions (and dreams of future projects), and I couldn’t be happier!

My Materials

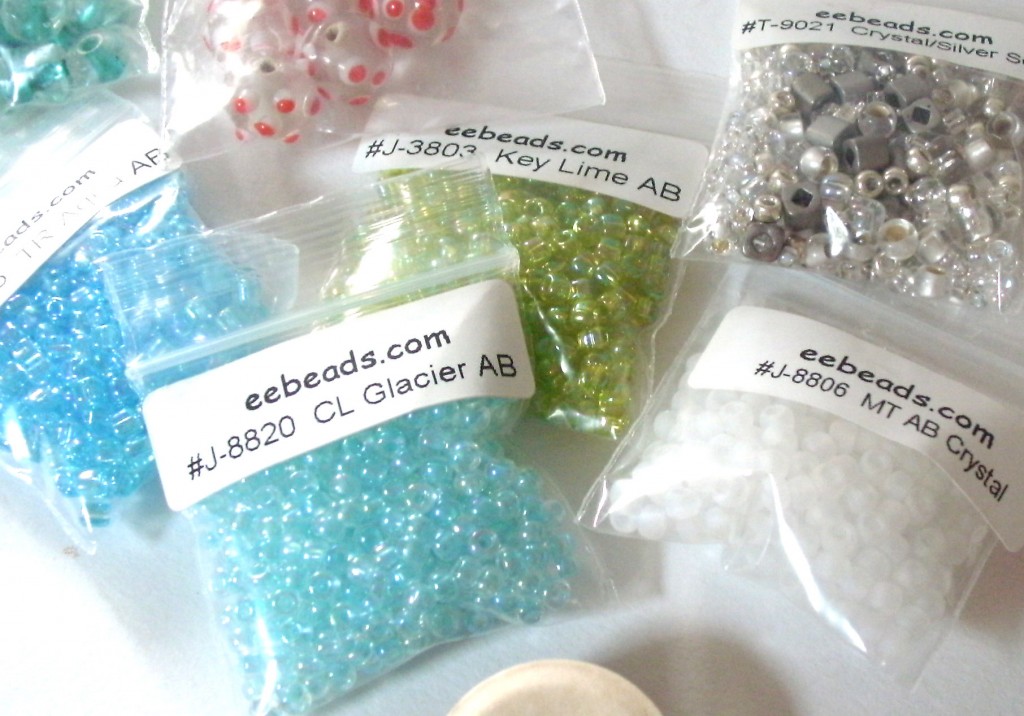
I checked out my local craft stores, and none of them carried the type beading thread that was recommended in the book. So, I ordered my thread (and some beads, while I was at it!) from eebeads.com.

What I Did

I’ll admit: since I’m a pretty proficient crocheter, I thought I could start straight away on one of the projects, and skip over the advised practice. I was wrong.

Bead crochet requires a new way of interacting with the beads and hook… and that’s really hard to do for the first time with bead thread.

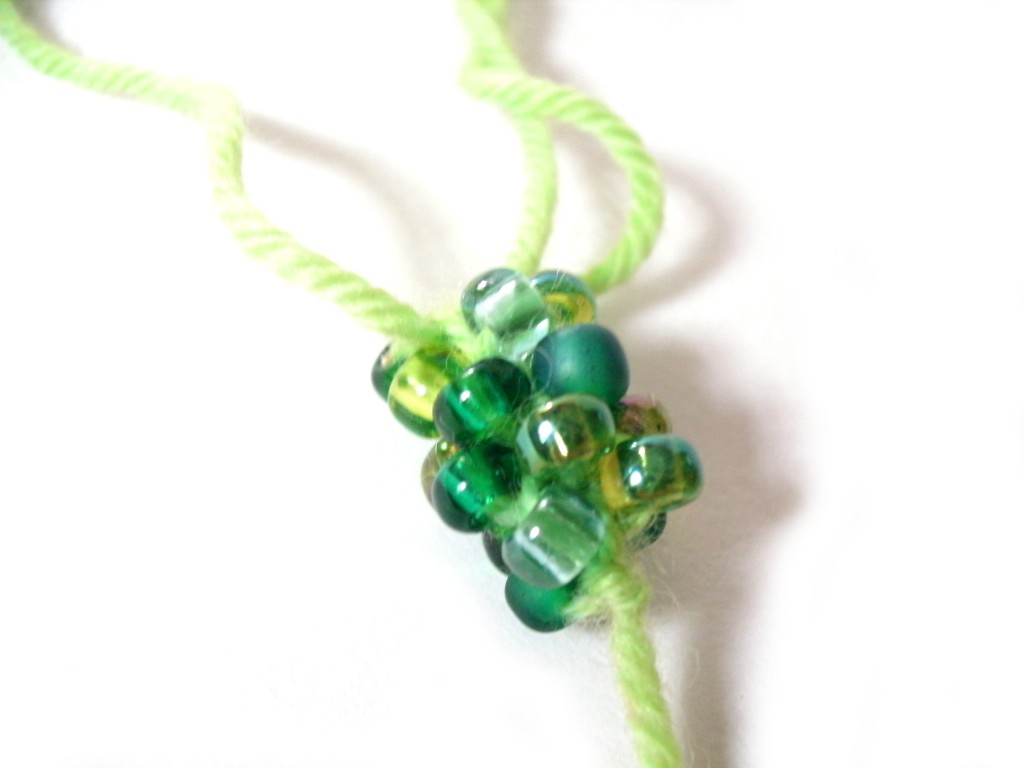
I began by stringing a pretty collection of beads. However, not only was the thread tiny (and I had no idea what I was doing!), the beads were slightly different sizes, making it a tough 1st project! So, after struggling a bit, I took the book’s advice and did a practice piece with yarn and jumbo beads:

I’m so happy that I did! Even though it doesn’t look fabulous, it allowed me to get the basic technique and get my fingers used to what they were supposed to do!

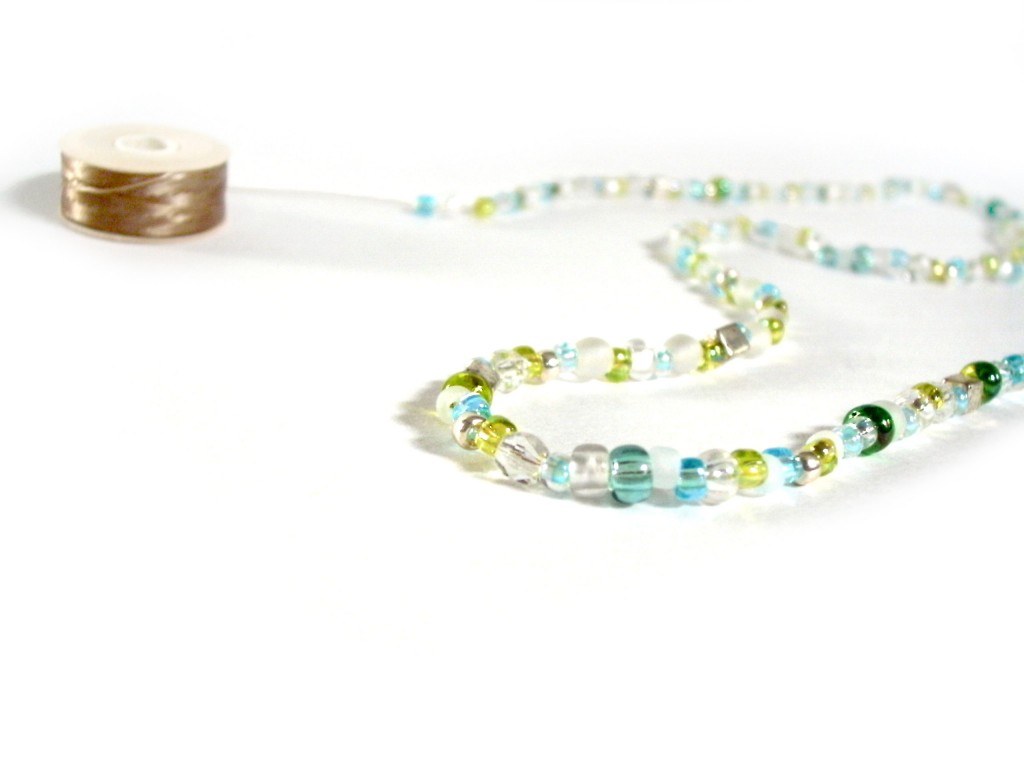
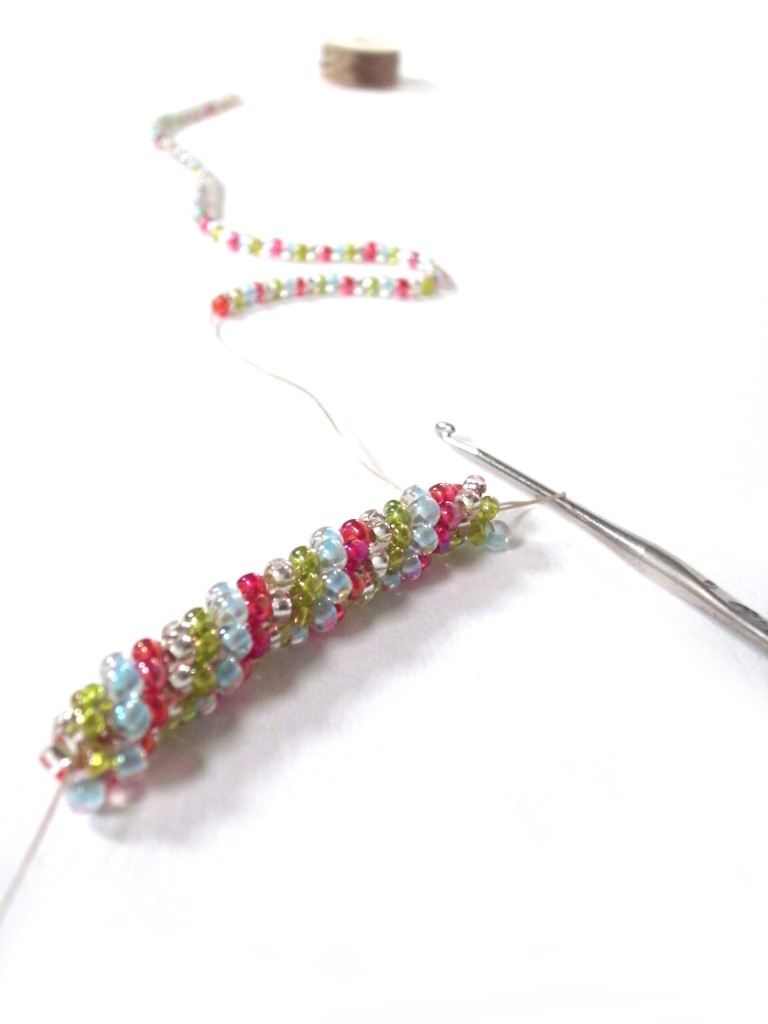
Next, I strung seed beads for my real project! I decided to use all identically-sized seed beads to make it easy on myself. I was delighted to discover that the crocheting was much easier now that I had some practice under my belt.

Isn’t it pretty? Look how nicely the colors are swirling! Yay!

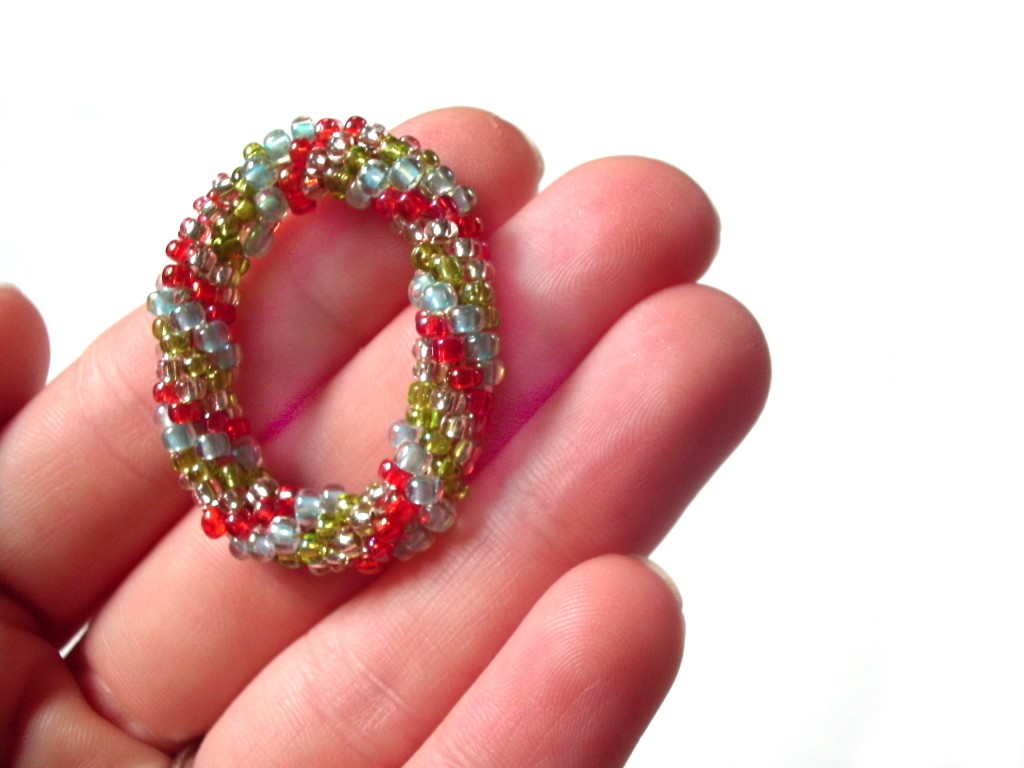
I even finished off my piece in a circle. I have no idea what I’ll use it for (turns out that I strung on too few beads for a bracelet), but I’m so proud!

What I Learned

Most importantly, I learned that I like bead crochet! I was very worried that I would find the pre-stringing and tiny thread size irritating… but I found the stringing relaxing and got used to the small gauge size. Hooray!

I also learned a few pieces of advice for starting. It’s incredibly important to practice with a larger hook/bead size to begin, and also use multi-colored beads. If you do that, you’ll get the hang of what you’re doing to move on!

Finally, I realized that I need reading glasses. I suspected this for a while, but this tiny project brought the need into focus! And trust me, it’s much easier to bead crochet when you can really see what you’re doing!

Future Goals

I love this! I’m going to keep going! Next up for me is a bracelet with some focal beads… so excited!

I totally recommend Bead Crochet Jewelry, it’ll really inspire you to learn!

Best,
Stacey

Using Embroidery Patterns for Something Besides Embroidery

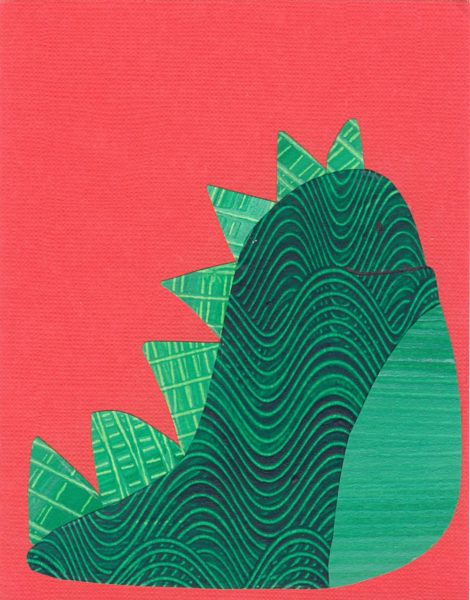
Jo’s been at summer camp for the last two weeks – hopefully loving every minute of it. 🙂 Last year I sent her cards made from my embroidery and applique patterns (see them here and here, and watch a video showing how to stitch on paper here) and this year she asked me to do the same thing. I thought I’d share them here with you so you could see a non-stitchy way to use embroidery patterns.

I use paper that I painted with simple patterns, but you could use magazines, the linings to security envelopes, giftwrap – any paper scraps really. You could also use the same patterns for applique – especially easy with fusible adhesive. Just enlarge them to whatever size you like!

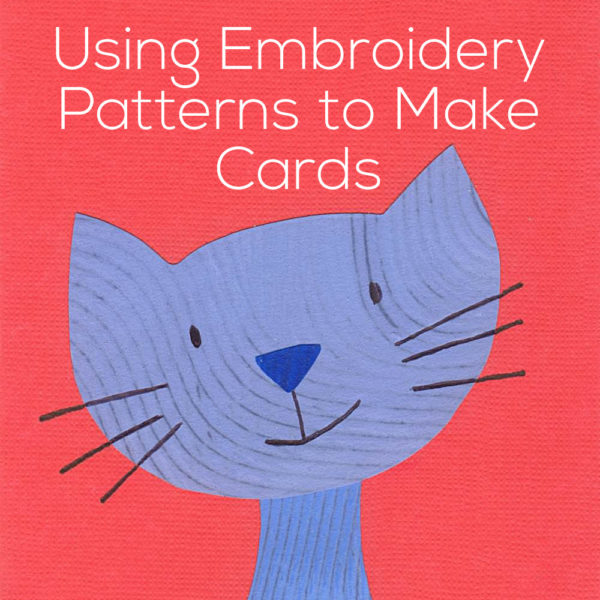
That blue cat up there at the beginning is one of the cats in this embroidery set.

Sluggo is the free pattern I gave away over at Wild Olive.

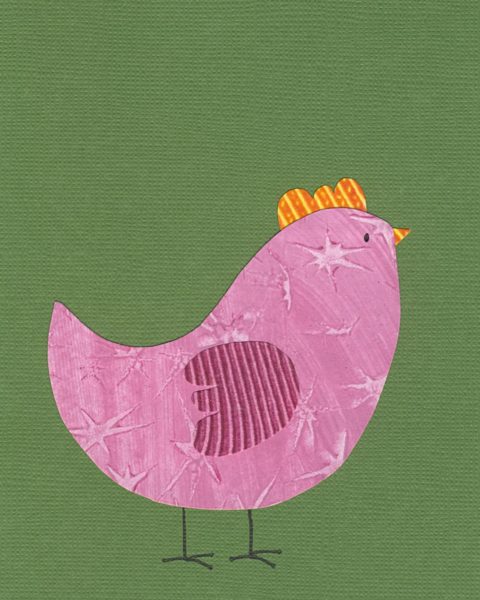
This hen is from the chickens collection.

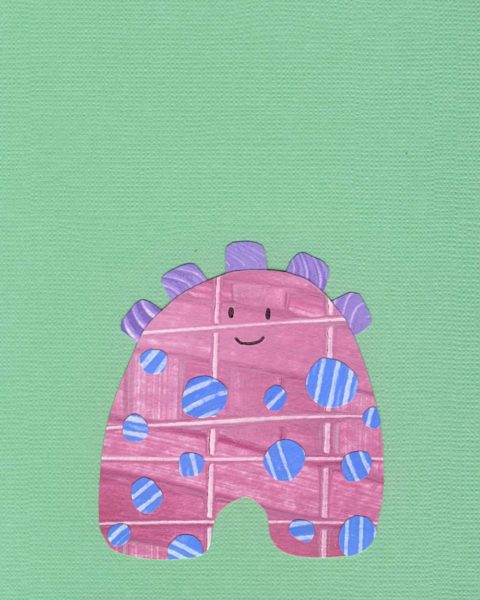
And this is one of the mini monsters.

Jo’s at camp for one more week – so a couple more will be coming soon!

Happy stitching!

Best,
Wendi

Sewing Camp Awesomeness

sewing camp

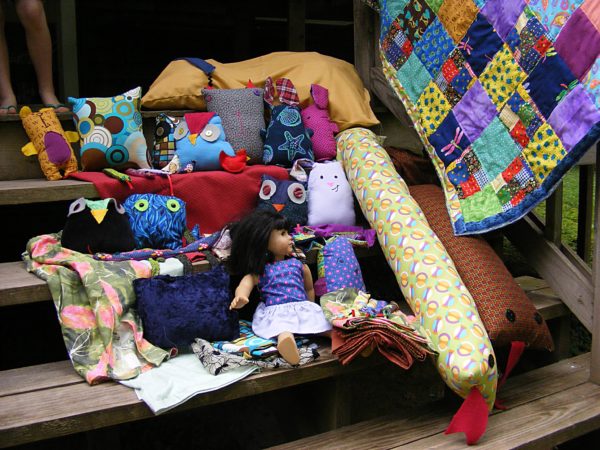
Sewing Camp last week was a huge success. I’m so glad I brought my camera and made time to snap some photos on the last day. Look at the fabulous things they made. . .

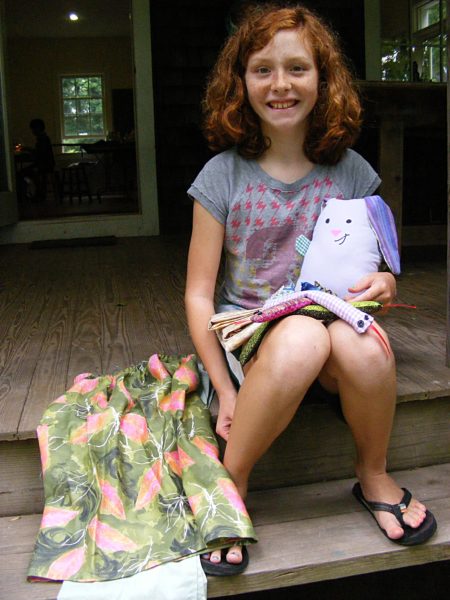
A cute bunny and some snakes in her lap – but don’t miss the silly monster on the floor near her. And that grey pillow is actually a cat pillow.

Another bunny, some snakes, a couple of skirts, a pillowcase, and some beanbags. Busy!

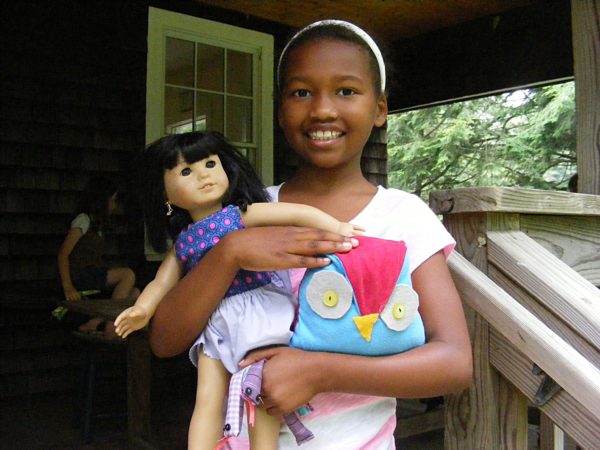
Some doll clothes, an owl, and more snakes!

More softies! She made a bunch of snakes and a few pillowcases too.

She wanted to make things for her pets, so that’s a dog bed and a cat toy.

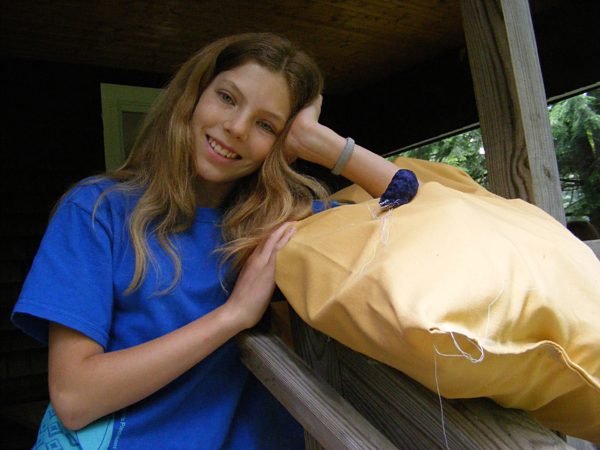
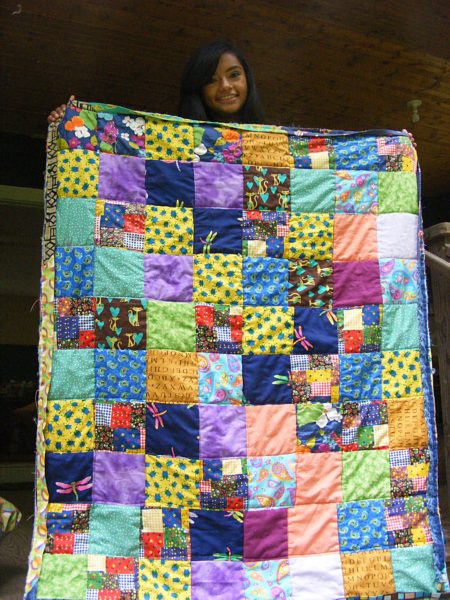
That quilt. That wonderful quilt!

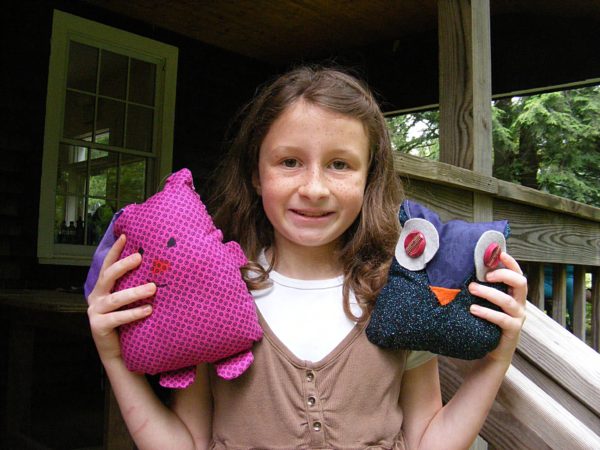
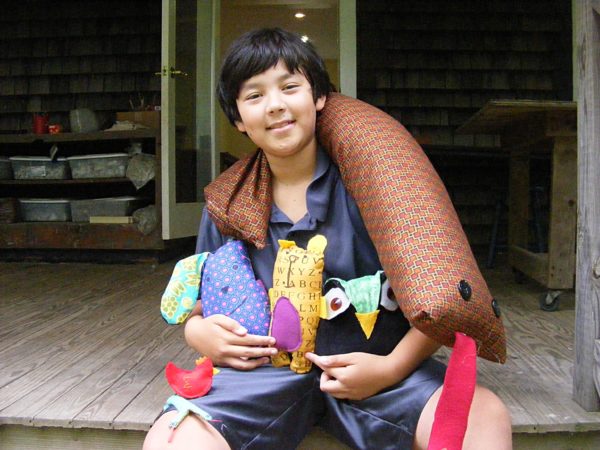
He was the softie-making king. That bear and bunny are for his sisters; the owl, hen and snake are for himself. Yes – that’s a GIANT version of the snake draped across his shoulders. 🙂

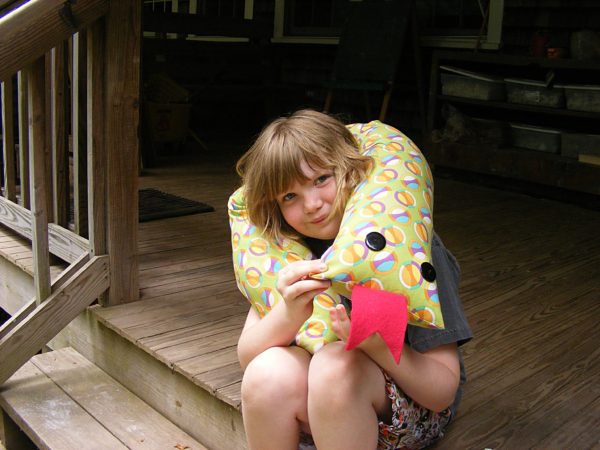
Jo was inspired to make her own giant snake.


The snakes were certainly popular. (Find the FREE snake pattern here and make your own.)

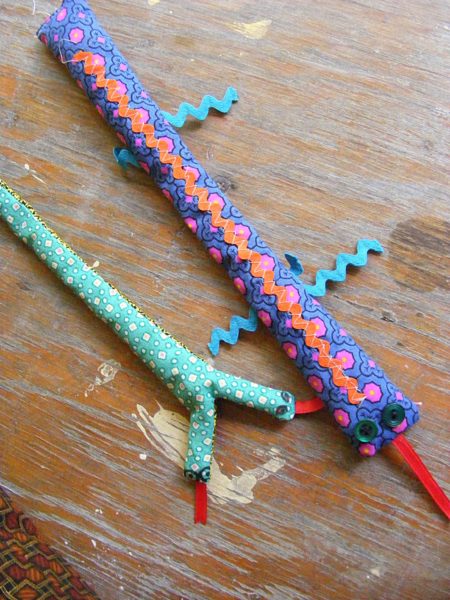
Here are two of the most special ones – a two-headed snake and a snizzard (that’s a snake/lizard, for those who don’t speak 8-year-old). 🙂

And one more shot of all the awesomeness. . .

Final tally:

  • 2 giant snakes
  • 14 small snakes
  • assorted things for the snakes to wear
  • 4 owls
  • 4 bunnies
  • 1 bear
  • 1 cat pillow
  • 2 plain pillows
  • 1 doll outfit (skirt and shirt)
  • 2 girl-sized skirts
  • 6 pillow cases
  • 3 pouches
  • 1 quilt
  • 1 dog bed
  • 1 cat toy
  • 1 bookmark
  • 7 beanbags
  • 8 proud kids

Holy cow!

Here are some posts with tips on sewing with kids.

Happy sewing!

Best,
Wendi

A plan for organizing your yarn stash!

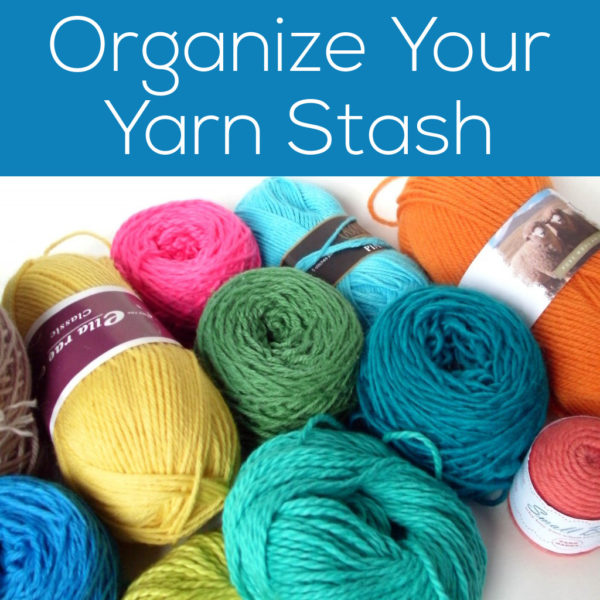
A Plan to Organize Your Yarn Stash - from FreshStitches and Shiny Happy World

Every knitter and crocheter has one… it’s called a ‘yarn stash’. And, if left unchecked, your stash can quickly turn into an unkept mess that just seems to keep on growing (on it’s own, of course!). But don’t worry! I’m here with a step-by-step-guide to organize yarn and get your stash under control.

Finding yarn in your stash is the key to using it

How many times have you bought yarn for a project… only to later discover that you had a very similar yarn at home? That’s because if you can’t find a yarn quickly and easily, you’ll forget that it’s there.

So, organizing your yarn so that you know what you have (and know how to get to it) is key. I’m not going to go into details about a specific organizational system (bins vs. shelves vs. baskets), because you have to find what works for you.

I am going to show you how to go through what you own and get your yarn under control.

Step one: drag it all out and sort it

Now, I know that some of you with larger stashes are rolling your eyes right now. But seriously, how can you know what you have unless you actually get it all out and look at it?

You can’t just say, ‘oh, I know what’s in that bin’… because you probably don’t. So get it all out.

Now that it’s out, sort it into piles. You’ll have to pick categories that make sense to you. Mine are: yarn for ‘real projects’ (i.e. yarns I have multiple skeins of), yarn for one skein projects (usually pretty sock yarn), yarn for custom stuffed animal orders (worsted weight yarns that are partial skeins), scrap yarns, and yarn to get rid of.

It’s important to be honest about your piles. Yarns only make it into my ‘scrap yarn pile’ if it’s a partial skein that I would actually use to make a scrap afghan. Nothing under 20 yards. No laceweight. No eyelash. Be honest with yourself!

Now these piles may take up your entire living room. I know it’s scary… but you’re after something better!

Catalog, wind and store

Now that you’ve divided your yarn into piles, resist the temptation to just put it back on the shelf!

Is some of your yarn tangled? Were you able to see it in its old storage space? If not, it’s time to rethink your strategy. Here’s what I do:

Catalog

Of course, we all fantasize about beautiful shelves that allow us to store pretty skeins in full view. But, many of us don’t have that kind of space, and need to use bins or boxes. So it’s important to take note of what you have.

I love the ‘stash’ tool on Ravelry – it allows you to list the yarn that you have and even list it ‘for sale or trade’ if it’s a yarn that you don’t want anymore.

Wind

If your yarn is in full skeins, then it’s probably behaving itself without getting tangled. However, if you have partial skeins, they have a propensity to get themselves in knots.

I have a Lacis Ball Winder that I use to wind partial skeins into cakes (see a how-to-video, here). When wound, the yarns stack nicely, and lay in a bin without getting tangled.

Store

NOW that your yarn is neat and cataloged, you can put it back on your shelf!

Make plans

Sure, your yarn looks neat… but don’t stop there! Do yourself a favor and make plans with the yarn while it’s still fresh in your mind.

When I’ve gone through my yarn, I like to match yarn with projects. That way, when I’ve finished a project and am itching to start another… I already have one (that uses yarn from my stash!) set up. That keeps me from buying more yarn on a whim.

For example, I have 10 skeins of this yarn in a color that just doesn’t flatter me at all:

My plan is to over-dye the yarn in brown and knit a Buttercup. If I didn’t make the plan, I would probably just leave that yarn languishing!

Weigh your yarn for project planning

If you have partial skeins, it can be hard to know how much yarn you have- making it hard to plan a project. A real help is to weigh your yarn. I have an inexpensive digital scale that I use to weigh mystery bits of yarn. By using the information on the ball band, you can calculate the yardage… and plan a project!

Enjoy!

Phew! That was a lot of work… but now you can sit back, knit, and enjoy your beautiful stash!

Want tips for organizing and decluttering your whole craft room? Wendi has a great post here.

Wrist Exercises for Knitters and Crocheters

If you knit/crochet a lot (or embroider!) . . . chances are you suffer from some achy wrists! I know that during last week, when I was crocheting up a storm, I certainly did!

Here are a few exercises that I do to relieve my sore wrists. Try to give these a whirl every hour or so while you’re working.

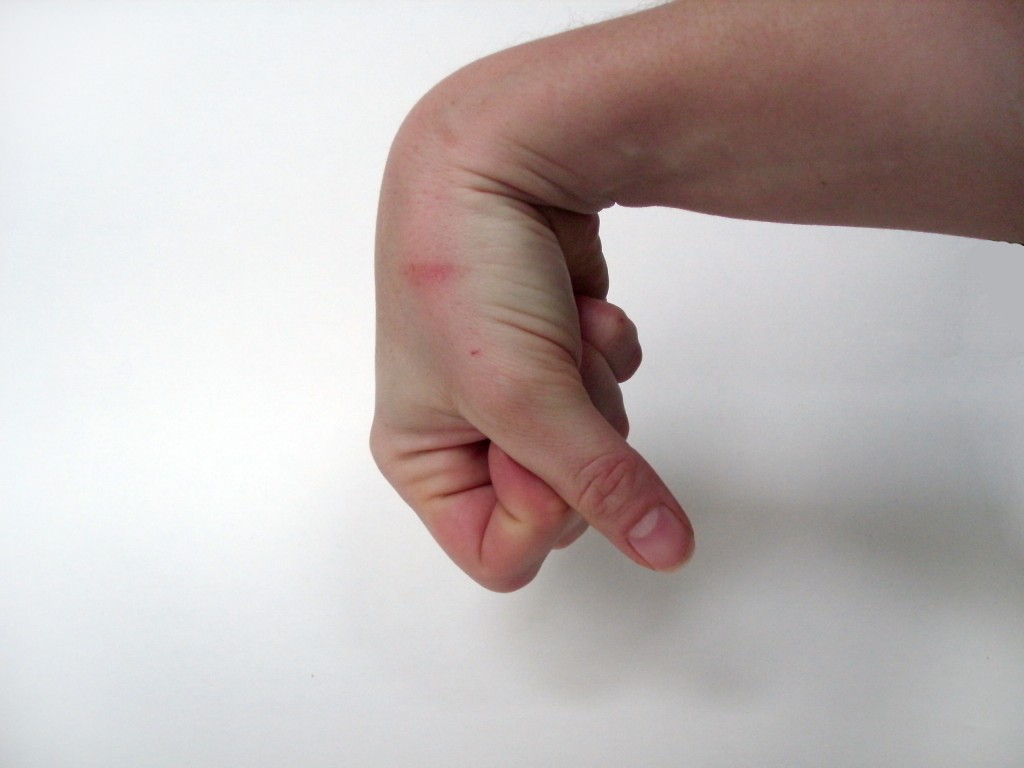
1. Swirl your wrist around! I don’t even know if this counts as an ‘exercise’… but moving your wrist in all sorts of directions (especially the directions it doesn’t move while you’re knitting/crocheting) really helps it out.

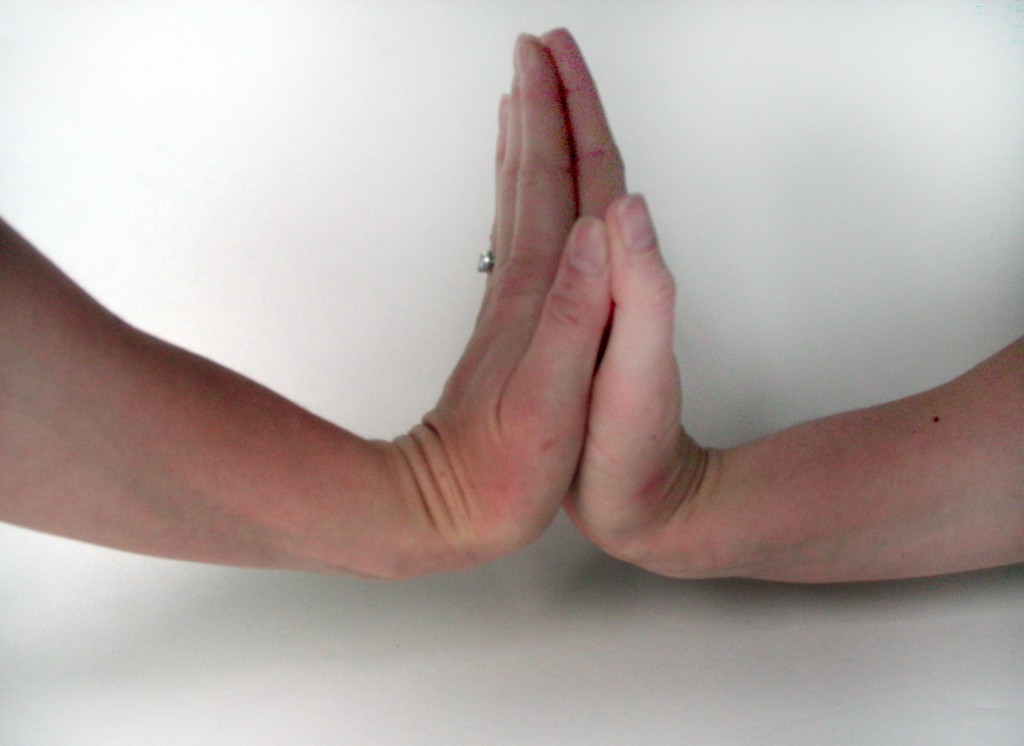
2. Prayer position. This is a little move I picked up from yoga class… it’s just like prayer position, but you’ll want to raise your elbows a little (while keeping your wrists still) to get a nice stretch in your wrist area.

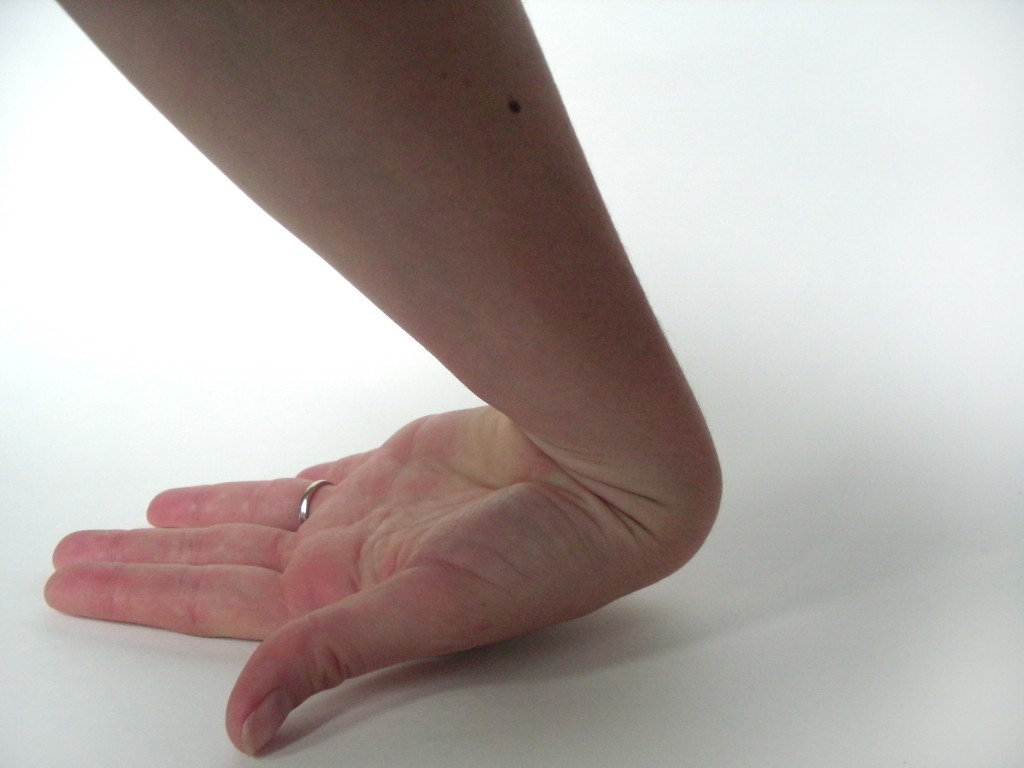
3. Reverse wrist stretch. This one is the opposite of the stretch in point 2. Lay the back of your hand on a table, and press down lightly with your arm.

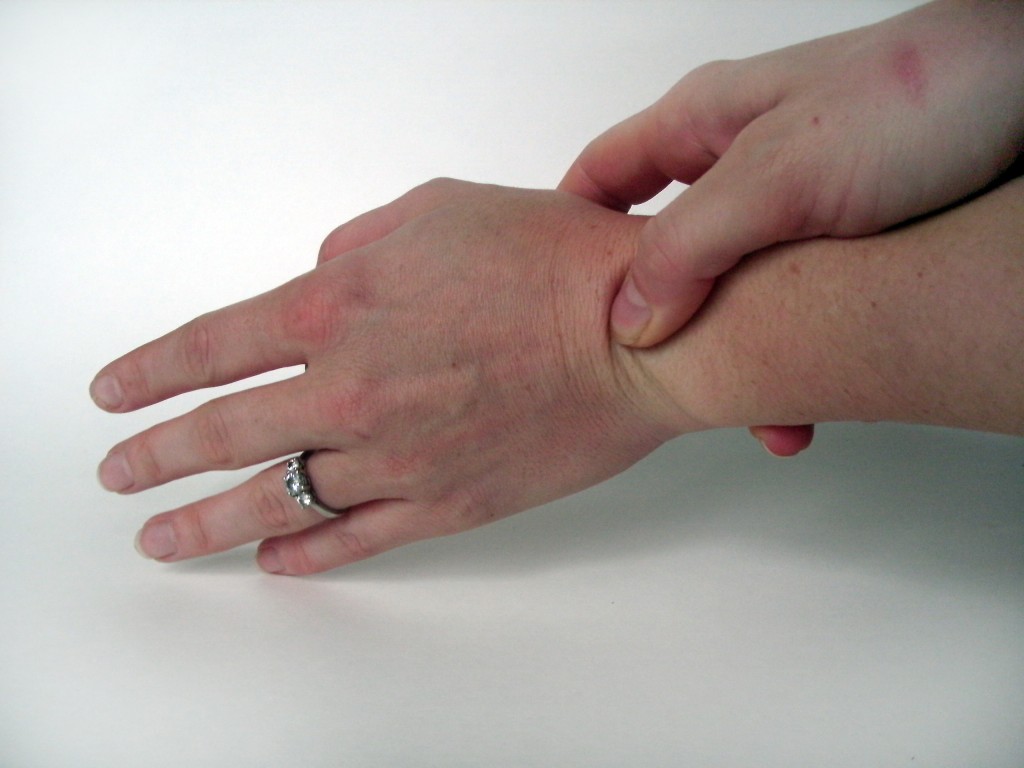
4. Rub those wrist bones! Use your thumb and massage all those little bones and tendons (and whatever else) that are in your wrist.

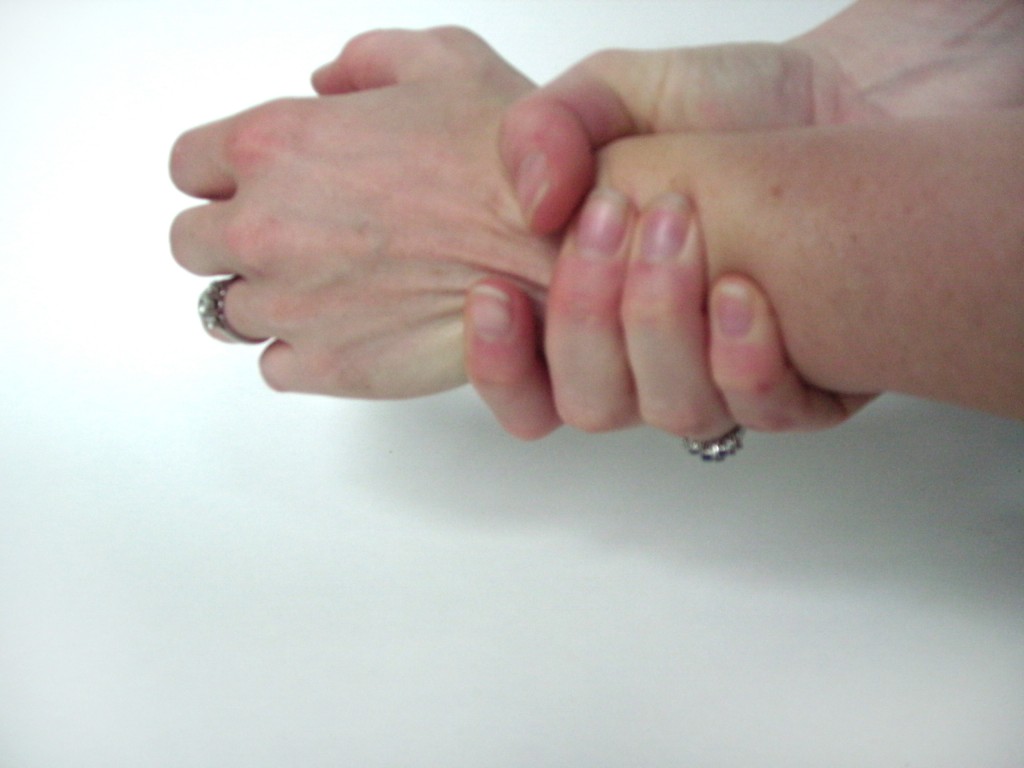
5. Squeeze. With your opposite hand, just squeeze your wrist. This gets all of your joint fluid flowing around.

Update! Stacey added a video showing some of these stretches here.

Happy wrists make a happy stitcher!

SHARE THIS

How to organize scraps of yarn

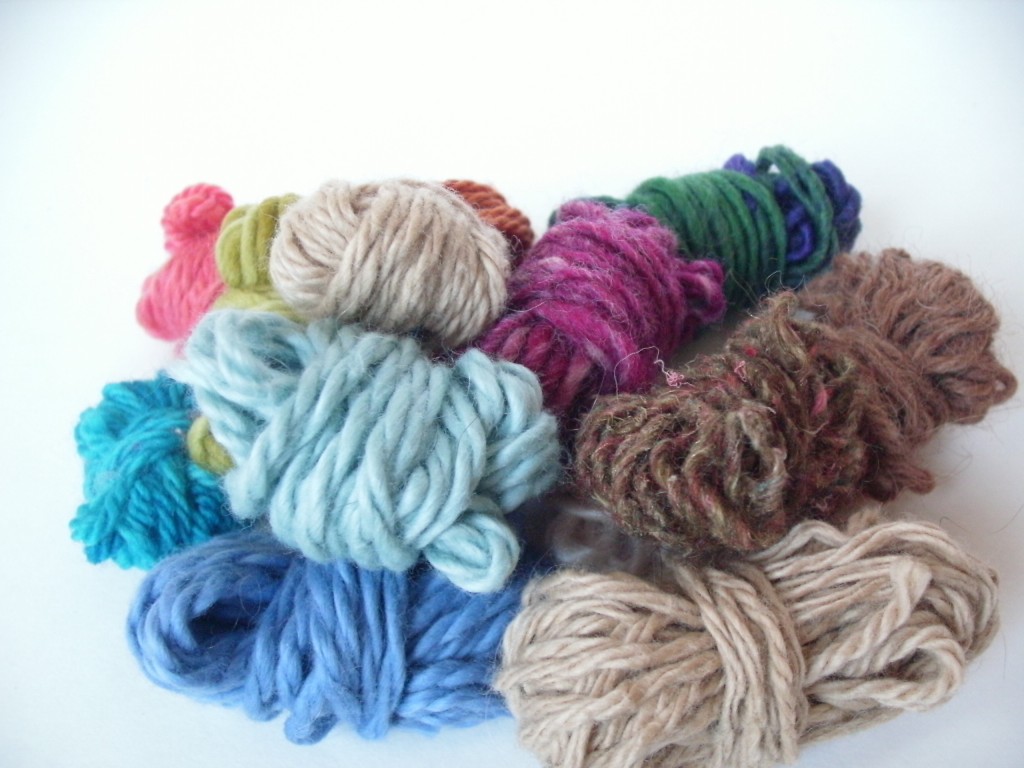
After you knit or crochet your first project, you’re immediately faced with an organizational problem: weird bits of leftover yarn. The more projects you do, the more these scraps build up.

And, if you don’t organize your scraps well, they have a habit of tangling themselves together into one giant knot. Not good.

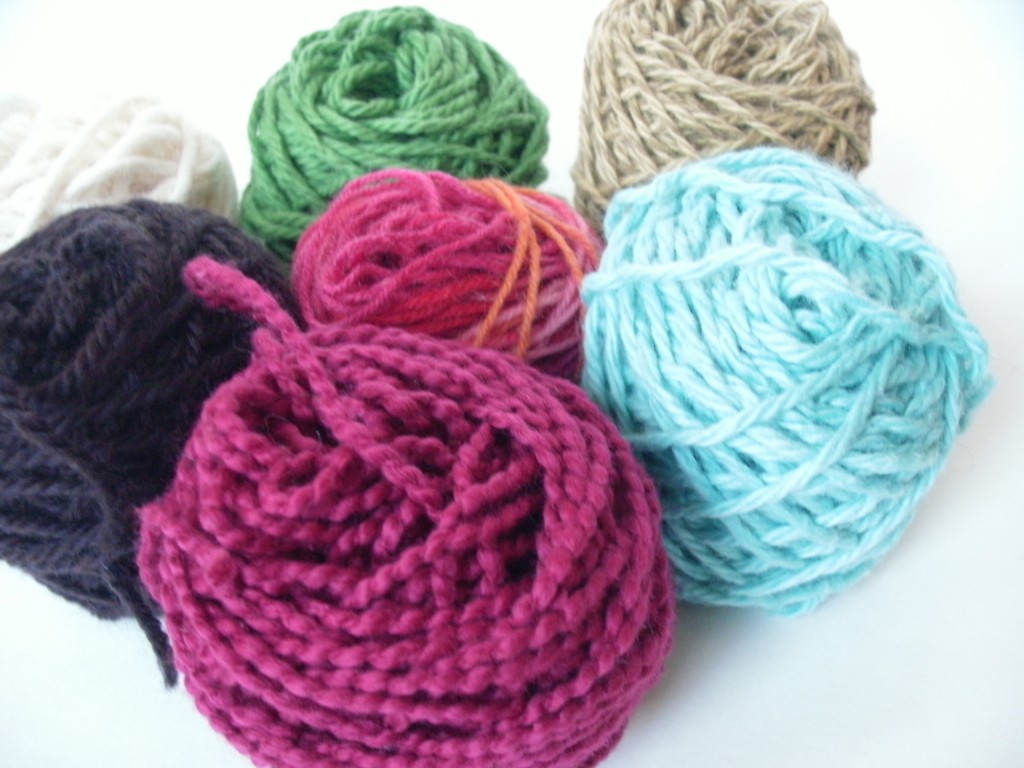
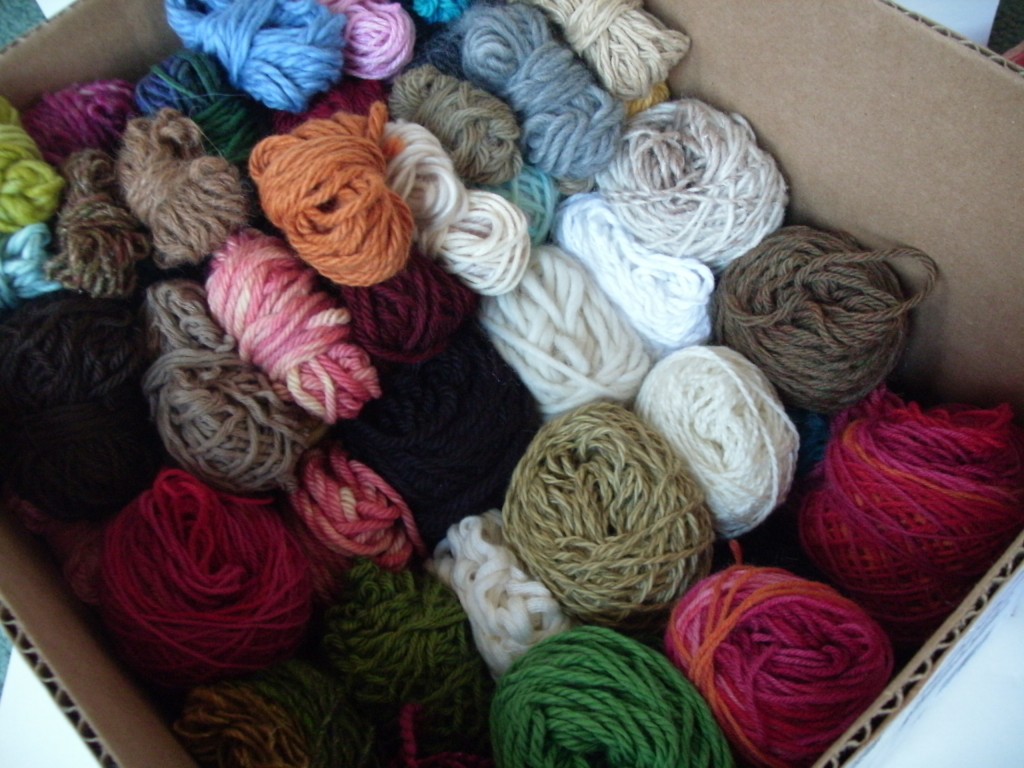
So, even though it may seem a little obsessive… I wind each one of my leftover yarn bits into a nice little ball, and tuck them into my ‘scrap box’.

The Box

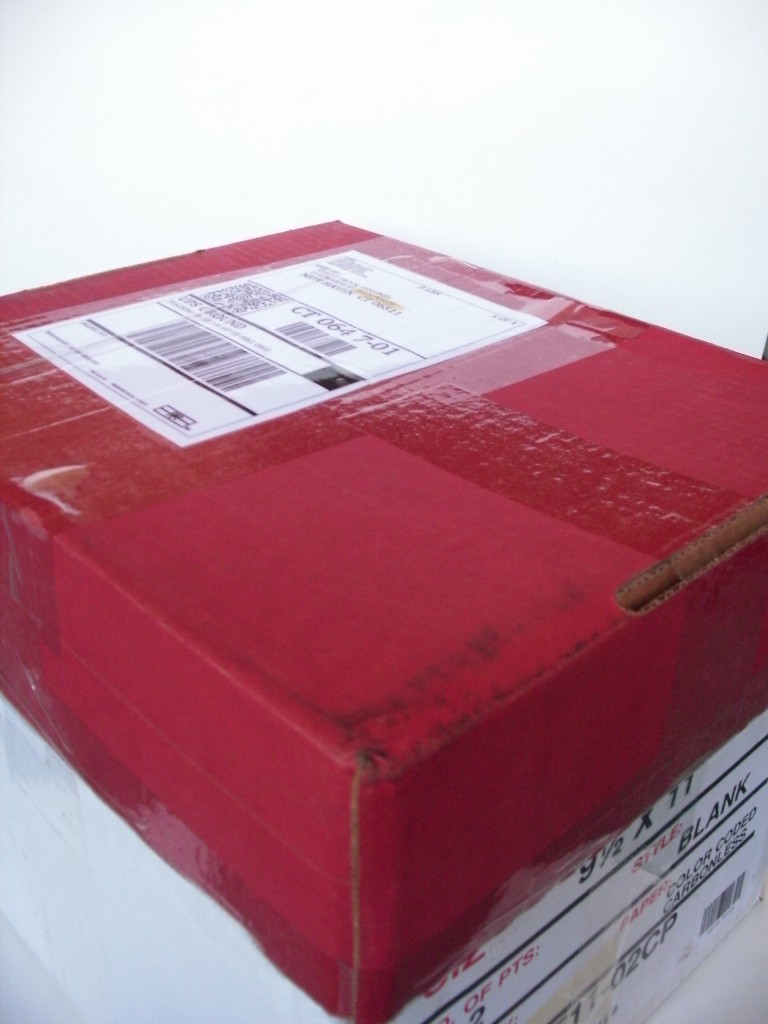
My box is just an ordinary copy-paper-turned-shipping box that I got in the mail one day. It’s sturdy, has a lid, and fits nicely on a shelf on my yarn bookshelf. Nothing fancy.

The big leftovers

My favorite kind of scrap yarn is the ‘big leftover’. You know what I mean… it’s a quarter to a half of a skein of some yummy yarn left over from a project. Since these guys are pretty substantial in size, I wind them with my ball winder. I make sure to tuck the end in the ball so that there’s no danger of them becoming unraveled.

Little Bits

Little leftover bits of yarn are trickier… I’m not even sure why I keep them. Maybe one day, I’ll just need 10 yards of bright orange for some project or another…

I just wind these guys around 2 fingers (it’s much too little amount for the winder), and then tie them around the center. Just like the big leftovers, you’ll want to make sure the ends are fastened so they don’t get the chance to become a giant knot in your scrap box.

What to do with the scraps…

Hmm… for now, mine live happily together (and neat) in their box. Sometimes I grab a ball if I need a little bit of a color… but no serious plans yet.

So, tell me… how do you organize your scraps? Any plans for them?

5,4,3,2,1 Things About Me

Makezine has a really fun series of profiles using a 5,4,3,2,1 format and Wild Olive invited her readers to join in. And now Makezine has invited everyone to join in. So here goes. . .

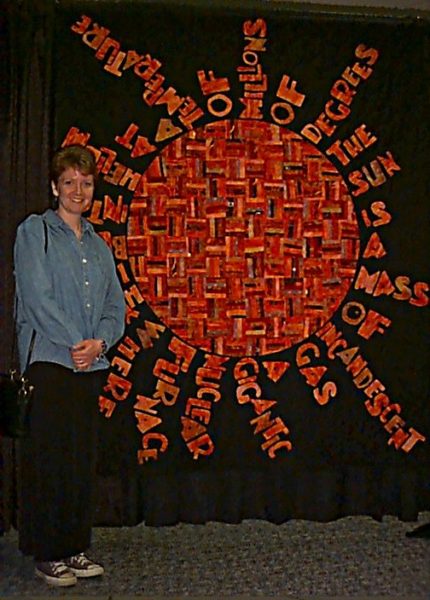
Wendi Gratz from Shiny Happy World with her first quilt

One Project You Are Particularly Proud Of

1: My very first quilt. I had almost no sewing experience at that point and I designed this enormous quilt with insane needle-turned applique letters and hand quilting. I figured it out as I went along (this was – ahem – before the internet) and just took it one step at a time. And it turned out fine! That experience really informed what I do now – I think beginners can tackle just about anything if they take it one step at a time. The most important thing is to make something you’re excited about making.

Two Mistakes You’ve Made in the Past

1: Not studying art in college. I was a good student and good students don’t go to art school, right? Plus, I thought that artists were painters and I’ve always been intimidated by painting. I wish I had known back then just how many different careers there are for artists.

2: Doing too much production work in the first iteration of Shiny Happy World. For me the joy is in the designing, figuring out the kinks, making the construction as simple as possible to achieve the look I want. Once I figure all that out, assembly-line construction of 100 bunnies isn’t much fun – though they look cute all stacked up. 🙂

Three Things That Make Your Work Unique

1: There’s a deliberate asymmetry and hand-drawn quality to all my designs that I think (hope) gives them personality and charm.

2: My color choices might look wild, but I actually have a very specific palette of bright, true colors I go to again and again.

3: Almost everything I do is designed to be made by beginners.

Four Tools You Love to Use

1: Needle and thread. I LOVE sewing and quilting by hand.

2: My Pfaff sewing machine with built-in walking foot.

3: My extra large cutting mat.

4: My extra-wide ironing board.

Five Inspirations

1: The Muppets

2: Ed Emberley

3: Eric Carle

4: Lauren Child

5: vintage toys (especially Fisher Price Little People)

Want to join in? Post your own profile 5,4,3,2,1-style and put a link in the comments so we can all read it!

Best,
Wendi

Applique Wendi (with fabulous hat)

SHARE THIS

Playing with Paper

Using my applique and embroidery patterns to make collage cards

Today my daughter is about halfway through her 3-week stay at camp. THREE WEEKS! She’s never been gone more than a week before! And those previous trips were to stay with family. I miss her – but I know she’s having a great time. I knew she would love it the second we set foot on the grounds – and every one of her letters confirms what a terrific time she’s having. Her last letter began with “I am so homesick” and then went on to detail everything she loves about camp. She loves the food – especially the bread (there’s fresh-baked bread every day). She quoted songs she’s learning. She’s gone swimming almost every day. She loves skits. Her tent mate loves the book of scary stories she brought with her and could I please send the other one in the series?

I don’t think she’s actually homesick. I think she’s trying on the idea of homesickness. And that’s okay. I want her to be happy to be there – and then happy to come home when that time is over.

The letters have, of course, been going both ways. We came home the other night to TWO bats in the house, so that gave me lots of exciting news to tell her.

I’ve been using some of her favorite patterns to make the cards I send to her – and I thought I’d share those with you today.

sly cat

This one is made from the Sly Cat embroidery pattern – shrunk down a bit to fit on a card.

anywhere bear

This one is made from a bear applique pattern. I had to shrink this one down a bit to fit on a card – but that’s easy to do with a copy machine or computer.

pink rainbow girl 1000 px

This one I had to enlarge just a bit to be a good card size. It’s one of the girls from the Rainbow Girls embroidery pattern.

I love making collage pictures like this. I have an enormous collection of paper that I’ve painted with various textures and it’s really easy to use the embroidery or applique patterns as a guide. I tape the pattern up in a window, then hold my painted paper over it and trace the shape I want to cut out. Cut it out with a pair of scissors or an exacto knife and glue it down with a glue stick. Easy peasy. I draw the faces (or other fine lines) with a fine-point Sharpie. If you want to stitch lines on this paper – this video will show you how.

If any of you have experimented with other ways to use the embroidery or applique patterns, I’d love to see them!

Hope you all are having a great week!

Best,
Wendi

How to Mend with Patches

How to Mend with Fun Patches - a video tutorial from Shiny Happy World

Use all your favorite embroidery stitches to make mending patches prettier AND stronger. First watch the video for the how and why – and then scroll down for some detailed examples of finished patches from a pair of my jeans.

 And now for the samples. These are all from one pair of jeans. 🙂

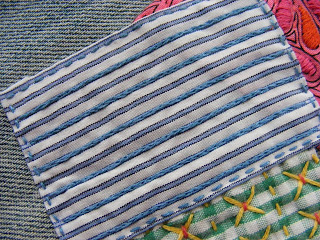
This one is super easy. I used a running stitch around the edge of the patch, and then I used split stitch over every other stripe.

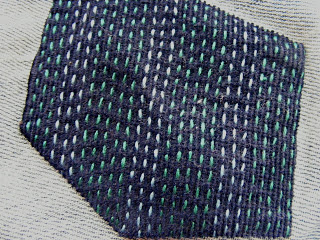
This is just running stitches – lots of running stitches. It’s stitched on corduroy so I was able to use the space between the ridges to as a guide to keep my rows of stitching straight and parallel. I used a two different shades of blue thread.

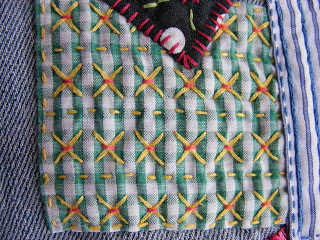
On this one I used the gingham print of the fabric as a grid to make nice, even cross stitches and running stitches. The stitches of my Xs were pretty big – possible to snag on things – so I took tiny little straight stitches in pink at each intersection to strengthen the whole thing and add a fun accent.

Pretty Patch Tutorial at Shiny Happy World

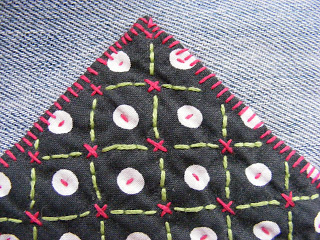
This started as a plain black fabric with white polka dots. First I took little straight stitches in the polka dots and made cross stitches in the spaces between them. That didn’t make the stitching as close as I wanted so I added a grid of backstitches in green.

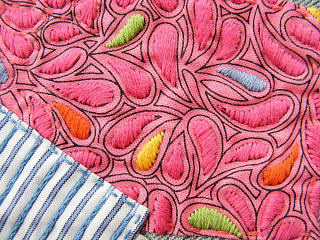
And finally – this one was a real labor of love. I satin stitched over each drop shape in the fabric print – matching the color of the printed drop. It took a long time but the texture is luscious.

If the tear is in a tricky spot – like when the rip is at the edge of a pocket – take a look at this post.

Have fun with some patches! Soon you’ll be looking for an excuse to mend!
Here are all the posts about finishing embroidery projects.

Basic Finishing

Other Ways to Use Embroidery

Return to the Learn to Embroider main Table of Contents.

Happy stitching!