How to make a hacky sack

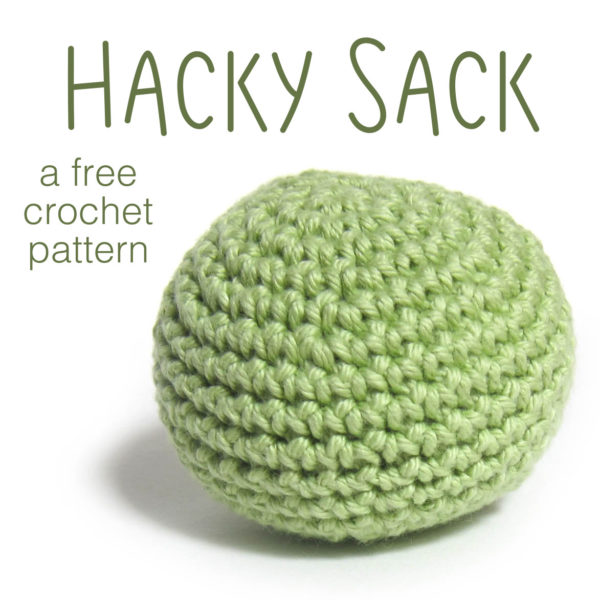
Hacky Sack - a free crochet pattern from FreshStitches and Shiny Happy World

Now that summer’s rolling around, I bet you’re looking for excuses to get you (and your kids) outside! How about making a hacky sack? (Don’t know what playing hacky sack looks like? It’s worth having a look on YouTube!)

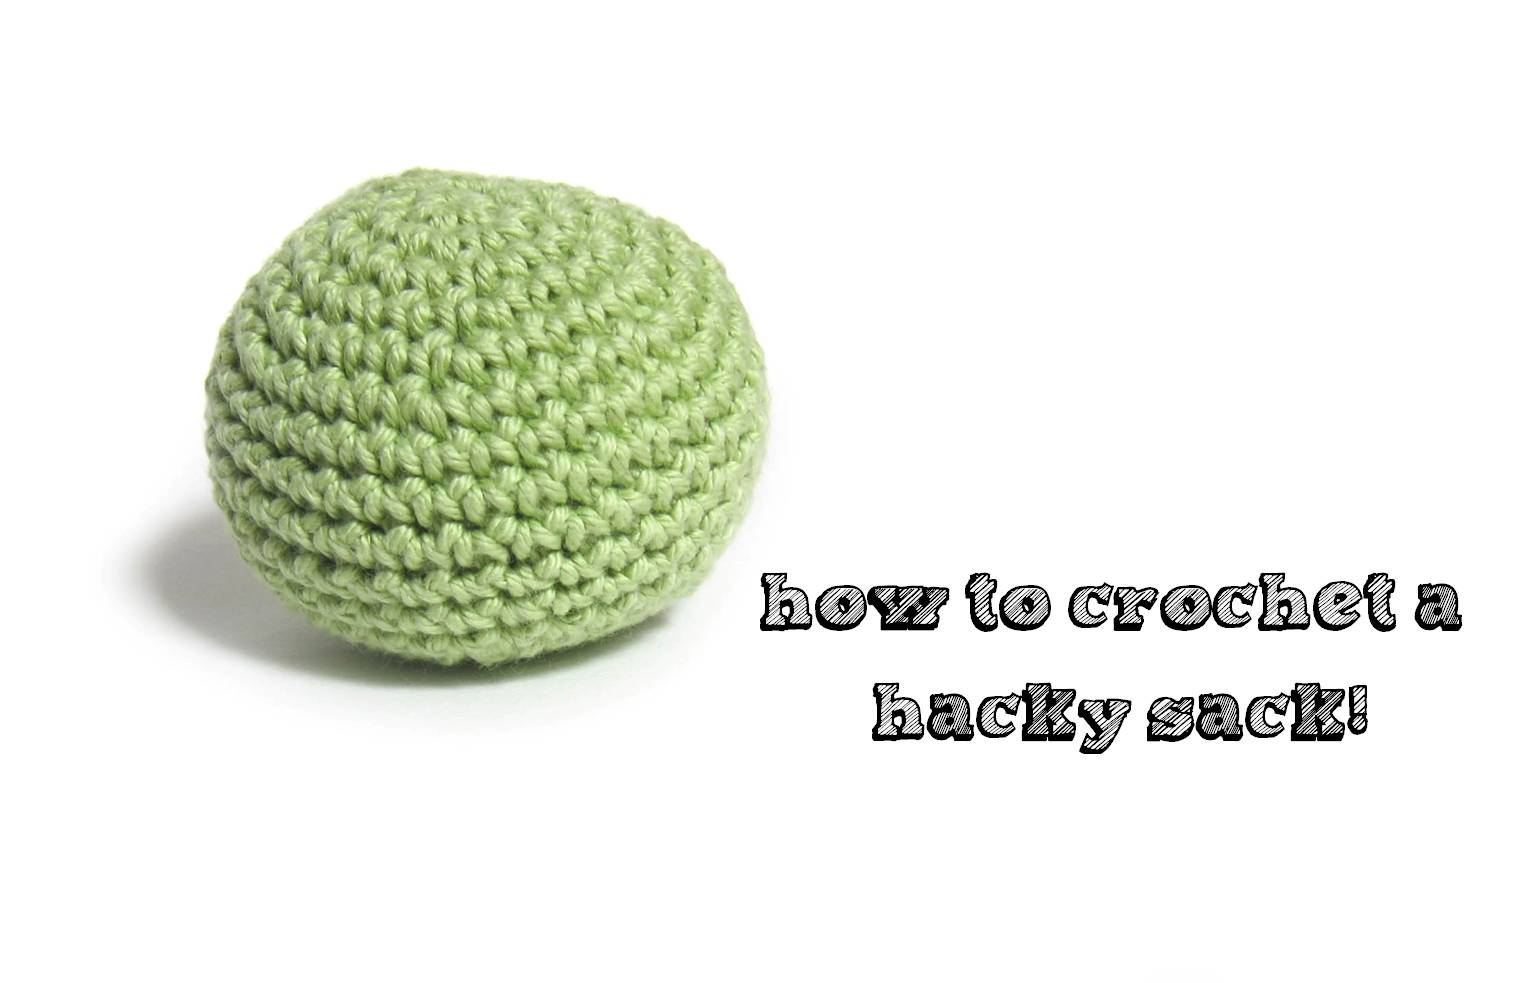
how to crochet a hacky sack

If you can single crochet, you can make a hacky sack! I’ll show you how!

Hacky Sack Materials

To make 1 hacky sack, you’ll need:

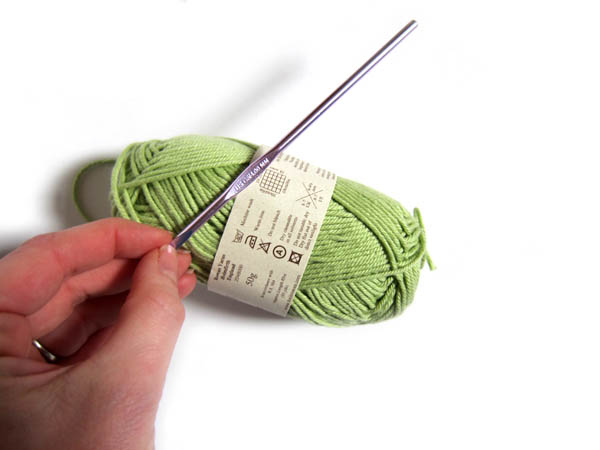
  • 30 yards of dk-weight, cotton yarn
  • a size G (4.0mm) crochet hook
  • a fist-full of poly-pellets
  • a nylon knee-high sock

cotton yarn for hacky sack

Crochet Hacky Sack Pattern

Rusty on your crochet? Check out my tutorials for how to single crochet, increase and decrease.

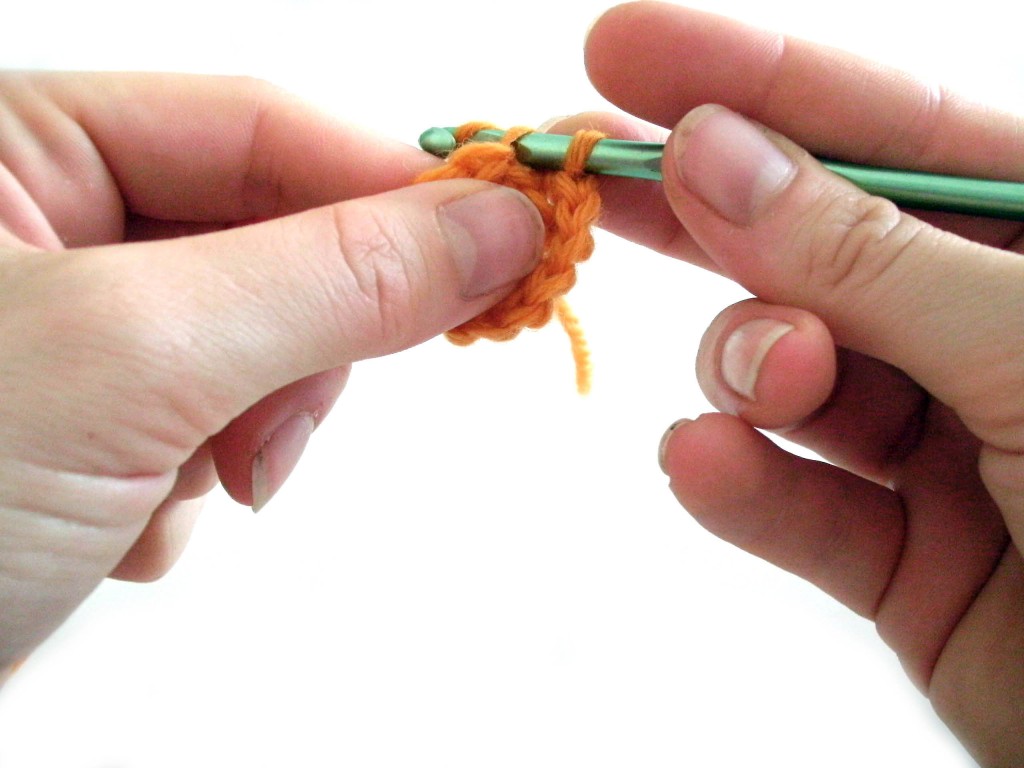
Start with a sloppy slip knot.

Ch 2.

Round 1: Sc 6 times in 2nd ch from hook. (6)
Round 2: Sc twice in each st. (12)
Round 3: *Sc twice in next st, sc in next st. Repeat from * 5 times. (18)
Round 4: *Sc twice in next st, sc in next 2 sts. Repeat from * 5 times. (24)
Round 5: *Sc twice in next st, sc in next 3 sts. Repeat from * 5 times. (30)
Round 6: *Sc twice in next st, sc in next 4 sts. Repeat from * 5 times. (36)
Rounds 7-12 Sc in each st. (36, 6 rounds)
Round 13: *Sc2tog, sc in next 4 sts. Repeat from * 5 times. (30)

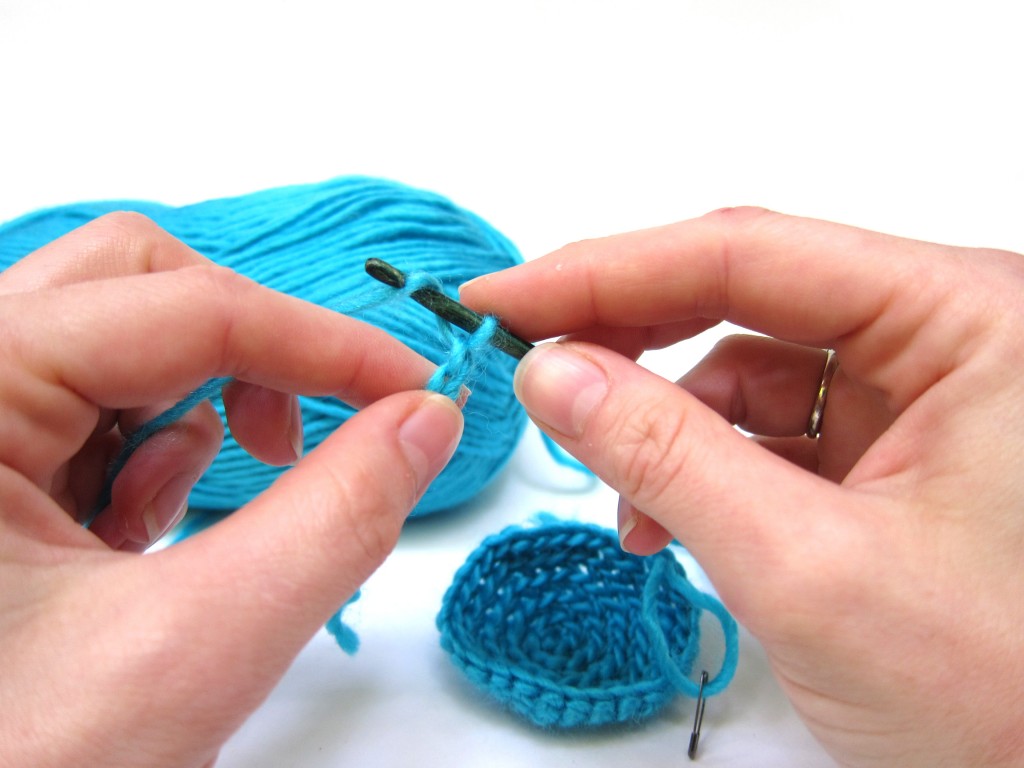
Remove hook…

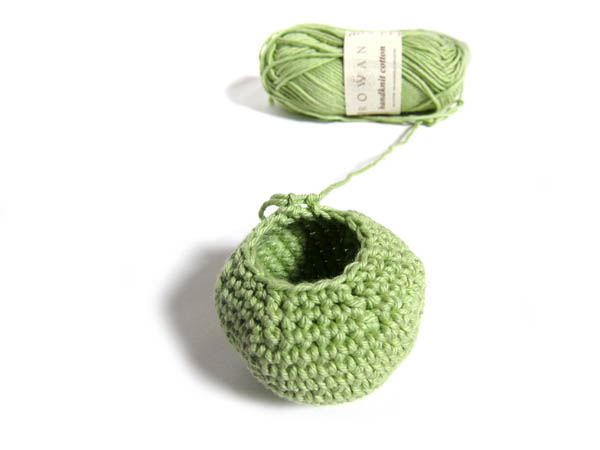
how to crochet hacky sack

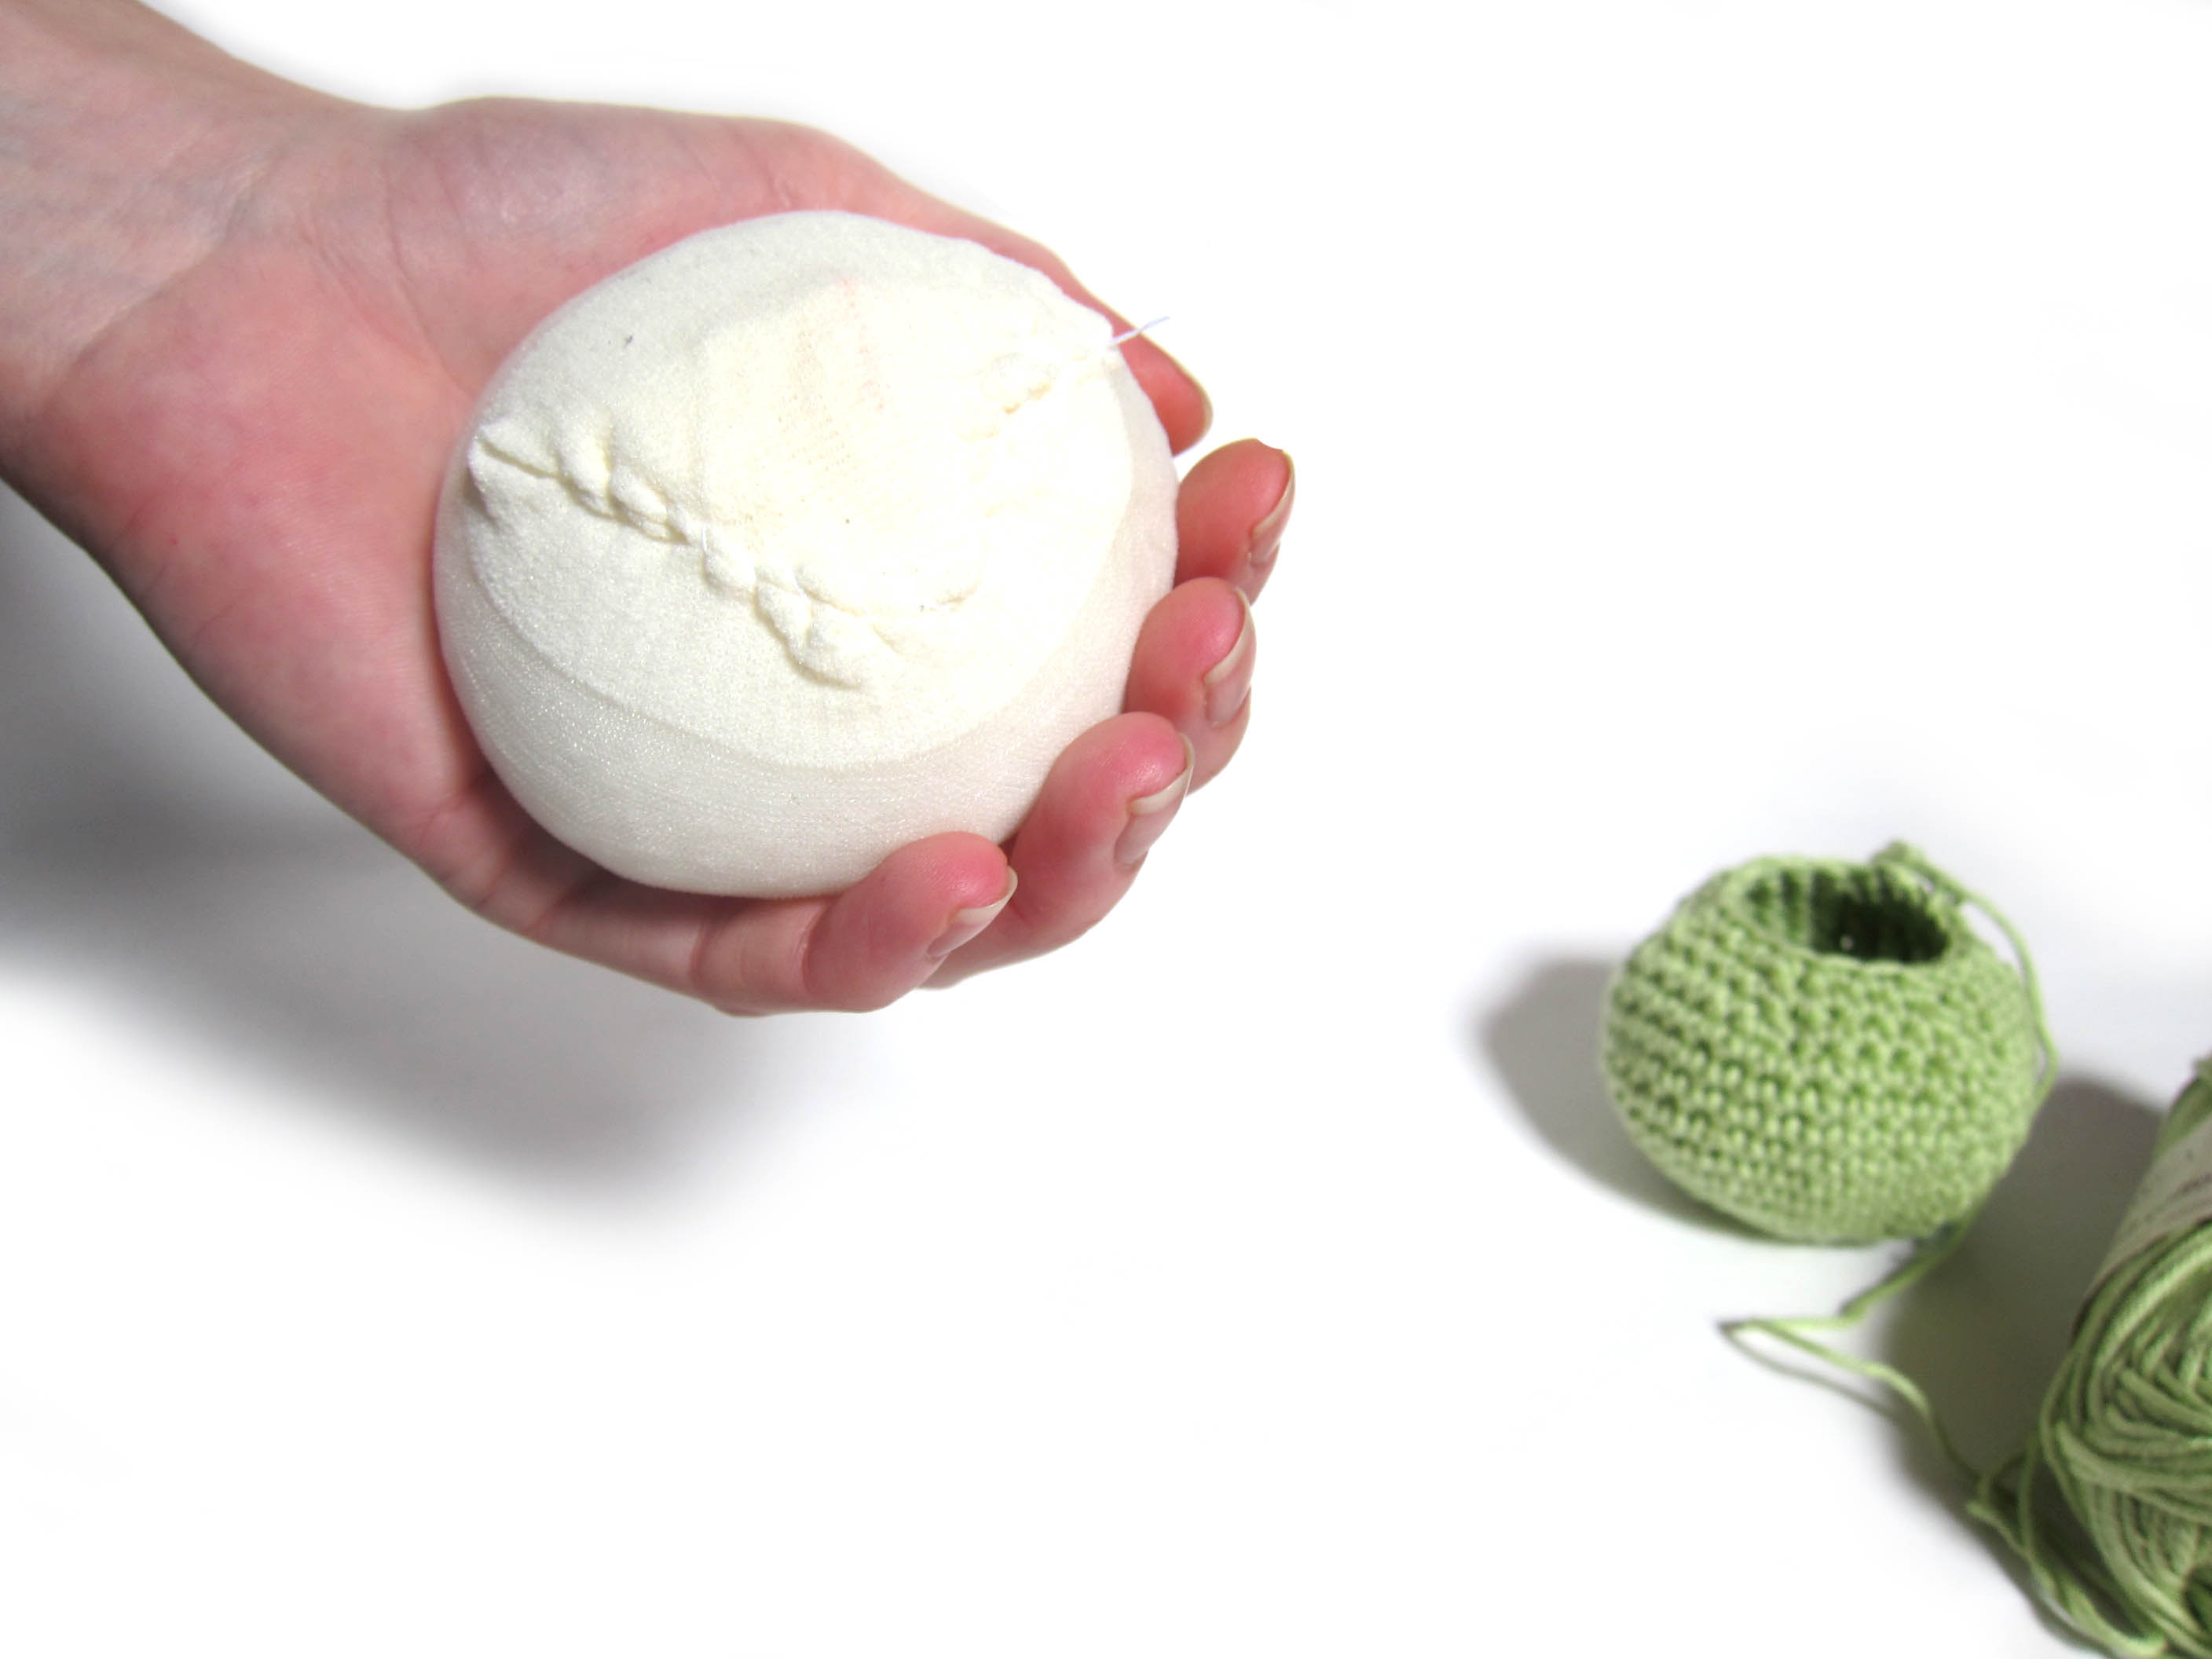
Place a handful of poly-beads in the nylon sock and sew it up. Your goal is to create a ball that will fill your hacky sack about 90% full:

poly pellets

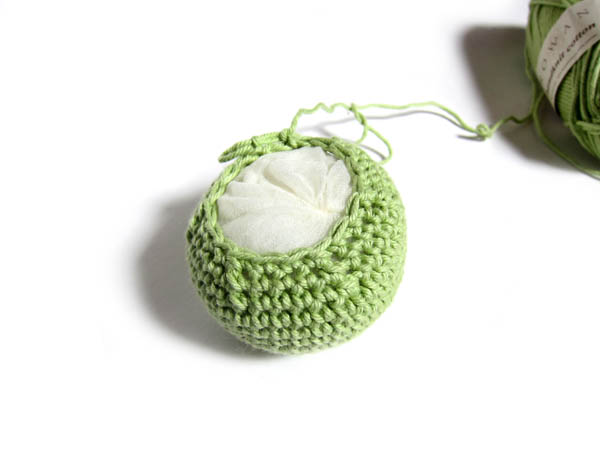
Place your stuffed stocking inside your crochet.

how to fill a hacky sack

Continue crocheting…

Round 14: *Sc2tog, sc in next 3 sts. Repeat from * 5 times. (24)
Round 15: *Sc2tog, sc in next 2 sts. Repeat from * 5 times. (18)
Round 16: *Sc2tog, sc in next st. Repeat from * 5 times. (12)
Round 17: *Sc2tog. Repeat from * 5 times. (6)
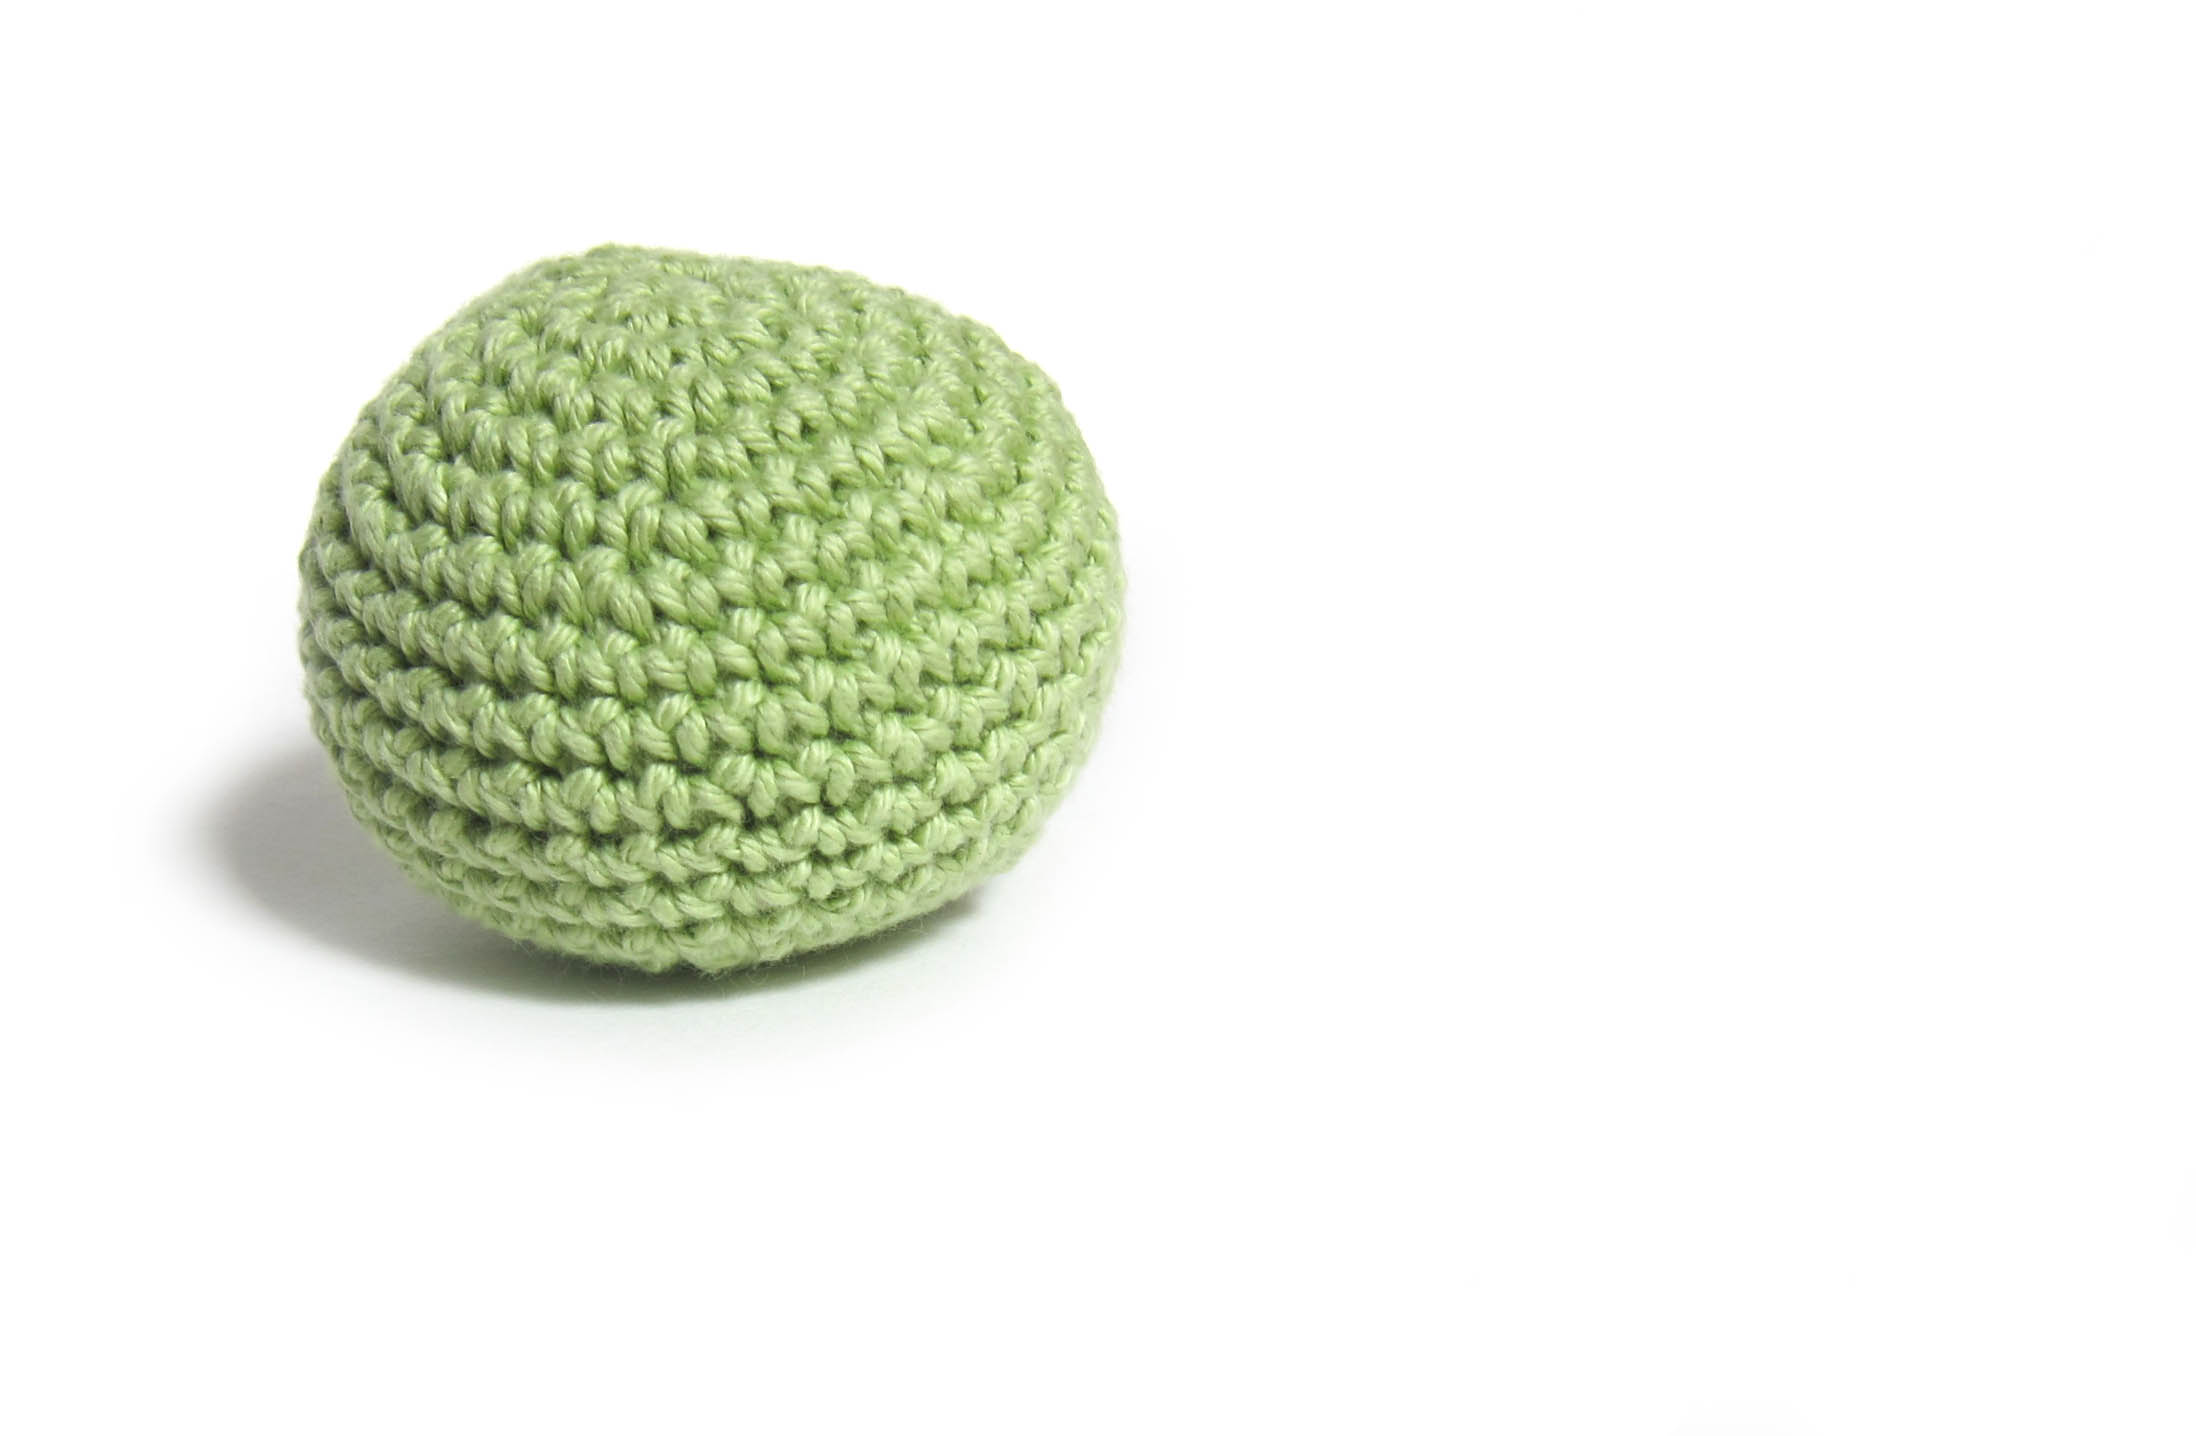
Round 18: Use the drawstring method to fasten off, and weave in the end!

how to make a hacky sack

Variations

Want to use a thicker yarn, like Lily’s Sugar & Cream? Simply skip rounds 6 & 13 (working fewer increase rounds), and use a size H (5.0mm) hook.

For more fun, add stripes of color! There’s a video here showing how to change colors with single crochet.

Happy stitching!

What else can you do with a unicorn pattern?

Wjat else can you o with a unicorn pattern? Show & Tell from FreshStitches and Shiny Happy World

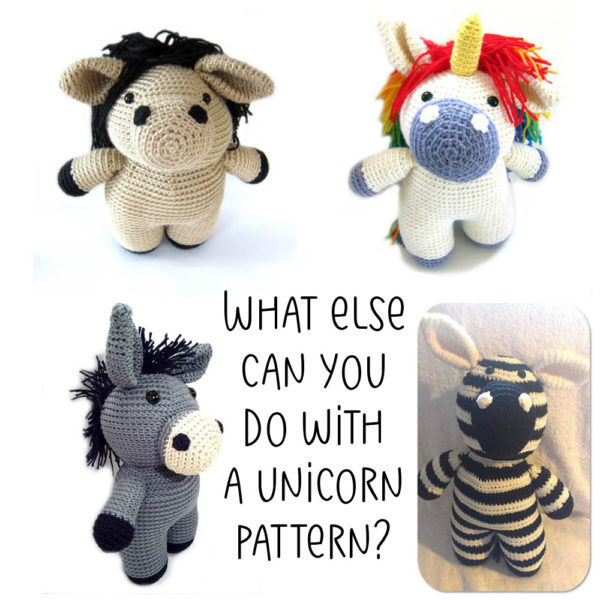
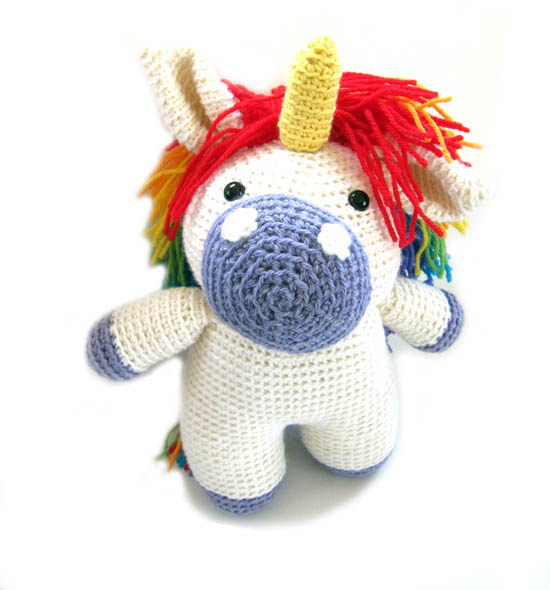
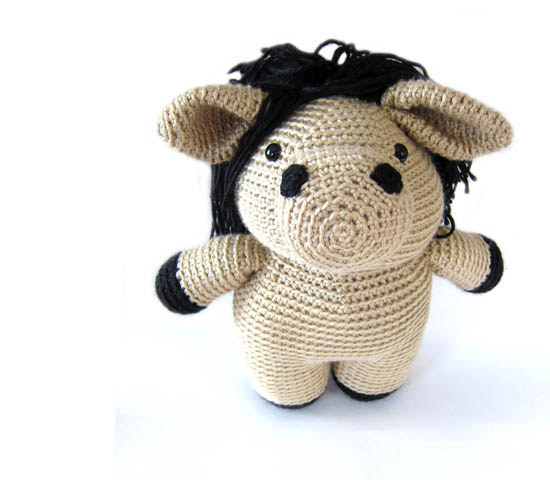
When I published Flavia the Unicorn, I thought I was being quite clever in suggesting you could use the same pattern to make both a unicorn and a horse!

adorable crochet unicorn with rainbow mane
amigurumi crochet horse

And then you guys got your creative juices flowing…

But my ideas are nothing compared to what happened when you guys got your hands on the pattern!

Horses and unicorns are child’s play! You started making donkeys and zebras!

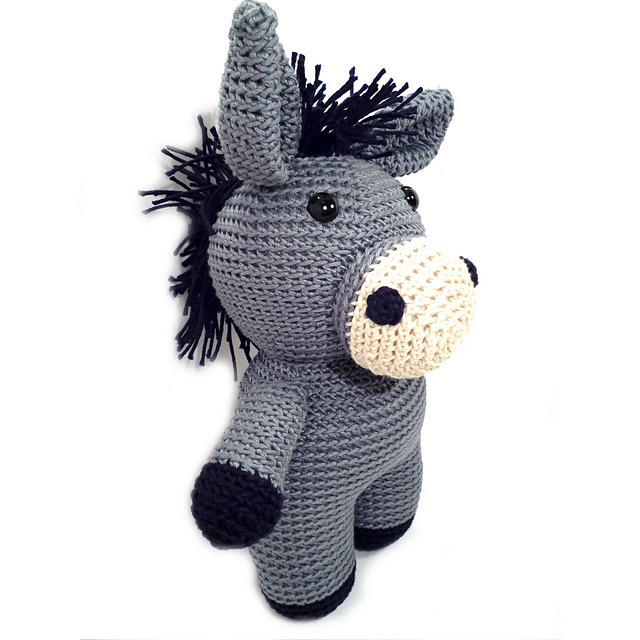
Chloe made an adorable donkey:

crochet donkey using horse pattern

And Nikki used the same pattern to crochet a zebra:

crochet zebra from a horse pattern

So creative!

I’ll bet that if you crochet this guy in pink, and leave off the hair, you’ll have pig!

What else can you think of doing with this pattern?

Best,
Stacey


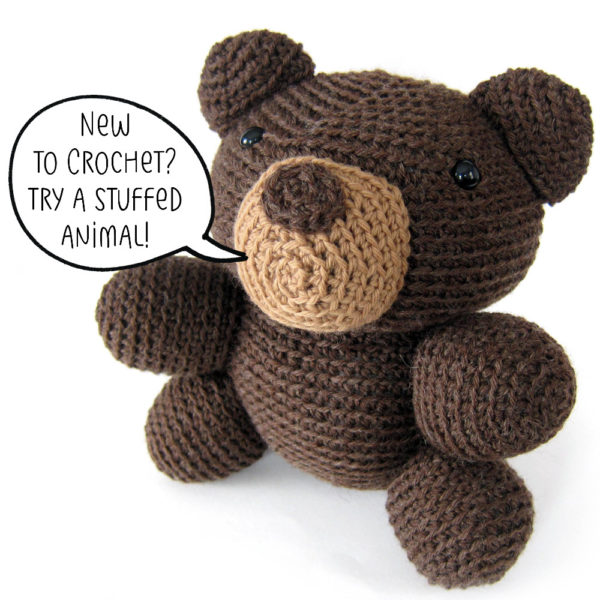
New to crocheting? Try an animal!

New to Crochet? Try a Stuffed Animal! It's a surprisingly easy way to start. Tips from FreshStitches and Shiny Happy World

Want to learn how to make adorable crocheted stuffed animals with an easy online workshop – totally free?

Sign up for Let’s Make Amigurumi here. You’ll learn how to get started, the tools and supplies you’ll need, and how to make an easy amigurumi from start to finish using simple crochet stitches.

It’s a fun, inexpensive, and totally portable craft. You can do it!

I honest-to-goodness think the easiest way to learn to crochet is to make an animal. But of course, I design crochet animal patterns, so maybe you don’t want to take my word for it!

I reached out to my readers and asked for folks whose first crochet project was a stuffed animal! Responses came pouring in!

Why are animals easy?

There are a few reasons:

  • They’re small (compared to an afghan), so changes in tension as you learn to crochet aren’t a big deal
  • They’re mostly single crochet… easy!
  • They’re crocheted in the round, so they avoid those oh-so-tricky turning stitches

How to get started

If you’re interested in crocheting an animal, I recommend beginners take my Let’s Make Amigurumi free video class or Stacey’s Amigurumi Woodland Animals class on Craftsy. They’re both geared to complete newbies.

But, not everyone takes my advice! Melanie L. dove straight into Nelson the owl!

She says: “I had no idea how to crochet and just grabbed a hook from my mum – I didn’t even know there were different sized hooks! So, using your pattern, the kit materials, and your videos, I got started on Nelson (of course I chose a more difficult one – with a colour change!). I watched some of the videos about 10 times each, I swear! But eventually I got through it, and Nelson the First was born. He’s affectionately known as a ‘special needs’ Owl due to the resulting product, but he has pride of place on my shelf. “

When there’s a will, there’s a way!

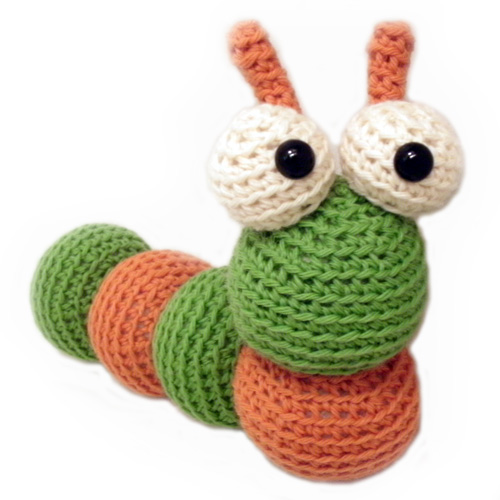
caterpillar2

Chloe confirms that the first project isn’t always the cutest: “In just a few words, last April, I wanted to do something crafty and I came across the Crocheted Softies on the Book Depository. It was love at first sight with those cuties on the front page! I knew I wanted to make them myself, it just happened to be crochet! My very very first project was the owl from that book. It was really chaotic at first. I didn’t know how to begin, I had to look up every stitch (and more than once), I wasn’t sure which were the back loops, I didn’t use stitch markers and kept losing count, I did a very clumsy work in attaching parts etc. It took me several days, but after that I was really hooked! I haven’t stopped crocheting since then!

So, don’t get discouraged if your first one seems a bit crooked… it’s your first one! We’ve all been there, and your skills will improve as you practice. Both Melanie and Chloe started crocheting about a year ago, and they’re putting out fabulous pieces, now!

Don’t give up!

It’s unanimous. The first project is the hardest!

And not only that – the first two rounds are the hardest. Once you finish round two you’re cruising. So don’t give up!

What’s important is to not be too hard on yourself, and find what works for you.

Melanie M. says that “By far the most difficult part for me was learning how to hold the yarn in order to achieve the right tension. I watched a lot of videos of people crocheting and tried out each of their methods for wrapping the yarn around their fingers until I found one that was comfortable for me.”

crocheting holding hook like a pencil

Nikki agrees, Don’t give up! Like any craft, learning something knew takes time. You’re not going to pick up the hook and yarn and know exactly what to do… start small and work your way up. I highly recommend Howie. (Click here for the free Howie the Penguin pattern.) It gives you all the necessary tools to begin crocheting. The best part about crocheting is there is always room to learn more; you will never be done learning.”

Are you ready to start?

Okay, I’ll warn you… it might be addicting!

crocheting

Melanie L. says, “I am definitely a convert! Crocheting plays a few roles in my life now – it’s a form of relaxation, enjoyment, and productivity. I love being able to hand-make a unique gift for my nieces or my friends’ kids, or even my adult friends and family! I can’t pass a yarn store now without buying a few balls of wool and I’m always trawling the internet for pattern ideas. I’ve even started to design a few things of my own. It’s a great hobby!”

Are you going to join us in loving crochet? If you do, be sure to stop by the Shiny Happy People group and say ‘hi’! We love newbies!

Best,
Stacey

Try our newest crochet pattern! Get the Merrick Monster pattern here.

How do you know if a design is original? Follow your gut!

Especially after last week’s Wingspan debacle, there have been a lot of questions about originality and copyright. How can you tell if your new design is ‘different enough’ from someone else’s?

This is a really tricky question, and frankly, I’m not going to talk about the legal side at all, because I’m not qualified to do so. But, today I’m going to talk about some questions to ask yourself when you’re wondering if your new design is original and suited to publish.

What’s the source of your inspiration?

I’m going to use the shawl that I knit last week as an example.

SpaceCadet shawl

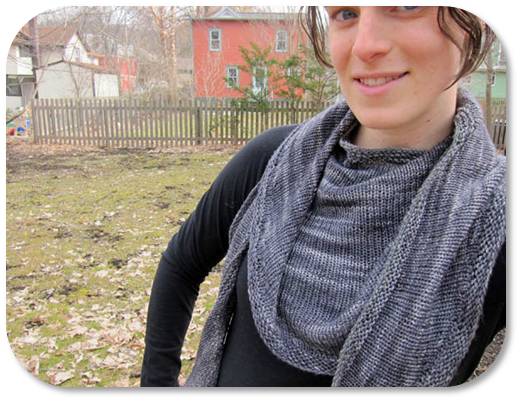
I originally began knitting Mrs. Tumnus by Eskimimi, but the lace pattern on the edging was too thought-intensive for my current knitting brain, so I decided to simplify the pattern.

In the end, I used the short-row shaping from Mrs. Tumnus, but enlarged the entire shawl and added a garter stitch border (with its own short-row shaping).

Would I consider publishing this shawl as a new pattern? No. Because I clearly used the Mrs. Tumnus shawl as an inspiration and made modifications.

But now, let’s look at the interesting case. What if I had designed the shawl completely from scratch… would seeing Mrs. Tumnus prevent me from publishing my new pattern? Probably not.

shawl knit from spacecadet creations

Mrs. Tumnus isn’t the first shawl to use short rows, and if I had come up with the ‘Stacey Shawl’ completely on my own, I wouldn’t look at Mrs. Tumnus and say, ‘geesh, that’s mine in a different size with a different edging’. I would probably publish the pattern, and it would be a case of two designers having similar ideas.

Do you see the difference? If you just ‘tweak’ an existing design, that’s not as original as coming up with the concept yourself.

Is the design your own style?

Creating an original design is tricky because we’re all using the same components. I didn’t invent crocheting in the round, increasing or crocheting through the back loop. But I use these components to create my own style of patterns.

You want to make sure that a design you publish is in your own style, as well.

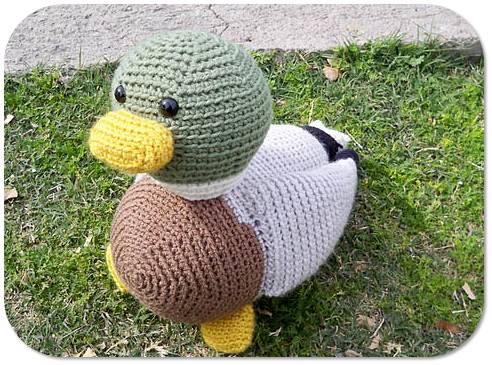
Some students of my Design Your Own Monster class have done an amazing job of creating patterns in their own style. Take a look at this Mallard designed by Hollie:

Mallard duck designed by Hollie

It’s crocheted through the back loop, in the round… but whoa! It doesn’t look like a FreshStitches pattern… this little duck has some fabulous shaping and color changes that represent Hollie’s own style. That’s fabulous!

What if you took my cow pattern and changed the ears so it looked like a pig? You see… that would look like another FreshStitches pattern, and isn’t really developing a different style.

A note about working from ‘inspiration photos’

It’s very tempting to look around online for cute photos… and with a little bit of skill, it’s possible to ‘reverse engineer’ a cute design: that is, crochet it without a pattern.

Is this your own design? Not really. If you’re crocheting an item that was designed by someone else (whether or not it’s an existing pattern), then you also aren’t creating your own design.

Follow your gut…

In the end, it’s up to you. While there are copyright laws in place, in practice, there isn’t much of a ‘copyright police’ going around that are going to investigate your pattern.

It’s up to you to only publish patterns that are original and uniquely your own.

This blog post isn’t an ‘answer’ to how to decide that for yourself, but I hope I’ve at least given you a starting point of some questions to ask yourself!

Meet an adorable Teddy Bear!

I’m happy to announce that Teddy, the Bear from my Woodland Animals class is now available as an individual pattern!

amigurumi crochet teddy bear

So, if you didn’t sign up for the class, but still want to make an adorable bear… now you can!

Don’t you want to crochet a cuddly bear, today? Grab your copy of the pattern!

Best,
Stacey

How to Crochet an Amigurumi Wizard!

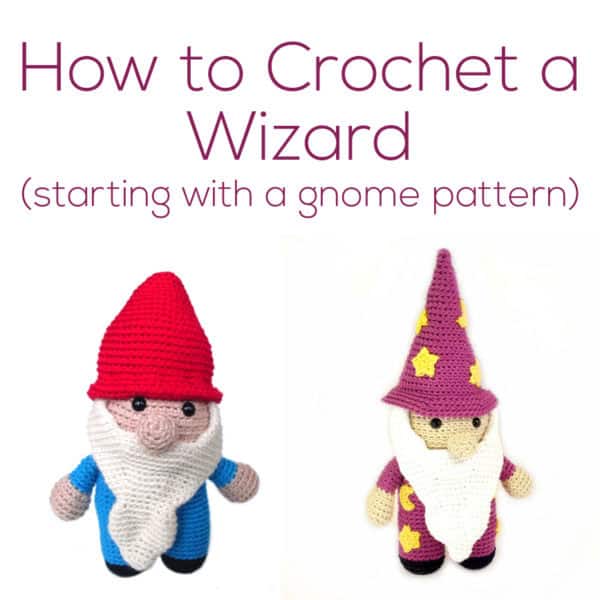
How to Crochet a Wizard - starting with a gnome pattern - tutorial from FreshStitches and Shiny Happy World

You’re in for a treat, today!

Chloe has become quite a celebrity because of her beautiful crocheting! She never ceases to post amazing project photos and animals in creative poses!

Today, Chloe is sharing with us how to transform a Forrest the gnome into a wizard! How cool is that?

And, you’ll definitely want to check out Chloe’s Ravelry page and blog to check out all of her great creations!

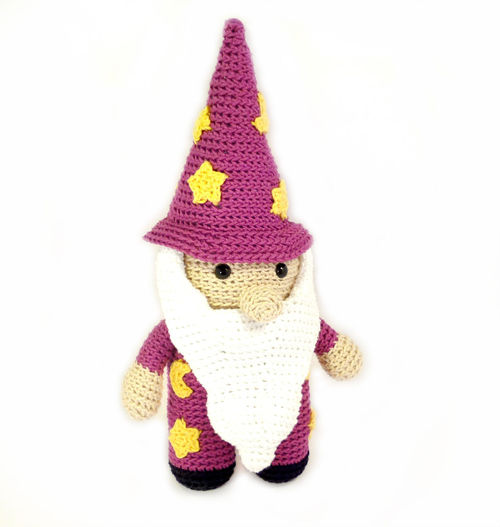
Amigurumi crochet Wizard, how to

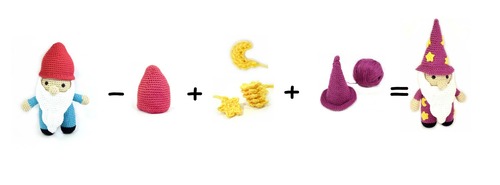
Hereby is the ingredient list and instructions for the Transgnome Potion aka How-to-turn-your-gnome-into-a-wizard Serum! So, grab your quills and note the materials you’ll be needing:

formula for crocheting a wizard

Now, take you wands..oops..hooks and off we go!

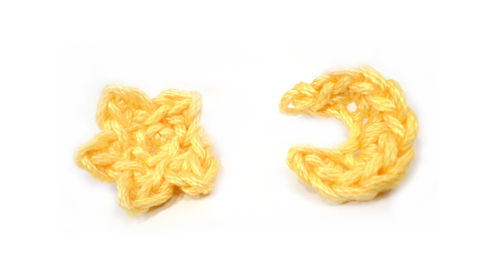
Step 1. Crochet tiny stars and crescent moons. I made 12 stars and 2 moons with a 2.75mm hook and yellow yarn. You might want to crochet more or fewer according to your item’s final size.

crochet tiny stars and crescent moons

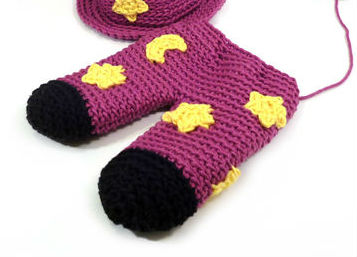
Step 2. Crochet all FreshStitches gnome parts, except for the hat. Attach tiny stars and moon onto the legs and body (mine took 7 stars and a moon). Assemble all crocheted parts together.

wizard body crocheted with stars

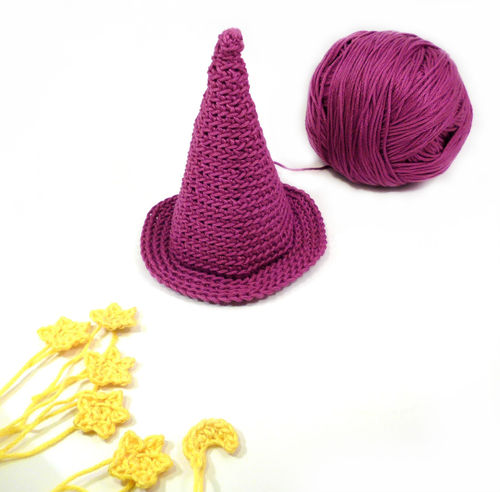
Step 3. Crochet the hat, according to the following instructions.

crochet wizard hat with stars (2)

Wizard hat

Crochet hook: 4.00mm
Yarn: Mouzakis Butterfly Super 10, 100% cotton, in purple

You’ll need approximately as much yarn as it’s calculated for the gnome’s hat. Crochet through back loops, except for round 24. The final hat is conical and 11 cm in height.

Ch 2
Rnd 1. sc 6 in 2nd chain from hook (6 st)
Rnd 2-3. sc each st (6 st)
Rnd 4. sc twice in each st (12 st)
Rnd 5-6. sc each st (12 st)
Rnd 7. [sc twice, sc next st] * 6 times (18 st)
Rnd 8-9. sc each st (18 st)
Rnd 10. [sc twice, sc next 2 st] * 6 times (24 st)
Rnd 11-12. sc each st (24 st)
Rnd 13. [sc twice, sc next 3 st] * 6 times (30 st)
Rnd 14-15. sc each st (30 st)
Rnd 16. [sc twice, sc next 4 st] * 6 times (36 st)
Rnd 17-18. sc each st (36 st)
Rnd 19. [sc twice, sc next 5 st] * 6 times (42 st)
Rnd 20-21. sc each st (42 st)
Rnd 22. [sc twice, sc next 6 st] * 6 times (48 st)
Rnd 23. sc each st (48 st)

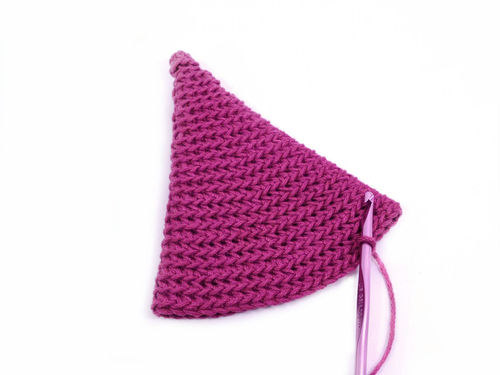
progress crocheting a wizard hat

To make the brim, crochet the next round through the front loops
*Front loops* Rnd 24. sc each st (48 st)
Rnd 25. [sc twice, sc next 7 st] * 6 times (54 st)
Rnd 26. [sc twice, sc next 8 st] * 6 times (60 st)
Rnd 27. [sc twice, sc next 9 st] * 6 times (66 st)
Rnd 28. sc each st (66 st)
Fasten off with tail.

instructions for a crochet wizard hat

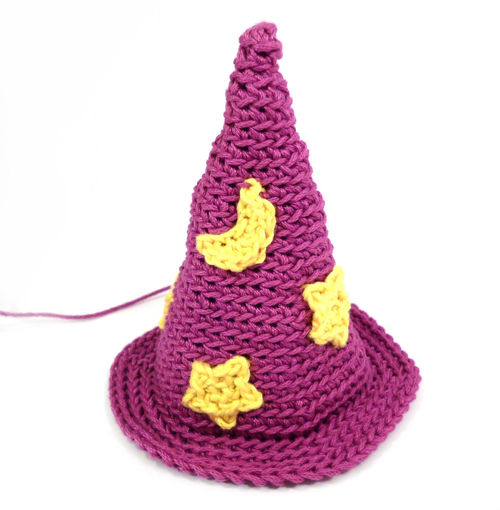
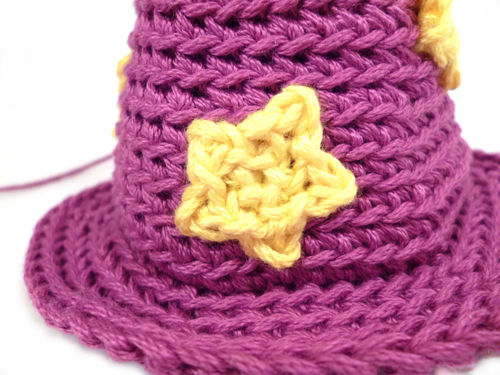
Now, you’ll use some stars and moons to decorate the hat!

crochet wizard hat with stars

I used 5 stars and one tiny moon!

crochet wizard hat close up

Step 4. Stuff slightly and attach the hat on the wizard’s head through round 24 of the hat.

Amigurumi crochet Wizard, how to

And you’re done! Not that difficult, right?

Suggestions

  • It’s more wizard-y using the same colour for the cloak and hat! I chose purple, which is a rather conventional choice for a wizard! Pick up your favourite colour, since magic comes in every possible colour!
  • Likewise, the stars and moons are expected to be yellow or white, but expectations are exceeded in the magical world!
  • I wanted the hat overall to look a little frail and worn-off (my wizard is doesn’t care for brand new clothes!). If, however, you want a more sturdy-looking hat, you can (a) make the brim double thick and (b) use a conical carton inside. Both these techniques are shown in the Freshstitches Leprechaun pattern that was released recently (see Hat).

Enjoy!

Meet the biggest owl in town!

Uh, oh. Maybe my title is too bold of a claim. Maybe there’s a bigger owl in town…

But this guy is definitely the biggest owl in my house. And probably on my block.

Check him out:

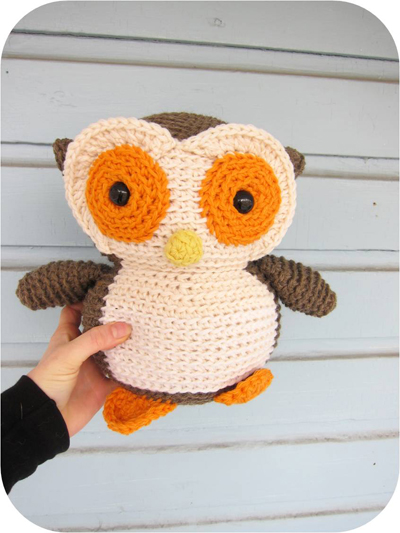
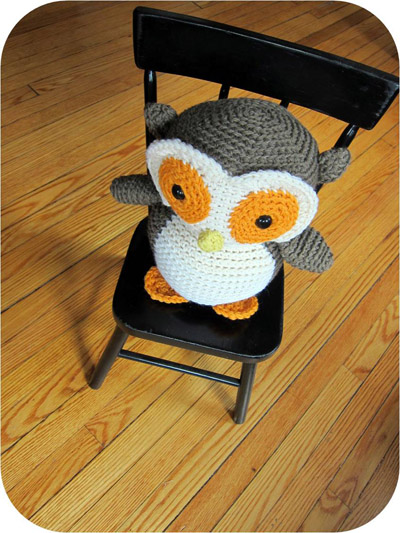
Super big crochet owl

He’s 12″ tall and can hold his own in a super-cute kiddie chair:

Crocheted owl in chair

And he’s huggable!

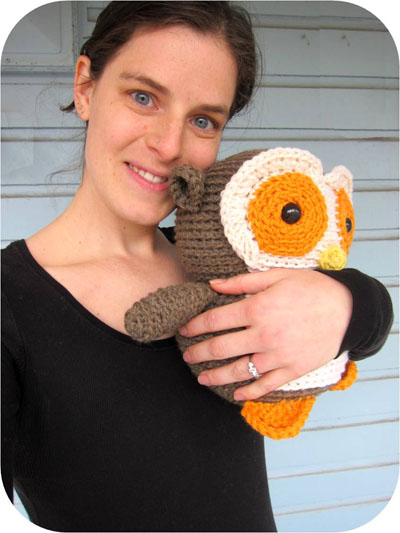
Big owl crocheted cuddly

I used my Nelson the Owl pattern, but crocheted it with a double strand of worsted weight yarn and a size K hook. Feel free to check out big Nelson’s Ravelry Page.

He’ll be on debut at my table at the Pittsburgh Knit and Crochet Festival!

I’m really into doing these ‘big’ guys… they don’t require any more crocheting than a normal one (since you’re just using a thicker yarn), but they turn out super-cuddly!

Upcoming Events

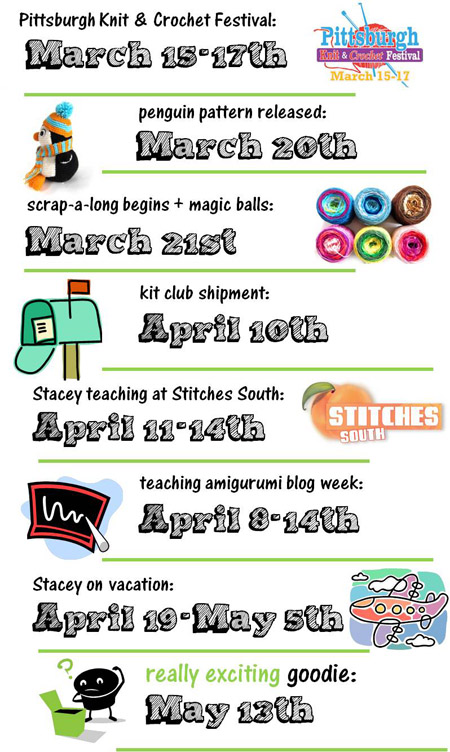
I’m so excited about the oodles of stuff that’s coming up at FreshStitches! Have a peek!
FreshStitches upcoming events

I hope you have an awesome and craft-filled weekend!

Tomorrow, I’m going to share all of the exciting crafty stuff I did at a workshop I went to last weekend!

Join the slug-a-long!

Crochet a long Slug amigurumi freshstitches

I know you’ve been gearing up for the next crochet-a-long! This one’s a… slug-a-long!

That’s right! This month, we’re crocheting Hannah the Slug. She’s a great pattern for those of you who have conquered your first amigurumi, and are looking for a fun project where you’ll learn something new, but isn’t too difficult.

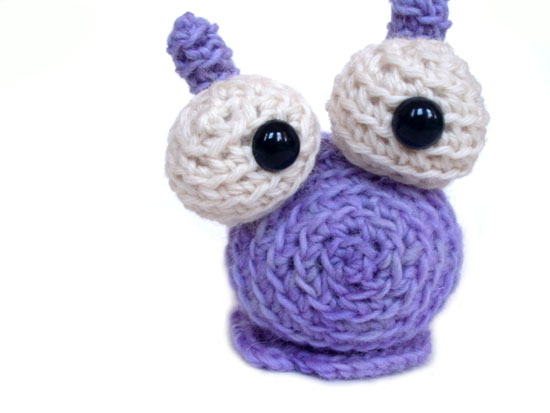
Isn’t she cute?

amigurumi crochet slug

And of course… Hannah looks great in any color. And, since she only uses 35 yards of yarn, this is a great project for using up a little bit of leftover yarn from your stash!

Ready to join in? Grab the pattern and get started crocheting with us!


Join the CAL!

Joining in the CAL is easy! Get yourself a copy of the the pattern, grab your materials and read all the slug-a-long posts here to get all of the helpful crochet/amigurumi tips that will guide you along the way!

If you’d like, you can even stick this adorable badge on your blog (right click and save, then link the photo to this post!) to let folks know you’re joining in:

slug-a-long badge

Are you in?

It’s going to be a blast… and I really hope you join us! Go ahead and leave me a comment… and tell me about your slug-a-long plans!

Free downloadable tags for your amigurumi!

My free holiday gift tags were such a hit that I’ve made some more!

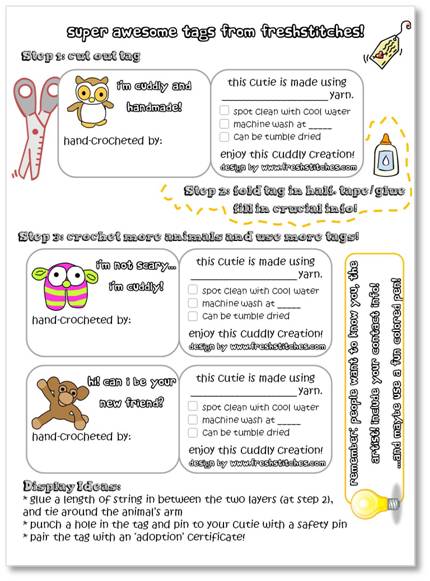
For your downloading and printing pleasure, I introduce to you… the amigurumi tag collection!
ree download gift tags for amigurumi crochet

Making some amigurumi? You’ll want to download these adorable tags!

I designed these tags specifically for your cutie stuffed animals… and even included a few tips for display!

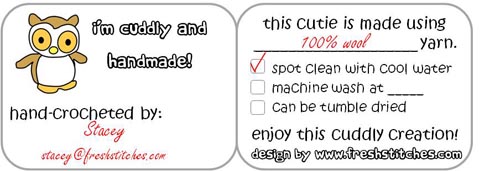
Once you download and print the tags, you’ll want to fill out the tag with all the crucial info. Check out my example:

example tag for your amigurumi

The tag easily folds in half… and is ready to adorn your cutie!

Enjoy!

Looking back at one of my biggest FOs: Crocheted Softies!

It’s Finished Object Friday!

As you may have surmised from this week’s Work-in-Progress post, I don’t have anything finished that I can actually show you…

But, do you know what today is? It’s the 1 year anniversary of the release of Crocheted Softies! Talk about a big FO!
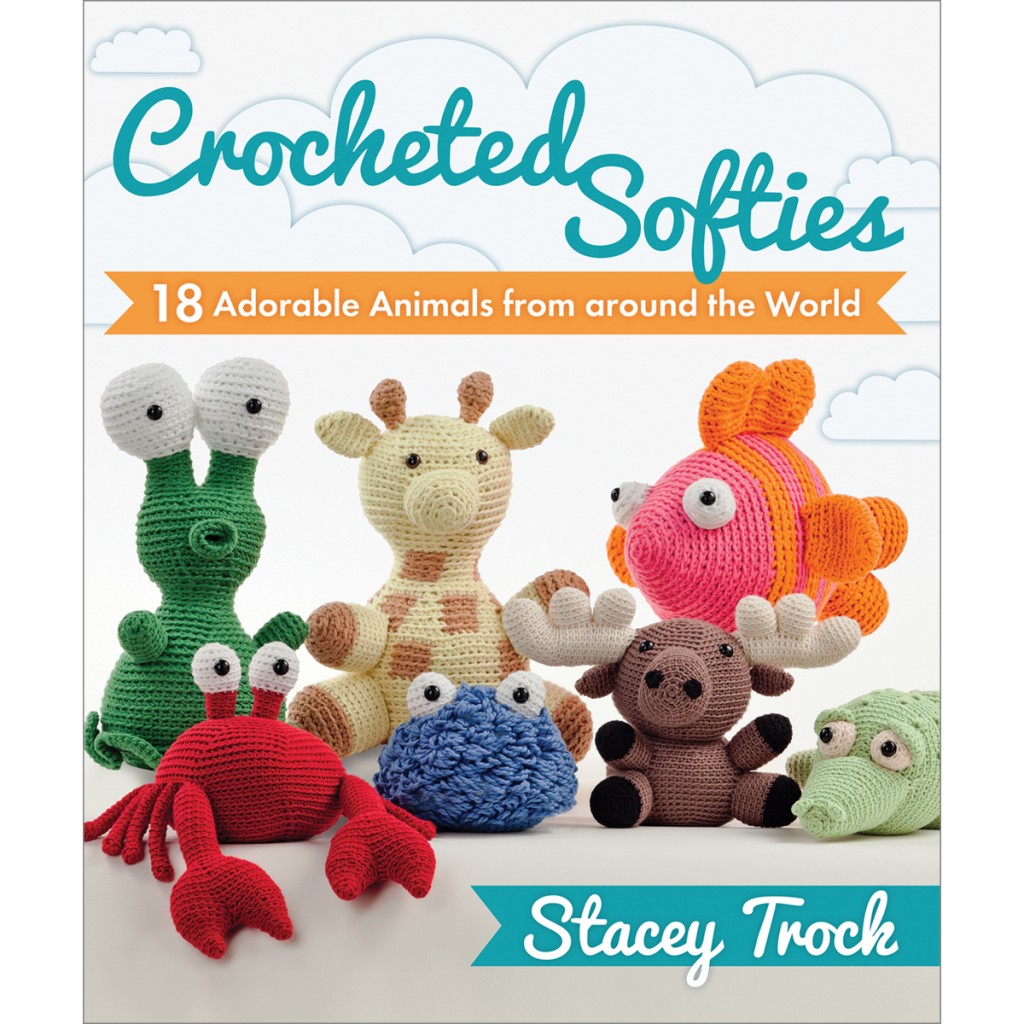
So today, I’m going to take a little look back and chat about my goals and how I chose the projects for the book!

My goals for Crocheted Softies

There are quite a few books of crocheted stuffed animal patterns out on the market. When designing my book, I wanted to make sure it was special and unique, so I set a few goals. I wanted to make sure that:

  • the book contained patterns for large, cuddly animals suitable for children to play with (many books available focus on teeny-tiny animals)
  • the book included Earth-friendly yarns, since one and two-skein projects are an excellent time to experiment with new fibers!
  • a newbie crocheter could pick up Crocheted Softies and make an animal
  • a crocheter of any level could find a project that is interesting and learn something new!

Selecting the projects

To meet these goals (the last two in particular), I had to put a lot of thought into selecting projects. I thought about what sorts of skills a crocheter might want to learn (from easiest to hardest) and then designed an animal that incorporated each one of these skills. Let’s take a peek!

The basics: single crocheting, increasing & decreasing

It can be daunting to start on a big project, so the simplest project in the book is also the smallest: Kai the Kiwi.
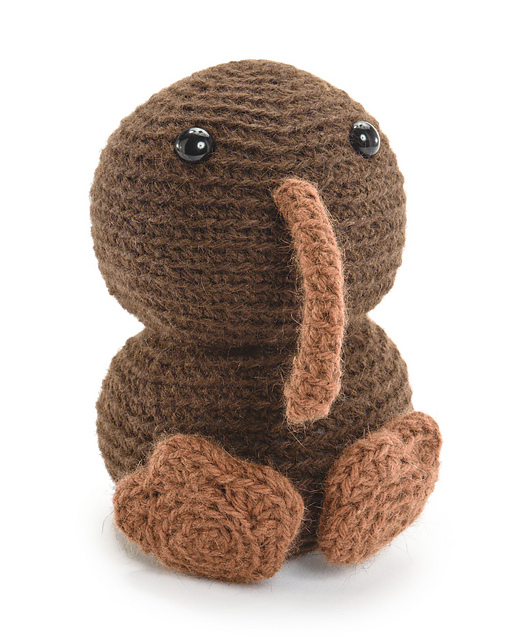
All photos courtesy of Martingale Publishing
This adorable little guy is a great project to start on (small, simple shaping, few pieces to attach) and also gave me the opportunity to use a yarn from New Zealand (that’s where Kiwis live!): Zealana Kia Ora Rimu DK. This yarn is made from New Zealand Merino and possum. The possums in New Zealand are an invasive species, and culling them for yarn saves the kiwi’s habitats! Isn’t that so poetic?

Practice attaching pieces, without complicated stitching

Many people tell me that attaching pieces is their least favorite part of making animals… so it’s helpful to get a little practice on a cutie that doesn’t require complicated stitching.

That’s why I designed this adorable owl: the stitches aren’t any harder than is required for the kiwi… but there are more pieces, so you’ll quickly gain confidence when putting him together.
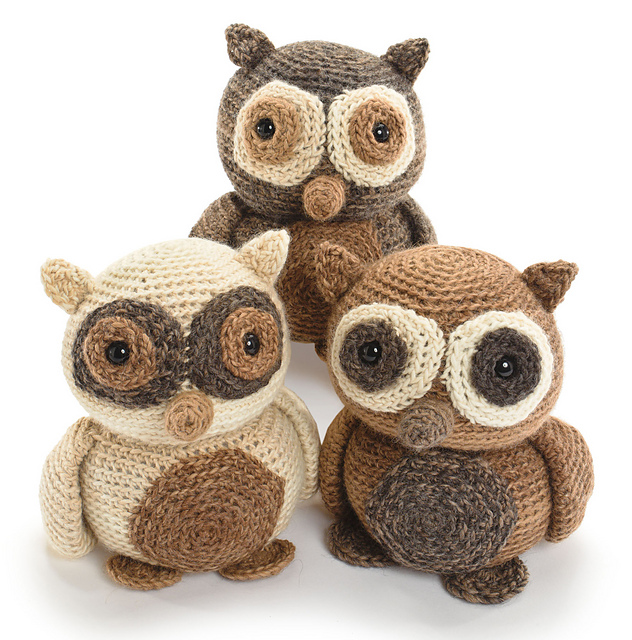
And don’t you just hate buying three skeins of yarn for one project… and then having lots of leftovers? I designed this owl so that you could make all three of the owls with only 3 skeins of yarn! By using the main color of one owl as the contrast color of another… you use up the skeins perfectly!

(I thought it was very clever…)

Changing Colors

Changing colors is a skill that you’ll need for a variety of crochet projects! And, it’s a fun way to add character, so I put quite a few ‘color-changing’ projects in the book.

Maple the Moose is a great way to ease in to changing colors: each of his limbs just require one color change (going from the black of the ‘hoof’ to the brown of his ‘leg’):

The next level up in working color changes is to execute stripes… check out Fins!
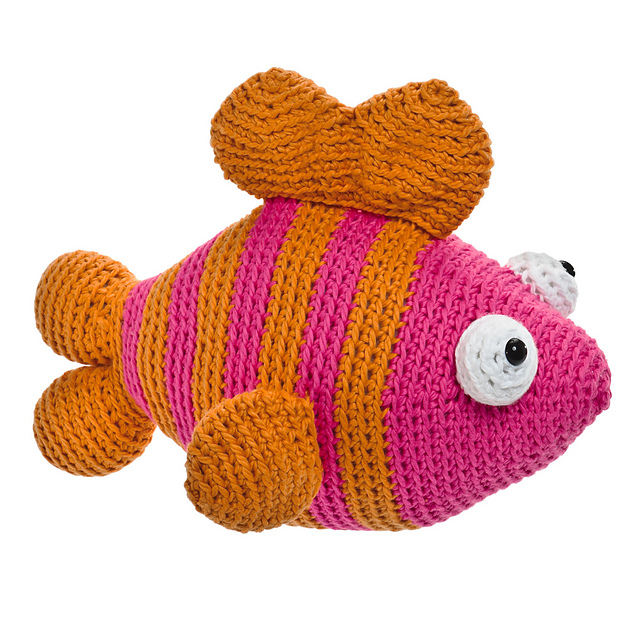
And once a crocheter has mastered those skills, they’re ready for working color changes multiple times over the entire piece, as you do for the patches of the giraffe:
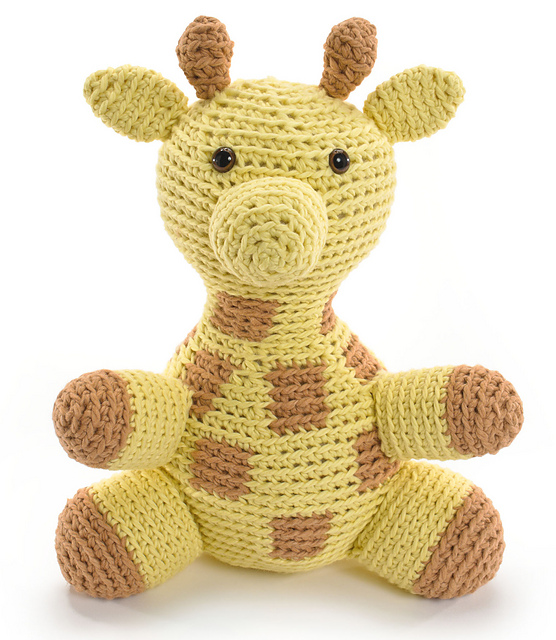
By working through these patterns, a crocheter would end up with a bundle of awesome color-changing skills in their pocket! And what’s better than feeling fully confident with changing colors? It’s a boost that’ll let you tackle a whole variety of (non-stuffed animal) projects!

Shaping with slip stitches

Aside from shaping by using increases and decreases, I wanted to include a project that used slip stitches to accomplish the shaping. This technique creates the curvy body of Slithers the Snake:
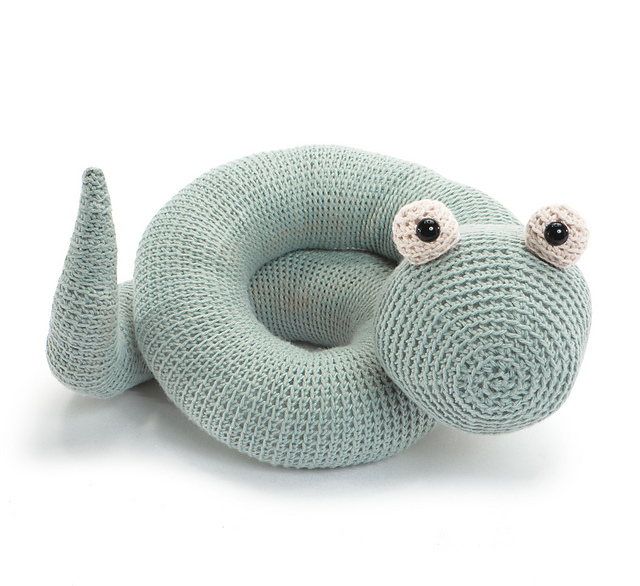
Doesn’t he look fun?

Shaping with short rows

Another technique for shaping is using short rows. I designed Tuskegee the Walrus, which uses short rows to achieve the curve of his body:
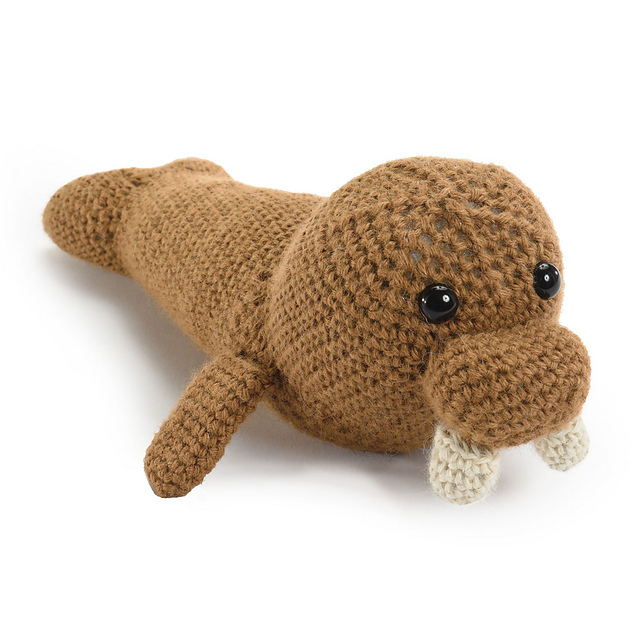
Shaping with short rows allows you to create a sharper bend than is possible with slip stitch shaping. It’s also a technique that will pop up in garments such as socks and some sweaters. I thought, ‘what better way to practice than on a stuffed animal that doesn’t need to fit anyone?’!

The loop stitch

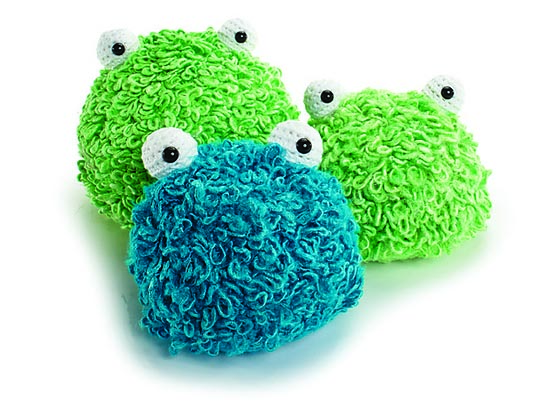
Who doesn’t want to add a little bit of texture to a crochet piece? The loop stitch is a super-fun stitch that creates a fabulous look. It can feel like a lot to learn, though, so I made sure to include a project with very little shaping, so crocheters could just practice the loop stitch:
And then, you could try your hand at the alpaca, which uses the loop stitch and shaping:
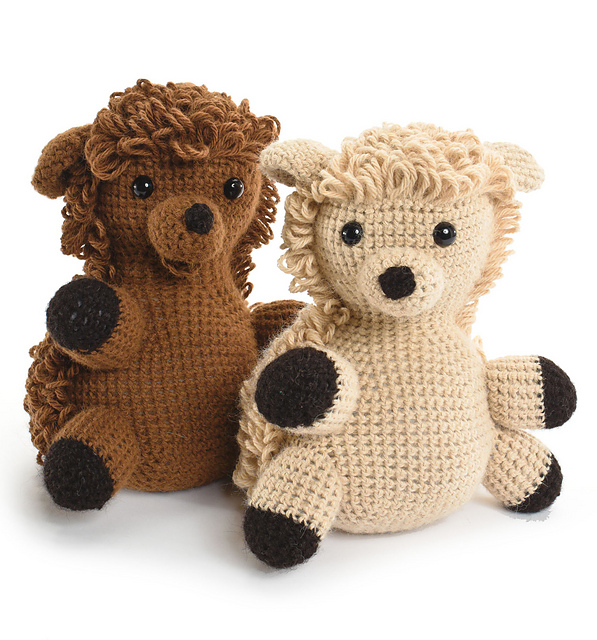
The alpacas are crocheted with 100% natural alpaca yarn… giggle!

The bobble stitch

I created (at least, I haven’t seen it anywhere else!) a bobble stitch that can be used on stuffed animals, since it doesn’t leave a hole in the fabric like many other bobble/popcorn stitches. I wanted to use this stitch, so I had to come up with an animal that would have bumpy skin…

It’s a crocodile! The perfect excuse to use those bobbles!

Joining pieces by crocheting

Another technique I knew I wanted to include was joining separate pieces by crocheting them together. This is how I designed Zork the Alien’s eyes:
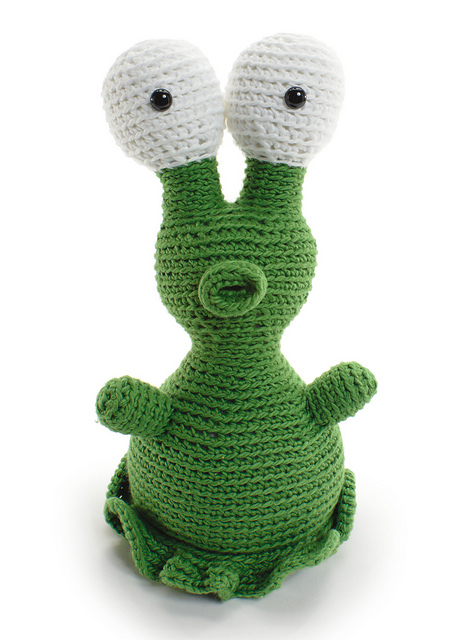
My hope is that this is a technique crocheters will fall in love with, and use on their own projects and designs!

Would you feel confident?

If you mastered all of these techniques, would you feel like a more confident crocheter? More willing to tackle patterns? My hope is that you’re saying, “Yes, I would!”!

There are more patterns!

Did you know that there were supposed to be 2 more patterns in the book? But that they got cut for space reasons?

And now… (this is exciting) those missing patterns are available for free!

One of these is M. Richard the Whale:
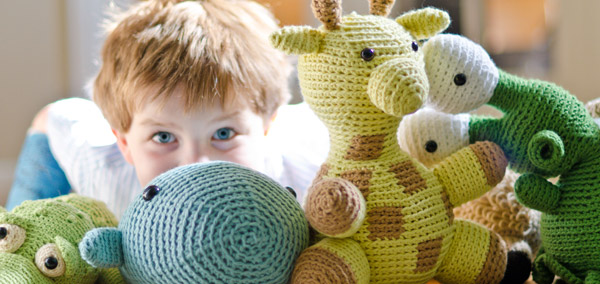
And he’s available as a free download from Martingale. (Do you like the name? Get it? M. Richard… think about that for a minute.)

The second is Hugo the hippo, available as part of Crochet Me’s free Amigurumi ebook!

Go ahead and grab those patterns!

Join in on the Crocheted Softies fun!

I’ve had a total blast in the year following the release of Crocheted Softies. It’s been wonderful getting emails from all over the world from people who have discovered/rekindled their love of crochet with my book! One of the highlights was when I found out that Adriana crocheted all 18 projects from the book! How awesome is that?

Crocheting doesn’t have to be hard or stressful… with the right tools (and I’m hoping the super-illustration-ful introduction of my book is one of them), you can develop the skills you need to make crocheting a fun part of your life!

So, thank you, everyone for loving Crocheted Softies and filling my year with fabulous projects and comments! If you don’t have it… maybe you should put it on this year’s Christmas list!

Thanks for stopping by and reading!

If you want to see more great finished items… make sure to visit Tami’s Amis blog, the organizer of this great FO Friday theme!

I hope you have an awesome and craft-filled weekend! I’m making it a goal to put some serious thought into my holiday crafting…

Want to discover a whole new world of patterns? Try reading crochet charts!

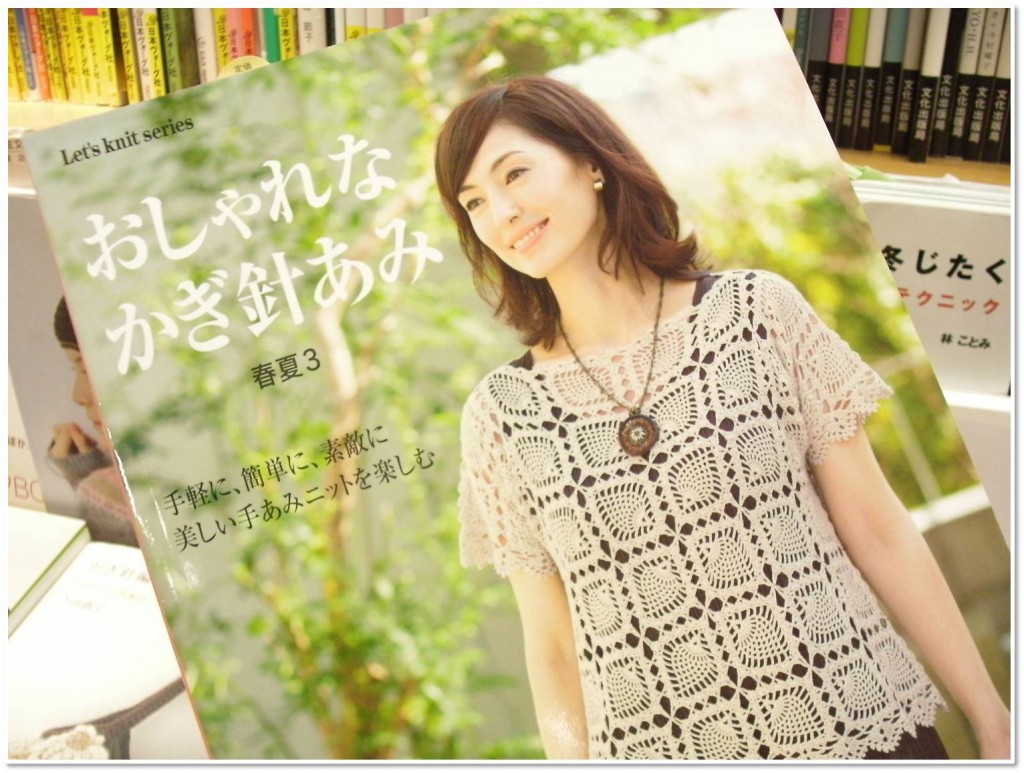
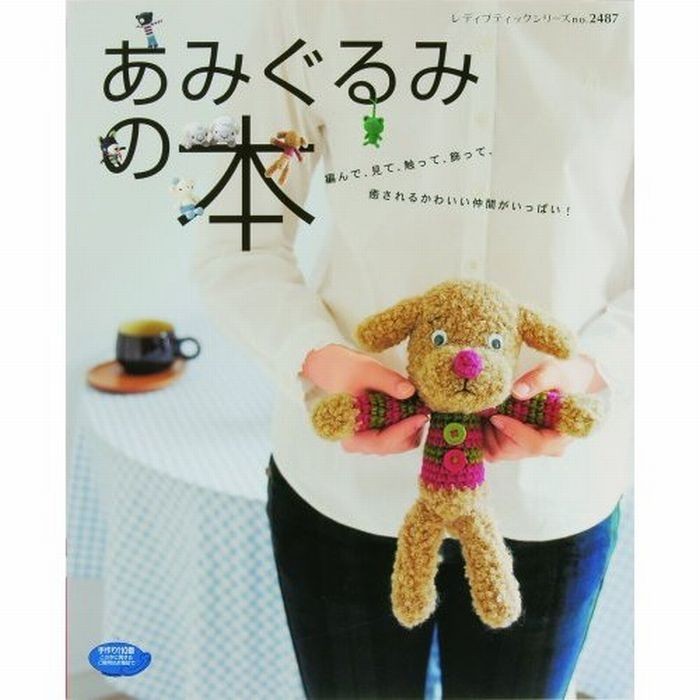
I adore Japanese craft books. It doesn’t matter if the craft is sewing, crocheting, needle felting… you name it and I can guarantee that you’ll find a supply of irresistible Japanese books on the topic.
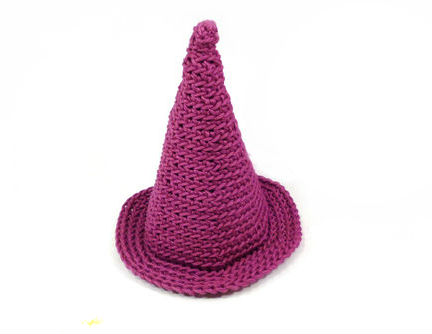
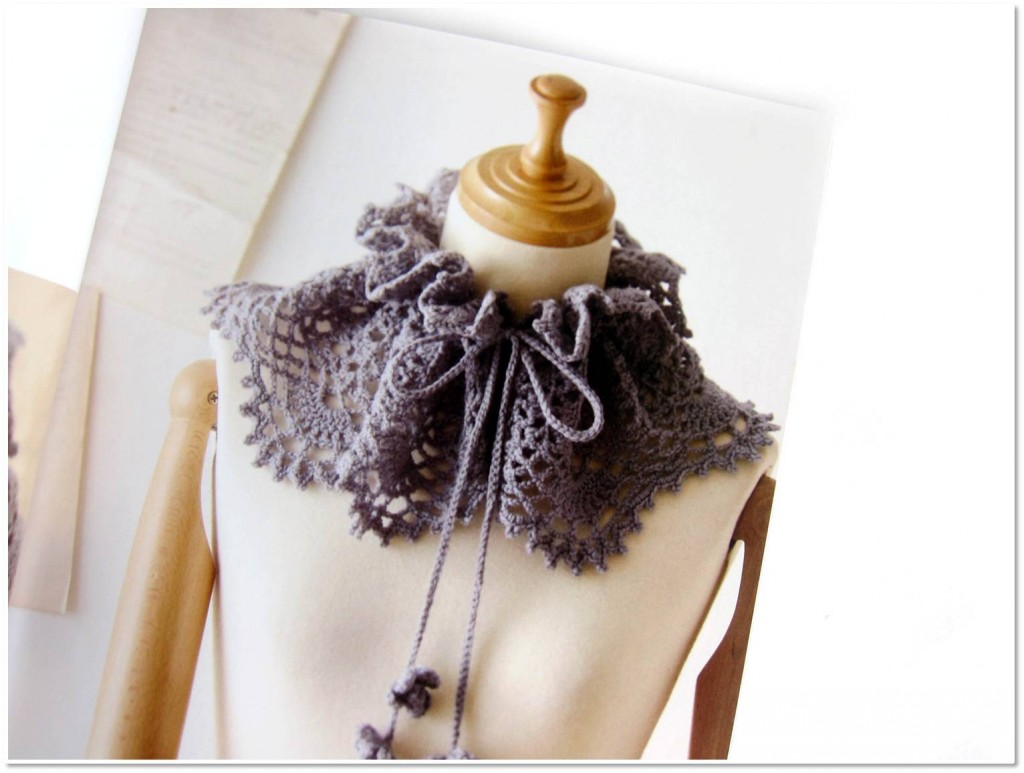
Just one example of the crochet fabulous-ness that comes out of Japan.
Of course there’s a little bit of bad news that accompanies this discovery: many of us (myself included) don’t read Japanese.

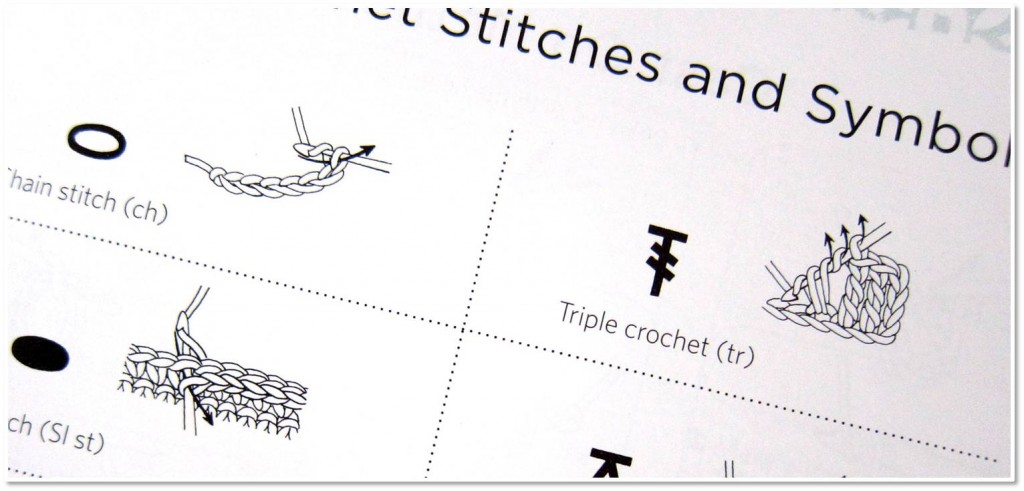
Meet your friend: the crochet chart

Want to know the good news? Japanese crochet patterns are written with charts: meaning that, if you can understand the international language of the charted symbol, you’ll gain access to all of those amazing patterns!

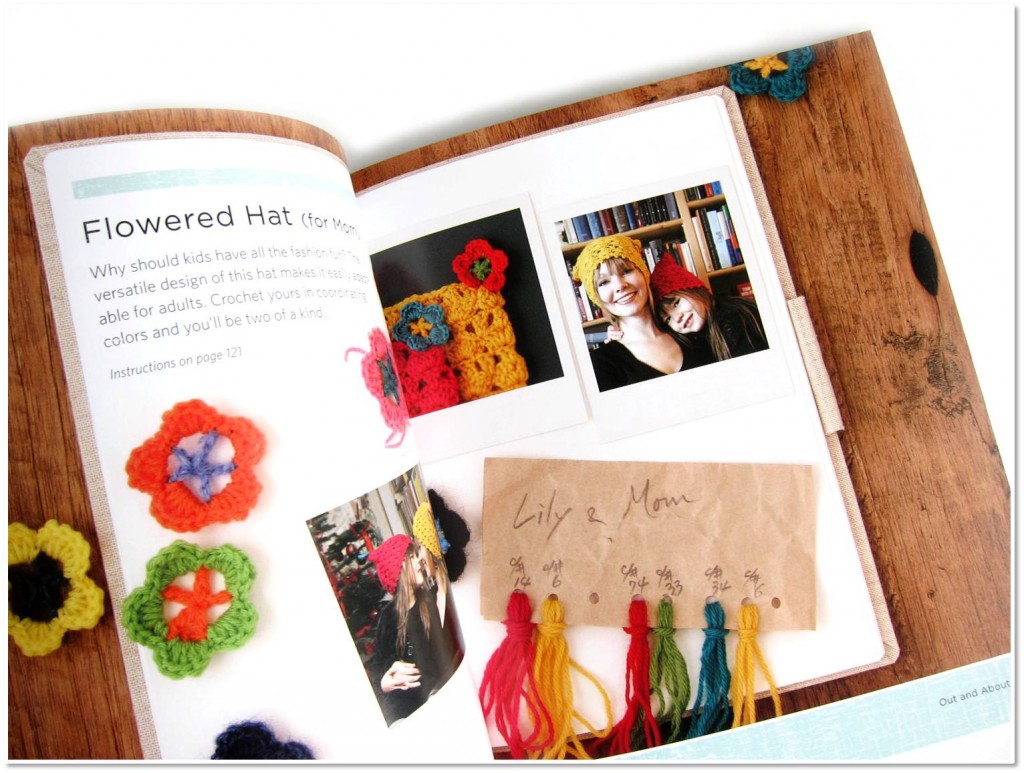
Page from Crochet with Color, book reviewed below.
(Actually, the illustration-heavy nature of Japanese instruction books applies to other crafts as well. You can read about my latest needle-felting book purchase in this blog post.)

I know… it can be daunting to pick up an entire book in another language. And, I’ll be honest with you: buying a Japanese book as a way of trying to learn the charts will be tricky. But fear not: I have an idea that will set you on your path to charted bliss.
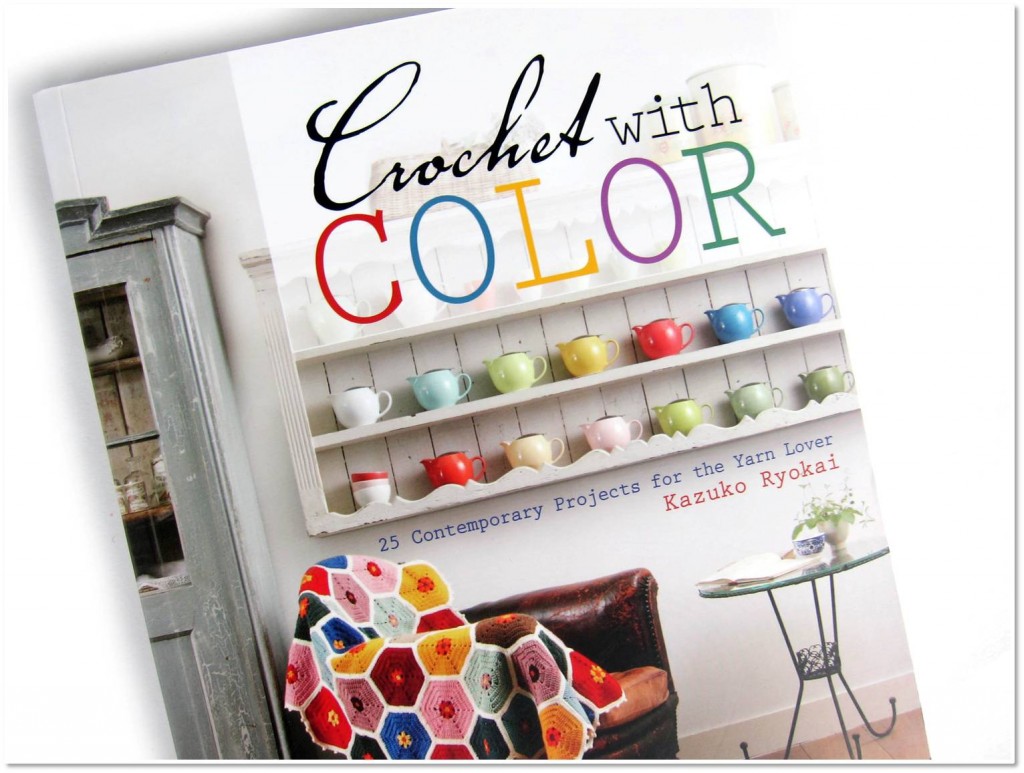
Crochet with Color

What if there were a magical book: originally written in Japanese (so it contains all of the charts and illustrations, exactly as they would be written in a Japanese book), but with the text of the book translated into English? Wouldn’t that be the perfect way to get your feet wet with charts?

Crochet with Color is your book!

This book contains 25 beautiful & colorful crochet projects, all fabulously photographed and totally enticing. But really, if you’re just curious about the projects in the book, you can head on over to Amazon and use the ‘look inside’ feature. It’ll tell you everything you need to know about what the book contains.

Although the projects are adorable and lovely… if you’re buying a book for the projects, it’s a personal judgement about whether the particular projects in the book speak to you. And I can’t tell you that! But, I think there’s a real value to this book aside from the projects, and that’s the charts I’ve been talking about.

Don’t get me wrong, there are American books that contain charts (Robin Chahula‘s books are almost all charted, and are fantastic). However, let’s say your goal is to gain the skill set to read Japanese crochet books. Crochet with Color is, in my opinion, one of the best stepping stones you can get: since the charts and illustrations are exactly what you can expect to find!

And yes, I really do think that once you can read the charts and understand the illustrations, you can use Japanese crochet books… because I’ve done it!

Feed the addiction…

Once you feel comfortable with reading charts, you’re going to want to get your hands on more Japanese books!

If you live in a big city, you might have a Kinokuniya, an import book store with a huge crafting section! I definitely suggest a visit if you’re near one!

Aww! So cute!
If you’re shopping online, it definitely takes a little searching to find a source: since most of us don’t know the Japanese characters you would need to search a Japanese website. The Etsy store, Japan Lovely Crafts sells Japanese knitting, crochet and sewing books. Ebay is also a good source, search “Japanese Crochet Book”, and a good number come up.

Just be cautious, you want to make sure you’re buying the actual (legitimate) book and not an illegal pdf photocopy!

I hope you’re motivated to delve into a new world of crocheting!