The Perfect Match – just the right color thread for your felt embroidery

You all may have noticed that I love a little felt embroidery. 🙂

I love how portable it is. I love the way the thread looks on the wool felt. I love the way it feels in my hands. It’s all so yummy!

The only part of the whole process I don’t enjoy is choosing matching thread colors.

I’m not talking about choosing thread colors for the design. That part is fun!

I’m talking about choosing embroidery thread that perfectly matches the felt color for sewing around the edges. Like sewing up this bird. (It’s a free pattern here.)

Flora - a free felt bird pattern from Shiny Happy World

It’s important to get a good match – but the process is boooring. Try this thread. Nope – but close. How about this one? Ugh – definitely not. This one? Yes. It’s not a creative decision in any way. It’s just finding the best match. *yawn*

Every single time I do it I think to myself that I ought to write it down when I find the perfect match – so I don’t have to do it again for that color.

Then I started thinking I should have a master list of all the thread colors that match all my felt colors. That would be handy!

Update! Ask and you shall receive. A few people asked for a printable list of the matching colors – so I made one! You can download it here.

Then I started thinking I should make that master list and actually carry the thread in my shop, so you can buy the matching thread when you buy your felt. Now that would be super handy!

So I did it. I waited for one of those perfect-light days and pulled out all my felt and my DMC thread card and I found the perfect match for every color felt I carry. Then I ordered in all the thread and added it to the shop.

Get the felt here.

Get the matching thread here.

Enjoy! And have a fabulous weekend!

Best,
Wendi

Play with some felt! Try the Oddballs – a fun pattern for silly monsters.

Evolution of a Mouse – a Peek at the Design Process

I designed a cute little mouse pattern, and I thought I’d share a bit of the design process with you.

The Head

I knew that I wanted to have his head be part of the body structure, just folded over. The original inspiration was this owl.

Orville the Owl softie pattern from Shiny Happy World

I designed it especially for quick and easy sewing (I need to make them with twenty kids at a Harry Potter Camp I was teaching – you can see all the details here).

When I was playing with that design I noticed that sometimes the bit folded over for the top of his head looked kind of mouse-like. If I stuffed it before folding it over it just might work – and I filed that thought away for later.

Well – now was later!

The Bottom

I also knew I wanted his body to be fat – so that his feet would disappear when he sat up on his back legs. (He actually has no feet – but the shape of his body makes them look like they’re just hidden.)

Usually if I want a fat bottom I design a flat pattern piece for the base and set it in, but that can be fussy sewing on a softie this small – and I avoid fussy sewing whenever possible. 🙂

I decided to use a technique that I use on all my tote bags. You’ll see it too in pillow corners – to give the pillow more fatness. It’s a way of boxing in the corners to add depth. I’ve used it before on these monsters and it was really easy to sew, so I decided to try it here. The final result looks like this.

Mischief of Mice - softie sewing pattern from Shiny Happy World

He’s not dead – he’s just lying on his back so we can see his bottom. 🙂

See how the “corners” of the body are boxed in? This is very easy to sew.

The Ugly Part of the Design Process

So – that was two design decisions made. Time to start some prototypes.

I sew these out of a yucky white sheet with whatever thread I happen to have in my sewing machine. They’re not pretty, but they let me work out the details of the pattern pieces.

Three Mice - prototypes of the Mischief of Mice softie pattern by Shiny Happy World

Sometimes the very first prototype is just right, but usually I have to try at least a few variations before things get good. I lost track of the number of prototypes I tried for this “simple” mouse – but these were the three still sitting on my table when I was done. Sometimes I take out the stuffing and resew a couple of seams – like to take in the sides a bit – instead of starting a whole new prototype.

The proportions on the first one were pretty good. I would have done a second round to make his body a little wider – but overall he was just too big.

The second one was better size-wise. But when I stuffed him properly he was just too tall, and when I took out some of the stuffing to make him shorter, he just looked hunchbacked.

The third one was just about right.

Time to add some details – ears, paws and a tail. I usually leave them off in the first round so I can just focus on the basic body shape.

The Details

When I start to add all the other bits and pieces, I usually cut them out of paper first and pin them to the softie. That’s a quick and easy way to check proportion and placement. Then I use those as pattern pieces and make up another prototype all from fabric.

It usually takes a bit of tweaking to get things just right – the size of the ears, the length of the paws, the thickness of the tail. In this case my original tail was too skinny to turn right side out. I had to redesign it so my favorite turning tubes would fit inside. 🙂

Mouse prototype - one step in the design process at Shiny Happy WorldI’m picky about eyes – I’ve written about my obsession with eye placement here and here. The main thing to remember is that the shape of the face can change a lot after stuffing – so I always just draw the eyes on a stuffed prototype. Usually I’ll also poke holes and try out a few different eye sizes. I pick the final prototype apart and trace that eye placement onto the final pattern pieces.

Cuteness!

The final step, of course, is to make him out of cute fabric. 🙂

I knew that I wanted him to be made of quilting cotton, because I wanted to use colorful, patterned fabric.

I couldn’t choose a color, and I couldn’t stop at one. I made a whole mischief of mice in a rainbow of colors – and I love them!

Mischief of Mice - an easy sewing pattern from Shiny Happy World

Finished!

So now you’ve seen the ugliness behind the scenes in the design process. 🙂

You can get the finished pattern here.

Happy sewing!

Controlled Chaos Quilt Block #4

Controlled Chaos quilt block #4 - a scrappy quilt-along with Shiny Happy World

Block #4 is finished for the Controlled Chaos quilt!

I realized all my blocks so far included blue – so this time I grabbed some purple and orange. I’m loving how they look together!

So far. . .

Speaking of how they look together, here’s a quick mock-up of the first four blocks. . .

Controlled Chaos Scrappy Quilt-Along - the first four blocks from Shiny Happy World

Love!

I’m so happy with how this is coming together!

Ready to make block #4?

What You’ll Need

  • 70  two-inch squares in color A (shown in purple)
  • 30 two-inch squares in color B (shown in orange)

Instructions

Use 1/4″ seam allowances for all sewing.

Arrange your squares according to the diagram below and sew them together into rows.

Press all the seams. I’m pressing mine open for this quilt. I think it will make things simpler in the end.

Sew the rows together to make the finished block.

Here’s the exploded view. . .

Controlled Chaos block #4 exploded

A Word About Randomness

It’s really HARD to be random when you’re sewing blocks together. The inclination is always to put two fabrics together that look good together, but if you do that you’ll have two things happen. . .

  1. It will take longer to make your quilt because you’re making decisions with every single square.
  2. You’ll tend to put the same fabrics together over and over again and a pattern will emerge. It’ll be a subtle pattern, but your scrappy quilt will look just a little less scrappy.

Some people throw all their blocks in a paper bag and draw them out without looking. I like the idea of that, but it makes my squares wrinkly and that bugs me.

Instead, I lay out one stack of squares for each fabric. I just stack them up near my sewing machine as I cut them, and I don’t go for any kind of order. Then when I sew, I just take them in order, regardless of what comes up together.

Did you see the video yet about chain piecing? Even if you already know what chain piecing is, take a look. I show my randomness method at the beginning of the video.

Block #5 coming next week! I don’t have any yellow or green yet, so I’ll definitely be using one of those colors.

Click here for all the Controlled Chaos posts.

If you’re stitching along – please send photos of any finished blocks! I’ll include them in future posts. You can email them to me at blockhead[at]wendigratz[dot]com.

Happy piecing!

Best,
Wendi
That's me!

Video – How to Chain Piece Quilt Blocks

In this video I show you how to chain piece quilt blocks for speedy piecing.

This is a really common technique in the quilt world, so I know a lot of you will be familiar with it already.

If it’s new to you – prepare for your world to be rocked.

Seriously.

It’s just amazing how much time you save by not snipping threads on each set of blocks as you go.

I don’t just use this technique for quilting. I use it any time I’m sewing more than one set of things together.

If I’m working on a puppy softie and I have four sets of paws, a tail and two sets of ears to sew up, I chain them all together. I do backstitch at the beginning and end of each of those sets – but I don’t cut the threads until I’m done with the whole chain.

Here’s the video. . .

See how easy?

This is the technique I’m using to sew up all those itty bitty blocks in the Controlled Chaos Scrappy Quilt-Along. I’ll be sharing the next block in that quilt tomorrow!

Happy quilting!

Best,
Wendi
That's me!

How to single crochet 2 together (sc2tog)…neatly!

Tip Tuesday

A question I get asked very often is: when I sc2tog, that decrease looks all big and loose. How do I fix it?

Today, I’ll show you! If you’re looking for a tutorial on how to sc2tog, then click here for a video.

Aim for even stitches

A very common problem is either having the decrease look loose, or the stitch next to it. No worries! It’s fixable!

Today, I’ll show you how to get a really nice decrease, based on my teardrop technique. Basically, at every step of the stitch, you want to make sure that the loop on the hook looks like a tight teardrop.

Let’s look at the step-by-step photos of me doing a decrease:

single crochet decrease

Do you see how at every step the loop is snug against the hook? Not strangling the hook, but snug.

That’s the trick! A crochet stitch is formed from these loops, so if one of these loops gets big, then your stitch will be big and loose!

Best,
Stacey

Video – How to Cut Small Squares from Scraps

How to Cut Small Squares from Scraps - a video tutorial from Shiny Happy World

I think everyone has a favorite method for cutting small squares from scraps.

In this video I share the two methods (and tools) that I use – depending on the size and shape of the scraps I’m cutting.

Of course, you can use these methods for any size squares. Right now I’m working on the Controlled Chaos quilt and that uses 2 inch squares, so that’s what I showed. 🙂

Here’s the video.

Coming next week. . . a video showing how I chain piece these squares together. It’s fast!

You can see all the Controlled Chaos posts here.

Happy quilting!

Best,
Wendi
That's me!

Controlled Chaos Block #3 – a scrappy quilt-along

Controlled Chaos Scrappy Quilt-Along at Shiny Happy WorldHere’s block #3 in the scrappy quilt-along.

I love it!

This time I went for a classic checkerboard in pretty blues and greens.

My inspiration?

A block sent in by a reader!

Ann shared her first block and wrote. . .

Blue and green stripes – not as noticeably ‘stripy’ as I had hoped for – will try for greater contrast in next block.

Here’s Ann’s block.

Controlled Chaos block #1 made by Ann

I have to say right here that I love this block! So much that it inspired the color combo in my own block #3.

But I see what’s Ann’s talking about so I’m going to share a little color lesson here.

The Official Quilters Rule (which you may choose to ignore at any time) is to choose your lights and darks carefully.

Ann has her rows divided by color, but within each stripe there’s a full range from very light to medium dark.

Sometimes your eye wants to see contrast because of color, and sometimes it wants to see contrast because of shade.

The best example in this block is that stack of three very light colored blocks right in the middle of the bottom three rows. See how your eye wants to group them together as one tall rectangle? That’s because they’re very similar in shade, even if some are blue and one is green. And they’re surrounded by noticeably darker blocks of both colors. That breaks up the desired stripey effect by creating a competing shape that the eye likes more.

I happen to LOVE this dapply effect and I reproduced it in my own block. But if it’s not your cup of tea, here are a couple of things you can do to help bring up the contrast.

1. Be more mindful of your darks and lights. If it’s hard for you to “see” the effect you’re getting, try using your camera to help. Lay out the blocks you think you want to use, snap a photo, then convert the image to black and white.

Here’s Ann’s block converted.black and white version of low-contrast Controlled Chaos block

Without the distraction of color you can more easily see that it’s a random assortment of light and dark.

Use this tool to help you really see which blocks are lightest and which are darkest. If Ann had used only her darkest blues and only her lightest greens, she would have gotten the more stripey effect she wanted.

You can get the same help by looking through a red lens – faster than taking photos and fiddling with filters. Quilt shops used to carry them, but I haven’t seen them in a long time. Get some red acetate from a florist and look through it to make a cheap and easy red lens for yourself.

2. Use the distraction of color to your advantage. If I’m pairing two colors in a block I almost always go for a warm color and a cool color. That helps your eye see contrast between the colors where there’s very little (or no) contrast in the shade. Take a look at my first block.

Controlled Chaos contrast lesson - block 1

If you look at the grayscale version it’s very clear that this is a big wash of medium tones with almost no contrast except a handful of randomly-placed very dark squares. (A total failure according to Official Quilter Rules.)

But in color you can clearly see the stripes! Thank you warm and cool contrast! 🙂

The reason Ann’s block didn’t feel stripey enough to her was because it had a range of shades in both color stripes and blue and green are right next to each other on the color wheel.

Again – I love it! But now you have some tools to help you out if you feel like you’re not getting the contrast you want. Thanks, Ann, for letting me use your block as an example! And for inspiring my third block. 🙂

Ready to make your own Block #3?

What You’ll Need

  • 52  two-inch squares in color A (shown in green)
  • 48 two-inch squares in color B (shown in blue)

Instructions

Use 1/4″ seam allowances for all sewing.

Arrange your squares according to the exploded view.

Controlled Chaos Block 3 exploded

Sew sets of four blocks into squares. Then arrange those squares in rows.

Controlled Chaos Block 3 in progress

Doing it this way will keep the edges of the color blocks perfectly straight, even if your seams and intersections aren’t perfect.

Sew the larger blocks together into rows.

Press all the seams. I’m pressing mine open for this quilt. I think it will make things simpler in the end.

Sew the rows together to make the finished block.

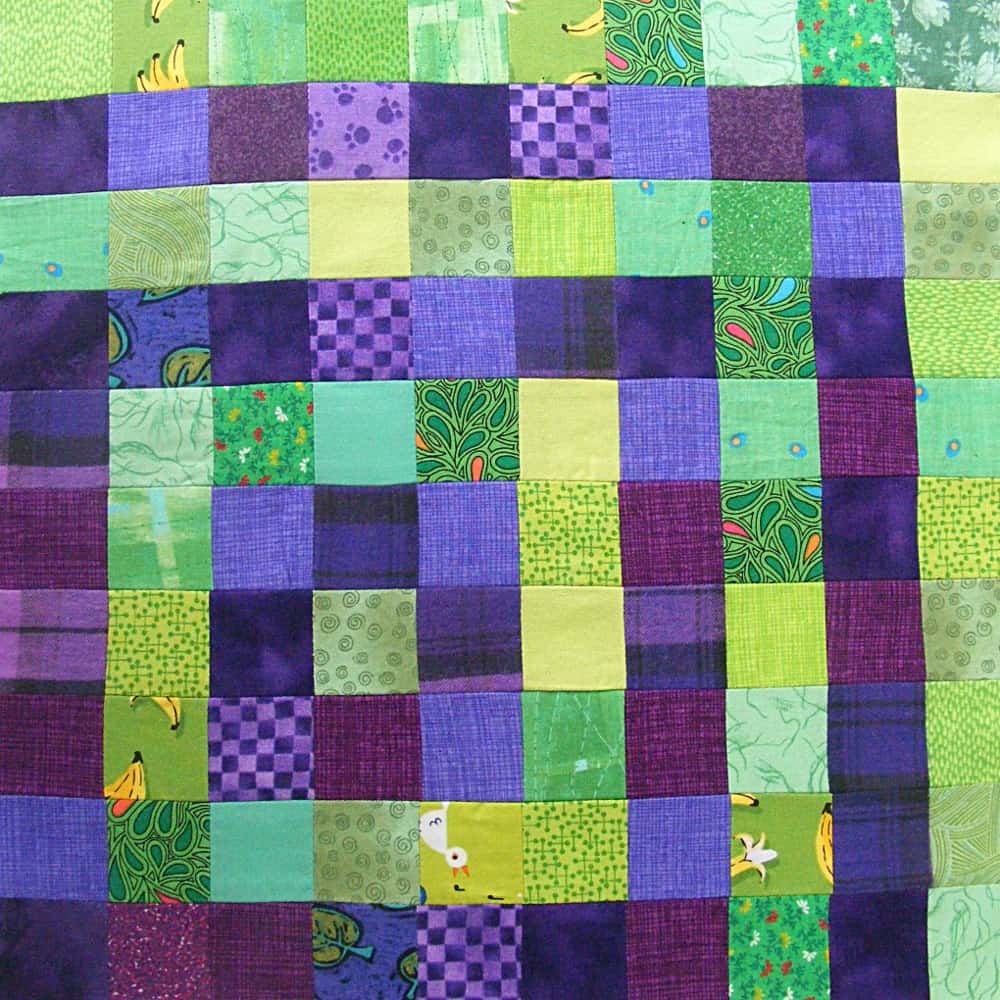
Here’s what my quilt is looking like so far.

Controlled Chaos Scrappy Quilt-Along: 3 blocks finished

I love it! But I have to NOT use blue in the next block. 🙂 I didn’t realize until I had put them all together that every block has blue so far!

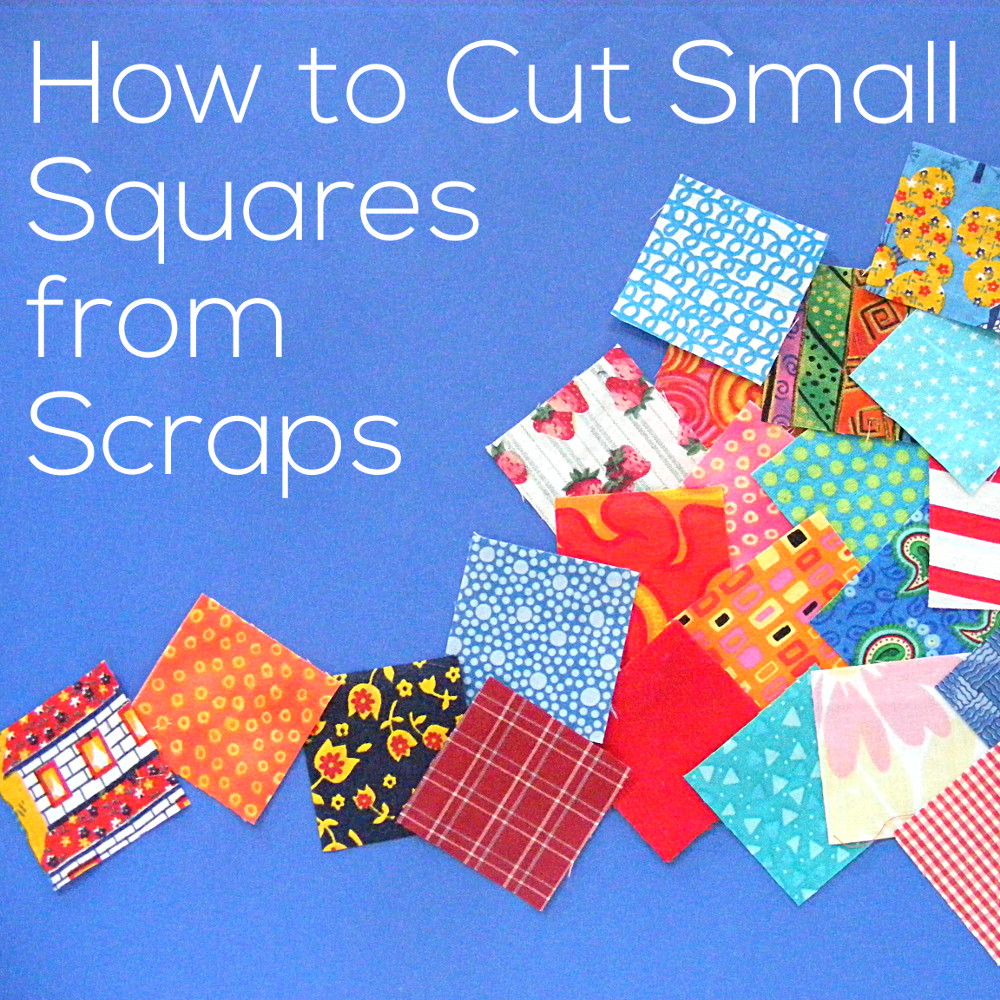
Block #4 coming next week! And take a look at this video showing how I cut my squares from scraps.

Click here for all the Controlled Chaos posts.

If you’re stitching along – please share photos of any finished blocks in the Shiny Happy People group! We’d all love to see what you’re making!

Happy piecing!

Best,
Wendi
That's me!


Why does Disney ‘go after the little guys’?

Disney’s characters are copyrighted. You can’t use a drawing of Mickey Mouse and sell it on a mug, unless you have authorized consent to distribute the image.

Disney has a reputation for being ruthless about protecting its intellectual property (example stories of folks getting sued here and here).

cartoon lawyer

This leaves a lot of questions from crafters asking, Why does Disney go after the little guys?

In short: they have to

I’m not a lawyer (disclaimer!), but since I’m in the crafting industry, I have a fair understanding about copyright.

Let’s pretend that Disney finds out that Crissy Crafter has been using images of Mickey Mouse without permission.

Then, let’s pretend that Disney decides she’s ‘too small’ and doesn’t do anything about it.

needle

What happens?

In this case, Disney has put itself in a very sticky situation. By failing to press charges, it can be argued that they are ‘allowing’ this illegal usage to occur, and may have trouble defending future cases.

So, they have to pursue every case they find!

What’s a crafter to do?

Disney, as the creator of these characters, has the right to defend the images.

As a crafter, your best course of action is to just do what’s right. Don’t design and sell crochet patterns of Mickey Mouse. Don’t sell necklaces with drawings of Mickey Mouse. Violating someone else’s copyright can get you into trouble.

cant do that

It’s also unfair a crafter to benefit by using someone else’s brand. By selling ‘Mickey Mouse necklaces’, you’re giving the impression that you have an official connection with Disney, and you are piggybacking off their fame to generate sales for yourself.

Be creative! Come up with your own unique designs and characters! And stay out of trouble!

Comments, welcome!

As always, I welcome comments on this blog post.

However, from past experience, I know that blog posts about copyright are controversial and generate heated discussion.

My goal in writing this post was simply to explain to crafters one motivation behind Disney’s enforcement of its copyright.

As I am not a legal expert, I will not reply to any questions/comments about what is/isn’t copyright infringement. Thank you in advance for understanding.

Best,
Stacey

Controlled Chaos: Scrappy Quilt-Along #2

Controlled Chaos - a scrappy quilt-along at Shiny Happy World

I’m so glad that some of you will be joining me in this scrappy quilt-along!

Here’s block #2. This time I used orange and mostly turquoise-ish blues.

Controlled Chaos Block #2

I really like how it turned out!

And here’s a quick mock-up of what it will look like if it ends up next to block #1 in the final quilt.

Controlled Chaos Scrappy Quilt-Along

I like the way the horizontal blue stripes of the first block kind of feed into the blue border of the new block.

What You’ll Need

  • 40  two-inch squares in color A (shown in blue)
  • 60 two-inch squares in color B (shown in orange)

Instructions

Use 1/4″ seam allowances for all sewing.

Arrange your squares according to the diagram below and sew them together into rows.

Press all the seams. I’m pressing mine open for this quilt. I think it will make things simpler in the end.

Sew the rows together to make the finished block.

Here’s the exploded view. . .

Controlled Chaos Block #2 - exploded

I’m really happy with the contrast in this one. 🙂

I’ve had a couple of questions about my process on this. . .

  • What’s the best way to cut squares from scraps?
  • Is there a tricky way to sew all the blocks together?
  • Is there a special way to make the seams line up just right?

I’m working on a short series of videos to answer these questions and hope to have the first one ready to post next week. Keep any questions coming and I’ll do my best to answer them as we go. 🙂

Block #3 coming next week! Click here for all the Controlled Chaos posts.

If you’re stitching along – please post photos of any finished blocks. We love to see!

Happy piecing!

Best,
Wendi
That's me!

Controlled Chaos Scrap Quilt Along #1

Controlled Chaos - a scrappy quilt-along at Shiny Happy WorldRaise your hand if you’d like to empty your scrap bins and make a pretty spectacular quilt along the way!

*hand raised and waving around madly*

I’m making a scrap quilt and I’d love for you to join me!

I had originally thought about just cutting all my tiniest scraps into two inch blocks and then sewing them together completely at random. That would be fun – in a way – but the call of pattern is too hard for me to resist.

Plus I know that that is one HUGE project and it will feel like a smaller project if I can have lots of “finished” bits along the way.

So then I decided to do a bunch of 10 x 10 square blocks, each one using only two colors.

I’m calling it Controlled Chaos. 🙂

This is going to be a regular series (that will help me actually finish it) with a goal of one block a week. We can make one block a week, right?

I’d love for any of you with overflowing scrap bins to join in!

Here’s Block #1. Simple. Classic. Stripes made out of itty bitty scrappy squares.

Controlled Chaos Block #1

What you’ll need

  • 50 two-inch squares of color A
  • 50 two-inch squares of color B

Instructions

Use 1/4 inch seam allowance for all sewing.

Choose one color and sew 10 blocks together into a strip. Repeat until you have 5 strips of each color.

Press all the seams. I’m pressing mine open for this quilt. I think it will make things simpler in the end.

Sew the strips together, alternating colors.

Here’s the exploded view.

Controlled Chaos Block #1 - exploded

I think this block would have been more successful if I had tightened up the colors a bit more. I think the reds are good – they’re all red or very dark pink. But there’s a bit too much variety in the blues. I wish I had made them all dark blue or all light blue. It’s ok here because there is so much contrast between the red and the blue that it still clearly reads as stripes (and no way am I taking them apart) but it’s something I’ll keep in mind going forward.

Block #2 coming next week! Click here for all the Controlled Chaos posts.

Happy piecing!

Best,
Wendi
That's me!