I’m so glad that some of you will be joining me in this scrappy quilt-along!
Here’s block #2. This time I used orange and mostly turquoise-ish blues.
I really like how it turned out!
And here’s a quick mock-up of what it will look like if it ends up next to block #1 in the final quilt.
I like the way the horizontal blue stripes of the first block kind of feed into the blue border of the new block.
What You’ll Need
40 two-inch squares in color A (shown in blue)
60 two-inch squares in color B (shown in orange)
Instructions
Use 1/4″ seam allowances for all sewing.
Arrange your squares according to the diagram below and sew them together into rows.
Press all the seams. I’m pressing mine open for this quilt. I think it will make things simpler in the end.
Sew the rows together to make the finished block.
Here’s the exploded view. . .
I’m really happy with the contrast in this one. 🙂
I’ve had a couple of questions about my process on this. . .
What’s the best way to cut squares from scraps?
Is there a tricky way to sew all the blocks together?
Is there a special way to make the seams line up just right?
I’m working on a short series of videos to answer these questions and hope to have the first one ready to post next week. Keep any questions coming and I’ll do my best to answer them as we go. 🙂
Raise your hand if you’d like to empty your scrap bins and make a pretty spectacular quilt along the way!
*hand raised and waving around madly*
I’m making a scrap quilt and I’d love for you to join me!
I had originally thought about just cutting all my tiniest scraps into two inch blocks and then sewing them together completely at random. That would be fun – in a way – but the call of pattern is too hard for me to resist.
Plus I know that that is one HUGE project and it will feel like a smaller project if I can have lots of “finished” bits along the way.
So then I decided to do a bunch of 10 x 10 square blocks, each one using only two colors.
I’m calling it Controlled Chaos. 🙂
This is going to be a regular series (that will help me actually finish it) with a goal of one block a week. We can make one block a week, right?
I’d love for any of you with overflowing scrap bins to join in!
Here’s Block #1. Simple. Classic. Stripes made out of itty bitty scrappy squares.
What you’ll need
50 two-inch squares of color A
50 two-inch squares of color B
Instructions
Use 1/4 inch seam allowance for all sewing.
Choose one color and sew 10 blocks together into a strip. Repeat until you have 5 strips of each color.
Press all the seams. I’m pressing mine open for this quilt. I think it will make things simpler in the end.
Sew the strips together, alternating colors.
Here’s the exploded view.
I think this block would have been more successful if I had tightened up the colors a bit more. I think the reds are good – they’re all red or very dark pink. But there’s a bit too much variety in the blues. I wish I had made them all dark blue or all light blue. It’s ok here because there is so much contrast between the red and the blue that it still clearly reads as stripes (and no way am I taking them apart) but it’s something I’ll keep in mind going forward.
Want to learn how to embroider with an easy online workshop – totally free?
Sign up for Embroidery 101 here. You’ll learn how to get started, the tools and supplies you’ll need, and all the stitches you’ll need to embroider just about any design.
It’s a fun, inexpensive, and totally portable craft. You can do it!
When my daughter Jo was little, I made her a yellow dress lined with pink satin, embroidered with a butterfly almost exactly like this one.
She loved it and wore it ALL THE TIME. When she outgrew it she passed it on to a smaller friend who also wore it ALL THE TIME. The last time I saw it around town, it was on a new little girl. Her Mom said she loved it and wore it ALL THE TIME.
I’m sure it was the satin lining getting all the love – but all three girls called it their “butterfly dress.”
Now you can make a butterfly dress – or t-shirt or pillow or tea towels or quilt or whatever needs a butterfly stitched on it.
My favorite way to transfer an embroidery pattern is to use Sulky Sticky Fabri-solvy. You can see it in action in this video. Just print the pattern right on the stabilizer, peel off the paper backing, and stick it down wherever you want to stitch your design. It works great for stabilizing stretchy fabrics like T-shirts too!
This cute little butterfly uses only backstitch – with optional running stitches if you decide to include her swoopy flight path. Those are the two easiest stitches in the whole embroidery world! And if you’re brand spankin’ new to embroidery, just click on the links to watch videos to see how to do them.
I used 4 strands of thread for everything except the butterfly’s face and antennae. I used just 2 strands for them.
Here are the thread colors I used. . .
For the orange body I used DMC #721.
For the pink wings I used DMC #601.
For the yellow spots I used DMC #736.
For the face, antennae and flight path I used DMC #3371.
Sweet Sylvia Snail loves to go for a sloooooow stroll around the garden, stopping at every pretty posy for a sweet sniff. 🙂
She’s small – the total image is under 4 1/2 inches wide and fits nicely in a 6 inch hoop.
As with any embroidery pattern, you can enlarge or reduce the pattern to make it any size you like, and use whatever colors and stitches you choose.
Here are the colors and stitches I used in my sample. . .
Body - backstitch the outline with DMC #703. Satin stitch the stripes. Add French knots to the tips of her antennae. All stitching is done with 4 strands of thread.
Flower - backstitch the stem with 2 strands of DMC #699. Use the same color for the leaves in lazy daisy stitch. Lazy daisy stitch the flower petals with 2 strands of DMC #601. The flower center is a French knot with 4 strands of DMC #151.
Face - backstitch the eye and the mouth with 2 strands of DMC #3371.
She’s sweet. Hang her on the wall. Stitch her on a gardening apron or tea towel. Stitch her down near the hem of a pair of jeans.
I’ve heard it all before. Crocheting makes your wrists hurt. It’s too hard to put your hook into the next stitch. Attaching pieces is a nightmare.
What if I told you that one little trick could totally change all that? And crocheting would become relaxing and easy on your wrists again?
I’ll tell you the one thing you can do! And then I’ll show you why it rocks so much!
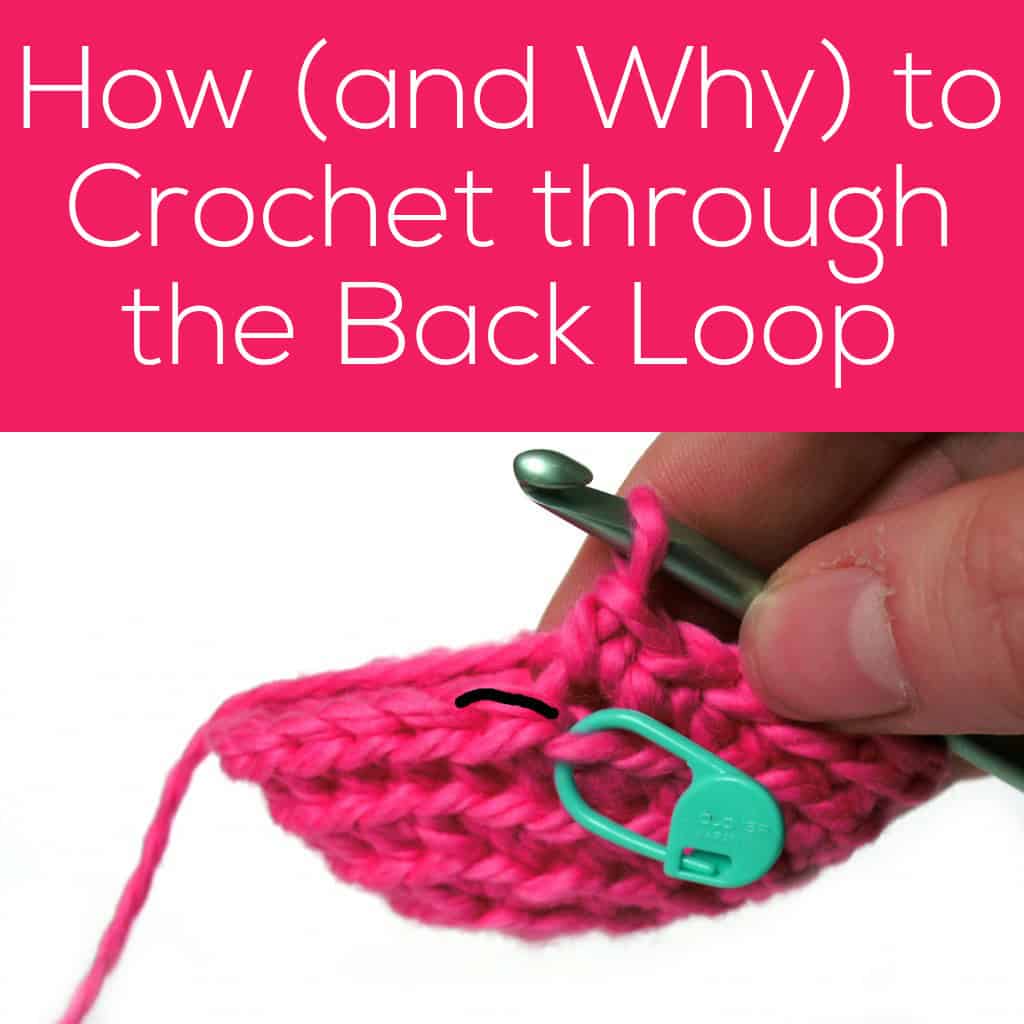
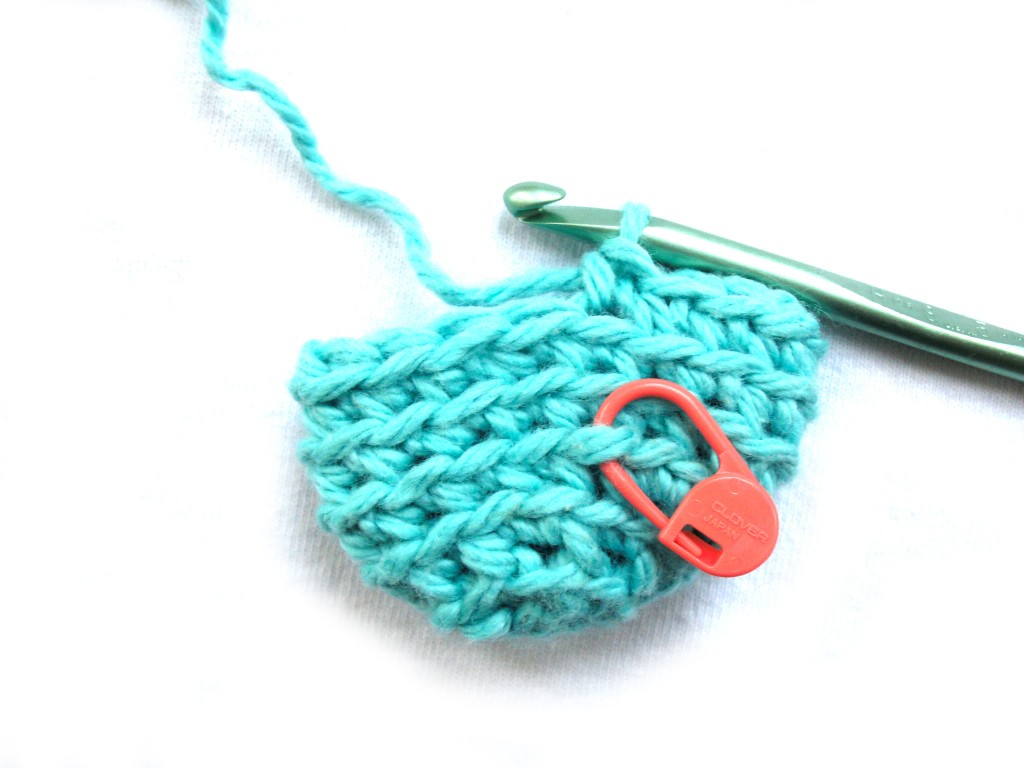
Crochet through the Back Loop
When crocheting, there are two loops: the front and the back (highlighted with a black line in the below photo).
The standard is to insert your hook under both loops when crocheting. But it’s not the easiest way!
Let me tell you all of the amazing reasons you might want to give the back loop a try!
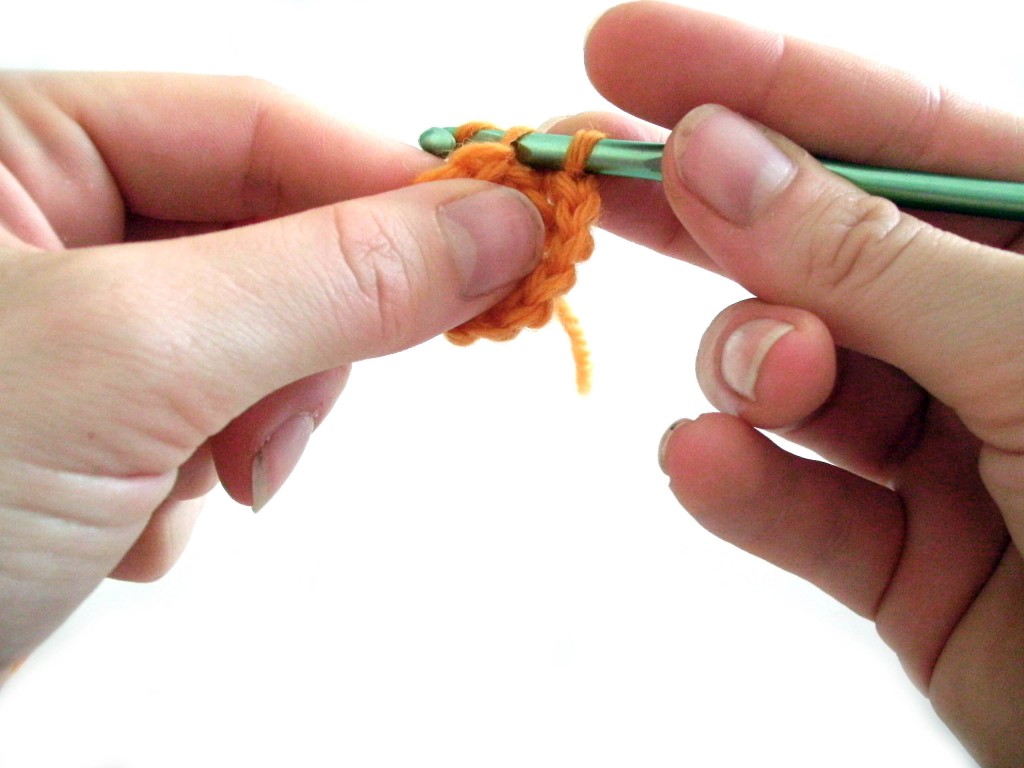
Crocheting through the back loop is easy
See how the back loop is just hanging out at the top? It’s easy to see and easy to stick your hook into.
The back loop is able to pull a bit of slack from the front loop, so you can pop your hook in even if you’re a tight crocheter or have a hook with a big head!
Use a Hook that’s Comfortable for Your Wrist!
I have bad wrists. Using a small hook and jamming it into tight stitches makes my wrists sore.
When you crochet through the back loop, you can use a slightly larger hook without getting holes in the fabric, because the front loop gives you some coverage.
This is especially important with stuffed animals, where you are going to add stuffing and don’t want it to show through. Many patterns tell you to use a size E hook with worsted weight yarn… that’s crazy! Talk about a recipe for sore wrists!
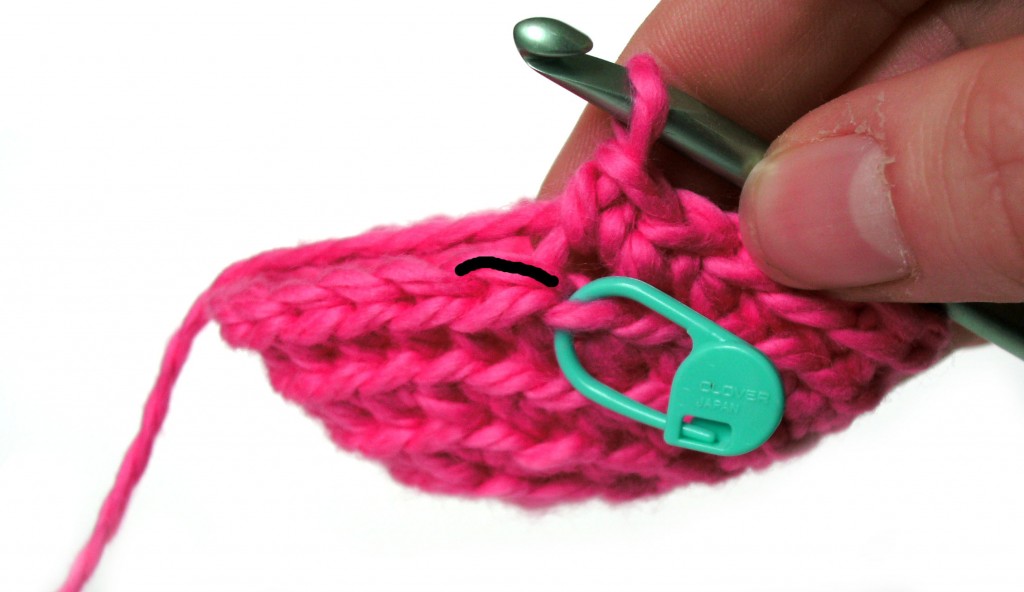
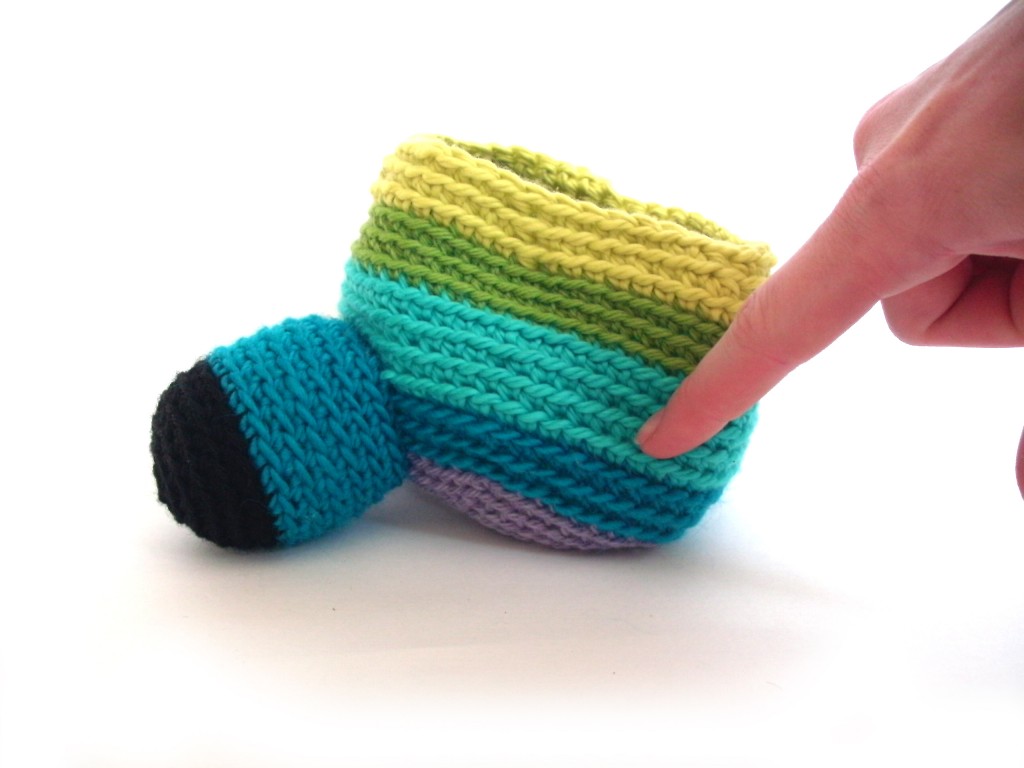
Make it Easy to Count Rounds
Crocheting through the back loop leaves the front loop behind to make a nice horizontal row.
This row makes it super-easy to count how many rounds you’ve done!
I’ve done three rounds since the stitch marker… isn’t that easy to count?
Read this blog post for more details on using locking stitch markers to keep track of your rounds.
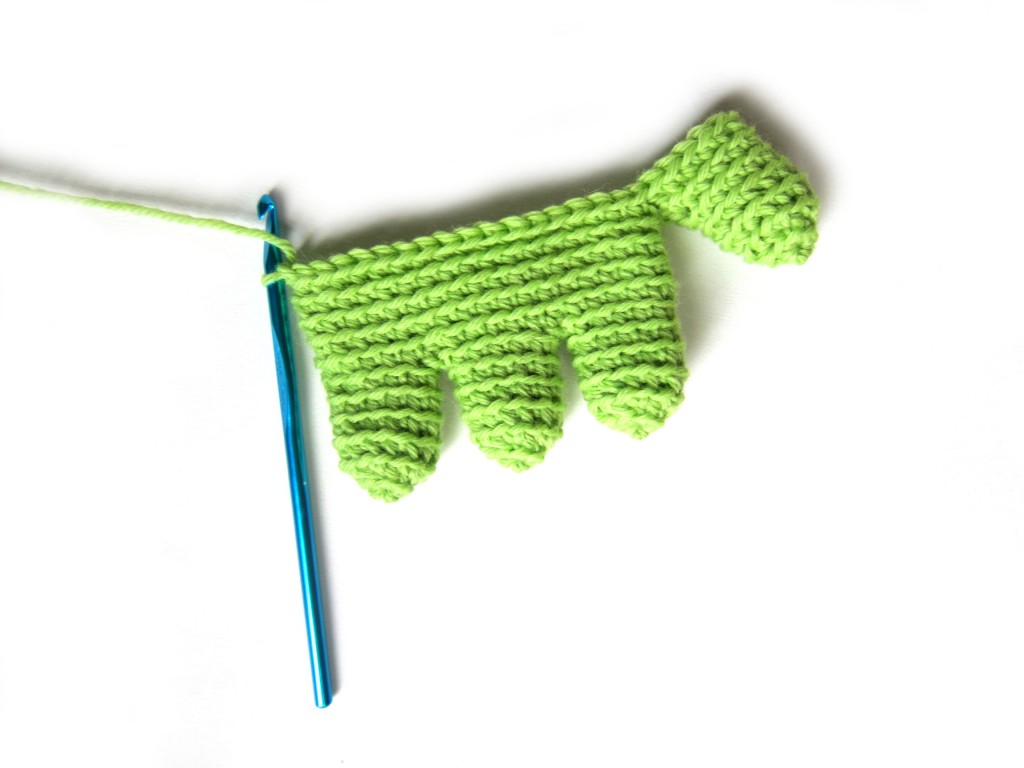
Make Attaching Easy!
That lovely row of front loop stitches makes attaching easy, too!
Attaching is usually the worst part of crocheting… but not if you crochet through the back loop and follow these easy tips!
Want to give it a try?
It’ll make your crocheting life oodles easier!
Here are handy links to all the posts about working the first round of your crochet pattern. . .
I’ve never worried too much about hiding the back of my embroidery when I frame it in a hoop. There’s a part of me that kind of likes leaving all the “ugly” visible to anyone who’s curious enough to flip it over and take a look. 🙂
But I understand wanting to cover up the mess (especially if you’re making something like a little hooped Christmas tree ornament) and I get a LOT of questions about how to do it.
This technique is really just a simple adaptation of my How to Frame Embroidery in a Hoop (Without Glue!) video. You can watch that here.
And when I say simple adaptation – I mean simple. As in – simply add an extra piece of fabric to cover the back.
Here it is in just a few easy steps. . .
That’s all one stacked image – feel free to pin it for handy-dandy reference. 🙂
Today is Children’s Day in Japan! That means families have been flying koinobori (carp flags) outside their homes and businesses for the last month. This is a beautiful tradition that greeted us when my family arrived in Japan for a month-long visit several years ago. What an amazing experience that was!
Today I thought I’d share a bunch of other craft ideas inspired by the same carp. All those images up there (and more) are in this Pinterest board. Click over there to see all the images I pinned and to click through to more info and tutorials.
My favorite are those washi tape cupcake toppers right in the center of the collage. Aren’t they great? So simple and perfect! You can find the tutorial here at Zakka Life.
Meet Sylvester. (A free embroidery pattern for you to stitch up!)
He’s a groovy monster who drives a groovy car.
He’s so proud of his car that he drives it everywhere – even when he only has to go a block or two.
Jo informs me that this is a bird – not a monster. I told her that any bird big enough and smart enough to drive a car is totally a monster. Big birds (but not Big Bird, of course) scare me.
This is a very easy embroidery pattern – great for beginners because it only uses a few easy stitches. The pattern has links to videos teaching all of them. 🙂
You can stitch him on anything you can get in a hoop – a T-shirt, a towel, a pillow. You can even frame your finished picture in its hoop! He’d look great hanging on the wall of a kid’s bedroom – and you can customize the colors to anything you like.
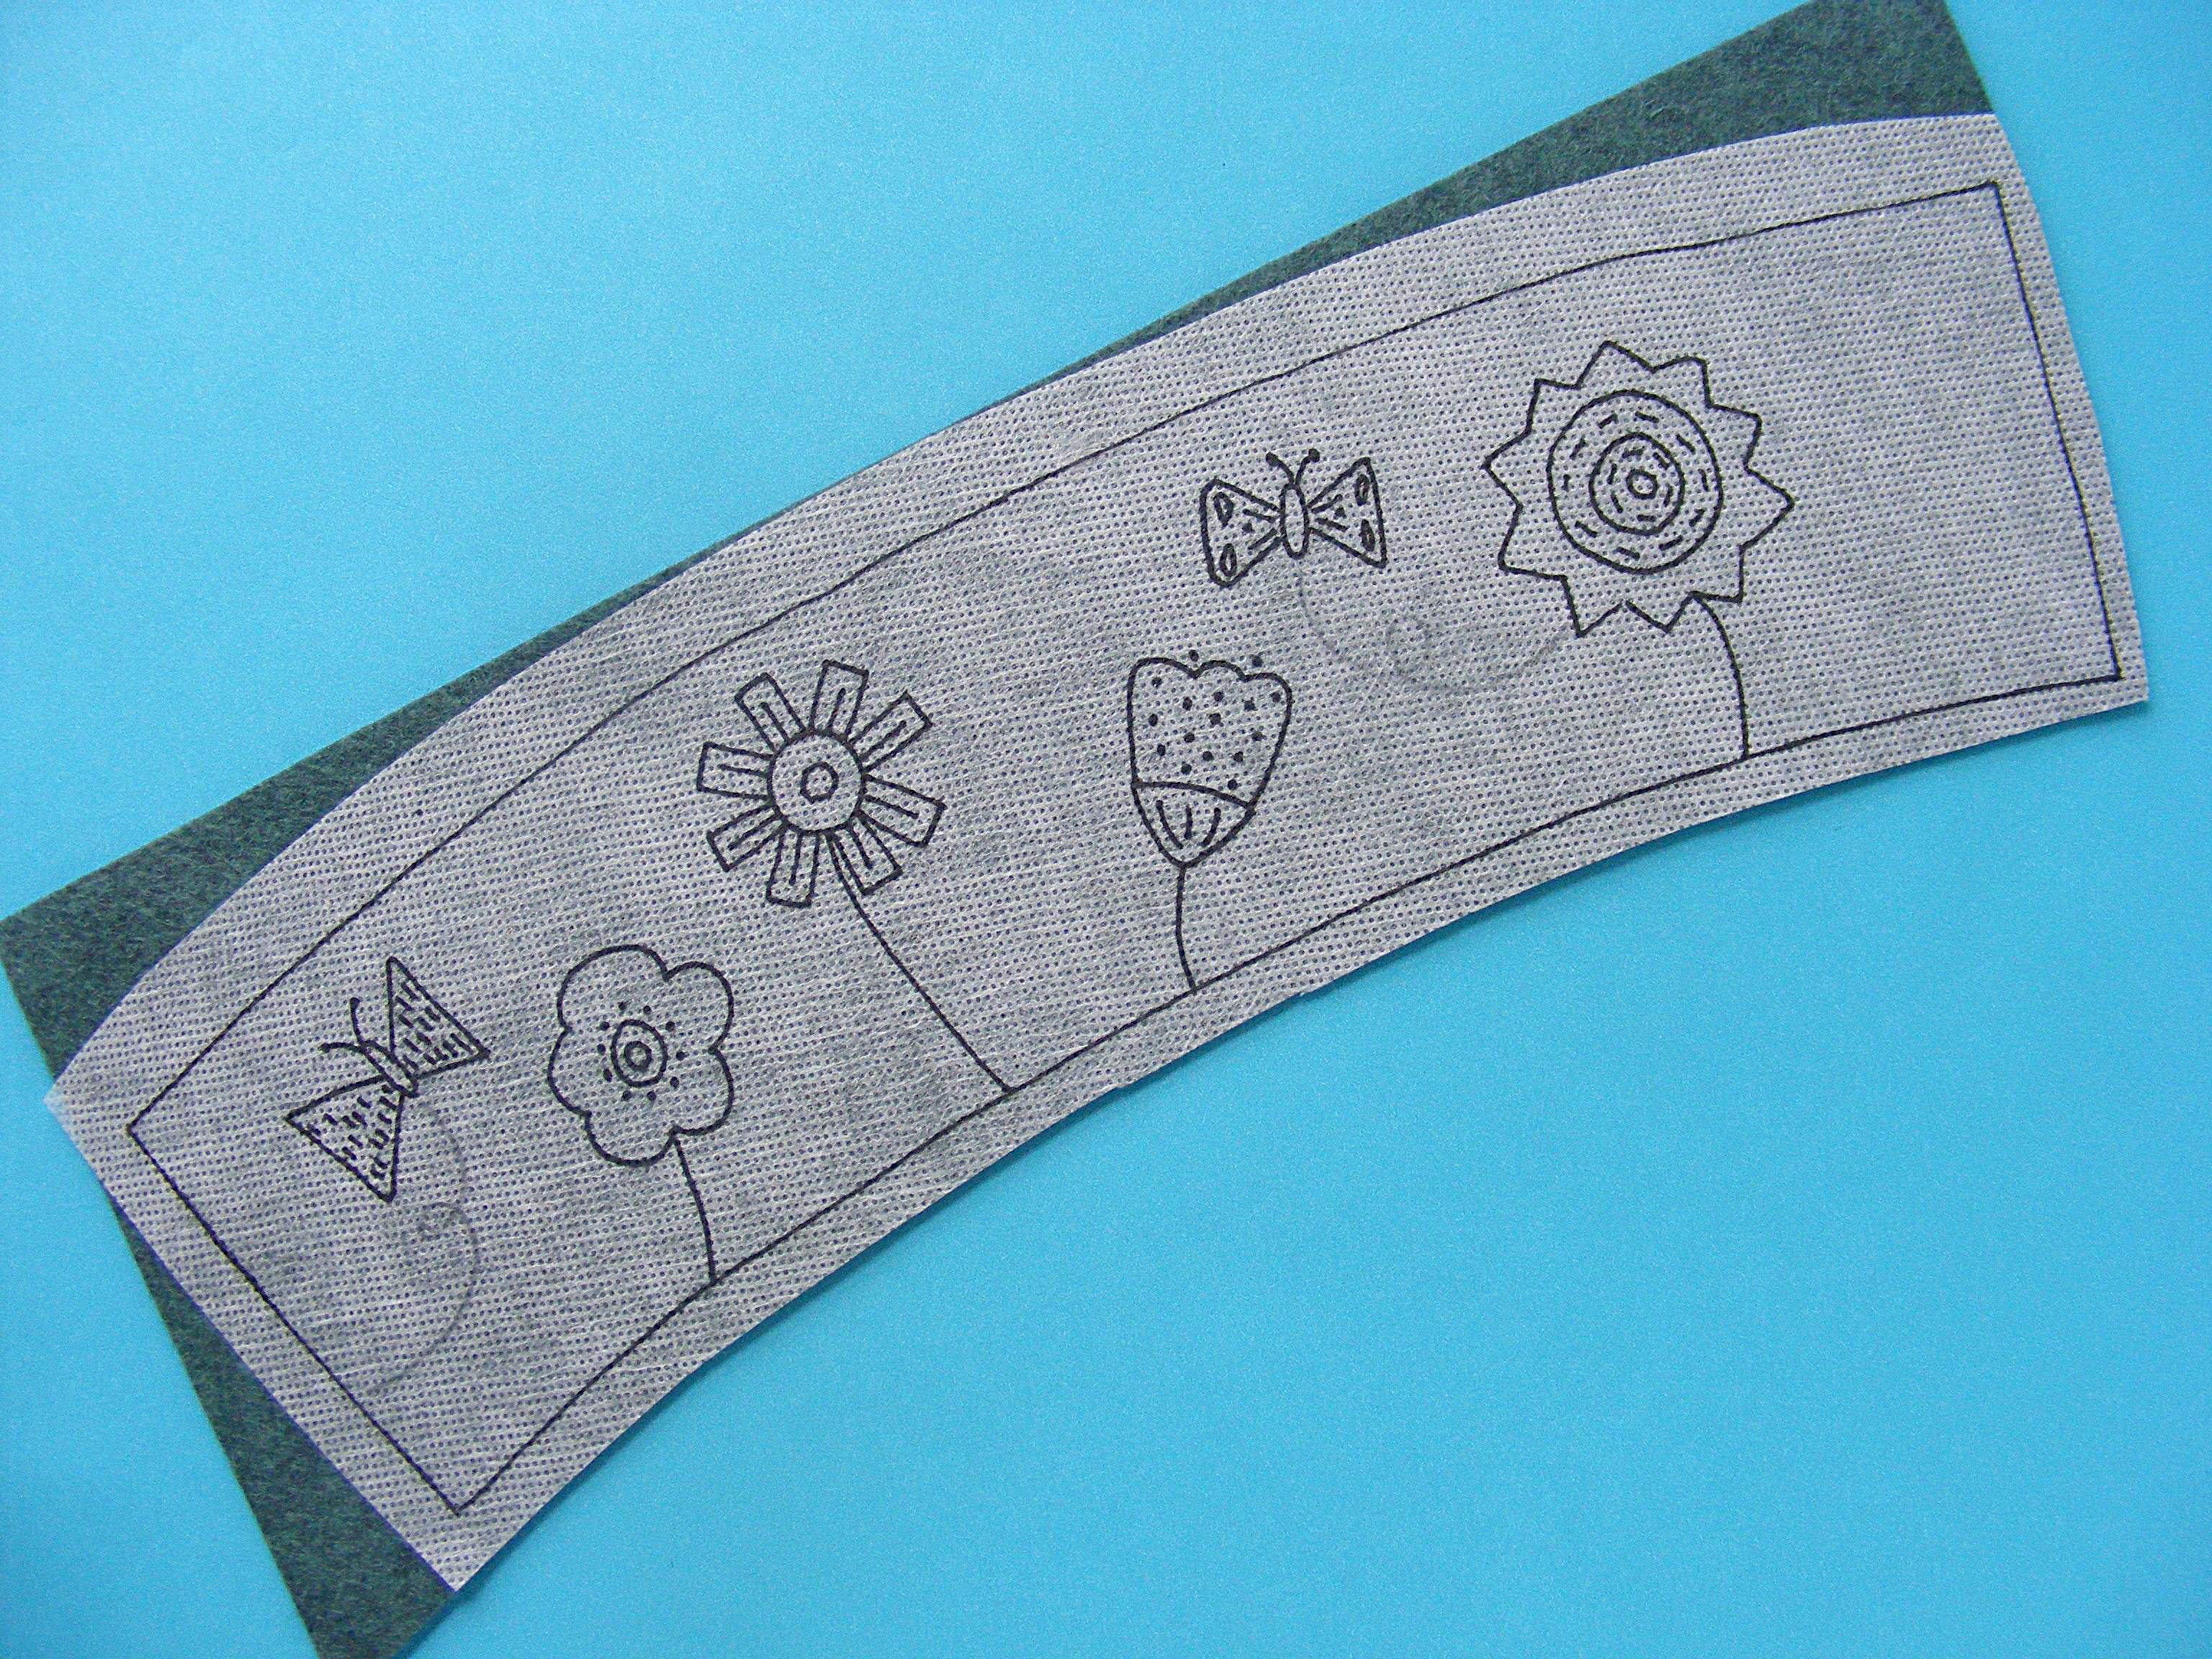
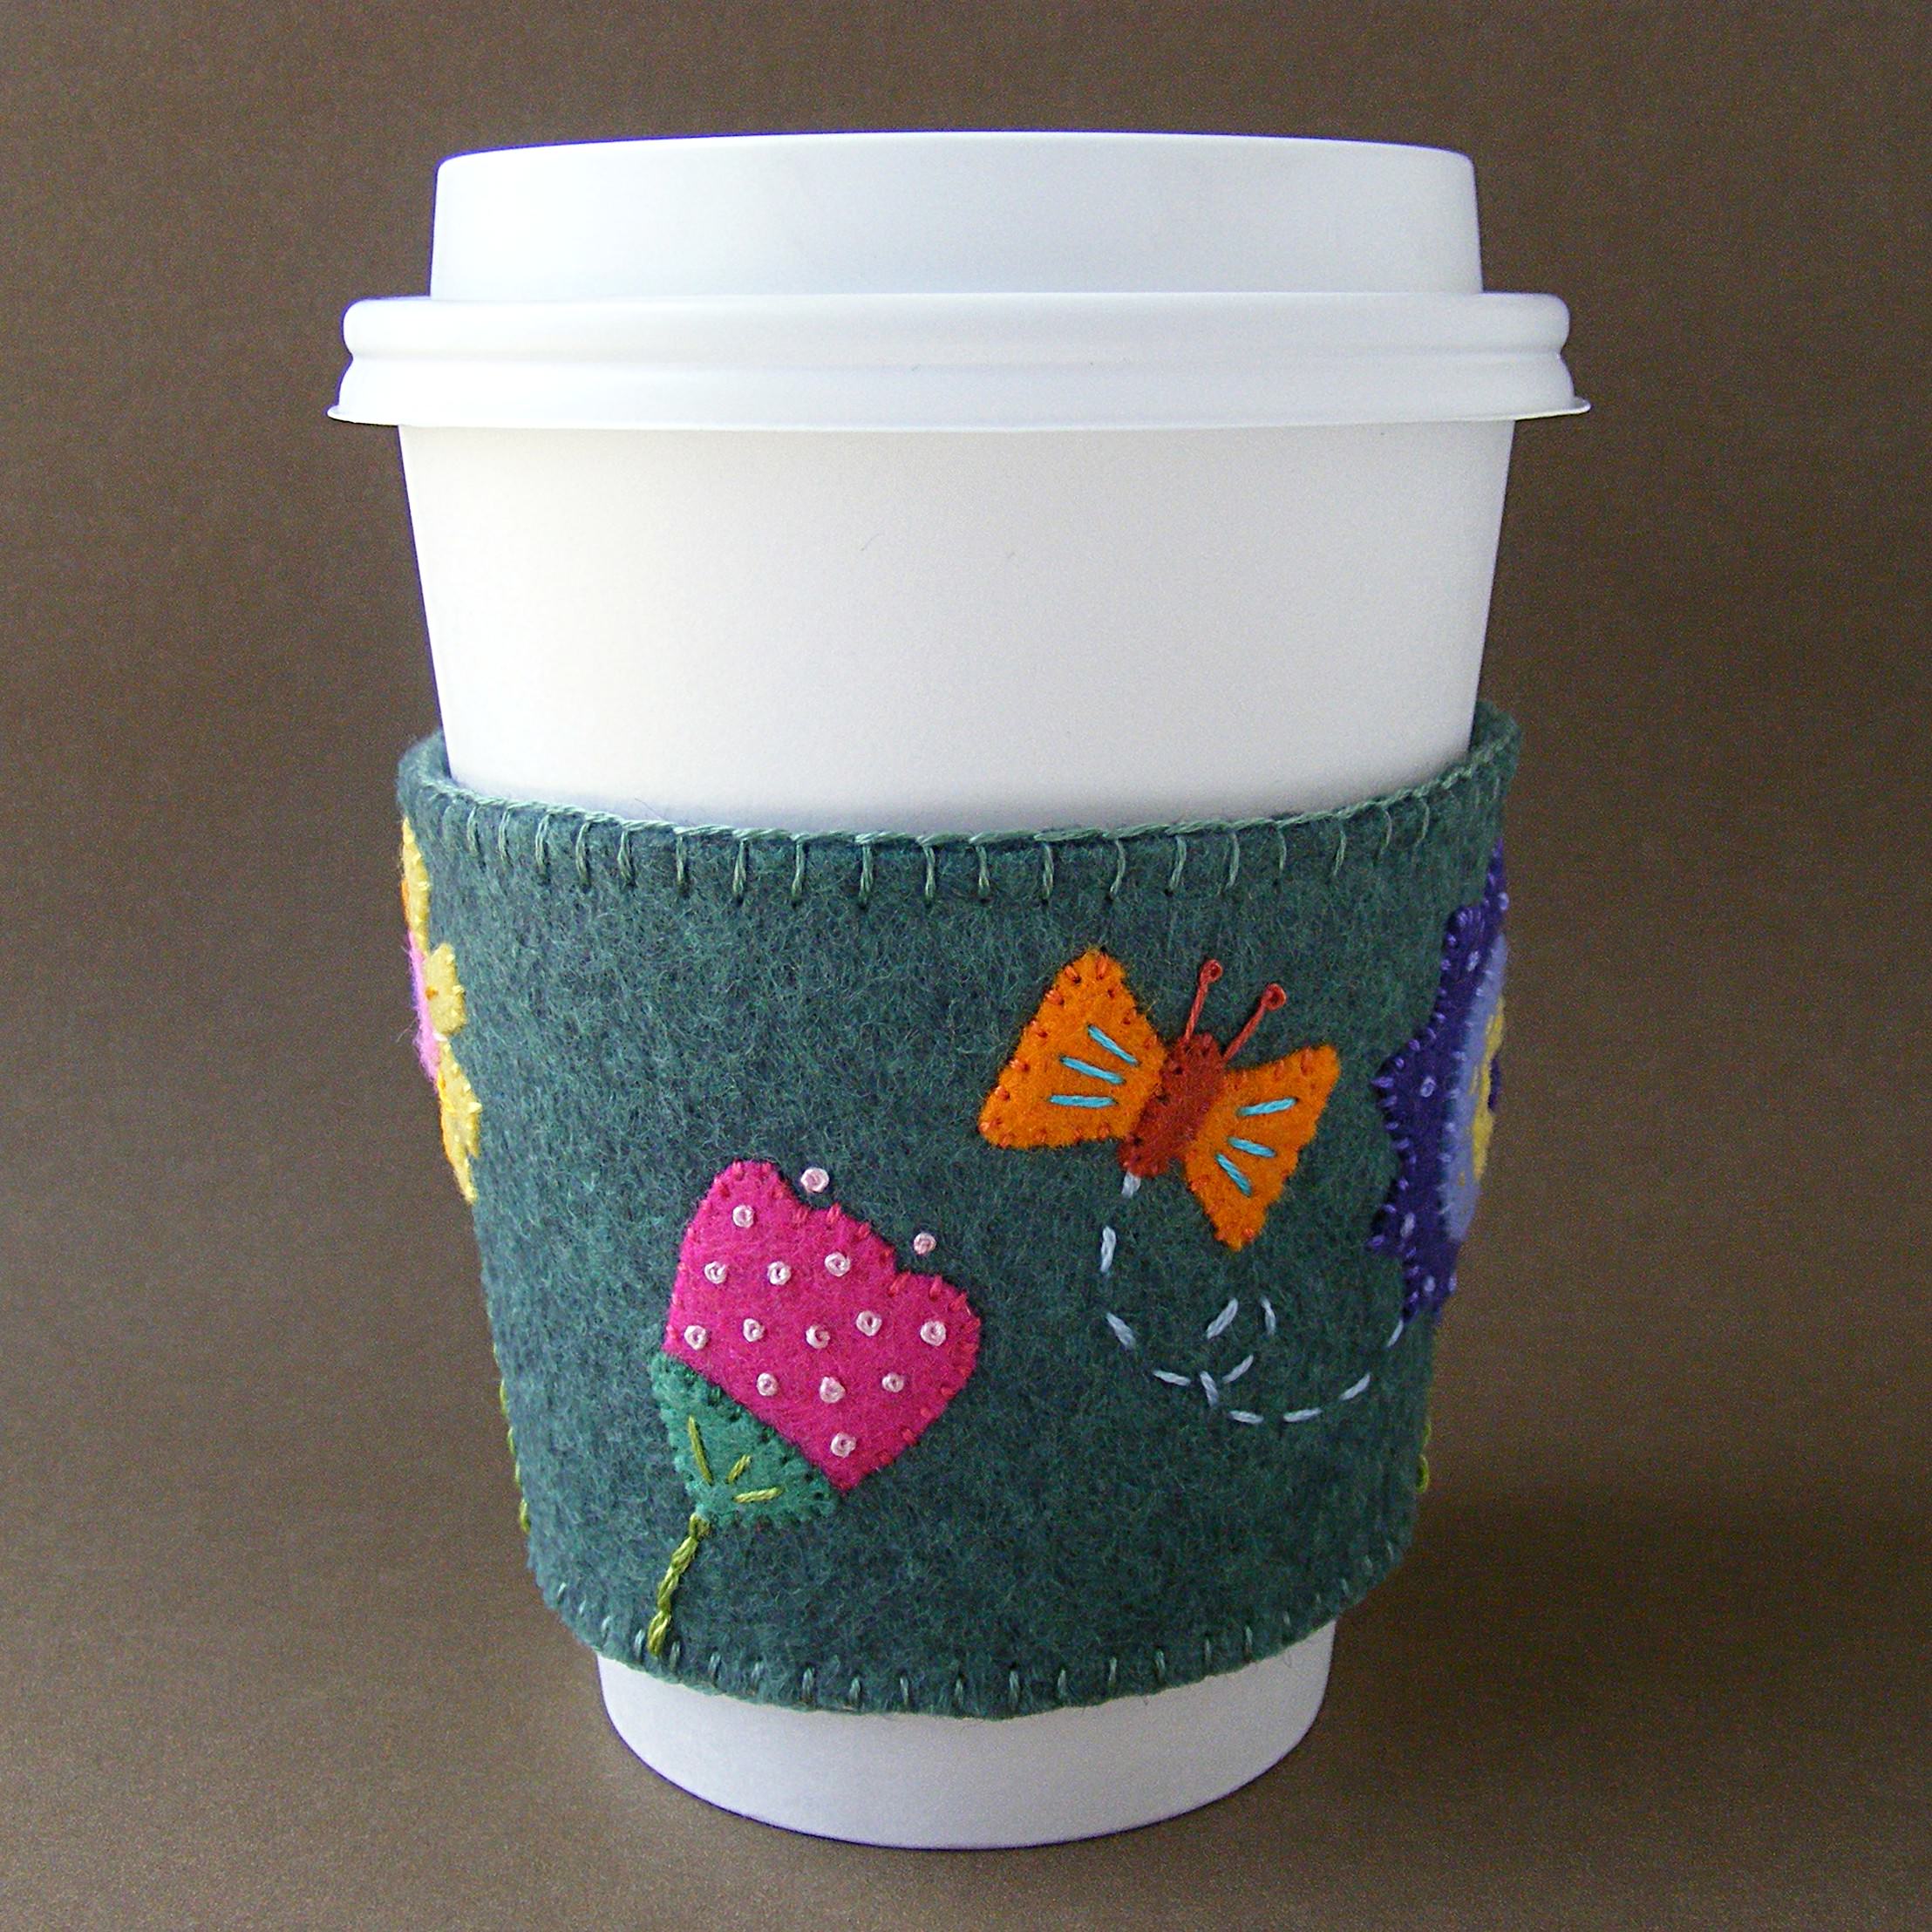
Transfer the pattern to the felt. I use Sulky Sticky FabriSolvy every time I work with felt. I love it!
If you’re wondering how it works with felt, read this post.
Step 2
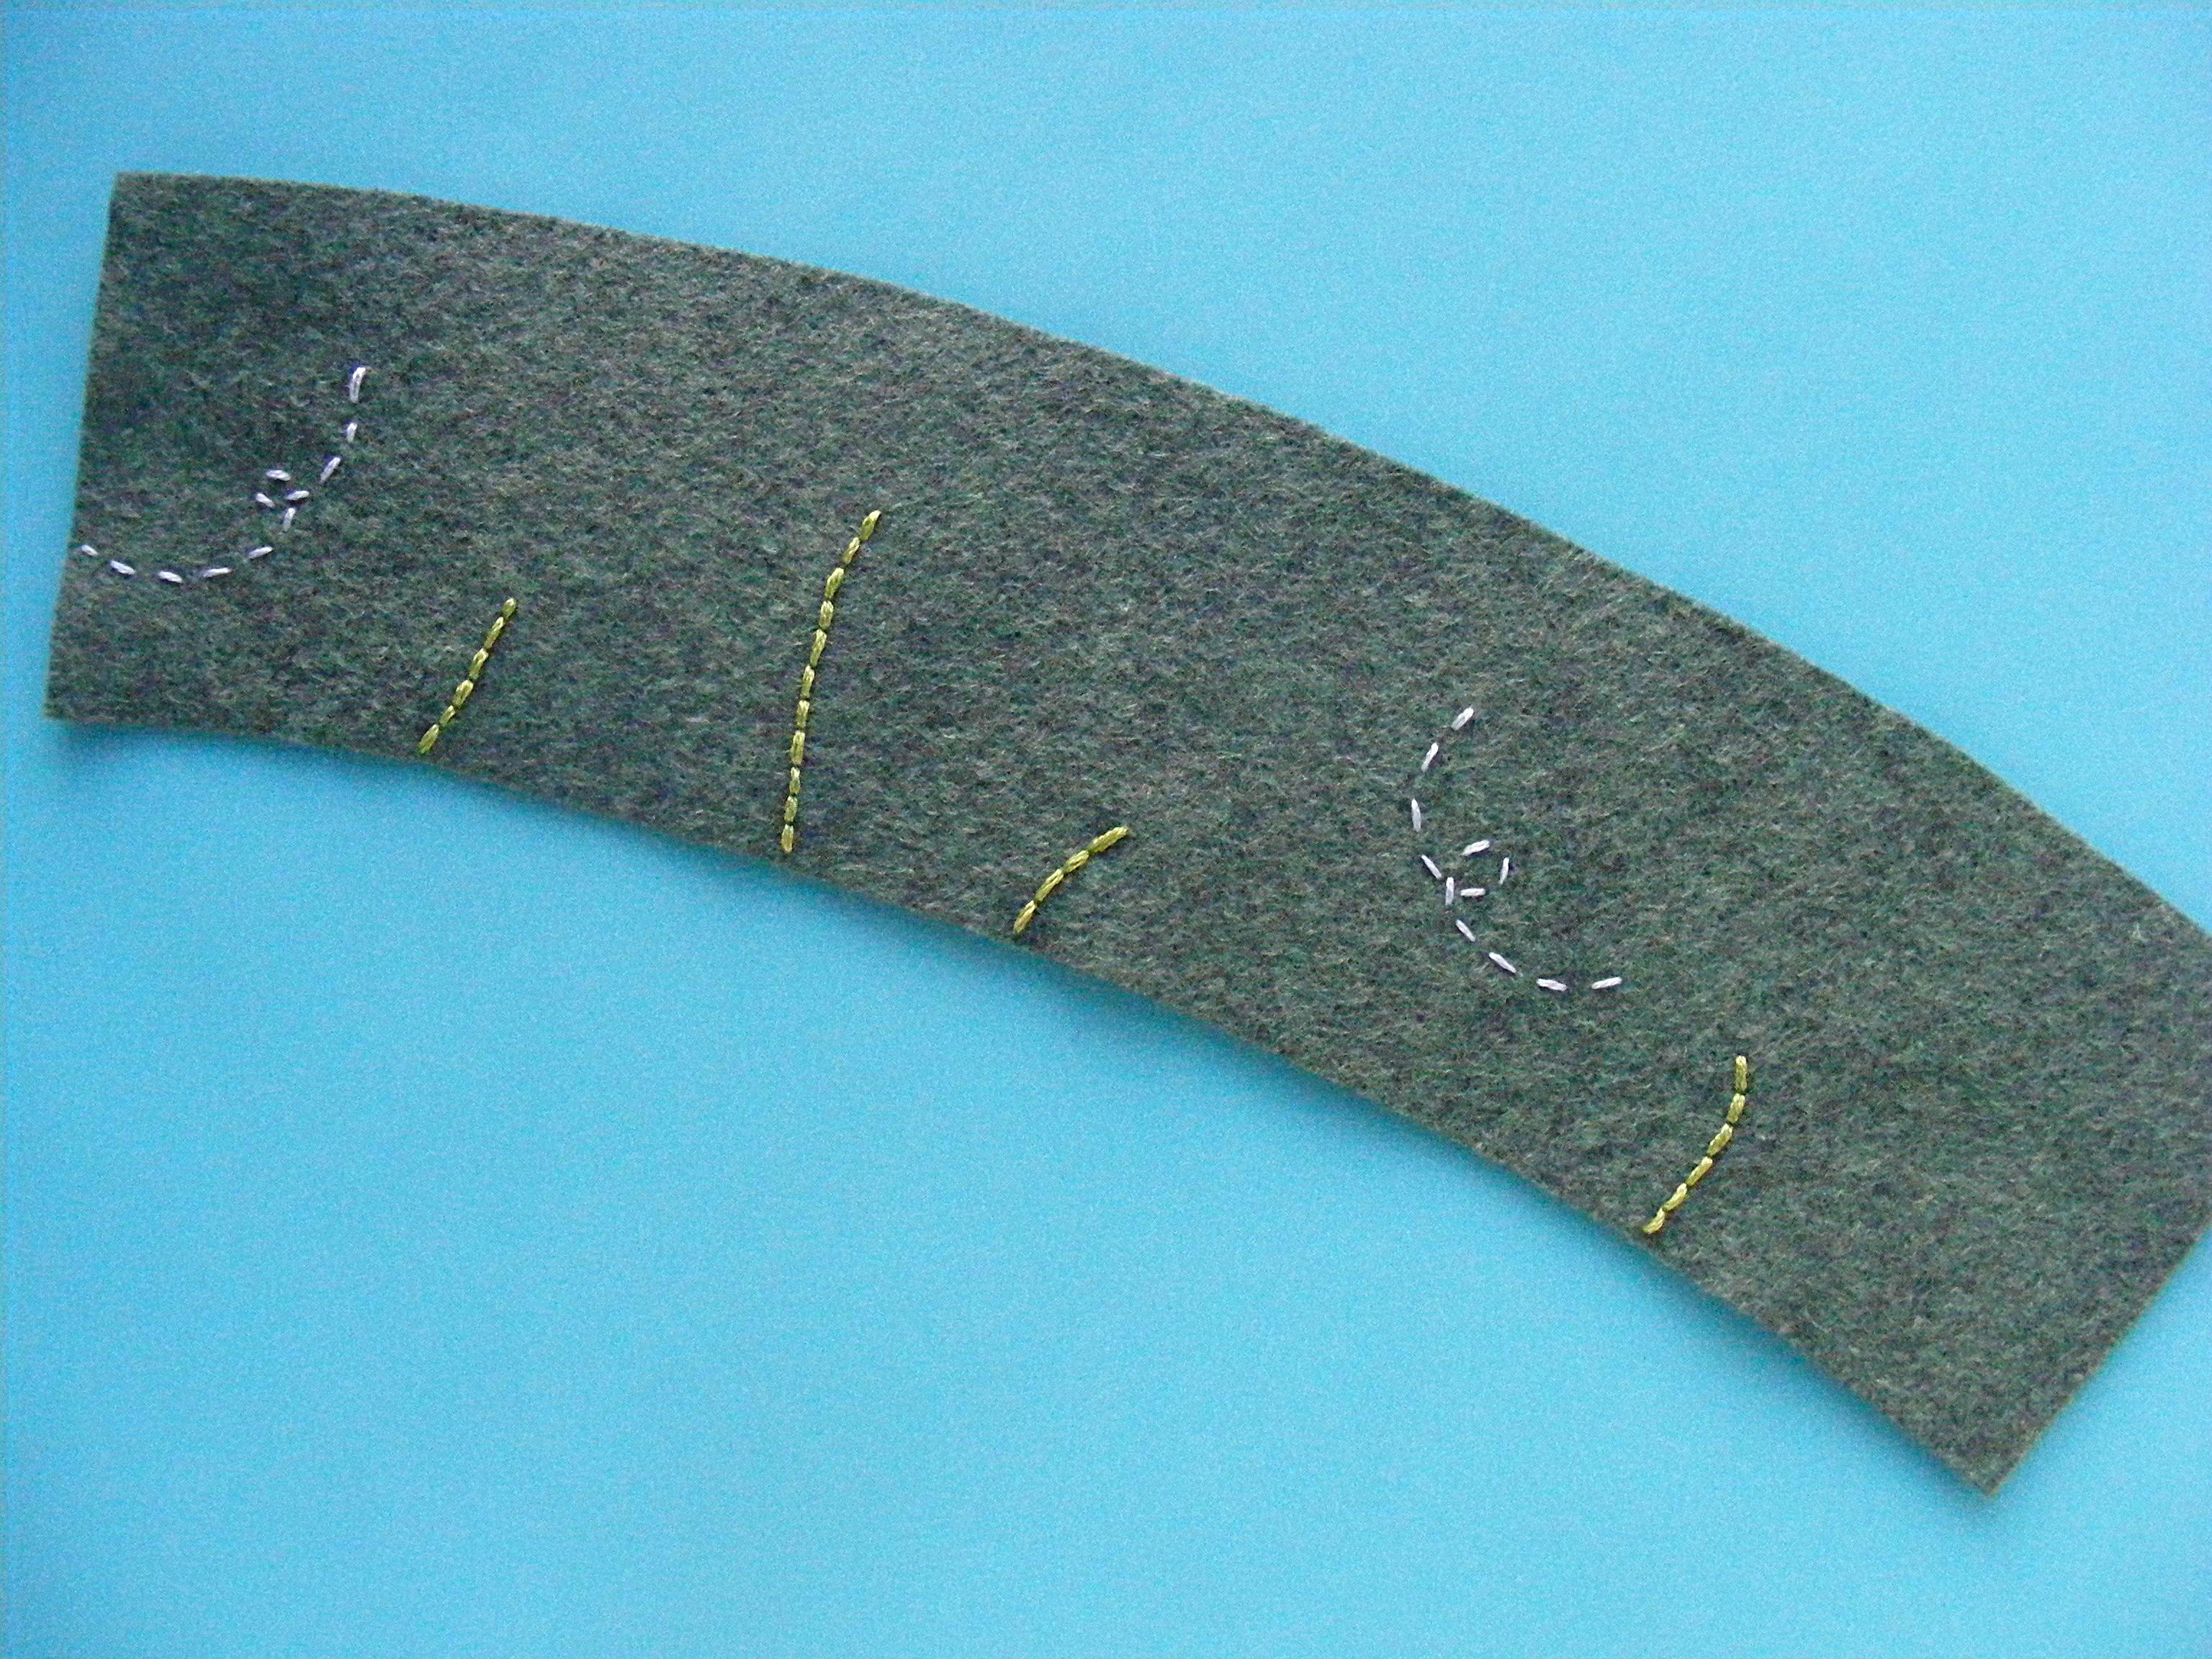
Embroider the design and trim the edges of the felt to size.
I’m going to applique all the flowers and butterflies, so all I stitched here are the stems and butterfly trails.
I used backstitch for the stems with four strands of green thread, and running stitch for the butterfly trails with two strands of light blue thread.
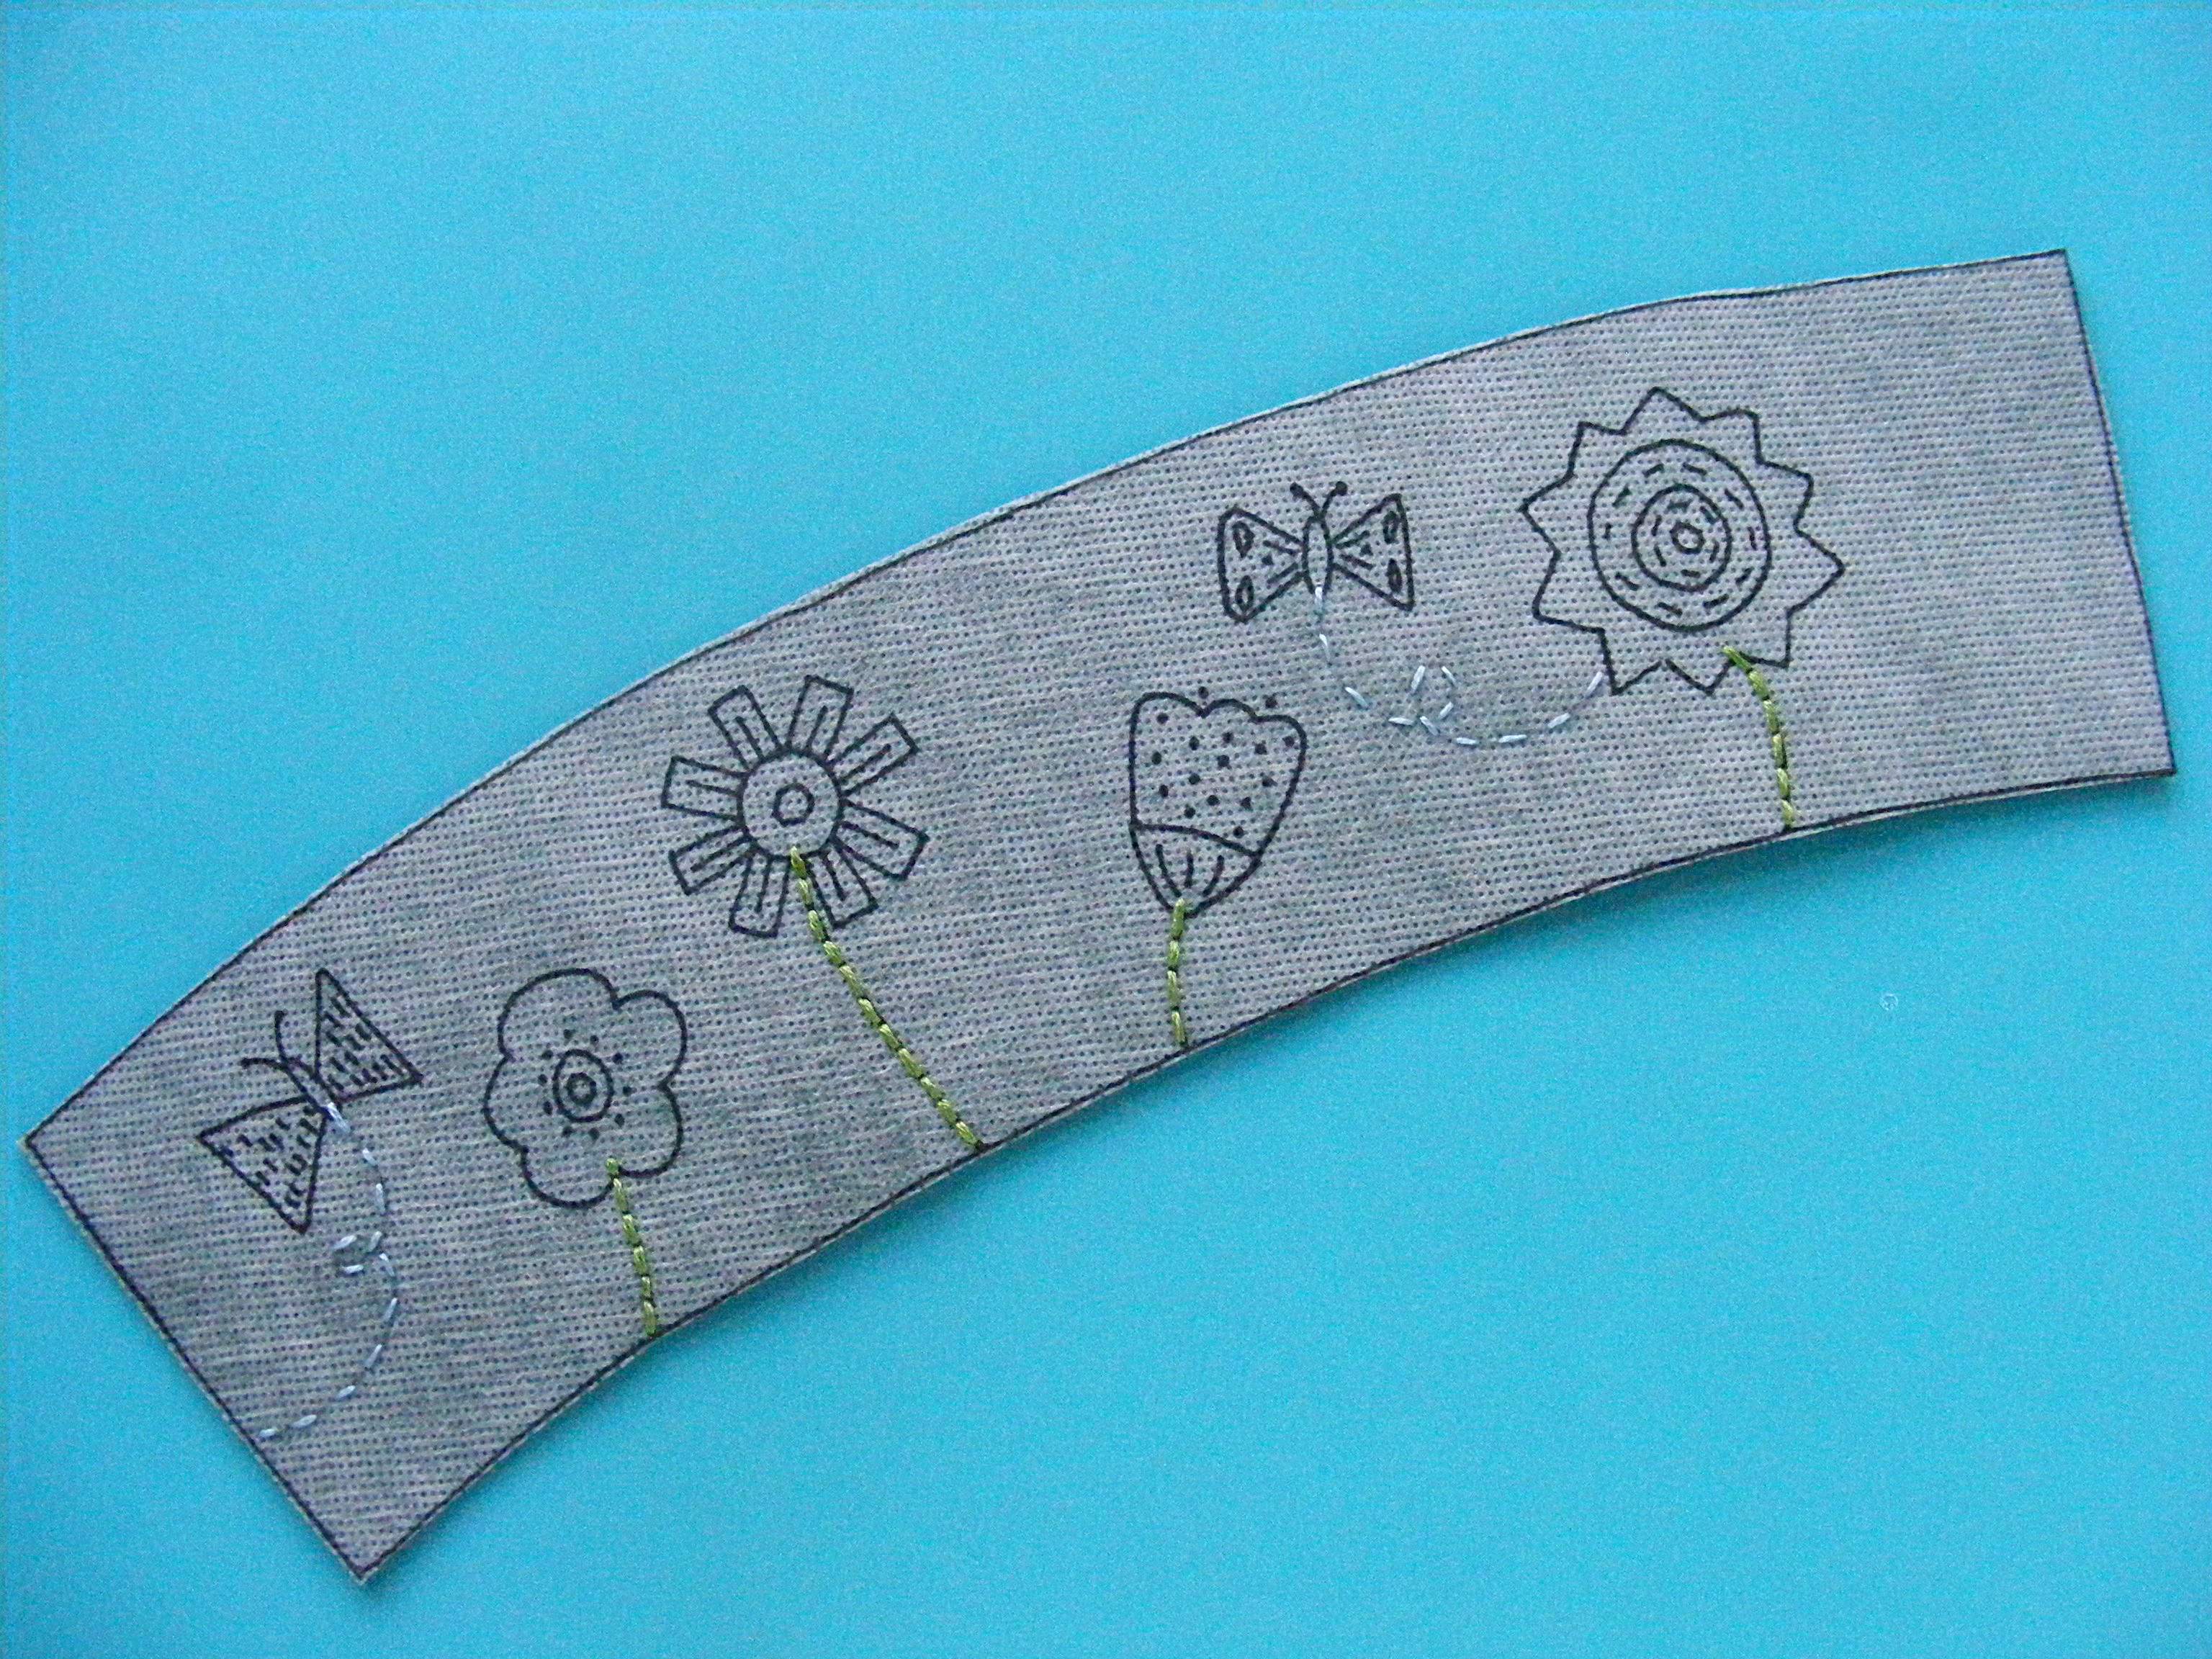
Step 3
Soak out the Sulky Sticky FabriSolvy in cold water and let it dry flat. Don’t wring, twist or even smoosh it. Just set it on a towel and let it dry overnight.
Look! Now I know exactly where each applique piece goes!
Step 4
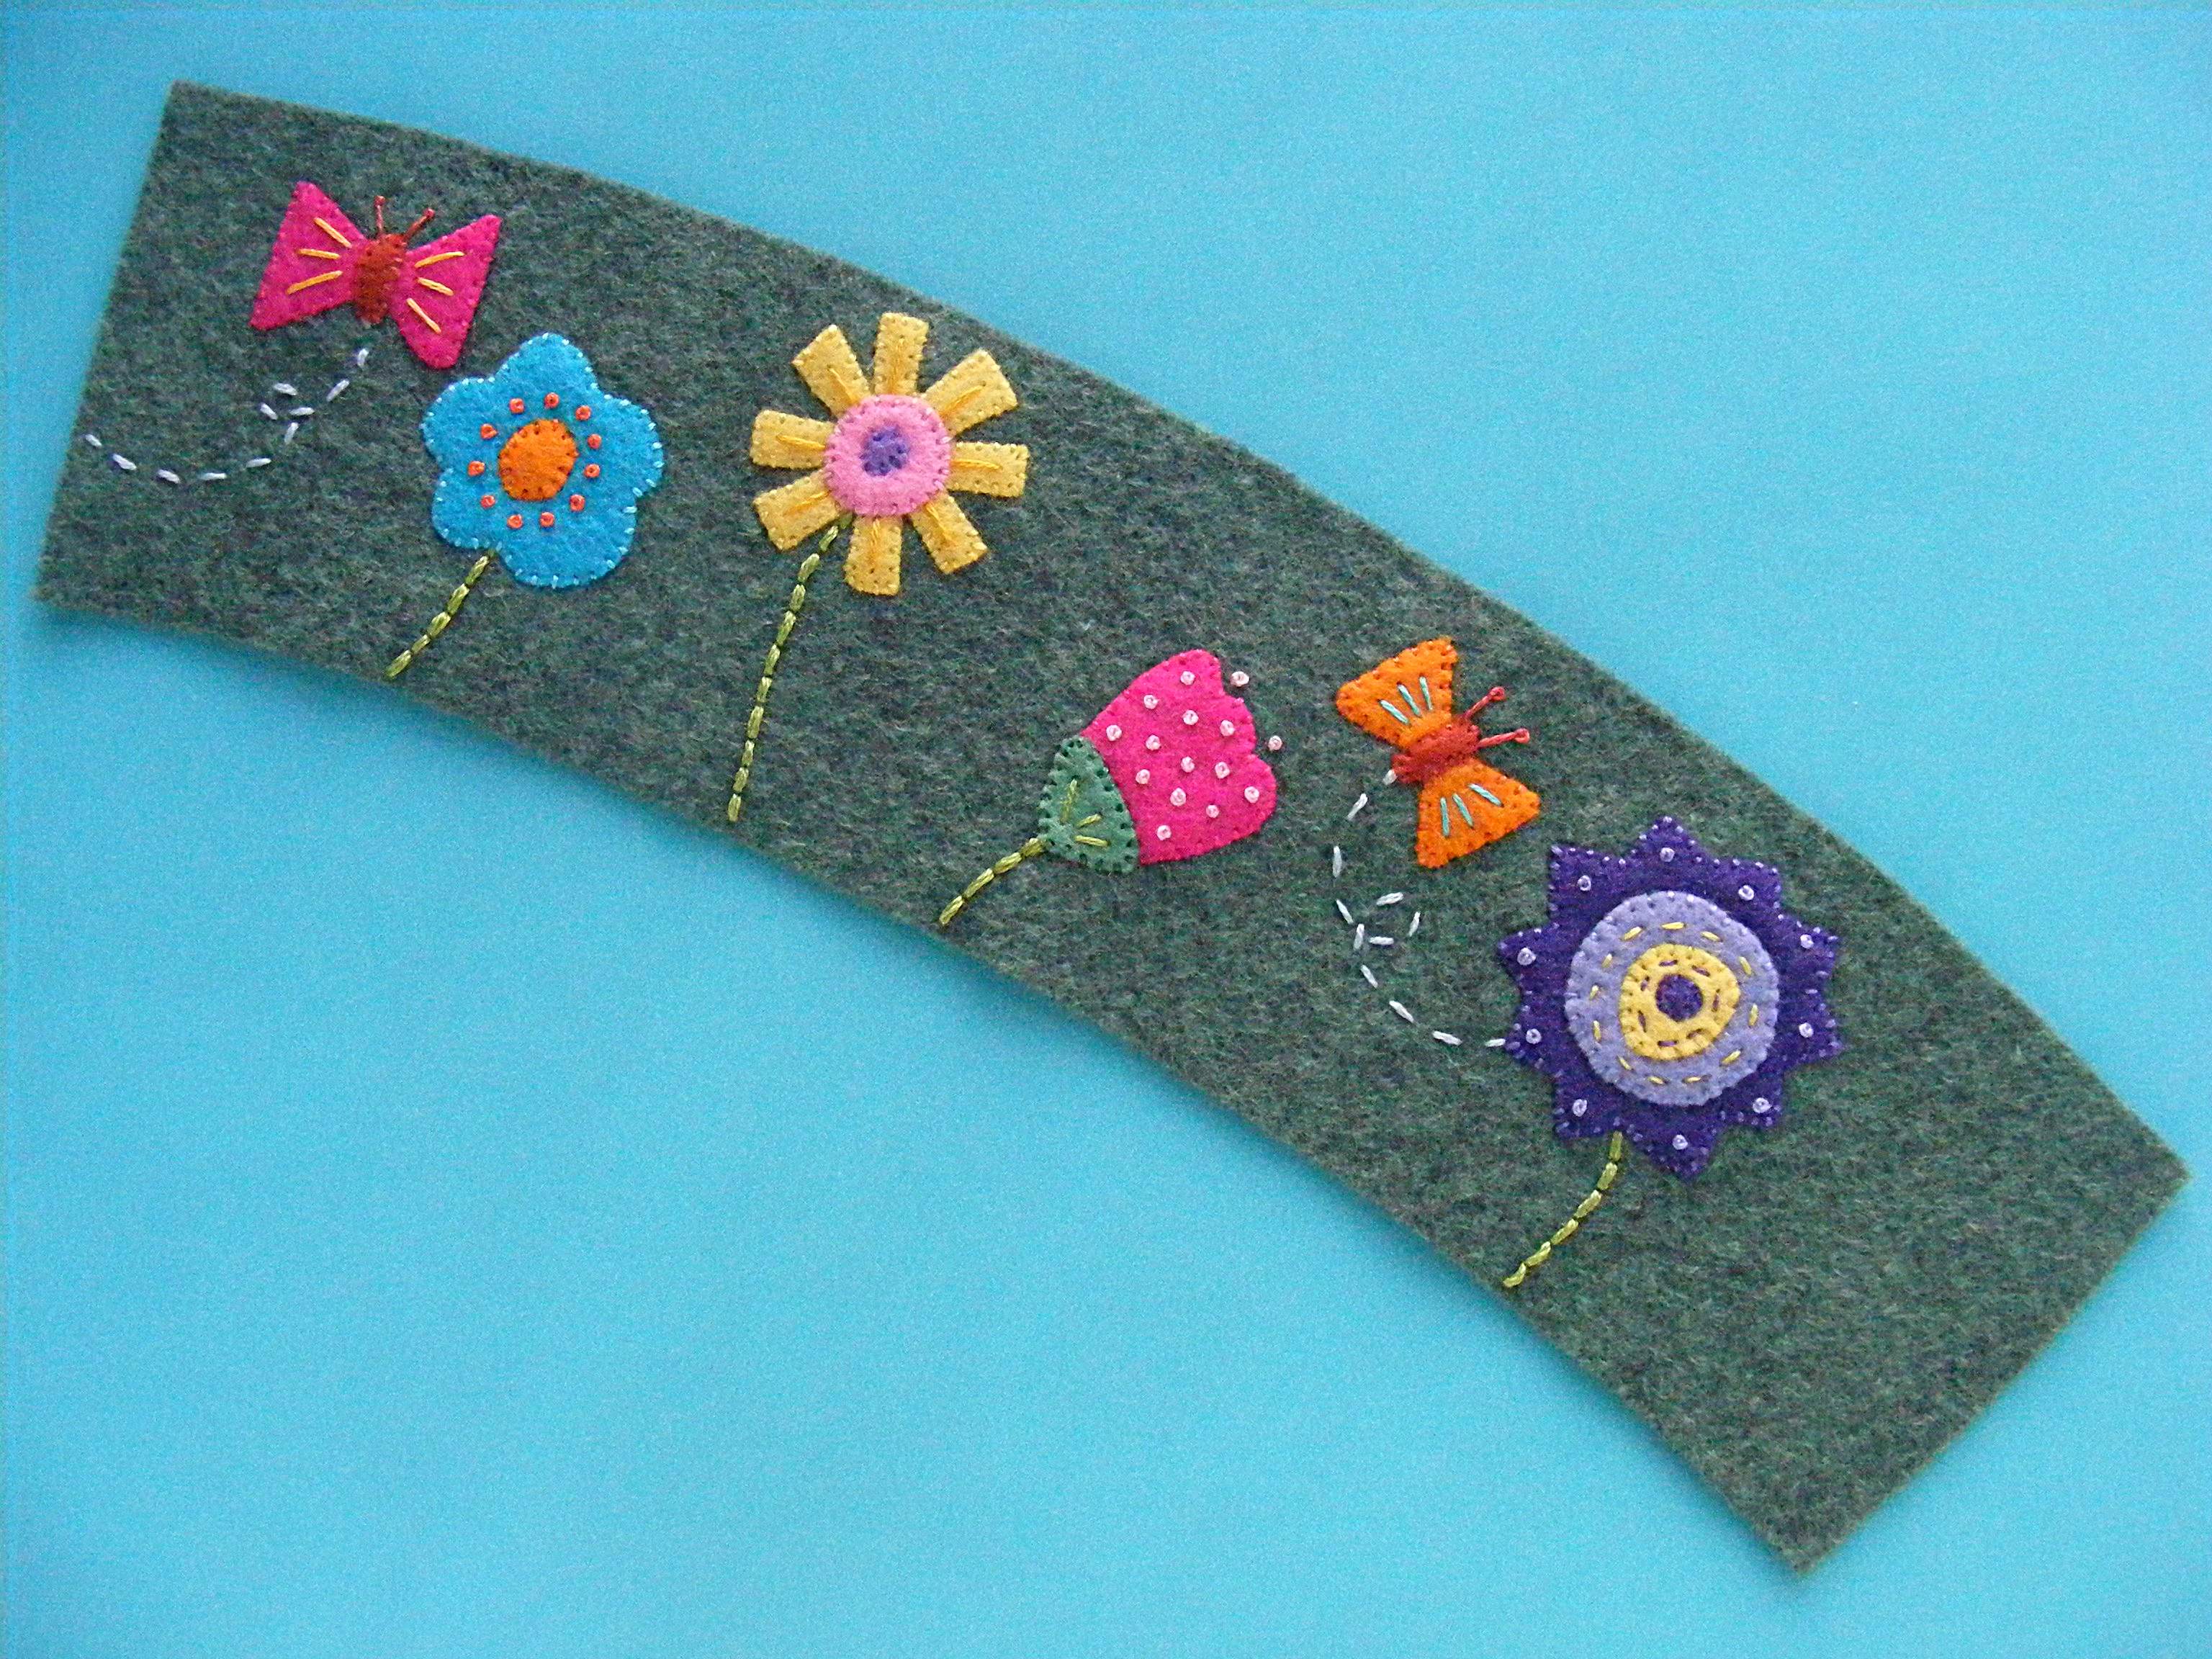
Applique and embroider the rest of your design.
Use freezer paper to cut out the tiny applique pieces. Trace the pieces onto the paper side of the freezer paper. Fuse the paper to felt, and then cut out the pieces, cutting through the paper and felt at the same time. It will help keep your cutting accurate.
I’ve been getting a lot of requests lately for a pattern for a topsy turvy doll.
Weird. I have no idea what has prompted the sudden influx.
I’ve had a topsy turvy doll on my Big List o’ Things to Make for a long time now, but the number of requests recently made me move it to the top of the list.
As soon as I mentioned it to Jo, she was full of IDEAS. She immediately started lobbying for a day and night doll. Not an awake and sleeping doll, but a doll with one girl all sunshine and bright, and another girl all deep indigo and starlight. She specifically asked for the night doll to have “dark blue hair – the darkest blue felt you have – sprinkled with tiny little embroidered stars in pale yellow.”
OK then. I can do that!
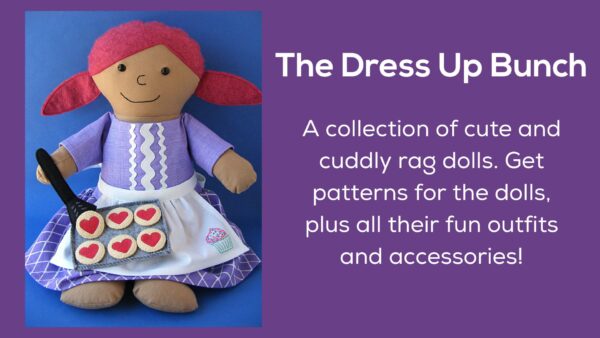
Instead of creating a pattern especially for one topsy turvy doll, I thought it would be more fun to show you how to turn any of the Dress Up Bunch dolls into topsy turvy dolls. You can apply the same basic technique to work with any rag doll pattern.
Fun!
So here we go. . .
To make a topsy turvy doll you’ll need to make two identical doll tops and no legs. The body will need to be chopped off at the waist so you can sew two bodies together.
Prep the Pattern
Measure down 4 1/2 inches from the top of the body front and body back pattern pieces of any Dress Up Bunch doll pattern. Draw a line parallel to the top of the pattern piece and cut off the bottom of the pattern. (if you’re using another pattern you’ll need to figure out where the “waist” of the body piece is and add 1/2 inch seam allowance before you make your cut.)
Cut Your Fabric
Cut out all the pattern pieces for two dolls except the legs. I usually use skin-colored fabric for the body, but I don’t like having to put a shirt on a topsy turvy doll so I cut the body pieces from fabric to match the dress. Only one doll half needs to have a stuffing opening, so cut a total of 3 doll front pieces and 2 doll back pieces.
Cut two pieces of fabric for the reversible skirt – each 10 1/2″ tall and 30″ wide. (You’ll need to calculate your own measurements if you’re using a different rag doll pattern.)
Leave One Stuffing Opening
Sew the two body back pieces together leaving almost the entire seam open for turning and stuffing. Don’t skimp on the size of the opening! You’ll be pulling a lot of fabric through here! I only sewed about an inch at the top and an inch at the bottom.
Press the seam open, then sew it to the back head piece. I stuck my turning stick through the stuffing opening so you can see it.
Sew Two Doll Tops
Follow the regular pattern instructions to make two doll tops, leaving the bottom open.
Man – these dolls look so creepy from the inside!
The second doll (the one without the stuffing opening) will use body front pieces on the front and back.
Make the Skirt
Fold one skirt rectangle in half so the short ends are lined up, right sides together, and sew those short ends together with a 1/4″ seam allowance. Press the seam open. That makes one (ungathered) skirt.
Repeat for the second skirt.
Turn one skirt tube right side out and put it inside the other tube, lining up the seams you just sewed. Now the right sides are together. 🙂 Sew the two skirt tubes together around the bottom of the skirt using 1/4″ seam allowance.
Flip the skirt so it’s right side out and press that bottom fold nice and flat.
Oooh! It’s looking nice! Both sides of the skirt are the “right” side. For now make sure it’s turned so that the fabric on the outside is the one matching the doll with the stuffing opening.
Gather the Skirt
I’ve got a video tutorial here showing how to gather. For this project I used the “old-fashioned” method of sewing two rows of basting stitches around the top (raw edge) of the skirt – sewing through both layers as if they were one – then drawing up the bobbin threads to gather up the fabric.
Fold the top of the skirt in half and half again and use pins to mark the four equal sections.
Fold the center front of the doll with the stuffing opening and mark the center front point. (The sides and center back are already “marked” with seams.)
Gather up the fabric of the skirt and stuff the skirt inside the doll with the stuffing opening, matching the center back seam of the skirt with the center back seam of the doll. Match the remaining pins to the remaining seams on the doll. Adjust the gathers so that the top of the skirt fits the bottom of the doll, adding additional pins as needed.
I’ll be honest. This part isn’t much fun. It’s not hard, but it takes some patience and fiddling.
Sew the top of the skirt to the bottom of the doll using 1/4″ seam allowance.
Add the Second Doll
You’re almost done! Turn the second doll right side out and stuff it inside the first doll and skirt. Make sure the back of the head is on the side where the stuffing hole is, and line up the side seams.
Sew around that same opening, this time 1/4″ from the first seam you sewed joining the skirt to the first doll. That means your seam allowance this time is 1/2 inch. This way you double-sew the skirt (extra-strong!) and also make sure all your basting stitches from gathering are well-hidden.
Turn Everything Right Side Out
You can do it – just be patient and go slowly. First pull the second doll outside of the first one, then pull the skirt through the stuffing hole and keep going until everything is right side out.
Finished!
Stuff the doll, sew up the opening as instructed in the pattern, and you’re done!
Normally the Dress Up Bunch dolls are very easy patterns. Turning them into topsy turvy dolls bumps them up a notch in difficulty. It’s not hard – it’s more about patience than actual skill – but I do NOT recommend this as a first project. Make a regular doll first, then start practicing radical, Frankensteinian surgery. Ok? 🙂