How to Piece Batting Together – a Thrifty Trick

Thrifty Tip - How to Piece Batting Scraps

Did you know you can piece together batting scraps?

Sometimes when I’m cleaning out my sewing room, I ask myself why I’m keeping all these long skinny strips of batting around. They’re mostly strips cut off the edge of a quilt after quilting and can be anywhere from 5-10 inches wide.

This week I was sooooo happy to have them!

I ran out of batting with just a few blocks to go on the Wild Flowers quilt. I’m doing Quilt As You Go, so small pieces work, but they needed to be at least 10 1/2 inches and I had already used all the bits that size.

I’m trying to finish the quilt by this weekend, so it was time to grab some of those scraps and piece the batting together.

Did you know you could do that?

Yep! And it’s pretty darn easy.

Step 1

Set your machine to the widest, tallest zigzag you can.

Step 2

Butt the edges of two batting scraps and run them down the machine so that the seam runs right down the middle and the zigs and zags catch some of the batting on each side.

My machine often skips stitches when I do this. Don’t worry about it as long as most of them catch.

Step 3

Use the new, bigger piece of batting.

Butting the edges keeps you from getting a fat ridge of overlapped batting in there, and the zigzag stitch is plenty to hold the pieces together during construction. And look how nicely it all holds together once I add some quilting! Click on the image if you want to see it bigger so you can really see where that seam is.

So that’s it! I used up some of those bulky batting scraps and I’m ready to finish the last blocks for my quilt. No shopping needed!

Want to know what my favorite quilt batting is and why? I lay out all the details in this post – My Favorite Quilt Batting.

Vibrant handmade crochet toys and patterns from Shiny Happy World.

These links go to all my posts about quilt supplies.

Finished with this topic?

Return to the Let’s Make a Quilt main Table of Contents.

Move on to the lessons about cutting and quilting your background blocks.

Happy stitching!

Vibrant handmade crochet toys and patterns from Shiny Happy World.

The Future of Crochet: 3D Printing for Hooks

Right now, you have 2 choices when it comes to crochet hooks. You can go to a store and purchase a hook that’s been made in the millions by a manufacturer or you can purchase a hand-carved, custom crochet hook.

furls crochet hook

In the future, I think there will be a third option. Hang on to your crochet hooks.

What’s wrong with the current options?

When a manufacturer makes a crochet hook, they’re trying to make one that will appeal to a large number of people. Their goal is to sell them by the thousands/millions.

crochet hooks selection

While there are lots of different designs, there might not be a hook that’s perfect for you. Especially if you have small hands or a unique crocheting style.

The hand-carved hooks can be personalized (for example, to fit a smaller hand), but they are pricey. This makes purchasing one ‘just to try out’ out of reach for most consumers.

Crochet Hooks and 3D Printing

Have you heard of 3D printers? They’re basically printers that use a resin (instead of ink) to create a 3D item.

Less than a decade ago, these printers cost tens of thousands of dollars and were only used by researchers and companies. Now, though, there are a selection of 3D printers available in the $500 range, meaning they’re becoming practical for home use.

reasonably priced 3D printer

You probably have purchased a pdf pattern online for knitting, crocheting or sewing. These are usually patterns made by independent designers (like me!) that can be produced without the costs involved with printing & distributing a book.

This model allows independent designers to create patterns for niche markets. For example, a giant company might not be interested in spending thousands to produce a squid pattern, but as a pdf pattern (without much cost overhead), designing an adorable squid is practical! Yay, niches!

I predict the same thing will happen with crochet hook designs. You will be able to purchase 3D Printer Plans for a crochet hook, that you can print on your printer at home.

Sketch for a crochet hook for a 3D printer

The cost of these plans would be similar to purchasing a pdf pattern, and would allow the customer to purchase a crochet hook almost exactly to their liking. Independent hook designers will cater to different hand shapes and styles, exactly as they do now with stitching patterns.

Isn’t that such a cool future?

What do you think? Do you see print-at-home hooks in your future?

Video – How to Sew Boxed Corners

How to Sew Boxed Corners - video

Why do I need to know how to sew boxed corners? I don’t even know what a boxed corner is!

Well – it’s a simple way of adding depth to a fabric shape. It’s what makes this mini tote bag (there’s a free pattern here) fat instead of flat.

And it’s what gives these little mice nice fat bottoms.

Blue and green mice made with the Mischief of Mice softie sewing pattern from Shiny Happy World

Look – this guy will show you his.

A closer look at the boxed corners at the bottom of a mouse softie, demonstrating how to sew boxed corners.

I describe how to sew boxed corners in the Mischief of Mice pattern, but someone asked for a video to help clarify the process.

Ask and you shall receive!

See how easy it is?

The trickiest part is getting the seam aligned, but if you open the seams (like you see in that photo above) it’s really easy to see where they line up.

You’ll run into instructions to sew boxed corners in a lot of pillow and cushion patterns, but I don’t often sew pillows and cushions. I prefer to sew covers for ready-made pillow inserts. But I use the technique a lot for bags and softies!

Here are a few more patterns that use this technique. . .

Goody Bags - free sewing pattern from Shiny Happy World

These goody bags are great little gift bags or party favor bags.

The Big Bag - a free tote bag pattern from Shiny Happy World

This big tote bag is my favorite for grocery shopping.

Cute monster stuffed toy with googly eyes and bright colors for kids.

And I love these fun and easy monsters. You can mix and match the parts to create your own variations.

Lots of ways to use easy boxed corners!

Happy stitching!

Block 6 in the Controlled Chaos Scrappy Quilt-Along

Colorful patchwork quilt with navy blue, yellow, and patterned fabric squares.

I was out of my studio last week so I didn’t get a block made, but I’m back this week with a brand new color. Yellow! This is its first appearance in the quilt and I definitely like it paired with the blue. (It’s crazy how many blue scraps I have. . .)

Ready to make block #6?

What You’ll Need

  • 70  two-inch squares in color A (shown in blue)
  • 30 two-inch squares in color B (shown in yellow)

Instructions

Use 1/4″ seam allowances for all sewing.

Arrange your squares according to the diagram below and sew them together into columns.

(I know usually I saw rows here, but this block will be easier worked in columns. That way you have two types – some that alternate blue and yellow and some that are all blue.)

Press all the seams. I’m pressing mine open for this quilt. I think it will make things simpler in the end.

Sew the columns together to make the finished block.

Here’s the exploded view. . .

Blue and yellow checkerboard pattern, vibrant and playful design, colorful kids' craft project, Shiny Happy World.

Here’s what my six blocks look like so far. . .

Colorful patchwork quilt made from various vibrant fabric squares.

Love! By next week’s post I’ll decide what the finished size of my quilt will be. I’m thinking about hand-quilting mine. Crazy, right?

Click here for all the Controlled Chaos posts.

Happy piecing!

Best,
Wendi
Bright red mushroom with white spots on a dark blue background.

Everything You Ever Wanted to Know about Sulky Sticky Fabri-Solvy

Everything You Need to Know about Sulky Sticky Fabri-solvy - one of my very favorite supplies

I call this The Magical Embroidery Stuff.

Why?

Well, partly because Sulky Sticky Fabri-Solvy is quite a mouthful. 🙂 But mostly because I use it for absolutely everything I stitch and it’s absolutely magical. It really is one of my favorite products ever.

(You can find links to sources for all my favorite supplies here.)

I’ve written a lot about it in a lot of different posts, so today I’m bringing all that info together in one handy-dandy place.

What is it?

It’s a printable wash-away embroidery pattern transfer and stabilizer. Yes – it does all of that in one easy product! In a nutshell. . .

  1. You print your pattern right on the sheets. You can print them with an inkjet or laser printer, or photocopy onto it. You can also trace onto it – but I hate tracing.
  2. Peel off the paper back and stick the stuff right to the surface of what you’re embroidering.
  3. Hoop it up and start stitching. You stitch right through the stuff.
  4. Soak it in water and the stuff dissolves away like magic.

Want to see all of that in action? Watch this video.

Problem fabrics

I use this on everything I embroider. EVERYTHING. But it’s especially useful on problem fabrics. You know what I’m talking about – the ones that are really hard to transfer an image to.

  • dark fabrics
  • napped fabrics like velvet, terry cloth and cuddle fleece
  • plasticy fuzzy fabrics like polar fleece
  • thick fabrics that you can’t see through to trace – like felt
  • stretchy fabrics like T-shirts

It’s awesome on everything!

Sulky Sticky Fabri-Solvy is great for transferring a face to cuddle fleece.

Look! You can stitch right through the stuff onto fluffy cuddle fleece.
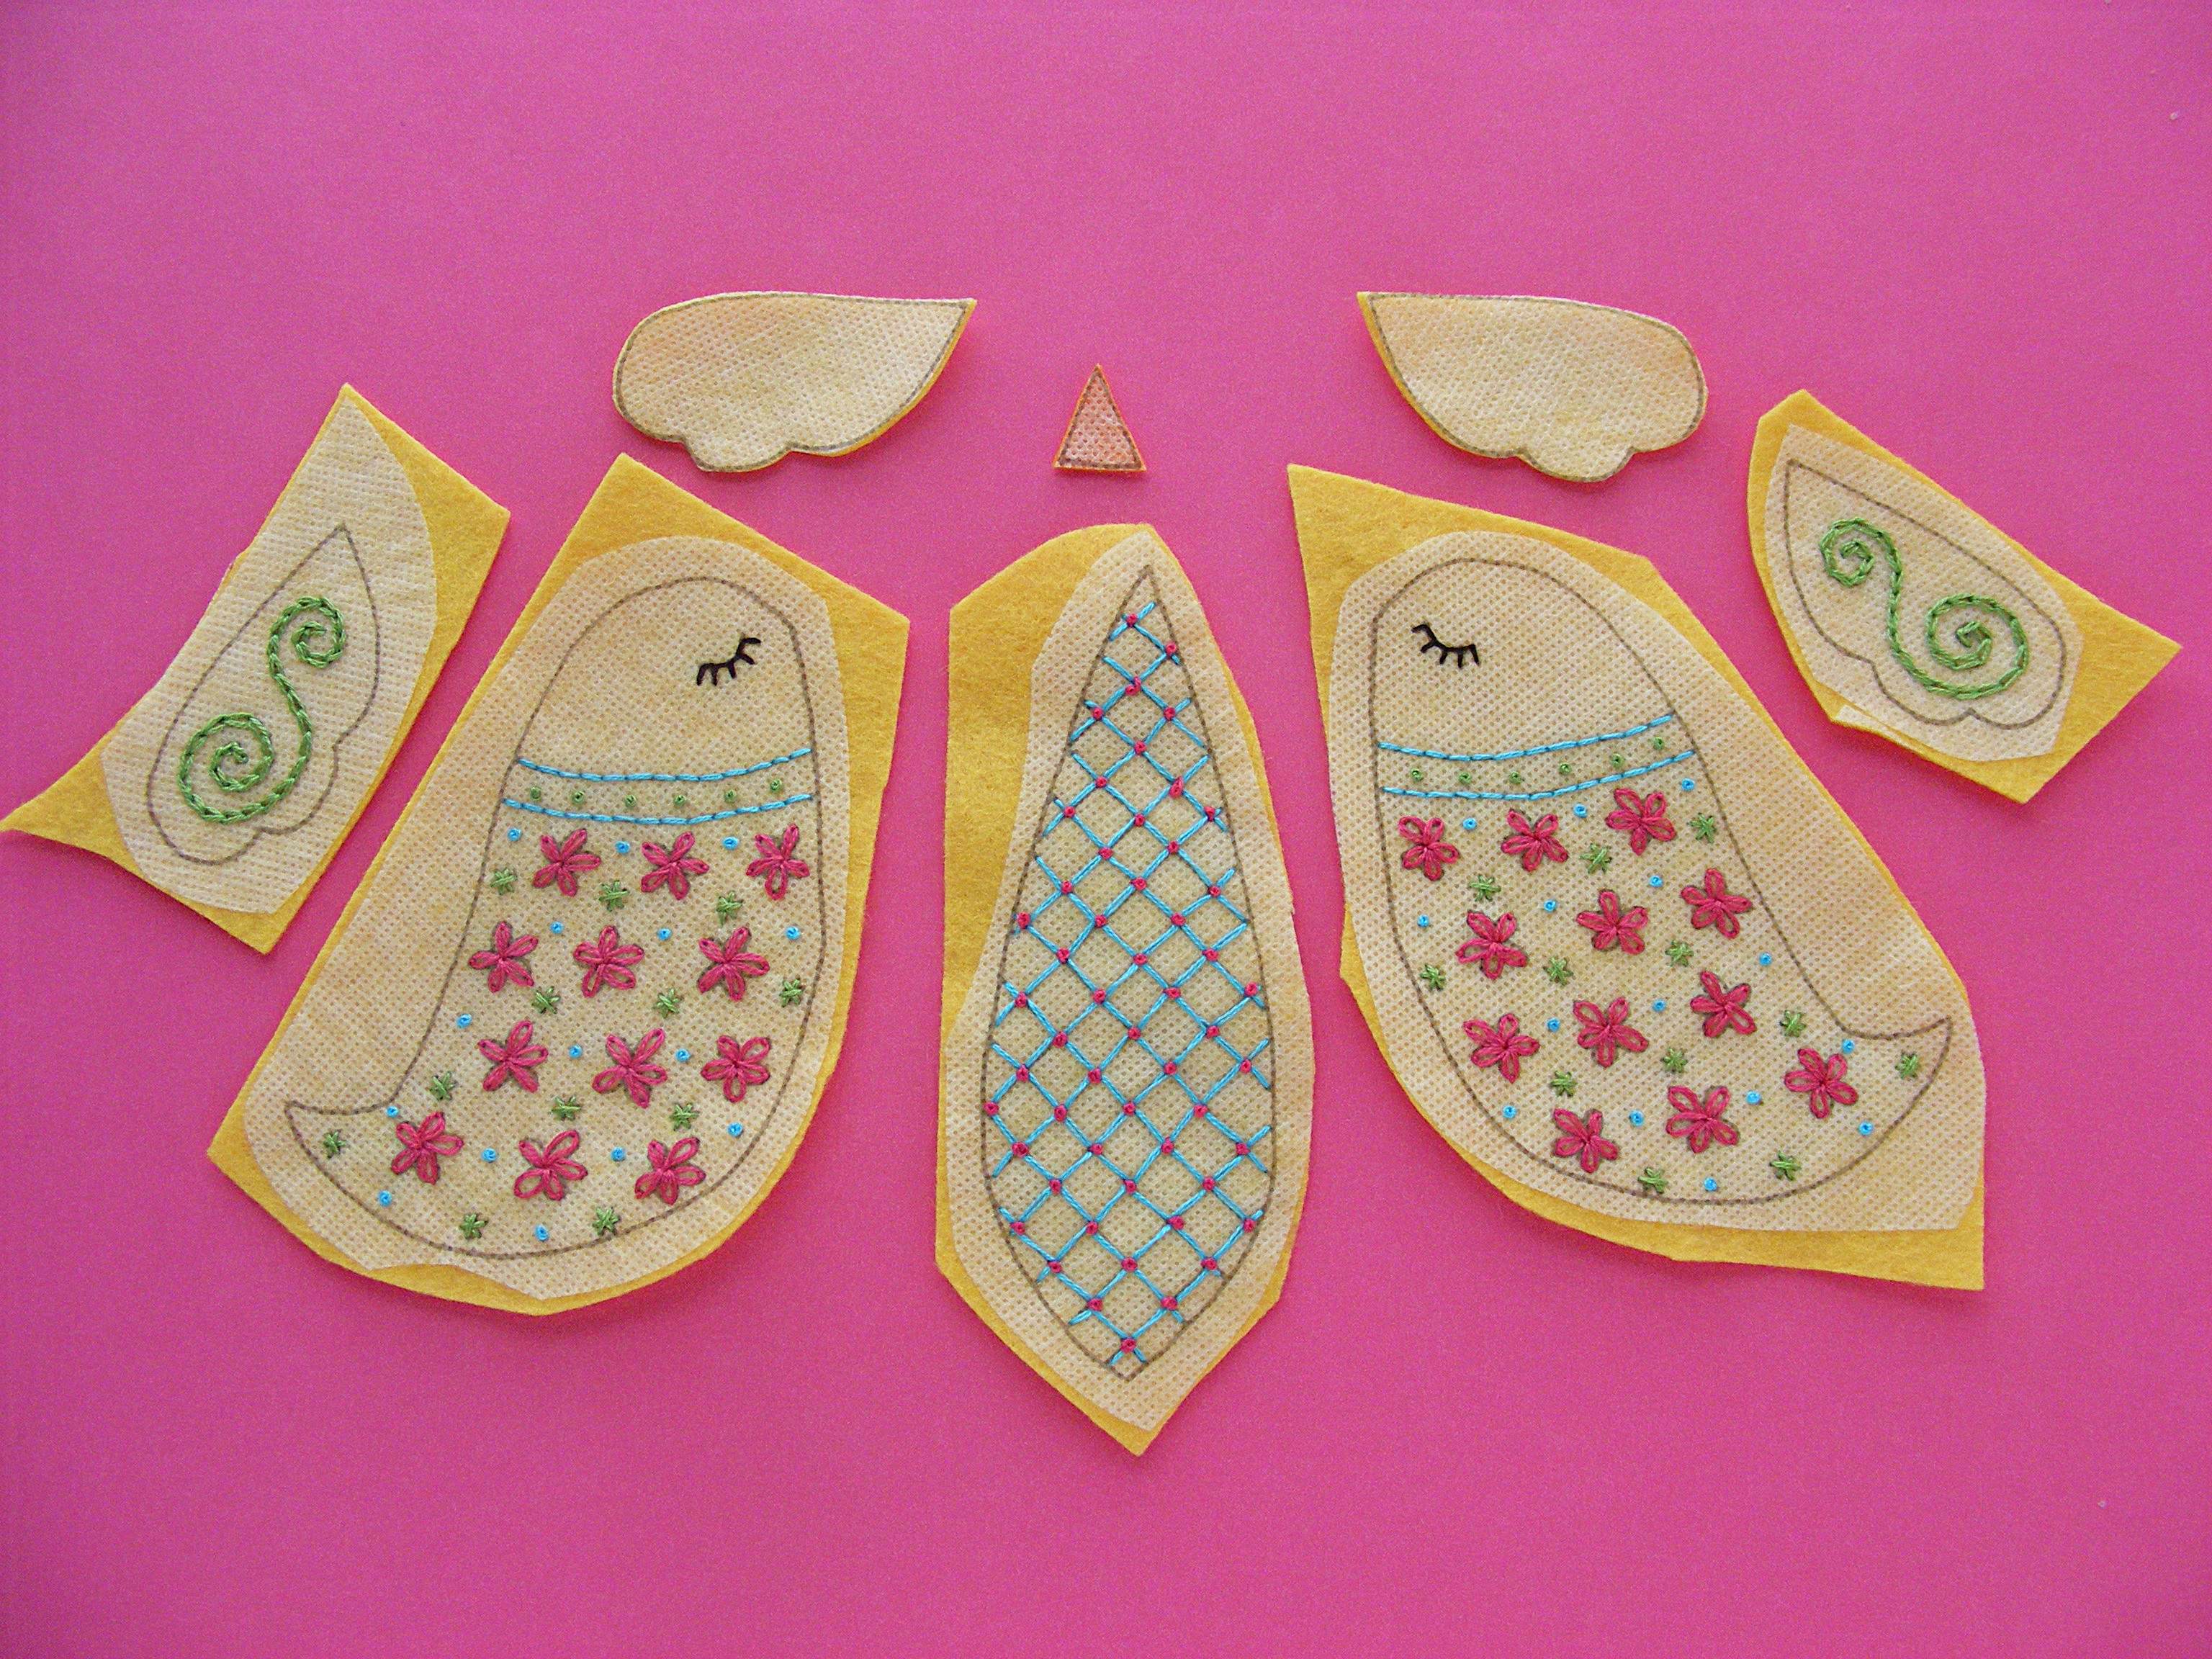
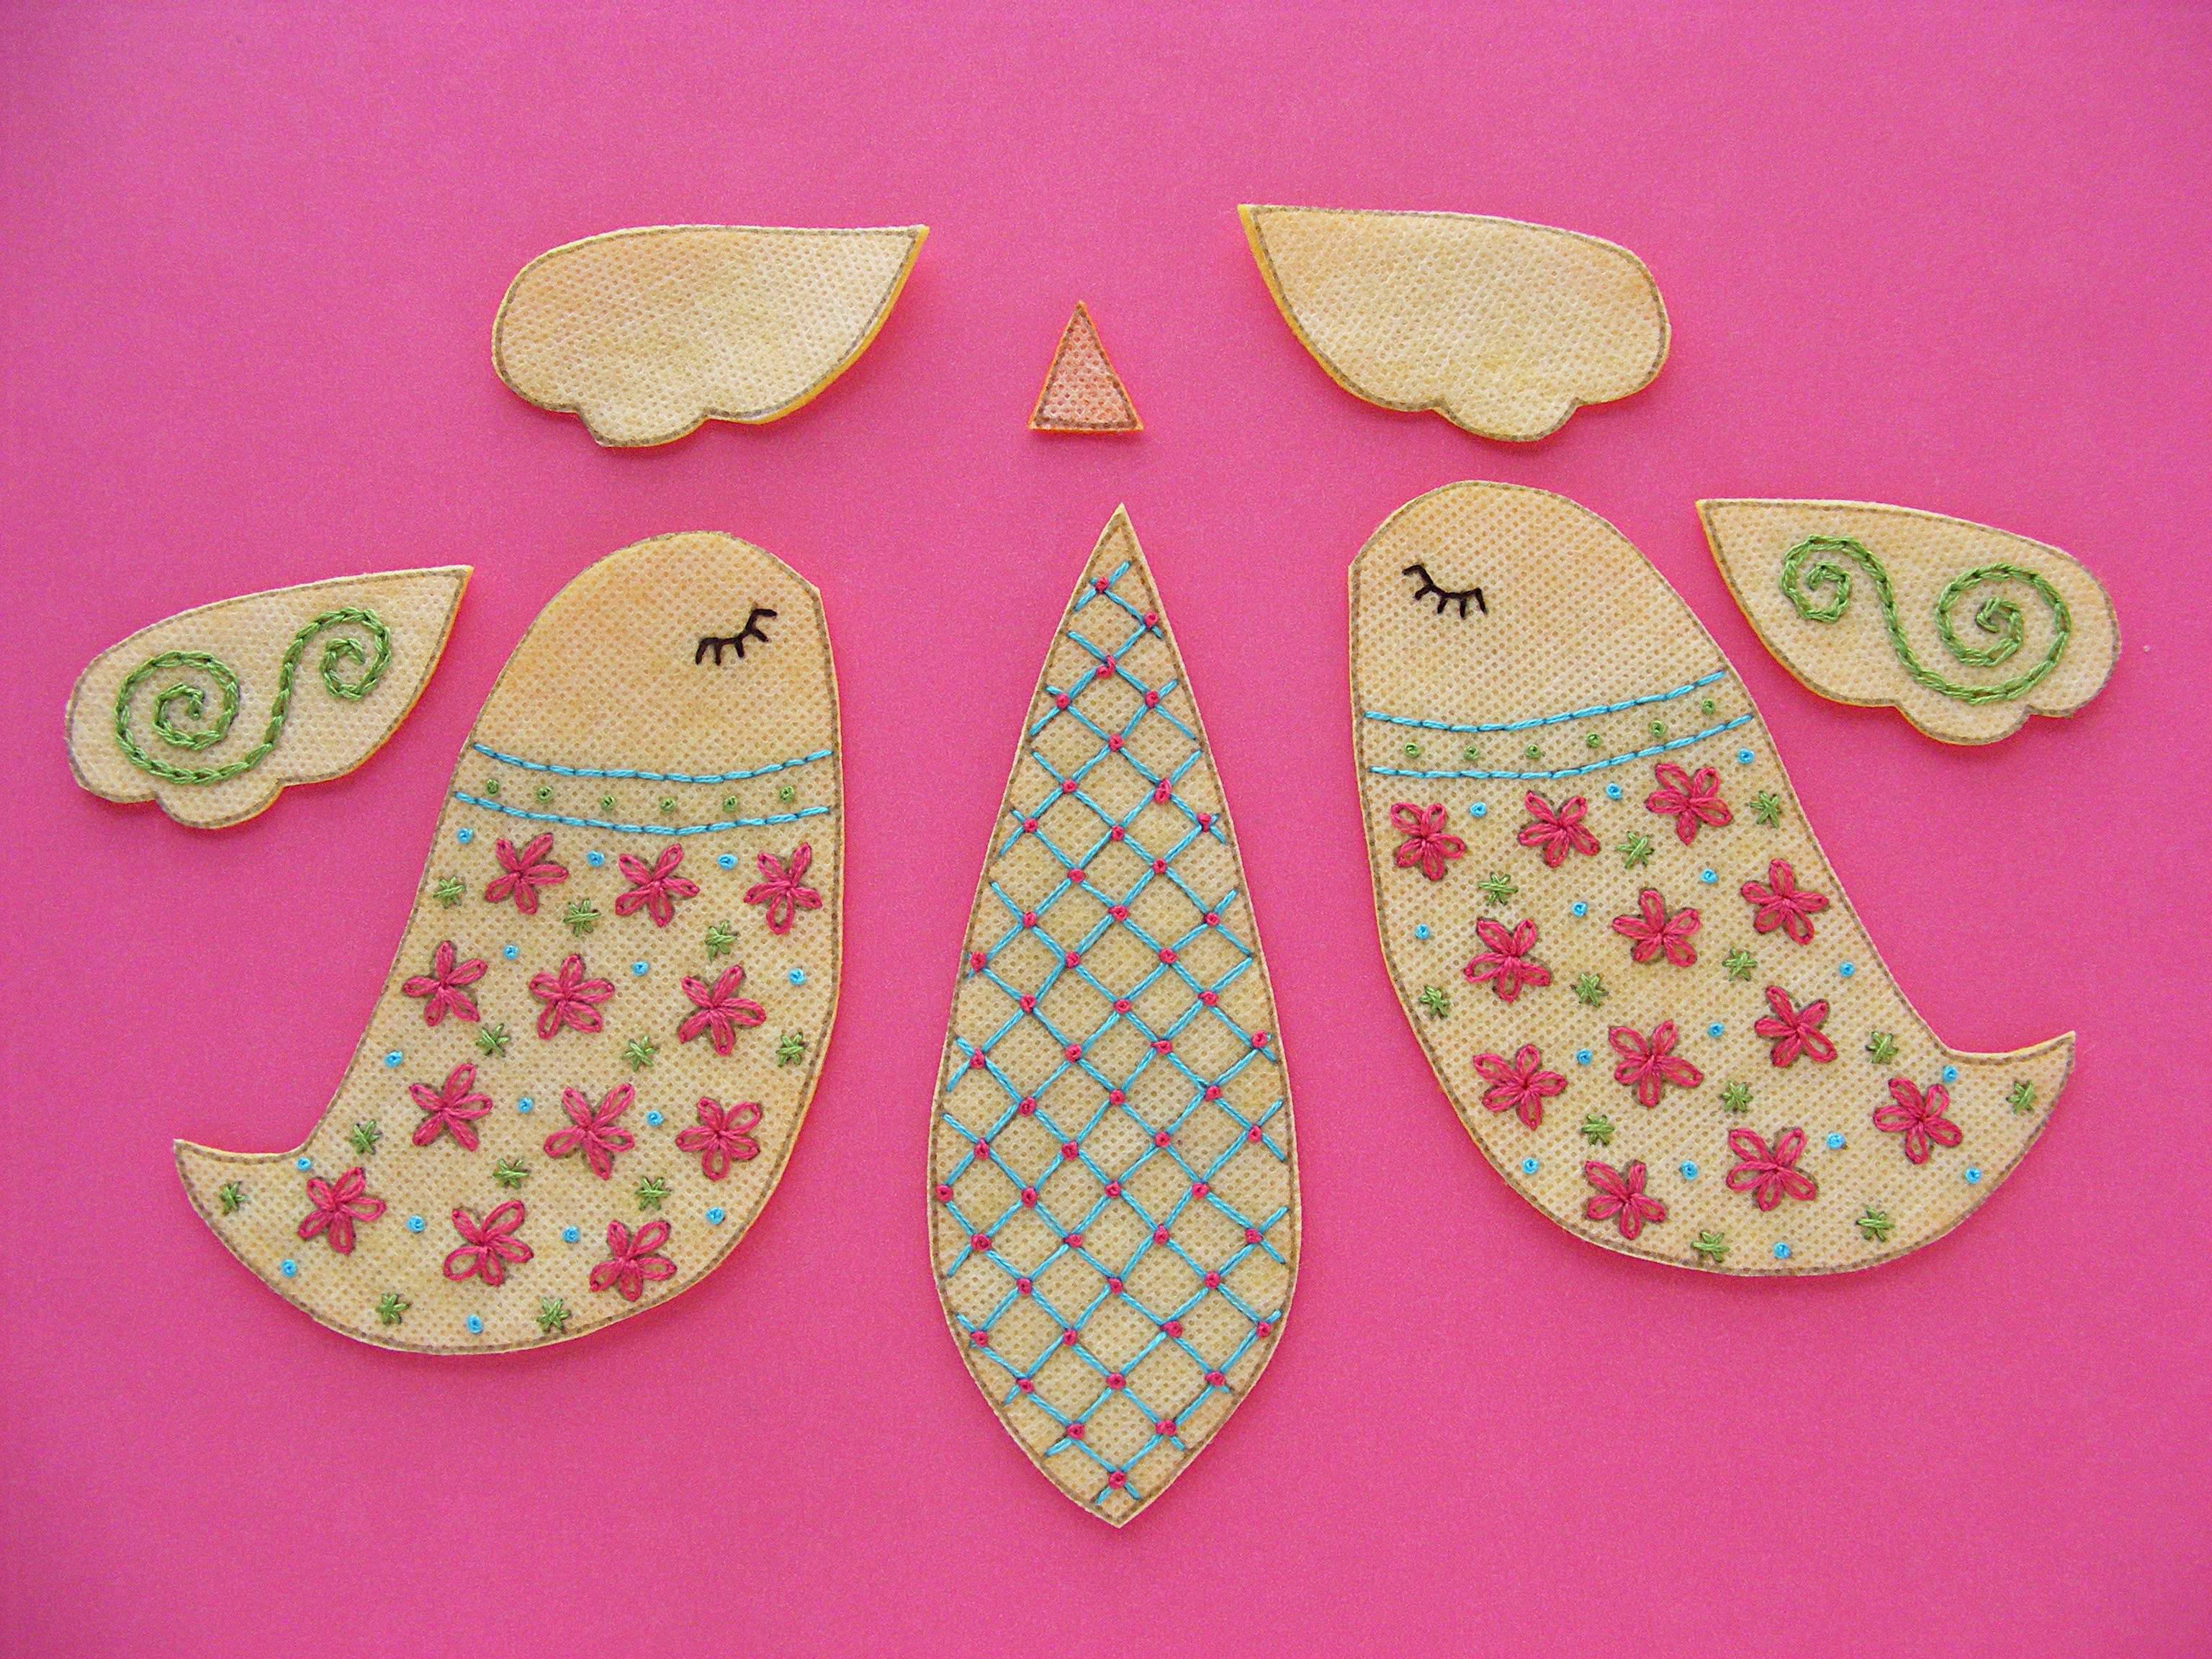
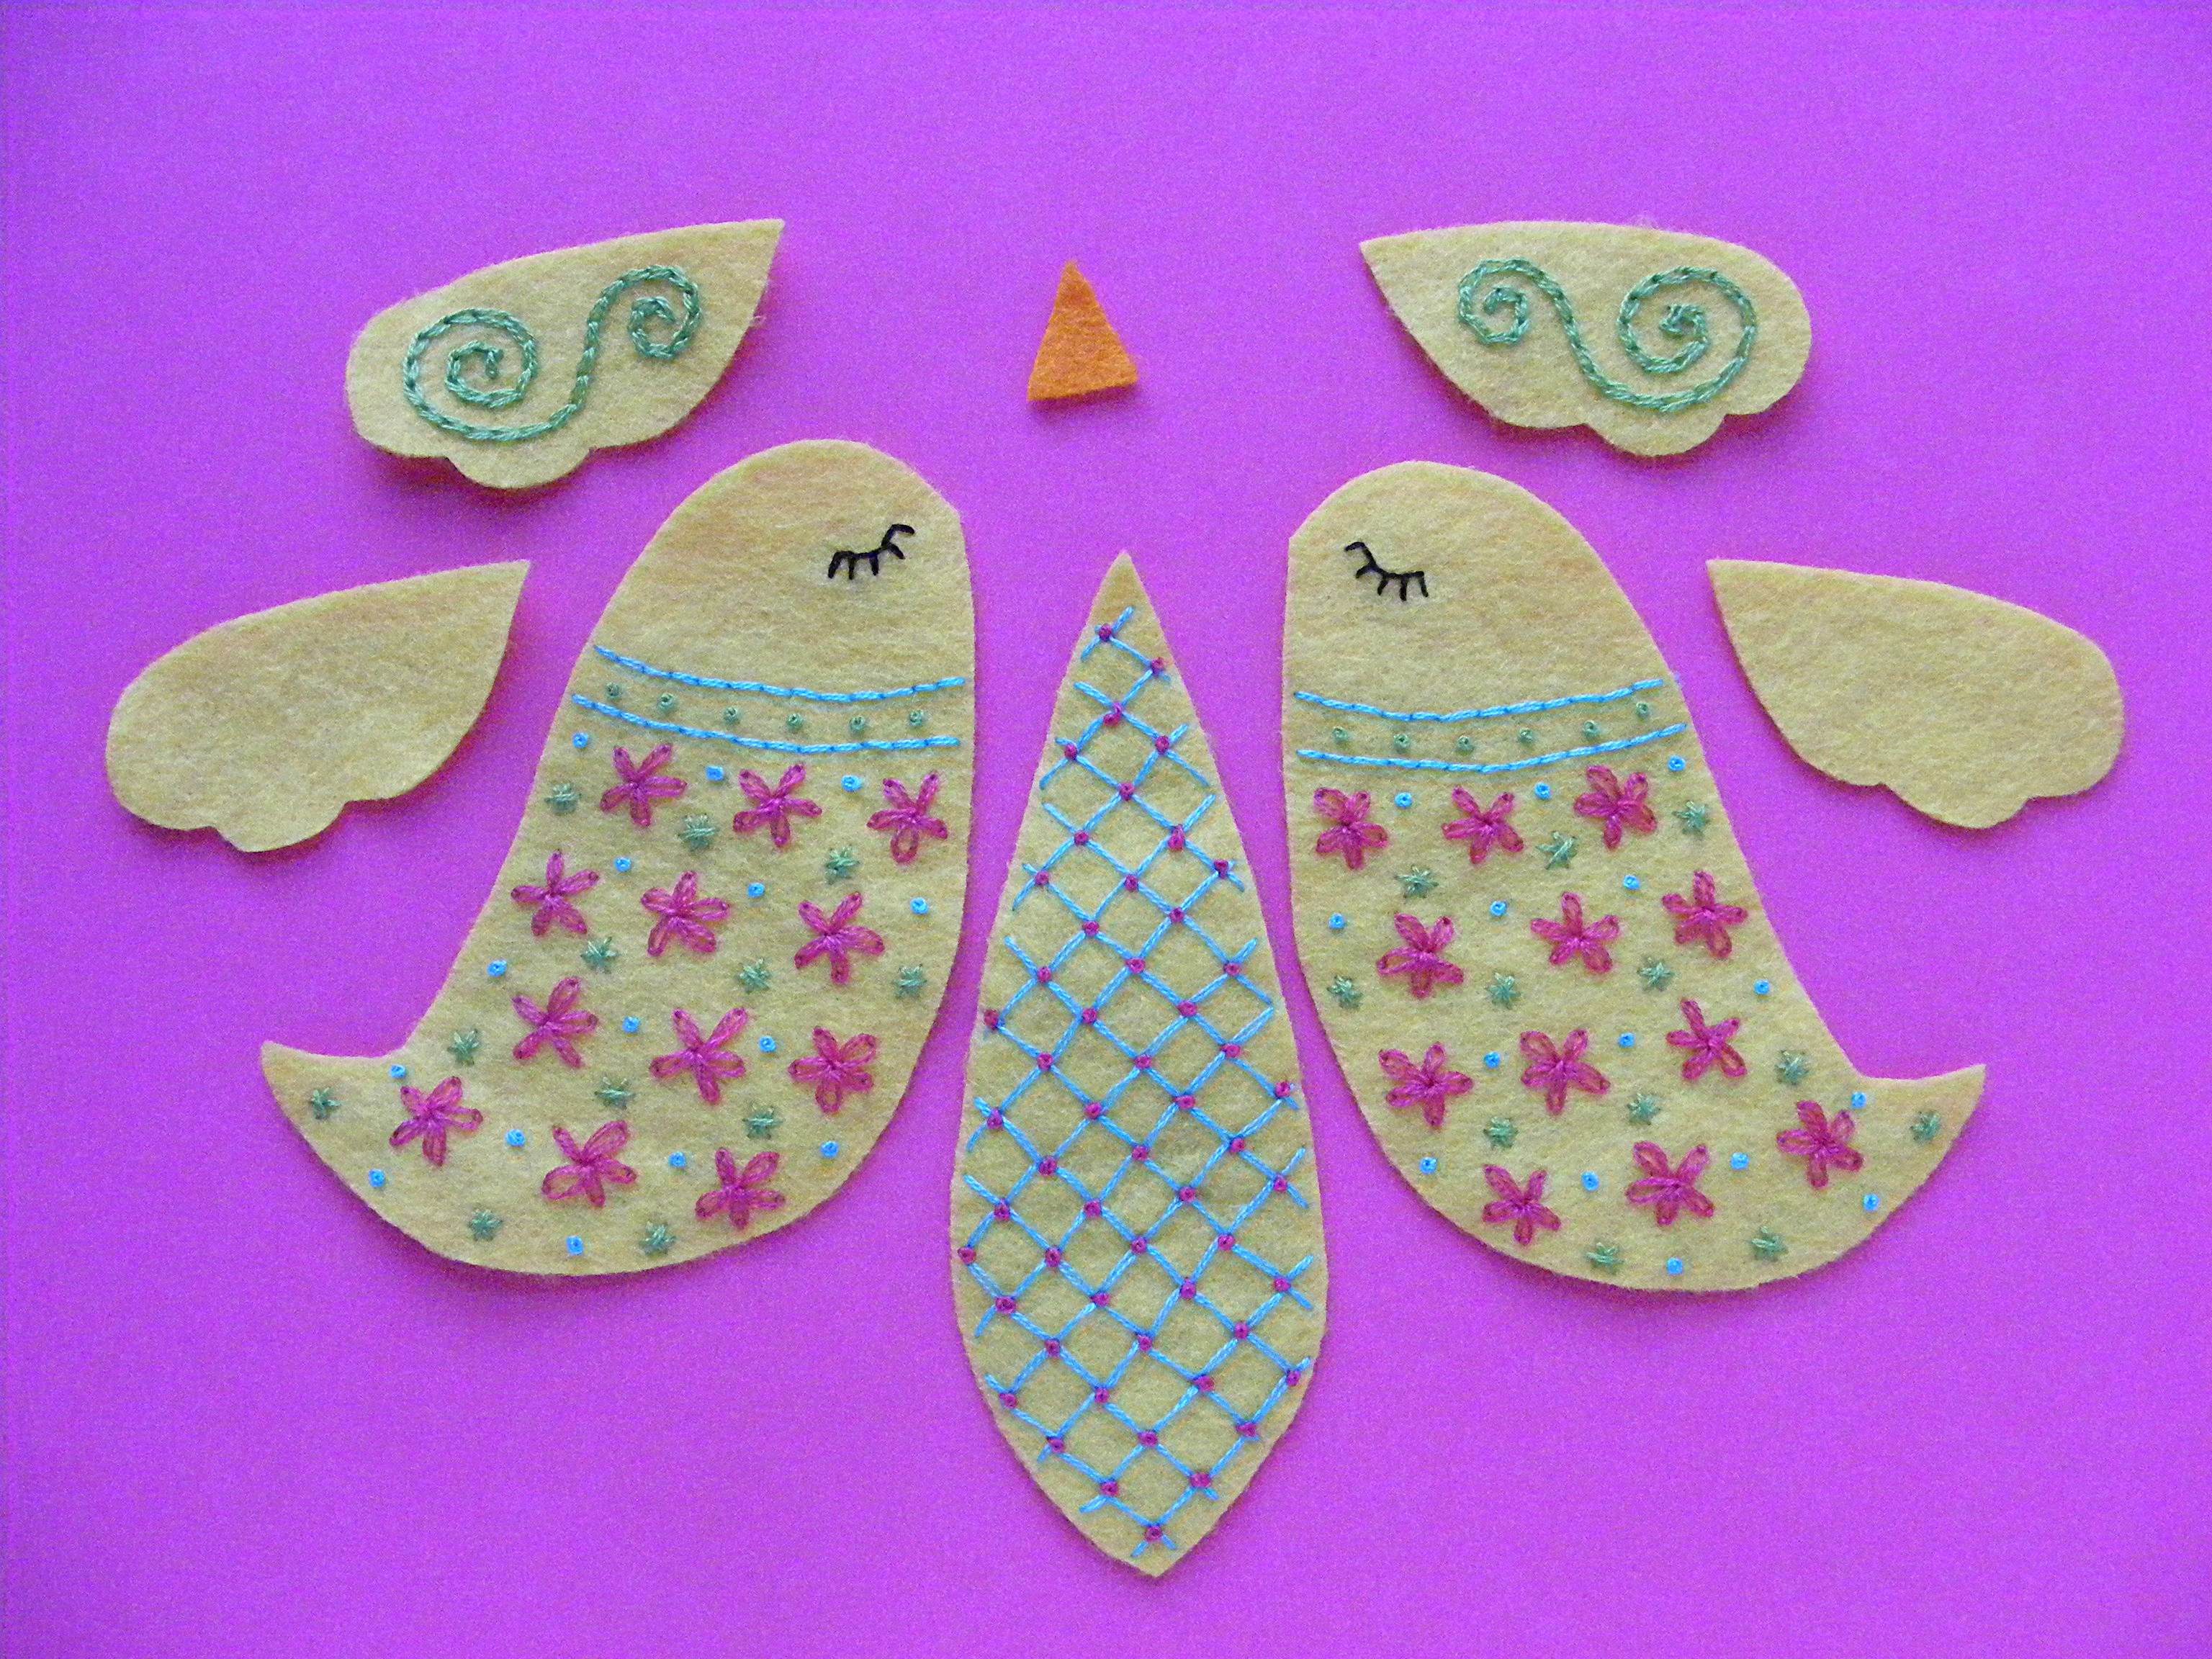
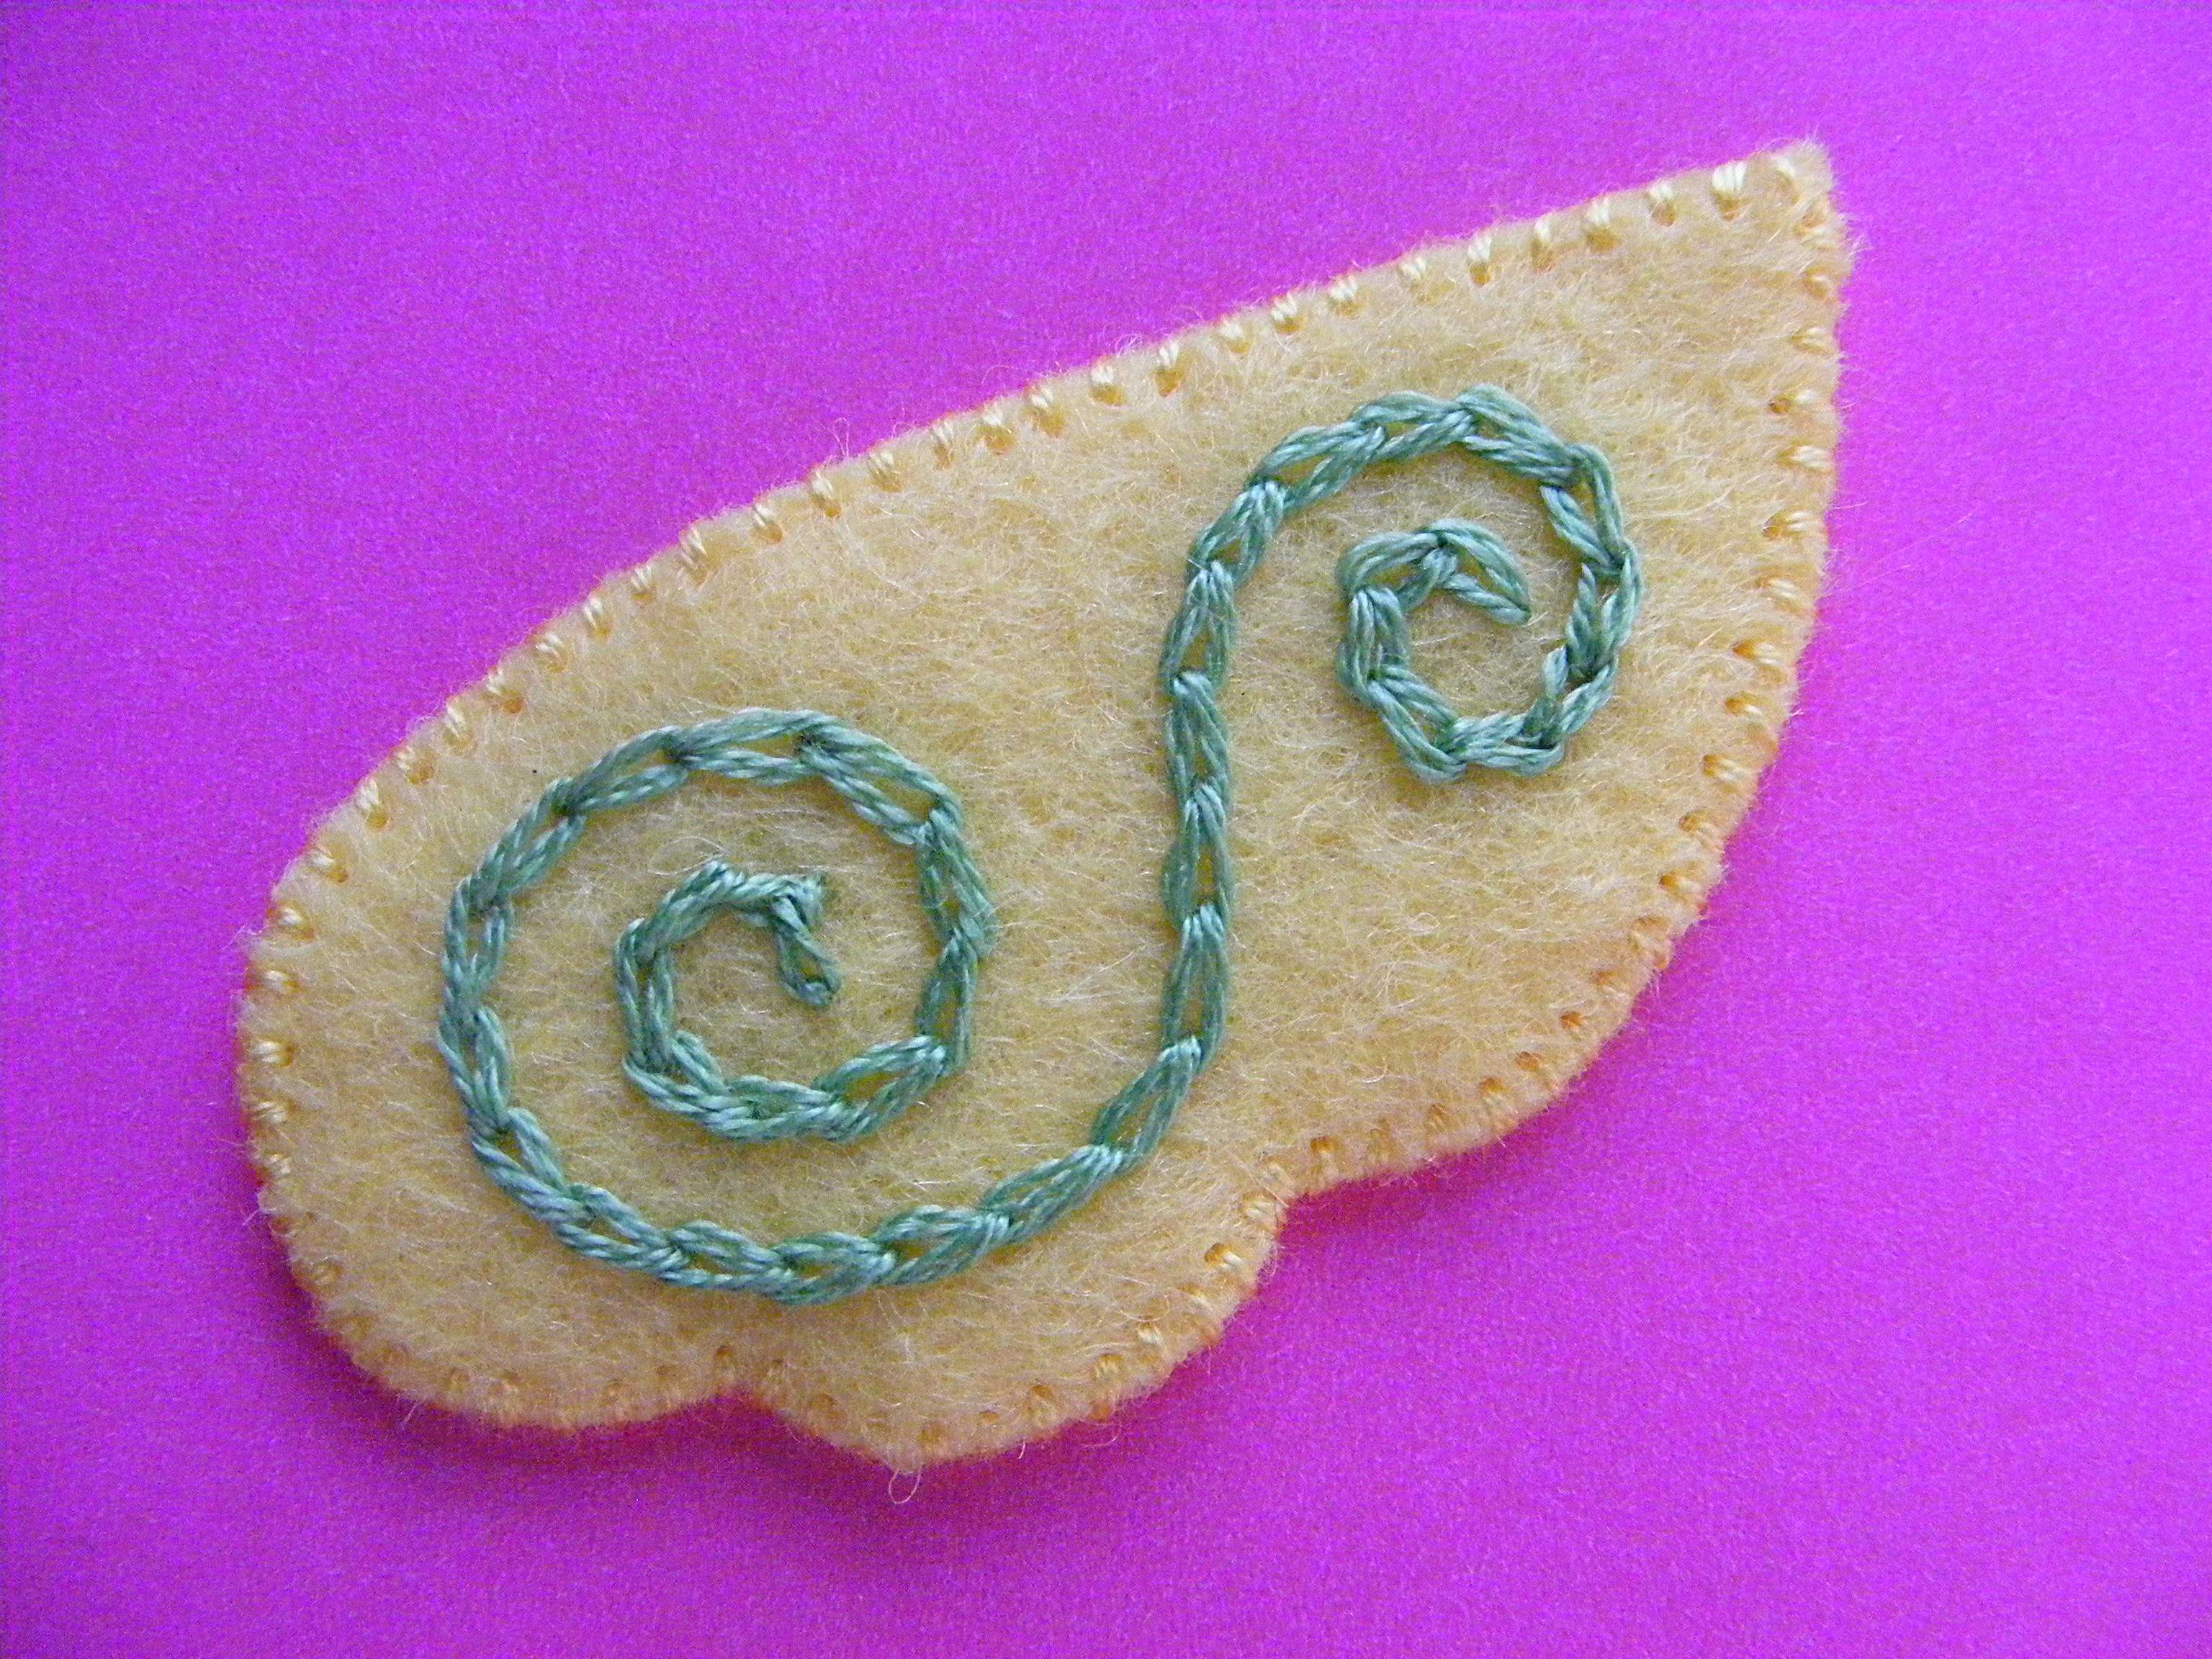
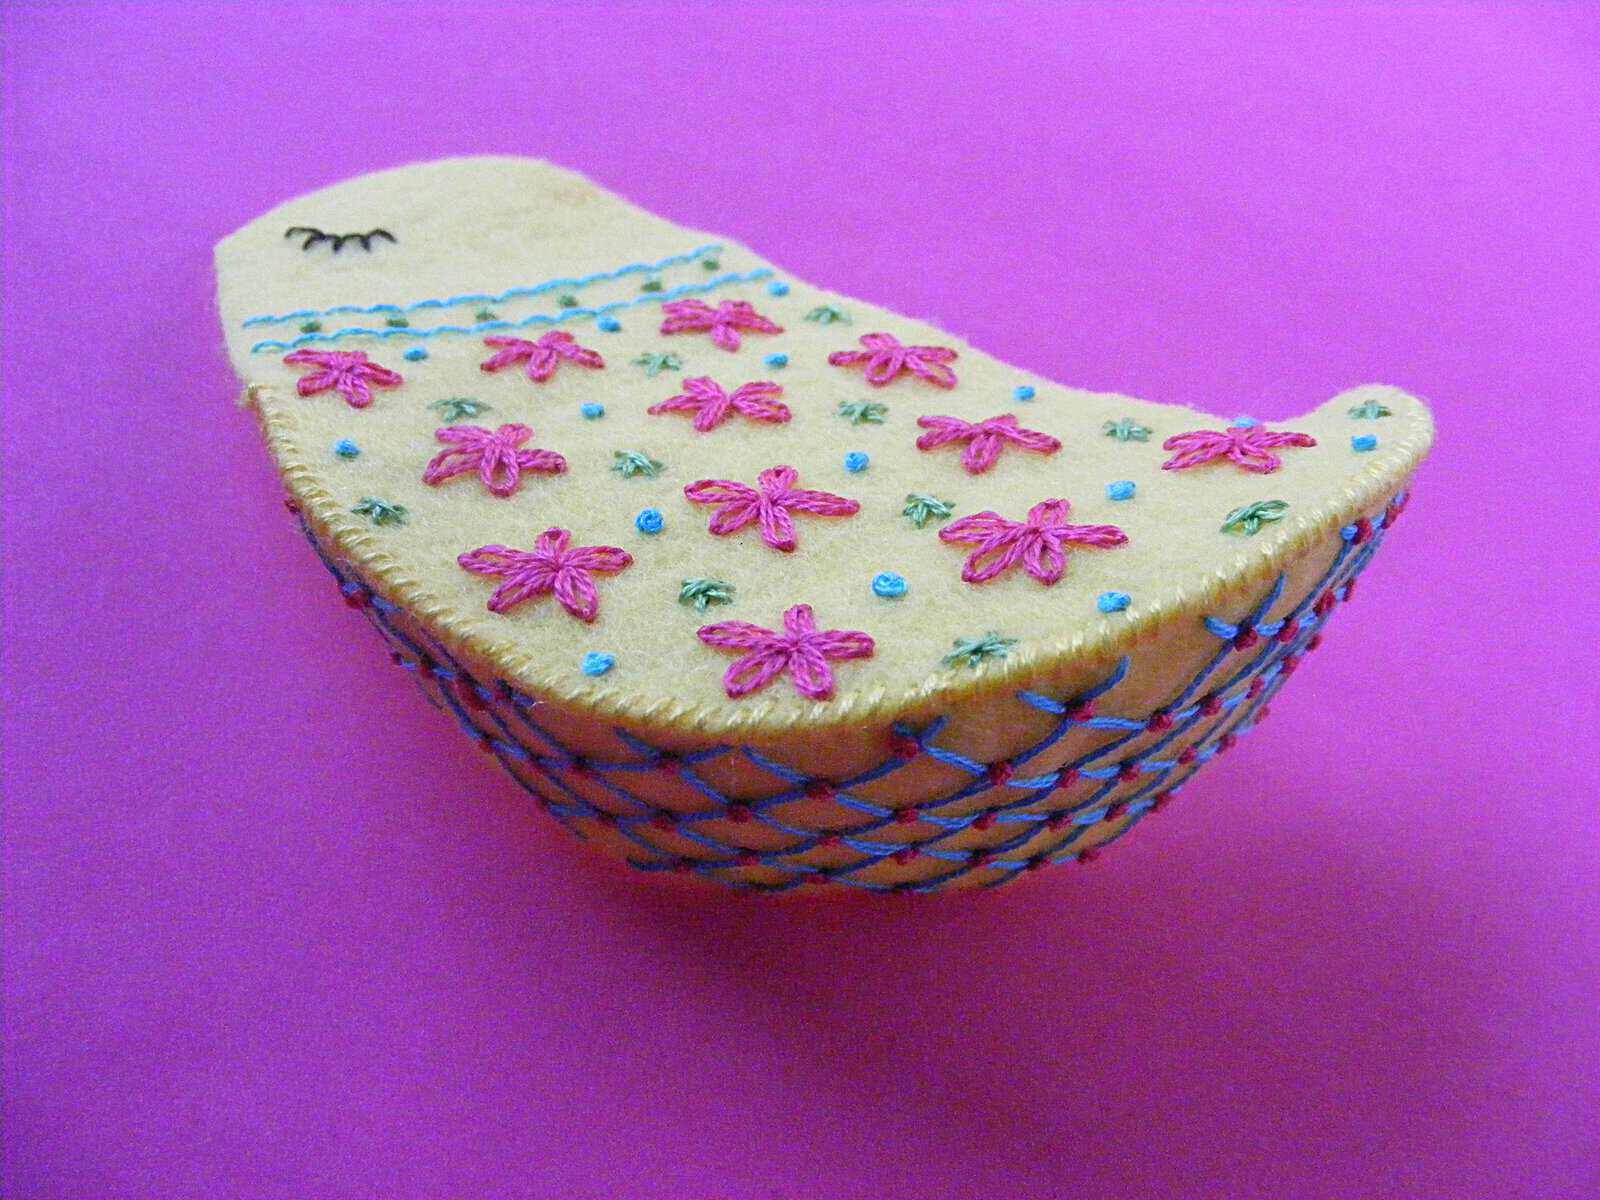
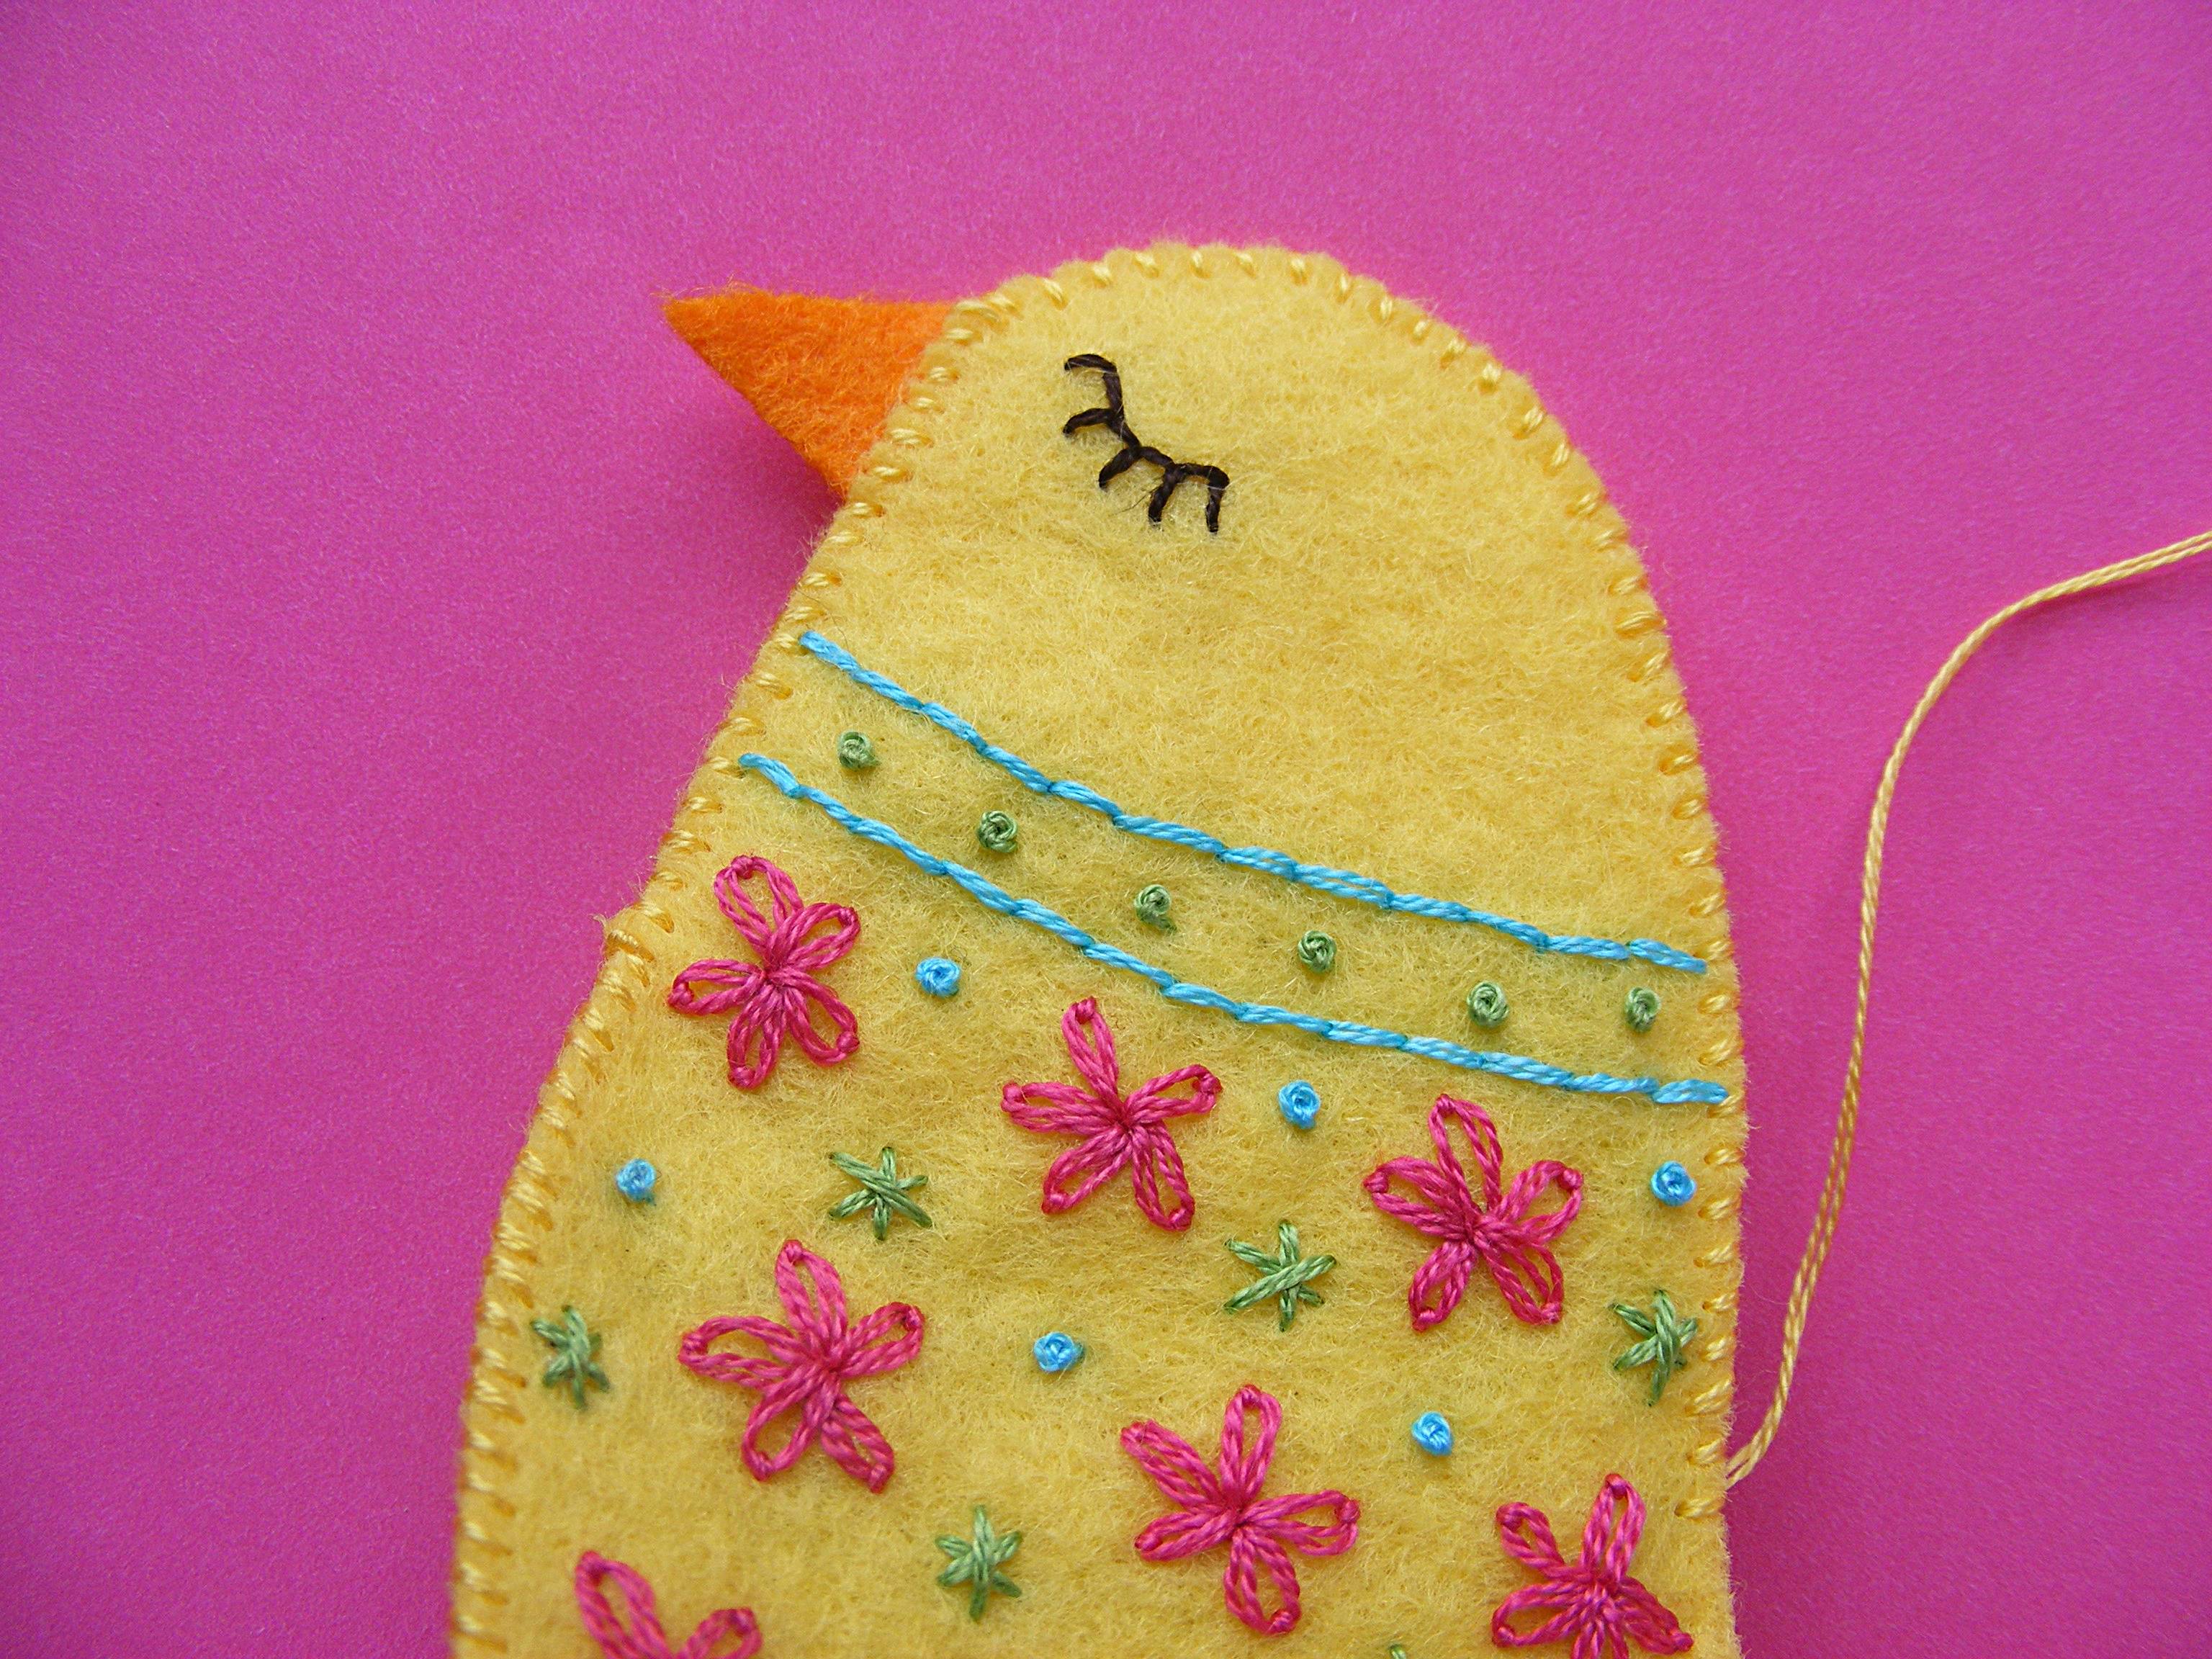
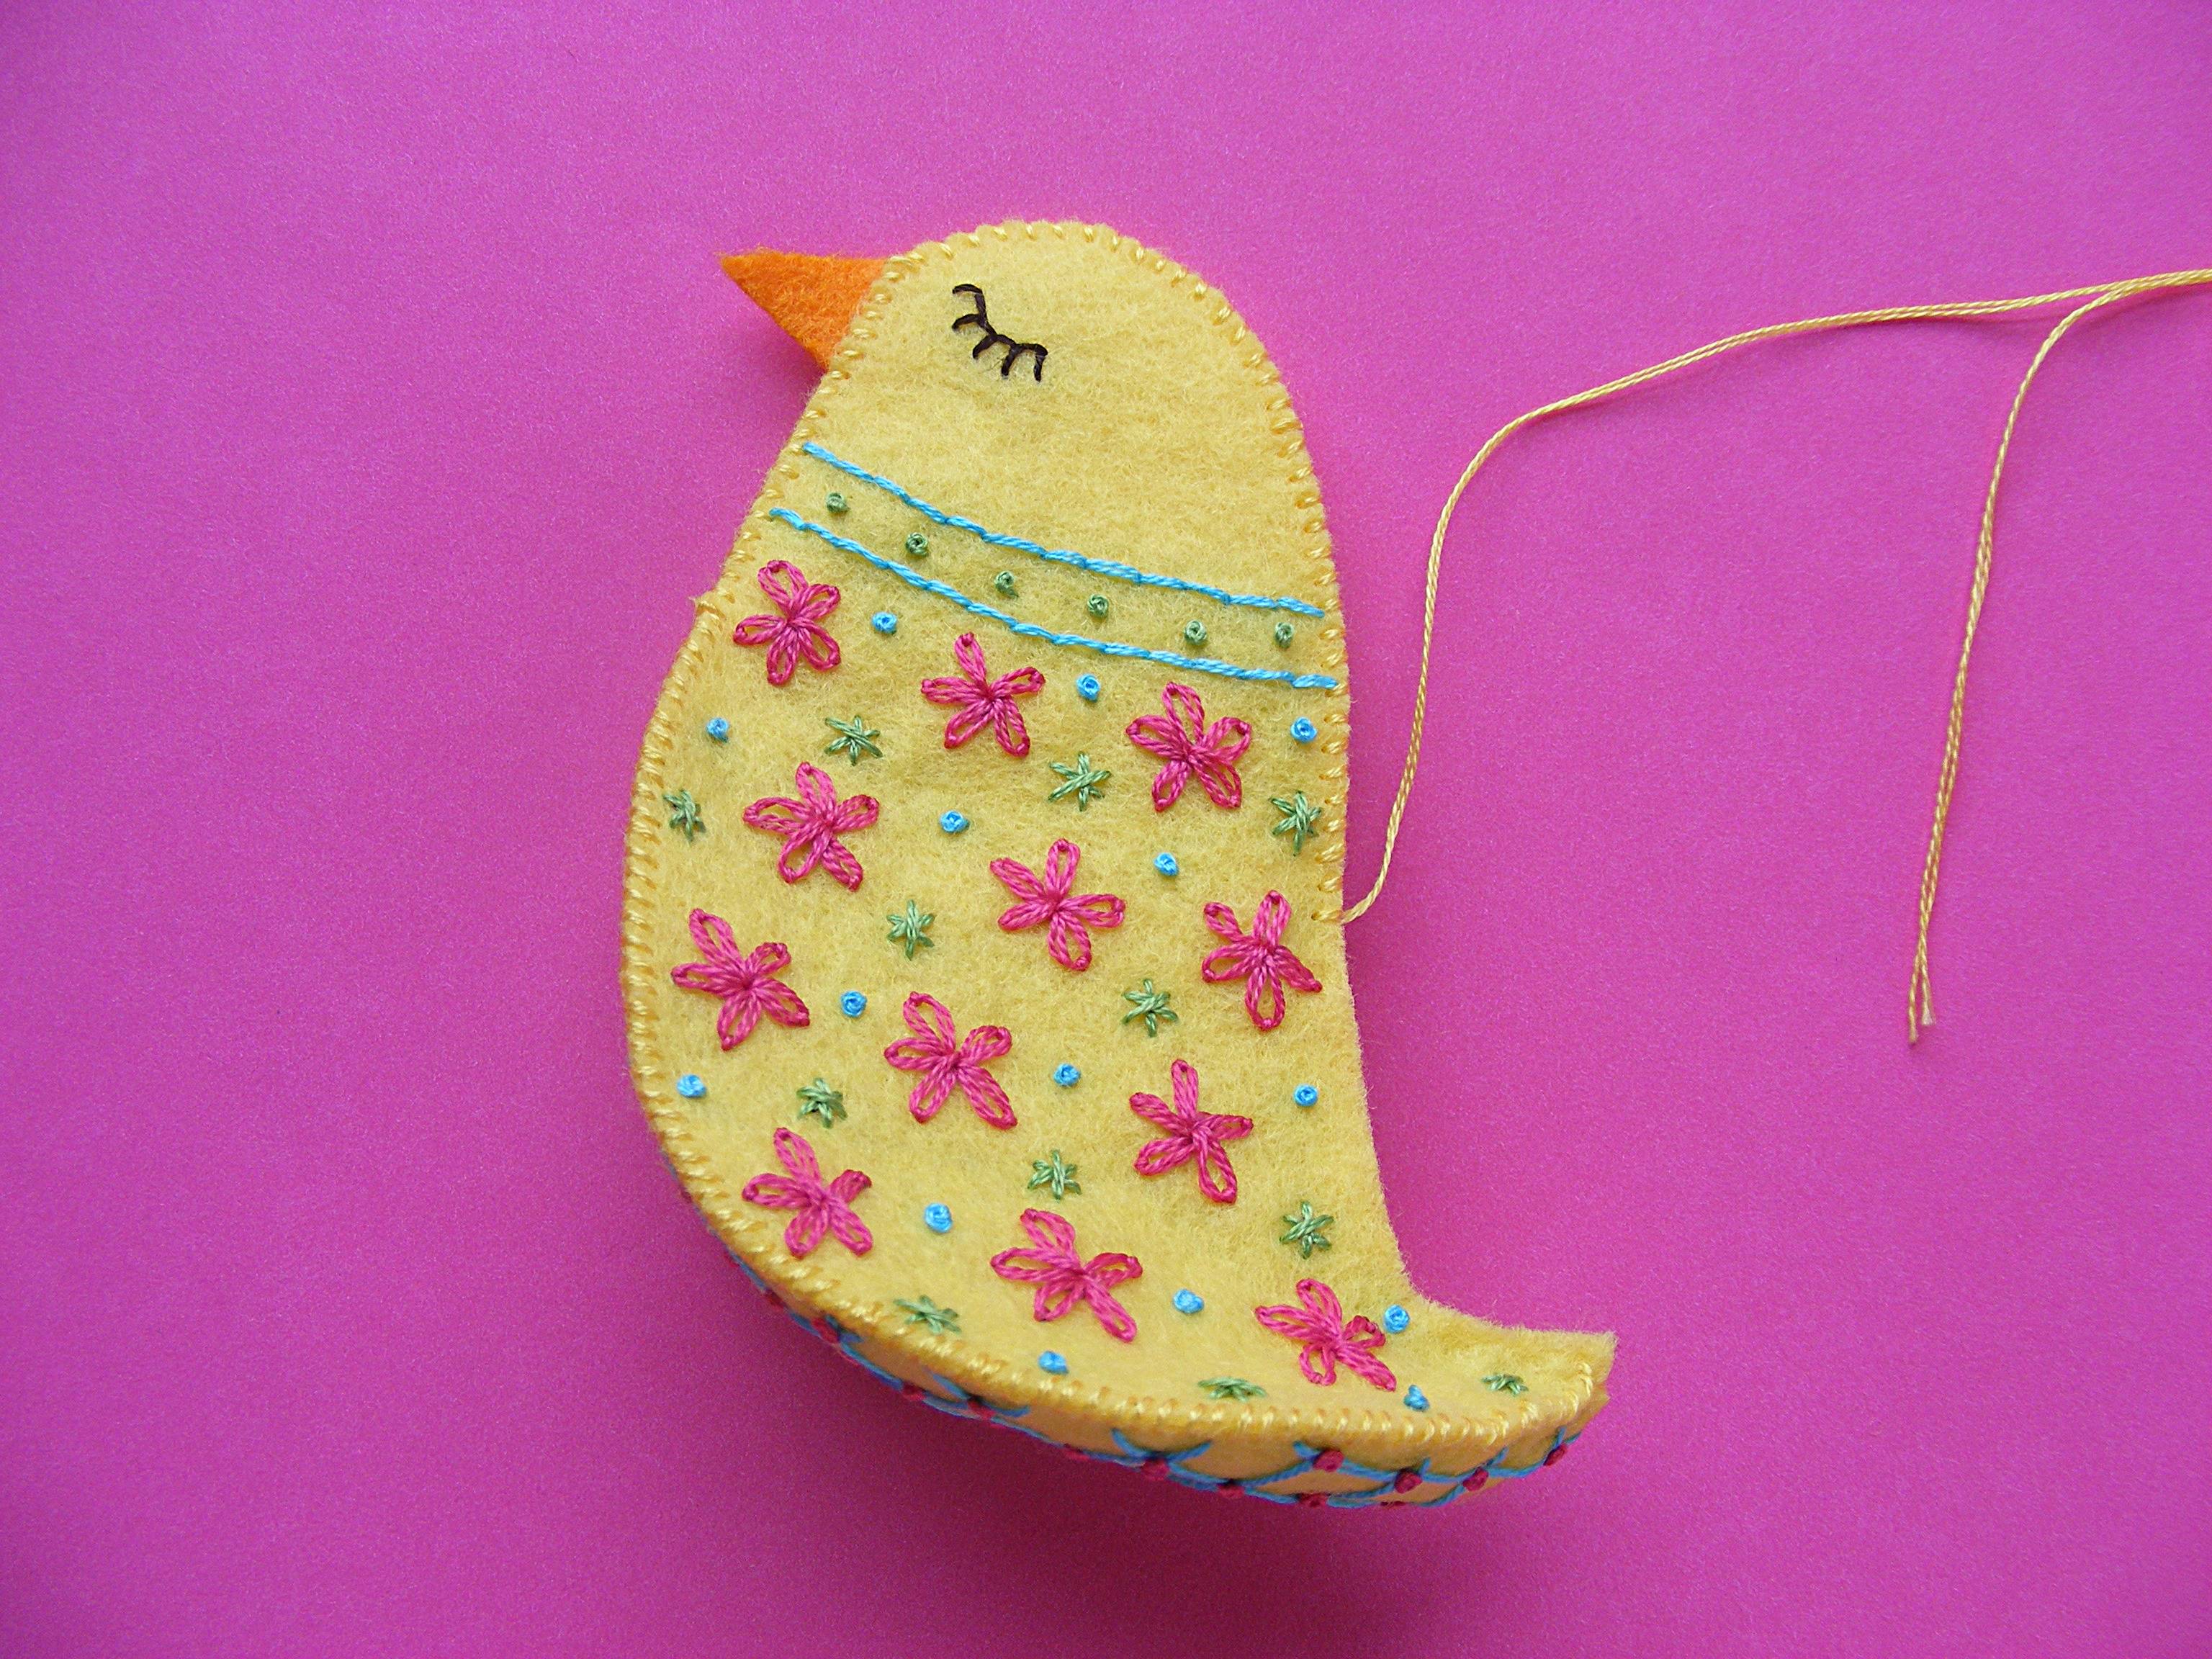
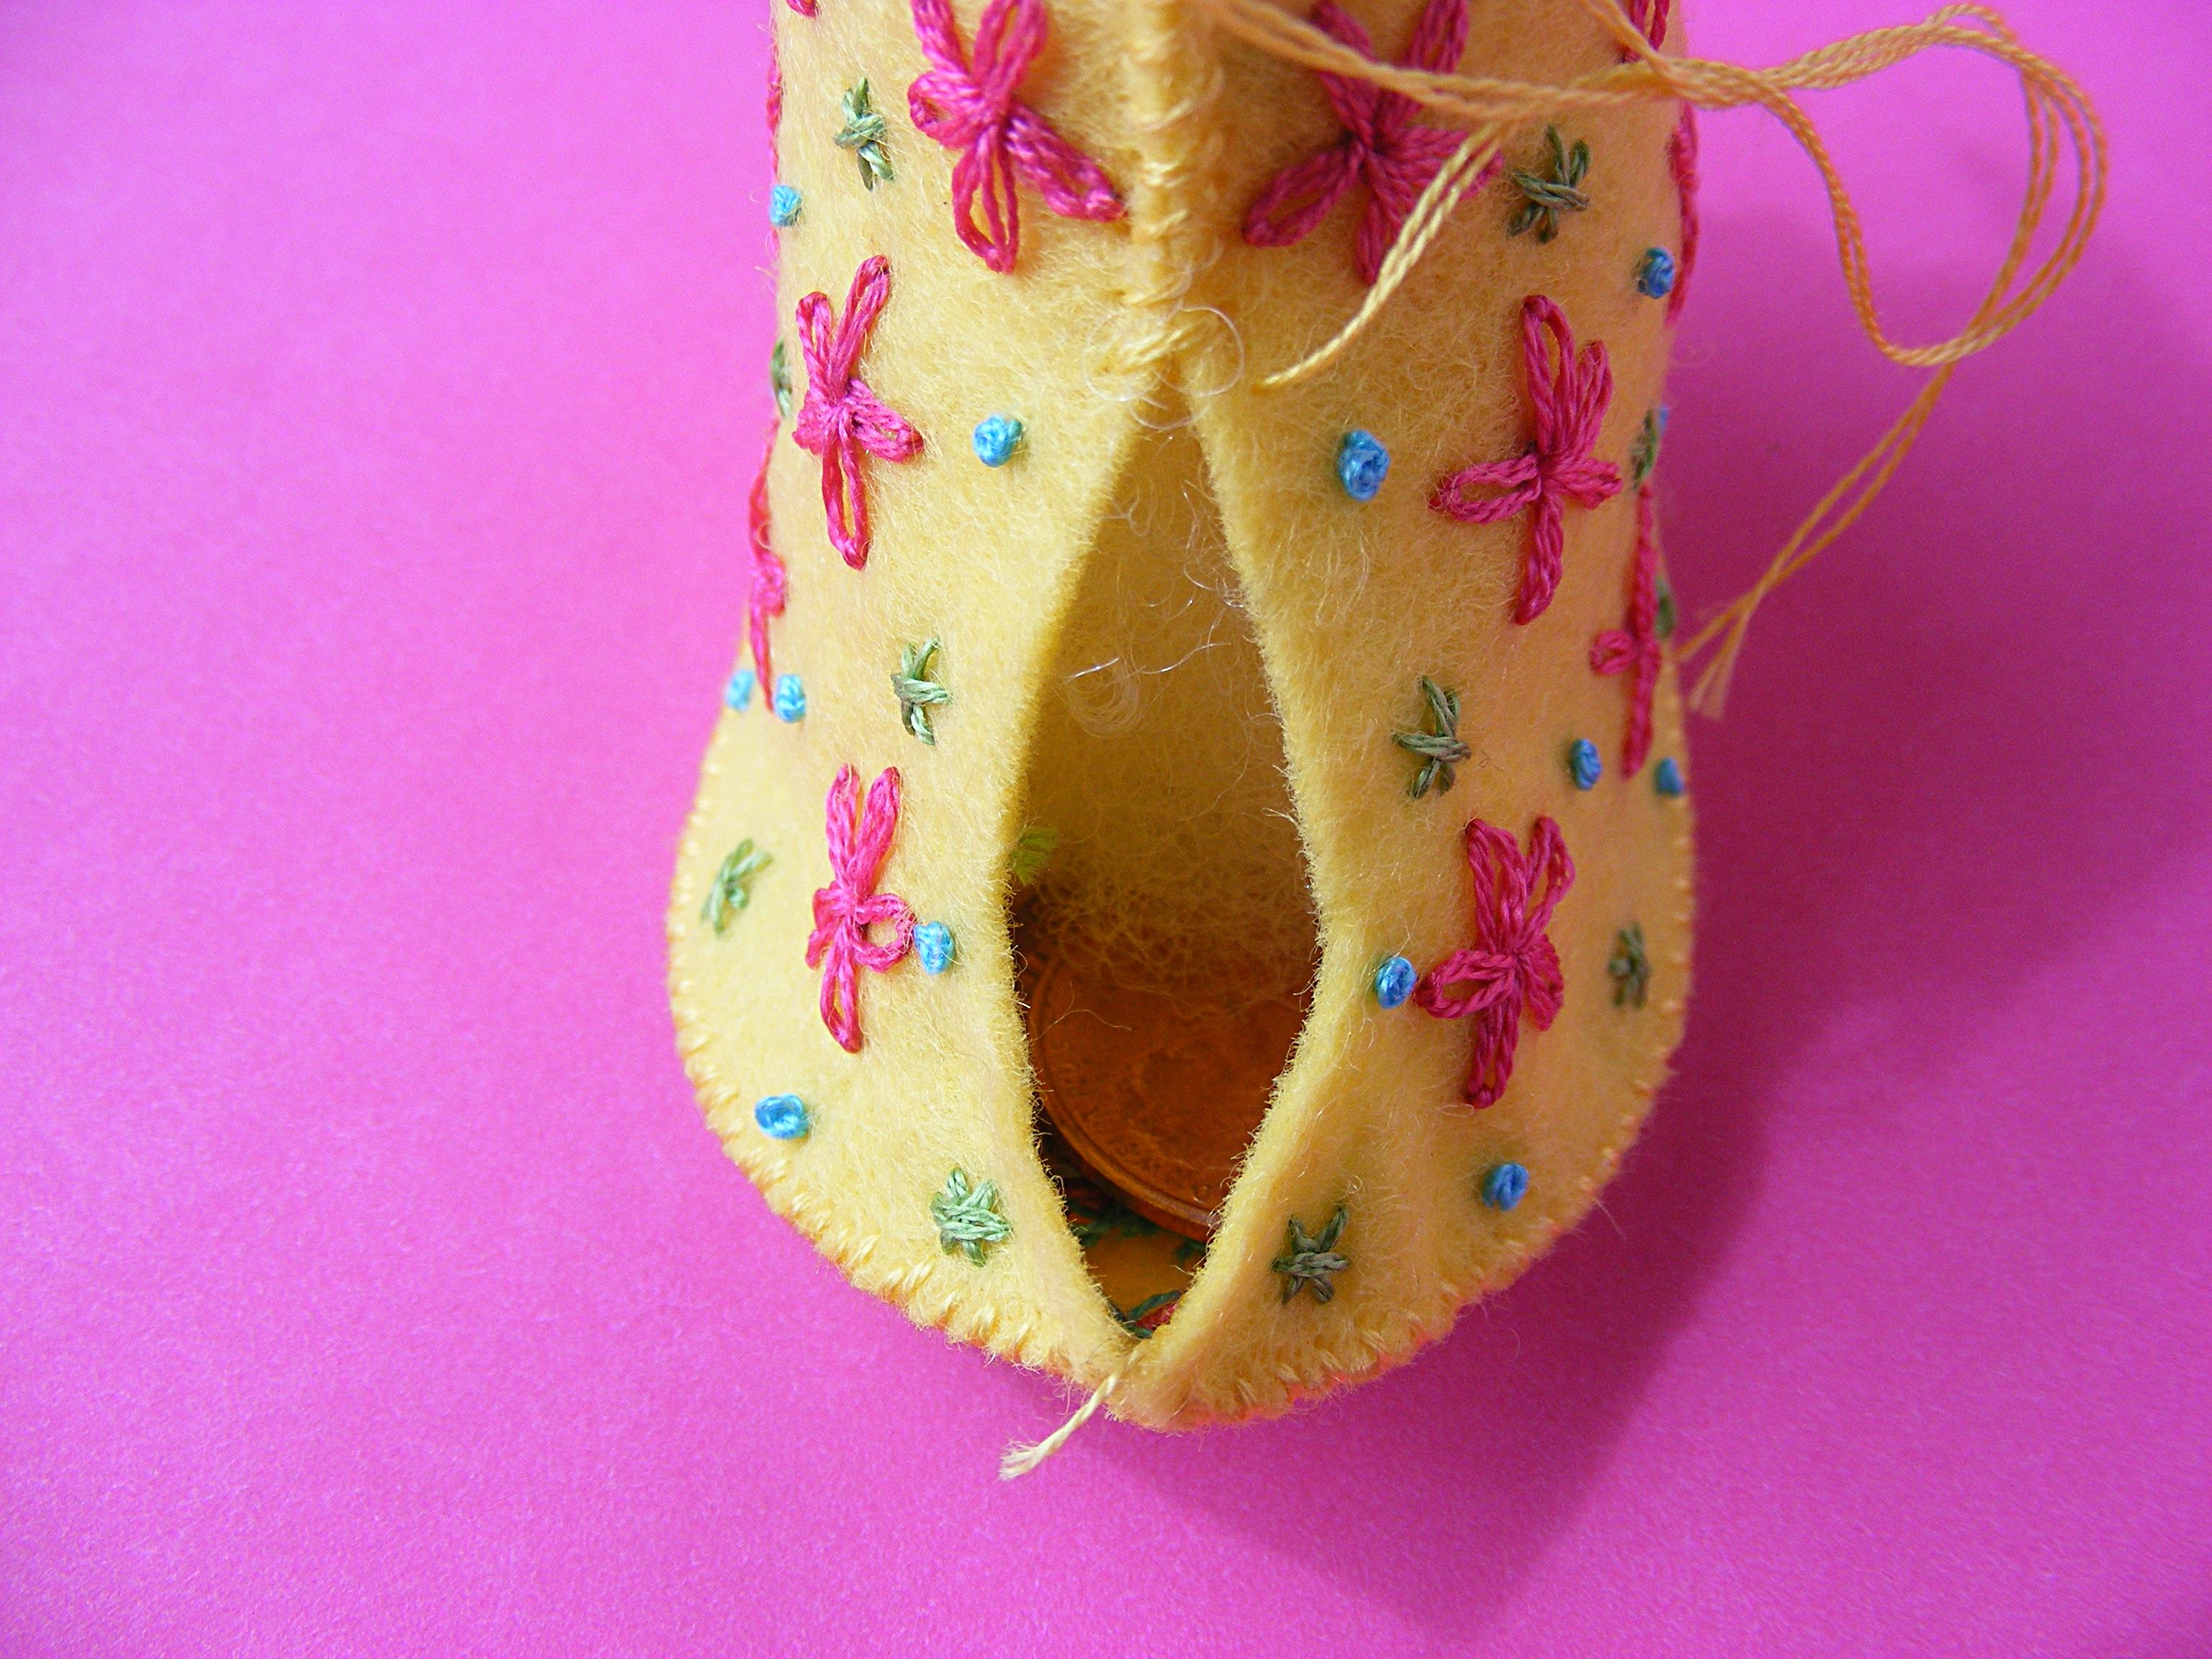
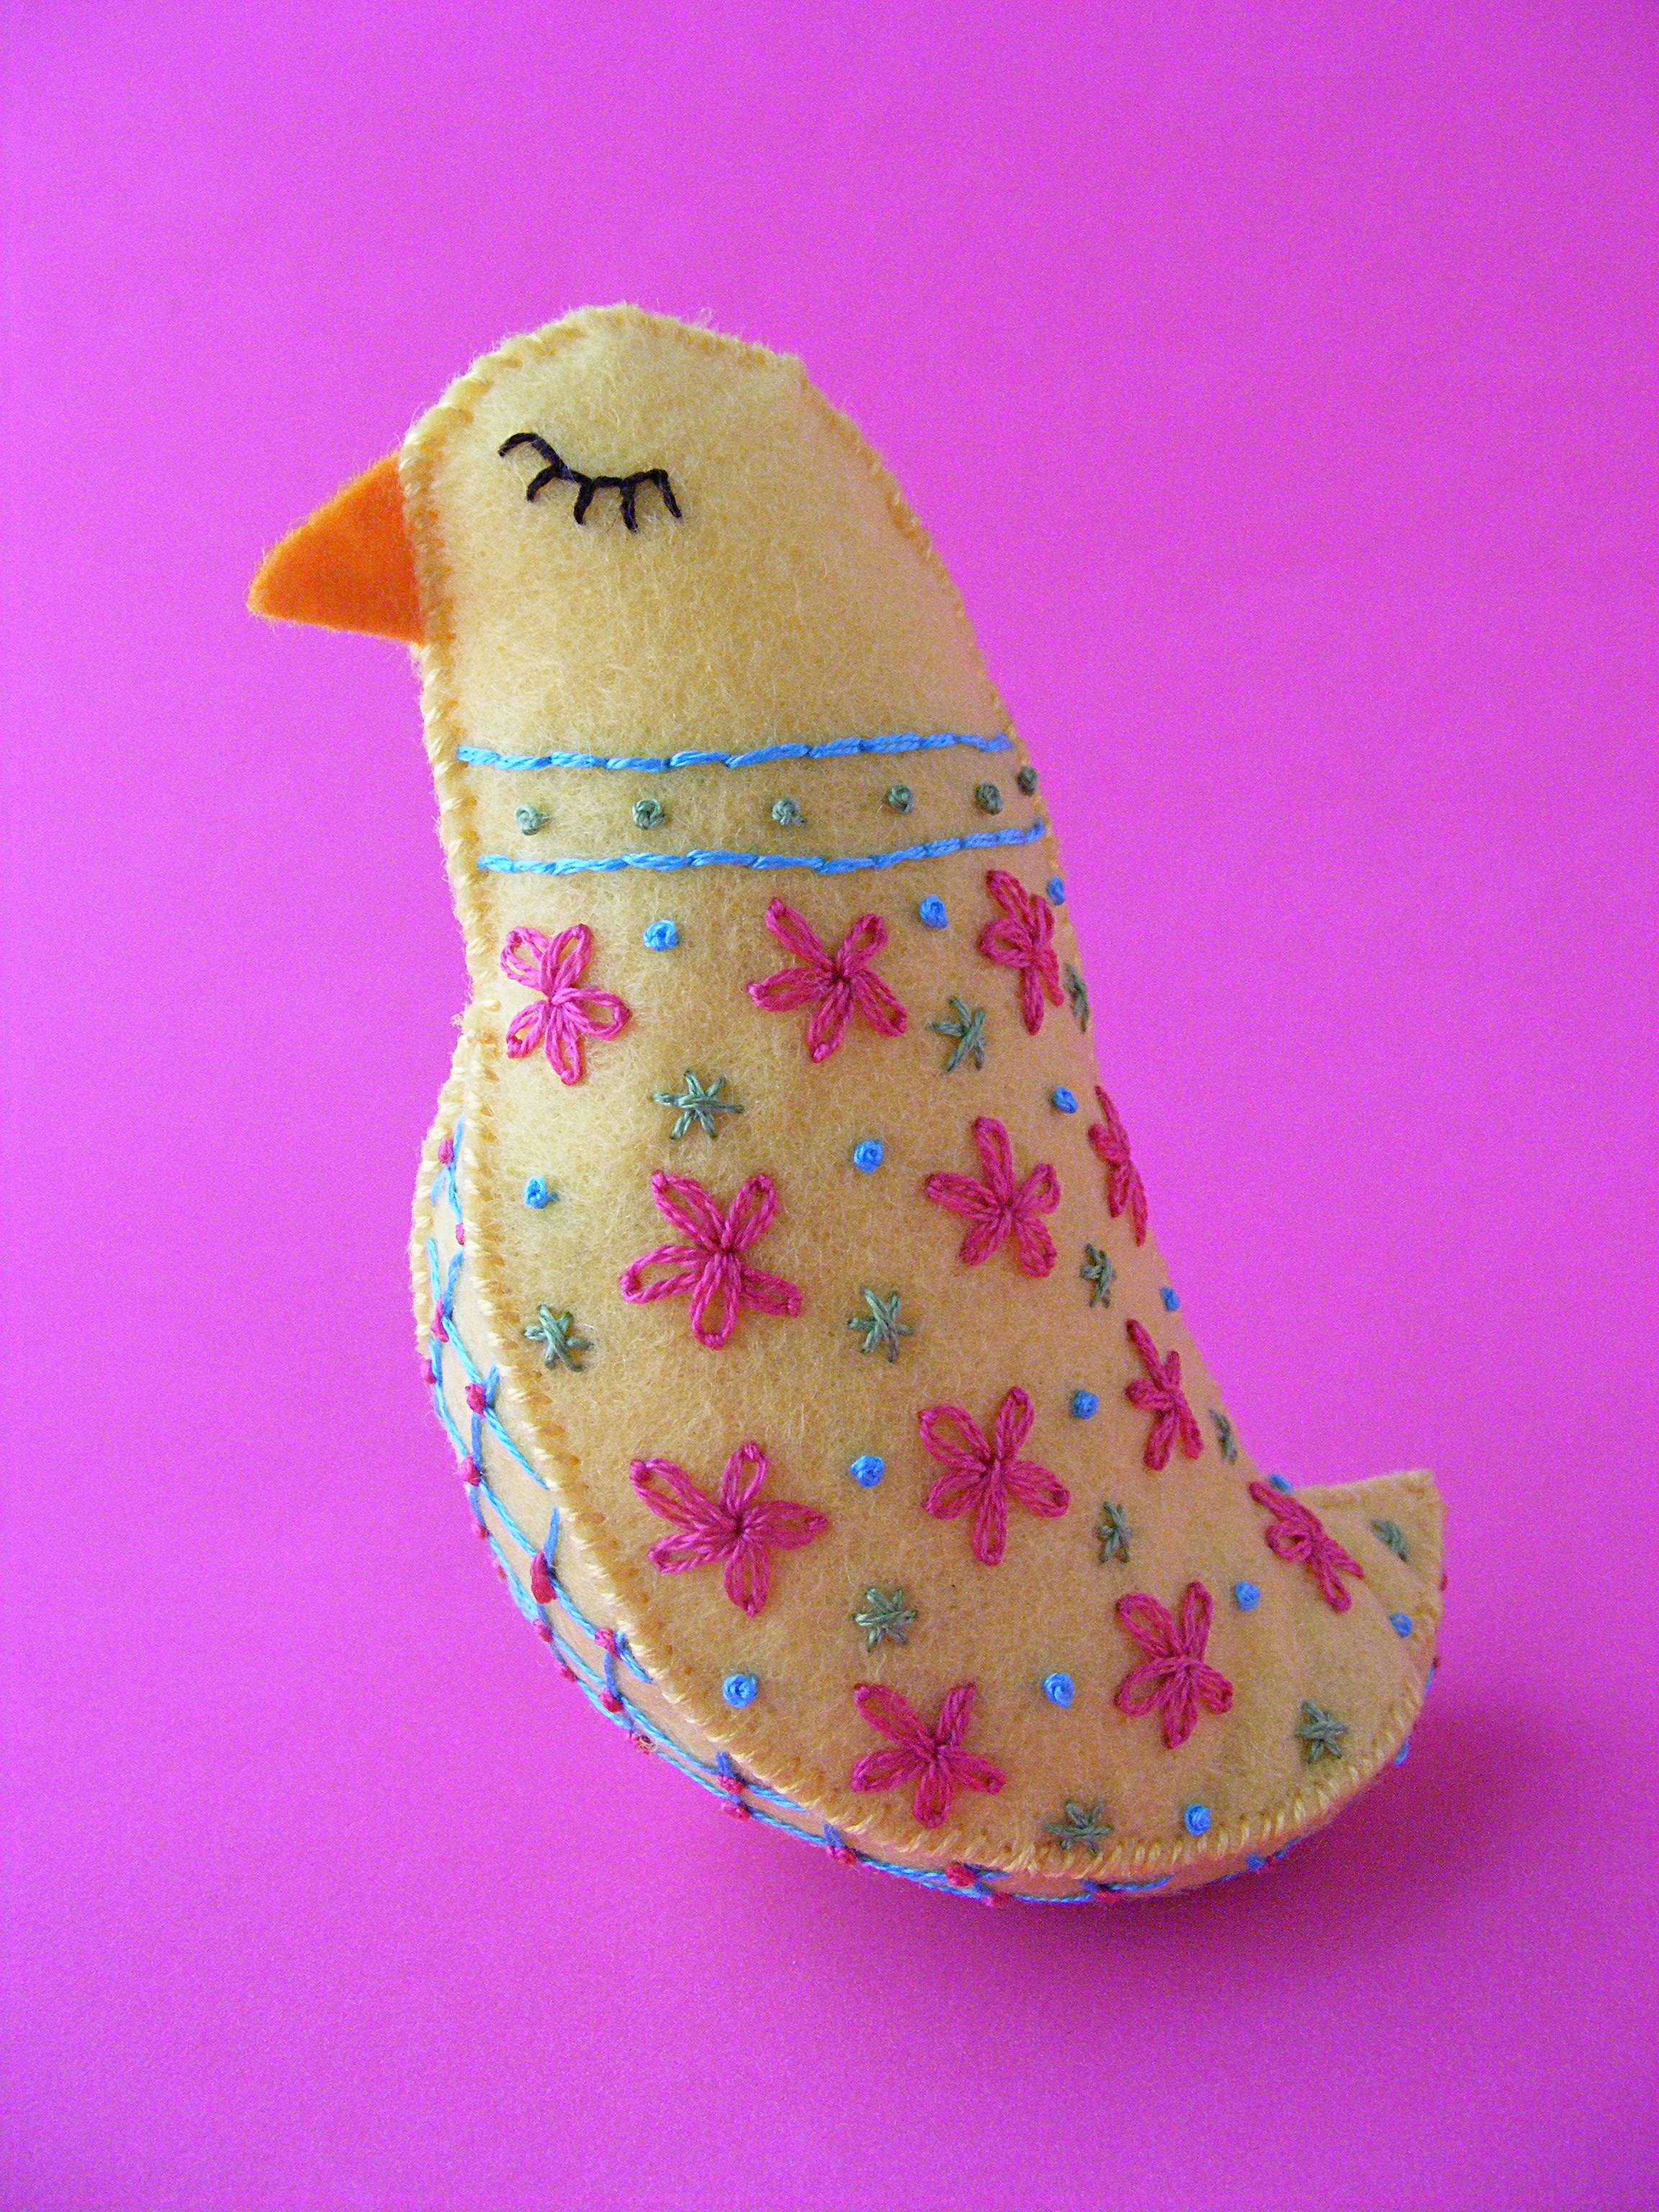
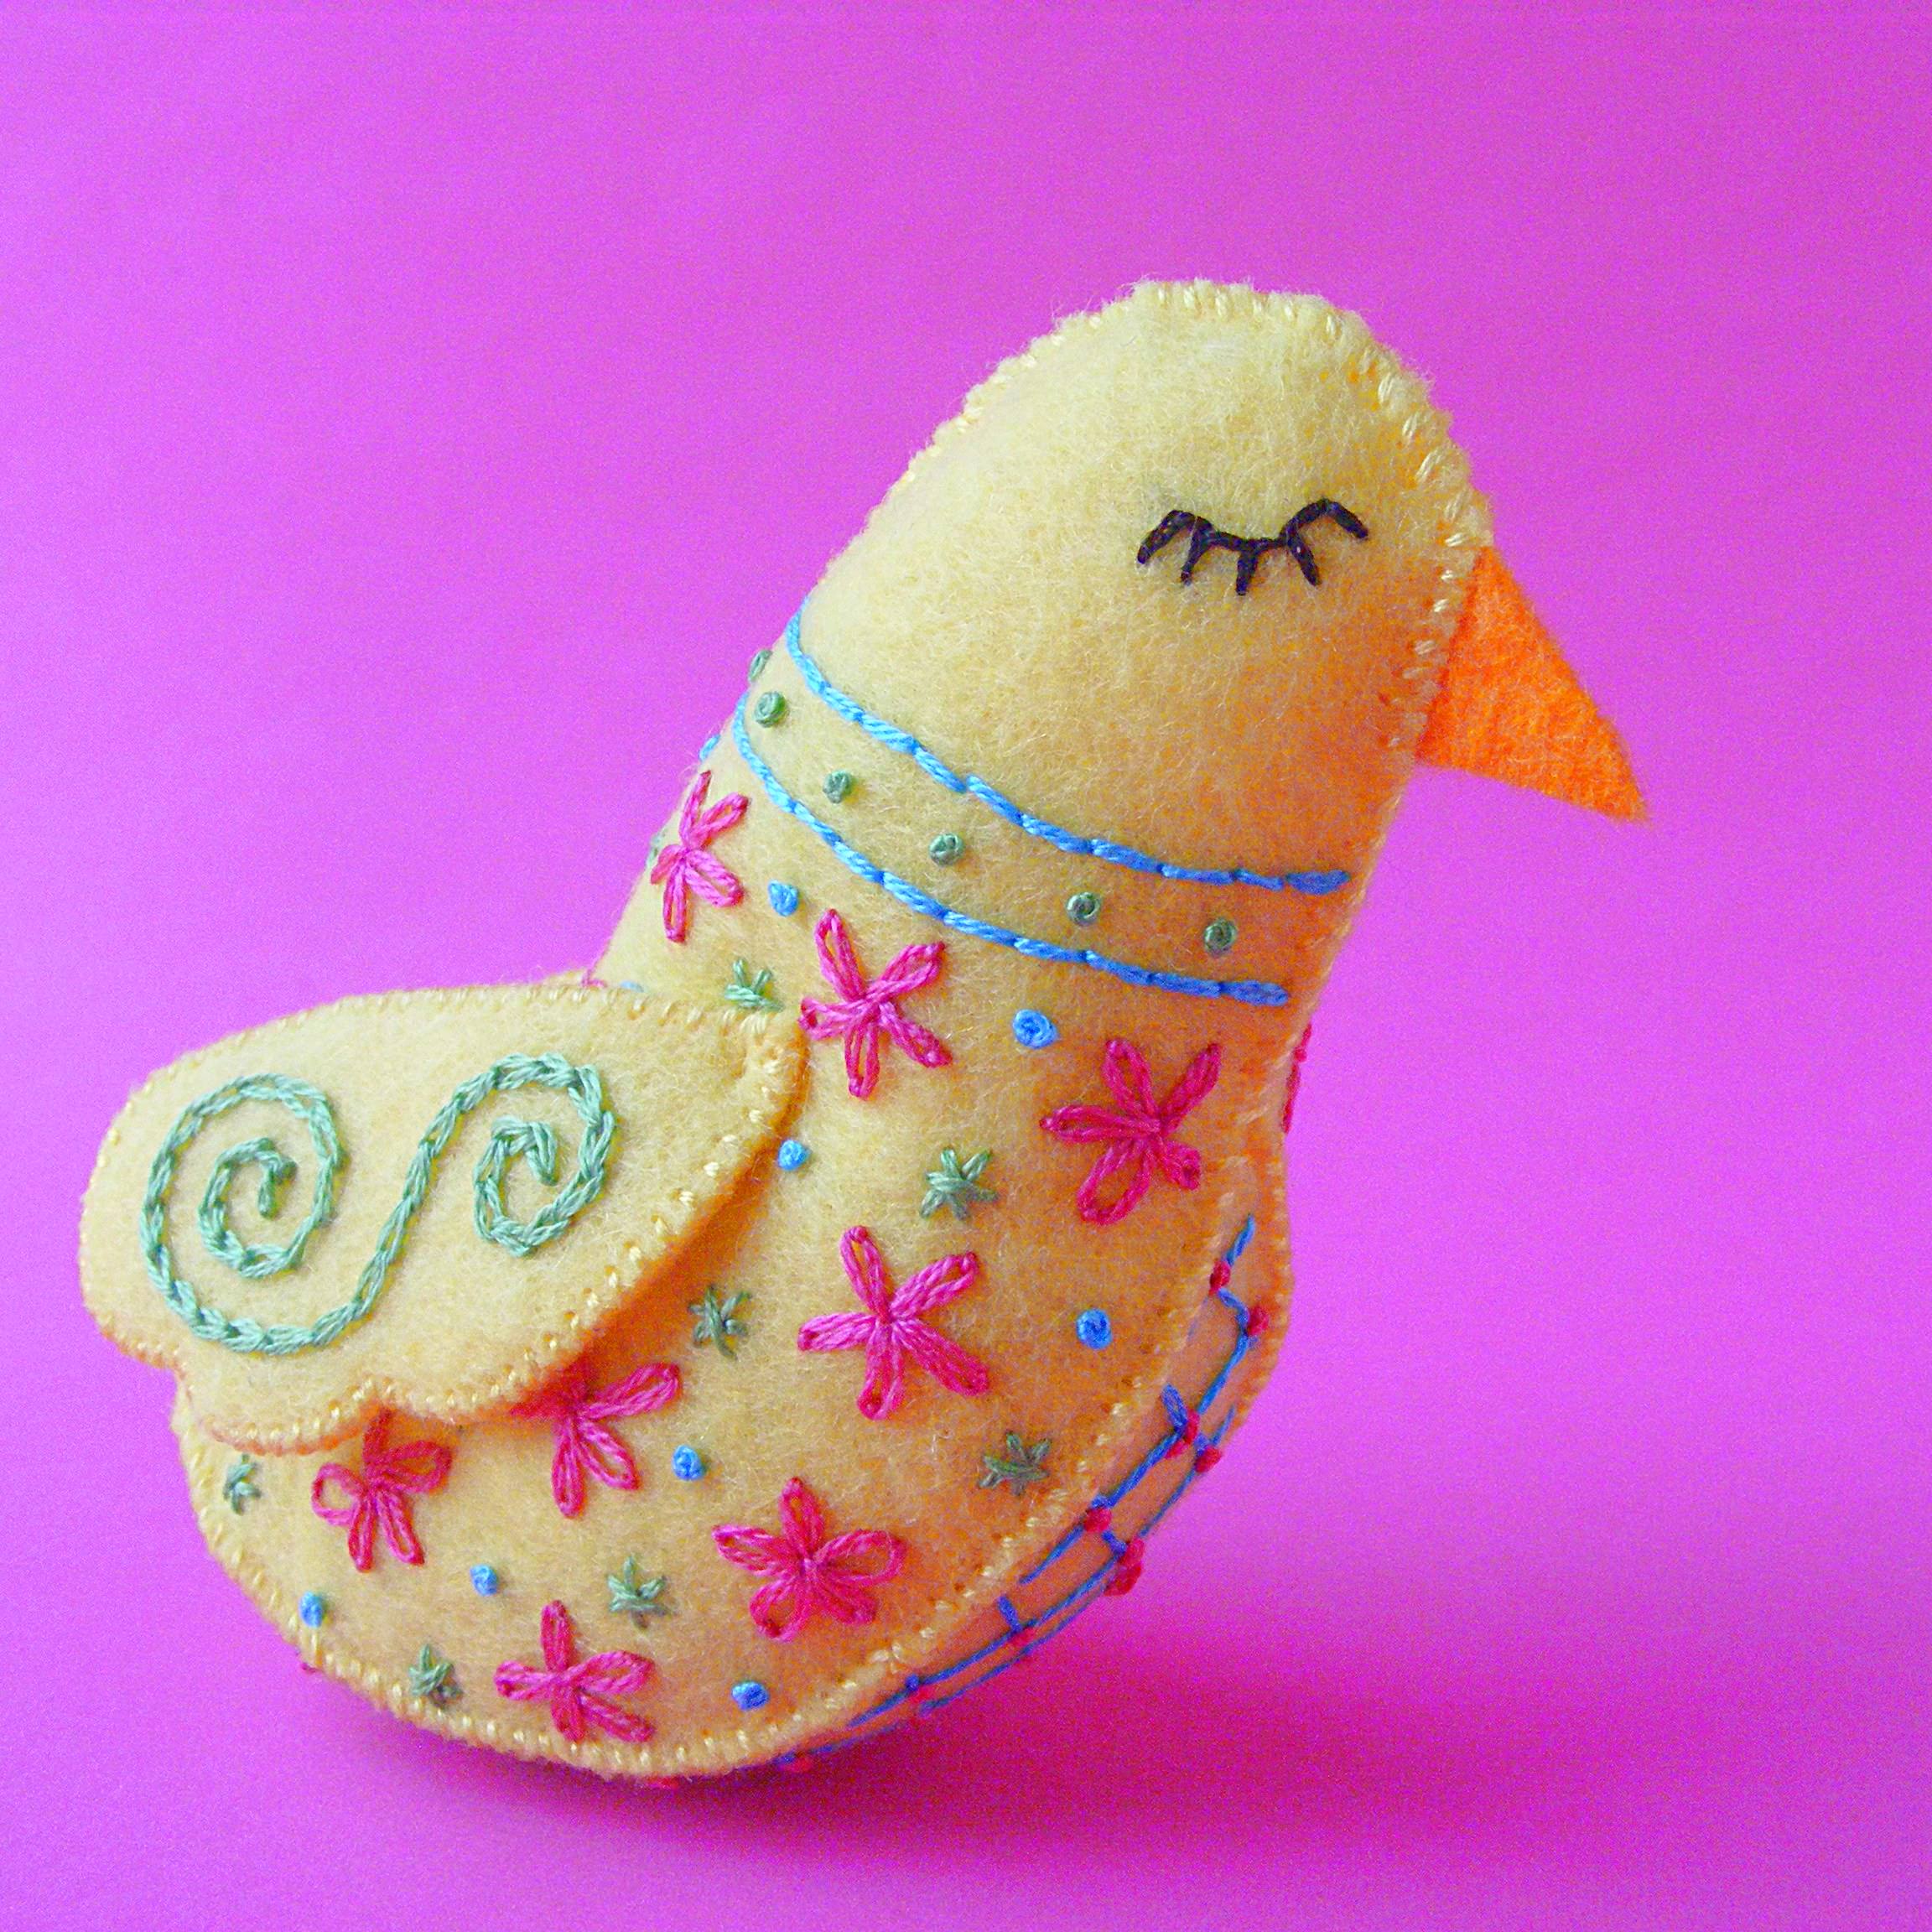
Even felt?

YES! Felt gets its own category here because Sulky Sticky Fabri-Solvy is just so perfect for it. In fact – I wrote a whole post about using it with felt here.

I love it so much with felt that I include pattern pieces already printed on it in all my felt kits. It’s that awesome!

Embroidered bird and butterfly fabric appliqué for quilting and craft projects.

See? Beautiful stitching and nice, accurate cutting.

I’ve never run into shrinkage problems with it – but I know a couple of people have with projects that really needed to be very precisely cut. Larissa Holland came up with a great solution to that problem here.

What about stickiness?

I never ran into problems with stickiness until I left a project sitting in a hot car one summer afternoon. The next time I picked that project up (even though it wasn’t hot anymore) I found that I was getting a sticky residue on my needle. Not fun!

And then I discovered Thread Magic. I was using it to solve another problem and discovered by accident that it totally eliminated any sticky needle problems. Fantastic! Especially since I love to carry my embroidery around with me and there was an excellent chance it would get left in a hot car again. Now I don’t need to worry about that!

Does the ink bleed?

It depends on the ink. I usually photocopy my projects or print them on my laser printer and those have never been an issue for me. But a couple of people reported the ink from their inkjet printers bleeding a bit when they rinsed off the stabilizer. Every brand is different so test the ink from your printer if you want to be sure! If you run into bleeding, try printing it out in draft mode – that uses a lot less ink.

The good people at Sulky let me know that one person had an issue with her laser printer. She said it didn’t actually bleed when she rinsed it, but it left little black specks all over her work. Yikes! The good news is that she sprayed it with Shout, washed it on the gentle cycle of her washing machine, and it came out as good as new. So if you run into laser printer problems, there’s an easy fix. 🙂

This isn’t a bleeding-ink issue – but it’s related. One customer reported that the ink wasn’t coming out of the centers of flowers where the stitching was the most dense. It wasn’t bleeding, but it’s like it was stuck there. She has very hard water and reported that a second long soak in distilled water took it out.

T-shirts

I want to add a special note here about T-shirts. I love embroidering on T-shirts, but it can be kind of fussy. You have to stabilize the fabric so it doesn’t stretch while you’re stitching. With traditional stabilizers you have to remove it after stitching. And stretch knits aren’t a treat to transfer the pattern to. All of these issues magically go away with Sulky Sticky Fabri-Solvy. Since it’s a pattern transfer and stabilizer all in one, you take care of both of those steps. And since it rinses out after stitching, there’s no fussy (and potentially destructive) removal of the stabilizer afterwards. It’s perfect!

Bright smiling girl holding a bear face sewing project outdoors, showcasing handmade craft skills.

That’s embroidered! 🙂

Now you know why I call Sulky Sticky Fabri-Solvy The Magical Embroidery Stuff. I love it!

I’ve heard that people use it for all kinds of other things too – like transferring complex patterns to a pumpkin for carving! If you’ve come up with an unusual use for it – let me know. I’d love to hear!

Happy stitching!

Vibrant handmade crochet toys and patterns from Shiny Happy World.

New Cross Stitch Embroidery Panels – Especially for Beginners

Cat and Dog Stamped Cross Stitch Panels

There’s a new kind of embroidery design here at Shiny Happy World.

Stamped Cross Stitch Panels for beginners – especially young beginners. 🙂

You can find both the cat and dog here.

I tell you all about what makes them special in the description, so here I’m going to show you some quick and easy instructions. There’s a video version of the instructions here.

If you’ve never done any kind of embroidery before, you might want to take a look at some of these videos before you get started.

Step 1

First you’ll need to hoop up your fabric. The fabric should be tight – like a drum – but not stretched out of shape.

Step 2

Choose the thread color that matches the background of the area you’re going to stitch. Thread your needle and knot the end of the thread. There’s a video here showing how to tie a knot in your thread.

Step 3

Start stitching. You work cross stitch one row at a time, filling in the bottom half of all the Xs first. Just stitch right over the Xs printed on the fabric. Make sure they’re all slanting in the same direction.

Colorful cross-stitch embroidery of a cute dog image, using embroidery hoop and thread, on striped fabric background.
I always make my bottom stitches slant forward.

Step 4

Now work your way back across the same row, crossing all your Xs.

Colorful cross-stitch skull embroidery in an embroidery hoop on blue striped fabric.
I always make my top stitches slant back.

Step 5

Work your way down until you fill in that whole section of color.

Step 6

Repeat until you’ve stitched up all the sections of the image.

Step 7

Finish as desired. You can make it into a tiny little pillow (maybe a scented pillow to keep in a drawer with your clothes?), use it as a square in a quilt, or frame it in its embroidery hoop.

Charlie - a dog embroidery kit from Shiny Happy World

Important Tip!

It’s very important to be consistent with the way your stitches slant. My bottom stitches always slant forward and my top stitches always slant back. It doesn’t matter which way you do it, as long as you do it the same way for the entire piece. Otherwise your stitches will look slightly off.

See how easy? This is a great, portable project for summer. It took me about 4 hours to stitch up the sample – with lots of interruptions. Most beginners will take longer than that. 🙂

Happy stitching!

Video: Learn the Wiggle Stitch

How to Wiggle Stitch - video tutorial from FreshStitches and Shiny Happy World

One of my favorite patterns in Modern Baby Crochet is the Colorful Wiggle Pillow… and my publishers must agree, because they decided to put it on the cover!

It’s a fabulous pillow, and a lot of fun to make! I’ve been getting a couple of requests for a video about how to do the wiggle stitch, and so I’ve made one. Now you can make a wiggle pillow, too!

Have fun with this!

Vibrant handmade crochet toys and patterns from Shiny Happy World.

Here are handy links to all the posts teaching more fancy crochet stitches. . .

Return to the main table of contents for Let’s Learn to Crochet Amigurumi.

Move on to the posts about working with crochet patterns.

Happy stitching!

Vibrant handmade crochet toys and patterns from Shiny Happy World.

Free Felt Bird Pattern – Meet Petal

Colorful felt bird with embroidery embellishments, perfect for sewing and craft projects.

Brighten up your world a bit with Petal – a free felt bird pattern.

Isn’t she pretty?

She looks complicated – but she’s really not hard to make. It’s all hand embroidery and hand sewing, so it’s not fast. But this is a project that takes more patience than skill. Expect to spend a couple of evenings on her. Or him. I guess in real life it’s the boy birds who are all fancy – but I thought the finished one looked like a gentle girl named Petal. 🙂

It uses just a few of the most basic embroidery stitches and simple whipstitch to put all the pieces together.

This project uses one half sheet of lovely wool felt (I used banana cream) plus a tiny scrap of contrasting color for the beak (I used mac & cheese) and some colorful embroidery thread. I also use The Magical Embroidery Stuff to mark all that pretty embroidery. It makes things sooooooo easy!

Ready to make her? Here’s how!

Step 1

Download the pattern pieces and print or trace it onto a sheet of Sulky Sticky Fabri-solvy.

You can print all the pieces needed for two birds on a single page, so that’s how it’s laid out. Save the other pieces to make a matching bird for a lucky friend. 🙂

Step 2

Roughly cut out the pattern pieces and stick them to the felt.

Colorful embroidered fabric birds and decorative pieces for crafting or quilting projects.

Embroider right through the stabilizer. I used 2 strands of embroidery thread for all stitching. These are the stitches and thread colors I used – but you can use any colors you like! (The links all go to video tutorials showing how to do the stitches.)

Step 3

Cut out all the pieces.

Embroidery felt bird and owl face embellishments on pink background for craft projects.

Cut them right on the solid lines – no need to add seam allowance.

Step 4

Soak off the stabilizer in cold water. Let it soak for at least 15 minutes (I often leave mine soaking for an hour or more) then rinse it off under cold running water. Use a sprayer to remove any stubborn bits, but do not rub the felt.

Colorful felt angel craft with embroidered details and whimsical wings on a pink background.

Lay the pieces flat on a towel to dry. Do not wring, twist or even smoosh them. Just let them dry flat.

Step 5

Time to start putting it all together! Use 2 strands of matching embroidery thread to whipstitch all the pieces together.

Hand-stitched felt leaf with decorative embroidery, perfect for craft projects or embellishments.

Sew one embroidered wing to one “naked” wing, all the way around the edge. Repeat for the second wing.

Step 6

Sew the belly to one side of the bird.

Colorful embroidered felt basket with pink flowers and blue accents.

Start sewing at the tail of the bird, matching it to the wider end of the belly piece, and sew all the way to the top of the belly piece.

Step 7

Sew the other side of the belly to the other body piece. Start again down at the tail and sew all the way up to the top, but this time keep going past the belly, sewing the two sides of the face together.

Colorful embroidered felt bird craft with floral details and decorative threads.

Slip the beak between the layers of the face and keep stitching. Instead of whipstitching up and over the edges of the felt, stitch through the beak.

Step 8

Continue sewing up over the top of the head and down the back.

Colorful embroidered felt bird decoration with flowers and a beak on pink background.

Stop when there are a few inches left open, but leave your thread tail hanging.

Step 9

Start adding small bits of stuffing to the head and working your way down the body.

Colorful embroidered felt ballet shoe for children’s craft projects, featuring pink and blue thread on yellow felt background.

When you get to the tail, slip in a couple of pennies or other weights to keep her from tipping forward. I used two American pennies in mine. If you want her standing up even straighter (like Flora) use three pennies.

Step 10

Bright yellow felt bird with embroidered flowers and colorful embellishments on a pink background. Add a bit more stuffing to the tail and finish sewing her up.

Step 11

Pin the wings in place, one on each side of the body.

Use the flowers as a guide to line them up exactly. Thread a long needle with a long piece of thread. Start sewing underneath one wing, near the top, leaving about 6 inches of thread hanging. Sew through the body and out the other side, through the opposing wing. Take a small stitch back into the wing, through the body and out through the first wing. Stitch back and forth like this a few times to secure the wings. Don’t pull the thread too tight or you’ll distort the shape of her body. Knot your thread underneath one wing and bury the tails.

There’s a video showing how to do this here ­- just leave off the buttons.

Soft felt bird toy with colorful embroidery and closed eyelids, perfect for children’s play and learning.

Finished!

No make another in a different color. 🙂

Happy stitching!

If you like this free pattern, sign up for my weekly newsletter so you never miss a new one!

Best,
Wendi
Bright red mushroom with white spots on a dark blue background.

PS – Do you like birds? Me too! Here are just a few of my other bird patterns!

Colorful bird embroidery pattern for quilting and sewing projects.

You can find all of them (and lots more, too!) here.