What kind of fabric can I use for embroidery?

What kind of fabric can I use for embroidery?

Every week I get questions from all of you. Good questions! And I try to answer them as quickly as I can. But I figure for every one of you that actually sends a question – a bunch of other readers have been wondering the exact same thing. So I’ll still answer your questions directly – but I’ll also pick some of them to answer here on the blog too.

I’m starting out with a question I hear a lot. . .

What kind of fabric can/should I use for embroidery?

I never really addressed this in the post about embroidery tools and supplies – because the answer is anything. You can embroider on anything.

If you’re just starting out, I recommend a smooth, woven (non-stretchy) fabric. It’s easiest to transfer your pattern to light fabric, but there are tricks to working with darker fabrics. Watch this video.

I said non-stretchy, but you can embroider stretchy fabrics too. It just takes an extra step in preparation – you have to stabilize the fabric. I show you how in this video.

I love stitching on velvet and other napped fabrics (those are fabrics with a pile like a rug – velvet, corduroy, terry cloth, etc.) Stitching on them is easy, though you may need to use an extra strand or two in your thread so your stitching doesn’t disappear into the pile of the fabric. The real trick is transferring your image. I have used Sulky Solvy Water Soluble Stabilizer in the past. It’s a water-soluble translucent film. You draw your image on that, then hoop it together with the fabric and stitch through both layers. Swish your finished embroidery in some water and the film just melts away. Easy peasy! I show you this stuff in action in this video.

Update: Since writing this post I discovered what I like to call The Magical Embroidery Stuff. Its real name is Sulky Sticky Fabri-solvy. It’s a pattern transfer tool AND stabilizer that works on dark fabrics, stretchy fabric, and napped fabrics. I use it now for EVERYTHING! Watch this video to see it in action.

If you want to stitch on some very fine, thin fabric, I recommend stitching through a double layer. You can also fuse some lightweight interfacing to the back. It helps keep your threads in the back from showing through to the front.

Want to stitch something extra thick like paper or leather? I have some earrings that I embroidered on metal! Poke your stitching holes first and then stitch. I show you how to stitch paper in this video. The process is the same for anything thick.

You really can embroider anything!

Got any other questions? Send them to me here.

Happy Stitching!

A Playdate with Made by Joel – and a Giveaway!

Free Christmas gift bag pattern with free embroidery pattern.

What do you get when you combine Joel’s Free Holiday Gift Tag printable with my Free Goody Bag pattern?

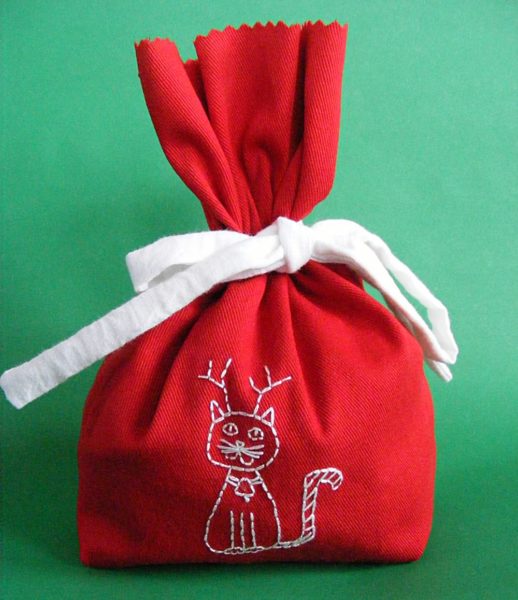
Red Christmas gift bag embroidered with a white cat wearing reindeer antlers

This! A cute, reusable Christmas gift bag!

The Joel, of course, is Joel Henriques, the amazing dad who blogs at Made by Joel and author of Made to Play – a book showing you how to make tons of great, creative handmade toys.

Want to make a Christmas gift bag yourself? It’s easy!

Get Joel’s free printable gift tags here.

Get the free Goody Bag pattern here.

Free Christmas gift bag pattern with free embroidery pattern.

Transfer the images from the gift tags to the fabric you’re going to use for the bags and stitch them up. I used a simple backstitch – easy peasy. There’s a video here showing how to backstitch.

Free Christmas gift bag pattern with free embroidery pattern.

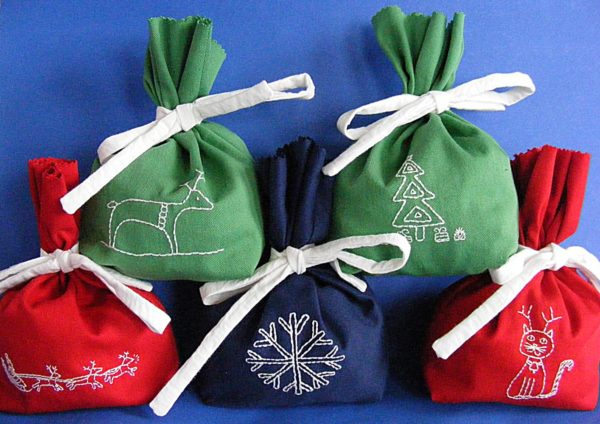
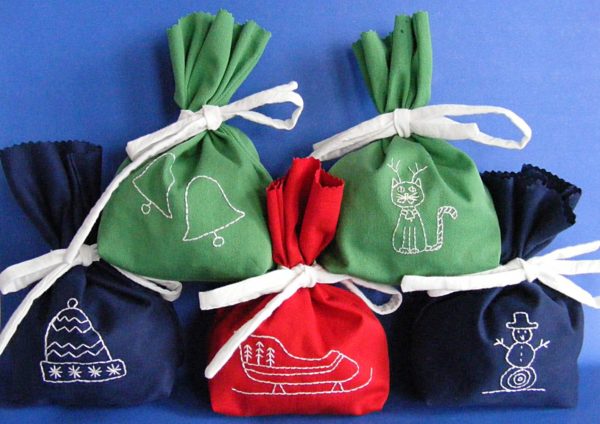
Now you have bunches of fun reusable Christmas bags!

Have a great day everyone!

Organizing Embroidery Thread

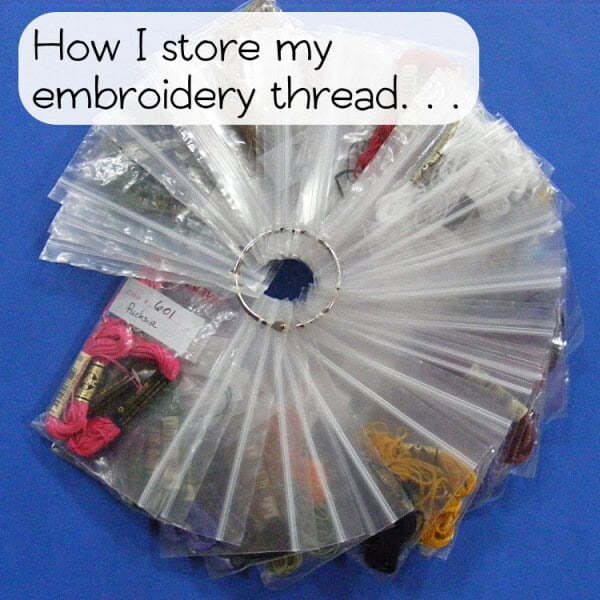
How I organize my embroidery thread

Way back in March I wrote a newsletter post and then a blog post about how I organize my embroidery thread. I had tried a few different methods – but none really gave me exactly what I was looking for so I asked you all for your advice. Wendi from Sew Cat Sew had a genius approach I had never tried before – and I pounced, with a tiny variation of my own because I couldn’t find the exact product she mentioned at any of the sewing or craft stores in my area.

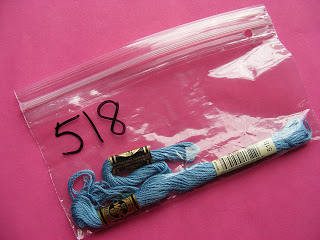
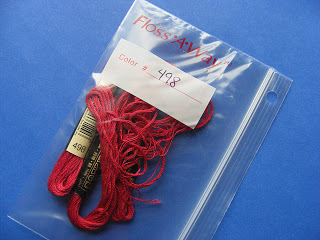
Each color thread goes in its own ziploc bag.

I couldn’t find the special bags Wendi used, so I just used snack-sized ziplocs from the grocery store. I punch a hole in the bag with a regular hole punch, then I write the DMC # on the bag with a fat Sharpie.

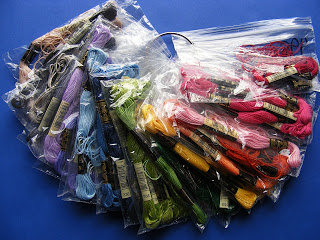
I put all the same colors together onto a binder ring (available at any office supply store). I have separate rings for red, orange, yellow, green, blue, purple, brown, white and off-white, black and gray. I dump all the bundles into a pretty basket. Easy peasy.

When I choose all the threads for a project, I pull them off their rings and create one ring with everything I need for that project. This makes it super-portable, which I love.

I realized I was constantly pulling off the same colors over and over again, so I took a good hard look at my enormous thread collection and created a ring with all my favorite lights, mediums, darks, and neutrals. Now I start here and only pull from the other rings when I need something outside my normal range. 

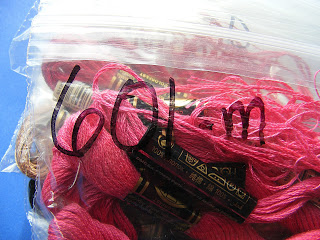
There was still one slightly annoying problem. Even though I wrote big, and with a nice fat black marker, the numbers on the baggies were sometimes difficult to read at a glance – especially if there were threads visible behind the number, which is usually the case when they’re all ringed together.

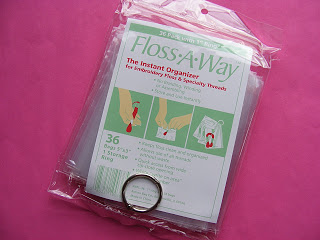
So I went back to Wendi’s note and found the baggies she used. Floss-A-Way. They have a handy little white area to write on. The bags are smaller (and therefore easier to schlepp around). And the holes are already punched. Handy!

Happy stitching!
Best,
Wendi
Applique Wendi (with fabulous hat)


Use a Teeny-Tiny Embroidery Pattern to Stitch a Great Big T-shirt

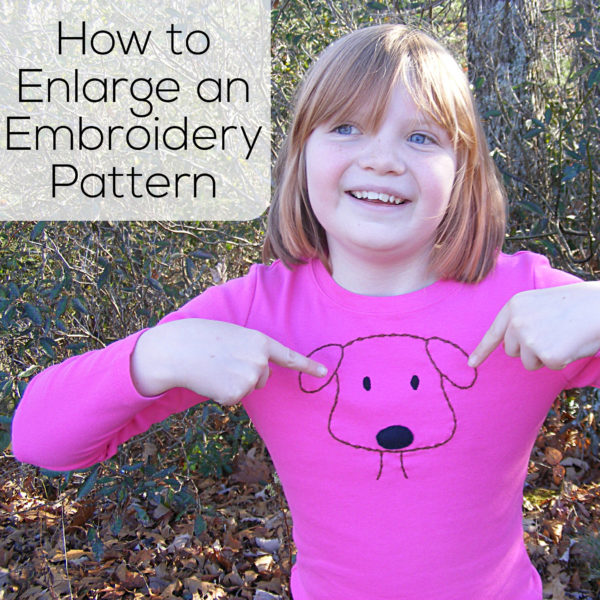
You know how I’m always saying you can play with the size of your embroidery patterns? Well – here’s a prime example. As soon as she saw the finished dogs my daughter squealed, “Ooooooh! That one is soooooo cute! Will you please stitch it on a T-shirt for me?”

Before I could even answer her she had pulled a blank T-shirt out of her closet and chosen the thread color she wanted for the dog.

I enlarged the pattern on the computer (you could use a copy machine if that’s more convenient). 6″ tall seems to be a great size for all T-shirt embroidery.

This post has some instructions for enlarging an embroidery pattern.

It’s important to NOT skip the stabilizer step with any embroidery on stretchy fabric — there’s a how and why video here.

Sulky Sticky Fabri-Solvy is what I use for all T-shirt embroidery. Pattern transfer and stabilize in one easy step – you’ve got to love that! See how it works in this video.

Enlarging the pattern made the lines really thick (remember – I was sizing up from a pattern that was less than 2 inches tall). I used a full 6 strands of thread to get a nice heavy backstitched line. I satin stitched the eyes and attached a little fleece nose with simple running stitches. An hour and a half later I had one finished T-shirt and one very happy daughter. 🙂

Here are all my posts about working with patterns.

Pattern Sources

How to Resize a Pattern

Return to the Learn to Embroider main Table of Contents.

Move on to the posts about knots. Yes – a whole section about knots. 🙂

How to Make a Fabric Bookmark

There are a lot of tutorials out there for fabric bookmarks, but I’m very. . . picky. . . about my bookmarks. I’m a book collector, you see. My husband is a writer. We met when we worked together at an independent bookstore. I spent twenty years selling children’s books. Almost all of the art in our house is by children’s book illustrators. We are book people.

I like a bookmark that’s not so tall that it hangs way out of the top of a standard paperback. And I definitely want a bookmark to be THIN. Nothing that will damage the spine please! (Lots of fabric bookmarks are way too thick.)

So here’s a quick and easy tutorial showing you how to make my kind of bookmark.

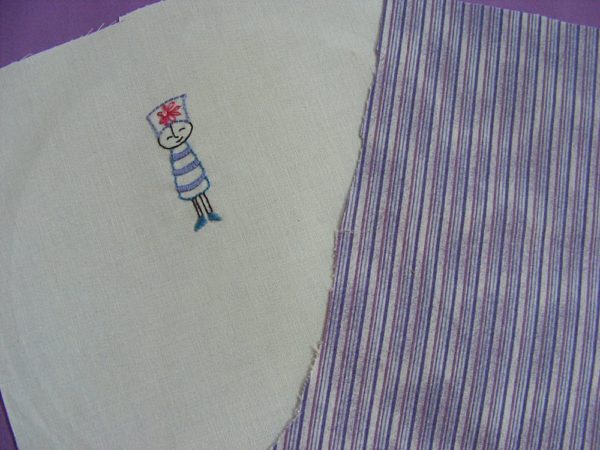
Materials to make a fabric bookmark with an embroidered motif.

You’ll need two pieces of fabric – one for the front and one for the back of your bookmark. I, of course, am partial to a bit of embroidery on the front, but you could just use any amazing fabric that you love.

If you’re going to have embroidery, do it now before you assemble the bookmark.

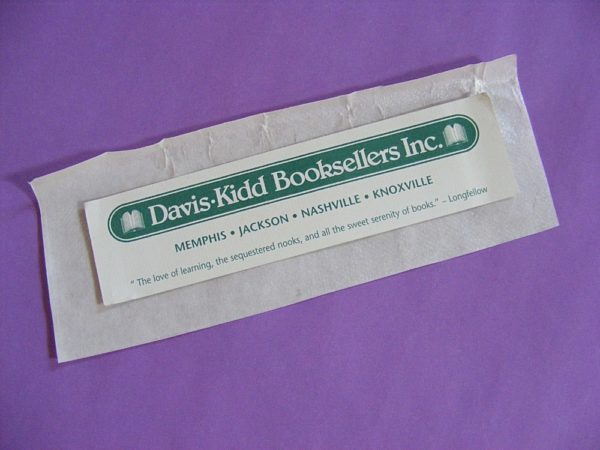
bookmark from Davis- Kidd Booksellers

Grab a bookmark you like the dimension of (this one is 1 5/8 x 7) and some super-strong, paper-backed fusible adhesive. I use Heat and Bond Ultra Hold. Do NOT try to sew through that stuff! It will gum up your needle like crazy. I keep mine separate from all my other fusibles – just in case.

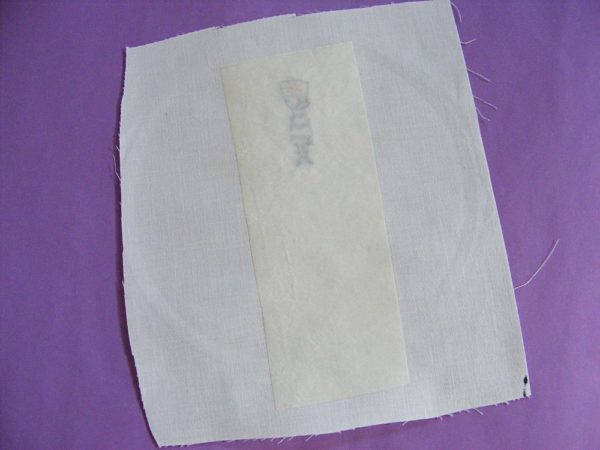
Cut out a piece of adhesive about 1/2 inch bigger than your bookmark all the way around. It doesn’t have to be neat.

The bookmark in the photo is just a guide for the dimensions. You’re not going to glue it inside or anything.

Making a fabric bookmark using fusible adhesive

Lay it adhesive-side down over the back of your embroidered piece. (Never iron the front of your embroidery! There’s more info here about how to iron your embroidery without smooshing the stitches.) Follow the manufacturer’s instructions to fuse it in place.

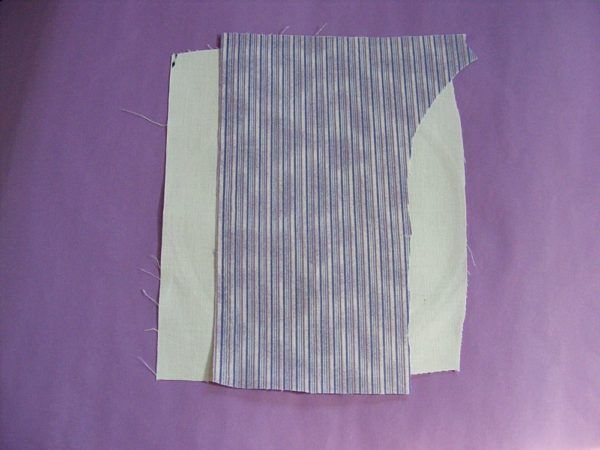
purple striped fabric

Let it cool. Peel off the paper and lay your bookmark backing right side up over it. Fuse in place. Now the bookmark front and back will be glued together.

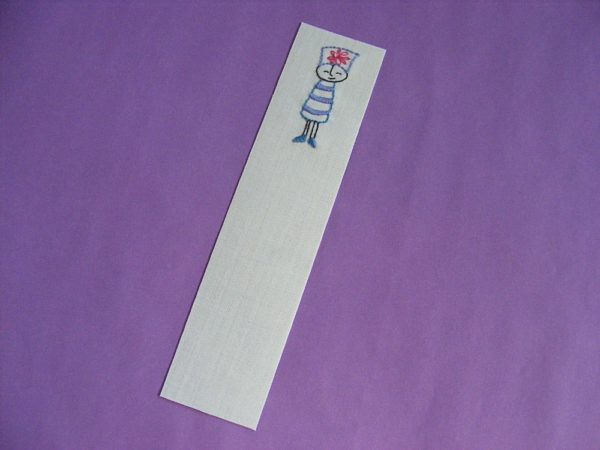
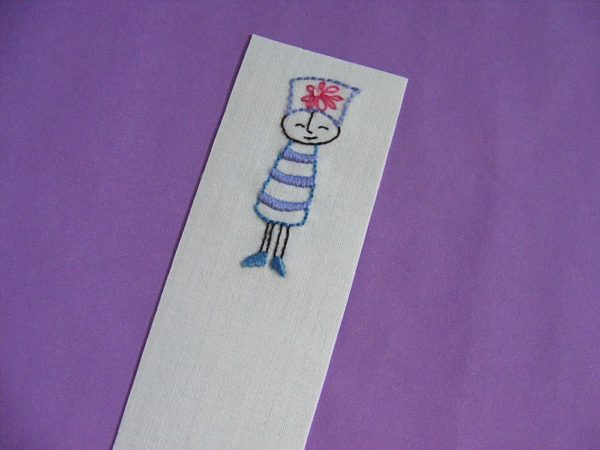
finished fabric bookmark made with an easy tutorial from Shiny Happy World

Flip it over so you can see the front. Trim to the size you want it. This is super easy with a rotary cutter and a ruler, but you can do it with scissors too.

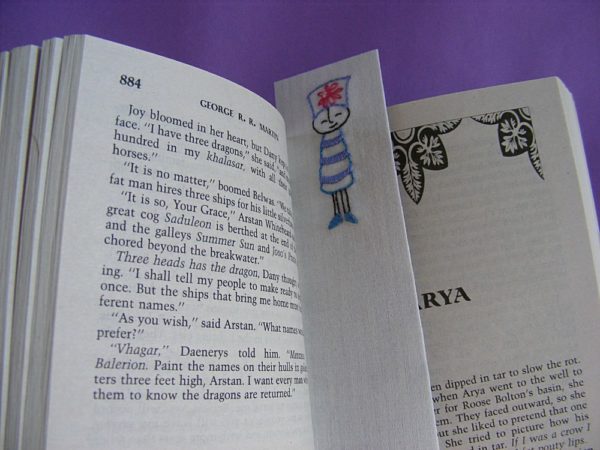
Embroidered lady wearing a hat - motif from the book How to Embroider Almost Everything

You’re done! The adhesive will add quite a bit of stiffness to the fabric bookmark. You could make it even stiffer by using two layers of adhesive with a sturdy interfacing between them, but I’m ok with some bend to my bookmark. And the adhesive does a really great job of keeping the edges from fraying – so you can skip the time (and bulk) of adding a hem.

I think including a handmade bookmark with a book makes it a really nice gift. And it takes no time at all! The lady took me about an hour to stitch (it would have been faster if I hadn’t added all the satin stitching) and making the bookmark takes all of five minutes.

Looking for the pattern for that lady? It’s in my book How to Embroider Almost Everything.

Happy stitching!

How to Mend a Tear Around a Pocket

How to Mend a Tear around a Pocket - a tutorial from Shiny Happy World

 I love to mend my clothing with visible stitching.

The Problem

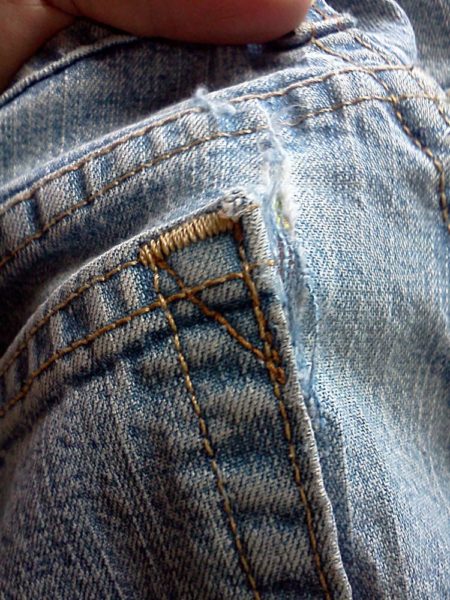
These jeans have torn right at the stitching where the pocket is attached.

Dang! That’s a tricky place to patch. But I WILL patch these jeans. Partly because I’m stingy frugal. Mostly because I loathe buying new jeans. The only thing worse is shopping for a bathing suit. Ugh.

The Solution

First, get out your seam ripper and pick off as much of the pocket as you need to to get at the tear. I went a good two inches past the bottom of the tear so I’d have plenty of room to work.

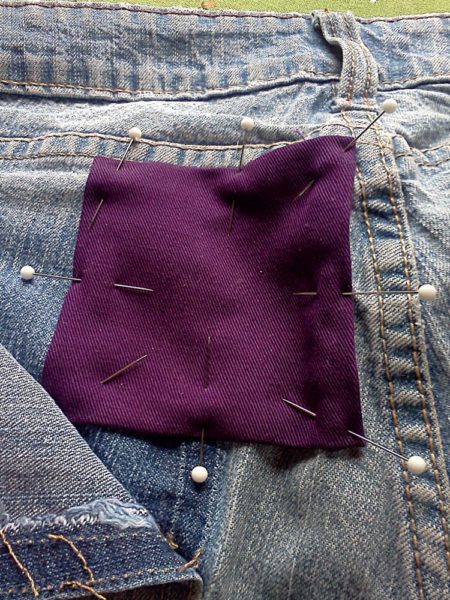
Choose a piece of sturdy fabric from your scraps. This is heavyweight cotton twill. Cut it at least an inch bigger than the tear all the way around. I often cut it as much as two inches bigger. Turn the raw edges under (about 1/4 inch or a bit more) and press. Pin the patch over your tear. In this case I butted it right up to the big fat seams. I don’t want to stitch over them if I can avoid it.

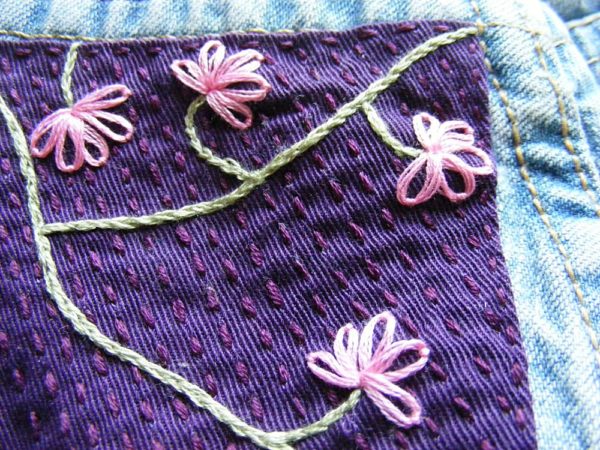
Now stitch the patch in place. I see a patch as an opportunity to fancify – so I embroidered it to the jeans. I started with split stitch for the stems, added some lazy daisy flowers, and then lots and lots of running stitches for strength. (Those links go to videos showing you how to do each stitch.)

See how the running stitches are parallel to the diagonal weave of the twill? Using the weave as a guide makes it easy to stitch nice and straight.

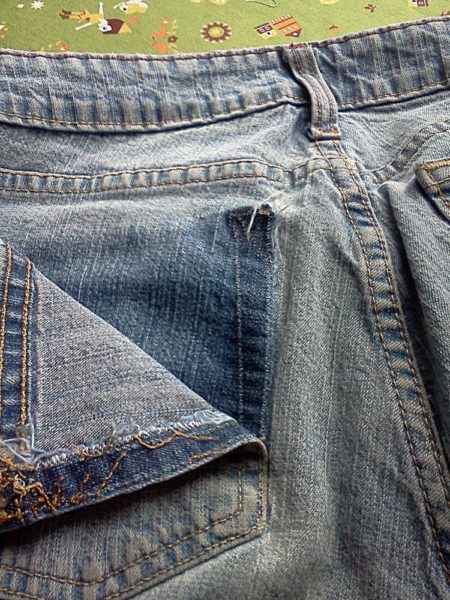
Those running stitches are the key to a successful patch. They distribute the stress on the fabric to the whole patch instead of just around the edges. I took this photo of the back of the patched area so you could see how the stitches would support the damaged fabric. The rip is that frayed line right up the center of the photo.

See this post for a basic tutorial on mending with patches – I go into more detail about the purpose of the all-over stitching – and show lots of samples of different patterns you can try.

Flip the pocket back into place. Put a heavy-duty needle and some gold thread in your machine and stitch the pocket down right over the original stitch lines.

Voila!

Here are all the posts about finishing embroidery projects.

Basic Finishing

Other Ways to Use Embroidery

Return to the Learn to Embroider main Table of Contents.

Happy stitching!

How to Frame Embroidery in a Hoop (Without Glue!) – video

How to Frame Embroidery in a Hoop - without using glue - a video tutorial from Shiny Happy World

I really like to frame my embroidered pieces in a hoop – you’ve seen it on several pattern covers. A couple of people have asked how I do this, so I put together a video showing you.

My husband is out of town – which means my daughter was holding the video camera. Hope you don’t mind a bit of shakiness and a couple of close-ups of the backs of my hands! 🙂

I went ahead and used it because she was proud to help me and, in spite of the shakes, you could still easily follow along. I even have a spectacular failure that made me have to start all over – and I know how much you all like it when I leave those in!

You can find the Firefly Tree pattern here.

And if you want to hide the messy back of your stitching when you hoop-frame like this – I show you a nifty trick here.

Here are all the posts about finishing embroidery projects.

Basic Finishing

Other Ways to Use Embroidery

Return to the Learn to Embroider main Table of Contents.

Happy stitching!

How to Embroider with Glow in the Dark Thread – video

How to Embroider with Glow in the Dark Thread - a video tutorial from Shiny Happy World

There are some tricks to working with Glow In The Dark embroidery thread. I show you how to make it “shine” in this video tutorial!

The embroidery pattern in the video is my Firefly Tree Embroidery pattern.

The thread I’m using in the video was from the awesome Jenny Hart at Sublime Stitching, but she doesn’t make it anymore. I’ve seen others from Sulky and DMC, but I haven’t tried them yet. They do seem less “crunchy” than what I used. 🙂

Jo’s a big fan of this stuff (I think all kids love glow in the dark anything) and she’s asked me to use it on one of her nightgowns.  What will you use it for?

Here are links to all my posts about embroidery tools and supplies.

For Beginners

Specialty Fabrics

Threads

Stabilizers and Pattern Transfer Tools

Return to the Learn to Embroider main Table of Contents.

Move on to the posts about working with patterns.

How to Fasten Off Thread on the Back of Your Embroidery – video

How to tie off the tail of your thread on the back of your embroidery - video tutorial

So – one of the very first videos I made showed how to tie a knot in your thread, for sewing or embroidery. A reader recently asked me how I knot off the thread on the back of my embroidery. Good question! Here’s the answer.

That’s the back side of my Firefly Tree embroidery pattern you see me working on. 🙂

Here are all my posts about knots.

Before you knot that thread you need to know how much to use, so here’s one more post that doesn’t really have a better place to live. 🙂 How Many Strands of Thread Should I Use?

Return to the Learn to Embroider main Table of Contents.

Move on to the lessons for the four most basic embroidery stitches.

How to Embroider on Paper – video

How to Embroider on Paper - a video tutorial from Shiny Happy World


I love making embroidered cards on paper!

In this post I showed you a few cards I made for my daughter using my embroidery patterns to make collage images. In the card above I glued paper on for the cloud, but I stitched the raindrops with embroidery thread on the paper card. In this video I show you how to do that stitching.

The trick is in pre-punching the holes. In the video I’m punching those holes with an awl I picked up at a rummage sale ages ago. If you just want to play around with the technique you can use a push pin. It works, but it’s not ergonomically friendly. If you’re going to do a lot of this, invest a couple of bucks in the tool I mention in the video – it’s called a potter’s needle and it’s a really inexpensive tool you can find here. It has a thin (but strong) needle and a nice handle that your hand and wrist will thank you for.

On this card I used a running stitch, which I love on paper. Backstitch and lazy daisy also work well, but I don’t recommend split stitch or French knots. If you want to go beyond that just play around and see what works for you! I’d love to see what you make!

Here are links to all my posts about embroidery tools and supplies.

For Beginners

Specialty Fabrics

Threads

Stabilizers and Pattern Transfer Tools

Return to the Learn to Embroider main Table of Contents.

Move on to the posts about working with patterns.