I usually use wool blend felt for the hair on my Dress Up Bunch dolls. It’s durable, easy to work with, and relatively inexpensive and it has a nice, classic look – even when I use non-traditional hair colors.
But you don’t have to use felt.
If you scroll through some of the photos in the Shiny Happy People group on Facebook you’ll find adorable dolls made with printed cotton fabric hair and cuddly fleece hair – but you can also use fun faux fur!
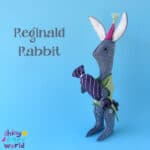
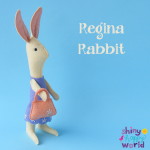
If you use a regular “hair-colored” fur you can make a doll with pretty realistic hair. If you use a more wild and funky fur (like the one I used) you can make a fun pixie. 🙂
Here are some tips to help you out. . .
Cut out the fur just like you would cut out the felt. Make sure the nap of the fur is running in the correct direction. To minimize flying fur bits, cut just through the fabric backing, as shown in this video – Intraux to Working with Faux Fur.
I stuck the fur piece for the bangs down to the top of the head using a glue stick, then appliqued the bangs edge with a wide and fairly open zigzag stitch.
After you get the bangs sewn in place, sew up the doll just like normal. You just need to make sure to smooth the fur into the seams. Here’s what the back of the head looks like – the fur is smoothed down between the back of the head piece and the back of the body piece.
Here’s how it looks when you clip the doll front to the doll back.
The fur on both pieces is smoothed between the layers.
Fur can be fat and difficult to pin. Sewing clips work really well with it.
And here’s my finished wild-haired pixie. 🙂
A couple more things. . .
I used Poppy’s bangs with this doll and they come down pretty close to her eyes. If you’re using a very long fur you might want to choose a doll with a higher hairline.
I skip the pigtails or the buns when I work with fur. They just don’t work very well with that fabric.
New easy (and free!) doll clothes patterns for the Dress Up Bunch!
I redesigned the Play Clothes pattern for the Dress Up Bunch to get rid of the set-in sleeves and fussy collar facing on the shirt. Yay! The new shirt is so much easier to make!
These are the basic doll clothes patterns that are included with all of the human dolls so I was looking at replacing it in Every Single Doll Pattern – which would take forever. Instead I decided to just make it free for everyone!
Use 1/4″ for all seam allowances unless otherwise noted.
Doll Shirt Pattern
Step 1
Join the 2 shirt pattern pieces into one and cut it out. Place the shirt and shirt lining fabric right sides together and cut the single shirt pattern piece out of them at the same time. That way the pieces lines up perfectly. 🙂 .
It’s a weird-looking pattern. Here are some quick labels to help you make sense of it.
Please note! This pattern only works with non-directional fabric. Since it’s all one piece, whatever is right side up on the front will be upside down on the back – so choose something that looks good both ways. Those fizzy, swirly polkadots are from the perfectly-named Pop collection from Timeless Treasures, and the shirt lining and shorts are in my favorite Sketch.
Step 2
Sew the main shirt and lining (right sides together) up one front side, around the neck, and down the other side. Clip the curves and corners.
Carefully smooth out the curve around the neck, poke out the corners, and press. From this point on you’ll treat the two layers of fabric as one.
Step 4
Hem the sleeves. Turn up the raw edge 1/4” and press. Turn it up another 1/4” and press. Stitch the hem in place.
You can hem to the outside, so the contrasting lining shows (like I did) or hem to the inside for a more traditional finish.
Here’s a closer look at one of my sleeve hems.
Here’s a little trick so you don’t have to measure that skinny 1/4 inch. Sew the two layers together 1/4” from the raw edge. Use that stitching line as a guide for turning up the first 1/4.” No measuring! Then turn the second 1/4” and stitch.
Step 5
With the shirt inside out, sew the underarm/side seam.
Start sewing at the armhole so that edge is perfectly lined up and finish at the shirt bottom. Any unevenness there will be hidden once it’s hemmed. Clip the seam allowance in the curve.
Step 6
Turn the shirt right side out and press.
Almost finished!
Step 7
Hem the shirt bottom the same way you did the sleeves in Step 4.
Sew the center back seam using 1/4″ seam allowance.
If you want critters with tails to be able to wear the shorts, leave the tail opening (as marked on the pattern piece) unstitched. Make sure to backstitch at the top and bottom of the opening.
Step 3
Press the center back seam open.
If you are leaving a tail opening, stitch a box around the opening to stabilize it.
Step 4
Start to make the casing for the elastic. Turn the raw edge at the top of the shorts down 1/2″. Press. Turn it down another 1/2″. Press.
Don’t sew this yet. It’s just easier to measure and press when it’s one flat piece.
Step 5
Unfold the casing creases you made in Step 4.
Match up the center front edges and sew, using 1/4″ seam allowance.
Step 6
Refold the casing creases and stitch it down almost all the way around the top of the shorts.
Leave a couple of inches open at the center back seam so you can get the elastic in.
Step 7
Cut a 12″ piece of 3/8″ elastic and thread it through the casing. Overlap the ends of the elastic 1 inch and sew them together. Slip the stitched elastic up into the casing and finish sewing the casing closed.
Sew up the inseam/crotch of the shorts using 1/4″ seam allowance.
Press anything you can get to with the iron. 🙂
Finished!
And here’s a view from the back.
It’s Spot the Puppy wearing these and he likes to have room for his tail to wag. 🙂
So there you have it – three basic doll clothes patterns – all super easy and free. The shirt, skirt and shorts will fit any of the Dress Up Bunch dolls.
Happy sewing!
Best, Wendi
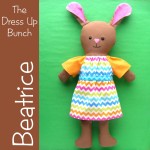
The Dress Up Bunch is a collection of cute and cuddly rag dolls. Get patterns for the dolls, plus all their fun outfits and accessories!
Easter is early this year – March 27 – so it’s time to start thinking about your Easter Crafts. What do you want to make?
I could just link to the Easter section of my shop – but then you wouldn’t see all the fun free patterns that are available!
(And there are a lot of them.)
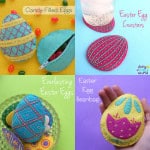
So I created this handy dandy round-up post with all the patterns for all my favorite Easter crafts. Just click on the image to go to that project!
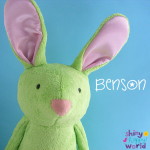
Easter Stuffed Animals
Some are big and huggable. Some are small and pocketable. They’re all easy and fun to make.
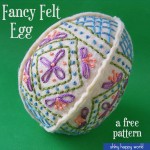
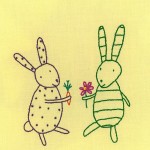
Easter Felt Projects
Spend a lovely spring afternoon stitching one of these by hand.
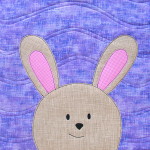
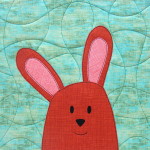
Easter Quilt Blocks
Make a kajillion bunnies with a fun mix & match pattern.
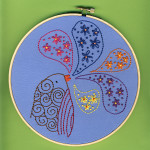
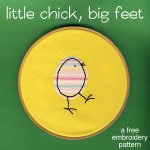
Easter Embroidery patterns
Stitch them on tea towels, baby onesies and more.
Other Easter Sewing Patterns
Including Dress Up Bunch dolls and clothes!
Of course, there are lots of spring-themed patterns too – but I stuck to Easter crafts for this post. 🙂
So whether you like to sew, quilt or embroider – stitch by machine or by hand – I’ve got an Easter craft pattern for you. Have fun with them and be sure to share what you make in the Shiny Happy People group on Facebook!
Sort of. True laminated fabric has a very thin layer of polyurethane film permanently stuck to the right side of the fabric. The resulting fabric is waterproof, but still has a nice drape to it.
It’s terrific when you can find it – and more and more manufacturers are making it. But it can still be pretty hard to find, and when you do – the print options are usually fairly limited.
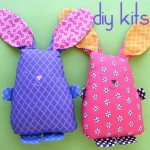
So what about when you find a lovely fabric collection like this one. . .
And you want to make that raincoat and boots out of laminated fabric because your kid is smart and they know regular cotton is not waterproof?
You make your own laminated fabric!
I used a product called Pellon Vinyl Fuse and it worked great. Heat & Bond also has a couple of laminating products (including one that brushes on!) that I’ll be testing soon. I’ll update this post after testing.
It’s very easy to use – you just iron it on. The package has very clear instructions.
After that you treat it almost like any cotton fabric – with a few key changes.
Tips for Working with Laminated Fabric
Do not iron it from the vinyl side of the fabric! Save the backing paper you peeled off when you applied the vinyl and use that as a press cloth if you absolutely must iron from the front. I found the stiffness of the fabric meant all I ever needed to do was a quick finger press – no iron needed.
The resulting fabric is stiffer, with less drape than a true laminated fabric. Choose a simple pattern without pleats of gathers.
Some people recommend sewing over a piece of tissue if you need to sew with the vinyl side down – for fear of the feed dogs scratching the vinyl. I sewed with the vinyl side up and down – with no tissue – and had no scratching or grabbing problems. But your machine may be different! I recommend sewing a tiny test.
If the laminated fabric crinkles a lot when you turn it right side out, you can hit it with a hot hair dryer and smooth things out really easily.
Use clips instead of pins to hold the pieces together. Pins will leave permanent holes in laminated fabric.
There’s a new outfit available for the Dress Up Bunch – a doll raincoat pattern!
It’s still snowing here, but soon it will be rain showers and flowers! Your dolls need to be ready for those rainy days so they can splish splash in puddles!
Of course you don’t just get a raincoat pattern. Let’s look at all the parts. . .
A new dress! It’s a short-sleeved dress with three front snaps and some optional fancy trim around the bottom hem. That butterfly print is perfect for spring!
Here’s a view of the raincoat from the back – with the hood down.
It’s a nice roomy hood – easy to make and easy for little hands to flip up and down over that big Dress Up Bunch head. 🙂
Want a closer look at those adorable boots?
They have a little flap on the front with velcro to make them easier for little hands to put on without any help. Plus the little bugs and caterpillars are so cute. I want boots like these!
You can use laminated cottons for the outer shell of the raincoat and boots – but I really wanted to use these prints so I laminated them myself using Pellon Vinyl Fuse. It’s easy – just follow the directions on the package and then treat it like regular fabric. Just don’t try to iron it! And clips are better than pins because pins will leave permanent tiny holes.
That means the people who love babies need a go to, easy baby bib pattern.
This is it!
It’s a simple bib shape – very easy to make and customize with any appliqué (or other fancification) you like. This pattern includes that sweet bear. 🙂
Make it out of regular quilting cotton for a basic bib. Back it with laminated fabric for heavy droolers. Make the whole thing out of laminate for those learning to eat solid foods. (The fabrics I used are from Timeless Treasures. The crosshatch is my beloved Sketch collection and the swirly fizzy dots are from the appropriately-named Pop collection.)
Cut two bib pieces (one front and one back) on the fold.
Step 2
Print or trace the bear appliqué pieces (the last page of the baby bib pattern PDF) onto fusible adhesive. This is the brand I use.
Roughly cut out each shape and fuse them to the back of the fabric, following the instructions for the brand you’re using.
Step 3
Cut out the pieces neatly.
Cut right on the solid lines. Leave a little extra seam allowance past the dotted lines. See the extra at the bottom of the ears? That bit will tuck behind the head.
Step 4
Hold the face up to the window so you can see the markings through the fabric and mark the position of the eyes.
I just use a fine tip Sharpie – nothing fancy.
Do the same thing with the muzzle, marking the position of the nose and the key points of the mouth.
You can also trace over the whole line of the mouth, if you prefer.
Step 5
Peel off the paper backings and layer the pieces together so that the ears tuck behind the head and the bottom of the bear body is lined up with the bottom of the bib.
Here you can see it a little closer.
Fuse the pieces down according to the instructions of whatever brand adhesive you’re using.
Step 6
Stitch around the edges of all the pieces.
I like to use black thread and a simple straight stitch. You can use a zigzag or other decorative stitch if you prefer. If you want a little help knowing where to start and in what order to stitch the pieces, this post should help you out. And this one will help you with managing those tight curves. 🙂
Step 7
Embroider the eyes and mouth.
I did it by hand using this stitch for the eyes, and following the instructions for the mouth in the free Warren the Charity Bear pattern. I used a single strand of this thread. That’s the equivalent of two strands of DMC floss, but I love using a single strand of thicker thread so I don’t have to worry about the strands separating on that long stitch connecting the nose to the mouth.
You can also sew the face by machine. That’s what I did for this cat bib. You can find info about how I did the eyes here. The mouth and whiskers are just a simple straight stitch, going over all the lines twice to make them a little thicker. (For those I traced the whole line of the mouth and whiskers in Step 4, not just the endpoints.)
Step 8
Cut a 1-inch square of hook & loop tape (or use snaps or a button).
Sew it to the bib as shown. Both bib pieces are shown right side up. I attached the loop side to the bib front and the hook side to the bib back, but it doesn’t really matter.
Step 9
Layer the bib front and the bib back right sides together.
Using 1/4 inch seam allowance, sew all the way around the edge. Leave a few inches open for a turning hole in the straight part of one of the sides.
Step 10
Clip the seam allowance in the concave curve around the neck.
For more on the the how and why of clipping curves, watch this video.
It would be fun to make a whole set of them with lots of different faces!
Have fun with this pattern! I’d love to see what you make – and I’d really love to see them on some adorable babies. 🙂 Post photos in the Shiny Happy People group so we can ooh and aah over them.
Here are several free patterns that work with my basic 10-inch applique squares – no resizing needed!
Here are several free patterns that work with just some simple resizing. This post about making coasters has info about resizing an applique pattern that can be applied to any of these projects.
This is a weirdly divisive question in the quilt world.
It’s also one of the most common questions I get. Do you prewash your fabric?
Yes.
Mostly.
How’s that for a definitive answer?
Let me clarify. . .
I prewash all quilting cottons. Always. They go straight into the laundry hamper when I buy them and they’re not allowed into my sewing room until I wash them.
Why?
I have had bad experiences with the fusible adhesive not sticking to fabric because of the sizing in it.
I have had dark colors bleed onto light colors in a finished quilt, washed for the first time. (Absolutely heartbreaking!)
I have had shrink issues with doll clothes where the fabric puckers badly along the seams because it had not been prewashed.
Sure – most fabrics won’t cause these problems if they haven’t been prewashed. But some do! And you never know which will be the problems until AFTER the heartbreak.
Prewash!
I prewash all knits and flannels.
They have more of a tendency to shrink than wovens and I want to get that shrink out of the way. I’m getting ready to start handsewing some clothes for myself (using this fabulous book my husband got me) and I definitely don’t want those to shrink after the fact.
I don’t prewash faux fur, satin, polar fleece or cuddle fleece.
They don’t have shrink issues. I’ve never had any of them bleed. The ones I buy never seem to be coated with excessive sizing so they don’t feel icky. There’s no real reason to prewash them.
I don’t really use any other fabrics – so I have no advice to give about rayons, voiles, challis, etc.
One more note. . .
A lot of people say they don’t prewash quilting cottons because they like the crinkle effect they get after washing. I’ve found that I get plenty of crinkle – even with prewashed fabric – by using cotton batting. I use Warm & Natural brand 100% cotton batting and I do NOT prewash it.
Want quick access to a bunch of other posts about fabric?
As soon as I wrote this post about sewing softies with stretchy knits, I started getting questions about using knits to make Dress Up Bunch rag dolls. I decided to give it a try and the answer is YES!
With a couple of caveats. 🙂
Everything in the post about stuffed animals applies to rag dolls.
Test your fabric with a universal needle and prepare to switch to a stretch or ballpoint needle if needed.
Do not overstuff.
The Do Not Overstuff rule is especially important for rag dolls. If you stuff them too fat, they won’t be able to fit into the regular Dress Up Bunch clothing patterns!
The knit fabric will change the proportions of your doll a bit – she’ll be a little wider. You can see the difference here between the knit Poppy (purple hair) and the woven Poppy (copper hair).
I was super careful not to overstuff, but you can see that the knit Poppy still has a slightly wider head.
The other thing to keep in mind is that you’ll also want to use a knit fabric for the hair. If you use felt hair with the knit skin, the hair will not stretch but the face will and it will look like her face is bulging out from under her hair. Not cute. 🙁
So you need to be extra careful with the stuffing, but the finished doll is incredibly soft and cuddly in a way that you can only achieve with knit fabric. Give it a try!
Most of the Dress Up Bunch dolls are human, but a few of them are critters with tails. And those tails need wagging room! Here’s how to add an opening to any pants or skirt pattern for the Dress Up Bunch dolls.
Cut out all the pieces as normal.
When you come to the part of the pattern where you sew the center back seam, jump in with these steps. . .
Measure down the center back seam 2 inches and mark with a pin.
Measure down 1 3/4 inches from that pin and mark with another pin.
Sew from the top to the first pin with a normal stitch length. Sew the space between the pins with a longer stitch length – the longest you can set on your machine. Switch back to the regular stitch length and sew the rest of the seam.
Make sure you backstitch (with the normal stitch length) a bit at the top and bottom of the section of long stitches. You’re going to cut those big stitches and this will keep the rest of the regular stitches from unraveling.
Press the seam allowance open.
Sew a tiny little rectangle around the section of long stitches to reinforce that opening.
(You’ll want to use matching thread, of course.)
Use a seam ripper to cut the large stitches inside that reinforced rectangle.
And voila! You have an opening for the tail! Continue with the rest of the pattern instructions.
This works for pants and shorts (as shown above) or with a skirt.
If you’re making Pip the Cat, Squeak the Mouse, or Spot the Dog this is a method you can use to adapt any of the clothing patterns to fit their tails. Have fun with it!
Did you know that you can use stretchy knit fabric to make extra cuddly and soft stuffed animals?
You can! And even though sewing with knits has a bad reputation – it’s really not any harder than sewing with woven fabrics.
Cloud 9 Fabrics – makers of all-gorgeous, all-organic fabric – recently released a line of deliciously soft knit fabrics perfect for comfy clothing, cozy pajamas, and cuddly soft stuffed animals. (That’s their adorable photo up there with the cozy jammie pants.)
They exhibited those knits at Quilt Market this fall and asked me to use them to make some squishy stuffed animals to add to their display. Fun!
I’ve used knits to make softies before (mostly old T-shirts to make Bartholomew Bunnies) and they make exceptionally soft stuffed animals. For this batch I decided to use patterns I had designed with fleece in mind. I love how they turned out!
My favorite is Franklin the Fat Cat made in an awesome striped knit that really accented his fatness. 🙂
Munch was also easy and fun and I liked playing with the different coordinating prints for him.
See how his shape nips in a little around the neck? He’s not one roundish shape like Franklin and Munch – and that’s what makes him slightly tricky. He’s not hard to sew – that’s easy. It’s the stuffing where you have to be careful.
What’s the right needle? Well – I sewed these guys all with a basic universal needle – and that’s usually what I start with. Sew a little test seam on some scraps and take a close look. Usually everything looks just fine and you can move on to your real project, but sometimes there are potential problems.
If you’re skipping stitches, switch to a stretch needle. It has a longer scarf (the groove that the thread rests in) and that helps prevent skipped stitches.
If you’re getting runs or snags in your fabric, switch to a ballpoint or jersey needle. It has a slightly blunt tip that makes the needle slide between the fibers instead of poking into them.
Those are the two potential problems to sewing with knits – both easily fixed with a new needle.
But the stuffing! The stuffing is where you really have to be careful. A softie made with woven fabric can sometimes be lumpy and bumpy – and that problem is a million times worse with stretch fabric where the fabric will just stretch around any lumpy stuffing. You must keep things smooth as you go. Also – usually understuffing is a problem with softies – but if you make them with knits you need to be careful of overstuffing. Use just enough stuffing to fill out the shape and keep it very smooth as you go.
That’s it! Use the right needle, don’t stretch the fabric while you sew, and keep things smooth while you stuff. The yummy Cloud 9 knits I used to make these cuties is in shops now. Make an extra squishy and soft stuffed animal today!