If you’re like most quilters – you have a LOT of patterns. 🙂
It’s always great to come up with another use for one of your favorites – especially if you can make an accessory to go WITH one of your best quilts.
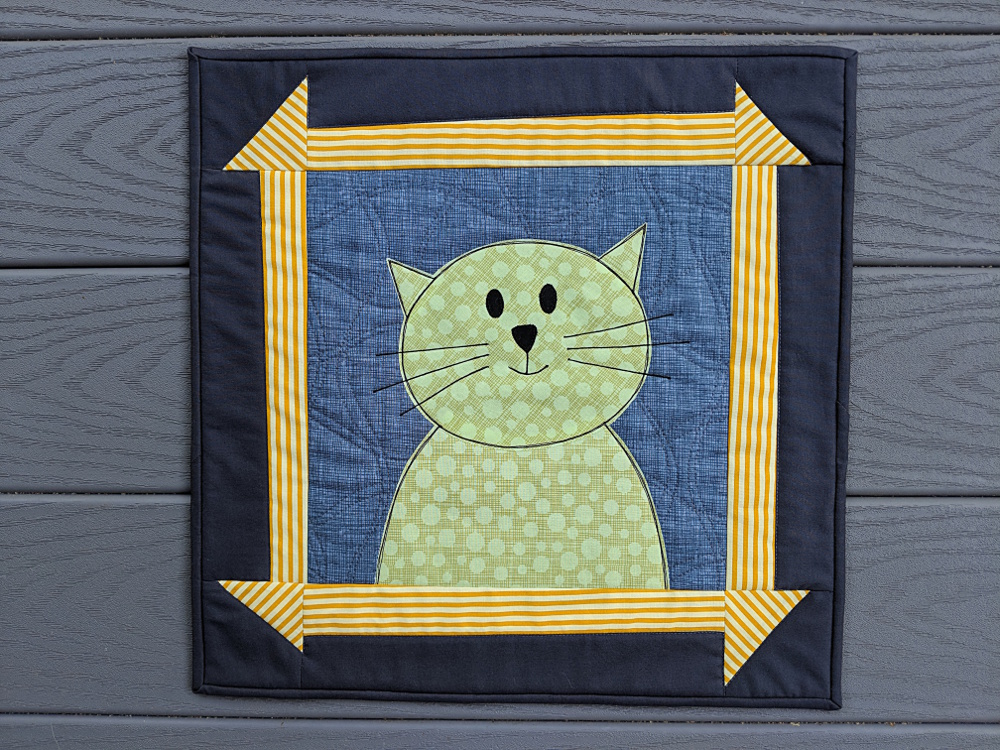
You can turn a single block into a wall hanging and hang it just as it is. But it’s extra fun to give that block a special frame to really set it off and make it into a piece of art. 🙂
And it’s even more fun if that frame uses a wonky version of a traditional quilt pattern.
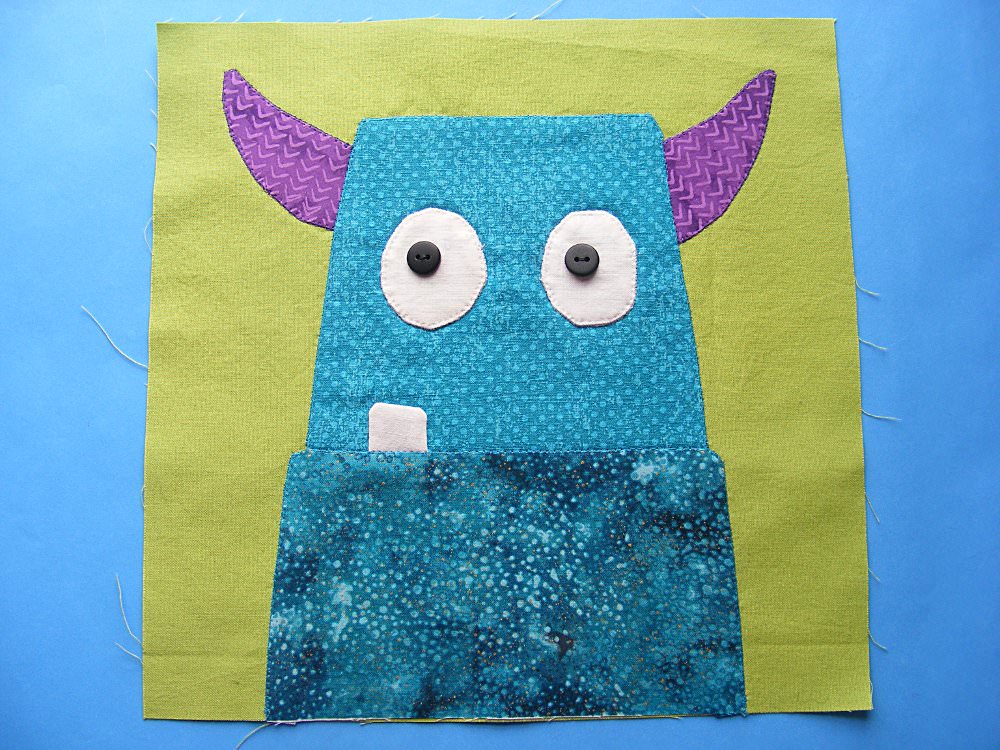
For this wall hanging I used one of my favorite blocks from the Cuddly Cats quilt pattern – no resizing. So it’s a 10 inch block in the center, with a wonky churn dash frame around it. The entire wall hanging is 16 inches square.
Here’s what you need. . .
- 18 inch square piece of batting (I use Warm & Natural cotton batting.)
- 10 1/2 inch square background block
- scraps (less than 1/4 yard of each color) for the cat applique, the churn dash frame, and the second background around the frame
- fat quarter for back of wall hanging
Here’s how to make it using Quilt As You Go. . .
Step 1 – Quilt Your Background Square
Press your batting square. Center your background block in the center of the batting.
Quilt the square to the batting.
I used double wavy stripes on mine. You can find a tutorial for that here.
Step 2 – Applique the Face
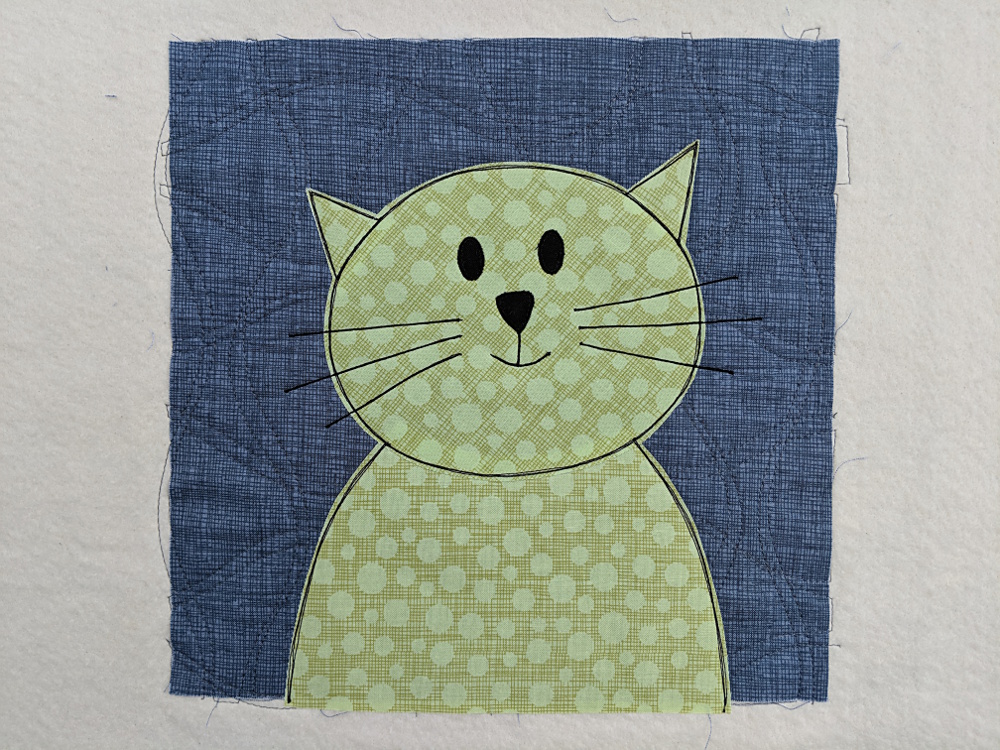
Applique the design to the block – being sure to line the lower edge of the applique up with the lower edge of the background block.
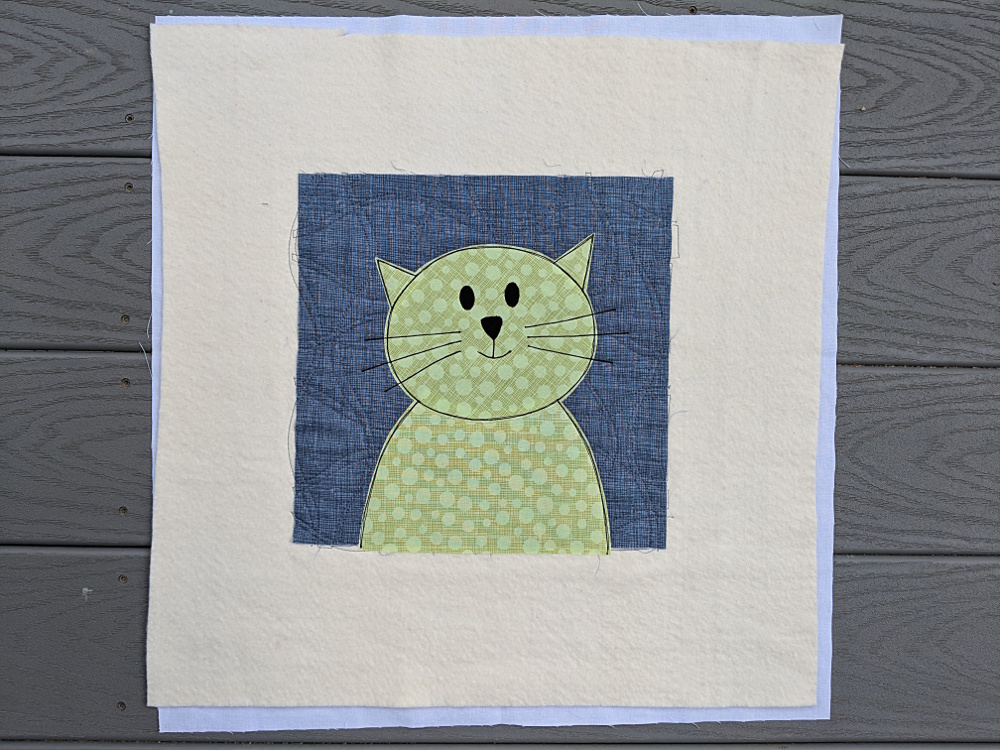
Add a backing to your wall hanging (I used spray adhesive to baste it to the batting) and outline your applique. Here’s a closer look at the placement and the outlining.
You can find a complete video showing how I applique with fusible adhesive here.
Set that block aside while you make the pieces for the churn dash frame.
(That adorable fabric I used for the cat is Hash Dot in Lime from Michael Miller Fabrics, available here.)
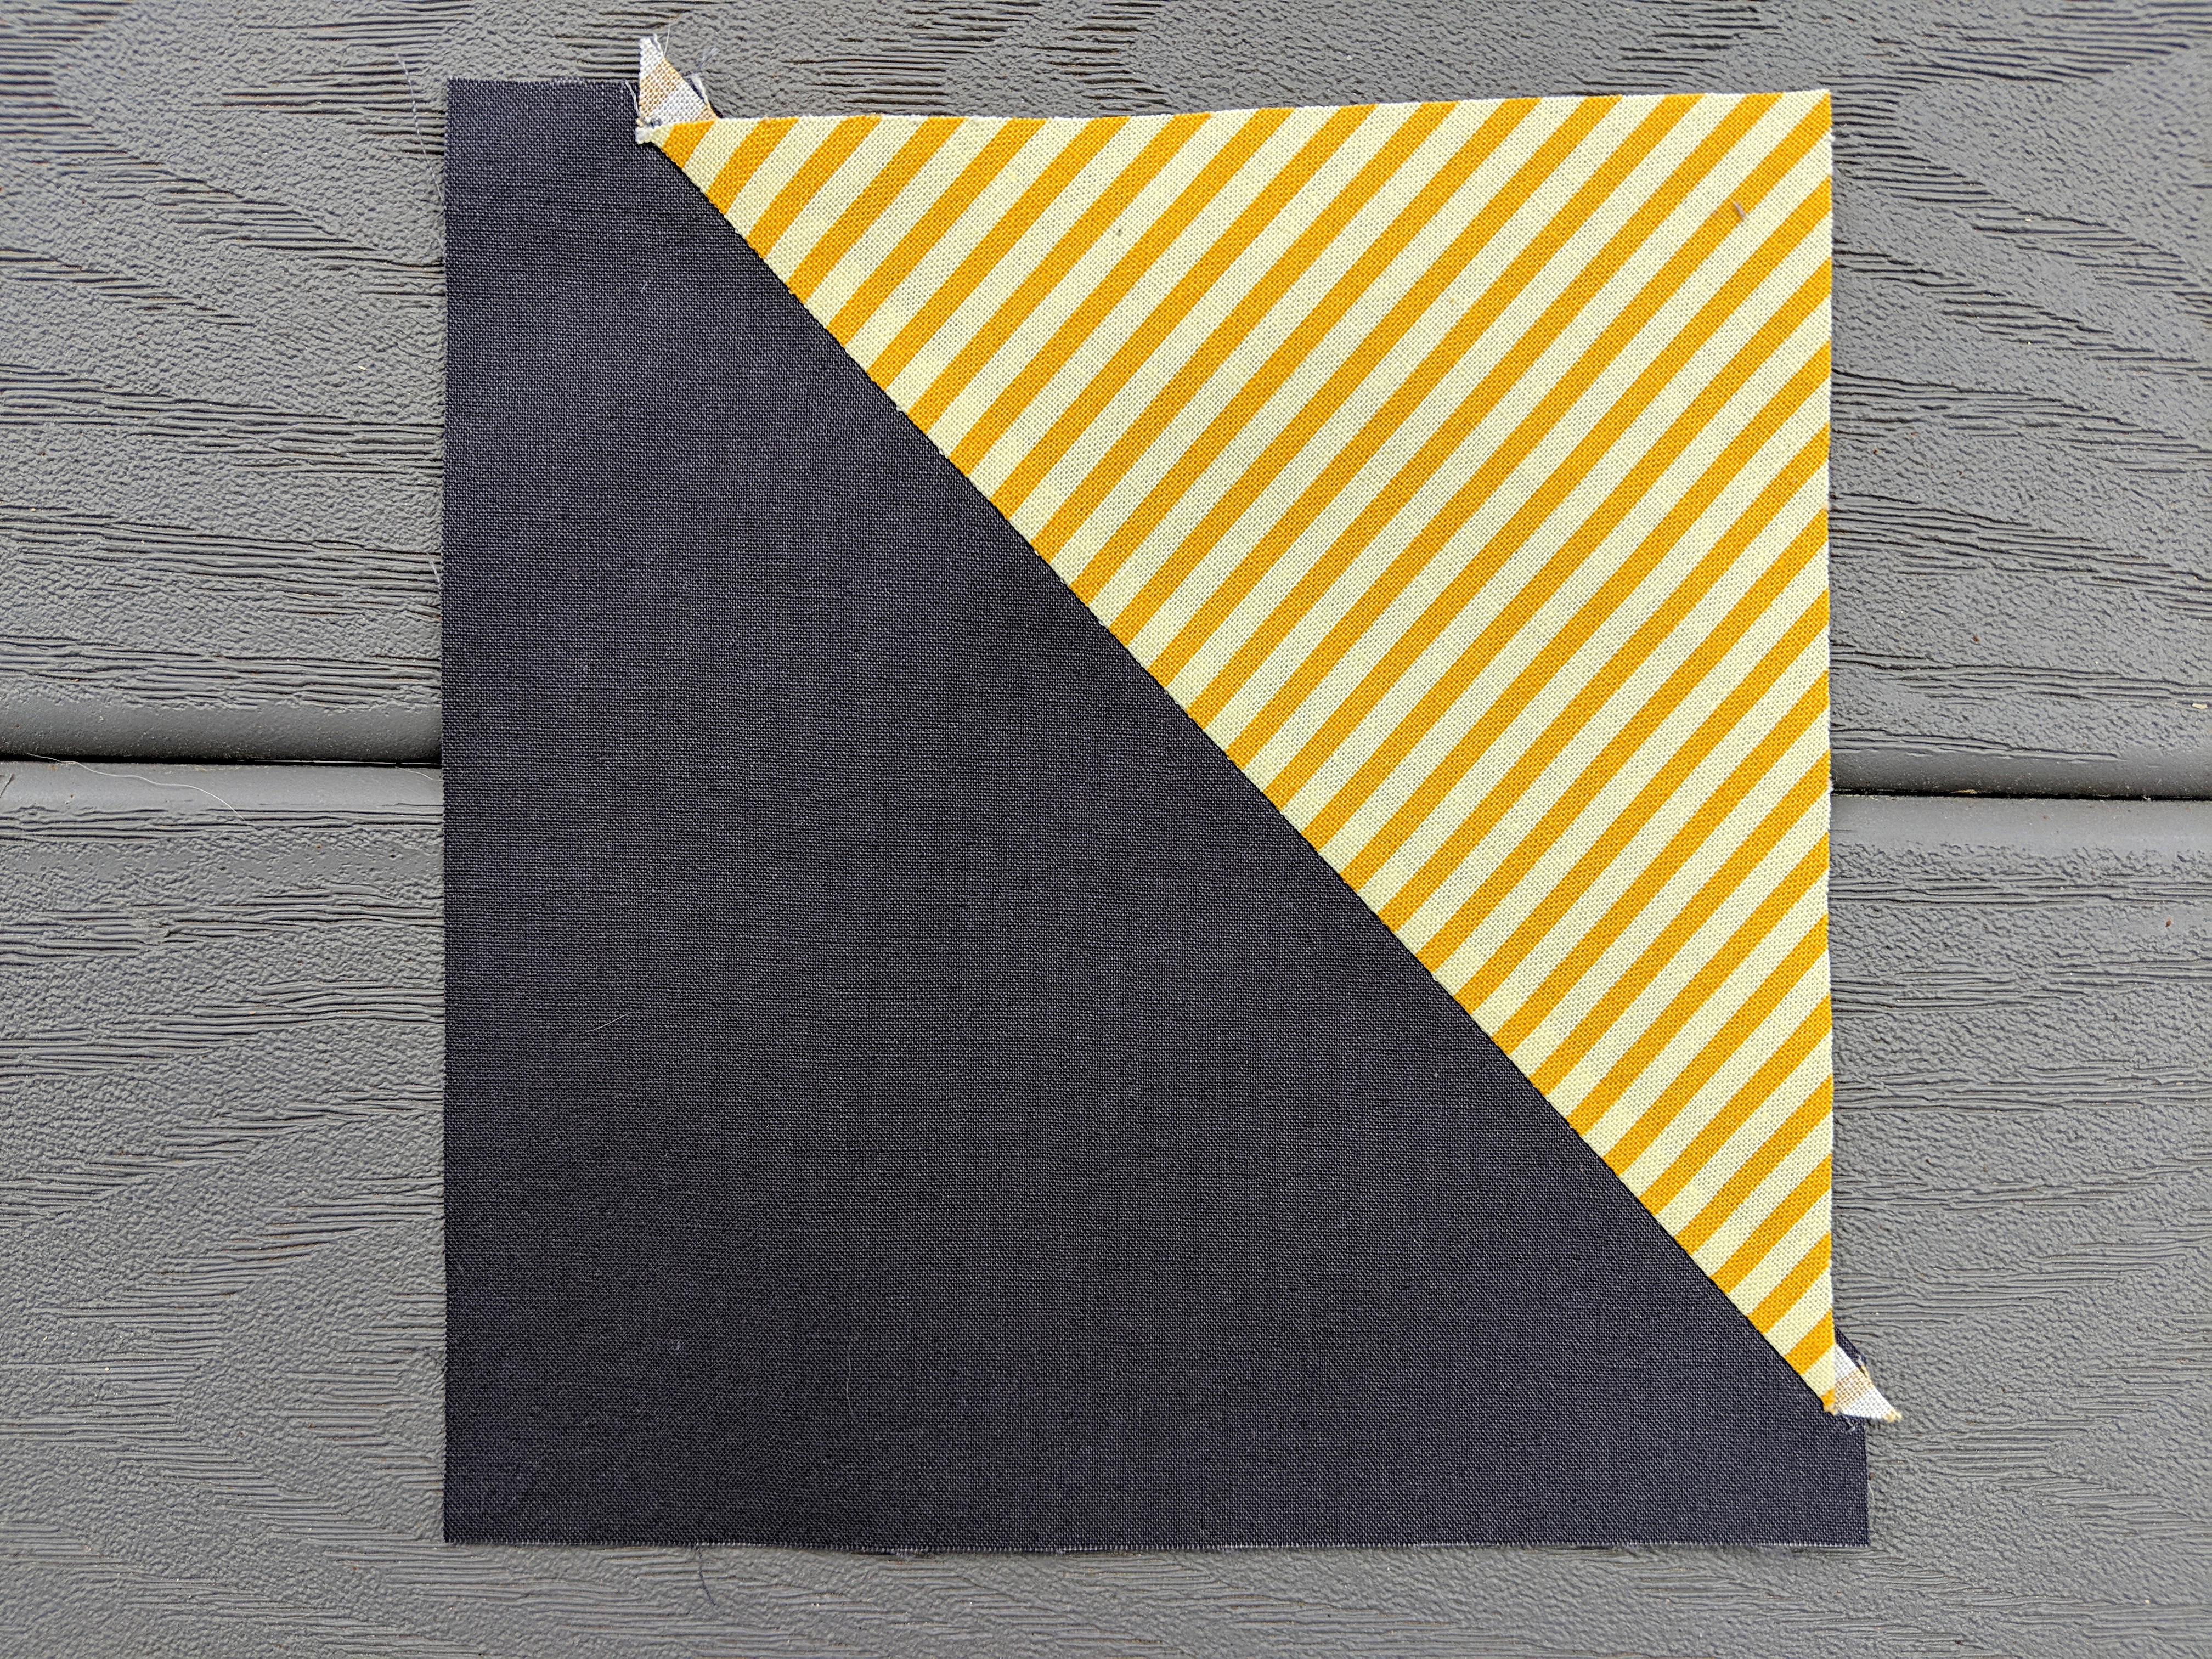
Step 3 – Sew Churn Dash Corner Triangles
Cut four background corner pieces each 5 inches square. I used dark grey for mine.
Cut four right triangles with the legs (not the hypotenuse) anywhere between 4 and 5 inches long. The triangles should all be a little different.
Lay one triangle face down over the corner of one square, so that the points of the triangle (at each end of the hypotenuse) just hang over the edges of the square, as shown.
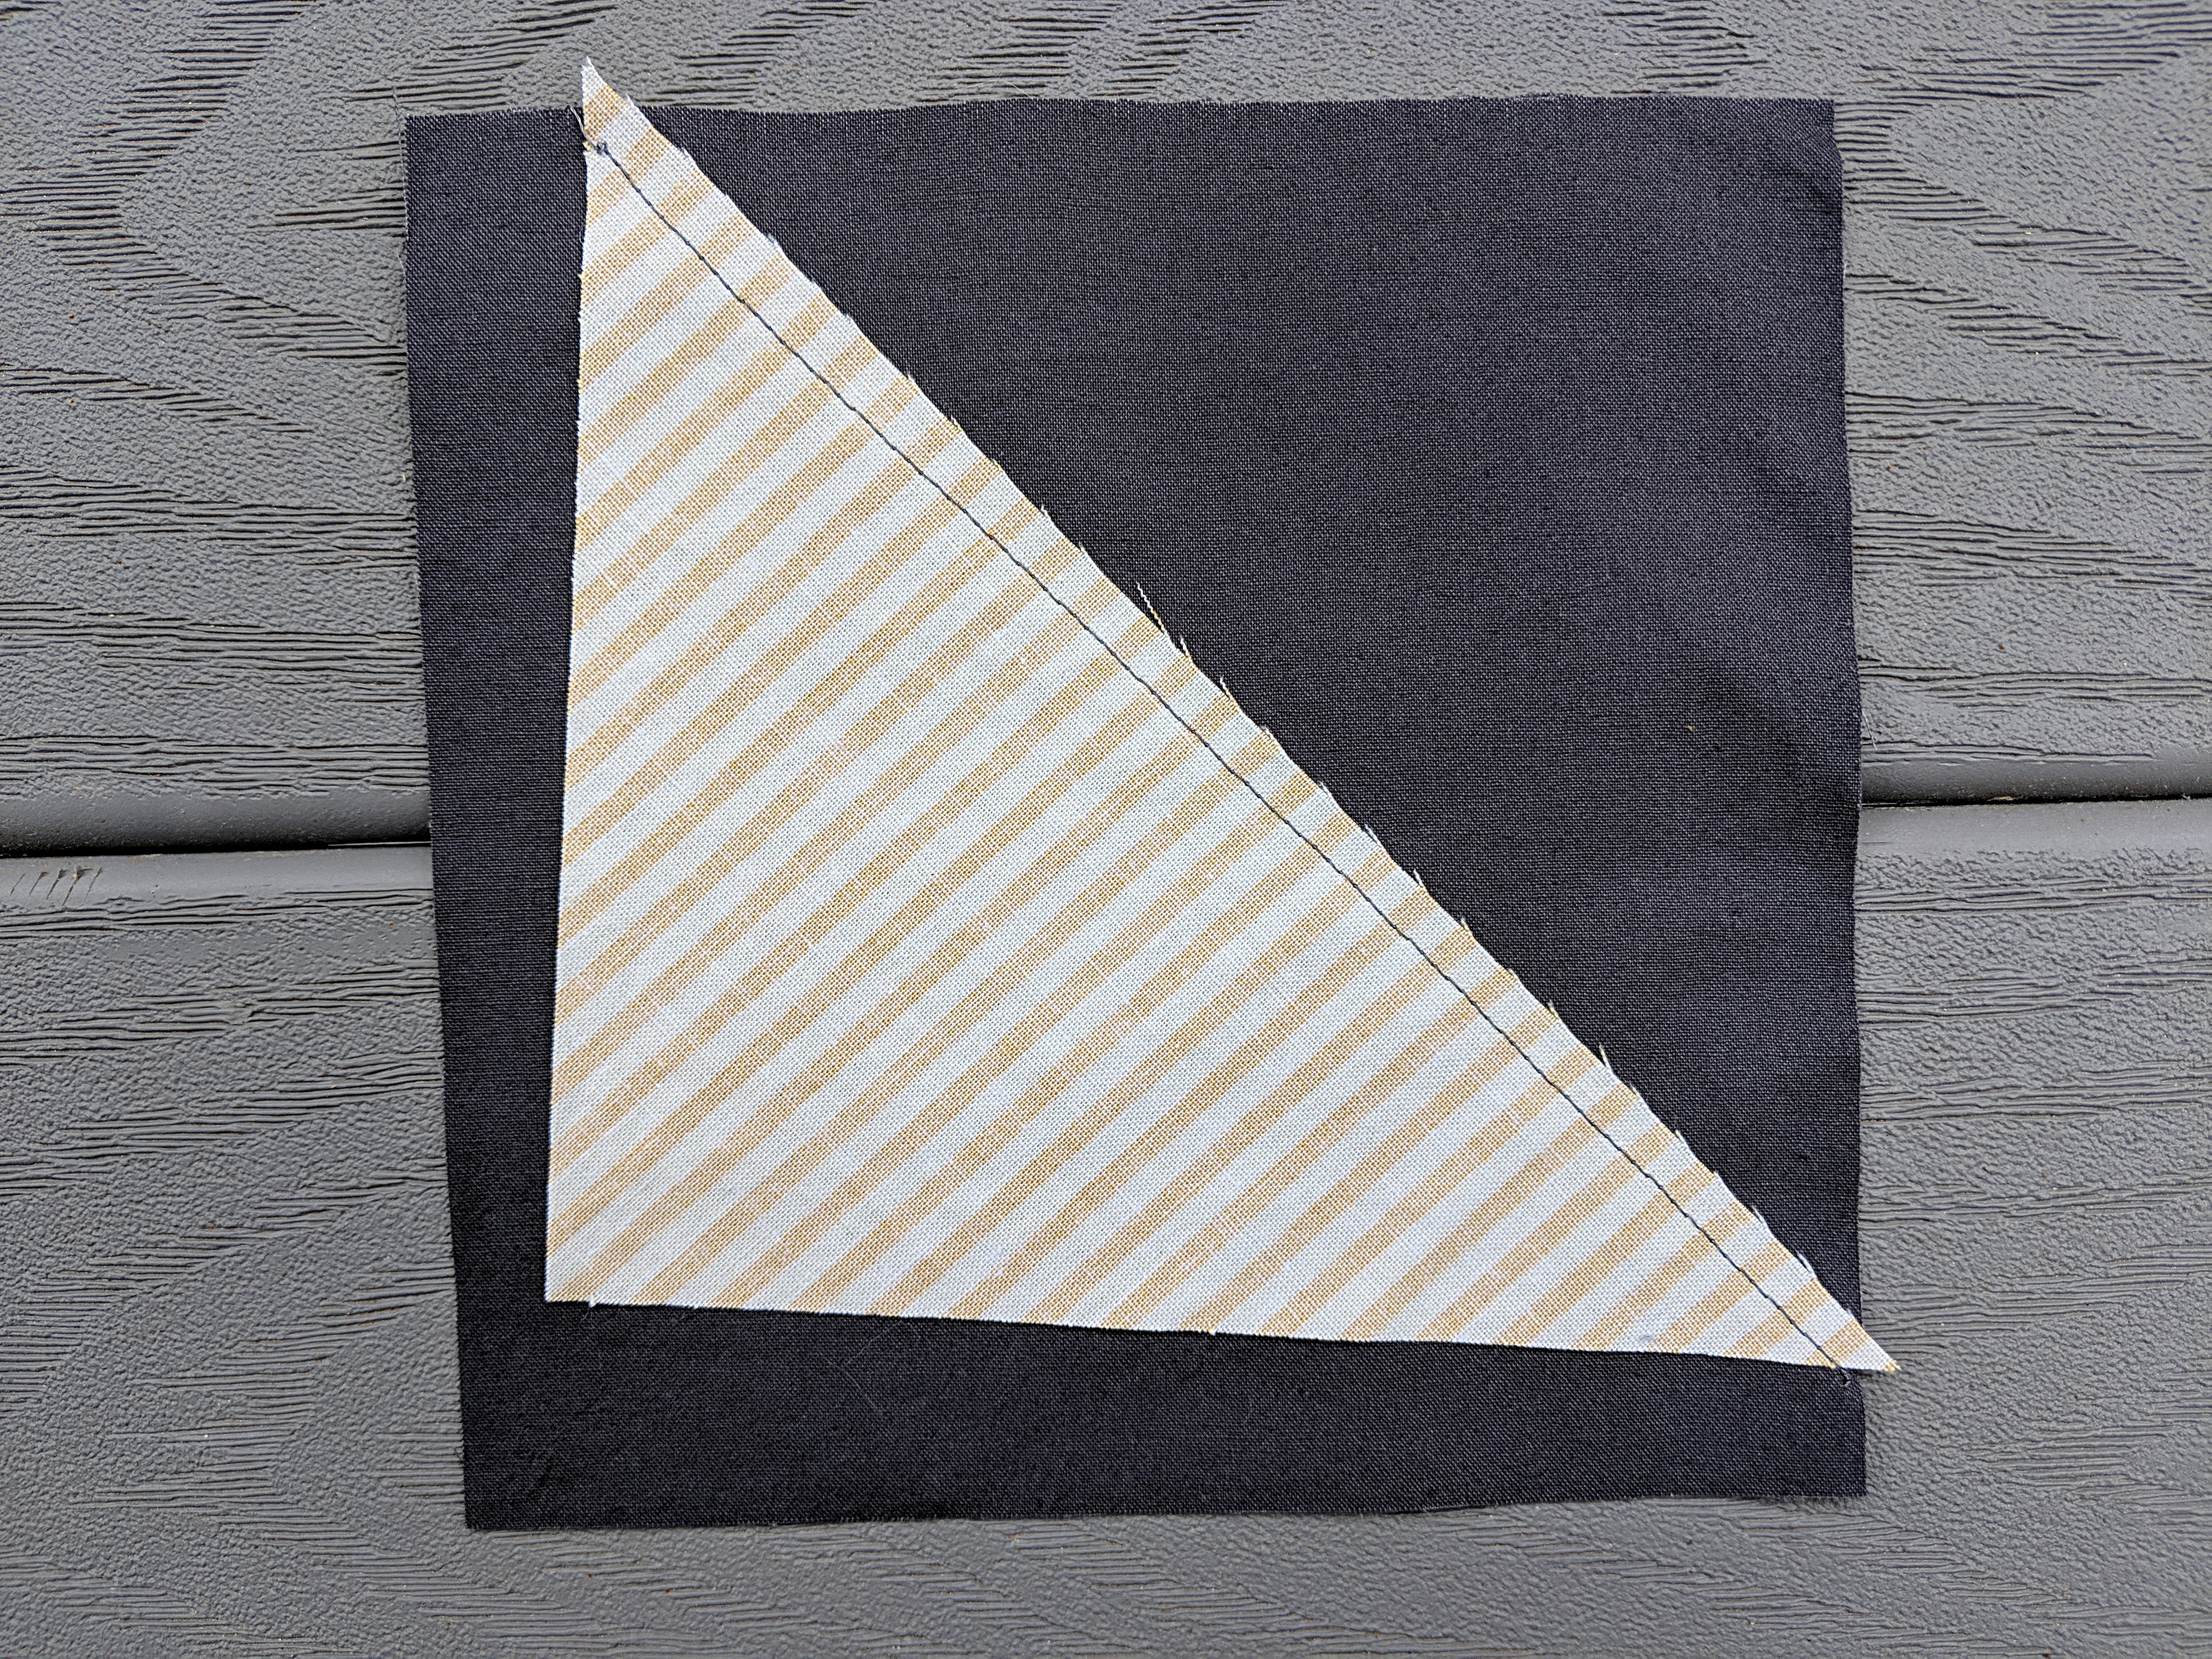
Sew the triangle to the square. Your seam allowance doesn’t need to be exactly 1/4 inch.
Step 4 – Open and Press Triangles
Trim away the excess fabric from the corner.
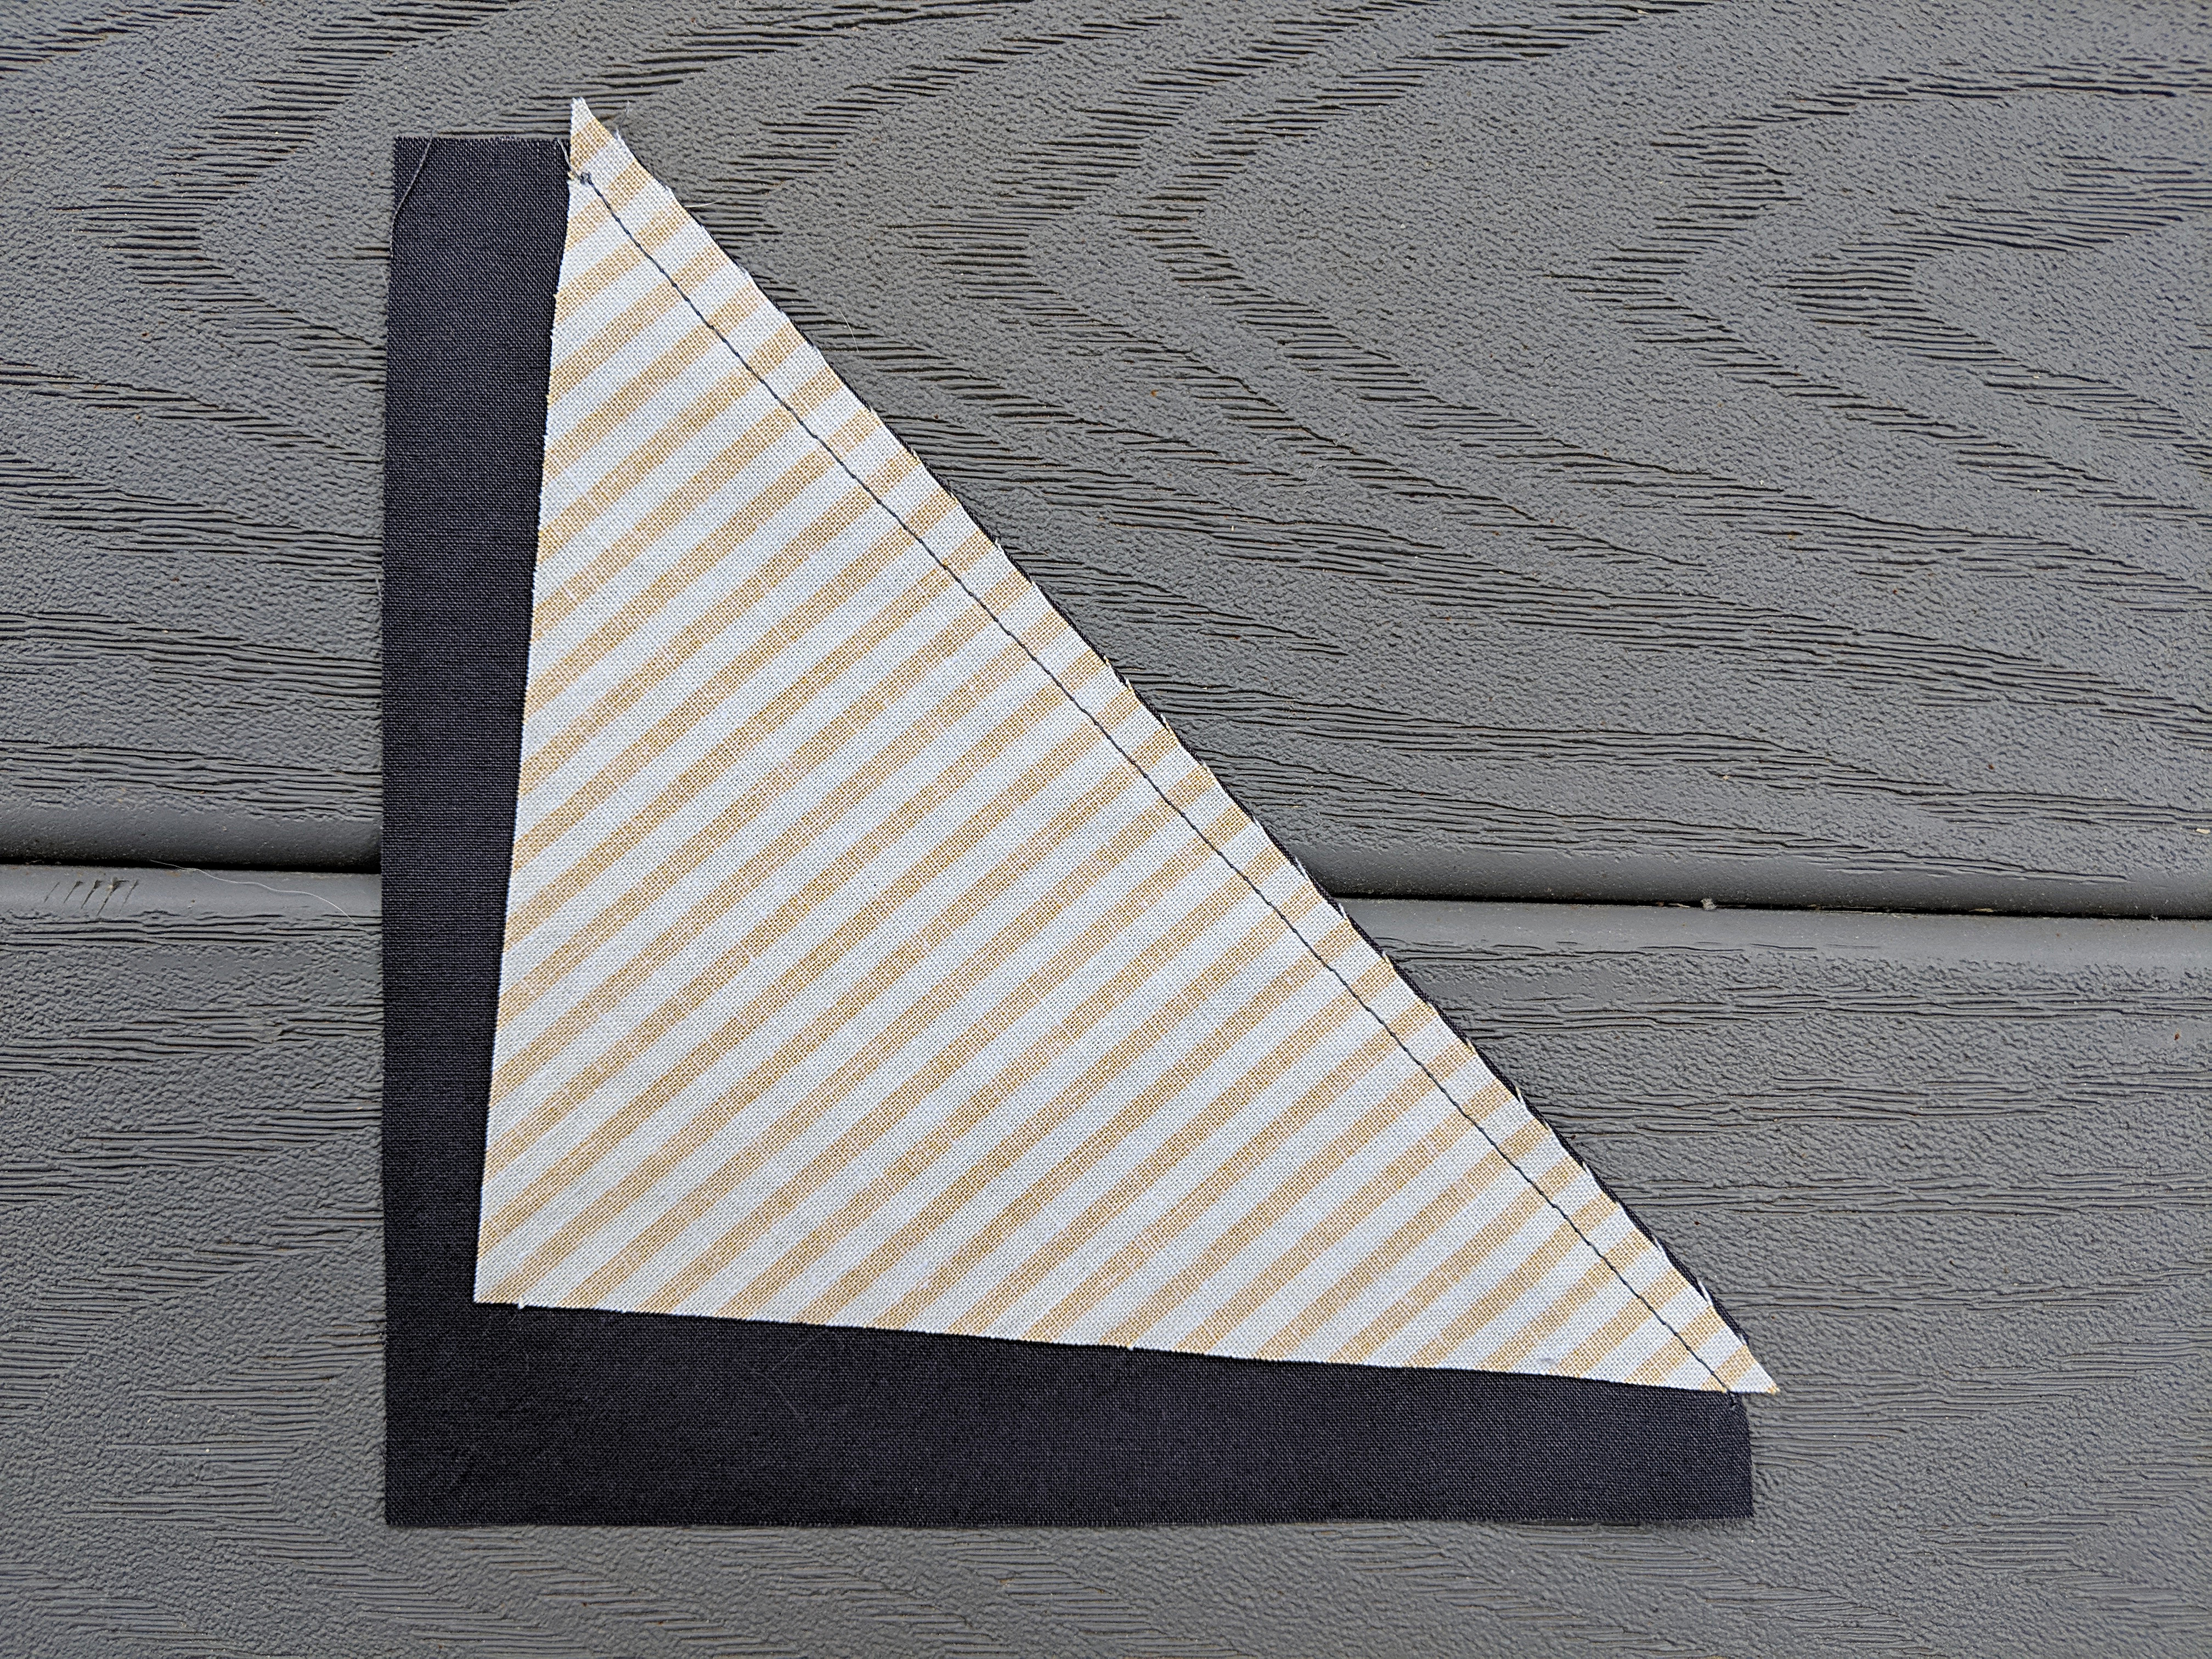
Fold the triangle out and press.
Step 5 – Trim Churn Dash Triangles
Trim the triangle down to a 3 inch square. (There’s a tutorial here showing how to use a square ruler for easy trimming.)
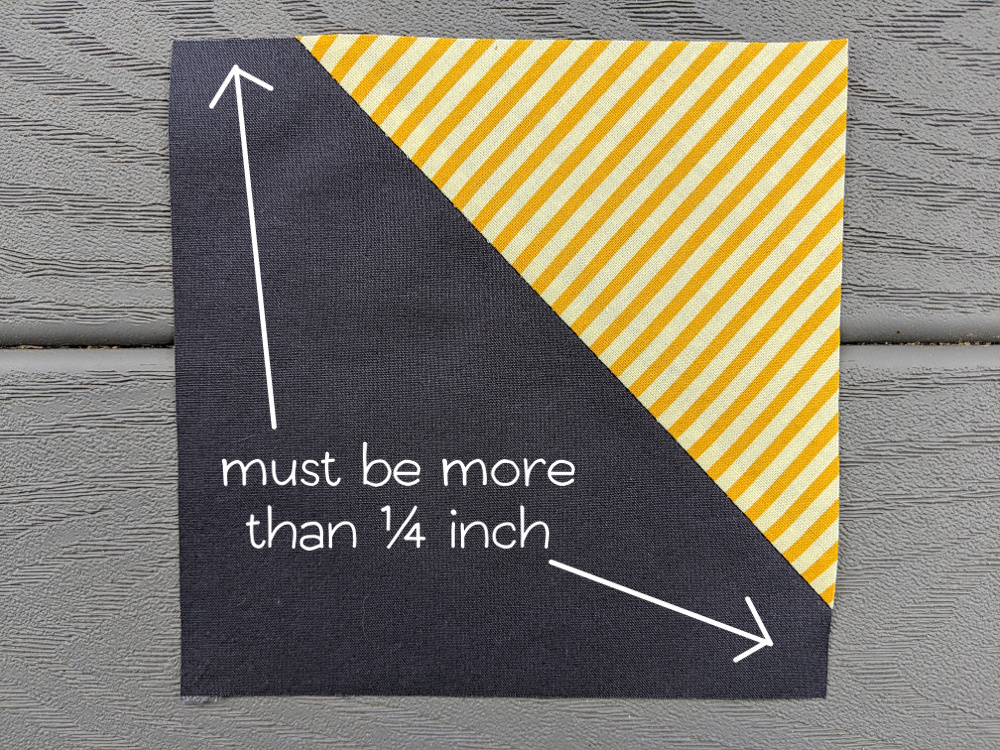
Make sure there is more than 1/4 inch between the points of the triangle and the edge of the background fabric square. That will make it impossible to accidentally chop off the points when you assemble the whole frame. 🙂 Yay for foolproof tricks!
Repeat for the other three squares, so you have the four corners of your churn dash block. The sizes and angles of the triangles should all be a little different.
Set them aside.
Step 6 – Preparing Background Rectangles
Cut four background strips 12 inches x 3 inches.
Cut four frame strips 12 inches x 2 1/2 inches.
Sew the frame strips to the background strips and then trim those rectangles down to 10 1/2 inches x 3 inches. Make the seam between the two strips go at a slight angle – and make all the angles a little different to make your finished block more interesting.
You can see my finished rectangles in the next step. See how some are wider than others? And they all slant a bit?
Step 7 – Laying Out the Churn Dash Block
Lay out all the churn dash components as shown.

Play around with the placement of the frame pieces until you’re happy with how things look.
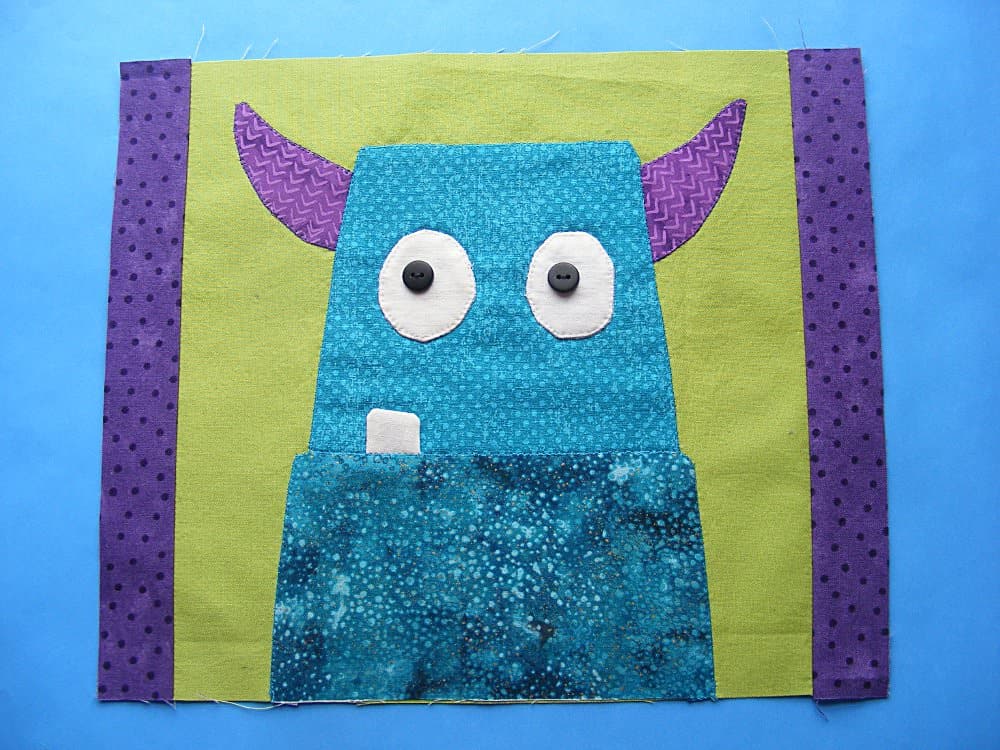
Step 8 – Sew the Side Rectangles
Sew the side pieces of the frame to the sides of the block, sewing through the batting and backing too. For this and the rest of the project it’s important to use an accurate 1/4 inch seam allowance.

Press the side pieces open.
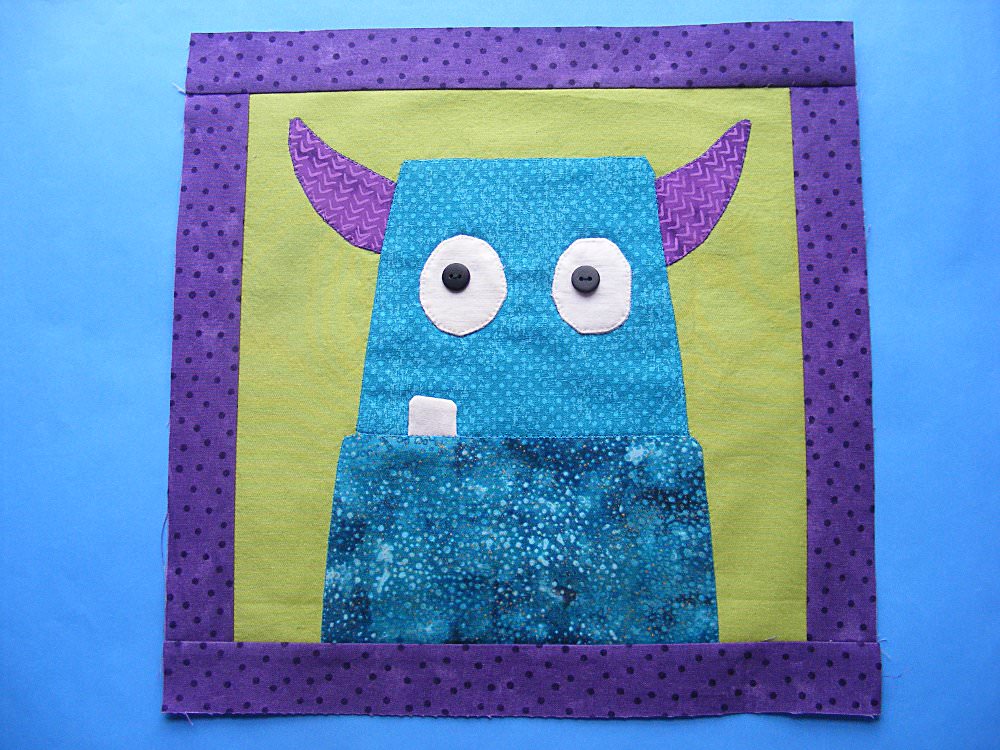
Step 9 – Sew the Top and Bottom Strips
Sew together the corners and strips for the top and bottom rows of the frame.
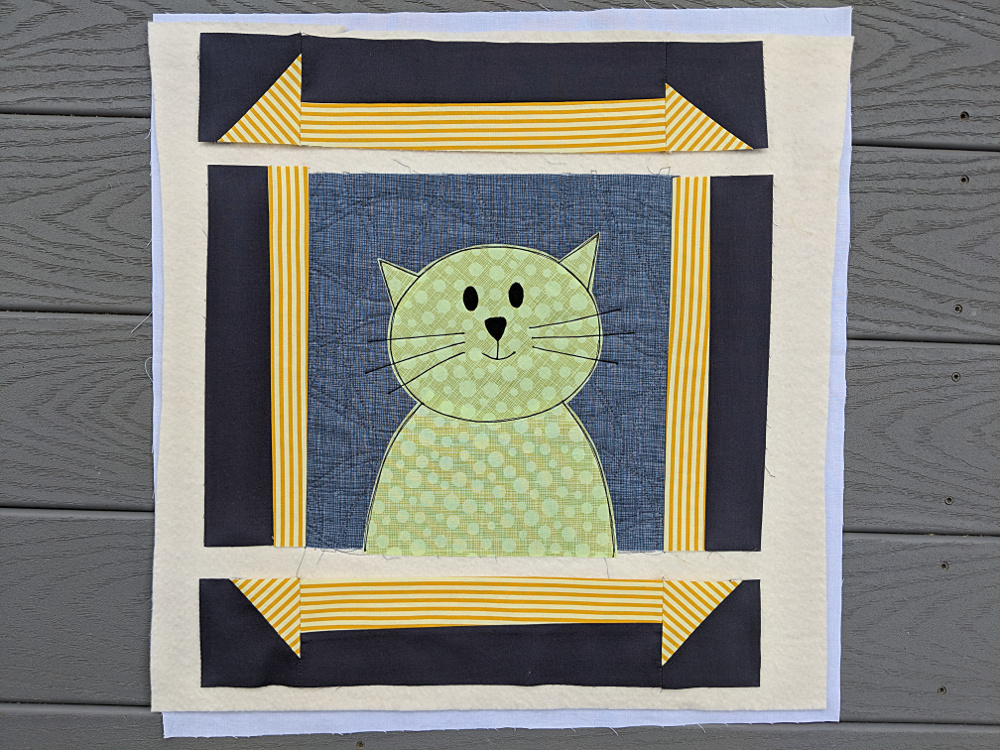
Press your seams in toward the strips – away from the corner triangles.
Step 10 – Finich Sewing the Churn Dash Block
Sew the top and bottom rows to the center of the block, being careful to line up the seams.
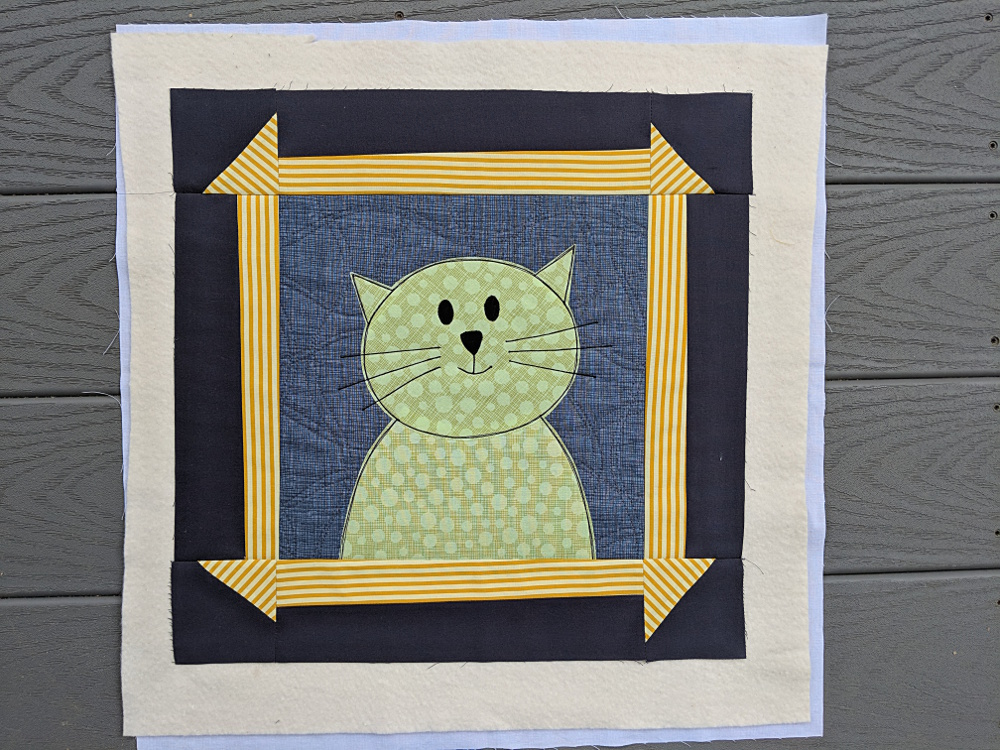
Press the whole block flat.
Step 11 – Quilt, Trim, and Bind
Quilt the frame if you want to. (It doesn’t need it structurally, so just do it for looks if you like.) I stitched in the ditch around the outside edge of the frame and that’s it.
Trim away the excess batting around the edges and bind your mini quilt.
This video shows my favorite binding method.
If you like, there’s a tutorial here showing how to add a hanging sleeve to the back.
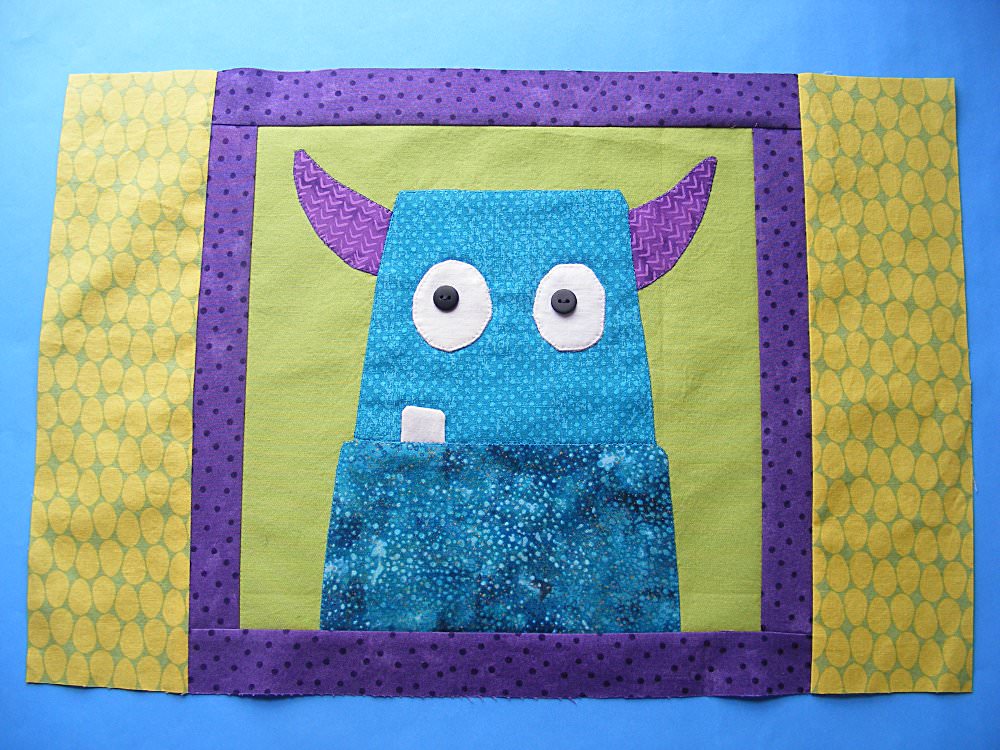
Finished!
Hang it on the wall and enjoy!
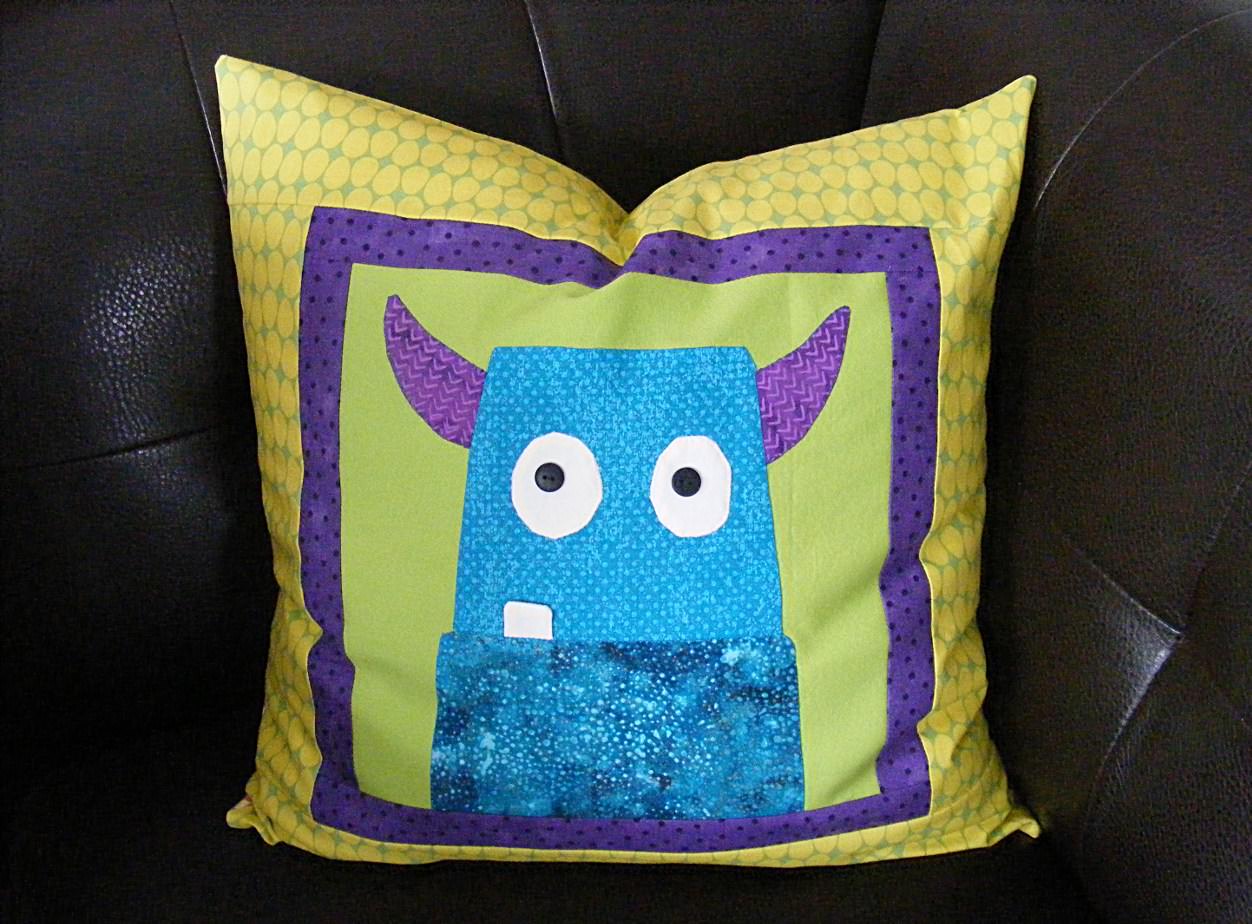
You can use the same method to make a fancy framed pillow cover. 🙂
Want to see more ideas for things you can do with a quilt pattern? Check out this round-up.

Here are several free patterns that work with my basic 10-inch applique squares – no resizing needed!
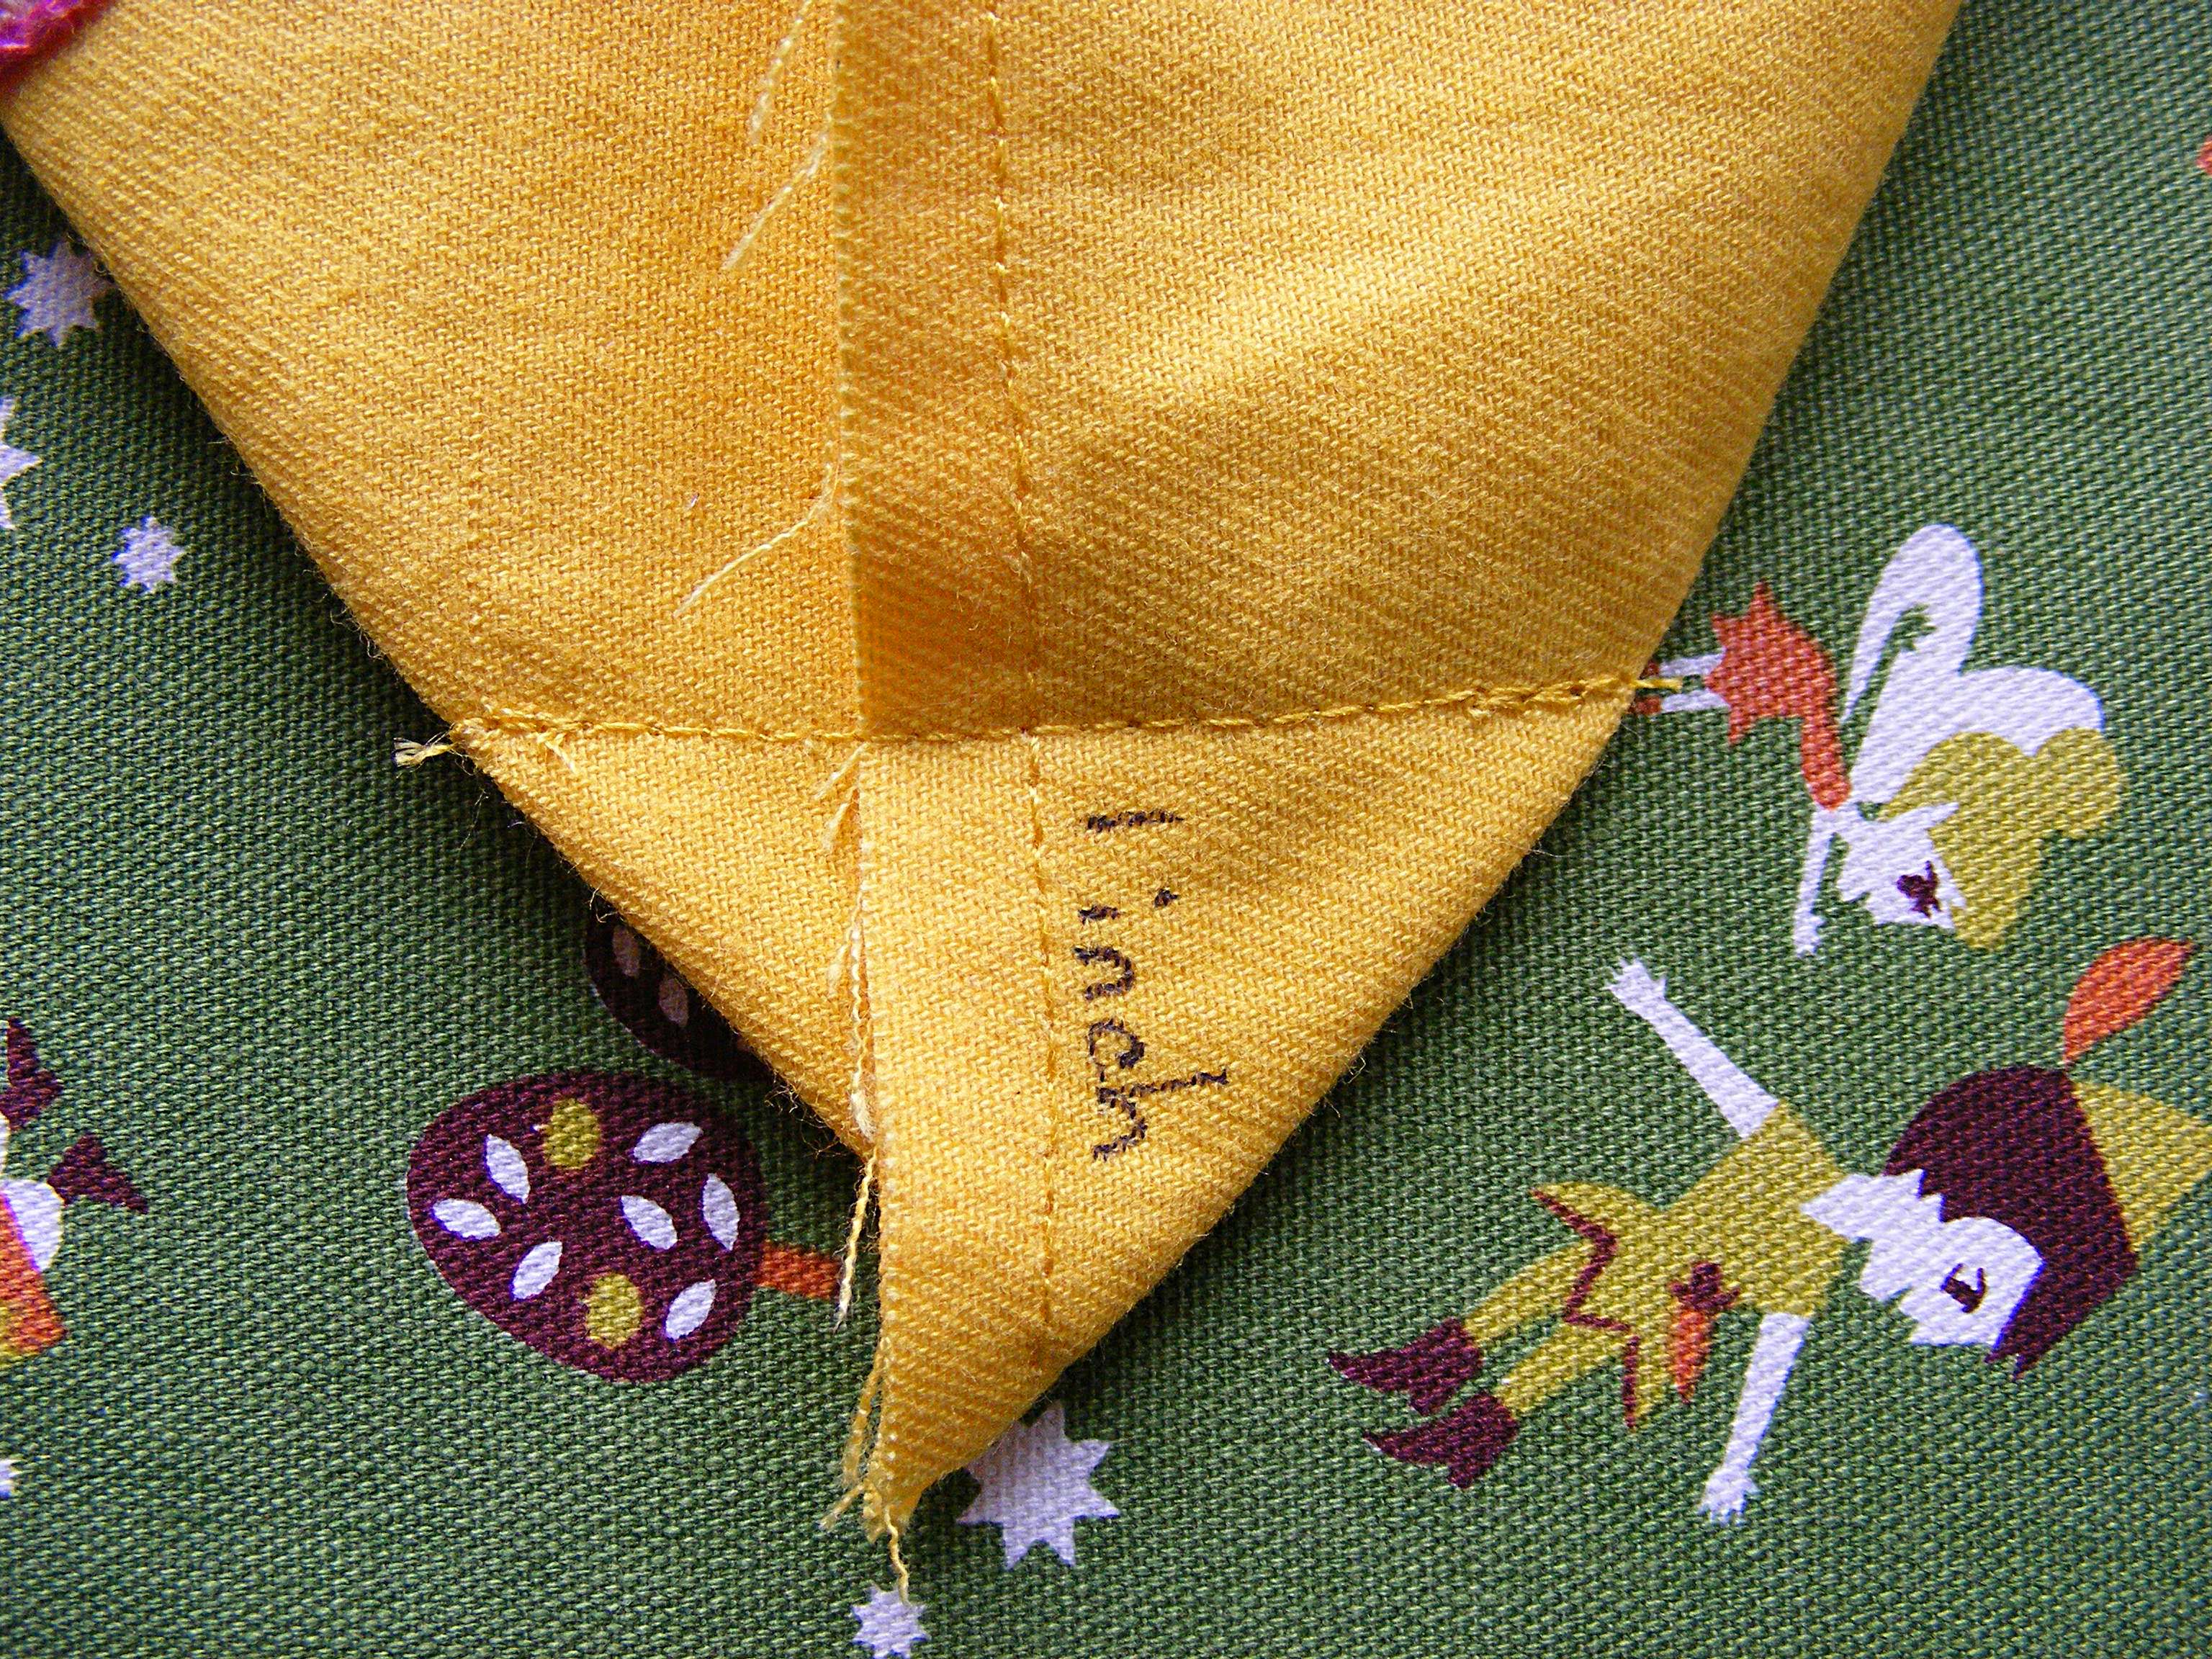
- Make a Wall Hanging with a Wonky Churn Dash Frame
- Trick or Treat Bag (medium tote bag)
- Quilted Tablet Cover
- How to Turn Any Quilt Block into a Pillow
- Fast and Easy Placemats
- Fancy Felt Frame
- Receiving Blanket
Here are several free patterns that work with just some simple resizing. This post about making coasters has info about resizing an applique pattern that can be applied to any of these projects.
- Free Bib Pattern
- Simple Christmas Stocking
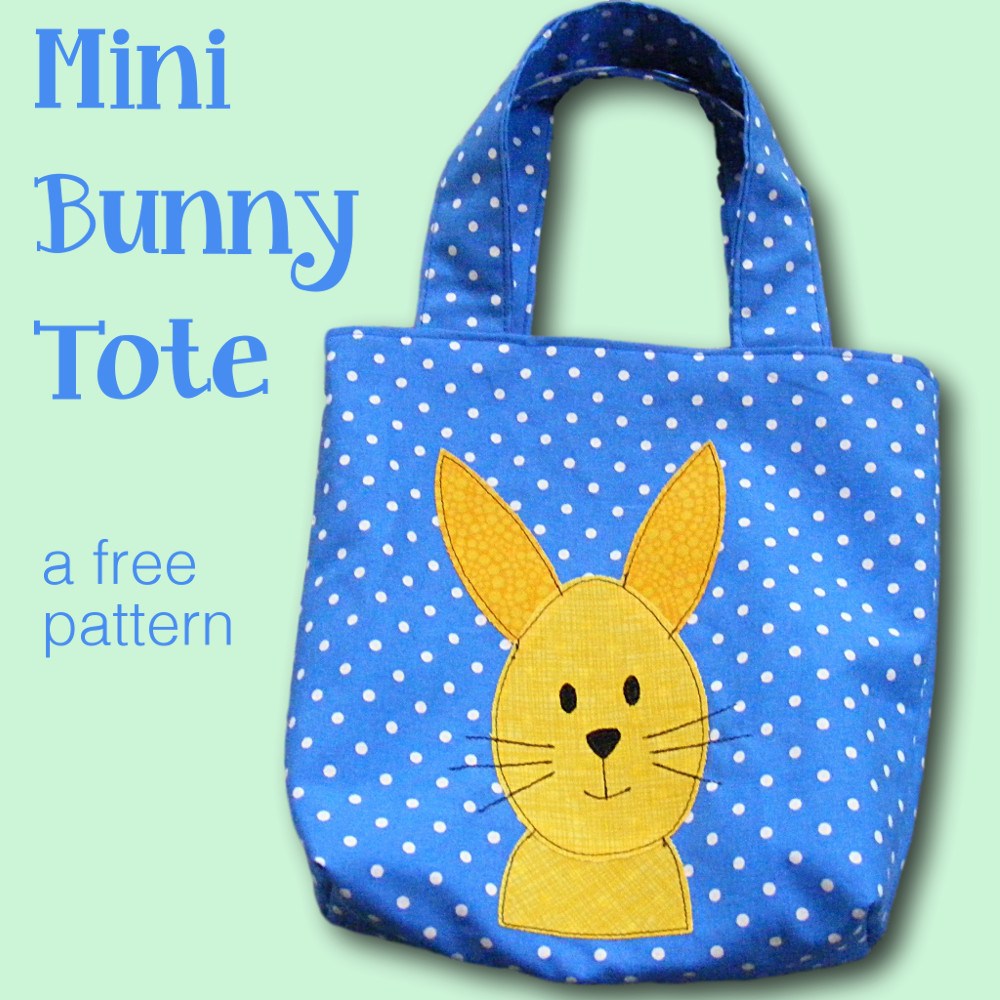
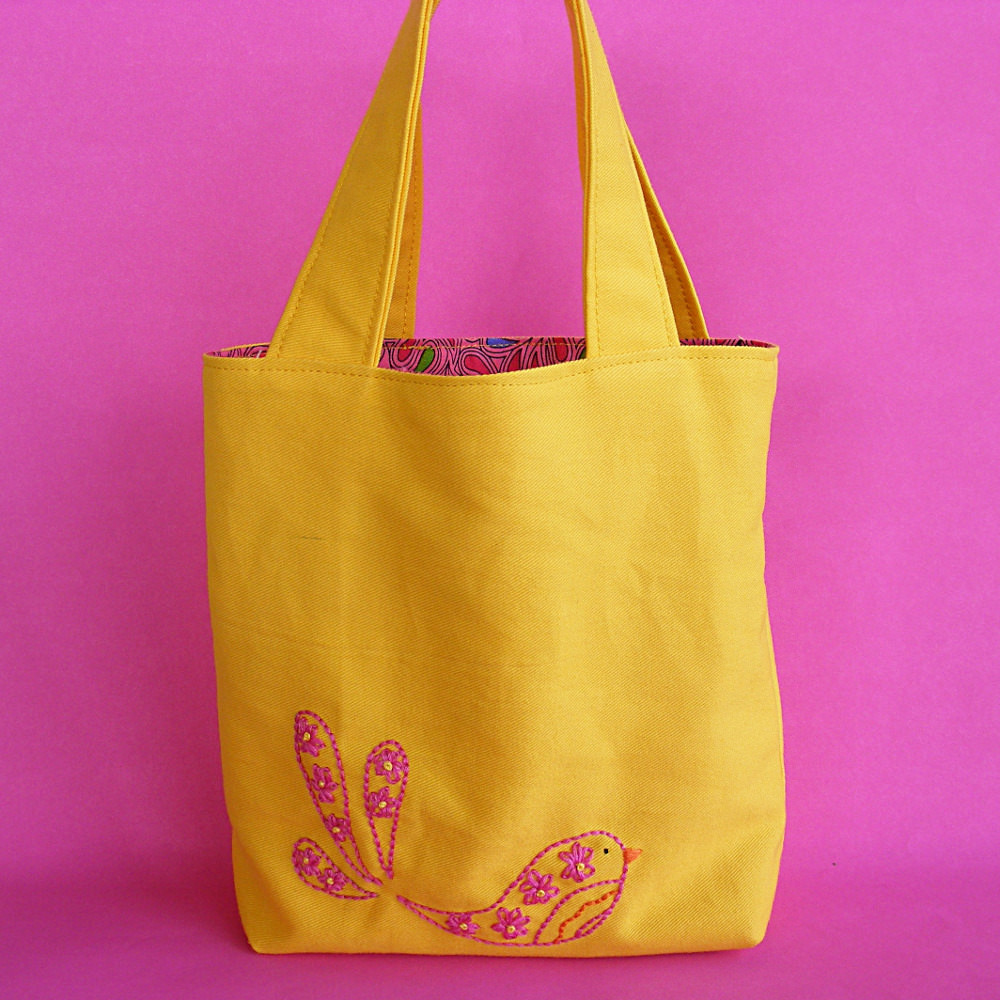
- Mini Bunny Tote Bag
- Turn Any Quilt Block Patterns into Cute Coasters
- Cozy Bear Coasters
- The Big Bag (applique on the pocket)
- Cloth Book for Babies
Return to the main Let’s Make a Quilt Table of Contents.
Happy stitching!