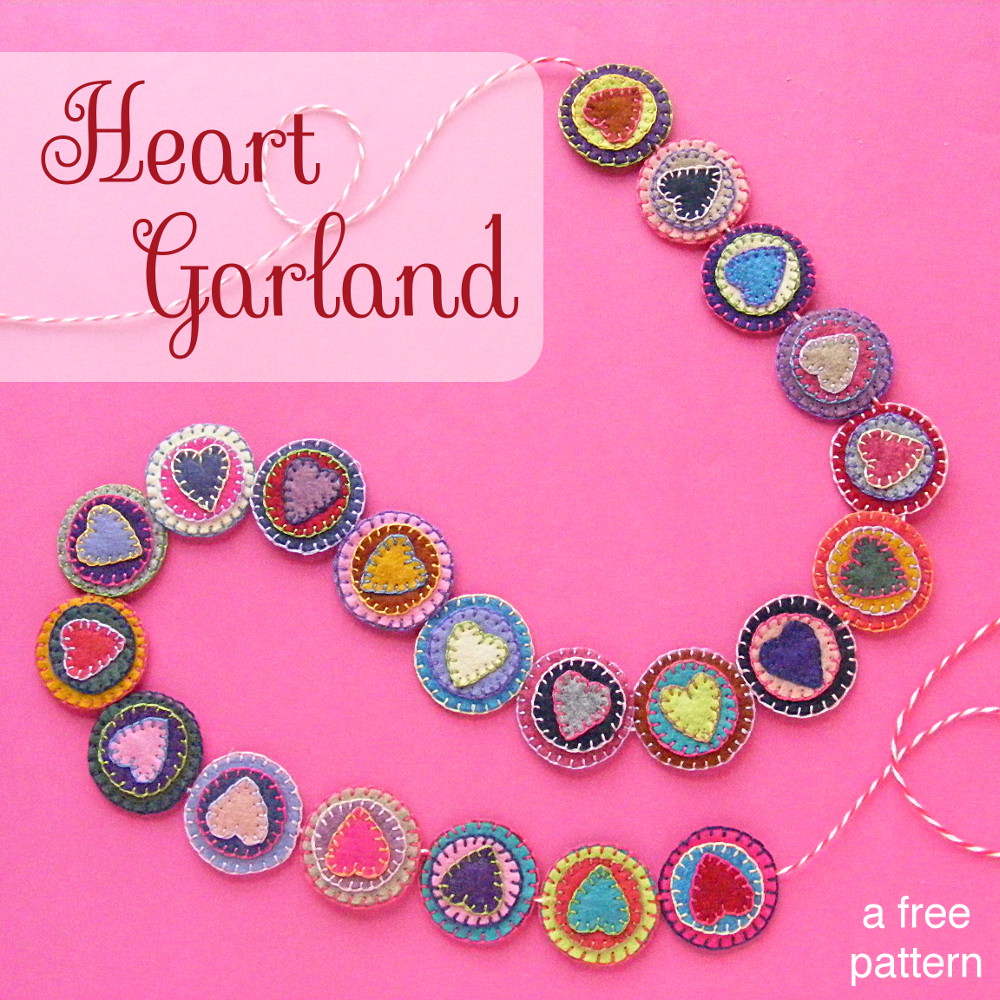
Crafting for Valentine’s Day is so much fun – especially since you don’t have to put the decorations away after the holiday’s over. Hearts never go out of season!
This pretty heart garland is easy to make (Just one stitch! And there’s a link to a video showing you how to do it!) and it’s a great way to use up tiny felt scraps and stray bits of thread. 🙂
Want the pattern? Here we go!
All stitching is done with two strands of embroidery floss.
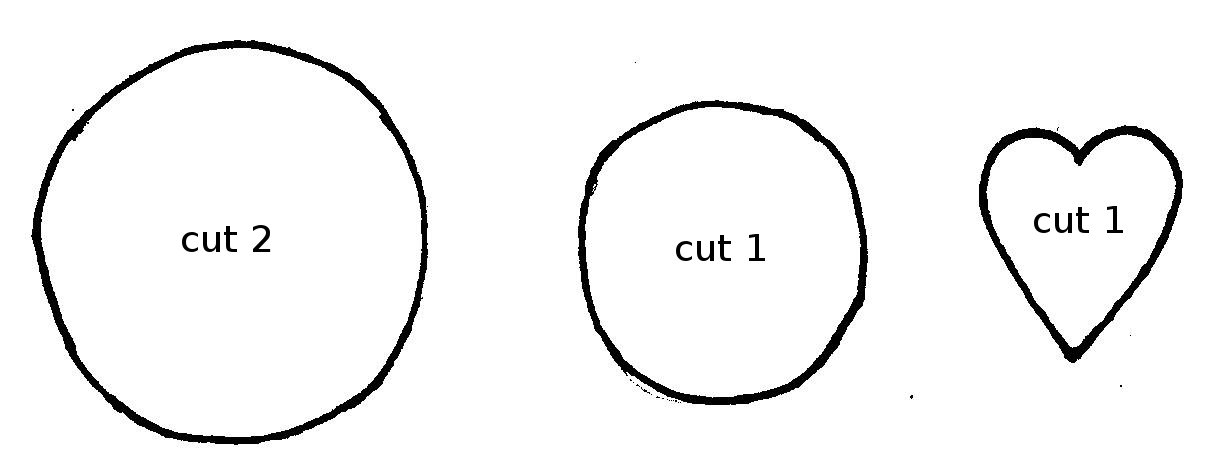
Print them out at 100% size (or whatever size you like). I really like using freezer paper for small pieces like this. Just iron it down to the felt, cut out the shape, peel off the paper and reuse it for the next one.
For each disc, cut out two large circles, one small circle, and one heart. I used lovely wool felt scraps for all of mine. (If you want your discs to have hearts on both sides, just cut out two of everything.)
For each foot of garland you’ll need 9 finished discs.
Step 2
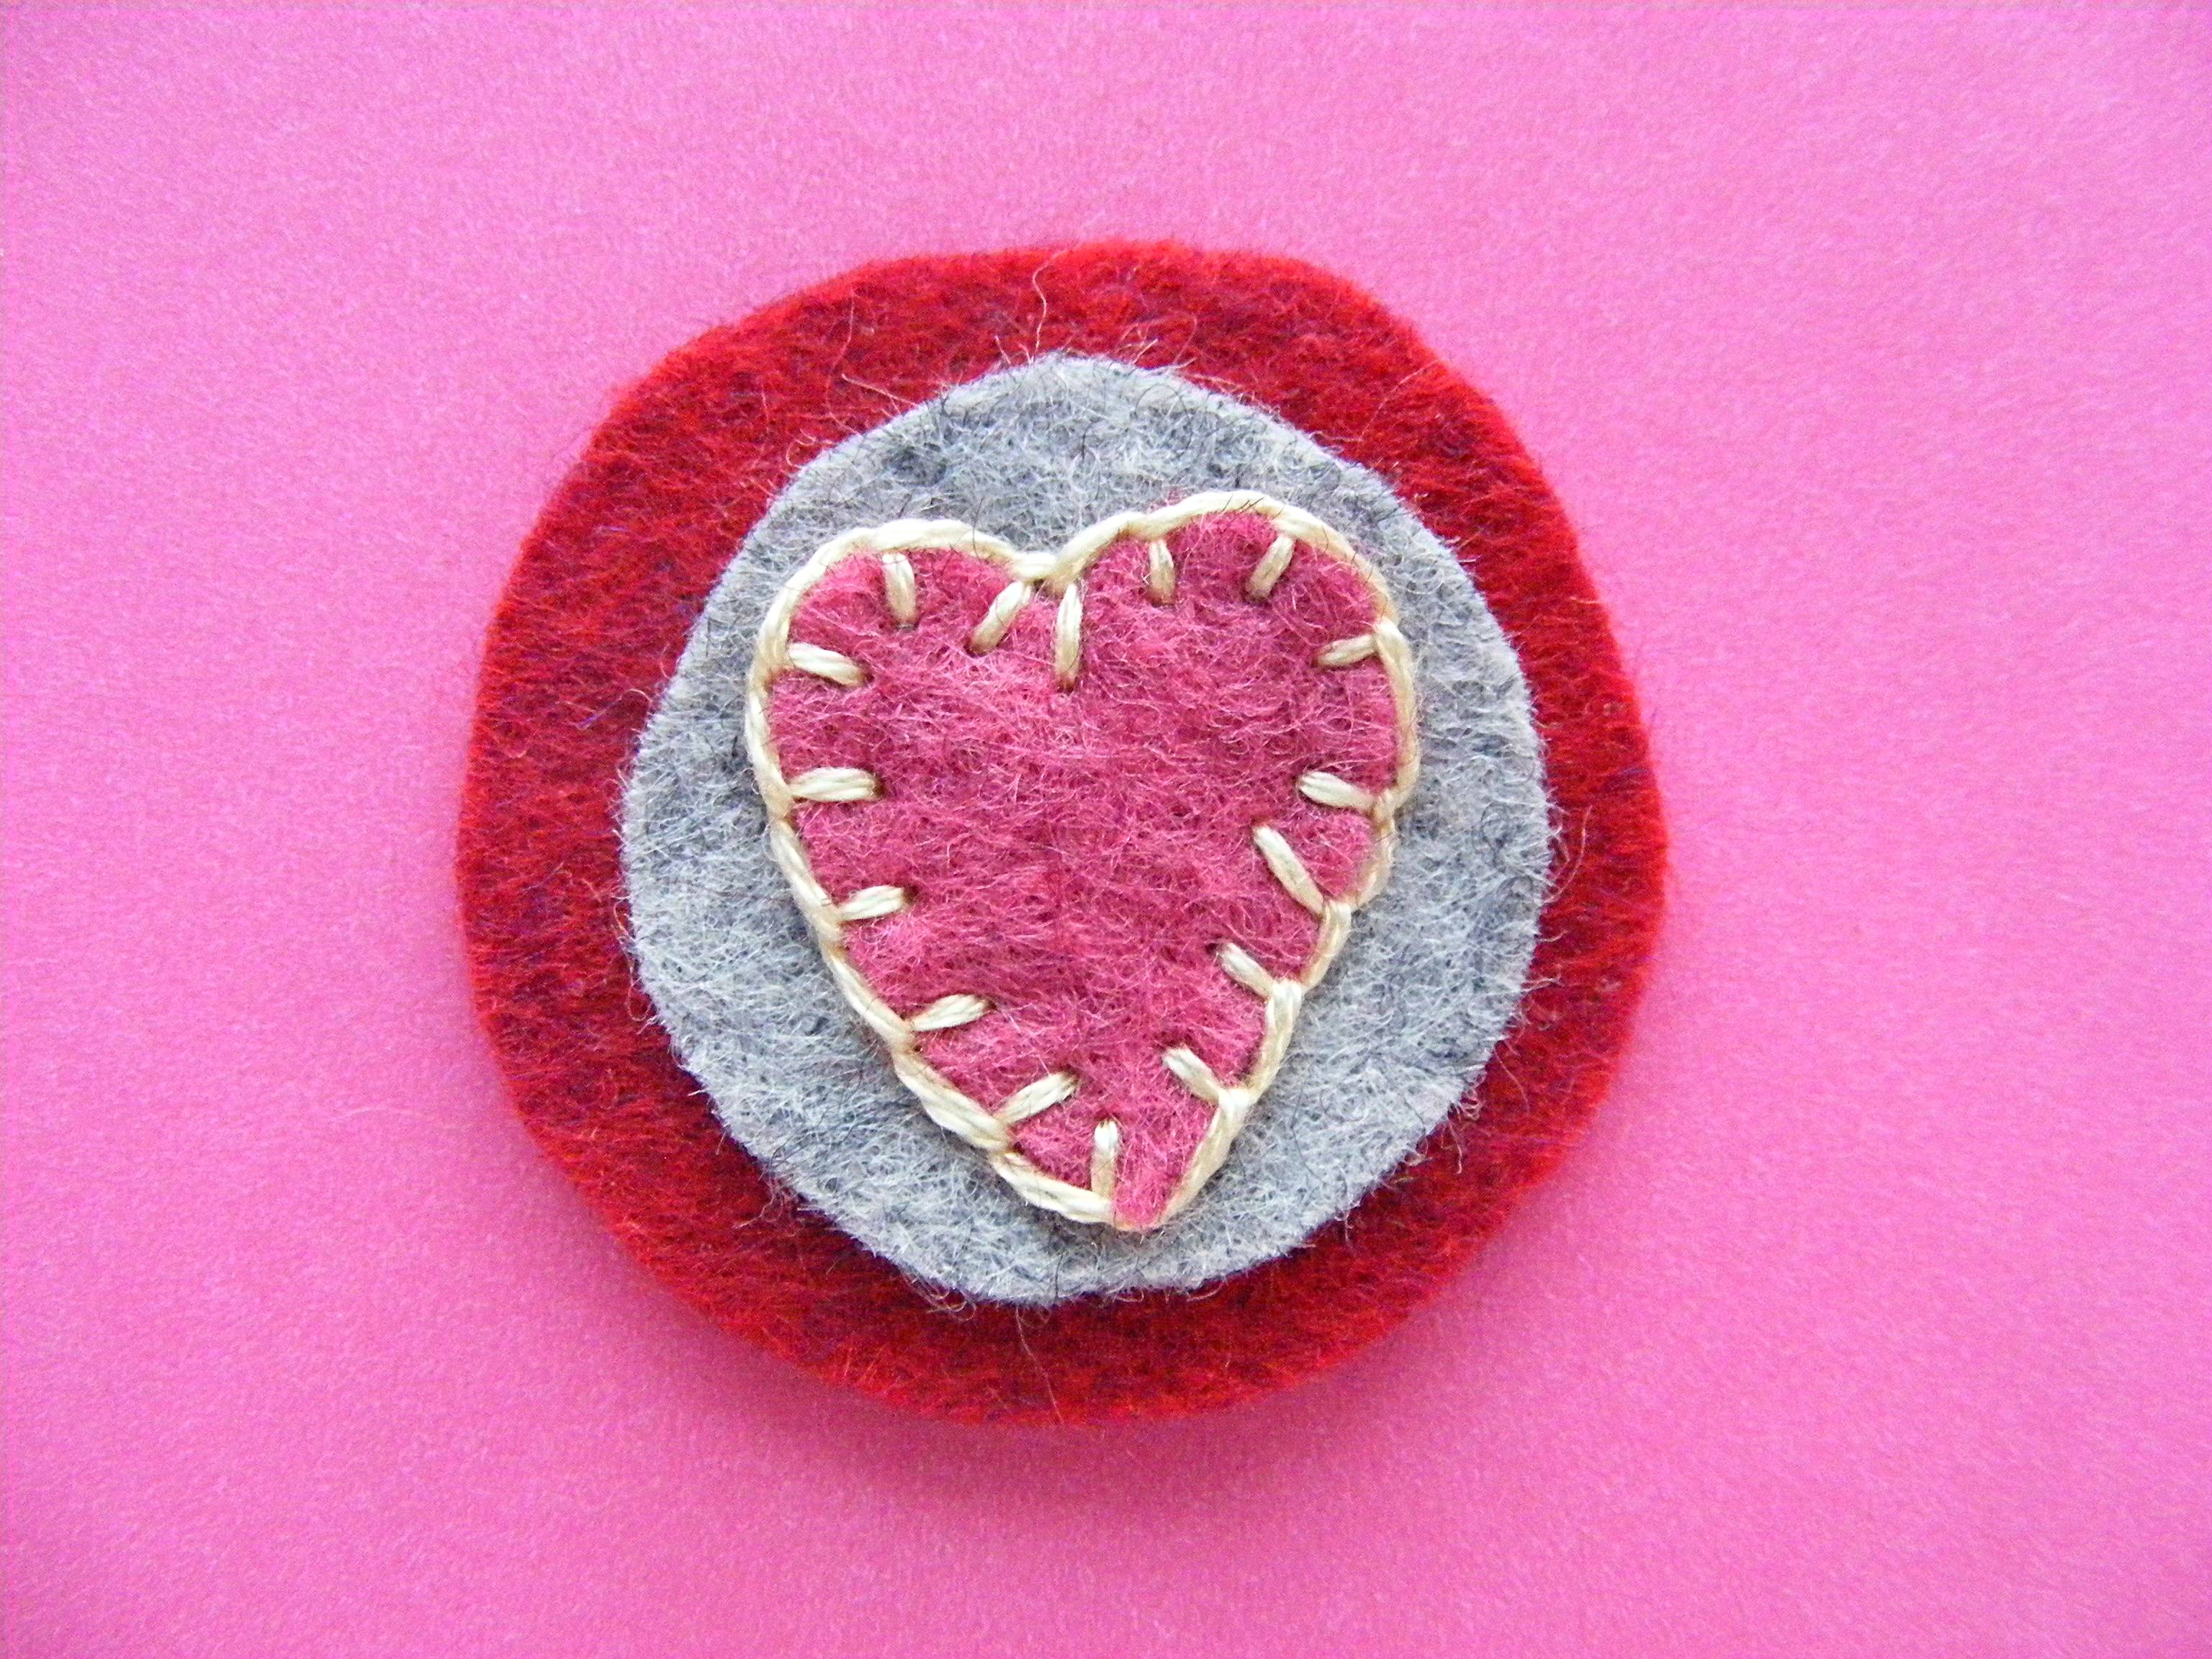
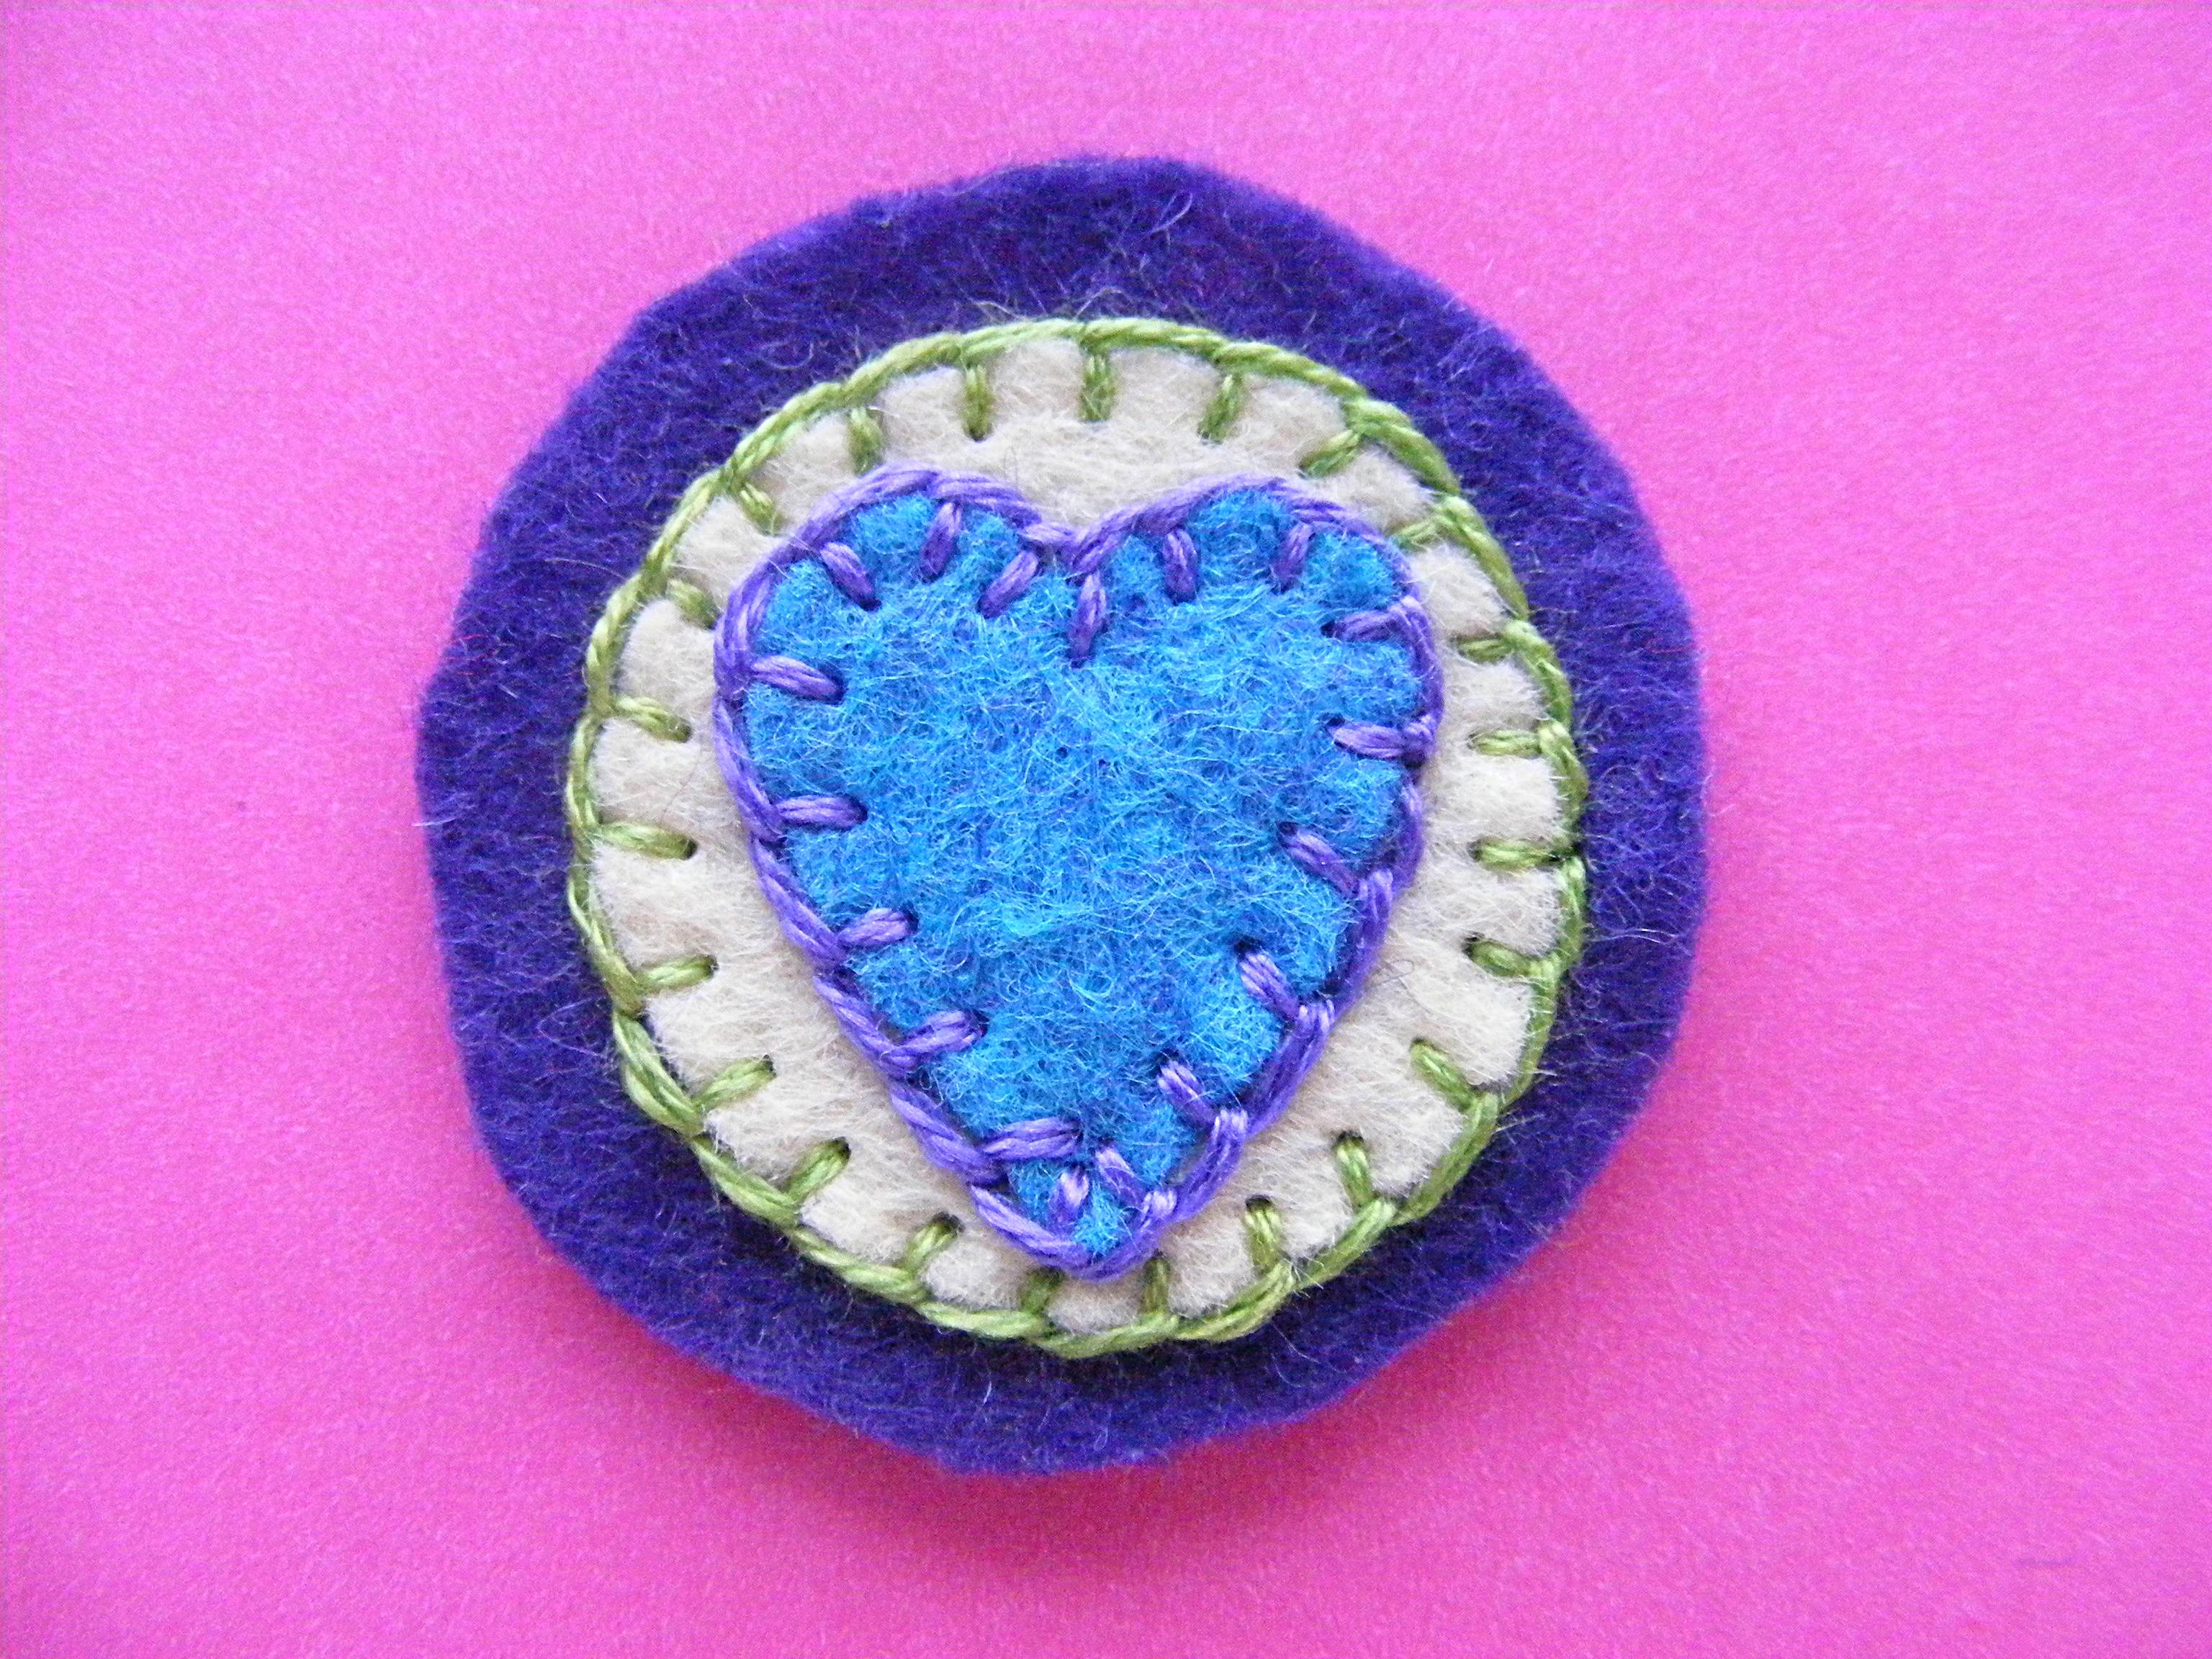
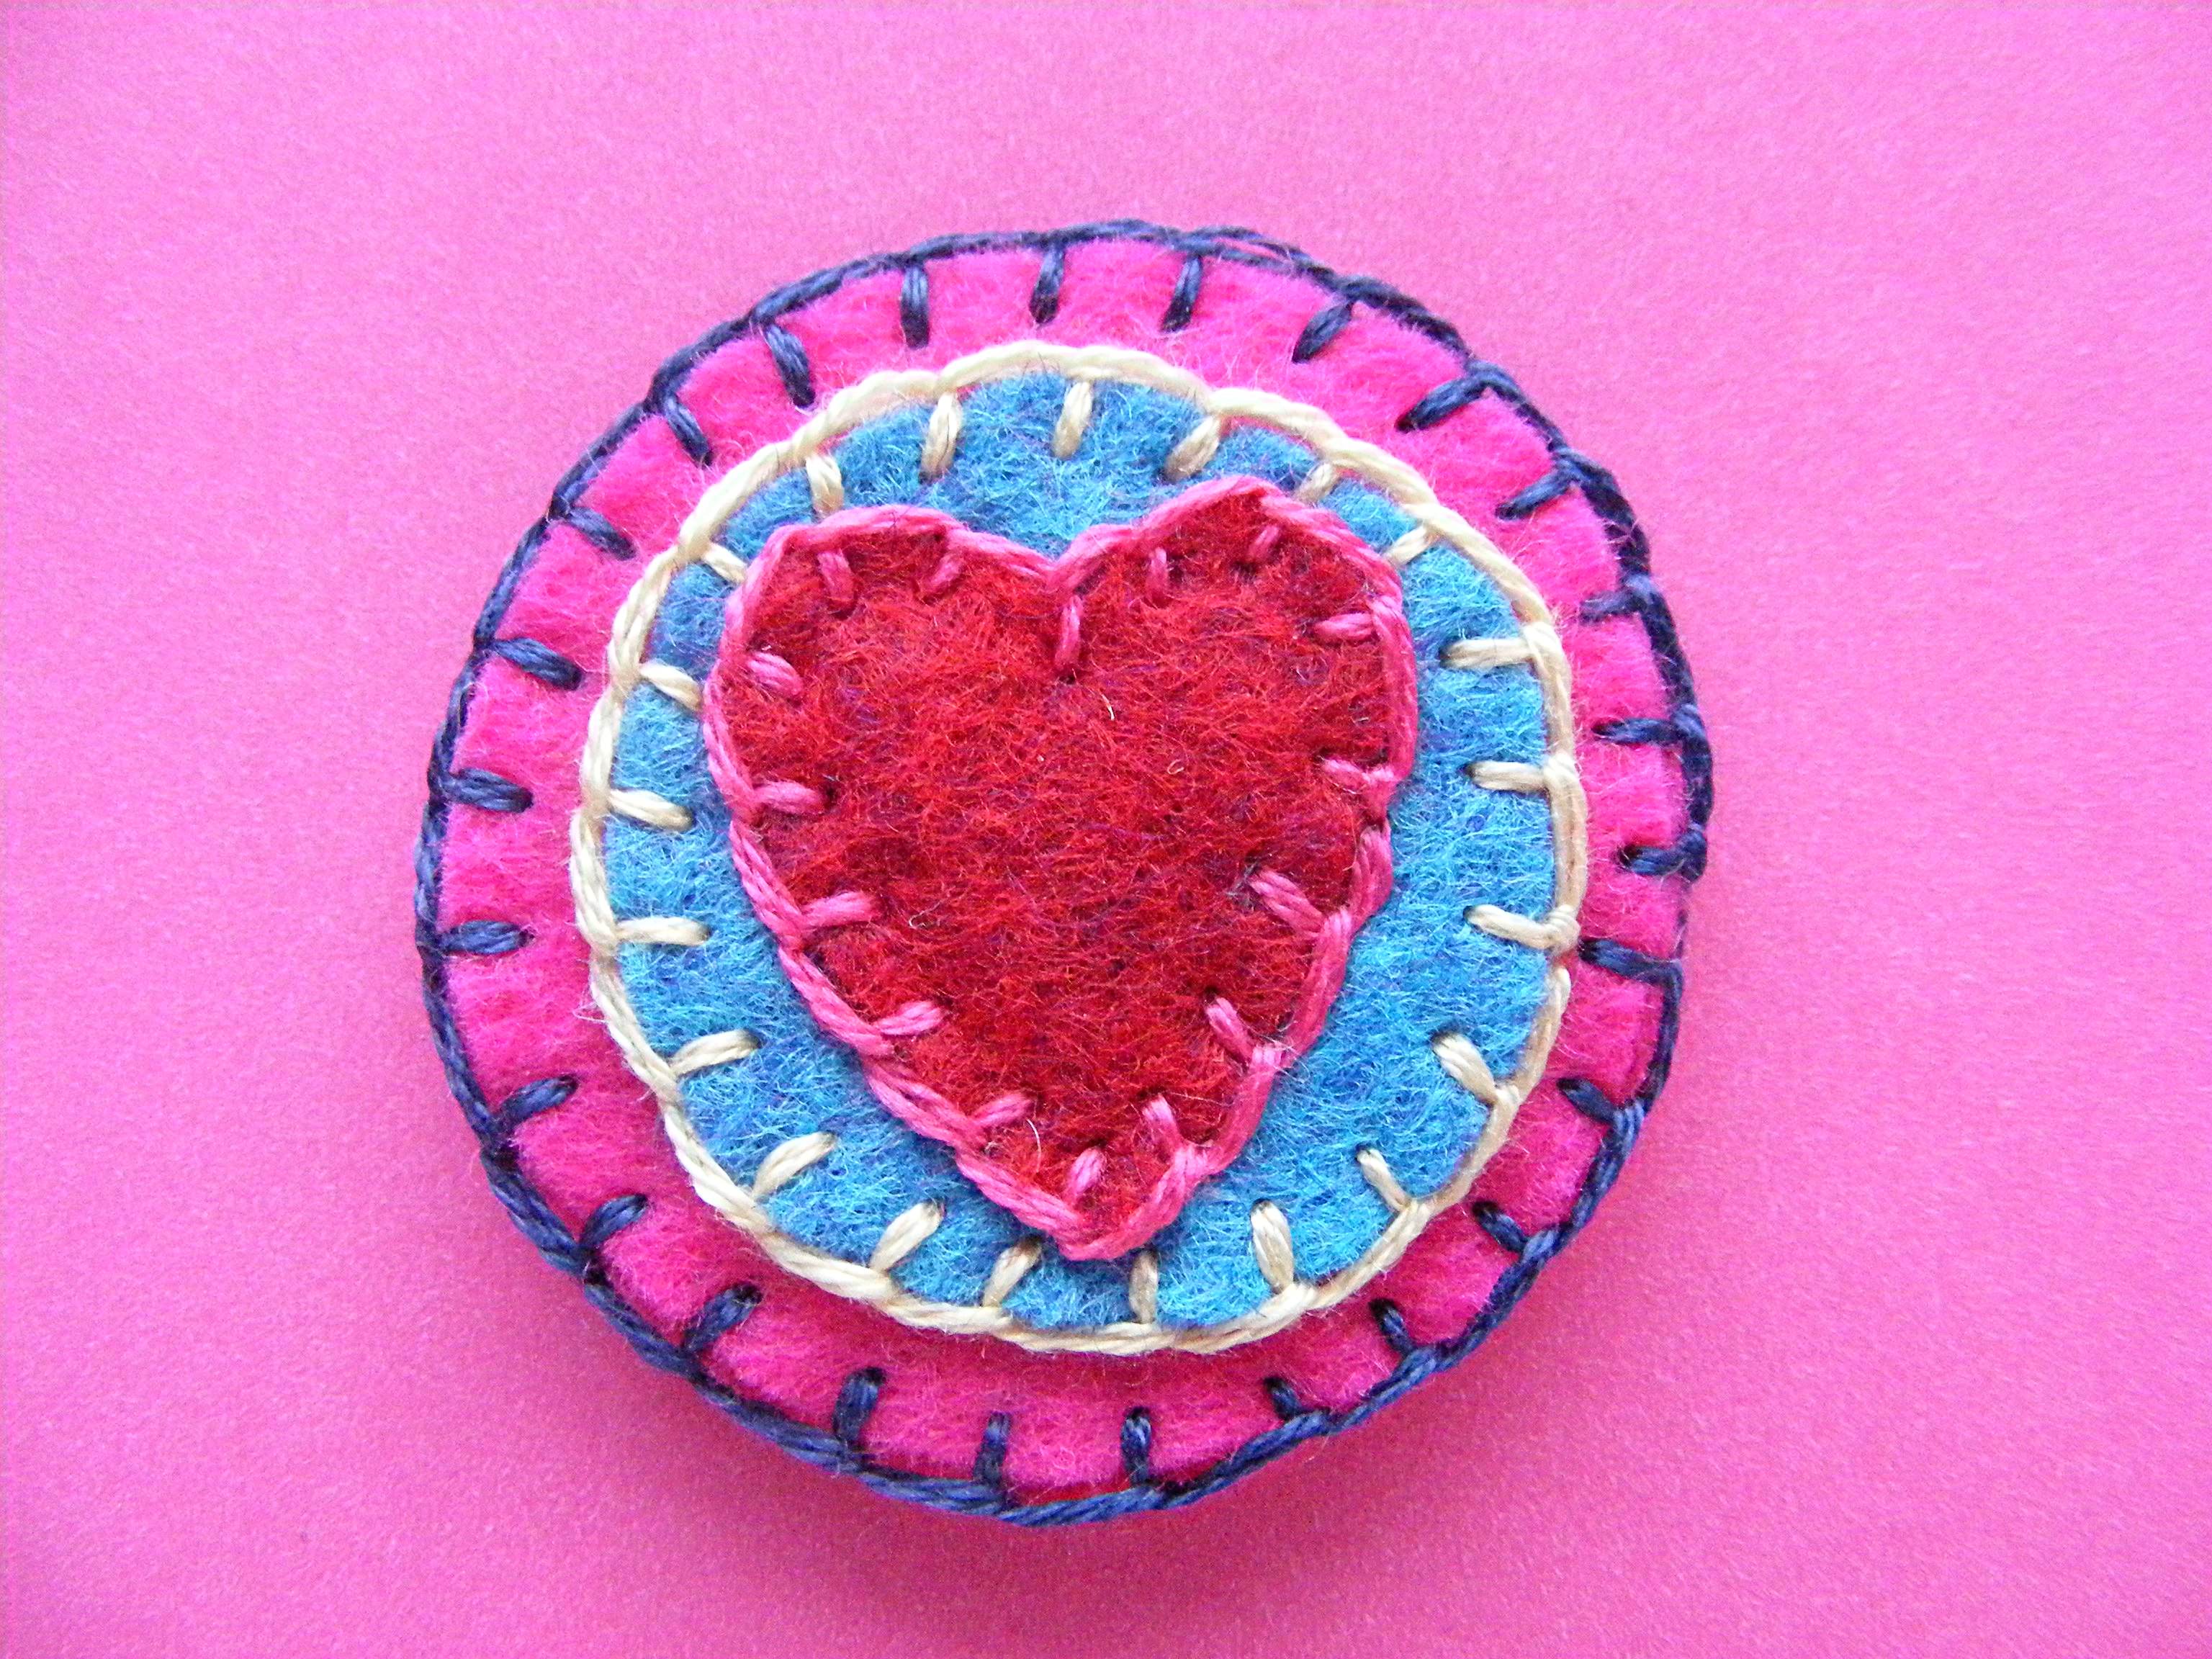
Stack one large circle, one small circle, and one heart.
Blanket stitch around the heart, stitching through all three layers of felt.
Step 3
Blanket stitch around the smaller circle.
You’ll be stitching through two layers of felt.
Step 4
Layer the second large circle on the back of the disc and blanket stitch around the edge of the two layers.
Now you won’t see the back of any of your embroidery. Neat and tidy!
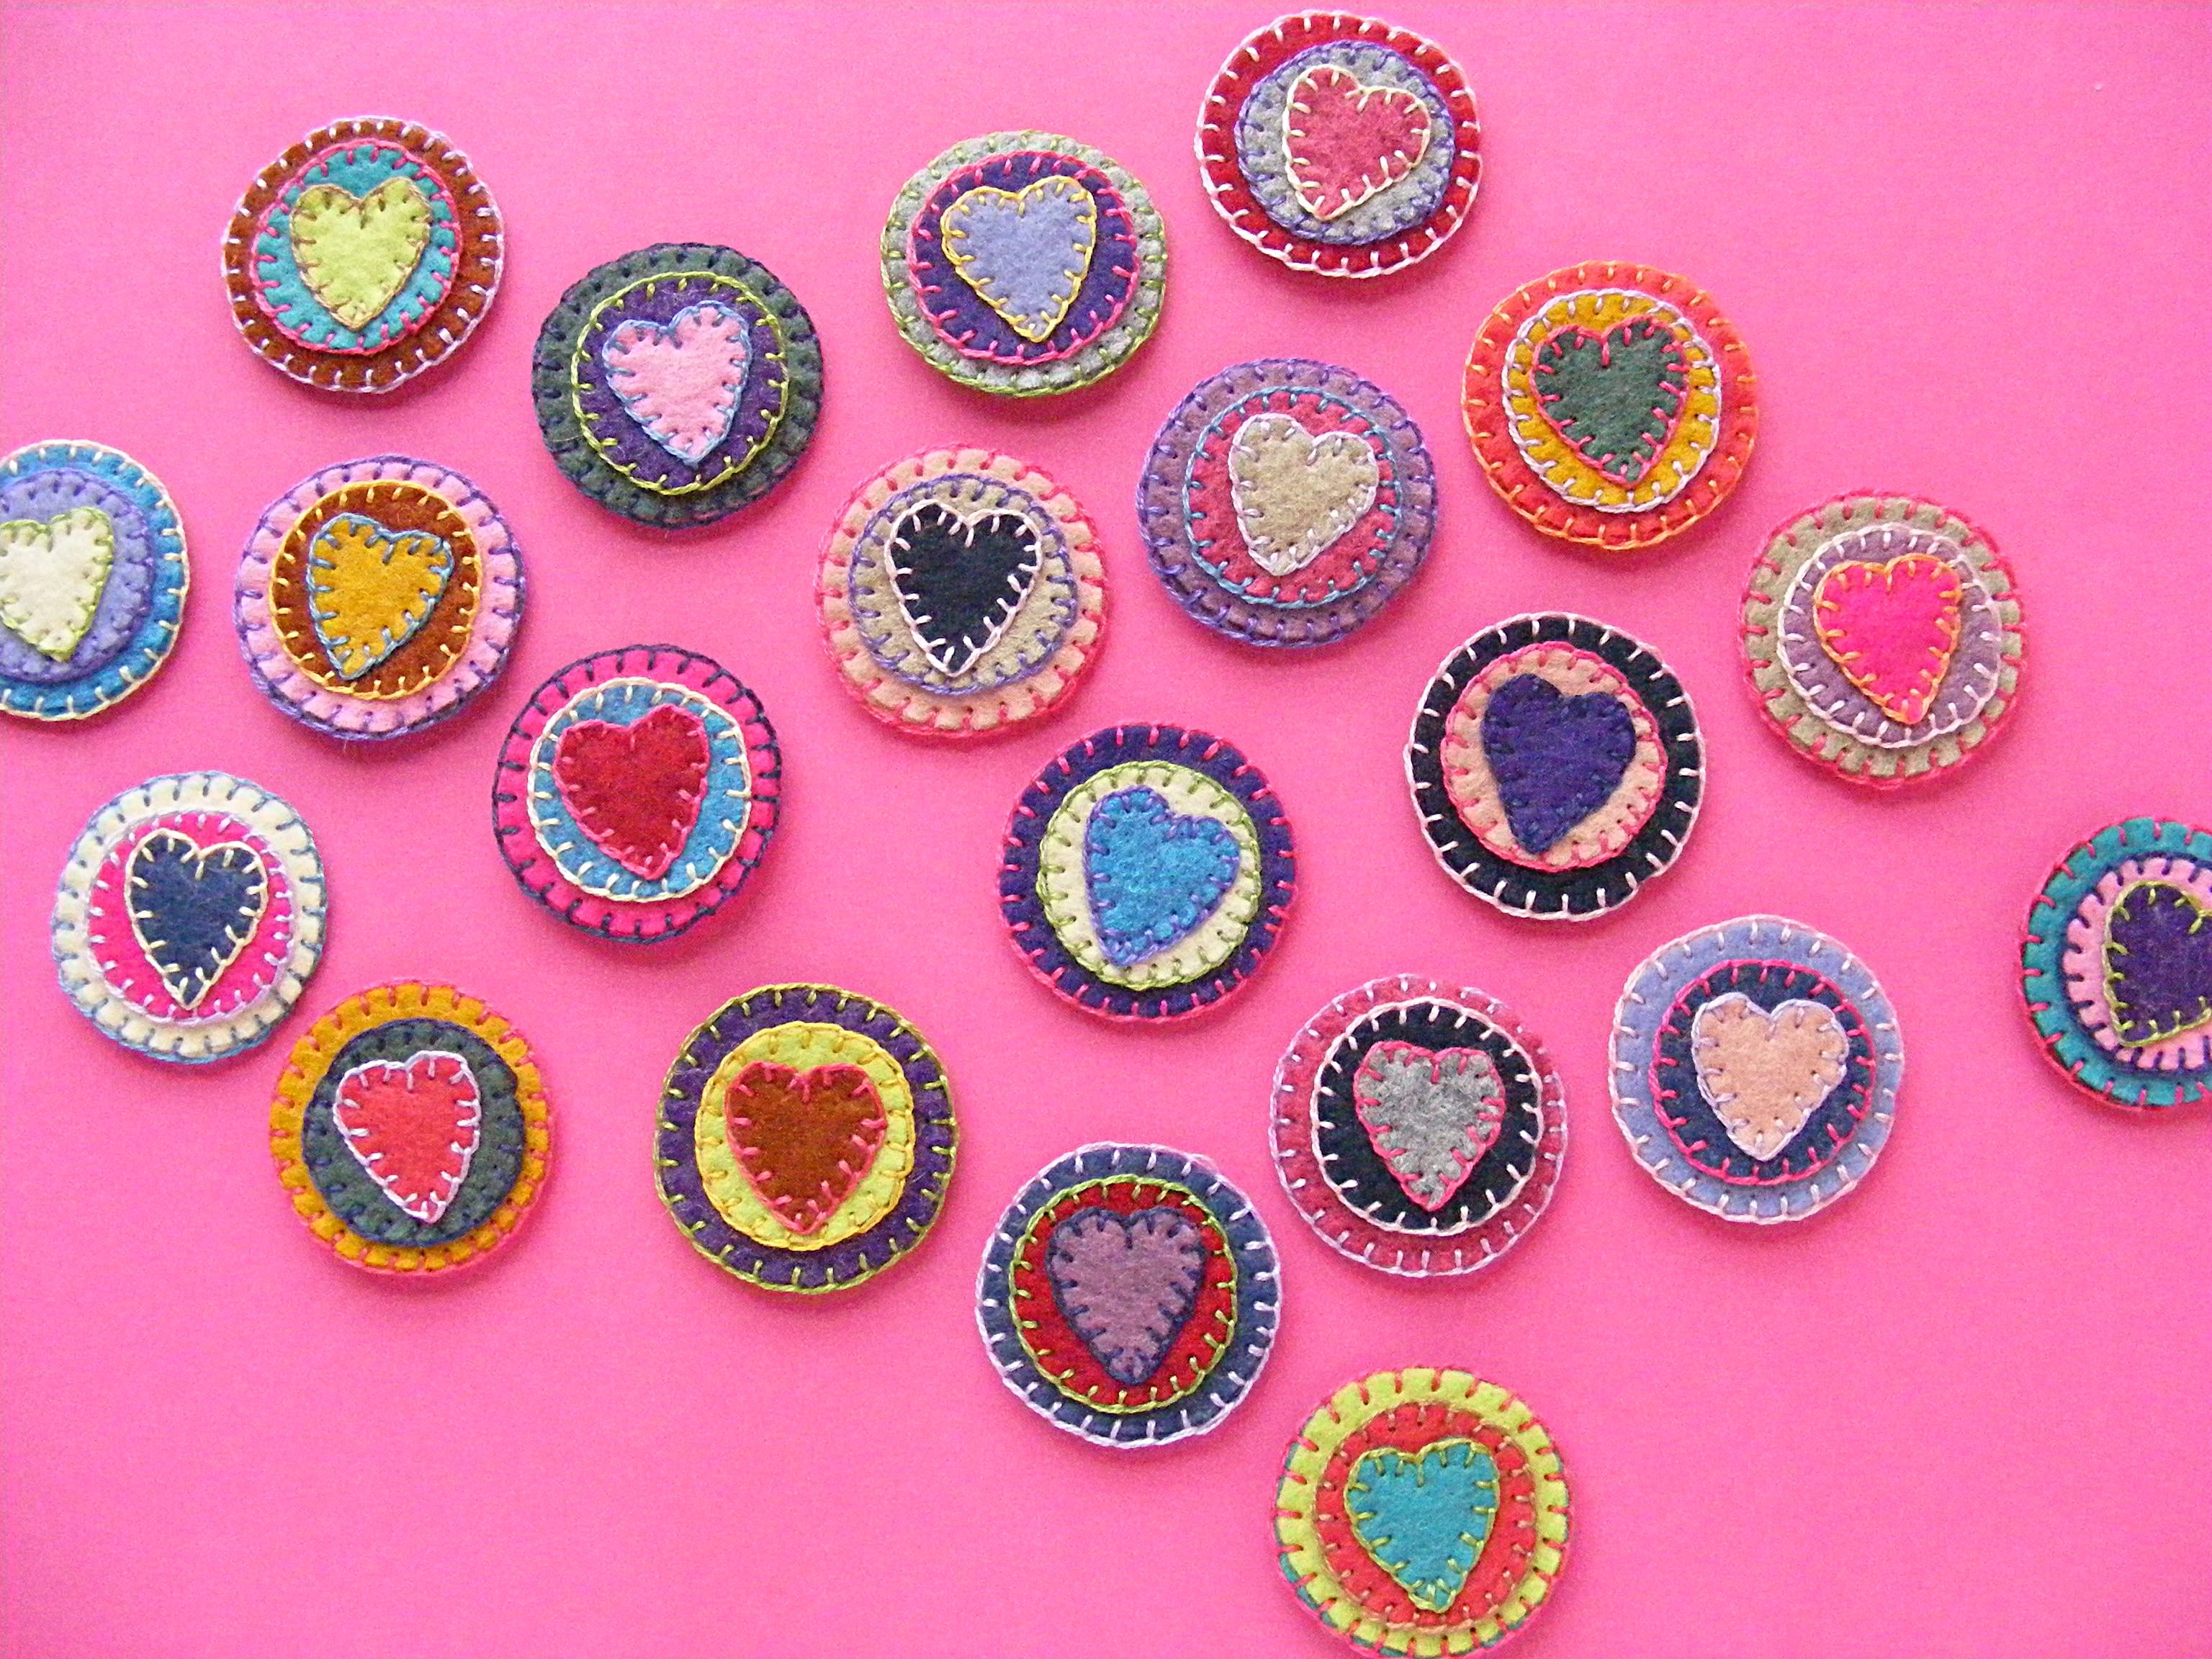
Step 5
Make as many discs as you want.
Each foot of garland needs 9 finished discs.
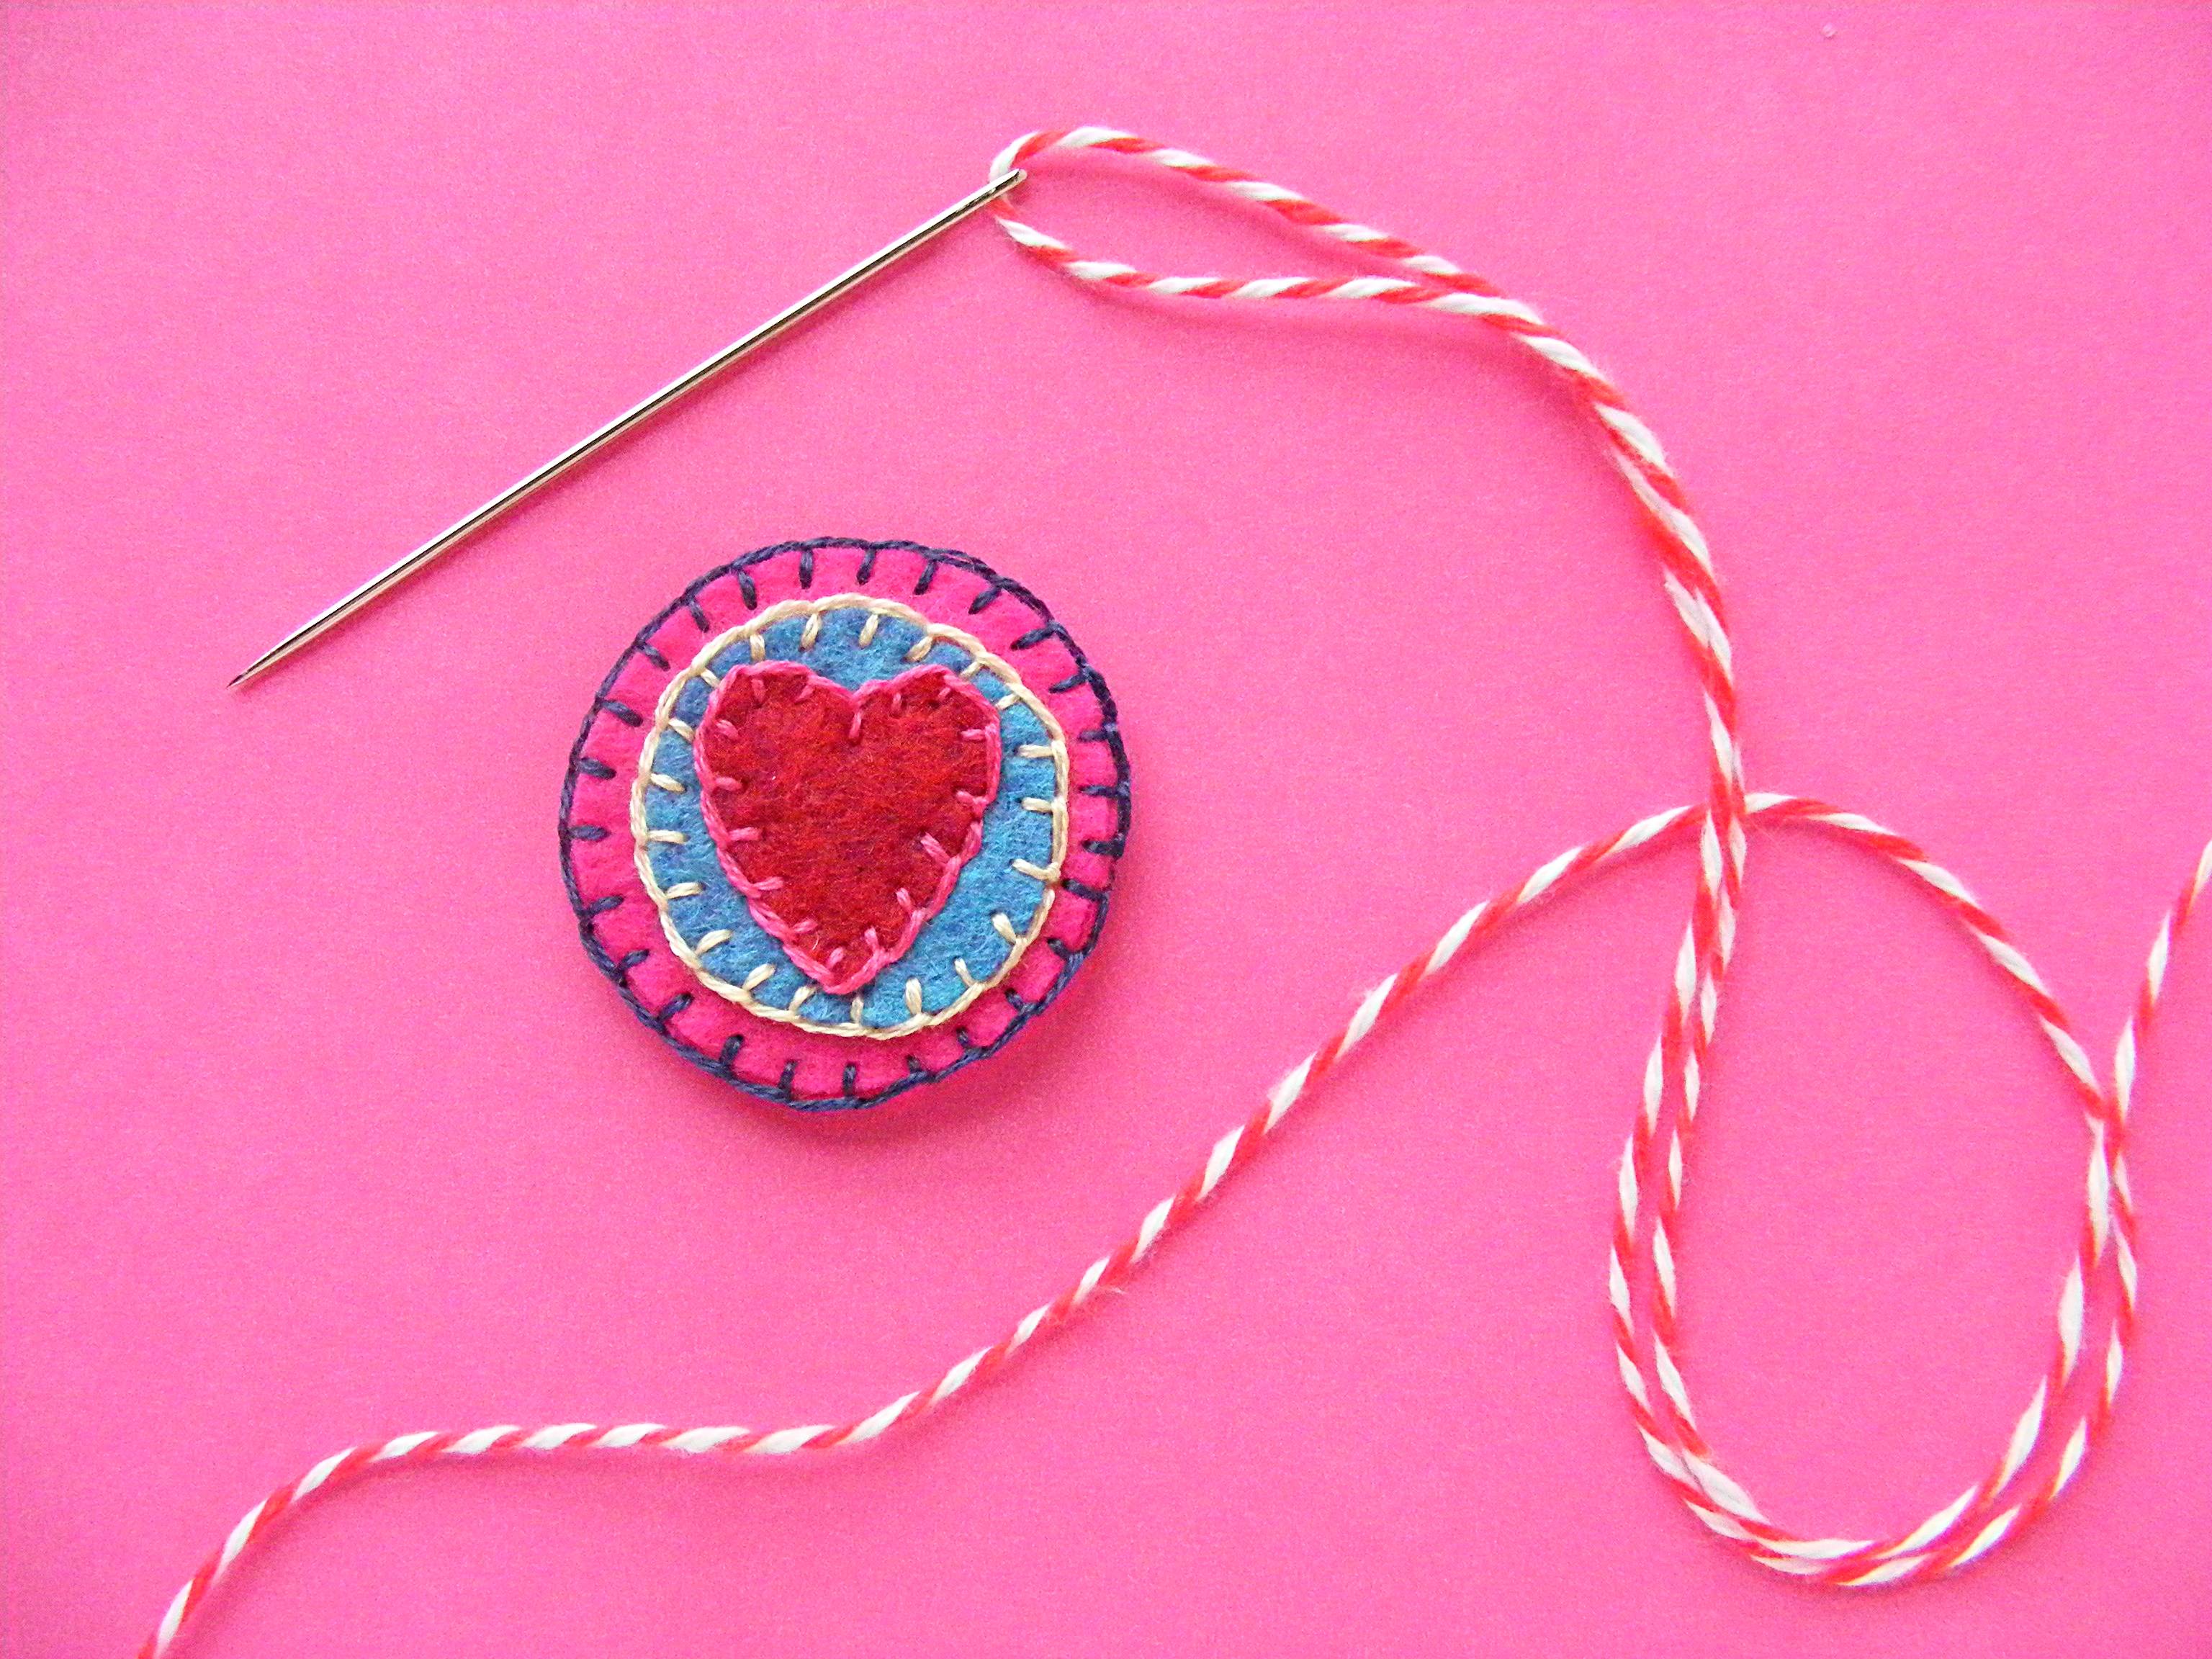
Step 7
Find a needle that’s longer than your disc is wide. Cut a length of stringing cord - I used one yard of pretty baker’s twine.
Thread the needle with the cord.
Step 8
Thread the needle between the two layers of felt, stringing the disc onto the cord.
Step 9
Continue adding discs until your garland is finished.
Admire your work! Isn’t it pretty?
Now hang it somewhere where it will make you smile every time you see it. :)
Stitch up some love!
Have a great day, everyone!
If you like this pattern, sign up for the Shiny Happy News! Subscribers get a weekly newsletter full of sewing tips and tricks, free patterns, special discounts and more.
I’m a morning person. I really do wake up most of the time happy and excited to start my day.
I know this can be super annoying. I live with two not-morning people who speak in grunts for the first hour they’re up. By the time they wake up I’ve usually been working for a couple of hours and I have all kinds of things I’m excited to show them. I’ve learned to restrain myself until they’re past the grunting stage. 🙂
As Polyanna as it can be – my eternal optimism is part of who I am. It’s a part of me that I like – and a part that I fully embrace in my work. So my studio is a great place to hang this happy reminder of how I like to start every day!
I love happy words, felt applique, and embroidered details – so you KNOW I had a ton of fun stitching up this project. 🙂
I printed the reversed version of the pattern onto a sheet of freezer paper, then cut the letters apart and fused them to some of my smallest felt scraps. I cut out the letters and the freezer paper at the same time – it’s the best way to accurately cut small, detailed pieces like this.
I colored in the regular (not reversed) version of the pattern with some crayons first to help me choose a good balance of colors and make sure I didn’t end up with consecutive letters in the same color.
My scraps were ruby red slippers, loden, periwinkle, love bug blue, old gold, and copper. Use what you have! Your scraps will be in colors you love!
Arrange the letters carefully on your base fabric. I used black cotton twill.
The pattern shows the letters arranged in an 8-inch circle, with a dotted line showing the vertical and horizontal centers. That line can help you eyeball the arrangement of your words. I used a 9-inch hoop for a little extra breathing room – plus it’s what I had on hand. 🙂
You can pin the letters in place, but it drives me bonkers when my embroidery thread catches on the pins, so I glued each letter in place with a tiny dab from a fabric glue stick.
I love the look of whipstitch in matching color thread, but an outline in blanket stitch in contrasting thread would also be really nice.
I could have stopped there – and I almost did. I thought there was a real charm to the simple refrigerator-magnet-letter look. But I couldn’t resist adding a bit of extra fancification. 🙂 I did keep the extra stitching tone-on-tone so the effect wouldn’t be too wild or overwhelming. And I love the texture it adds!
Sometimes I just did little straight stitches across the letter.
Sometimes I made little stars out of simple straight stitches.
Sometimes I backstitched a stick letter right in the middle of the block letter.
And sometimes I did some extra little stitches across the backstitched letter for a “Frankenstein stitches” kind of look. 🙂
For the two i letters and the exclamation point, I stitched a star in the dot and a row of three backstitches in the line.
I didn’t plan anything out – I just did what would be easiest in each letter and tried not to do the same fancification in two letters right next to each other.
Want to learn the basics of hand embroidery with an easy online workshop – totally free?
Sign up for Embroidery 101 here. You’ll learn how to get started, the tools and supplies you’ll need, the four most basic stitches, how to transfer your pattern and how to display your work.
If you already know the basics – sign up for Embroidery 201. It’s also free! You’ll learn how to stitch on specialty fabrics like felt and stretchy T-shirts. Plus you’ll learn lots and lots and LOTS more stitches – all my favorites!
I love snow!
Especially when it’s big fat flakes coming down on a not-too-cold, not-too-windy day. 🙂
And I love snowmen too! Especially this snowman with his chubby face and stubby snowball arms.
This free snowman embroidery pattern is small – just 2 1/2 inches wide and a little over 3 inches tall.
You can see him above in a larger hoop for a wall hanging – with lots of snowy white space around him. But you can also put him in a smaller (4 inch) hoop to make a tree ornament, like this. . .
If you want to skip the hoop you can stitch him on a tea towel, a gift bag, a stocking, a T-shirt or baby onesie. Have fun with it!
It’s super easy – just a few of the most basic stitches! The pattern has links to videos teaching you all of them.
Want the pattern? Here’s the link to download it – free!
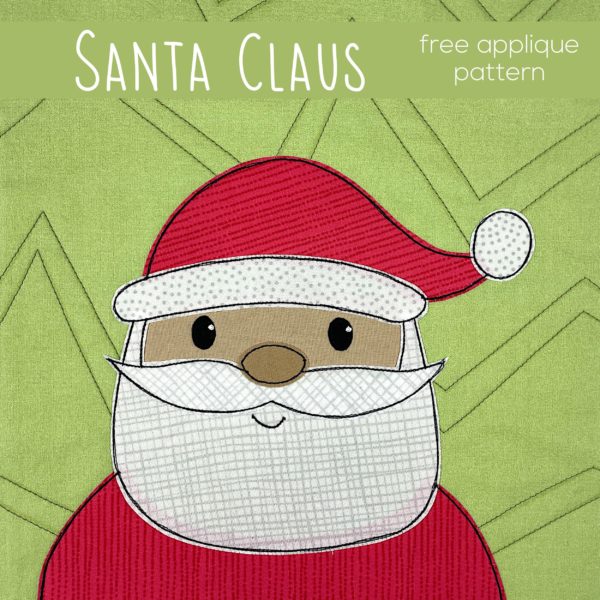
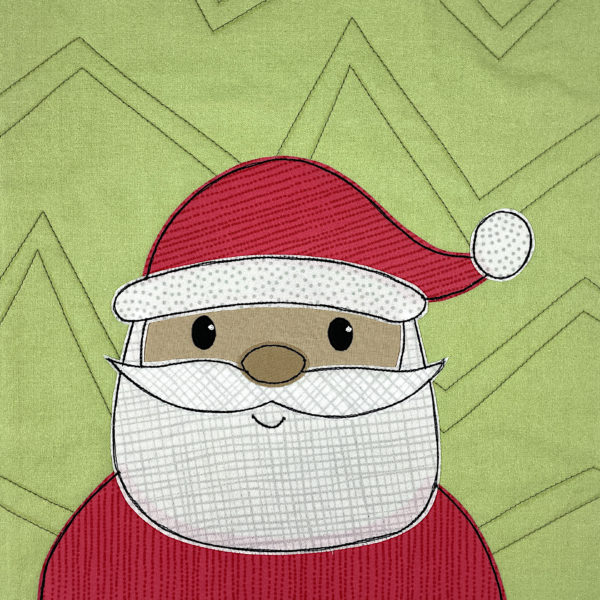
The pieces are designed to make an applique that fits in a 10 inch block. That makes it really easy to resize as needed. Do you want to make a 4 inch coaster? Print the pieces at 40% size. Do you want to make a tote bag that’s 17 inches square? Print the pieces at 170% size.
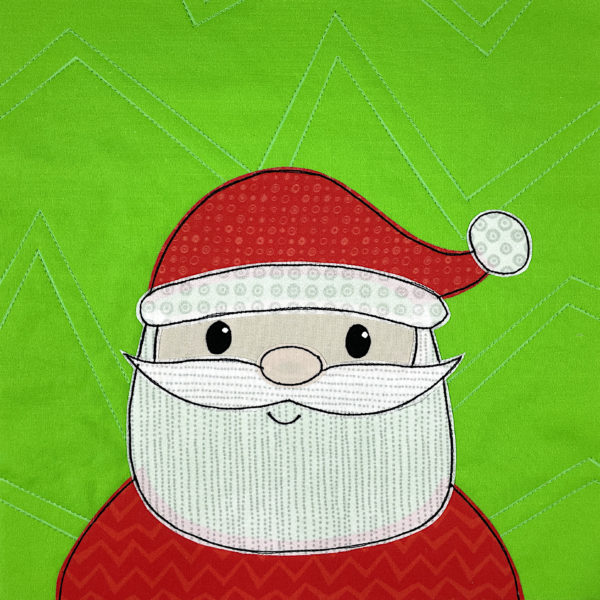
The question is – where can’t you use a jolly old elf?
A Little Extra Help
If you’ve never done any applique before, or are new to my method) there’s a free video workshop here. You can work through the lessons using any pattern – including this Santa.
There’s also a single video here that takes you through all the basic steps of my method.
You can find loads of single-topic tutorial videos here, and also by using the search box at the top of the page.
Prep Your Block
Cut an 11” square of fabric for the background, and an 11 inch square of batting.
Press the quilted block again (with steam) and let it cool.
This video has a general intro to my Quilt As You Go method, along with complete instructions for how to assemble the block. It’s a long video, but there’s timestamp info to help you skip to the specific instructions you want.
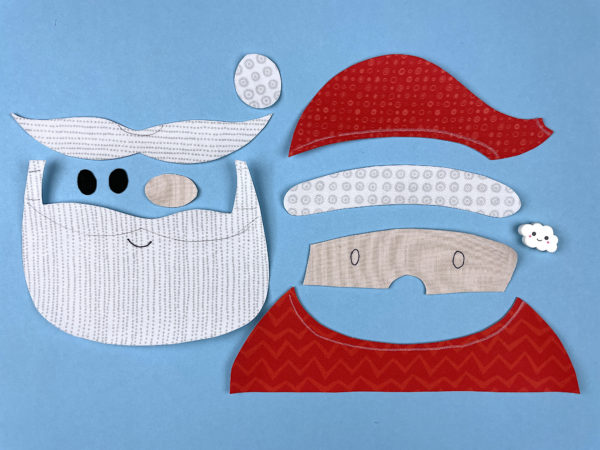
Cut Your Pieces
Download the template pieces and placement guide here.
If you have an electric cutting machine, you can use it to cut your pieces. Download the SVG file here.
The image in the SVG file is NOT reversed. If your cutting machine has you cut your pieces fabric side up, leave the orientation as it is. If your cutting machine has you cut your pieces fabric side down, you’ll need to flip the image horizontally.
Different cutting machine brands import the image at what seems to be totally random sizes. To fit the appliqué on a block that finishes at 10 inches square, check to make sure the small square in the image is one inch, and resize if necessary before ungrouping the pieces. Delete that square after resizing so your machine doesn’t try to cut it. 🙂
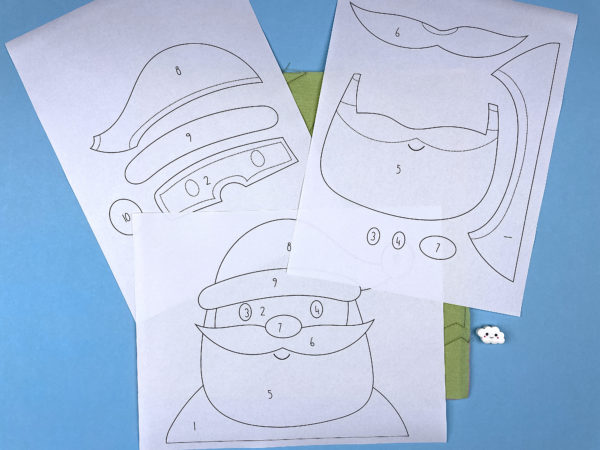
Print your templates.
If you’re cutting everything by hand you’ll need to print the reversed and exploded templates. If you’re using printable fusible adhesive (I use Heat & Bond Lite for all my quilts) you can print those pages directly onto the paper side of your fusible.
If you’re using a lightbox you’ll also need to print the placement guide.
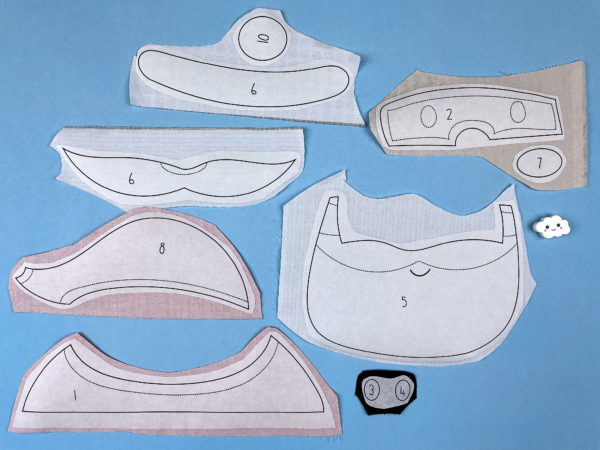
Roughly cut around each shape. Leave a little bit extra all the way around each piece.
Follow the package instructions and fuse each piece to the wrong side of the fabric.
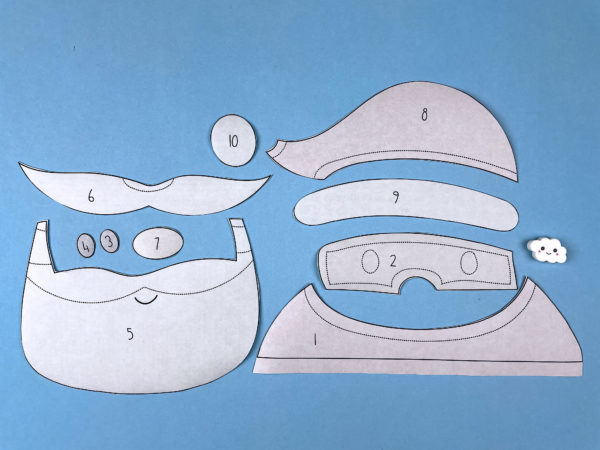
Cut out each piece neatly, directly on the solid lines.
Cutting after you fuse ensures that the adhesive goes right to the very edge of the fabric.
Trace the dotted lines onto the fabric. If you hold the pieces up to a window, the light will make the lines very visible – even on dark fabric.
If you want to skip this step, this video shows how to use a light box. If you use a light box, you only need to transfer the smile.
Put It All Together
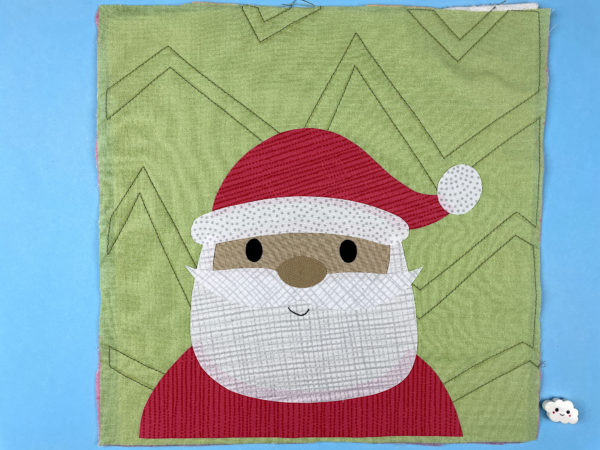
Peel off the paper backing and arrange the pieces on your background block. Fuse in place according to the adhesive package instructions.
This video shows the assembly with me explaining how I’m layering the pieces.
This video shows the same thing – but using a light box to guide placement.
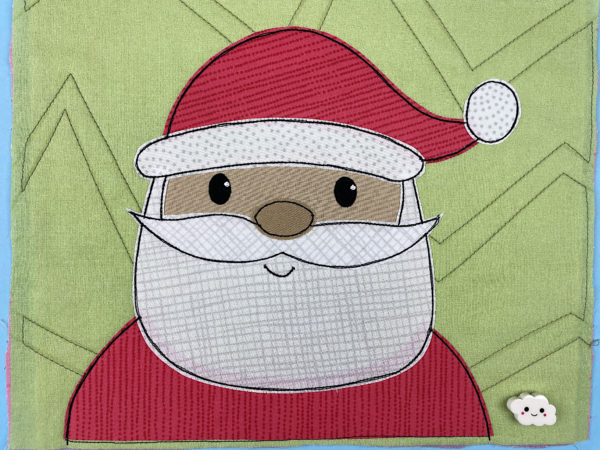
Stitch all the edges down. You can use any stitch you like, in matching or contrasting thread. I really love the cartoony look of a simple straight stitch with black thread.
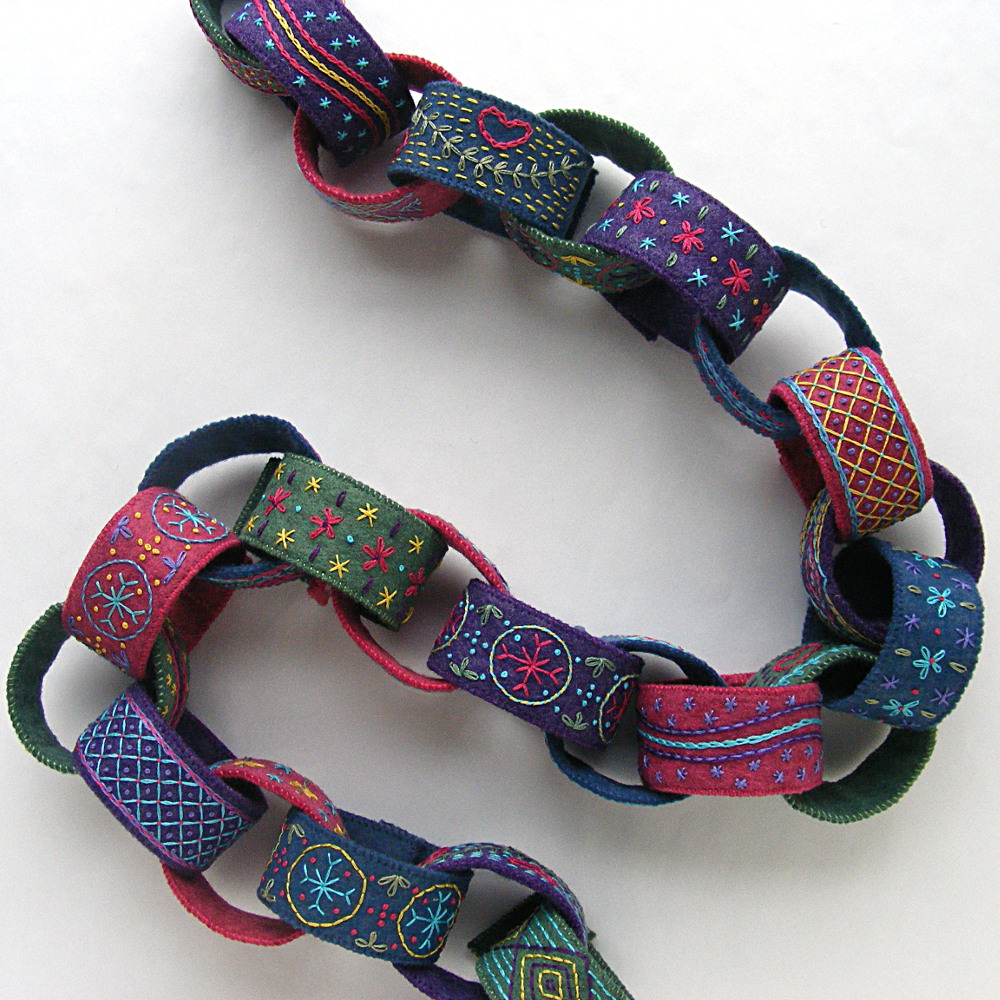
I mean – it’s lovely. A paper-chain inspired garland of hand-embroidered felt rings with hook & loop closures so you can store them easily. It’s sooooo beautiful and looks so warm and cozy and wintry. I’m absolutely enchanted with how it turned out!
But seriously. Hand-embroidered felt garland rings? Twenty-four of them? This is hours and hours and hours (and hours!) of hand embroidery. Of course, I enjoyed every minute of it. But I’d be the first to admit that I’m a little crazy about hand-embroidery on wool felt. This is a project that will keep your hands busy for a LOT of cozy evenings.
If I haven’t talked you out of it yet, here are the instructions. . .
The pattern includes six different band decorations and they all fit on one piece of Magical Embroidery Stuff (aka Sulky Sticky Fabri-solvy). So I did six bands each of four different felt colors for a total of 24 rings. That made a chain 42 inches long. For the materials below I’ll assume you’ll do the same crazy thing. 🙂
What you need
wool-blend felt – 2 sheets of each color you plan to use (I used grape jelly, babbling brook, denim, and ruby red slippers)
embroidery thread in matching and contrasting colors (I used DMC #550, 502, 336, 600, 3746, 522, 726 and 3846)
Sulky Sticky Fabri-solvy (optional, but very strongly recommended)
You can find a list of my favorite supplies (with links to where to buy them) here.
Throughout the pattern, the links go to video tutorials teaching that skill. If it’s a new stitch or technique for you, just click through to see how to do it!
Here’s how to make it. . .
1. Print the pattern.You can download it here. Print the pattern at 100% size onto four sheets of Sulky Sticky Fabri-solvy (aka The Magical Embroidery Stuff).
2. Peel the backing off and stick the stabilizer/pattern transfer onto the felt.
Cut the pieces out on the lines.
Embroider the designs right through the stabilizer.
I didn’t embroider the designs the same way every time – preferring instead to just play around. You should play too! You can find tutorials for plenty of stitches here. . .
cross stitch (the little stars are just cross stitches, with an extra stitch taken across the middle)
By all means – don’t be limited to these stitches! They’re just what I used. You can find lots more stitch tutorials here.
3. Soak off the Sulky Sticky Fabri-solvy. I soak mine in cold water for at least an hour, then rinse off the mushy stabilizer under cold running water. Don’t rub it to remove any stubborn bits – just hit them with a kitchen sprayer if needed.
Lay the pieces flat on a towel to dry. Do not wring, twist or even smoosh them. Just set them sopping wet on a towel and let them be. I promise they’ll dry. 🙂
4. Finish the bands. Cut second piece of felt for the back of the band. I just laid the front band down and cut around it so the back would match the front exactly.
Sew a small piece of hook & loop tape to the blank end of the top of the band, and to one end of the back of the band.
I used a sewing machine, but you could do it by hand if you prefer. I left enough space on the embroidered side to use the narrowest big-box-store hook & loop tape (like you see on the top band) but if you order one of my kits you’ll get the special less-bulky skinny hook & loop tape I prefer (like you see on the bottom band).
Put the front and back together so that the hook & loop tape is on opposite ends of the band and sew the pieces together around the edge. I used whipstitch, but you could certainly use a sewing machine – especially if you want to finish before the end of the year. 🙂
5. Wrap them into rings and build your chain.
In the photo above you see the six designs in the pattern, stitched up on purple felt.
Make this sweet little elf ornament! Hang her on your tree or attach her to a package for someone special.
It’s a free pattern!
Here she’s a Christmas elf. But she doesn’t have to be! I made a couple of “everyday” pixies that you can see here, along with their holiday friend.
Make a bunch of them in a rainbow of colors!
And did I mention they’re posable? They have a pipecleaner “skeleton” so you can bend and pose them however you like. This little cutie is sitting on a spool of thread.
Want the pattern? Here’s the link to download it. It’s free!
I realized that I didn’t have much diagonal action in the quilt yet, so I’m correcting that with the next few blocks.
Here’s block #13 in the Controlled Chaos Quilt!
What You’ll Need
48 two-inch squares in color A (shown in purple)
52 two-inch squares in color B (shown in yellow)
Instructions
Use 1/4″ seam allowances for all sewing.
Press all the seams. I’m pressing mine open for this quilt. I think it will make things simpler in the end.
Arrange your squares according to the diagram below.
For this block I sewed things up in rows. First we’ll sew some groups of like colors together. . .
1. Sew up 12 sets of three purple squares.
2. Sew up 14 sets of three yellow squares.
3. Sew up 4 pairs of two purple squares.
4. Sew up 4 pairs of two yellow squares.
Use the diagram above to sew those groups into rows.
Then sew those rows into one fabulous block. 🙂
That’s 13 blocks done – just 7 more to go!
I still haven’t decided whether I’ll use sashing between the blocks or not. If I do it will be in a nice slate grey. If I d0 use sashing it’ll be 310 seams I don’t have to match up – a major plus in my book. 🙂
As much as I love to cook, and as much as I love the flavor of gingerbread, and as much as I love candy and fussy details – I’ve never made a gingerbread house. Until now.
Maybe the problem is that I know a real gingerbread house is not really edible, even thought it’s made of edible goodies.
No such illusions with this little house made of felt and embroidery thread! You get all the pretty decorations and fanciness and it will last for years. Plus you can make it on your couch in front of the fire instead of in the kitchen. 🙂
Here’s what you’ll need. . .
You can find links to sources for all my favorite tools and supplies here.
scraps of wool felt (I used Tahitian sunset for the gingerbread and lavender, grass skirt, blue bayou and fuchsia for the decorations)
matching embroidery thread (I used DMC floss in white, 3858, 3746, 550, 907, 699, 326, 601, 603, 3846)
1 sheet of Sulky Sticky Fabri-solvy (optional, but recommended – will make two ornaments)
small amount of polyester fiberfill stuffing (a few cotton balls will do if you don’t have it)
scrap of string or yarn for the hanging loop
Throughout the pattern, the links go to video tutorials teaching that skill. If it’s a new stitch or technique for you, just click through to see how to do it!
Here’s how to make it. . .
1. Print the pattern.You can download it here. It’s formatted to give you the pieces for two houses – make one for yourself and one for a friend. Print the pattern at 100% size onto a sheet of Sulky Sticky Fabri-solvy (aka The Magical Embroidery Stuff).
2. Peel the backing off and stick the stabilizer/pattern transfer onto the felt. I used Tahitian sunset for the gingerbread, fuchsia for the pink lollipops on the sides of the door, grass skirt for the green stick candy sills, blue bayou for the door, and lavender for the purple candy.
Cut the pieces out on the lines.
Embroider the designs right through the stabilizer.
I used the following stitches and colors. . .
For the snow along the roof I used U-stitch and 4 strands of DMC #white.
For the snowflakes I used 2 strands of DMC #white.
For the center window I used backstitch in 2 strands of DMC #white, with French knots in the same color below it.
For the candycane stripes on the windows and door I used whipped backstitch. Backstitch the lines first with 4 strands of DMC #white, then whip with 2 strands of DMC #326.
For the lollipop sticks on the sides of the door I also used whipped backstitch. Backstitch the lines with 4 strands of DMC #699, then whip with 2 strands of DMC #907.
For the swirls on the purple candy I used chain stitch and 2 strands of DMC #550.
3. Soak off the Sulky Sticky Fabri-solvy. I soak mine in cold water for at least an hour, then rinse off the mushy stabilizer under cold running water. Don’t rub it to remove any stubborn bits – just hit them with a kitchen sprayer if needed.
Lay the pieces flat on a towel to dry. Do not wring, twist or even smoosh them. Just set them sopping wet on a towel and let them be. I promise they’ll dry. 🙂
4. Layer the small applique pieces onto the house. The stitching makes such a nice guide to help position everything!
I usually just hold them in place while I stitch them down, but this time I experimented with using a fabric glue stick. I used Prym brand and it stuck really well, but there was also a noticeable hardness to the glued bits. It wasn’t so hard that it was difficult to sew through – especially since I was mostly just sewing around the edges and I put a dab of glue in the middle of each piece – but I’d be careful not to use too much.
5. Use whipstitch and matching thread to applique each piece in place.
Add a tiny bit more detail stitching because there wasn’t enough already. Really – if you can’t go overboard on a gingerbread house then when can you? It’s supposed to be slightly insane. 🙂
I added little diagonal stripes on the green stick candy with 2 strands of DMC #699. I also added little starbursts in the centers of the pink lollipops using 2 strands of DMC #603.
6. Layer the ornament front and back together and whipstitch all around the edges.
Whipstitching the edges of the felt is a little different that whipstitch applique, so it has its own video. You can watch it here.
Leave the bit under the door open for stuffing.
7. Add a few pinches of stuffing through the hole, then switch to matching blue thread and sew up the opening.
Thread a 10″ piece of string through the peak of the roof and tie a knot to form a hanging loop.
Finished!
Like all Shiny Happy World designs – you’re welcome to sell items you make with my patterns, but please don’t sell or distribute the patterns themselves.
If you like this free pattern, sign up for the Shiny Happy News! Subscribers get a weekly newsletter with updates, special offers and links to happy things. Sign up here.
This ornament is the same style and size (and difficulty level) as all my other holiday ornament patterns. Here are the first ten ornaments in this year’s Christmas Club collection.
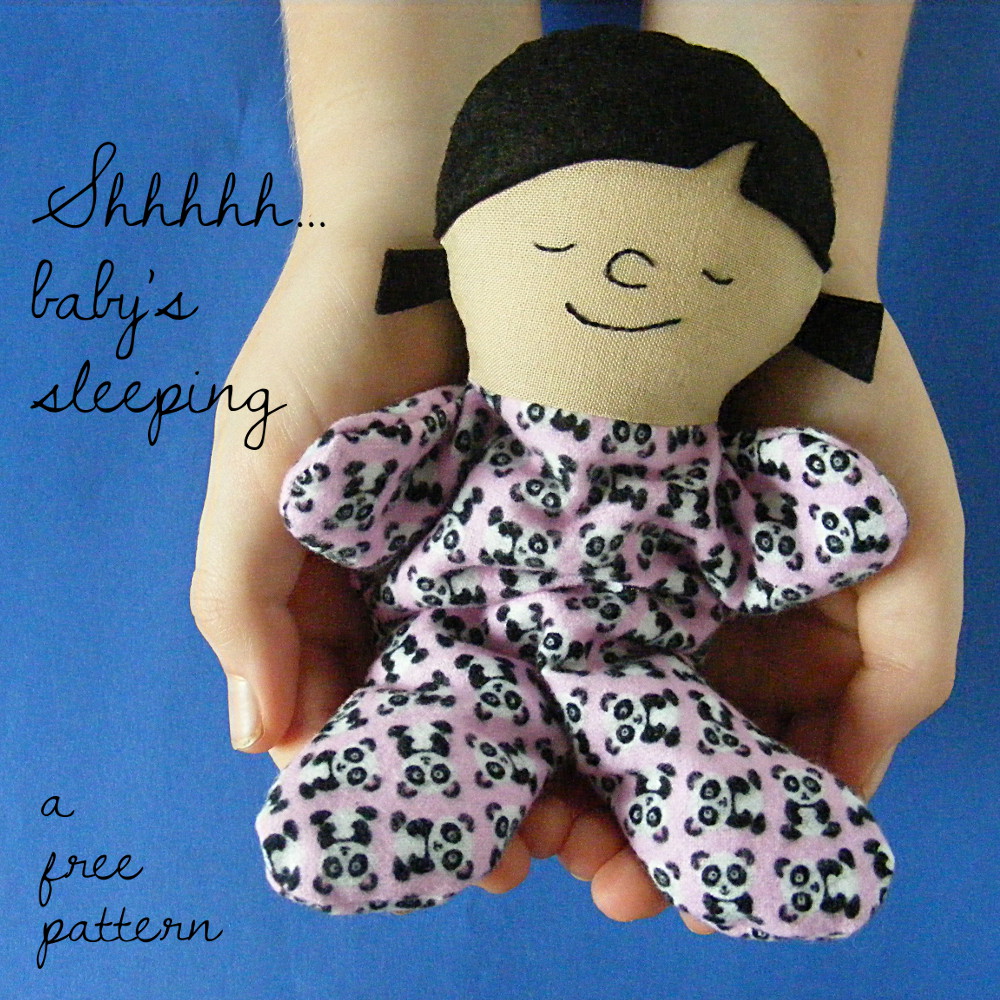
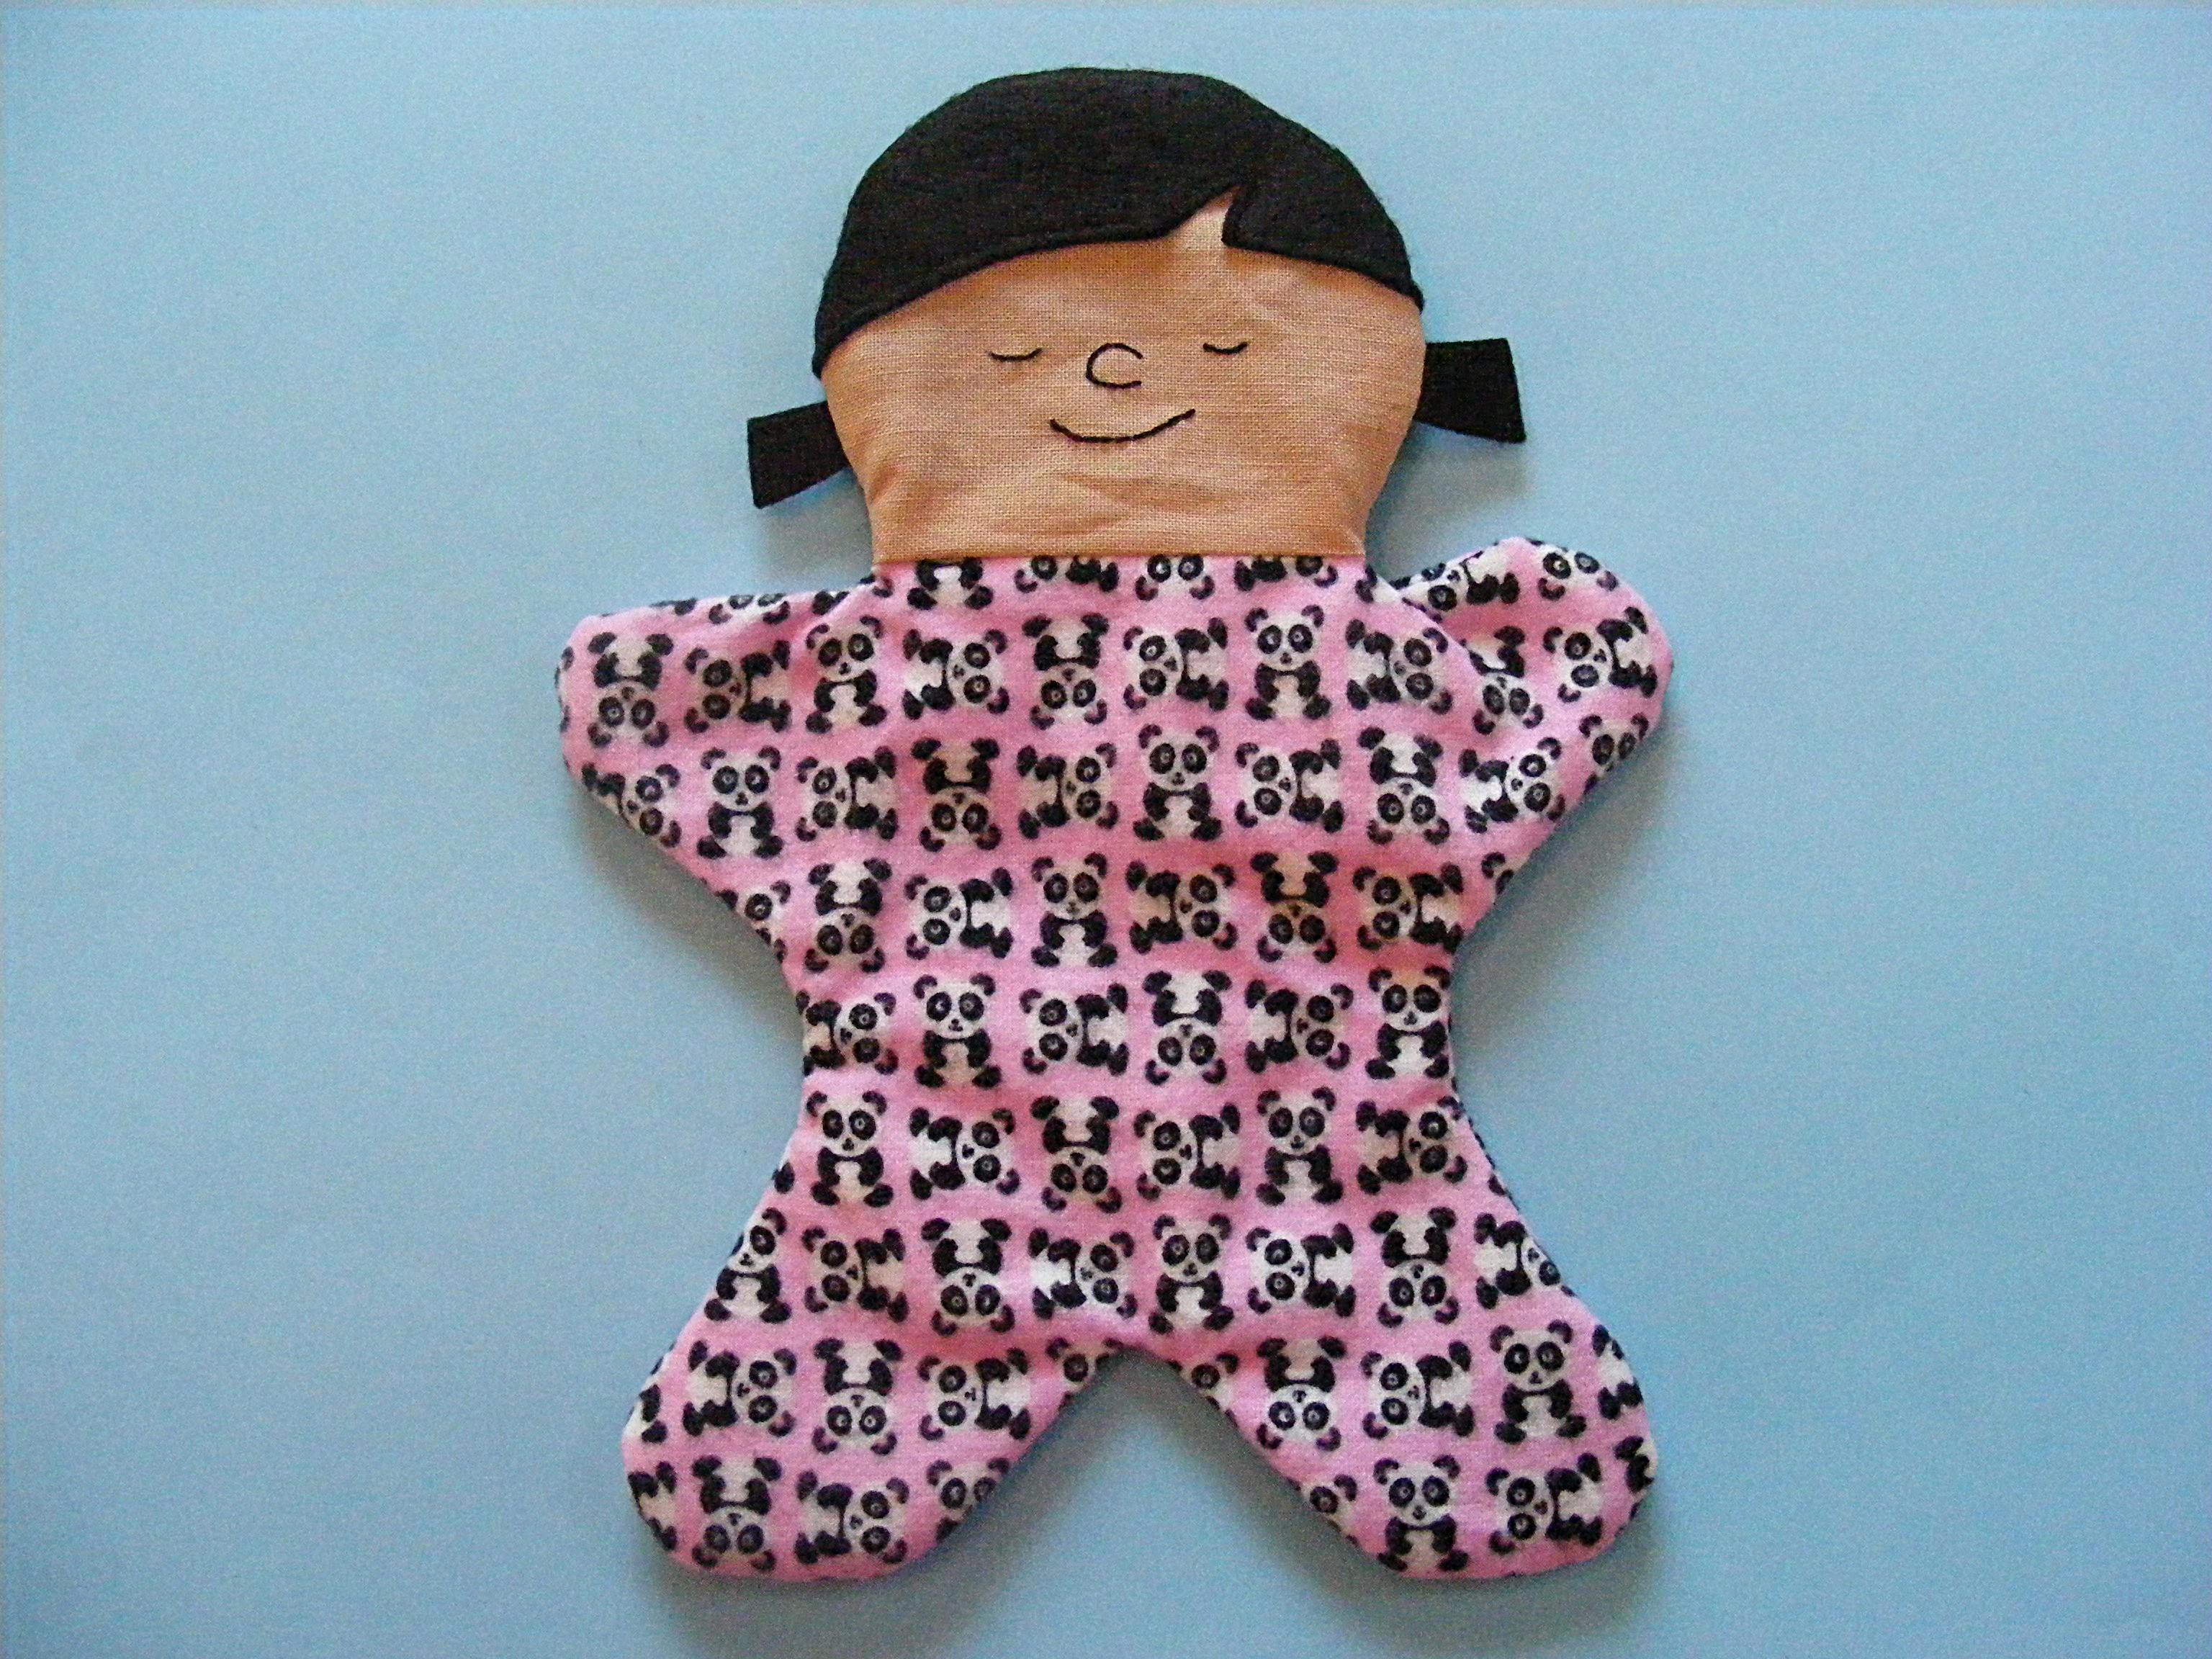
Here’s a free doll pattern to make a sweet Itty Bitty Sleepy Baby – a cuddly beanbag doll.
She’s a sleepy little girl who wants to curl up and take a nap in a special someone’s pocket. :)
She’s super easy to make - great for beginners. And she’s just the right size to be a mini doll for the dolls in The Dress Up Bunch. Fun!
Want to make her?
Here’s how!
Throughout the pattern, the links go to online video tutorials demonstrating the techniques used, or to sources for the materials. All seams are 1/4 inch seam allowance.
Happy sewing!
Materials
• scrap of people colored fabric • scrap of wool felt for the hair (I used black) • less than a fat quarter of pajama fabric • embroidery thread for the face (I used Sulky 12wt. cotton thread in black) • plastic pellets (I like PolyPellets Weighted Stuffing Beads) • polyfill stuffing (I like Soft Touch Polyfil Supreme Fiberfill)
Cut out all materials as directed on the pattern pieces. You should have:
1 body front piece
2 body back pieces
1 head cut from people-colored fabric
1 head cut from felt
1 front hair cut from felt
2 pigtails cut from felt
Step 2
Trace the face onto the people-colored head piece.
Embroider the eyes, nose and mouth using backstitch and a single strand of Sulky 12 wt. embroidery thread (the equivalent of two strands of regular embroidery thread).
Step 3
Sew the hair to the face piece.
Stitch very close to the edge and use matching thread.
Step 4
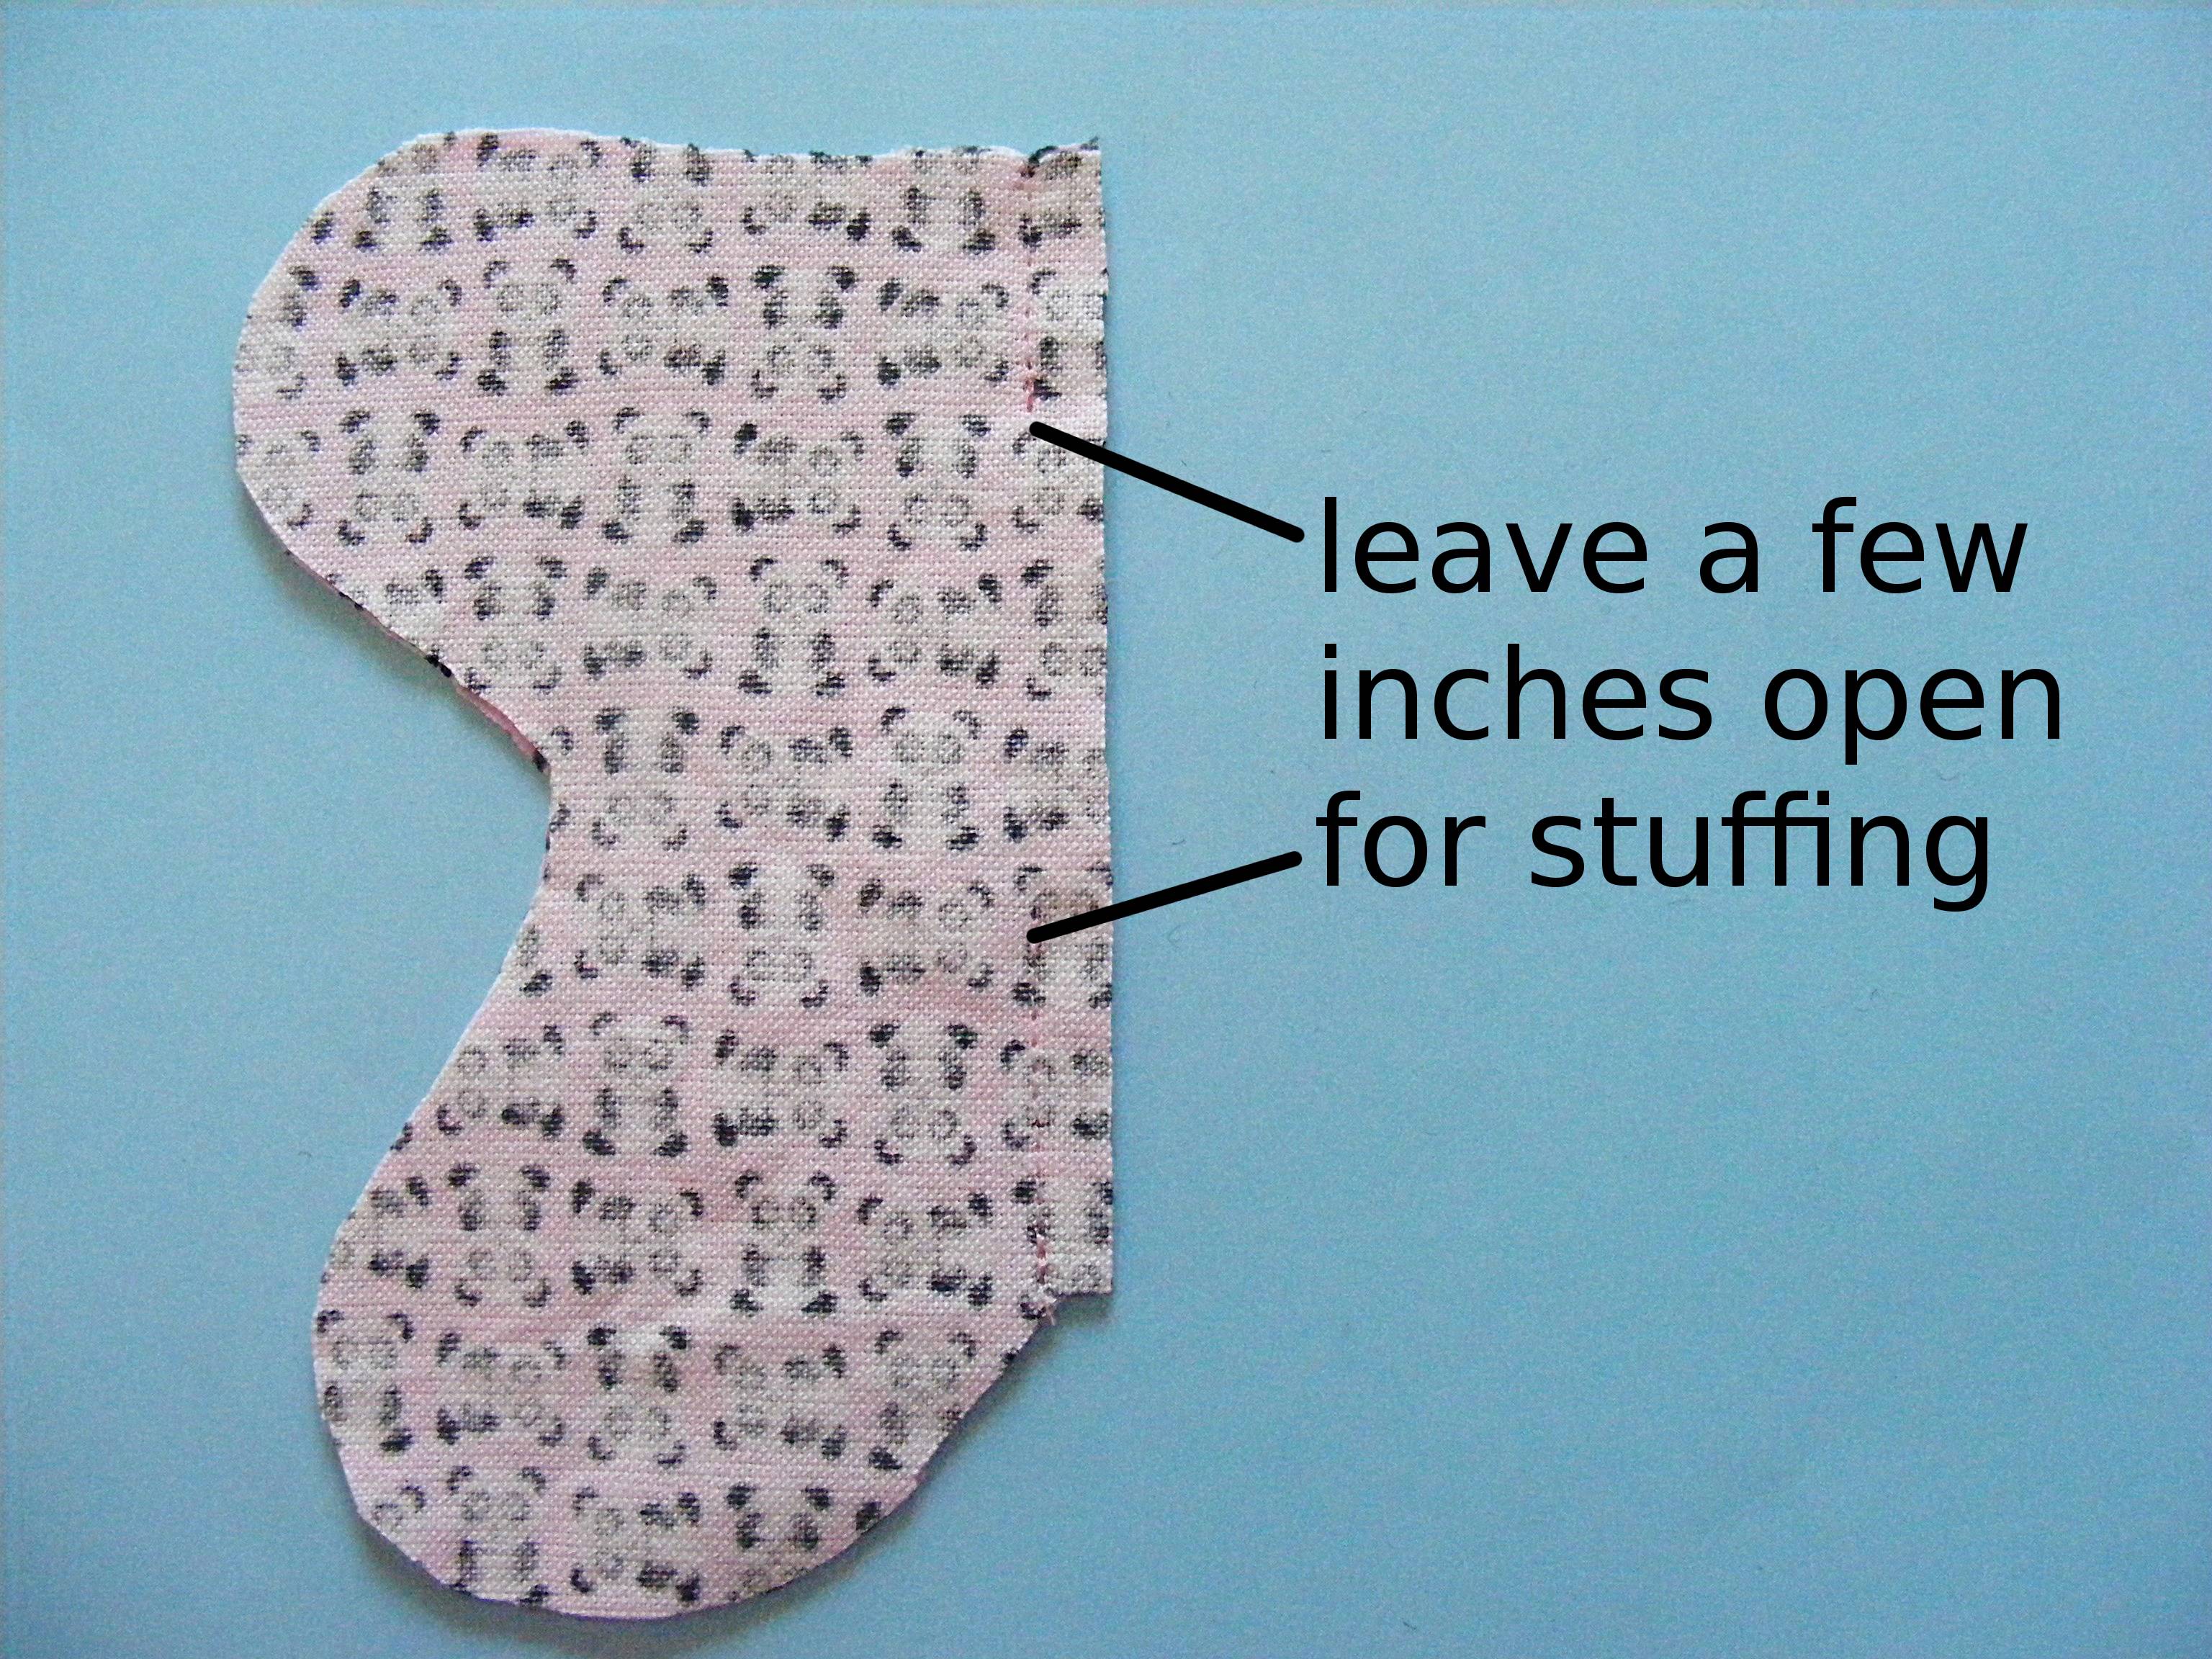
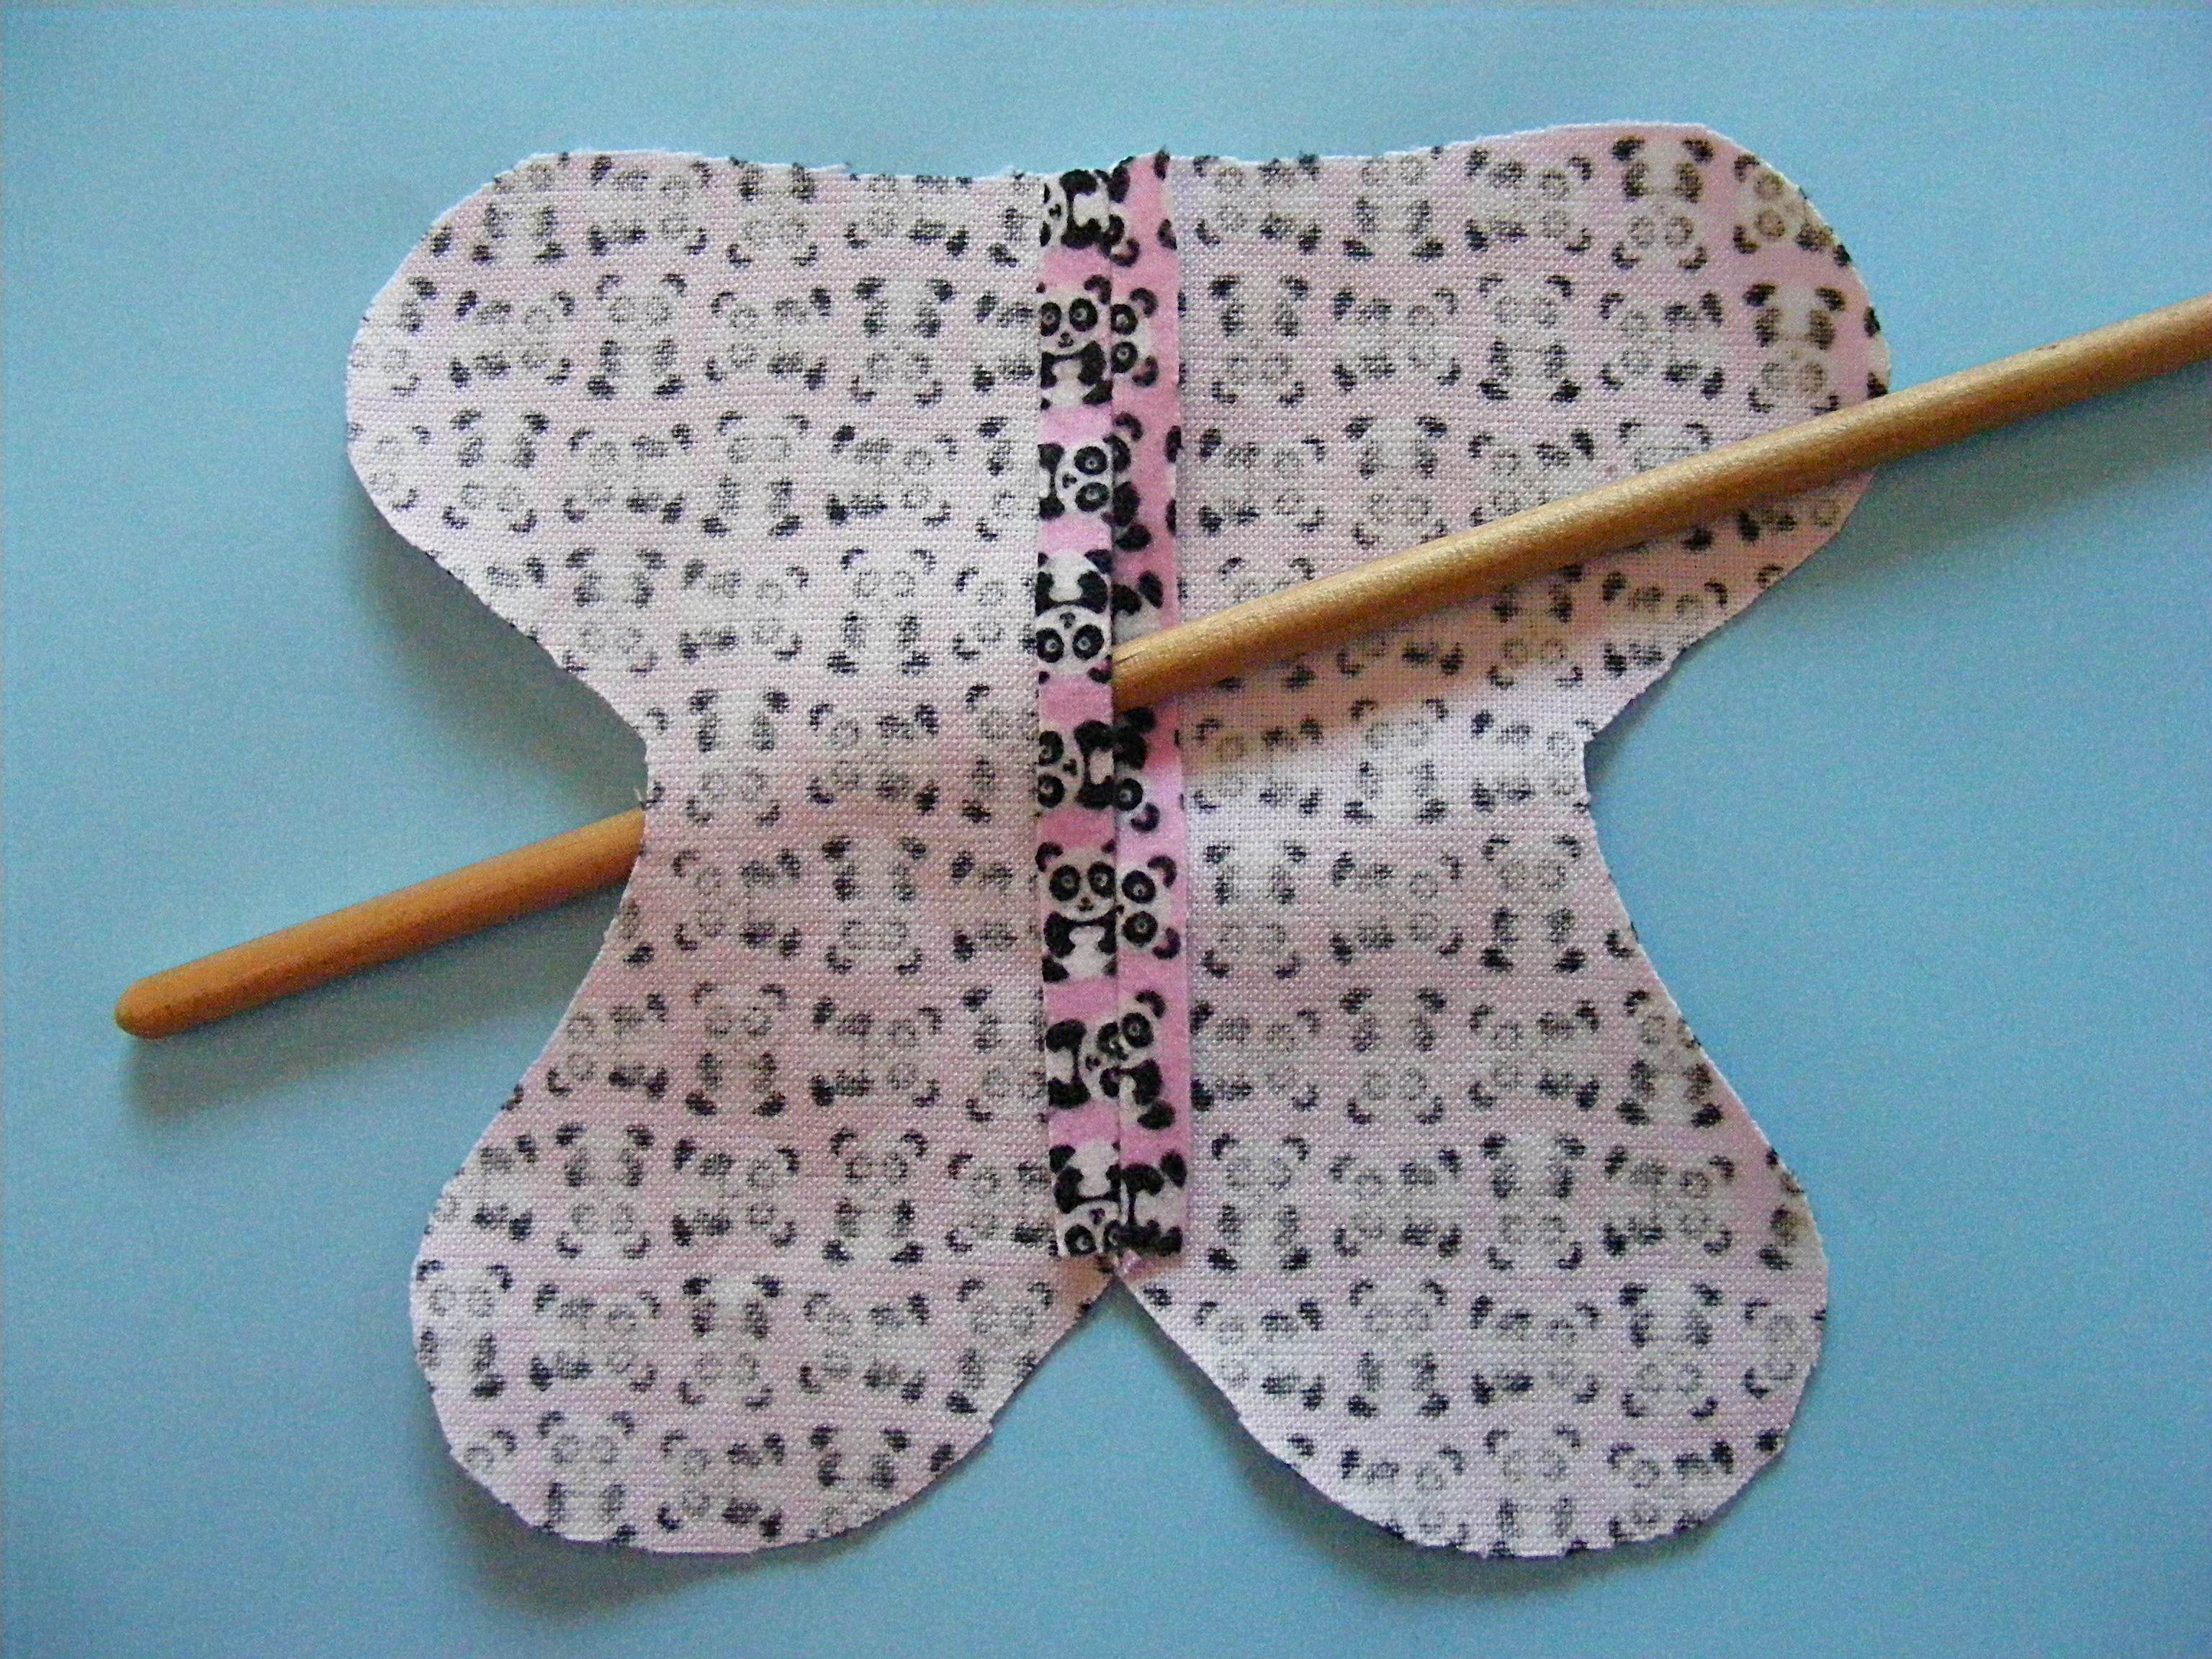
Sew the two body back pieces together along the center back line, making sure to leave a few inches open for stuffing.
Don’t forget to backstitch at the beginning and end of your stuffing opening.
Step 5
Open up the center back pieces and press the seam nice and flat, including the edges of the stuffing opening. That will give you a nice clean edge to sew when you’re closing up that opening by hand.
The stick shows where the stuffing opening is.
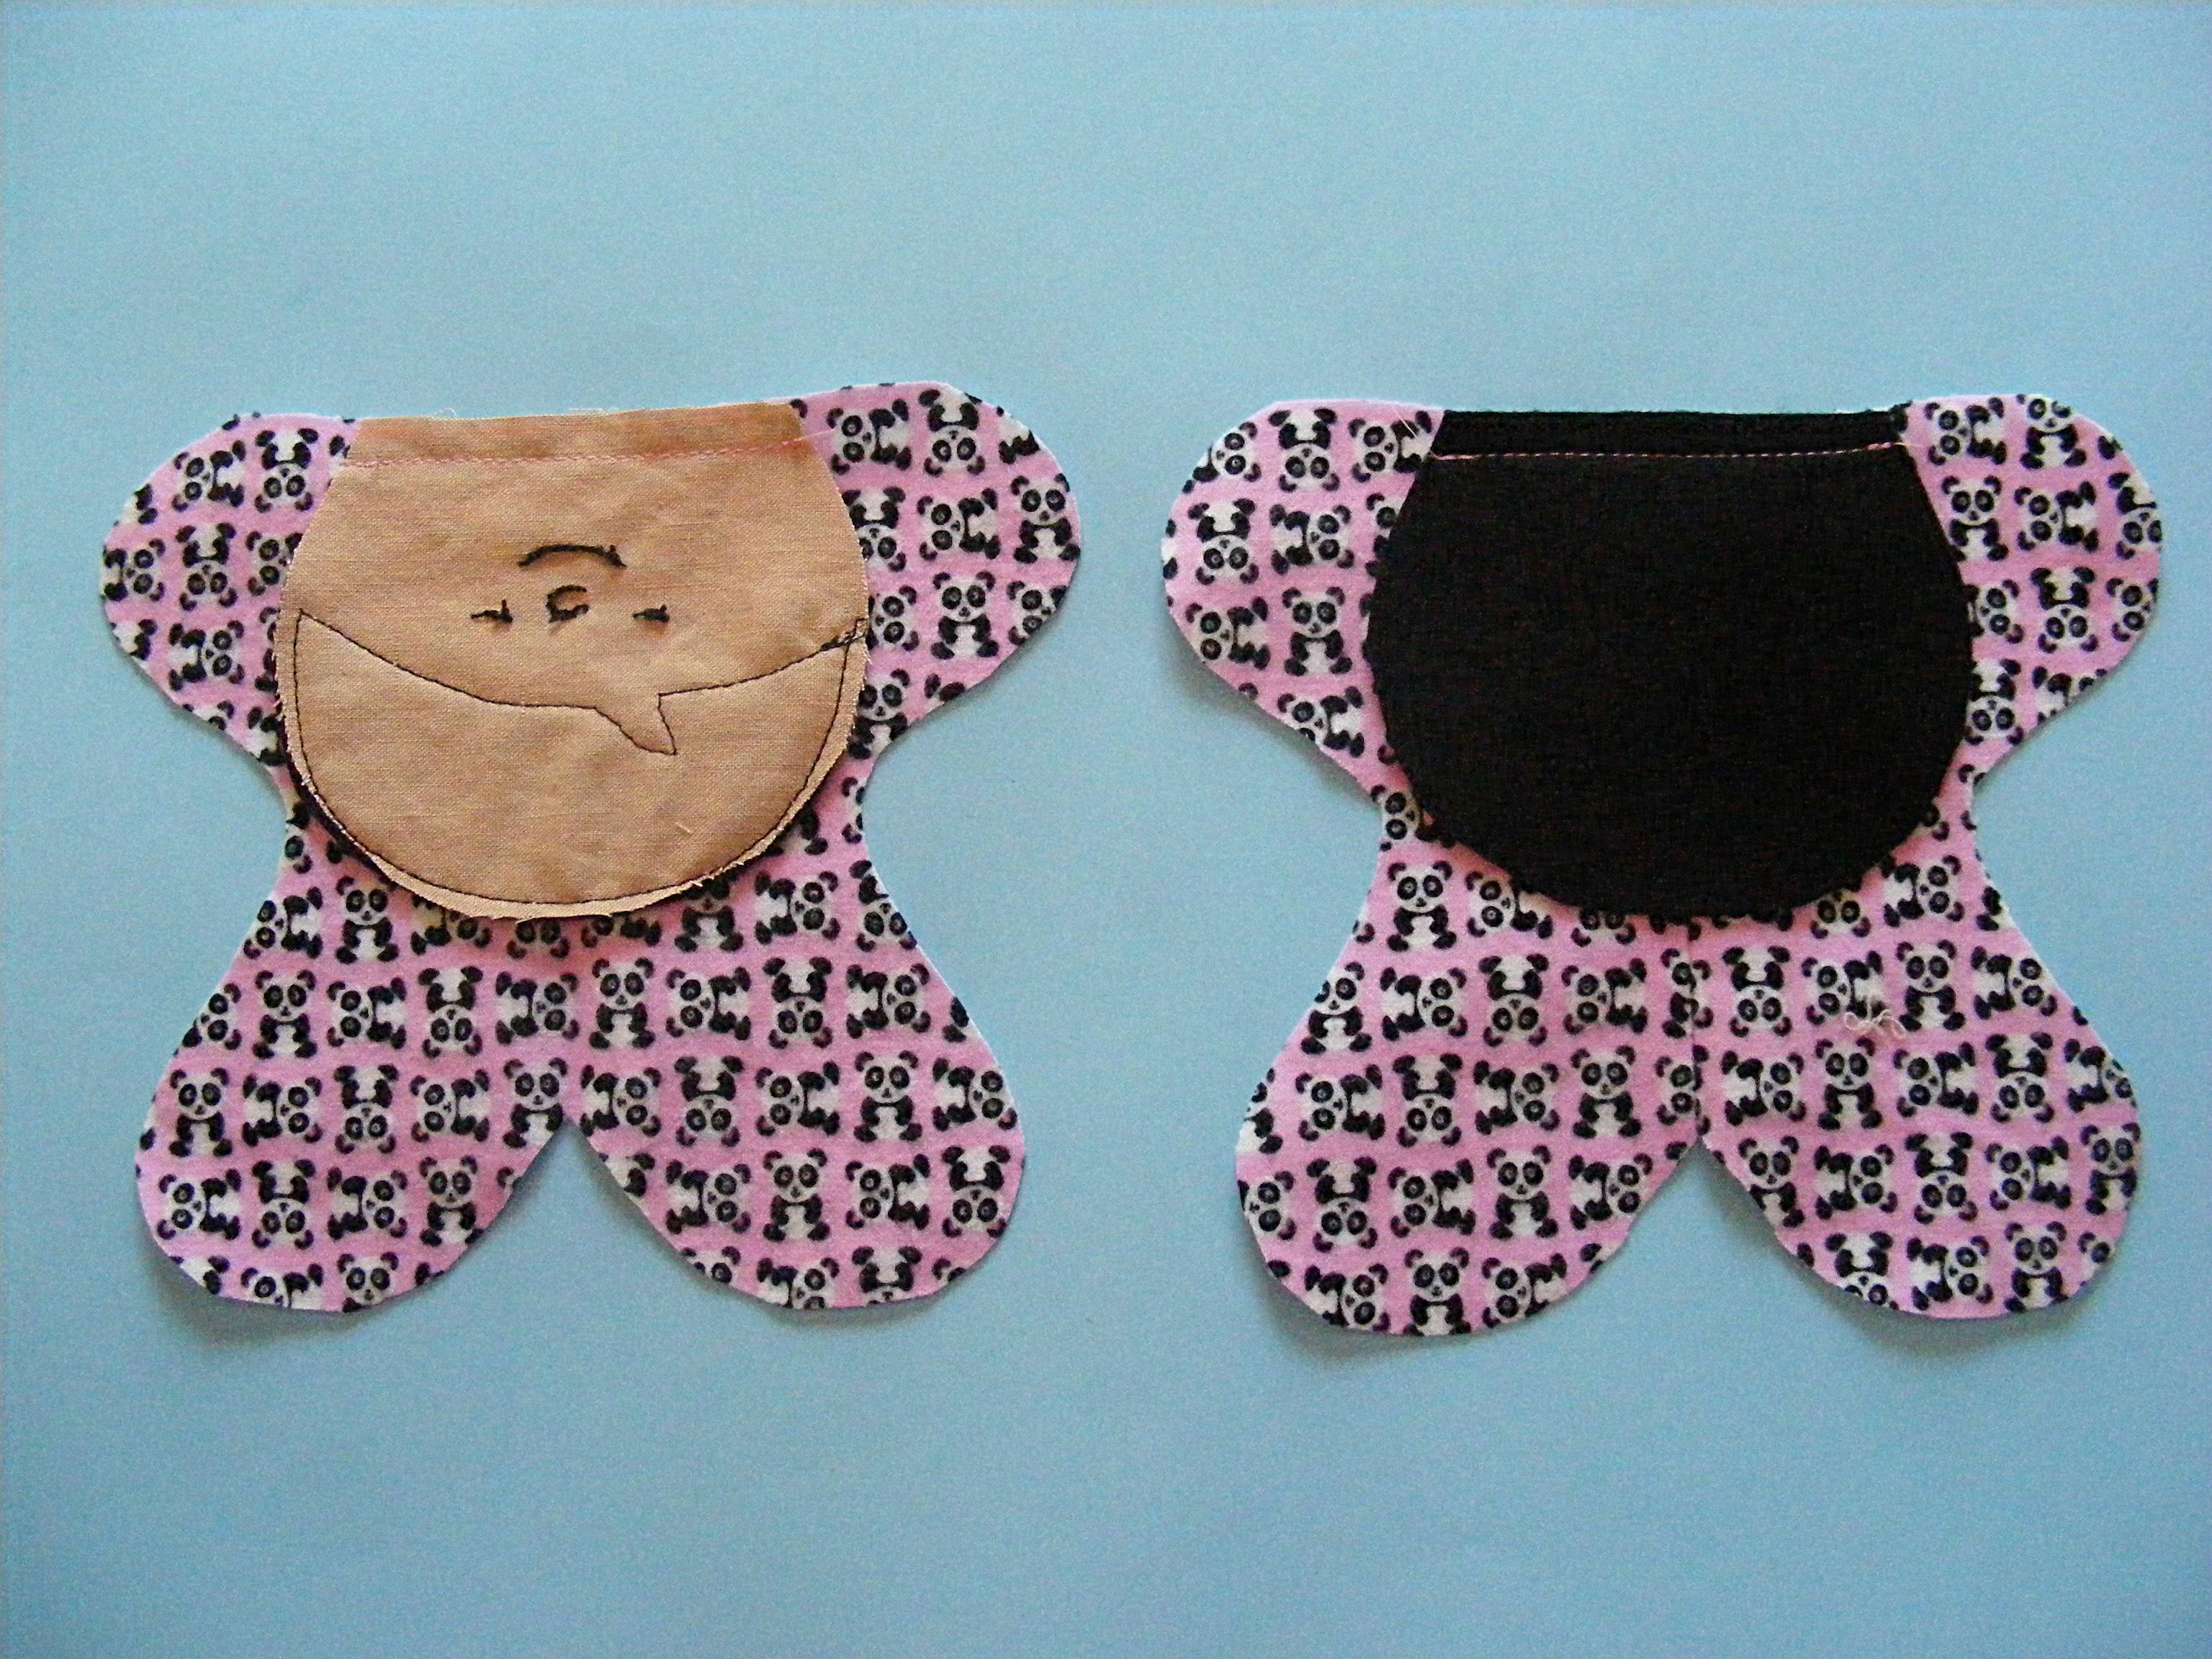
Step 6
Fold the bottom of the head and the top of the body in half to find the centers. Line those centers up so the head is exactly centered on the body.
Sew the face to the body front and the felt head piece to the body back.
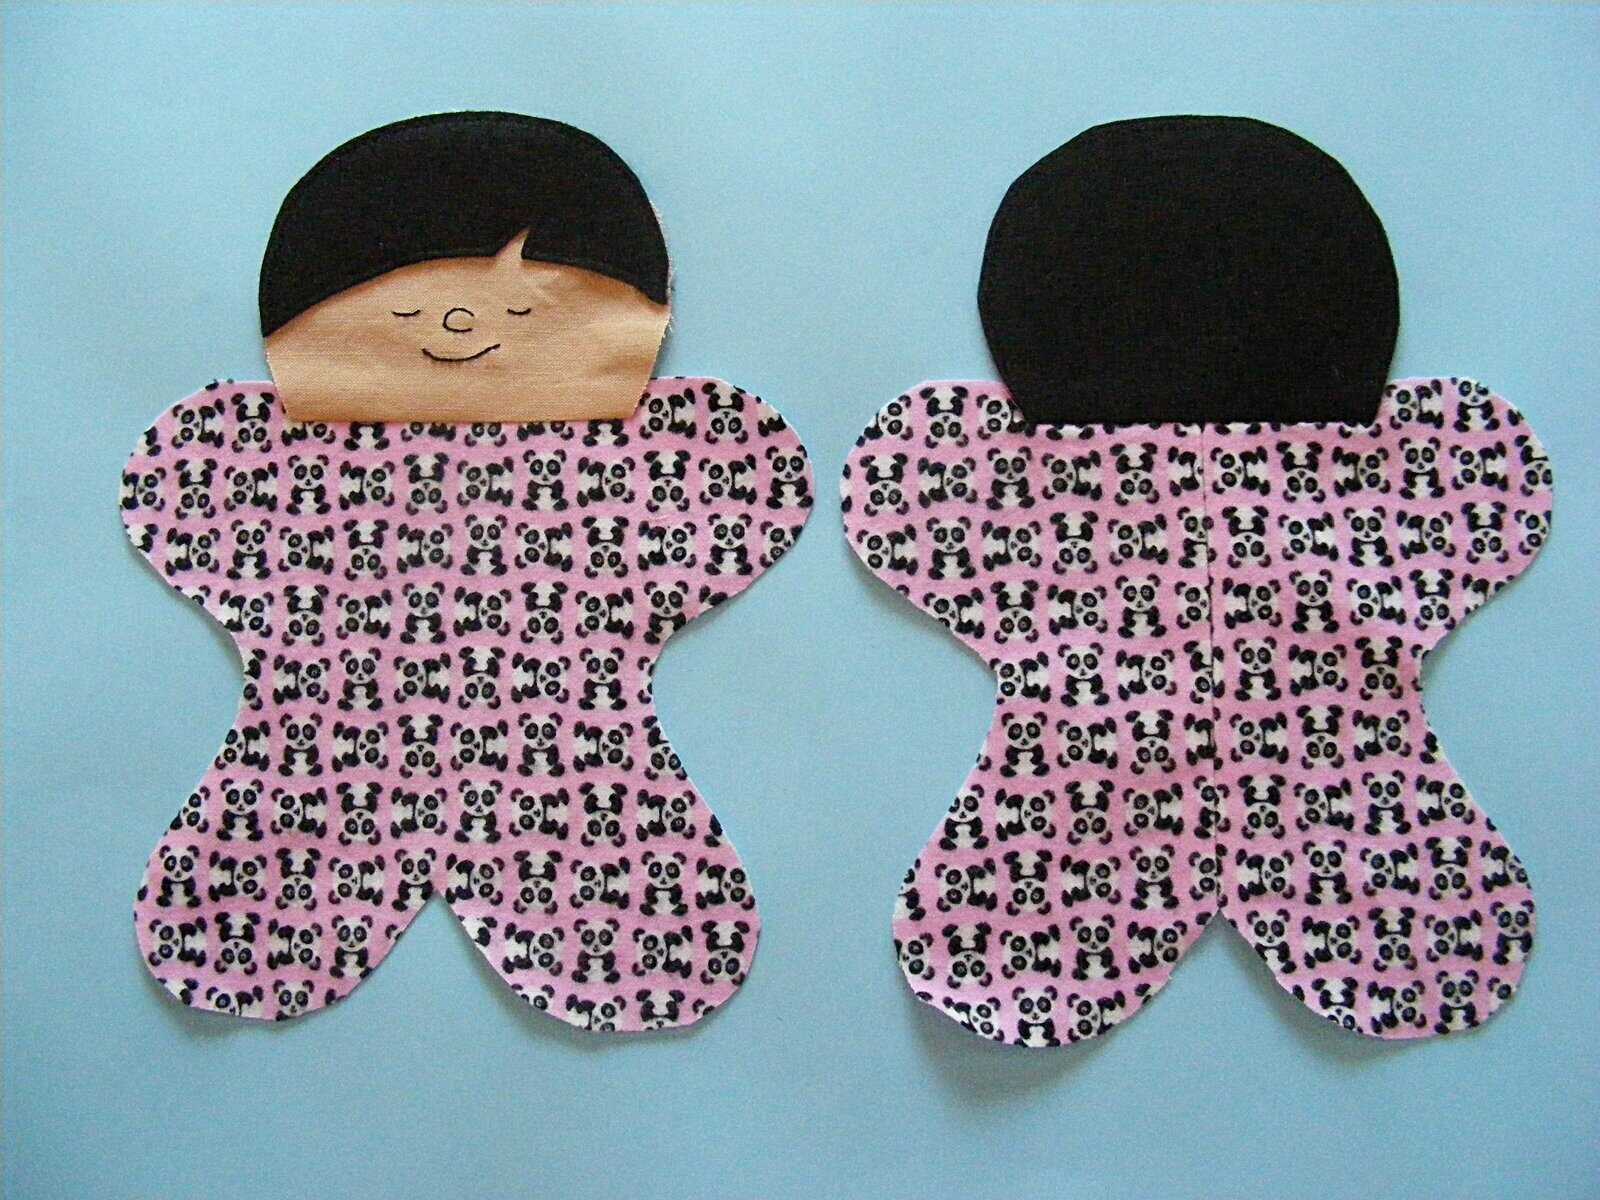
Step 7
Fold the heads up and press.
The seam allowance should be pressed toward the head so the body remains flat.
Step 8
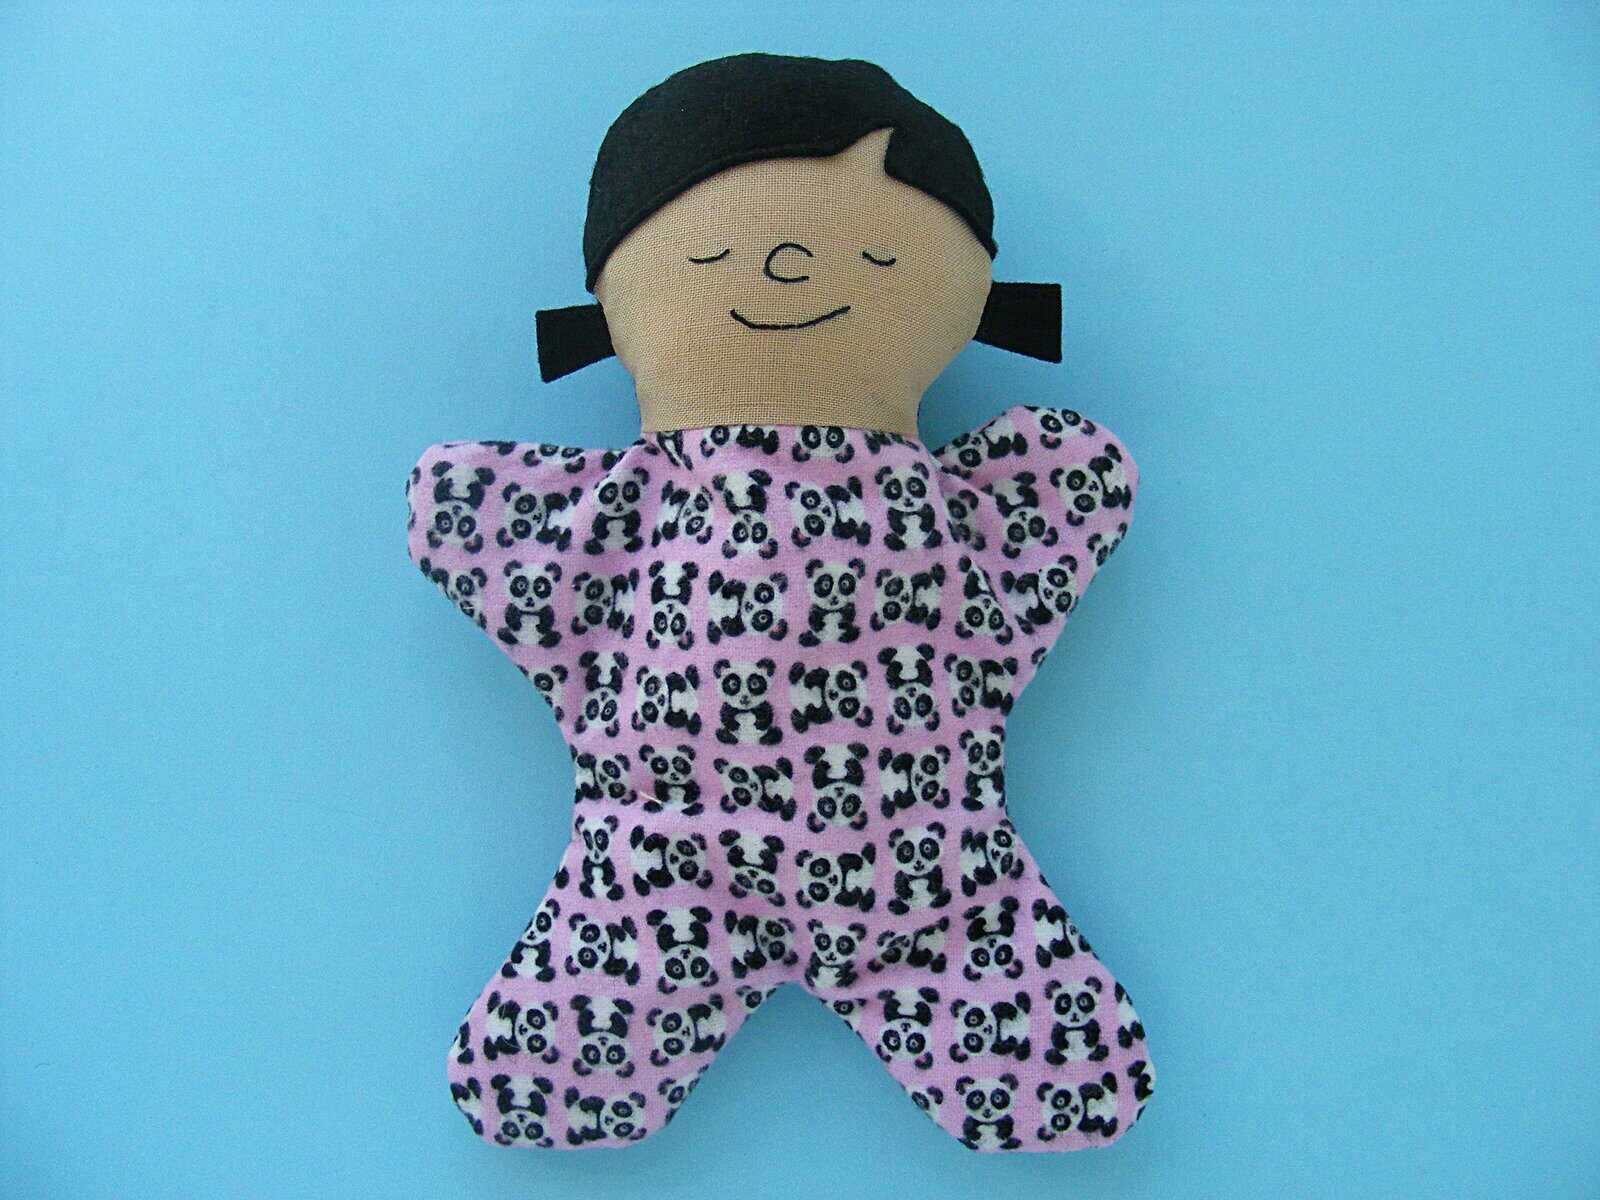
Lay the body front face up on a flat surface.
Lay the pigtails over the face as shown in the photo. Don’t worry about making them perfectly even - crooked is cute. :-)
Pin or clip in place.
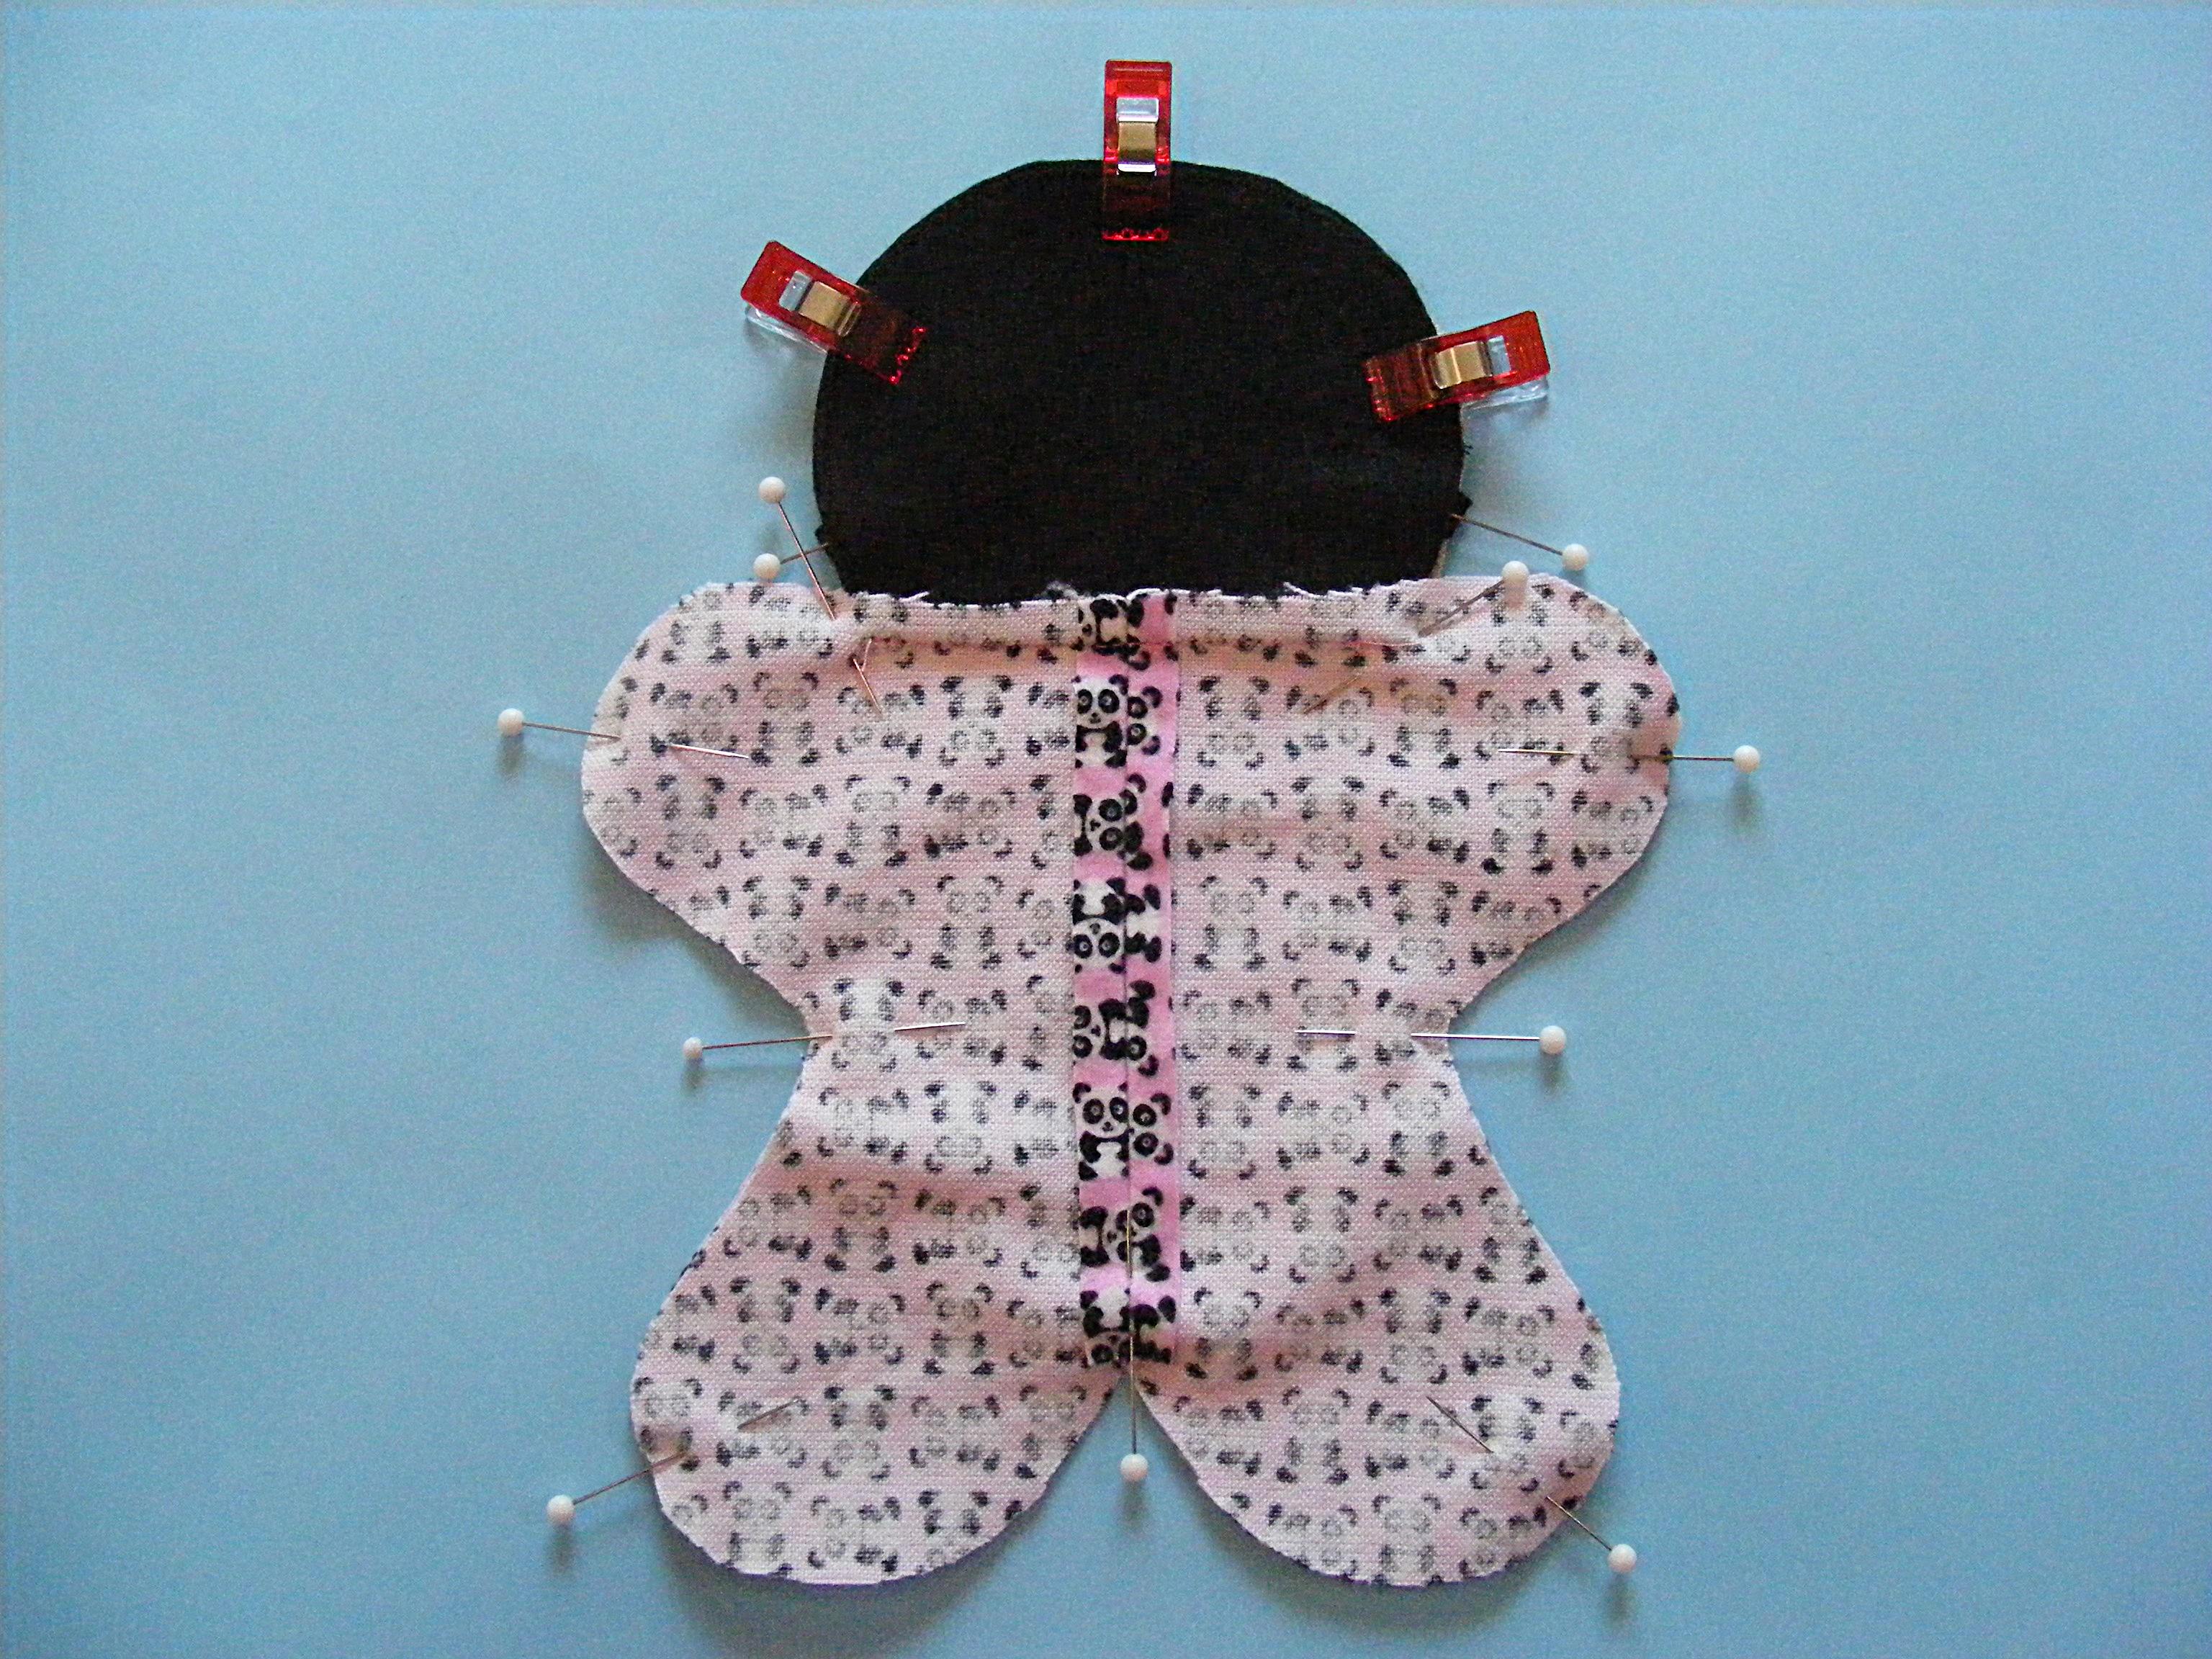
Step 9
Place the body back face down over the front, sandwiching the pigtails between the layers. Pin or clip the layers together carefully.
I match the neck seams first, then the center bottoms, then the dips at the sides and then the tips of the arms and legs and the head.
Step 10
Sew all the way around the body using 1/4 inch seam allowance. Make sure you’re catching the pigtails.
I changed the thread color when I got to the hair. I didn’t want specks of pink colored thread to show at the seam.
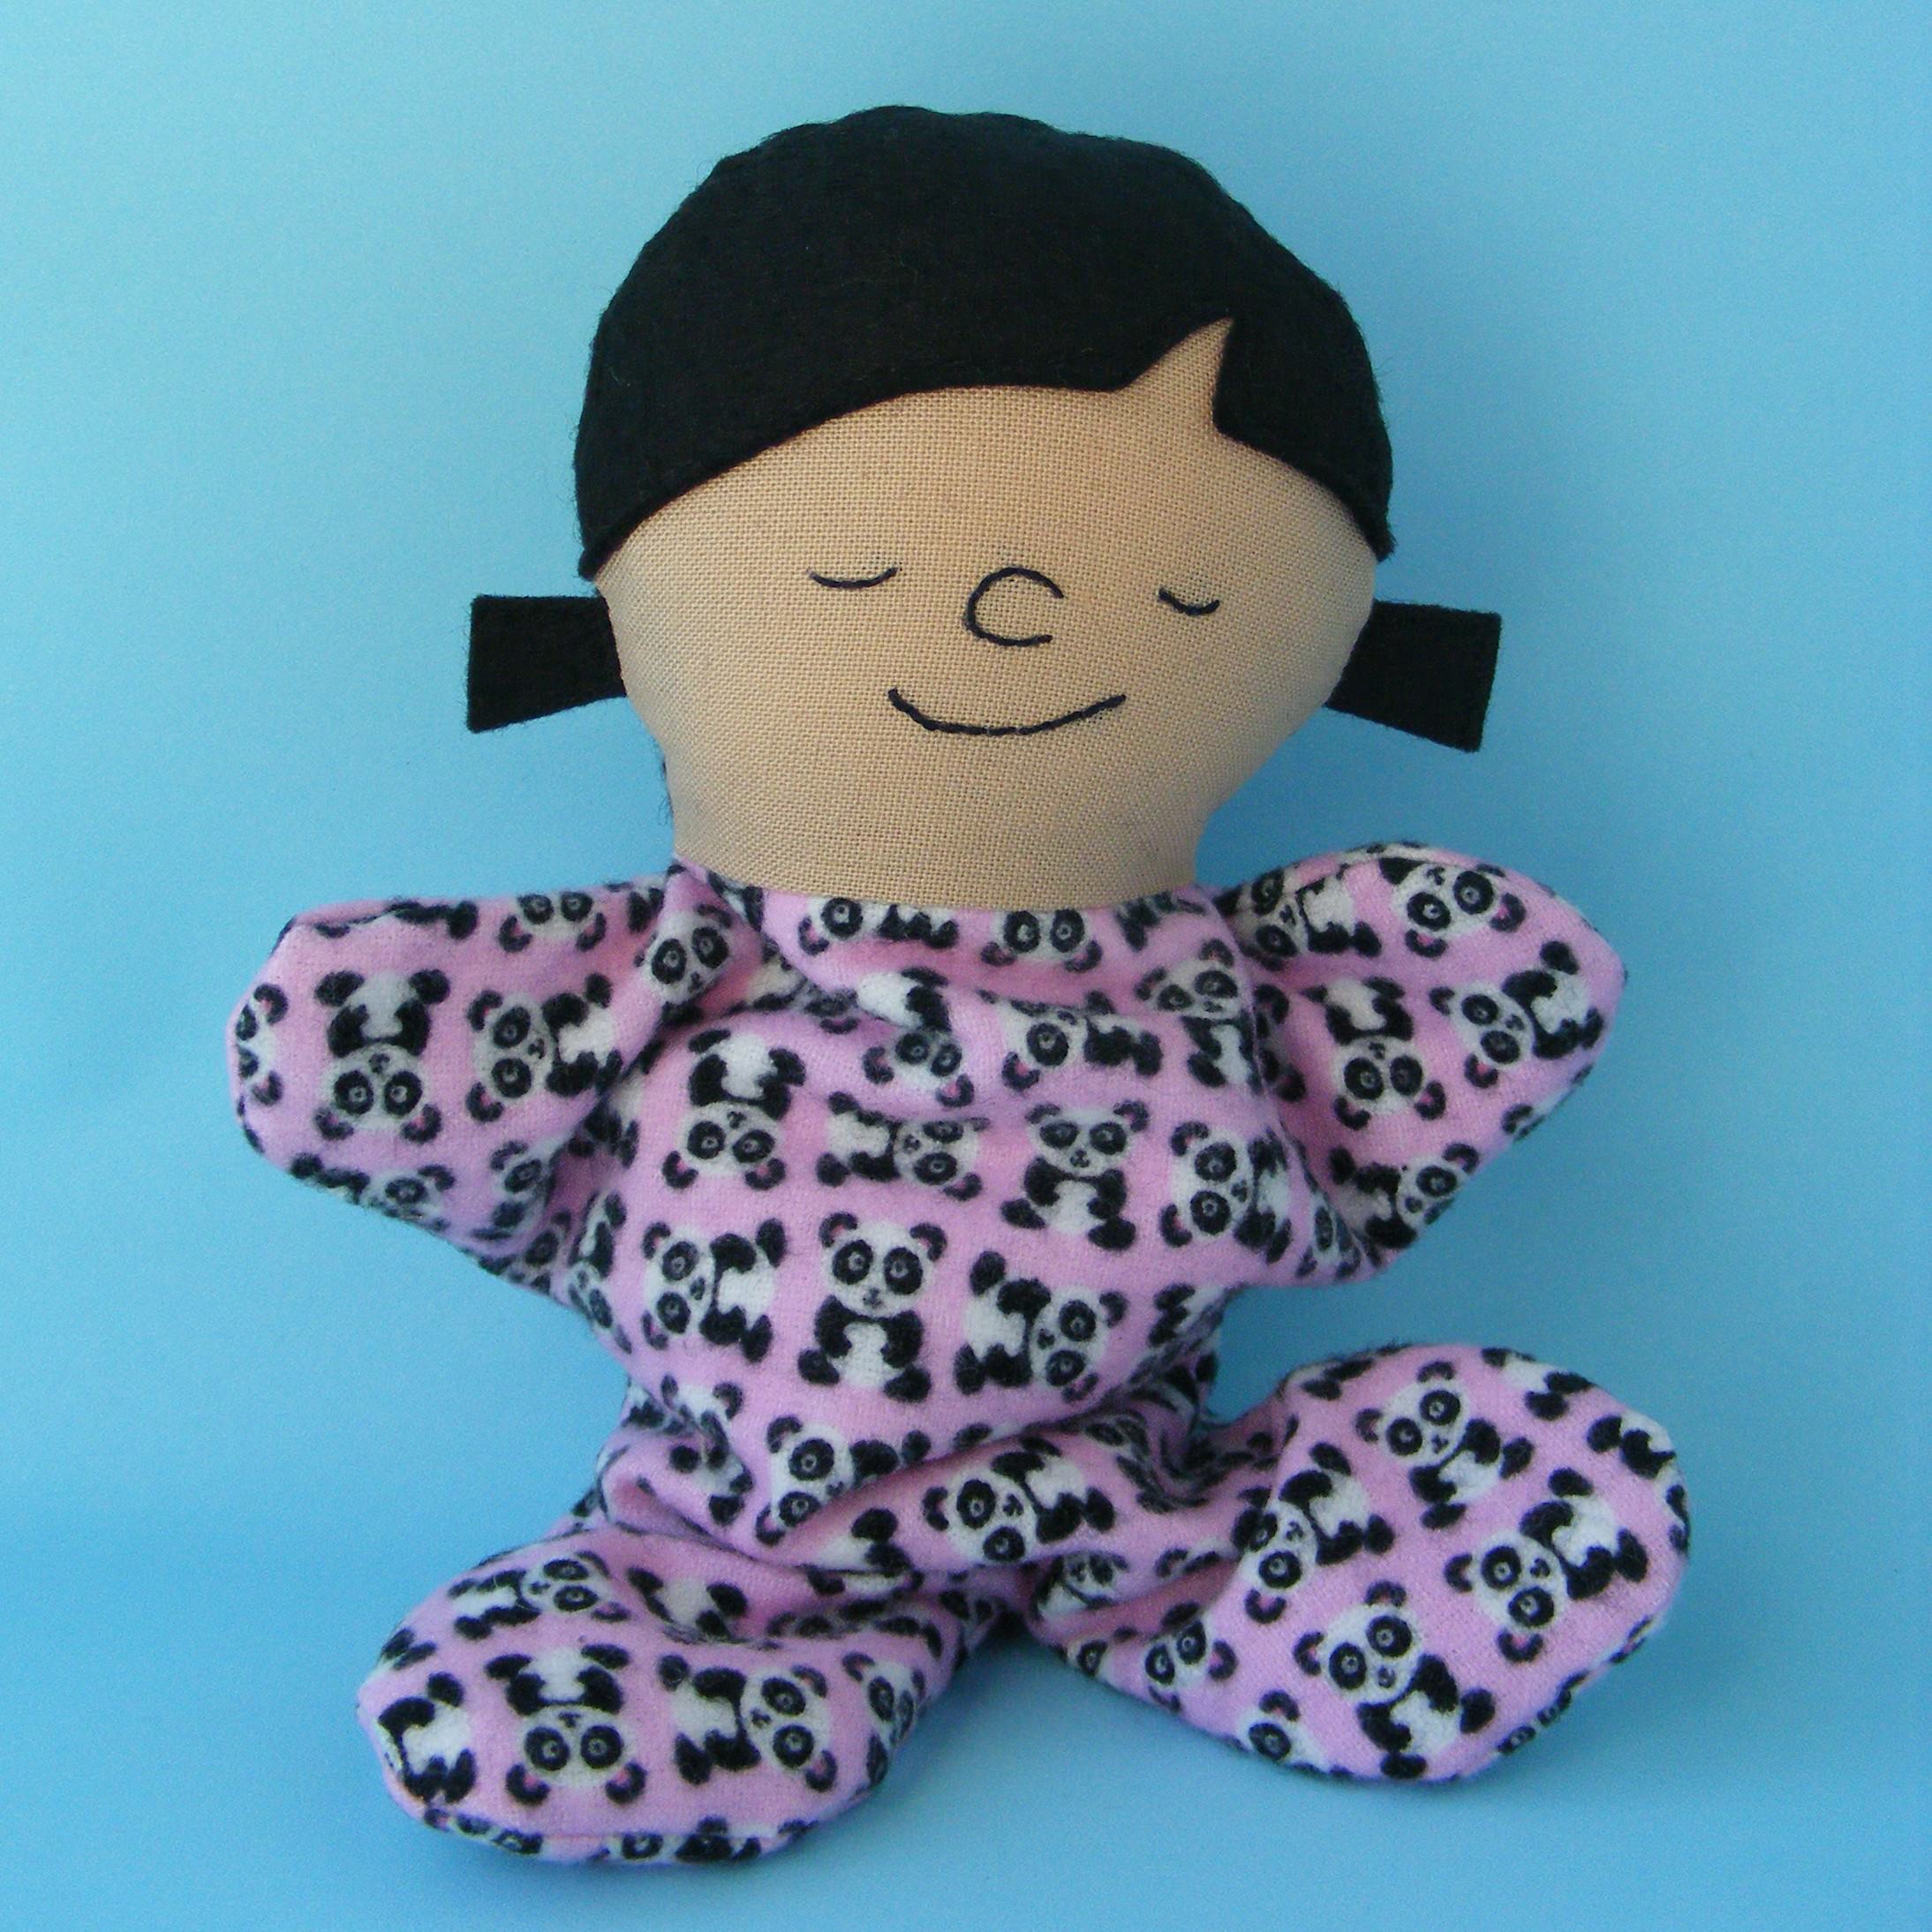
Awwww! Isn’t she a cutie? Take a moment to admire your work so far. She’s almost done!
Step 12
Stuff the head pretty firmly with fiberfill.
Pour 1/2 cup of plastic pellets into the body and sew up the opening in the back using ladder stitch.
Finished!
Give her a big hug and then slip her into a special someone’s pocket. :-)
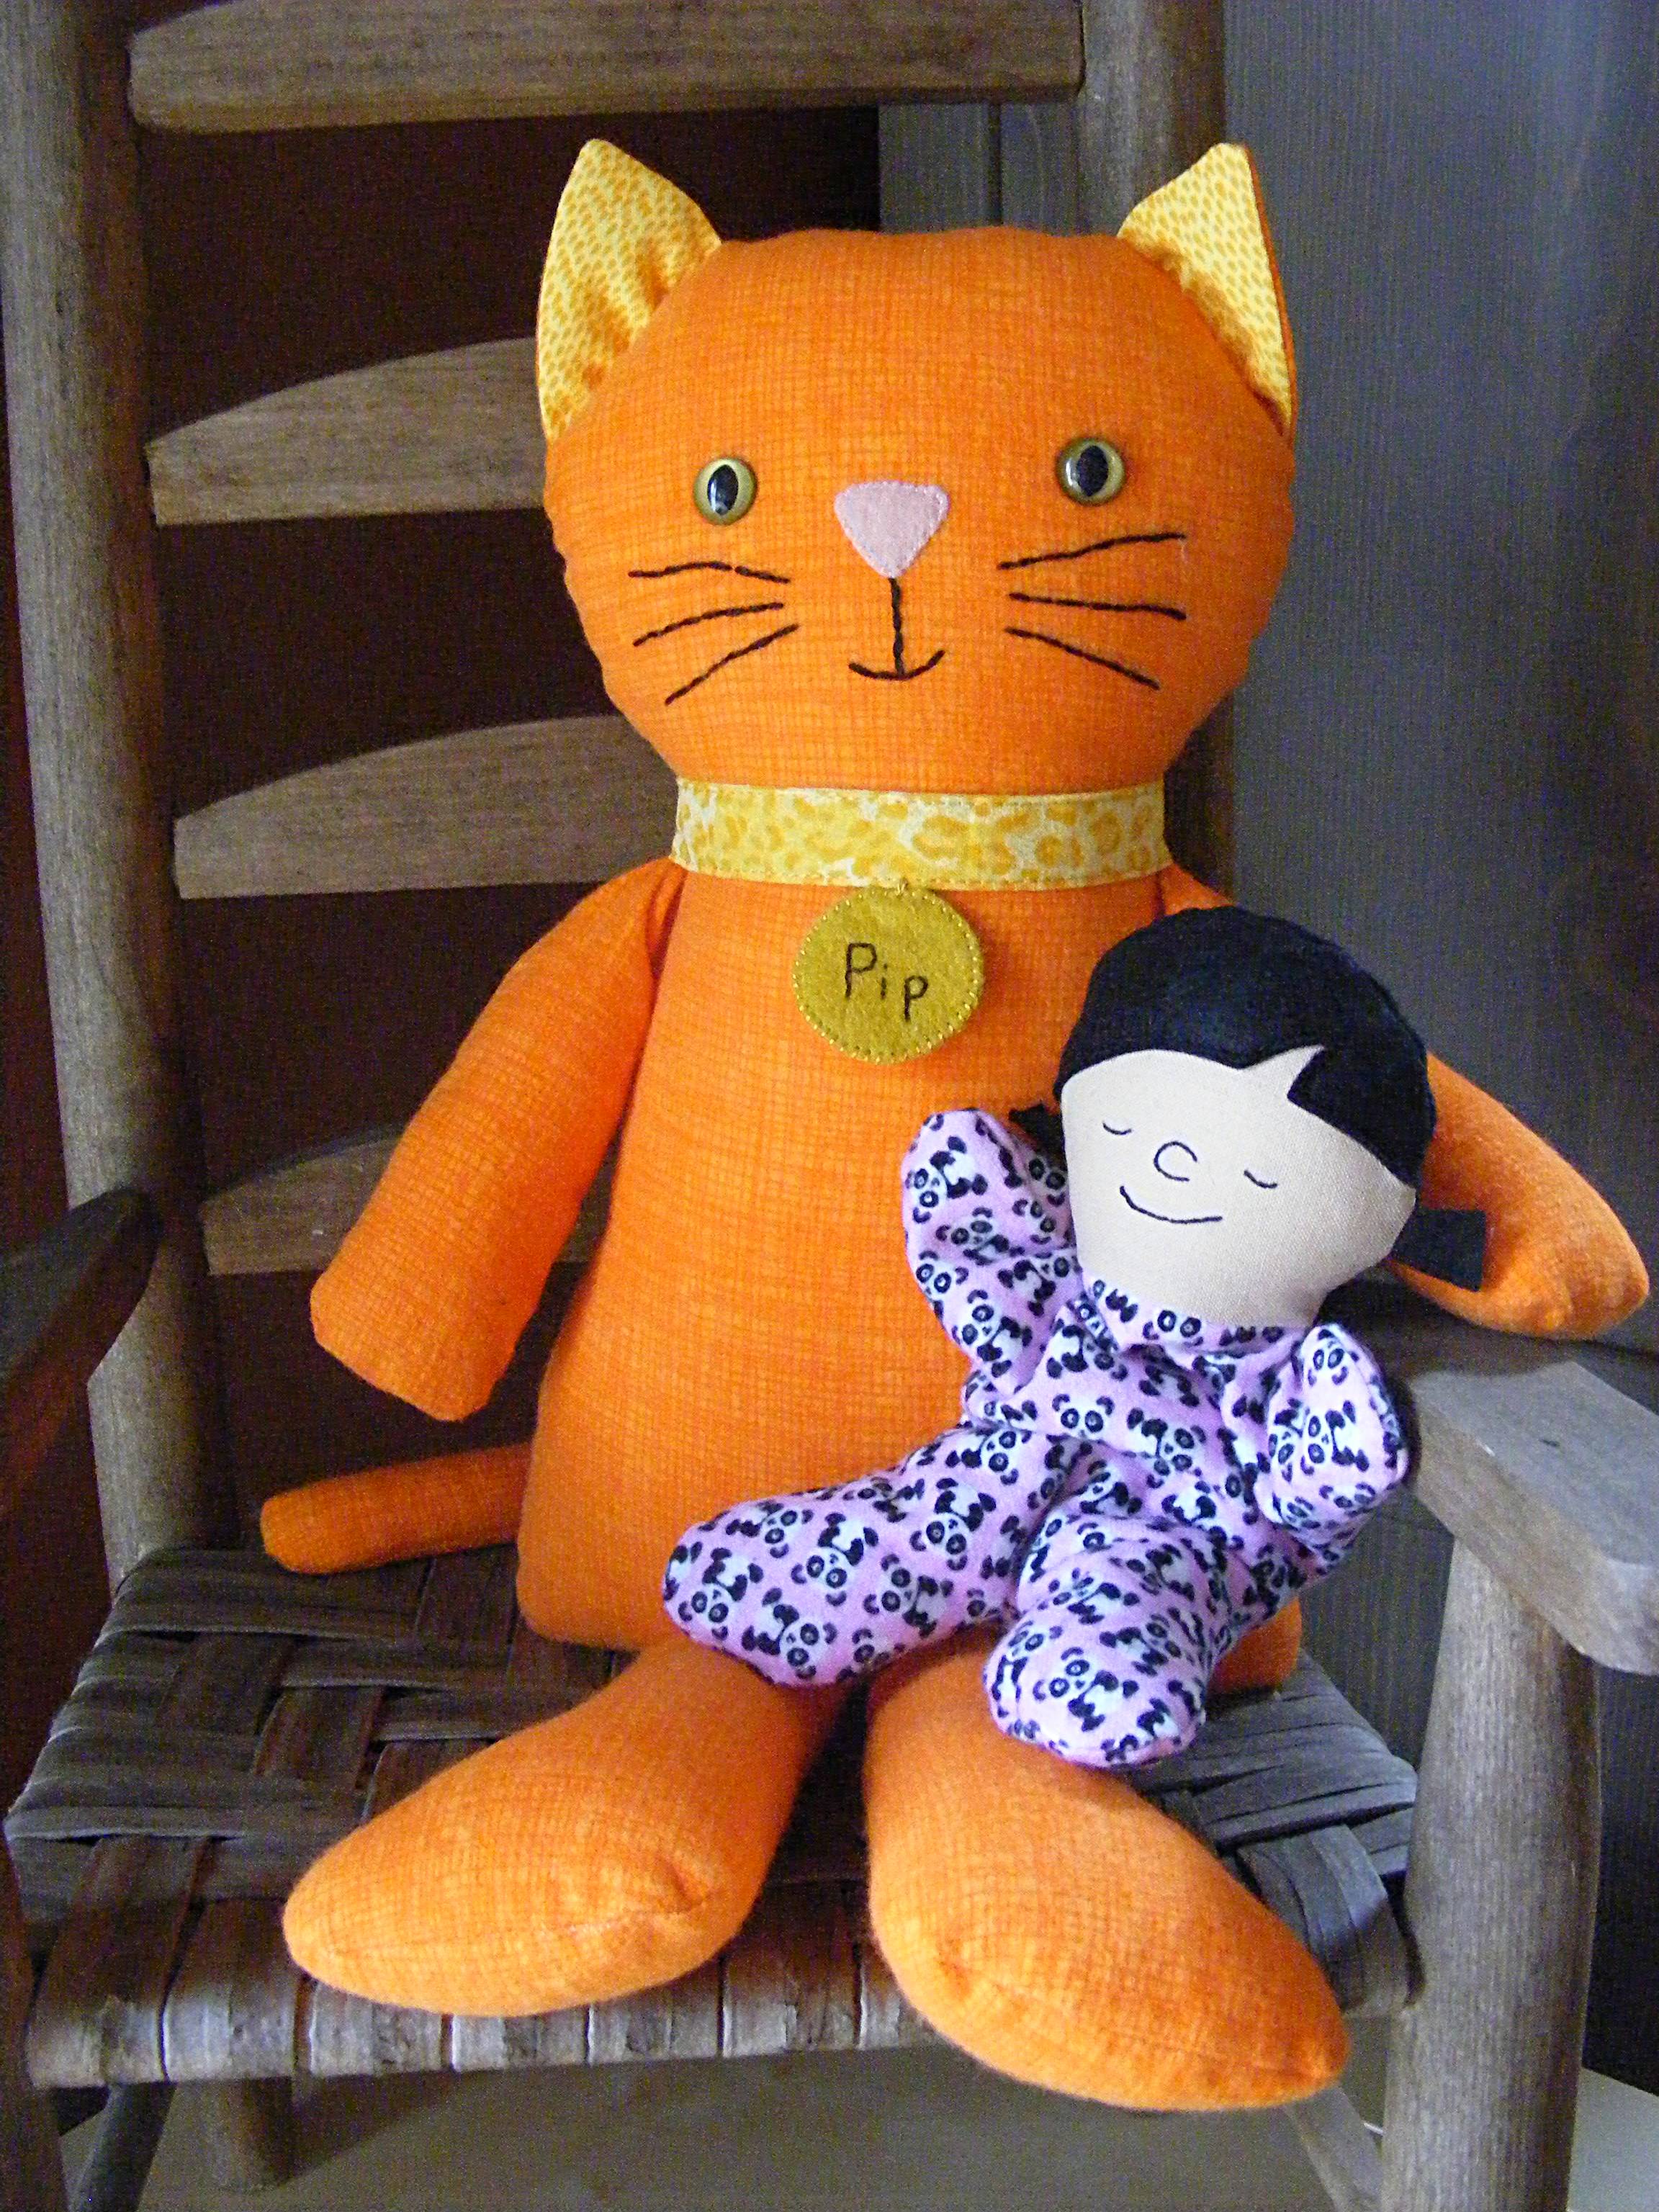
I designed her to be just the right size to work as a sweet baby doll for everyone in The Dress Up Bunch. Because dolls need dolls to play with, of course. :-)
Like all Shiny Happy World designs – you’re welcome to sell items you make with my patterns, but please don’t sell or distribute the patterns themselves. 🙂
If you like this free doll pattern, sign up for the Shiny Happy News! Subscribers get a weekly newsletter with updates, special offers and links to happy things. Sign up here.
Have a great weekend, everyone!
The Dress Up Bunch is a collection of cute and cuddly rag dolls. Get patterns for the dolls, plus all their fun outfits and accessories!


 Now hang it somewhere where it will make you smile every time you see it. :)