What is Quilt As You Go (QAYG) and How Do You Do It?

What is QAYG and How Do You Do It? video

Quilt As You Go (QAYG) is a technique that’s been around for a long time – but I’ve never tried it until now. There are a few different techniques floating around the internet – including a really common one that uses bias tape and is VERY fussy and irritating, in my opinion. I’ve been playing around with the method for a couple of months now and this is the way I like to do it. πŸ™‚

The video has more detail, but here it is in a nutshell. . .

The hardest part of machine quilting is any time you change direction. That’s pretty limiting. There are plenty of times when a grid or a series of parallel lines is just perfect for a quilt I’m making, but sometimes I want the background quilting to be a little more fun. This is especially the case with my applique quilts, where what I really want to do is quilt around each face and then do something fun to add texture to the background.

That’s when QAYG is perfect.

You layer a piece of batting with each block and then quilt just that block in the machine. It’s small and easy to spin around in all kinds of fun patterns. Whee!

You join all the blocks together after they’re quilted, and then just do some easy grid quilting in the final big quilt.

So here’s the first video in the series. . .

See how easy that is? There’s still some machine quilting, but it’s the easiest kind. And the rest of it opens up a whole new world of easy peasy zigzags and triangles and wobbly waves.

I know some of you already do all that stuff with free-motion quilting. I tried that once and it was a disaster. I’ll try it again someday when I have the magical Bernina Stitch Regulator – I’ve tried that at a show and it does make it super easy. But in the meantime – this is the method I use.

So think of my QAYG method as giving you the look of free-motion quilting without having to learn that tricky technique.

Happy quilting!

Vibrant handmade crochet toys and patterns from Shiny Happy World.


If you want to learn more about how I do Quilt As You Go, there’s a much longer post with WAY more detail and lots of links to additional info and tutorials.

Quilt As You Go – Everything You Need to Know

If you’re ready to jump in, here’s a post with some tips for choosing a pattern.

Choosing a Quilt Pattern

Vibrant handmade crochet toys and patterns from Shiny Happy World.

Video – How to Add Freckles to Your Rag Doll

how to give your doll freckles

A while back, someone suggested that one of the rag dolls (I think it was Poppy) needed freckles. I made a note of it, and when I started working on the new Dress Up Bunch doll pattern for Emily – I added freckles!

It’s really easy – you just need to do some testing to make sure your marker looks good on the skin color fabric – and that it doesn’t bleed!

Now you can add freckles to any Dress Up Bunch doll. Cute!

Happy sewing!

Vibrant handmade crochet toys and patterns from Shiny Happy World.

Why I love the US Postal Service

Can I tell you something?

When I hear folks complaining about the USPS, it makes me a little sad. Because I adore the postal service.

usps_logo

The US postal service provides an amazing service and isn’t in as much financial trouble as the rumors report.

Shipping boxes as Post Office

My postal carrier delivers mail to my doorstep 6 days a week. He picks up packages from my door to take back to the postal office. And USPS will hold or forward my mail if I go on vacation or move.

Isn’t that amazing?

If that strikes you as ‘same old, same old’, then let’s chat about the postal service in other countries:

  • In Australia, the postman does not pick up letters from your door. Or deliver on Saturdays.
  • Some countries do not offer a hold on mail, so you are responsible for managing your own packages while on vacation. Other countries charge a fee.
  • The Canada Post had a 12 day strike in 2011, leaving many people (and businesses!) unable to conduct their normal business. Can you imagine?
  • The USPS cost of shipping a package is much cheaper than in many other countries!

We receive continuous service for a low price (even despite last year’s price increase). And USPS does it all without any taxpayer money (unlike Britain’s post, where low prices are a result of heavy subsidies)!

Endicia Shipping Label

You may have heard that the post office is experiencing financial difficulties, which is true. It’s happening all across the world as people send fewer letters.

However, much of the losses come from government legislation requiring USPS to pre-fund a benefit account, a unique funding situation most companies don’t have to contend with.

Yeah, it’s a tough situation… but don’t take it out on your mailman.

In Maryland, a postal worker was recently shot amid numerous recent attacks on mail carriers.

Mail man

My mailman is a ‘substitute’, since a hiring freeze leaves them unable to hire more permanent carriers. But he still his job amazingly, even bringing me bags (for my outgoing boxes) without me even asking.

Your carrier is probably stressed during this busy season, and the negative sentiment going around about the post office can’t be lifting his spirits. So, next time you see your mail carrier, give him a friendly wave! Say hi! Tell him you appreciate him.

He brings happiness to your doorstep!

SHARE THIS

Reusable Christmas Gift Bags

I don’t use paper gift wrap anymore. It’s expensive. It’s a pain to store. And the pile of it left after opening gifts always feels more than a little wasteful.

A couple of years ago I started making fabric bags for gifts. I love them! They’re so crazy easy to make – and they take no room at all to store when they’re not in use. Nice! Oh – and the ribbons are attached. No separate bows and no tape needed.

I make two different kinds. Ones that gather and tie at the top, like this one. . .

Vibrant red fabric gift wrapping with white Asian characters, tied with white ribbon on green background. And ones that wrap around the gift and then tie, like this one. . .

Colorful TARDIS fabric wrapped gift box tied with blue ribbon on green background. Want to know how to make them? Be prepared for simplicity.

Cut two rectangles of fabric. Any size. I have a huge variety.

Sew them together around three sides (watch this video showing how to sew a straight line and turn corners if you’re a beginner). If you’re making the first kind of bag – the one that gathers and ties at the top – cut 1 yard of ribbon, fold it in half, and embed the fold in the side seam (video here), a few inches from the top of the bag. When you turn it right side out it will look like this. . .

Colorful fabric bag with blue straps on green background, perfect for sewing projects. Hem the top opening. (Video here.)

If you’re making the second kind of bag, cut a ribbon 2 times the length of the bag plus an additional yard. Fold it in half and sew the fold at top of the bag in the center of one side. It should look like this. . .

Yellow and blue ring pattern fabric with green ribbon and straps on light blue background. Done!

Wrapping is easy. Pop in the gift. Fold the top of the bag over. Tie the ribbon. Here’s what it looks like from the back. . .

Colorful fabric gift wrap with yellow and blue circle pattern and green ribbon.

And here it is from the front. . .

Colorful gift-wrapped package with yellow and blue pattern, tied with a green ribbon. I don’t stick to holiday-ish fabric – we use these for birthdays and other occasions too.

Colorful geometric fabric wrapped with a black ribbon on pink background. A lot of mine use grosgrain ribbon because I have a lot of it on hand from some aprons I used to make and sell. But sometimes I use pretty gauzy ribbon.

Wrapped gift with blue and gold spiral pattern wrapping paper and sheer white ribbon. Any fabric. Any ribbon. It all works well, looks pretty and folds up to store easily. Love!

Colorful fabric bundle with holiday decorations and greenery.

Update – I got a lot of questions about how we tag them. I started using easy reusable felt tags, and there’s a tutorial here showing how to make them.

Happy sewing!

Best,
Wendi
Wendi_Gratz_Shiny_Happy_World


Gifts for Kids Who Love to (or Want to Learn to) Sew

Tools and Supplies for Kids Who Want to SewIs your child interested in learning to sew? Or can they already sew and they want to do more?

Here are some great gift ideas for them. . .

A sewing machine! Here are some tips on choosing one for a beginner.

Seam Ripper Every sewist needs at least one.

Needles and thread When I sew with kids I use Size 5 embroidery needles for just about everything. They have a bigger eye, which makes them easier to thread.

Fabric Get a couple of fat quarters of fun prints – and maybe some of this fabulously soft cuddle fleece. Or get them a gift certificate to your local independent fabric store so they can choose their own!

Thread Get a spool each of black and white, plus another fun color or two. Don’t worry about getting thread to match a particular fabric. In my experience kids ALWAYS want to use contrasting thread in a favorite color. Get a skein of black embroidery thread too, for stitching on faces.

Stuffing This is my favorite brand.

Turn-It-All Tubes These are so much fun to use – and they make turning skinny parts right side out super easy. Watch them in action in this video. Get Turn-it-All Tubes here.

Patterns! I have lots of free patterns here. Print a couple out and include them with some supplies. I especially recommend this one. πŸ™‚ It’s perfect for beginners. And, of course, my book Creature Camp is packed with kid-tested softie patterns. Read some reviews of it hereΒ andΒ here. And get a signed copy here. I’ll draw a picture in it for you! πŸ™‚

Extra Doodads Fill up some ziplock baggies with assorted buttons, rick rack, ribbon, beads, safety eyes, feather boas, yarn and other fun stuff for hair, eyes, scales and other add-ons.

See all my posts about sewing with kids here. It’s so much fun!

Best,
Wendi
Wendi_Gratz_Shiny_Happy_World

Making Playful Bits for 3D Applique

What’s 3D applique?

Well, usually when you applique, you sew the fabric bits in place around all the edges.

But sometimes it’s fun to make them flappy. πŸ™‚ It’s a way to add a playful element to your applique!

If you look closely at the spikes on that monster above, you’ll see that they’re only attached at the base. That gives them some fun dimension – and makes them fun to play with.

I did the same thing with the teeth on this monster.

Today I’m going to give you some general instructions you can use with any applique pattern.

I’ve been working on refreshing the Peekaboo Bear quilt pattern and decided I needed to take new step-by-step photos. I didn’t want to make a whole new quilt, but Jo asked for a new pillow and that was just right.

I decided to make the ears flappy – with satin linings on the front. Oooh! Satin! Fancy! This would be especially fun to do on a baby quilt where that satin can be a soothing sleepytime thing. πŸ™‚

Here’s what you do. . .

Cut out the freezer paper pattern as usual.

Fuse it to the back of a piece of fabric, as usual. But don’t cut the pieces out!

Instead, layer that piece of fabric with another one, right sides together. Sew around the freezer paper piece, leaving unsewn where it will tuck under another applique piece. In this case, I sewed around the tops of the ears and left the base unsewn. I removed the second freezer paper ear so you could see the stitching more clearly.

Now cut out the ears, leaving a little less than 1/4 inch seam allowance all around the shape.

Turn the ear right side out and press it flat.

Voila! You have a finished shape, ready for applique!

Tuck the shape in place and stitch it down. You’ll sew the larger piece (in this case the head) in place, right over the base of the ear. Since the rest of the ear edges are all finished, they don’t need to be stitched down.

You have a flappy cute ear!

I use this 3D applique technique most often on ears, hair and teeth, but it’s great for any little flappy bit. How about a lolling tongue on a puppy dog? Or a collar on a shirt? Or the wing of a bird? Or flower petals?

If you want to make a larger piece that’s flappy, but not floppy, you can use some soft foam inside. I give instructions for that here.

Have fun with it!

Vibrant handmade crochet toys and patterns from Shiny Happy World.

Here are links to all the posts showing how to applique with fusible adhesive – my favorite method. It’s fast and easy and (with the right materials) it holds up beautifully to rough use and repeated washing.

Here are links to special posts about eyes.

Here are links to some extra fun things you can do with your applique.

Other Applique Methods

Finished with this topic?

Return to the Let’s Make a Quilt main Table of Contents.

Move on to the lessons about outline stitching.

Happy quilting!

Vibrant handmade crochet toys and patterns from Shiny Happy World.

Enough Is as Good as a Feast – a free Thanksgiving embroidery pattern

Colorful embroidered quilt with inspirational quote about sufficiency and gratitude. Happy Thanksgiving!

Whether you celebrate the American holiday or not, I want to take today to tell everyone how very grateful I am for you – who allow me to do this job I love so much.

Feast is one of my favorite embroidery patterns, and I’ve decided to make it free. You can download it here.

It’s a good message for Thanksgiving, but mine hangs on my studio wall all year long.

The stitching on this is easy – no tricky or advanced stitches – but it will take some time. It’s the sort of thing that’s a delight to pull out every night and stitch a little bit at a time in front of the fire.

Enjoy! And thank you!

Best,
Wendi
Colorful embroidered mushroom design on fabric, vibrant and detailed art piece.

SHARE THIS

Secrets of Sensational Softies

SECRETS of SENSATIONAL SOFTIES phrase on purple background, playful font, cozy craft project.

When was the last time you walked into a store and saw an appealing stuffed animal sewn from quilting cotton? Dolls yes – the smooth fabric makes it easier to dress and undress a doll. But cuddly stuffed animals? They’re ALWAYS made from softer stuff.

And they’re almost always made from fabric that you can’t buy at your regular fabric store. Super soft stuff that’s made especially for these toy companies.

Cordy Roys

I would dearly love to find a source for the fabric Jellycat uses in their Cordy Roys collection!

Polar fleece and minky fabrics are usually as close as home sewists can come – and it’s just not the same.

But I found a source!

When I was at Quilt Market last spring I met with a company (Shannon Fabrics) who makes amazing plush fabric. They sell to a few specialty fabric stores, but none of the big box stores. They mostly sell to manufacturers.

I knew as soon as I touched their fabric that this was what I had been looking for to take my softies to the next level. I touched every kind of minky and fleece they made (and they make a lot!) and I kept coming back to something called Cuddle Fleece. It was amazing! Super soft, slightly stretchy, with a nice drape. I knew it would make terrific stuffed animals – and also blankets and quilt backs.

I searched for a few months, but I had a heck of a time finding reliable sources for anything but their dimple minky. I wanted cuddle fleece and I wanted to buy it by the yard!

You know what I do when I can’t find the materials I want to use? I find them at wholesale and add them to my shop. I figure if I’m having a hard time finding them, then so are you.

So I rearranged my studio, hemmed and hawed over color choices, and bought six enormous bolts of fabric. Now I’m going to have to rearrange my studio again because they. . . ummmm. . . don’t fit in the space I had made for them. πŸ™‚

Colorful cuddle fleece fabric swatches for sewing and quilting projects. But they are here! And they’re available for you to make the most amazing softies ever!

Over the next few weeks I’ll show you some of my favorite patterns made up in these fabrics. I can’t wait to play! And Jo is already claiming the samples. πŸ™‚

In the meantime, you can find this super-soft cuddle fleece here and start making your own super soft softies!

I’m convinced that the fabric is the key to a sensational stuffed animal – but there are a few other materials that play a strong supporting role.

Safety eyes make your handmade softies look really special. I love the way the light glints off those shiny black domes – it makes the whole face come to life!

Make sure you’re using a good quality stuffing – it makes a far bigger difference than I ever anticipated – until I actually tried it. Here’s a post about my favorite kind and where you can find it.

I don’t make a lot of baby toys – but Abby Glassenberg at While She Naps is a master at it. Most store-bought baby toys have extra interactive bits: rattles, music buttons, squeakers, etc. Did you know you can add those to your handmade softies? I’ve never seen any of these components in a brick & mortar store, but Abby carries a few special supplies in her shop. Give some of these a try the next time you’re making a gift for a baby!

High end mass-produced stuffed animals are made pretty much the same way you make yours at home. Yes – they’re made assembly-line style by low-paid workers in a factory, but the process of sewing and stuffing is essentially the same. They just get softer results because they’re using softer materials. Materials not readily available to home sewists. Until now. πŸ™‚

Happy sewing!

Best,
Wendi
Wendi_Gratz_Shiny_Happy_World

My Awesomely Huge Ironing Board – An Ikea Hack How To

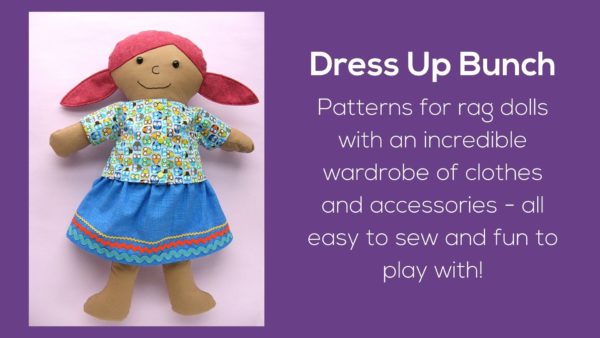
There are three things I LOVE about my awesome new ironing board.

One is obviously the fabric for the cover. This is The Land that Never Was designed by Lisa Congdon for Cloud9 Fabrics. I love the whole collection!

Two is the size. I can iron an entire piece of fabric – selvedge to selvedge – on this baby – with room to set my iron on the board too.

Please admire the vastness. πŸ™‚

Three is the storage underneath.

I never take my ironing board down – so the easily collapsible X bottom was just a waste of space for me. This ironing board sits on some handy dandy Ikea Expedit shelving!

Here’s how I made it. . .

1. Start with your shelves. I was going to use a different piece from Ikea. When we went they had plenty in stock, but they were all on the top shelves of the storage area and they said they couldn’t get them down until after hours and we’d have to come back the next day. The Ikea is 2 1/2 hours away. Coming back the next day wasn’t an option – so we went with two of these instead, laid them on their sides and screwed them together in the back. It’s even longer than I had planned – but that’s ok with me! (Edited to add: Ikea no longer stocks the Expedit shelving. Their replacement is the Kallax, which would also be suitable for this project.)

I also added the wheels to the bottom for easy moving and vacuuming.

2. Now measure the top of your shelves. Find some small L-brackets and measure them too. You’re going to cut a piece of plywood big enough to hang over the edge of the shelf on all sides by the width of a bracket. These next pictures will make it clear.

Here’s a bracket (the ones I found were 1 1/2 inches) attached to the edge of the plywood. It’s attached to what will be the underside of my ironing board.

In this photo I’ve flipped my board over. It’s resting on the top of the shelving unit and the brackets are holding it in place so it doesn’t slide around. You could screw the brackets to the shelving unit too, but I wanted the whole top to be easily removable and I found that six brackets around the edge (two on each long side and one on each short end) held it in place nicely.

I wrapped the lower (not screwed in) part of the brackets with a layer of masking tape so they wouldn’t scratch the surface of the shelving unit. You never know – I might take this whole thing apart at some time in the future and use the shelves in another way.

Here’s the wooden top seen from above, before adding padding and the cover. Yes – that’s a seam down the middle. No – I don’t recommend doing the top in two pieces. I had a bunch of kids with me in the car the day I bought the wood and I couldn’t put the back seat down to accommodate a larger piece of plywood. I should have waited.

I rounded the corners of the wood just a tiny bit. I set a can of spray paint on the corner and traced that curved edge to use as a guide. This isn’t necessary – but I’m going to use a drawstring cover and it will wrap more neatly around a curve.

Now I’m ready to add some padding and the cover.

I covered the top with six layers of white cotton terry cloth. I usually use cotton batting, but I think this terry cloth might hold up better (compress less) over time. Cut the terrycloth so it hangs over the edge of the tabletop by 1-2 inches. Smooth out any folds or wrinkles.

Round the corners of the terrycloth too.

Now it’s time to add the pretty! A good selvedge on fabric makes me happy in the same way that good endpapers in a book make me happy.

From here on out it’s just like covering any ironing board. I’ve got a video here showing how.

Cut the fabric to cover the top plus 1-2 inches all around the edge – just like the terry cloth. Round the corners of the top fabric, too.

Sew bias tape all around the edge of the new cover. Use that bias tape as a tube and thread it with a long piece of cord. I like using a smooth nylon cord – it draws up easily.

Center your cover over your ironing board. Draw up the drawstring and use a toggle to hold it in place.

Ta daaaa! I love my new ironing board!

Vibrant handmade crochet toys and patterns from Shiny Happy World.

Here are handy links to all the posts about quilting tools and supplies.

Sewing Machine

Iron

Rotary Cutting Tools

Scissors

Other General Sewing Room Supplies

One More Hugely Popular Post that Seems to Fit Here Better than Anywhere Else

Return to the Let’s Make a Quilt main Table of Contents.

Move on to the posts about choosing your quilt pattern.

Happy sewing!

Vibrant handmade crochet toys and patterns from Shiny Happy World.

Book Review: Woodland Knits

I adore Stephanie Dosen’s (aka Tiny Owl Knits) designs. She designs whimsical and fun knitting patterns… so I was really excited to see her book, Woodland Knits.

Woodland Knits by Tiny Owl Knits

The book contains 21 adorable patterns, 10 of which are new designs for the book. The remaining 11 designs are well-loved favorites, like the deer with antlers hat, bo peep scarf and fawn poncho.

mr. fox stole my heart woodland knits

The book contains cute little notes and helpful tips throughout, but no introductory material. It’s 21 lovely patterns bound together in a book.

Woodland knits

I was surprised to see that all of the patterns in the book are available for individual purchase as pdf downloads. At around $5 a piece, if you’d like to make a few, then $20 for the book is a great deal!

Bo peep scarf tiny owl knits

Besides the discount over purchasing 21 individual patterns, though, you don’t get much additional content to the book. So, I would recommend having a peek at the included designs (which is tricky, since only the new 10 designs are listed as patterns in the book on Ravelry), and deciding whether there are a few you’d like to knit.

The patterns are cute and the book is very pretty… so if you can find a few, then I’d say go for it!


disclaimer