How to Embroider a Running Stitch – video

How to Embroider Running Stitch - a video tutorial

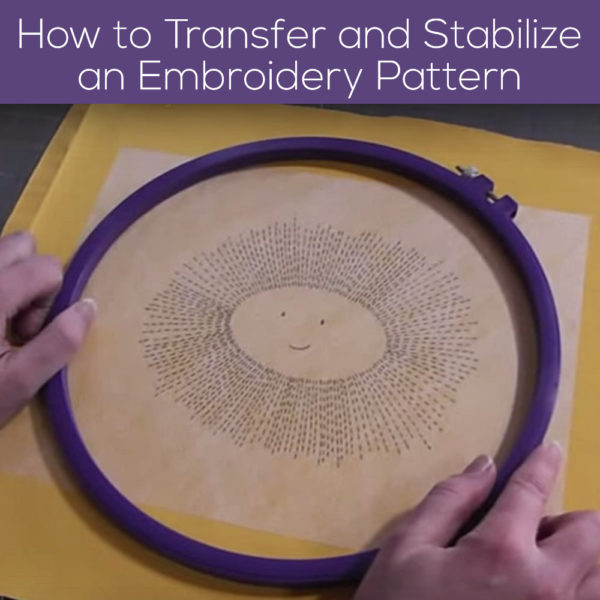
There are a lot of outline stitches you can use for different effects when you’re embroidering by hand – the running stitch is the easiest.

It’s a great stitch to start with – the first one I teach to beginning stitchers.

So watch the video and get stitching!

Remember – the “correct” way to do running stitch is where the length of your stitches is equal to the length of the space between the stitches. But that’s not the only way to do it!

I prefer to have more stitch and less space. Every once in a while, depending on the effect I’m going for – maybe raindrops? – I might want to have spaces longer than my stitches. It’s totally up to you!

If you want to practice your running stitch, here’s a free pattern to try. It uses just that one stitch!

Raining Rainbows - free embroidery pattern from Shiny Happy World

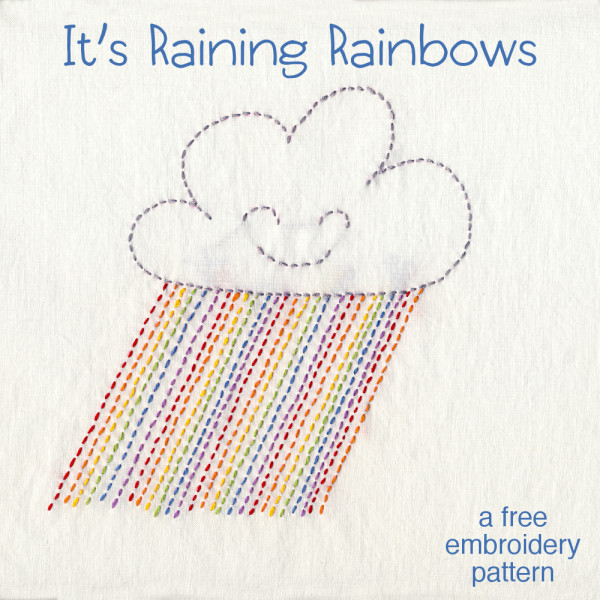
Get the Raining Rainbows embroidery pattern here.

You can use the running stitch for more than embroidery. It’s the stitch I use for all my Big Stitch Quilting! Here’s a little peek at a project.

Close-up of Big Stitch Quilting (using running stitch) on a colorful scrap quilt.

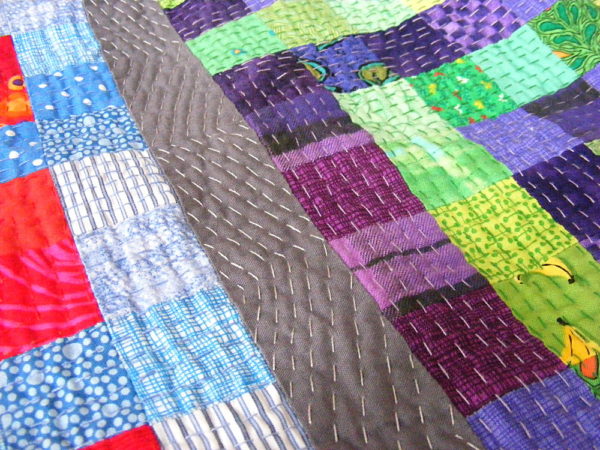
If you look closely you can see that the space between my stitches is WAY smaller than the stitches themselves.

If you want to practice the Big Stitch use of running stitches, here’s a free project to try.

Big Stitch Polkadot Coasters - a free pattern from Shiny Happy World

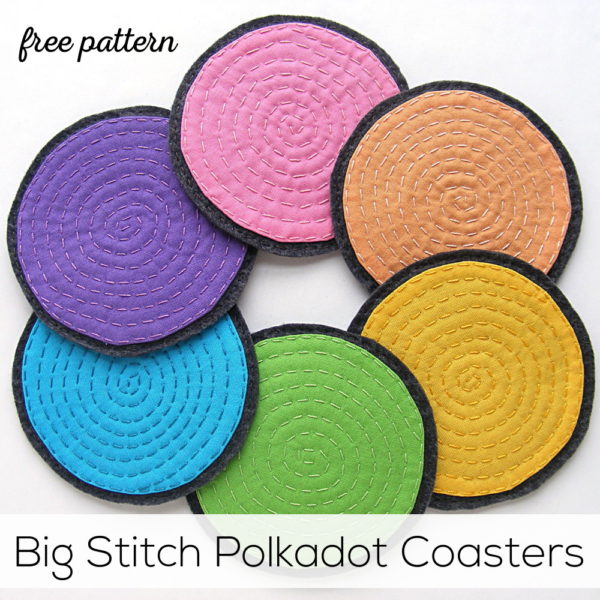
Click here to go to the Big Stitch Polkadot Coasters pattern.

Vibrant handmade crochet toys and patterns from Shiny Happy World.

Here are all my lessons for outline embroidery stitches.

Return to the Learn to Embroider main Table of Contents.

Move on to the lessons teaching fill stitches.

Vibrant handmade crochet toys and patterns from Shiny Happy World.

How To Sew Without a Machine – video

Sewing tutorial hand stitching fabric without machine bright green background.

I know everyone’s eager to get on the machine – but sometimes you have to do a bit of handwork and this is the most basic hand sewing stitch there is. It’s not tricky and it actually goes much faster than you’d expect. And once you get the hang of it you can sew ANYTHING ANYWHERE. Really. Clothing, quilts, toys, repairs – you can do it all with just a needle and thread.

Just grab a scrap of fabric and a needle and thread and practice some hand sewing. Once you get a feel for the stitch – try to make something! You can sew any pattern by hand. 🙂

Happy sewing!

Best,
Wendi
Applique Wendi (with fabulous hat)

How To Tie a Sewing Knot – video

I know it seems silly to record a video about how to tie a sewing knot – but this knot is so awesome it’s worth teaching.

When I’m sewing in public and strangers see me tie this knot – they stop and ask me how I did that. Yes – it’s that cool.

And it’s easy. 🙂

With just a little practice you can look like a sewing superstar.

I’ve heard it called a tailor’s knot and a quilter’s knot – but I just call it my favorite knot. 🙂

I use it for any and all hand sewing that I do – sewing, embroidery, hand quilting, you name it. If it calls for a needle and thread, with a knot in the tail of the thread – this is the sewing knot I use.

Vibrant handmade crochet toys and patterns from Shiny Happy World.

Here are all my posts about knots.

Before you knot that thread you need to know how much to use, so here’s one more post that doesn’t really have a better place to live. 🙂 How Many Strands of Thread Should I Use?

Return to the Learn to Embroider main Table of Contents.

Move on to the lessons for the four most basic embroidery stitches.

Vibrant handmade crochet toys and patterns from Shiny Happy World.

How To Transfer Embroidery Patterns – video

How to Transfer Embroidery Patterns - a video tutorial from Shiny Happy World showing three different methods

In this video I show you three different ways to transfer embroidery patterns – including super tricky fabrics like black velvet.

I mention a couple of products in this video. One is Sulky Solvy. The other is an iron-on transfer pen or pencil. Both are from Sulky and both work really well. But. . .

Update – Since I recorded this video I’ve discovered a new product that is so amazingly awesome it gets its own video. You MUST watch it. It’s also from Sulky and it’s called Sulky Sticky Fabri-solvy. I call it The Magical Embroidery Stuff. 🙂 It’s pure magic! I use it now every time I transfer embroidery patterns. It works for regular fabric, for knit fabric, for dark fabric, and even for napped fabric like velvet or terrycloth. It’s fabulous!

Vibrant handmade crochet toys and patterns from Shiny Happy World.

Here are all my posts about working with patterns.

Pattern Sources

How to Resize a Pattern

Return to the Learn to Embroider main Table of Contents.

Move on to the posts about knots. Yes – a whole section about knots. 🙂

Vibrant handmade crochet toys and patterns from Shiny Happy World.

How to Hand Embroider on T-shirts

Can you stitch on stretchy knit fabrics? I get this question a lot – and the answer is a resounding YES!

Here’s how to hand embroider on t-shirts.

You can’t just pop any stretchy fabric into a hoop and start stitching away.

Well – you can – but the results will be terrible. The fabric will stretch but your stitches will not, so when you take it out of the hoop you’ll have big, loopy, awful stitches.

The trick is to make your stretchy knit fabric think it’s a nice, stable, woven fabric. How do you do that? With stabilizer!

There are a lot of different stabilizers you can use to hand embroider on T-shirts, but my absolute favorite (by a LOT) is Sulky Sticky Fabri-solvy. It’s so fabulous that I have a whole post about it here.

I sing its praises in this post and video – but I don’t even mention using it to embroider T-shirts, because when I made it I hasn’t tried that yet. I’ve tested it on T-shirts since then and it’s an absolute dream. No marking on the T-shirt, totally stable to stitch, and no stabilizer bits to pick out of the back – it just rinses away like magic.

I love magic.

Print the pattern onto the rough side of the stabilizer, peel off the paper back, then stick it to the front of your t-shirt. The stabilizer is not stretchy – so when it’s stuck to your fabric it also makes your fabric not stretchy.

Hoop it up – being sure to catch the edges of your stabilizer in the hoop, like this. That way the fabric around the spot you’re embroidering doesn’t stretch either.

This isn’t a t-shirt project, but you can see what I mean about including the stabilizer in the hoop.

Colorful embroidery hoop with a smiling sun pattern on fabric.

The stabilizer has a papery feel and you stitch right through it and the t-shirt together. It does a great job of keeping everything neat (and non-stretchy) while you stitch.

When you’re done stitching, you just soak the whole shirt and all the stabilizer disappears.

Go grab a plain T-shirt and embroider something fun on it. 🙂

If you’re looking for that cute puppy – you can find the pattern here. And that sunshine pattern is here.)

Vibrant handmade crochet toys and patterns from Shiny Happy World.

Here are links to all my posts about embroidery tools and supplies.

For Beginners

Specialty Fabrics

Threads

Stabilizers and Pattern Transfer Tools

Return to the Learn to Embroider main Table of Contents.

Move on to the posts about working with patterns.

Vibrant handmade crochet toys and patterns from Shiny Happy World.

Pattern Cutting Basics – video

Colorful fabric bows arranged on paper pattern for sewing tutorials.

In this video I give you an introduction to some pattern cutting basics.

When I say basics I do mean basics. This isn’t about transferring complicated markings from garment patterns to your fabric. This is very basic stuff about how to lay out a pattern piece and cut around it.

It may seem like I’m overemphasizing the “lay your pattern out as close to the edge of the fabric as you can get it” stuff – but every time I teach a sewing class I come home with at least one large piece of fabric with a small hole cut smack out of the middle of it.

Surprise!

Like this one. 🙂

Here’s the video. . .

So there you are – a simple introduction to pattern cutting. If you want to get just a tiny bit more advanced, check out this post about fabric grain. Happy sewing!

Best,
Wendi
Colorful embroidered mushroom design on fabric, vibrant and detailed art piece.

How to Use and Maintain Your Steam Iron

The most dangerous tool in the sewing room isn’t the machine with the fast-moving super-sharp needle. It’s the steam iron.

Really!

It’s so easy to burn yourself either by touching the iron directly, or by the steam that comes shooting out the sides. 🙁

Do you know how to take care of your iron?

Did you know that there’s a difference between pressing and ironing?

Do you know how to remove gunk that has baked onto the sole plate of your iron?

From safety to maintenance to proper use – this video has everything you ever wanted to know about your steam iron.

A lot of people ask about what steam iron I use.

For a few years I used an Oliso Pro.

I loved it! It got nice and hot, generated plenty of steam, and didn’t need to be propped upright. But then it started to die. It never leaked, but it stopped getting up to full temperature. If I were still teaching kids I would have replaced it with the same model. That stand-up feature is AWESOME for kids who often leave the iron sitting flat on the ironing board. 🙄

But I don’t teach kids very often anymore, so I bought a less expensive iron – a Sunbeam Turbo Steam Iron. It’s a great iron too! It has three steam settings – no steam, normal steam, and a crazy insane amount of steam. 😂 It holds temperature well, has a big tank for water, and has tiny steam holes – a feature I like for fusible applique.

If you’ve got an iron, you’ll need an ironing board. Here are a few more handy posts. . .

And here’s a post especially for those who do embroidery – How to Iron Your Embroidery without Smooshing the Stitches.

Vibrant handmade crochet toys and patterns from Shiny Happy World.

Here are handy links to all the posts about quilting tools and supplies.

Sewing Machine

Iron

Rotary Cutting Tools

Scissors

Other General Sewing Room Supplies

One More Hugely Popular Post that Seems to Fit Here Better than Anywhere Else

Return to the Let’s Make a Quilt main Table of Contents.

Move on to the posts about choosing your quilt pattern.

Happy stitching!

Vibrant handmade crochet toys and patterns from Shiny Happy World.
SHARE THIS

How To Choose Fabric – video

Blue textured fabric swatches for beginner quilting and sewing projects.

You’ve got your machine and all your tools and you’re ready for the fun part – picking out the fabric. Woo hoo! What you might not know is that some fabrics are a dream to work with – and some are a nightmare.

This video gives you some tips on how to choose fabric for a beginning sewist. Hint: It’s not the velvet and satin! At least not for beginners. After you have some of the basics under your belt we’ll have a few special lessons on working with all the “tricky” fabrics I mention. You will learn to sew with velvet – just not for your first project. 🙂

Want to jump ahead to working with some of those “fancy” fabrics? Here are links to some lessons. . .

And I have a whole bunch of info about working with felt – one of my favorite fabrics.

If you’re looking for specific info about choosing fabrics (and colors) for a quilt, here are some helpful posts for you.

Now that you know how to choose fabric that will be easy to work with – pick a project and start sewing! There are a bunch of free patterns here.

Happy sewing!

Best,
Wendi
Colorful embroidered mushroom design on fabric, vibrant and detailed art piece.

Basic Sewing Machine Maintenance

So, you’ve got yourself a sewing machine. Now you have to learn how to take care of it. Don’t worry! Sewing machine maintenance is pretty easy – just regular cleaning and the occasional drop of oil. You’ll have to change the needle pretty often too. I show you how to do it all in this video.

Update! A lot of commenters on YouTube have freaked out because I blow compressed air into my machine. The guy who cleans my sewing machine actually taught me to do this, so I feel pretty ok about it – but it’s important to do it after you brush all the big, obvious stuff out. It helps to get the little bits that are hidden in nooks and crannies. 

See how easy basic sewing machine maintenance is? I give my machine a good cleaning and oiling in between every major project – and sometimes multiple times during larger projects like a quilt. It only takes a minute and your machine will thank you. 🙂

Vibrant handmade crochet toys and patterns from Shiny Happy World.

Here are handy links to all the posts about quilting tools and supplies.

Sewing Machine

Iron

Rotary Cutting Tools

Scissors

Other General Sewing Room Supplies

One More Hugely Popular Post that Seems to Fit Here Better than Anywhere Else

Return to the Let’s Make a Quilt main Table of Contents.

Move on to the posts about choosing your quilt pattern.

Happy sewing!

Vibrant handmade crochet toys and patterns from Shiny Happy World.

Basic Sewing Supplies

Basic Sewing Supplies

If you’re a beginning sewer there are a few basic sewing supplies you’ll need to invest in. You’ll add more later as you learn more advanced techniques – but these are all you need to get started.

All of these links go to online sources – but all of these should be easy to find at any fabric or craft store. I made this post light on the pictures so you can easily print this list out and bring it in to your local fabric store. Just hand it to one of the employees and they’ll set you up with everything you need.

Basic Sewing Supplies – Everything a Beginner Needs

  • seam ripper* – Oh yes, you will be ripping out stitches. I promise. I keep one at my machine, one on my work table, and one at my ironing board. That’s how often I end up using it. 🙂 There’s a video here showing how to use this scary-looking tool.
  • needles – Look for sharps, embroidery needles, or betweens – all will work for hand-sewing. There’s a post here all about the difference between those needle types. Start with a pack of assorted sizes so you can try out several and see what you’re most comfortable with. Many people start sewing with a larger needle and then progress to smaller needles as their skill improves.
  • sewing gauge* – Such a handy little tool – you’ll use it all the time.
  • marking pencils* – You’ll need at least two – a light color for dark fabrics and a darker color for light fabrics. I often use a regular pencil to mark on light fabrics, and I like this assortment for marking on darker fabrics.
  • bent shears* – The bent shape on these makes it easy to cut through layers of fabric without shifting it around too much. You can buy really expensive shears and have them sharpened regularly or you can buy inexpensive ones like these. If you use them ONLY FOR FABRIC and do a lot of sewing you’ll probably need to replace them after about a year. If you cut paper with them you’ll need to replace them a lot sooner. You can read about The Great Scissor Rotation here. 🙂
  • thread snipper* – You’ll need a pair of small scissors for cutting threads close to the fabric. I love my spring-loaded snips, but any small, sharp scissors will do.
  • pinking shears* – You won’t need these unless you start sewing garments, but they’re fun to have for other projects too.
  • pins* – You need long, sharp pins with large heads that will be easy to spot. I love these pretty pearly ones.
  • pin cushion* – Get something pretty or plan to make your own very soon. (Here’s a free pattern.) If you go with the classic tomato and strawberry combo – the tomato is for storing your pins. The strawberry is for sharpening them. Don’t store pins in the strawberry or they may rust.
  • clear straight-edge ruler*

If you want to buy some thread now, go ahead and get a couple of spools of all-purpose thread in black and white. You’ll buy other colors as you need them and you’ll want to match them exactly to your fabric.

Of course – you’ll need a sewing machine too. Here’s some info to help you choose a good one for beginners. You’ll also need an iron and an ironing board – but I’m guessing most people already have those. You don’t need anything fancy – just an iron that will make steam.

That’s it! Gather up your sewing supplies and come back here to learn how to sew!

Best,
Wendi
Colorful embroidered mushroom design on fabric, vibrant and detailed art piece.

*All links marked with an asterisk are affiliate links to the exact products I use in my studio.