Ultimate Crochet Hook Review: which hook is right for you?

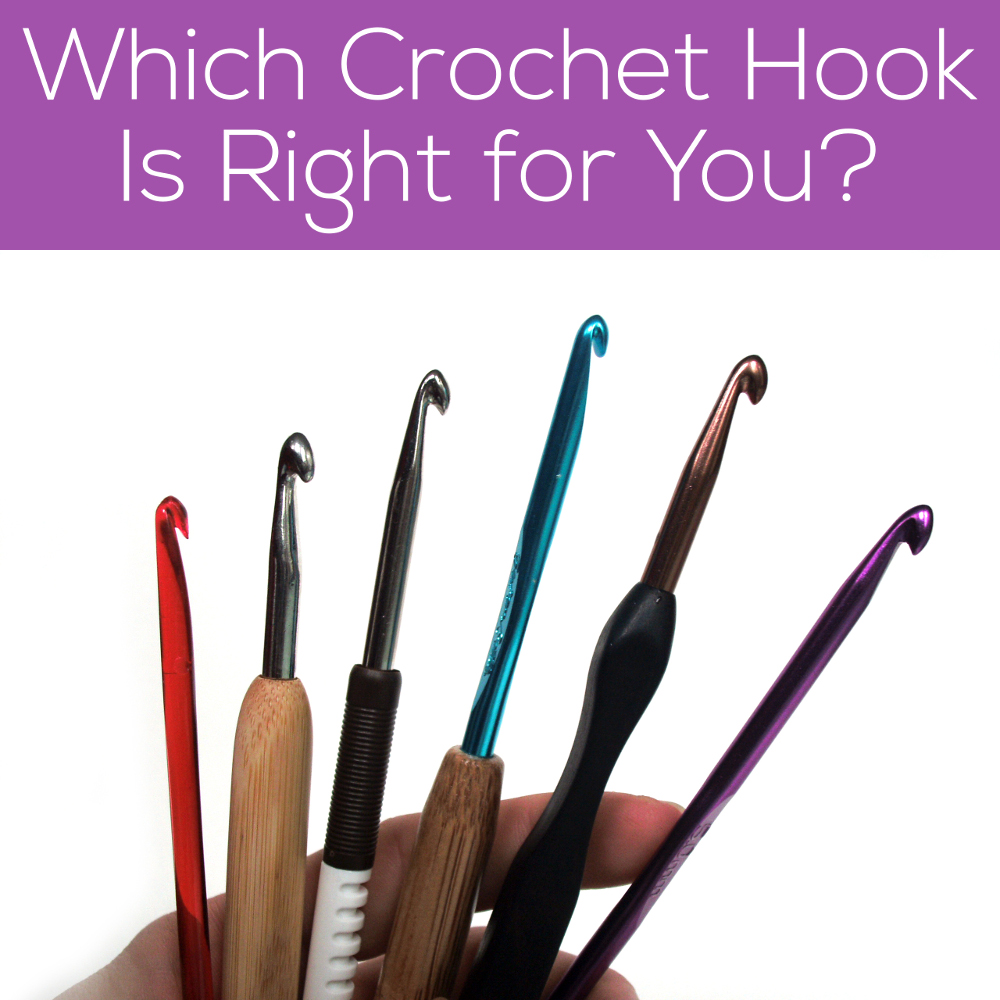
There’s no such thing as the perfect crochet hook. There may be a perfect hook for you, but not all hooks work for all people.

Yesterday, you learned all about the differences between different styles of hooks. Today, you’re going to learn how to pick a hook that’s right for you.

Finding the right hook for you takes some trial and error, but you can narrow down your search by paying attention to your crochet habits. Here’s a little quiz that will help you out:

Do you roll your hook? When you’re crocheting, do you roll the handle around in your hand? Or do you like to keep your thumb firmly planted? If you’re a roll-er, then you’d do best with a hook without a thumb rest.

pictured: Susan Bates Bamboo Handle

Hooks to try: ChiaoGoo Bamboo, Addi Bamboo, Addi Comfort Grip, Clover Takumi, Etimo Cushion Grip.

Do you crochet tightly? If you tend to crochet very tightly, a hook with a tapered throat will probably only make the problem worse (as you’re tempted to pull the yarn tightly around the thinner parts of the throat). Try a hook with an inline throat.

Hooks to try: Susan Bates (all models), any hook made from Bamboo (because of the way tapered hooks thin at the top, most wooden/bamboo hooks feature inline throats for strength).

Are you always splitting your yarn? If so, you probably need a hook with a rounder (rather than a pointier) tip.

Hooks to try: HiyaHiya, Addi Comfort Grip, Susan Bates (Bamboo, Quicksilver and Aluminum), Boye crochet hook, Kollage Square Hook, Addi Swing, ChiaoGoo Bamboo Handle.

Do you find it difficult to insert your hook into the next stitch? Then you’re a candidate for a pointy crochet hook!

pictured: ChiaoGoo Premium Bamboo hook

Hooks to try: Almost any wooden/bamboo crochet hook sports a pointy tip, including: Addi Bamboo, ChiaoGoo Bamboo, Clover Takumi, Brittany

Do you toss your hooks into one bag and then forget what size they are? You need a hook that has the hook size permanently etched/carved into the hook. Otherwise, you’ll be stuck pulling out your gauge every time you need to crochet!

Hooks to try: Addi Comfort Grip (color-coded handles), Susan Bates (raised lettering on all models), Boye (raised lettering), ChiaoGoo (sizes laser-etched into all models), Boye (raised lettering on all models)

Have you broken your fair share of hooks? You’ll need one that’s super strong. There are a few varieties to try. Metal hooks are very difficult to break. Plastic hooks are flexible, so they bend easily and are slow to break.

Hooks to try: Any metal or acrylic hook. If you love bamboo, try ChiaoGoo, which is made from Chinese Moso bamboo, which is supposed to be the strongest bamboo around.

Do you find it hard to ‘catch’ your yarn while crocheting? A hook with a deep groove may be just the answer you’re looking for.

Hooks to try: Kollage Square hook, Susan Bates (all models).

Looking for something a little fancy? Do you make a statement with your hook? Then you’d probably love one with a decorative handle.

pictured: Furls handcarved hook

Hooks to try: Furls handcarved hook, Brittany.

Do your hands ache after too much crocheting? A handle with a comfort or ergonomic grip might help you out. A comfort grip is a handle that is bigger than a standard handle, and easier to hold. Ergonomic grips are curved to fit in the palm of your hand.

pictured: ChiaoGoo Comfort Grip

Hooks to try: Addi Swing, Addi Comfort Grip, Etimo Comfort Grip, ChiaoGoo Comfort Grip, Susan Bates Bamboo Handle, Kollage Square Hook.

Do you have arthritis? If you have arthritis, crocheting can be an achy task. You may find crocheting with an ergonomic or comfort grip (above) more comfortable. I’ve heard some folks with achy hands prefer plastic hooks (since they bend in your hand as you work) or wooden/bamboo hooks (because they’re warmer than metal) helpful.

Hooks to try: Susan Bates Crystalites, ChiaoGoo bamboo, Clover Takumi.

Do you have trouble seeing your stitches? If you need a lot of light to see well while crocheting, a light-up or glow-in-the-dark hook might come to your rescue!

Hooks to try: Susan Bates SmartGlo, Clover Crochet Lite.

How’d you do in the quiz? I’m a thumb-rest user who tends to split stitches and likes a deep groove… how about you?

Here are handy links to all the posts about crochet tools and supplies.

Return to the main table of contents for Let’s Learn to Crochet Amigurumi.

Move on to the posts about yarn.

Happy stitching!

Ultimate Crochet Hook Review: anatomy in action

So, yesterday you learned terminology associated with hook anatomy, and have a rough idea of ways in which hooks can differ… but what do all these differences look like in action? What’s the difference between a pointy and a rounded point? Let’s find out!

Finding out how to identify these differences in real-life hooks is crucial to helping you find your dream hook!

Points

The point of a hook makes a big difference to the way you crochet. A pointier point allows you to stick your hook into the next stitch much more easily than a rounded point, but comes at the risk of splitting your yarn. If you’re using a splitty yarn, then a rounder point is advisable.

Grooves

The groove is what catches your yarn as you pull it through the loop you’re working on. If the groove is too shallow, you’ll lose your yarn. If it’s too deep, it may get in the way of your crocheting rhythm. You may find that, as you become more experienced, your preference for groove depth changes.

Throats

An inline throat means that the width of the throat is the same all the way down the hook. This style helps some crocheters keep a more even gauge (especially for those who tend to crochet tightly). A tapered hook is much smaller at the top compared to where the throat meets the shaft.

Shafts

The shaft of the hook is what determines the size of your stitches. Since it’s job is to produce an even-sized stitch, most hooks have a straight shaft. However, occasionally, you’ll find a hook with a tapered shaft, and you’ll need to practice to make sure your gauge is spot on.

Thumb rests

A hook may or may not have a thumb rest. For some crocheters, a thumb rest is a convenient place to put your thumb and a way to maneuver the hook. For others, it just gets in the way. Whether or not you need one depends on your crocheting style.

Handles

The handle doesn’t need to be made from the same material as the hook. Many hooks have handles that are just an extension of the hook (or are ‘plain). Other hooks have comfort or ergonomic handles for your crocheting comfort. A ‘comfort handle’ is bigger than a plain one, and easier to grip. An ‘ergonomic handle’ is specifically shaped to rest in your hand for maximum comfort.

What’s the right one for you?

How do you know if you need a pointy point or a rounded one? That’s tomorrow’s topic!

Ultimate Crochet Hook Review: hook anatomy

Welcome to day one of my Ultimate Crochet Hook Review! I’m so excited to be running this series on my blog. Do you know why? Because there are so many crochet hooks out there, it often feels impossible to choose the right one for you! So, this week, I’m going to talk about the nitty-gritty details about hook shape and design, how to identify your crocheting style, and help you pick the hook that’s right for you!

So, let’s get started! How well do you know your crochet hook? Before you can figure out which hook will work best for you, you’ve got to get to know the basic anatomy of the hook.

Here’s a diagram:

Hook terminology

  • Point: this is the part of the crochet hook that pokes into the stitch you’re crocheting into. The point can range from very pointy to rather dull (rounded). Sometimes called the ‘tip’.
  • Groove: The groove is the indentation that catches the yarn as you pull it through a stitch. Grooves can be either deep or shallow, although there’s no standard way to ‘measure’ the ‘groove depth’.
  • Throat: the throat is the part of the hook where the loop transitions from being caught in the groove to its resting place on the shaft. Throats can be either ‘inline’ or ‘tapered’. This is perhaps one of the most salient features of a hook, and the throat style is often described on the package.
  • Shaft: the shaft is the part of the hook that the loop rests on while you are crocheting. It is the part of the hook that determines the size of your stitches.
  • Thumb rest: this part is pretty self-explanatory! It’s an optional indentation that allows you to rest your thumb on the hook.
  • Handle: another self-explanatory part! The handle is the part of the hook that you’ll hold while crocheting. Handles are usually made from the same material as the rest of the hook, but some styles of hook feature ergonomic or comfort handles.

More hook differences

In addition to the points raised above (inline vs. tapered throat, pointy vs. rounded point, etc.), hooks can differ in many other ways. Hooks can be made in many different materials (metal and bamboo are 2 of the most common), of course, come in different sizes and those sizes can be printed on the hook in different ways (ranging from ‘not at all’ to ‘laser inscribed’).

What the heck does all that mean? Want to know what all of these differences mean to you and your quest for the perfect hook? You’ll have to come back for the rest of the series! (it’s way too much for one blog post!)

How to embroider a smile on your amigurumi!

About a week ago, Tiffany wrote on the FreshStitches Facebook wall, and asked if I could post about how to embroider a smile on amigurumi. Sure thing!

If you’re shaky on doing embroidery, check out my video on embroidering amigurumi. That’ll help you with the basic technique. And now, I’ll show you how to get a nice, even smile!

Planning the smile

So, we begin with a blank canvas (in this case, an amigurumi head):

Now, here’s the real trick: I use locking stitch markers to plan out the shape of my smile! Here, I put one marker in each of the upper corners of the smile, and one at the bottom. You can use more if you feel like you need a bit more guidance while embroidering.

Embroidering
Now, with the smile all planned, you can begin embroidering! First, thread your tapestry needle with the yarn you want to embroider with:

… and get started! If you want to see how to embroider in more detail, check out my video on embroidering amigurumi.

And, you’re done!
Since you used the locking stitch markers as your guide, you have a nice, even smile!

Just remove the markers… isn’t it lovely?

Hope you enjoyed this Tip Tuesday… and that it’ll inspire you to dress up your amigurumi with pretty smiles!

Here are handy links to all the posts about faces and details. . .

Return to the main table of contents for Let’s Learn to Crochet Amigurumi.

Move on to the lessons about eyes.

Happy stitching!

Crocheting baby-safe eyes for amigurumi

Larger-sized amigurumi make lovely presents for babies… but you’ve got to make sure they’re safe for the little ones! Today, I’m going to give you the pattern for crocheting baby-safe eyes (to replace the plastic eyes often called for in patterns), and show you a technique for attaching the eyes so you’ll end up with an awesome plushie!

crochet owl

Pattern for Baby-safe Crocheted Eyes

Even though the plastic eyes used in amigurumi are often called ‘safety eyes’, they’re not approved for use by children under 3. So, whenever I’m making a toy for a baby, I crochet the eyes. Here’s the pattern:

With black yarn (in weight and hook called for in the remainder of the pattern), ch 2.
Round 1: sc 6 times into 2nd ch from hook. (6)
Round 2 (optional): Sc twice into each st. (12)
Fasten off with a long tail.

That’s it! Easy!

Attaching Crocheted Eyes

When you are attaching limbs, I recommend that you use a whipstitch to attach the piece to the loops on the fabric. However, because the eyes are so tiny, this technique makes the eyes stick out a bit:


This is the first baby-safe toy I crocheted… see how his eyes are a little buggy?


To get the eyes to lay flat, you’ll want to stitch all the way through the fabric that you are attaching to. Let’s look at an example of attaching baby-safe eyes to an owl.

To begin, I thread my tapestry needle with the tail of the yarn, as usual. Then, I stick my tapestry needle through the eye, then all the way through the head of the owl (going all the way to the wrong side of the owl head):

attaching a baby safe eye in amigurumi

Then, to complete a second stitch, I stick the needle back up through the next stitch- through the owl head and through the eye:

crocheting a baby safe eye on amigurumi

This is attaching the eye using a running stitch, and pulls the edges of the eye much closer to the head than with a whipstitch. Isn’t the final result pretty?

amigurumi crochet owl

Ideas for Variations

You don’t just have to crochet a black eye… you can be creative! Try:

  • Embroidering a french knot with a scrap of white in the center for a pupil
  • Crocheting a second round of white, so that the black is the pupil
  • Use a funky color!

Hope this tip helps you create a fabulous baby-safe toy! So, next time you have a baby shower to go to… think ‘stuffed animal’!

Tip for working long color changes in crochet

Happy Tip Tuesday! Last week, I talked about how to crochet with 2 colors of yarn, using a technique called stranding. This technique works wonderfully when there are only a few stitches between color changes.

crochet owl by freshstitches

I get a lot of questions about how to handle the color changes for the body of Nelson the Owl. To crochet Nelson’s body and head, you crochet 20 stitches in one color, then 40 stitches in another color, meaning stranding doesn’t work too well. Today, I’ll show you what I do!

One option is to cut the yarn every time you change colors, and tie a knot. However, this is time consuming, and makes the process of crocheting this cutie owl a drag… so I skip it!

What I do is strand the yarn across the back while crocheting! Crochet just like you would with a short color change, leaving the yarn stranded across the 20 stitch color change, as pictured:

Now, you can’t just leave them like this, because of two reasons. One, the stranding won’t allow you to stuff the owl well. Two, all of that extra yarn with no tension on it will make the edge stitches uneven. So, what you need to do is cut down the center of the strand:

It will look like this when you’re finished:

Now, you need to tie these ends into knots to secure them. I start at the bottom of each side, and tie a square knot (you know, that boring kind of knot) with one strand of white and one strand of brown. (If you’re wondering why there looks like there are too many strands here, it’s because I crocheted this particular owl using two strands of yarn at once… try to ignore that if you can!)

Here’s how it will look:

Yay! With this technique, the knot tying happens all at once, which means it takes less time overall. I’ve gotten pretty speedy with my owls!

Hope you enjoyed this crochet tip!

Here are handy links to all the posts about changing yarn color in crochet. . .

Return to the main table of contents for Let’s Learn to Crochet Amigurumi.

Move on to the lessons about crocheting stuffed animals in different sizes.

Happy stitching!

How to crochet with 2 colors, stranding

Hi everyone! On this Tip Tuesday, I’m going to talk about how to crochet with 2 (or more) colors by stranding the unused color along the back of the work. This is a great technique to use for crocheting vertical stripes, or other patterns where there aren’t many stitches between color changes. Since I know a lot of you are visual learners (and sometimes photos just aren’t enough!), I’ve filmed a video tutorial. Scroll down to see it!

Last week, I received a custom order in my Etsy shop to crochet a zebrafish, a fish with black and white stripes. I used the Wal the Tiny Fish pattern, and instead of crocheting in one color, crocheted black and white stripes.

Since these stripes are vertical (with respect to the direction of crocheting), I needed to change colors every couple of stitches. Now, you can imagine how annoying it would be to cut the yarn and tie a knot every couple of stitches to change yarn… which is why I didn’t do that! Instead, I did something called ‘stranding’, which is carrying the unused color along the back of the work. Stranding is a great technique to use anytime there aren’t more than 4 or so stitches between color changes.

Here’s how it’s done:

Above is what the first half of my little zebra fishie looked like! You can see that there are vertical stripes, with the white stripes 2 stitches wide and the black stripes 3 stitches wide.


Okay, now it’s time for me to change colors (I’m at the end of a black stripe). If you’re unfamiliar with how to change colors cleanly, check out my tutorial on clean color changes. Now that it’s time to use the white yarn, I pick it up (it’s dangling in the back from the last time I used it) and pull it across the back of the work.


Now, using the yarn I just picked up, I’ll begin crocheting with it!


As you can see, when you look at the back of the work, you’ll have lots of little horizontal lines between each color change. Beautiful!

If you’d like to see this in action, check out my video:

As I said, this technique is best for when there aren’t too many stitches between color changes. So, what do you do when there are lots of stitches between changes, like for Nelson the Owl? I show you that in this post about working long color changes in crochet.

Here are handy links to all the posts about changing yarn color in crochet. . .

Return to the main table of contents for Let’s Learn to Crochet Amigurumi.

Move on to the lessons about crocheting stuffed animals in different sizes.

Happy stitching!

New, Super-Easy Magic Ring!

NEW! Super Easy Magic Ring for Starting Amigurumi - a video tutorial from Shiny Happy World and FreshStitches

Update! If you want the easiest method for starting your amigurumi (easier than any version of the Magic Ring) try a sloppy slip knot. I started using it a few years ago and I’ll never go back to a Magic Ring.

Has the magic ring method for beginning to crochet in the round gotten you all tied up in knots? No worries! I’m going to show you a new and super-easy method for getting an adjustable (magic) ring to begin crocheting your amigurumi. First, I’ll show you in photos, but scroll down if you’d rather just watch the video!

In this technique, you begin by making a slip knot, then creating the adjustable loop. With this method, there are less loops flying around, so it’s more accessible to beginners. Who knows, it may become your favorite!

Step one: make a slip knot
Start off by getting the hook and yarn called for in your pattern.

Then, make a slip knot with about 6 inches remaining at the tail, and insert the hook into the slip knot.

Step two: make a loop
With that 6 inches you left in in the tail, make a loop, as pictured:

Step three: crochet into the loop
Pretend that GIANT loop is just one crochet stitch. Crochet into it six times (or do however many stitches called for in your pattern). To single crochet one stitch into the loop: insert your hook into the loop, wrap your yarn over the hook and pull through the loop, then wrap your yarn over your hook again and pull through the two loops on your hook! Repeat this until you’ve crocheted all of your stitches! Your piece will look like this:

Step four: pull, and you’re done!
To close up the hole, pull on the tail!

You’re done! Hooray!

If that went by too fast, have a look at the video I recorded of the technique:

I hope you found today’s post useful for demystifying the magic ring!

If not – seriously – just use the sloppy slip knot. 🙂

Here are handy links to all the posts about working the first round of your crochet pattern. . .

Return to the main table of contents for Let’s Learn to Crochet Amigurumi.

Move on to the lessons for round two and beyond of your pattern.

Happy stitching!

Finding yarn stores in Bermuda

As many of you know, last week, I went on a fabulous cruise to Bermuda! And as with anywhere I travel, I’m on the hunt for yarn stores, with locally-crafted or somehow unique fine yarns as my ultimate goal.

I’ll skip to the chase: you’re not going to find any beautifully-crafted lovely yarn in Bermuda (or, if you do, please let me know, because you deserve a sleuth-award!). However, I found three places to buy yarn (big-box store brands like Lion Brand, Red Heart and Patons), and I found visiting these shops to be revealing about Bermudans and their yarn culture. And isn’t that what traveling is about?

The research

Before I set out, I always do a bit of research… I google for yarn stores (isn’t that how we find everything, these days?), I check Knitmap.com for listings, and check out the LYSs listed in Ravelry. Not much popped up on the radar.

After lots of poking around, I found one blog post mentioning a yarn store in St. George’s, Bermuda and one forum post mentioning a department store that had a yarn/fabrics department. So, off I went!

Gibbons
Location: 21 Reid Street, Hamilton, Bermuda

Gibbons is a brightly-colored (as are most buildings in Bermuda) department store in Hamilton, Bermuda. The city isn’t very big, so if you’re ‘in town’ (as the Bermudans say), you’ll be within a couple blocks of the store. It’s one street off of the main shopping street (Front Street).

Head downstairs, and you’ll find that about a third of the lower level is dedicated to crafts, yarn and fabrics.

The yarn selection contains a fair bit of what you would expect to find in a JoAnn’s in the US: Red Heart and a variety of acrylics. Because it’s so warm in Bermuda, there’s not a large selection of wools.

Like the buildings, you won’t have any trouble finding a selection of great, bright colors! And, you’ll certainly find a selection of crochet hooks, needles and pattern books at Gibbons… everything you’d need for a project!

Betty’s Needle Crafts
Location: 17 Duke of York St, St. George’s, Bermuda

I stumbled upon Betty’s while walking around in St. George’s… it had eluded me in my pre-vacation internet search. Inside, it was a quaint (read: sorta crowded, sorta old-skool knitting) yarn shop that also contained some additional crafting materials, like sequins and the like.

There wasn’t a table to sit & knit, so I got the feeling it was a ‘stop and pick up your yarn’ sort-of shop.

Needles Etc
Location: 22 Clarence St, St. George’s, Bermuda

I had found Needles Etc online during my research, but unfortunately, they were closed when I arrived (at about 11am on a Wednesday… the store hours didn’t help to clarify the situation). I grabbed some photos from the window:


The store looked really beautiful, clean and bright (well… would have been if the lights were on), and I think it would be my favorite spot of all the yarn shops I found. I spotted some Paton’s yarn, but because I couldn’t go inside, I didn’t get a good survey of what other brands they carried.

And, in the Commonwealth tradition of yarn shops, they carried needlepoint/cross-stitch as well as crochet/knitting supplies.

Funniest Product Award

I also found a product that made me giggle (especially since I’m an amigurumi-lover…

So, you can have a knitted amigurumi creation without any actual knitting! *giggle*

What do Bermudans do with all that yarn?
Safe to say that the knitting/crochet tradition in Bermuda isn’t the same as in the US… but they do something utterly fabulous with all those bright colors of acrylic yarn!

Bermuda is home to the tradition of Gombeys, a dance that dates back to African slaves who were moved to the island. They dance and wear fantastic bright costumes…

… which wouldn’t be complete without yarn-fringe!


Aren’t they fantastic?!?

Of course, I don’t mean to imply that Bermudans don’t knit or crochet… they do (I’ve seen them on Ravelry, and I saw knitted and crocheted finished items for sale in the Bermuda Craft Market in King’s Wharf, Bermuda. But, the Gombeys really stand out as being different!

Have I said that I love traveling?

Help! Crocheting in the back loop is too hard!

Today’s tip is inspired by a customer question!

Recently, I received this email from Nicole:

I saw that your recommend stitching in the back and it looks a lot nicer. I can do it but it is very difficult. I find it very hard to get my hook into that stitch. For some reason that back stitch is very tight. Is that normal? Is there a trick? Thanks appreciate any insight you have.

After some further emails, Nicole and I figured out that she wasn’t actually crocheting in ‘the back loop’, but picking up a loop that is even further back, and quite tricky to grab!

I’ve written blog posts about crocheting through the back loop before, but I haven’t taken up-close photos to help you figure out which loop is the back loop! So, here it is!

If we’re working in the round, we’ll have the piece below after the 3rd round.

The back loop is the loop that I’ve highlighted with a blue line:

As you can see, when you’re looking at your work, it’s right along the top of the piece, and should be relatively easy to stick your crochet hook into.

Now, what was that tricky loop that was giving Nicole trouble? Let’s look at our crochet from the side to find it… so we’ll rotate our piece a bit…

Then, a little more, until we can see the piece from the side:

If you look at your crochet from this angle, you can see that there is another loop back there, which I’ve highlighted with a blue line:

This is the loop giving Nicole all of her trouble!

So, to crochet through the back loop, go for the easy one shown in the first photos, instead of that super-tricky loop on the side. Then, you’ll be crocheting with ease!

Thanks so much for your question, Nicole!

Here are handy links to all the crochet troubleshooting posts. . .

Return to the main table of contents for Let’s Learn to Crochet Amigurumi.

Happy stitching!