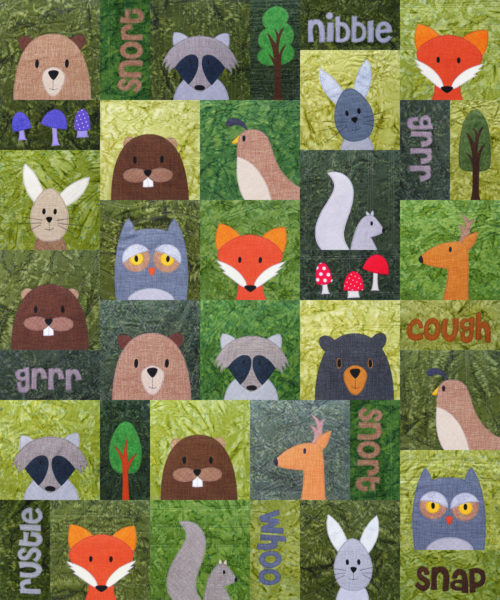
The first triangle blocks I taught you were half square triangles. Those are my favorites and you can make quilts for the rest of your life and never move beyond that. Seriously. They’re that versatile.
But quarter square triangles are also a great skill to have. They’re not much harder, and they allow you to make a whole bunch of additional star blocks.
If you don’t already know half square triangles, go get that lesson here. Quarter square triangles start with half square triangles so you need to know them first.
When I read a book to review it, I read it with a notepad next to me so I can capture my thoughts as I go along. My notes for Quilting Happiness – a terrific new book by Diane Gilleland and Christina Lane ended up being a long list of things I loved.
So let me tell you what I love about Quilting Happiness. . .
I love the title. My business is called Shiny Happy World. How can I not immediately pick up a book called Quilting Happiness?
I love the quote mentioned in the dedication. “You’ll never notice it on a galloping horse.” That – in a nutshell – sums up my quilting spirit. It’s something I often tell my students when they fixate on a tiny “mistake” in a big, beautiful quilt.
I love the list 5 Things About Quilting That Makes Us Happy.
I really connected immediately with both authors of the book – but especially with Diane’s last point. “Give me some hand quilting to do, a cup of coffee, and a Doctor Who marathon, and I’m one happy woman.” That’s exactly how I feel about all hand work – quilting, embroidery, finish work, etc. Although I’d also add in Sherlock, Downton Abbey, the Phryne Fisher Mysteries and lots of other favorite TV shows. 🙂
I love the many quizzes sprinkled throughout the book. They can help you articulate what kind of quilter you are – something I sometimes find difficult to do. And I love how the results of the quizzes point you to specific quilts in the book. It’s a fun “Choose Your Own Adventure” way to work your way through the projects.
I love that every single project has very specific suggestions for quilting each quilt.
So many books just say “quilt as desired.” That’s not helpful at all! And not only does the book have specific suggestions – it has multiple suggestions for every project! And they range from simple line stitching to more complicated free motion stitching and even some hand quilting and tying suggestions. That is fantastic – and very unusual!
I love that the instructions for each quilt are super clear – with excellent diagrams.
I love that there are detailed instructions for cutting the fabric. A lot of books will tell how many of each shape and size to cut, but leave it up to you to figure out the most efficient way to do that. This book breaks it down step by step. It tells you how many strips to cut of each size, then exactly what pieces to cut from those strips. Very nice!
I love this Crazy Strips quilt. I think it’s my favorite in the whole book. It’s pieced improvisationally, but within a structure. That helps keep things balanced and can be less overwhelming to someone just getting started with that kind of loose approach.
I love the range and variety of projects. There are bold, dramatic, modern quilts. There are traditional quilts made with vintage-style fabrics. There are quilts for beginners and quilts for more advanced stitchers. There are small projects like pillows and tote bags, and there are large bed quilts. This is an especially great book for beginners who know they want to try quilting, but maybe aren’t sure what kind of quilts they want to make. They can take some of the quizzes to get pointed in one direction, then stretch their skills as they learn.
I love the “Happiness Practice” exercise about Finding Inspiration Guides. It’s a great guide to studying a quilter you admire – breaking down just what it is about their quilts that really works for you so you can apply that to your own work without copying them directly. What a terrific exercise!
I love the general instructions at the end of the book. They’re very clear and cover all the basics – how (and why) to square up your fabric, piecing curves, basting and binding your quilt and more. It’s a great reference.
I love this Haphazard Chevron Pillow. It’s similar in many ways to the Crazy Strips quilt I mentioned above – in that it’s irregular piecing within a structure. But it’s a smaller project and one I could realistically tackle right now. So I decided to make one for myself!
I strayed a bit from the instructions (of course) – not because they were unclear – they’re terrific! But I have overflowing scrap bins, I knew my daughter would really like a rainbow pillow, and I wanted to try a quilt-as-you-go technique I’ve been toying with. So here’s my Scrappy Rainbow Chevron Pillow. 🙂
My pillow form was a bit larger than the one in the book, but I used the same suggested range of widths for the strips I cut so it would have a similar effect.
I love it! Thanks so much for the inspiration!
Are you ready for some Quilting Happiness of your own? Get the book here.
To me, glue is something that holds two things in place while you attach them more securely with something else – like screws or stitches.
I’ve just had too many glue fails in my lifetime. I have a big crate of all different kinds of glues and I really try to make sure I’m using the right glue for the right situation. But still – glue fails.
That’s one reason I’ve always been pretty hesitant about using fusible adhesive. Sure – it’s fast and easy and I’m happy to use it on something that doesn’t need to be held together forever. It’s great for Halloween costumes. It’s fabulous for banners and wall hangings. But I’ve never used it on a clothing or a bed quilt.
Besides the fail factor – there’s the stiffness. I don’t like it.
And the stitching that you usually add around the edge to secure it can look awfully clunky.
Plus – I hate tracing. (I know. I know. I’m a broken record on this. But I really hate tracing.)
When I went to Spring Quilt Market one of the things I was looking for was a fusible adhesive I could fall in love with.
I would love to be able to share a product with you that would allow you to make quilts like this. . .
. . . super fast and with no burned fingers.
I tested two weights of Heat & Bond fusible adhesive.
Heat & Bond Featherlite is very, very soft. It doesn’t have any of that fusible adhesive stiffness.
Heat & Bond Lite is a little bit heavier – but still very soft.
I set up two identical applique blocks, following the instructions on the packaging exactly. I never use fabric softener or dryer sheets on fabric I’m going to sew with because it can interfere with any adhesives I might use. I used exactly the same fabric in the two blocks.
This is before any washing (except for pre-washing the fabrics).
I sewed around the head with a basic straight stitch. I sewed both sides of the neck with a fairly open zigzag stitch. I didn’t do any extra stitching on the ears, the eye spot, the eyes, or the nose.
Then I threw them in the wash with a load of laundry, and ran them through the dryer too.
After one trip through the washer and dryer.
Featherlite is the one on the left. Everything not sewn on fell off – but that was to be expected. The instructions DID say to sew it after fusing so it was kind of an unfair test. I just wanted to see what would happen. 🙂
So you do have to sew this stuff in addition to fusing. On the plus side – it was so soft that you could easily hand stitch through it – and there was no gumming of the hand or machine needle. And after one washing the applique was crazy soft. So soft that I never would have guessed there was adhesive in there.
The Heat & Bond Lite is the one on the right. It’s also supposed to be sewn on, but it didn’t lose as many unsewn pieces. One eyeball came off, the eye spot came loose, and the top ear came loose. (Again – not a fair test because the package DOES say to sew it.) With this product too, there was no gumming of the needle when I did sew it. You can feel a little stiffness from the adhesive, but it’s not bad at all.
So I found out that both products needed stitching on top of the glue (as I suspected all along and as the package said). Now I wanted to find out how things held up after repeated washing and drying. This time we’ll look closer at the edges of the sewn applique pieces.
After two trips through the washer and dryer.
The Featherlite (on the left) is showing a little fraying on the edges – but I kind of like that so I don’t consider it a problem – just something worth noting because I know some people don’t like it. There’s more fraying on the head piece with the straight stitching than on the neck with the zigzag – even though it’s a pretty open zigzag.
The Heat & Bond Lite had no fraying at all.
I had more laundry, so. . .
After 3 trips through the washer and dryer.
No noticeable change. Looking good!
I had one more load of laundry. Towels. Towels are rough so this would really put those edges to the test.
After four trips through the washer and dryer – including in a big load of towels.
Hmmmm. . . maybe a tiny bit more fraying on the Featherlite? Maybe? All in all I was really impressed with how they held up.
Update – I’ve used the Featherlite on some other projects since then and it DOES continue to fray over time. The Heat & Bond Lite really doesn’t. What you see after a few washes is pretty much what you’re going to get.
The final verdict. . .
They both win!
No. It’s not a cop out. I’d just use them for different purposes!
If I were adding applique to clothing that would only be worn a few times I would use the Featherlite.
It’s super soft, making it especially awesome forthings like baby onesies where it will only fit for a short period of time and so the number of trips through the wash is limited.
For toddler T-shirts I’d use the Lite weight for better durability – and it’s still awfully soft after that first washing.
For just about anything else I use the Heat & Bond Lite.
It held up really well in the wash – far better than I anticipated. I cannot believe that tiny eyeball hung on through that final load of towels – with no stitching! And there was almost NO fraying on the sewn pieces – even when sewn with a straight stitch (which I prefer over the zigzag).
It’s also pretty dang soft. Not as soft as the Featherlite, but not bad at all. In fact – I don’t think it’s really even noticeable in a finished quilt. When layered and quilted it’s really hard to tell that there’s any extra stiffness under the applique.
So there you have it! I can recommend both of these fusible adhesives, but the Lite weight is the one I use in all my quilts. I LOVE the printable sheets so I don’t have to trace my pattern pieces. Shop for Heat & Bond Lite printable sheets here.
One more thing – a lot of people ask how this holds up over a long period of time with just the straight stitching. I’ve got a post here that shows one of my daughter’s quilts after almost two years. You can see the results in this post.
What about Ultrahold?
Yes – there’s another fusible adhesive weight available. It’s called Ultrahold and it’s the strongest adhesive that heat & Bond makes.
You’re not supposed to stitch through it. I tried it and it gummed up my needle like crazy. I do not recommend trying it yourself. 🙁
It’s very stiff, so I only recommend it for small pieces like eyes and noses – pieces that are annoying to stitch around and small enough where you’ll never notice that extra stiffness.
This weight does hold very well – BUT ONLY IF YOU DRY IT AT LOW TEMPERATURES. The adhesive melts at high temperatures, right? That’s what gets it to stick. That’s also what gets it to unstick. If your dryer gets as hot as an iron on medium heat, no steam (mine does) that is hot enough to loosen the adhesive. So wash and dry on cold or cool!
All of my patterns are optimized for use with printable products. What does that mean? Each applique block in the pattern is formatted “reversed and exploded” with extra space between the pieces for use with printable fusible adhesive or this freezer paper method.
Yes! I found a fusible adhesive that I’m excited to use! Not just excited – giddy! I was awake most of the night thinking about my next project. 🙂
These links go to all my posts about quilt supplies.
Want to learn how to machine applique with freezer paper?
This is the post for you.
You can see all my applique videos here, including needle turn applique, how to applique with fusible adhesive, and how to applique with (and on) fake fur.
My preferred method is Quilt As You Go and fusible adhesive, but some people don’t like the raw edges on fusible applique. But they also don’t like the amount of time and handwork involved in needle turn applique. For those folks, freezer paper applique is the best option.
This post rounds up all the lessons on freezer paper applique – all in one place.
If you’re getting ready to start your very first applique project, grab a cup of tea and sit back and watch these lessons first. It’s like a mini online workshop – for free.
There’s one more post guaranteed to come in handy if you use this method. . .
The Joy of Starch – If you’re having any trouble getting nice sharp folds on your applique pieces – or having them come uncreased before you have a chance to sew them down – try starch. Read this post to see photos of the difference it makes and learn two ways to use it.
You can use this method with just about any applique quilt pattern. 🙂
Here are links to all the posts showing how to applique with fusible adhesive – my favorite method. It’s fast and easy and (with the right materials) it holds up beautifully to rough use and repeated washing.
We had over 17 inches of rain in the first week of July – and we’ve continued to have heavy rains in the last few weeks. We usually get about five inches for the whole month.
My flour is clumpy. My cereal boxes are soggy. My salt is unsprinkleable. And my applique pieces won’t stay folded!
Aaaaargh!
Five minutes after I press them they look like this.
It’s coming unfolded before I can even press all the pieces for one block!
The solution, my friends, is starch.
Look at the difference.
This is two days after I pressed it.
Starched folds stay folded.
I just use regular spray starch from the grocery store. Nothing fancy or expensive. And I think I’ve been working off this same can for over 10 years.
Or you can spray some into a small dish (like a little custard cup), wait for the foam to subside, then paint the liquid starch on with a paintbrush. If you do that you don’t have to paint the whole seam allowance – just make sure you get it right up against the freezer paper. That’s where the fold will be that you’re desperately trying to hold in place while you get the rest of the pieces for the block pressed.
I use both methods interchangeably. It depends on my mood, how many pieces I’m working on, my tolerance for mess that day, and how generally lazy I’m feeling.
If I’m only pressing a few pieces I just spray it on and ignore the mess from the overspray. The extra flakes of starch will brush right off my ironing board and wipe off my iron.
If I’m doing a whole bunch of pieces I’ll actually go downstairs and get a dish, then dig around for a paintbrush and use the paint-it-on method. I actually prefer that, but sometimes I’m too lazy to go to the extra trouble.
But starch isn’t only useful for applique! That’s where I use it most often, but it’s great for holding any pressing. It’s especially useful for hemming – particularly if the fabric you’re trying to hem isn’t a crisp woven cotton. It can be really helpful in making slippery synthetic fabrics behave like a nice, obedient cotton. 🙂
The newest Starry Night Quilt Block of the Month Block is here – a Red Giant!
What is it about pink and red together that makes my heart sing? It’s one of my favorite color combinations.
And here’s a quick look at all the blocks so far. They’re starting to get wonderfully complex – but still very easy to make!
Update – I’ve pulled the Starry Night pattern temporarily while I reformat it to be released as a regular pattern. Sign up for the newsletter to make sure you know when it’s in the shop.
Nothing – and I mean nothing – is more likely to make me curse like a sailor than when my bobbin runs out of thread in the middle of a long row of stitching while machine quilting. You sew and sew and sew, shifting the heavy weight of the quilt over and over again – and then get to the end and realize you just stitched a whole row with no bobbin – so there’s no stitching. Grrrrrrr. . . just thinking about it is making my blood pressure go up.
*breathe*
I had this happen one too many times on my last project – and then I had a little epiphany.
Actually – a big epiphany. 🙂
Wind a bunch of bobbins before you get started. Like – at least ten for a twin size quilt. Pop matching full bobbins into the top (where you’d normally use a spool) and in the bobbin case. The top and bottom stitching should use the same amount of thread, so you can look at the top bobbin at any time to see how much thread you have left in the bottom (secret hidden) bobbin.
Check before you start every row. If it’s close to empty – go ahead and replace both bobbins. You may waste a little thread – but you’ll be saving your sanity. I say choose sanity.
And even if you miscalculate and run out in the middle of a row – you’ll know right away instead of continuing to stitch on in painful, oblivious ignorance.
Here are all my posts about layering and basting your quilt, and the final round of quilting.
Here are all my posts about hand quilting and Big Stitch quilting. I don’t use these techniques with fusible applique or Quilt As You Go, but I LOVE using Big Stitch Quilting with my cheater fabric.
In this video I show you how to install and use the quilt guide – a mysterious-looking tool that comes with most sewing machines. It’s really easy to use and lets you sew or quilt perfectly parallel lines.
You can do quilting that looks like this. . .
Buttonholes Quilt with simple parallel lines quilted
Or you can topstitch on plain fabric to give it pinstripes. I did that on this Mighty Casey baseball jersey I made for my husband.
You can click on it to get a closer look.
Here are all my posts about layering and basting your quilt, and the final round of quilting.
Here are all my posts about hand quilting and Big Stitch quilting. I don’t use these techniques with fusible applique or Quilt As You Go, but I LOVE using Big Stitch Quilting with my cheater fabric.
I know. You look at that mass of quilt and you look at the space under the arm of your sewing machine and you think, “No way!”
You’d be wrong.
You can totally quilt a big quilt on a regular sewing machine.
I’ve actually quilted king size quilts on my machine – though in this video I’m demonstrating on a twin size.
First, watch this video showing the basics of machine quilting. That video uses a little doll quilt as a sample – easy to see and get a feel for the process – but it doesn’t answer the question you really have about doing the same thing with a bed quilt. That’s what I tackle in this video. So watch it now.
Important! See that little black bit behind the presser foot on my machine? That’s my walking foot. I forgot to mention it in the video – but it’s pretty critical. You really can’t machine quilt without one – it’ll end up all puckery and you’ll be sad. 🙁
And what if you want to quilt lines that don’t follow the seams of the quilt?
Tape – my friends. Painters tape.
On the Flower Beds Quilt I wanted to quilt a diagonal grid over the whole surface. I laid down a strip of masking tape to guide my first line. See how the edge of the tape intersects the corners of the blocks? (That’s what those red circles are showing.) That helps me get a perfectly straight line. Quilt right along the edge of the tape.
Then remove the tape.
You only need to do this for the first row of stitching. After that each row serves as the guide for the next.
Here are all my posts about hand quilting and Big Stitch quilting. I don’t use these techniques with fusible applique or Quilt As You Go, but I LOVE using Big Stitch Quilting with my cheater fabric.
Print or trace the pattern onto the paper side of paper-backed fusible adhesive. I like to use Heat & Bond Lite.
Roughly cut out all the pieces and fuse them to the wrong side of the fabric.
Cut out all the pieces neatly. Cut directly on all the solid lines. Leave a little extra seam allowance wherever there’s a dotted line.
Peel off the paper backing and fuse the pieces onto your block. Tuck the seam allowance at all the dotted lines behind the adjoining pieces.
Outline all the pieces. I like to use black thread and a simple straight stitch for a fun cartoony look.
Finished!
A lot of the fun of this pattern is in the fabrics you choose. You can also play around with the angle of the stem, and the flower at the top of the stem.