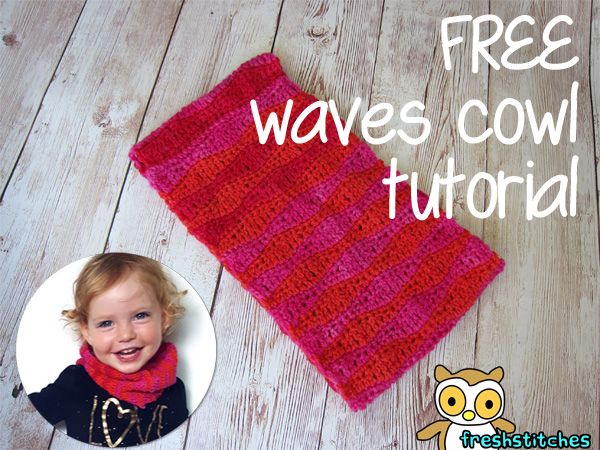
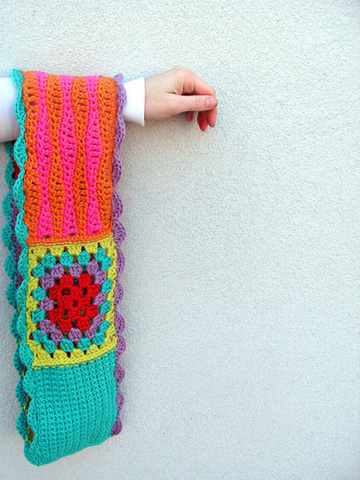
One of my favorite stitches is the wave stitch. So, when Maddie asked for a scarf for fall, I knew right where to turn!
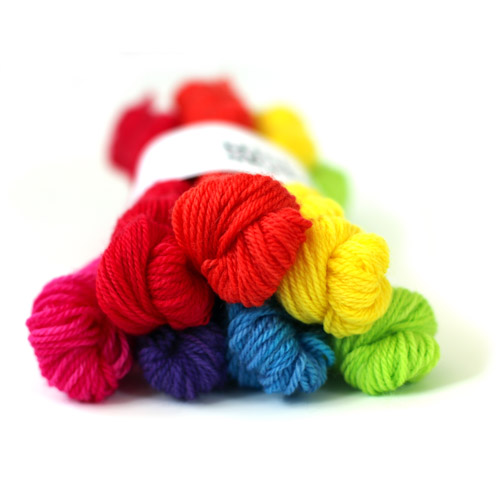
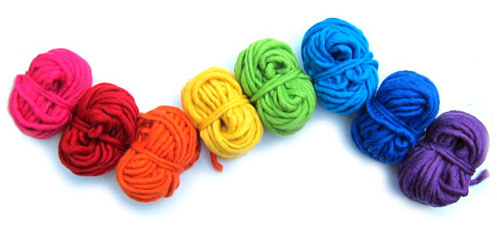
First, I pulled out a SpaceCadet Rainbow Mini-Skein Bundle and let Maddie choose the colors she wanted.
(Since each mini-skein is 70 yards, I needed less than 3 to make a baby cowl… but one set would more than make an adult one!) Maddie is really into red, so she selected the red, pink and orange.
Then, I grabbed a hook and started crocheting! With this fingering weight yarn, I used a C hook.
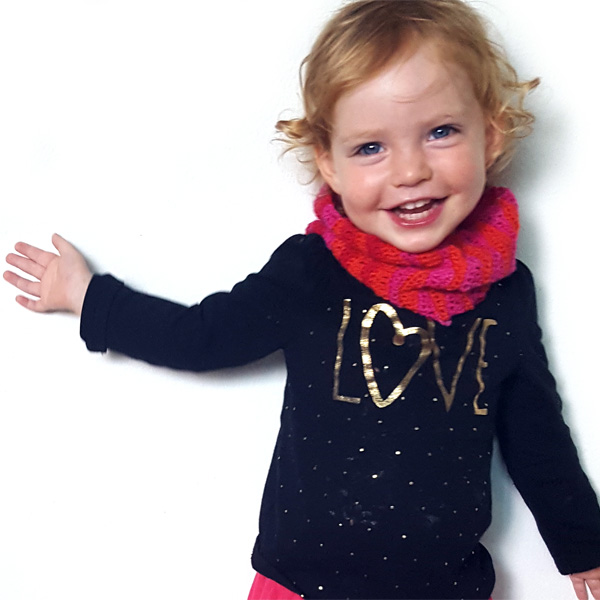
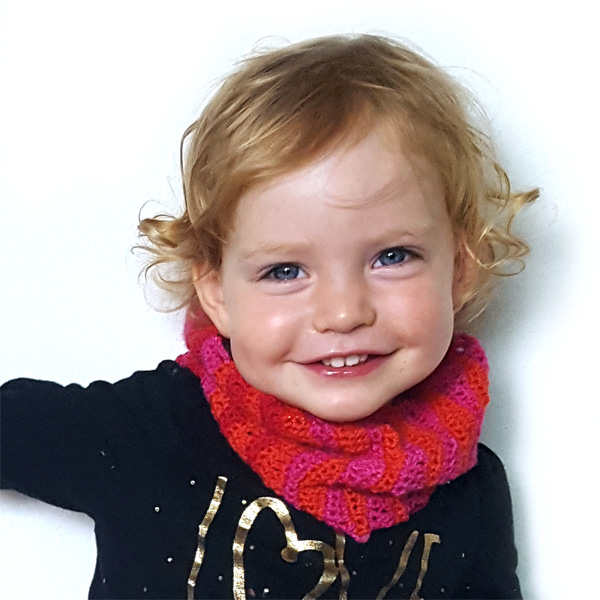
The result is lovely and drapey… and Maddie loves it!
tr= treble crochet
With A, ch 30. Row 1: Sc in 2nd ch from hook and each ch across. (29) Row 2: With A, ch 1, turn, sc in next sc, * sc in next sc, hdc in next 2 sts, dc in next 2 sts, tr in next 3 sts, dc in next 2 sts, hdc in next 2 sts, sc in next 2 sts. Repeat from * once. (29) Row 3: Ch 1, turn. Sc in each st. (29) Row 4: With B, Ch 4 (counts as tr), turn. * Tr in next st, dc in next 2 sts, hdc in next 2 sts, sc in next 3 sts, hdc in next 2 sts, dc in next 2 sts, tr in next 2 sts. Repeat from * once. Row 5: Ch 1, turn. Sc in each st. (29)
Repeat rows 2-5 until piece measures desired length (circumference of the cowl) and fasten off and sew ends together!
I used this pattern to make a cowl, but you can also use this pattern (repeating rows 2-5 until piece measures 5.5″ long) and add with other blocks to make a sampler cowl!
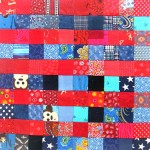
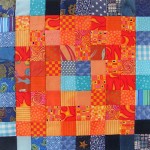
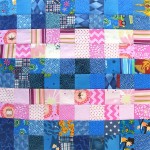
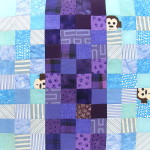
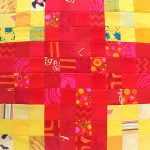
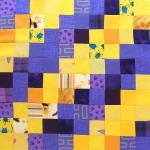
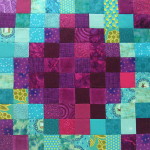
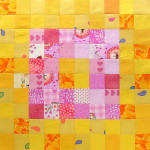
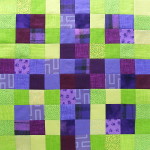
The Controlled Chaos Quilt is finished! And I love it soooooo much!
Before I get to the story – I want to give you all the link to the free scrap quilt pattern. It’s really much more than a pattern, because there are also lessons about working with color, and videos teaching all the skills I used – from cutting to sewing, quilting, and binding. It’s really a complete scrap quilting workshop. Get all the details here and make your own!
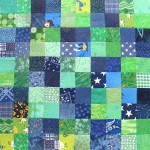
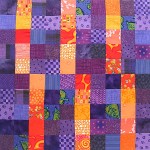
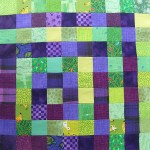
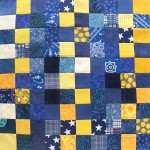
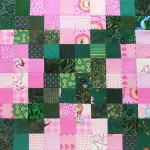
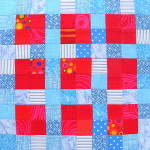
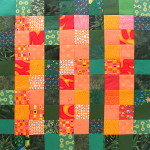
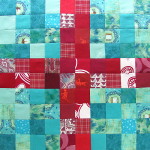
I started this quilt way back in May 2014. My scrap bins were overflowing and I particularly wanted to use up a lot of the smaller scraps. I thought about sewing them together randomly, creating a chaotic splash of colors – but I decided to control the chaos and create patterned blocks with those scraps. I’m so glad I did!
My plan was to make one block a week, so I would be done with the piecing in 20 weeks.
ha ha ha ha ha ha ha ha ha ha ha ha ha ha ha ha
Fifteen months later I finally finished piecing all the blocks. 🙂
This was a project that I set aside repeatedly – every time work got busy. But I always came back to it and I loved seeing the pile of finished blocks stack up.
Block #16
It took me another three months to sew the blocks together and add sashing. It shouldn’t have taken that long, but it was the middle of the pre-holiday prep season and I had to set it aside again.
Once I got the top finished and basted, I decided to hand quilt it using Big Stitch Quilting.
That was the best decision ever!
Jo took one look at the quilting and announced that I was completely bonkers. In her words, “That’s going to take FOREVER!”
It actually took seven months.
Seven months of absolute bliss.
Seriously.
If I knew I was going to get some couch time with my quilt in the evening, I looked forward to it All Day Long. I’ll continue to machine quilt the quilts I want to finish quickly, but for the personal projects that are all about taking my time and enjoying the process – it’s Big Stitch Quilting forever for me. I don’t think I’ll ever do traditional hand quilting again.
Look at that texture!
The whole quilt took a little over two years from start to finish.
That’s a long time for a single project, but I enjoyed every minute of that time – especially the hand work. In fact, I think my next big project like this will be all hand work from start to finish.
If you look at my timeline, the place I really stalled was piecing the blocks. In a way that makes sense. I sew at the machine during the day – which makes it work time. I sew by hand at night – free time while I watch television. Since this was a personal project it got set aside during busy work times. If the next one is all hand work, I think my progress will be more steady.
I used running stitch for the whole thing – learn how to stitch a running stitch here. It’s the easiest embroidery stitch there is – the first one I teach to beginners.
You don’t have to use just one stitch. It would be adorable to use the lazy daisy stitch for the raindrops. Or maybe rows of French knots. Have fun with it! (Those links go to how-to videos.)
You can use any thread colors you like.
You don’t have to stitch it on white fabric. I love the “Lite-Brite” effect I got when I stitched it on a black T-shirt for my daughter.
Find tips for embroidering T-shirts here. Again – Sulky Sticky Fabri-solvy is my favorite product for that. It transfers the pattern and stabilizes the stretchy fabric in one step – and washes away completely. That stuff is magic!
You (yes, you!) can stitch up a lovely felt egg just like this one. What do you need? Some felt. Preferably wool felt. It’s dreamy to stitch on and you can find it in hundreds of gorgeous colors.
You’ll need embroidery thread. Use any colors you like – either an assortment of colors like the sample above, or one color for a very simple, classic egg.
You’ll need a needle. I stitched my sample with three strands of thread – for that I recommend a #5 or a #8 embroidery needle.
You’ll need the pattern – of course. Download that here. It’s full-sized, so no enlarging needed.
You’ll need a bit of stuffing. A handful of cotton balls will do the trick.
Finally, there are a couple of optional items that I strongly recommend to make your stitchy life better. Sulky Sticky Fabri-solvy is fantastic for transferring patterns to felt (as you’ll see below) and Thread Heaven just makes your thread behave really nicely.
You can find a list of my favorite tools and supplies (with links to sources) here.
Rough cut around each piece and stick it to the felt.
Step 3
Embroider the design. You’ll be stitching right through both the stabilizer and the felt. I used a combination of the following stitches – the links below take you to videos teaching you how to do them if you’re new to embroidery.
I used three strands of thread for all my stitching. It’s all white thread on Norwegian blue felt. The top sample used straw felt.
Repeat for all four wedge shapes.
Step 4
After you’re done with all the embroidery, cut the four pieces out neatly on the outline.
Step 5
Soak off the stabilizer. This is the magical part! Drop the pieces face down in a bowl of cold water and let them sit there for about an hour. The stabilizer will get all mushy and soft. Rinse it off under cold running water. If any bits are stubborn, just hit them with a kitchen sprayer and that should do the trick. Don’t rub the surface of the felt – just let the running water do its thing.
Set them flat on a towel and let them dry. Don’t wring them out, twist them, or even smoosh them. Just lay them sopping wet on a towel and let them dry.
Step 6
Place two egg pieces wrong sides together and stitch them together along one edge. I used running stitch, which leaves a nice ridge that I like along the seams of the egg. If you want a smoother finish you can use whipstitch instead.
Repeat for the second pair of pieces.
It’s easy to mix up the ends – one is a little pointer than the other and has a bit more lattice. Make sure you put matching ends together.
Step 7
Put your pairs together (make sure the matching ends are together) and sew the last two seams. Leave a couple of inches of the last seam open for stuffing.
It will be easiest to sew your egg together if you let it collapse into a deflated football kind of shape.
If you like this free pattern, sign up for the Shiny Happy News! Subscribers get a weekly newsletter full of sewing tips and tricks, free patterns, special discounts, and other things to make you smile. 🙂
New easy (and free!) doll clothes patterns for the Dress Up Bunch!
I redesigned the Play Clothes pattern for the Dress Up Bunch to get rid of the set-in sleeves and fussy collar facing on the shirt. Yay! The new shirt is so much easier to make!
These are the basic doll clothes patterns that are included with all of the human dolls so I was looking at replacing it in Every Single Doll Pattern – which would take forever. Instead I decided to just make it free for everyone!
Use 1/4″ for all seam allowances unless otherwise noted.
Doll Shirt Pattern
Step 1
Join the 2 shirt pattern pieces into one and cut it out. Place the shirt and shirt lining fabric right sides together and cut the single shirt pattern piece out of them at the same time. That way the pieces lines up perfectly. 🙂 .
It’s a weird-looking pattern. Here are some quick labels to help you make sense of it.
Please note! This pattern only works with non-directional fabric. Since it’s all one piece, whatever is right side up on the front will be upside down on the back – so choose something that looks good both ways. Those fizzy, swirly polkadots are from the perfectly-named Pop collection from Timeless Treasures, and the shirt lining and shorts are in my favorite Sketch.
Step 2
Sew the main shirt and lining (right sides together) up one front side, around the neck, and down the other side. Clip the curves and corners.
Carefully smooth out the curve around the neck, poke out the corners, and press. From this point on you’ll treat the two layers of fabric as one.
Step 4
Hem the sleeves. Turn up the raw edge 1/4” and press. Turn it up another 1/4” and press. Stitch the hem in place.
You can hem to the outside, so the contrasting lining shows (like I did) or hem to the inside for a more traditional finish.
Here’s a closer look at one of my sleeve hems.
Here’s a little trick so you don’t have to measure that skinny 1/4 inch. Sew the two layers together 1/4” from the raw edge. Use that stitching line as a guide for turning up the first 1/4.” No measuring! Then turn the second 1/4” and stitch.
Step 5
With the shirt inside out, sew the underarm/side seam.
Start sewing at the armhole so that edge is perfectly lined up and finish at the shirt bottom. Any unevenness there will be hidden once it’s hemmed. Clip the seam allowance in the curve.
Step 6
Turn the shirt right side out and press.
Almost finished!
Step 7
Hem the shirt bottom the same way you did the sleeves in Step 4.
Sew the center back seam using 1/4″ seam allowance.
If you want critters with tails to be able to wear the shorts, leave the tail opening (as marked on the pattern piece) unstitched. Make sure to backstitch at the top and bottom of the opening.
Step 3
Press the center back seam open.
If you are leaving a tail opening, stitch a box around the opening to stabilize it.
Step 4
Start to make the casing for the elastic. Turn the raw edge at the top of the shorts down 1/2″. Press. Turn it down another 1/2″. Press.
Don’t sew this yet. It’s just easier to measure and press when it’s one flat piece.
Step 5
Unfold the casing creases you made in Step 4.
Match up the center front edges and sew, using 1/4″ seam allowance.
Step 6
Refold the casing creases and stitch it down almost all the way around the top of the shorts.
Leave a couple of inches open at the center back seam so you can get the elastic in.
Step 7
Cut a 12″ piece of 3/8″ elastic and thread it through the casing. Overlap the ends of the elastic 1 inch and sew them together. Slip the stitched elastic up into the casing and finish sewing the casing closed.
Sew up the inseam/crotch of the shorts using 1/4″ seam allowance.
Press anything you can get to with the iron. 🙂
Finished!
And here’s a view from the back.
It’s Spot the Puppy wearing these and he likes to have room for his tail to wag. 🙂
So there you have it – three basic doll clothes patterns – all super easy and free. The shirt, skirt and shorts will fit any of the Dress Up Bunch dolls.
Happy sewing!
Best, Wendi
The Dress Up Bunch is a collection of cute and cuddly rag dolls. Get patterns for the dolls, plus all their fun outfits and accessories!
Here’s a super simple Easter embroidery pattern – easy enough for even the littlest kids to stitch.
I originally published this back in 2011 – but now it’s updated with new images and links to video tutorials. I can’t wait to see the new chicks you make!
Back when I released the chickens embroidery pattern, people said they especially liked the little egg-shaped chicks with big feet.
I told you they’d be back again and here one is – sized a bit bigger – as a free pattern. 🙂
It’s lots of fun to decorate that egg-shaped body for Easter!
Of course, you can fill in the shape with all kinds of stitching in any design you like – but there are a couple of other options that are a lot faster.
For a really fun option, you can color the egg with colored pencils before you stitch. There’s a video here showing that technique in complete detail. In a nutshell, fuse some freezer paper to the back so the fabric behaves better, then color it in just like paper. If you’re going to hang the finished chicks on the wall you don’t need to worry about heat setting the pencils or anything like that. Stitch the outline after you’re done coloring and hoop it up for framing.
Look at the cute little Easter chicks my daughter made that way! (The other two chicks are from the chickens embroidery pattern.)
I love framing each tiny chick in its own hoop. They make a really cute Easter decoration hanging in a cluster.
Remember – it’s a cute Easter embroidery pattern – but chicks are cute all year long! You can stitch this to a baby onesie, applique it to a receiving blanket, stitch it on a tea towel or baby bib and more. Have fun with it!
That means the people who love babies need a go to, easy baby bib pattern.
This is it!
It’s a simple bib shape – very easy to make and customize with any appliqué (or other fancification) you like. This pattern includes that sweet bear. 🙂
Make it out of regular quilting cotton for a basic bib. Back it with laminated fabric for heavy droolers. Make the whole thing out of laminate for those learning to eat solid foods. (The fabrics I used are from Timeless Treasures. The crosshatch is my beloved Sketch collection and the swirly fizzy dots are from the appropriately-named Pop collection.)
Cut two bib pieces (one front and one back) on the fold.
Step 2
Print or trace the bear appliqué pieces (the last page of the baby bib pattern PDF) onto fusible adhesive. This is the brand I use.
Roughly cut out each shape and fuse them to the back of the fabric, following the instructions for the brand you’re using.
Step 3
Cut out the pieces neatly.
Cut right on the solid lines. Leave a little extra seam allowance past the dotted lines. See the extra at the bottom of the ears? That bit will tuck behind the head.
Step 4
Hold the face up to the window so you can see the markings through the fabric and mark the position of the eyes.
I just use a fine tip Sharpie – nothing fancy.
Do the same thing with the muzzle, marking the position of the nose and the key points of the mouth.
You can also trace over the whole line of the mouth, if you prefer.
Step 5
Peel off the paper backings and layer the pieces together so that the ears tuck behind the head and the bottom of the bear body is lined up with the bottom of the bib.
Here you can see it a little closer.
Fuse the pieces down according to the instructions of whatever brand adhesive you’re using.
Step 6
Stitch around the edges of all the pieces.
I like to use black thread and a simple straight stitch. You can use a zigzag or other decorative stitch if you prefer. If you want a little help knowing where to start and in what order to stitch the pieces, this post should help you out. And this one will help you with managing those tight curves. 🙂
Step 7
Embroider the eyes and mouth.
I did it by hand using this stitch for the eyes, and following the instructions for the mouth in the free Warren the Charity Bear pattern. I used a single strand of this thread. That’s the equivalent of two strands of DMC floss, but I love using a single strand of thicker thread so I don’t have to worry about the strands separating on that long stitch connecting the nose to the mouth.
You can also sew the face by machine. That’s what I did for this cat bib. You can find info about how I did the eyes here. The mouth and whiskers are just a simple straight stitch, going over all the lines twice to make them a little thicker. (For those I traced the whole line of the mouth and whiskers in Step 4, not just the endpoints.)
Step 8
Cut a 1-inch square of hook & loop tape (or use snaps or a button).
Sew it to the bib as shown. Both bib pieces are shown right side up. I attached the loop side to the bib front and the hook side to the bib back, but it doesn’t really matter.
Step 9
Layer the bib front and the bib back right sides together.
Using 1/4 inch seam allowance, sew all the way around the edge. Leave a few inches open for a turning hole in the straight part of one of the sides.
Step 10
Clip the seam allowance in the concave curve around the neck.
For more on the the how and why of clipping curves, watch this video.
It would be fun to make a whole set of them with lots of different faces!
Have fun with this pattern! I’d love to see what you make – and I’d really love to see them on some adorable babies. 🙂 Post photos in the Shiny Happy People group so we can ooh and aah over them.
Here are several free patterns that work with my basic 10-inch applique squares – no resizing needed!
Here are several free patterns that work with just some simple resizing. This post about making coasters has info about resizing an applique pattern that can be applied to any of these projects.
I’m completely in love with the Controlled Chaos scrap quilt!
A lot of you are too, because I’ve been getting a lot of emails asking about it lately. 🙂 It’s about time to put all the links together into one handy place!
I’m still working on the quilting, so this is a work in progress. I’ll update it with new info as I get closer to finishing and post more details. 🙂Read all about the finished quilt here!
The Blocks
Click on the image to jump to the instructions for that block.
Block #1
Block #2
Block #3
Block #4
Block #5
Block #6
Block #7
Block #8
Block #9
Block #10
Block #11
Block #12
Block #13
Block #14
Block #15
Block #16
Block #17
Block #18
Block #19
Block #20
The Quilting
I used Big Stitch Quilting for this quilt, all by hand.
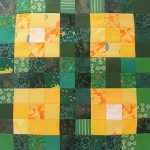
I find it helpful for a project like this, where every block will be quilted a little differently, to establish “rules” for the overall quilt. For this quilt, my stitching within each block runs parallel to the edges of the block. My quilting in the sashing is zigzag angles. I think it helps set that sashing off as different, so it frames the blocks better.
The Tutorials
These are all general tutorials you can use for any quilt project, but they’re especially helpful for the Controlled Chaos quilt.
There it is! Everything you need to make your own Controlled Chaos Quilt! Of course yours will look totally different because your scrap bins are filled with your favorite colors – the ones you go to again and again. Sew them up into a beauty like this! 🙂
Cut a piece of fabric and a piece of batting 11″ square. Layer the fabric over the batting and quilt the two layers together.
Step 3
Roughly cut out all the pieces and fuse them to the wrong side of the fabric.
I used white felt for the snowman head, and Timeless Treasure prints for the rest of the fabrics: charcoal Sketch for the hat, red Pop for the ribbon, orange Sketch for the carrot, and solid black for the eyes.
Step 4
Hold the snowman face up to a window so you can see the face markings through the felt and mark the placement of the eyes, nose and the mouth.
Step 5
Cut out the pieces neatly on the solid lines. Where there’s a dotted line, leave a little extra seam allowance.
Step 6
Peel off the paper backing and layer the pieces on the background block. The bottom edge of the head should line up with the bottom edge of the block. The hat should overlap the top of the head.
Fuse the pieces in place.
Step 7
Stitch the edges of all the pieces down. I like to use a simple straight stitch and black thread.