The second pattern in this year’s Christmas Club went out this morning!
I must be on a bit of a sweater kick. The first ornament was a snowman sweater. This week’s is a cute dachshund wearing a candy cane sweater.
I’ve wanted to do this design forever! I’ve never actually seen a dachshund in a candy cane sweater – but I always thought that long body would be perfect for those spiraled stripes. 🙂
Why are we doing Christmas patterns already?
I know it’s early – but the holidays can be such a stressful time of checking things off lists that we sometimes don’t have fun. Every year I hear from people who had planned to make a lot of handmade items, but just ran out of time. Or did it – but were completely stressed out by the whole process.
The idea behind the Christmas Club is that we’ll make a dozen handmade felt ornaments (at a relaxed pace so we really enjoy the process) before the holiday craziness really starts at Thanksgiving. No pressure. No sewing machine. Just a little time every week to put our feet up and enjoy hand stitching on some lovely wool felt.
I rely heavily on three products/stabilizers for the work I do.
Freezer paper
Sulky Sticky Fabri-solvy
Heat & Bond Fusible Adhesive
(You can find links to sources for all of these – and all my other favorite tools and supplies – here.)
I recently had someone ask when I use each one – and that’s a great question.
Here’s the rundown. . .
Freezer Paper
Freezer paper is an excellent stabilizer.
I use it most often to cut out felt pieces. I print the pattern pieces directly onto the freezer paper. (You can trace if you’re not as lazy as I am.) I iron the paper to the felt and then I cut the pieces out – cutting through the felt and the freezer paper at the same time. Since I label all my pieces it means I have a nice pile of labeled felt pieces, cut perfectly accurately, waiting for me to stitch them together. Awesome!
Freezer paper also works this way when cutting out regular fabric, but I only use it on fairly small pieces – so small that I can’t use pattern weights. I use it for ALL my felt cutting.
Freezer paper is also excellent for fusing to the back of any fabric that you’re going to draw or paint on. If you’ve ever tried to do that without a stabilizer, you know that the pen or marker will tend to drag the fabric along with it. It can be really hard to keep it flat and smooth. Freezer paper makes the fabric act like paper. Handy!
Finally, people use freezer paper for this appliqué method. That used to be my favorite method – until I tested some of the new fusible adhesives out on the market and found a new favorite. 🙂
In all cases – the freezer paper will peel right off when you’re done. It doesn’t leave any residue behind, and you can reuse it a LOT of times before it loses its ability to fuse.
You can find rolls of freezer paper in the grocery store, or shop for printable sheets.
Fusible Adhesive
Fusible adhesive is what I use in all my appliqué projects. That’s mostly quilts, but also T-shirts, tote bags, pillows and more. Unlike the freezer paper – which sticks temporarily to the fabric – the fusible adhesive is a permanent glue.
So the only time I use this product is when I want to permanently stick one piece of fabric to another.
I LOVE LOVE LOVE using Heat & Bond Lite fusible adhesive in printable sheets, as opposed to the stuff you can buy by the bolt. It’s more expensive – yes – but it lets me skip over the tedious tracing step and jump right to the fun part of my appliqué project. That’s worth money to me. 🙂
I use it to transfer embroidery patterns to EVERYTHING. There are other products you could use to transfer a pattern to light-colored, smooth, woven fabric – but Sulky Sticky Fabri-solvy makes embroidery on every surface possible. And it makes stitching on smooth woven cotton easier and better.
With this stuff you can embroider stretchy fabrics like T-shirts and baby onesies (no extra stabilizer needed). You can embroider dark fabrics. You can embroider nappy fabrics like velvet and terrycloth and fleece. You can embroider felt. Oh! How I love embroidering on felt!
I use it to stabilize stretchy fabrics when I appliqué on them. It just washes away – leaving no itchy stabilizer behind.
I freehand all my quilting designs – but if I did anything fancy I would print or draw it on this and stitch through it, then soak it away later.
Freezer paper vs. Sulky Sticky Fabri-solvy
I think this is where most people get confused, because I use both of them extensively when I work with felt.
If I’m just cutting the shape out – I use freezer paper. It’s cheaper and doesn’t require soaking to remove.
If I’m embroidering something on the shape and then cutting it out – I use the Sulky Sticky Fabri-solvy. Sometimes you’ll see me recommend both things in one project – like this snowman ornament.
The hat, hat band, and carrot nose have no embroidery on them. Neither does the back of the ornament. I cut all of those pieces out with freezer paper.
The snowman front and the scarf both have embroidery on them, so for those I printed the pattern on Sulky Sticky Fabri-solvy, stuck it to the felt, embroidered the details, cut it out on the lines, and soaked off the stabilizer. (You can see how this works in this post.)
All of my patterns tell you which product to use where.
I hope that answers your questions about which product I use in which situation! Let me know if you have any other questions about any of them. I love them all and I’m always happy to share info about products that make your crafting easier and more fun. 🙂
These links go to all my posts about quilt supplies.
If you want to make something besides bears, you can use any of my applique patterns. Just print the pieces at 40% size. You’ll find more info about resizing a pattern here.
Here’s how to make them.
Cut two 4-inch squares of wool felt for each coaster.
If you live in a humid place where one beverage will soak through two layers of wool felt in no time, cut a 3 1/2 inch square from something waterproof for each coaster. It doesn’t matter what it looks like – it will be hidden inside the coaster. I use a shower curtain liner. 🙂
Download the pattern and print (or trace) the pieces onto freezer paper. The sheet has enough pieces for 6 coasters.
Rough cut around the pieces and fuse the freezer paper to wool felt. Cut out all the pieces. Cut right through the felt and the freezer paper – it helps you get neat cuts on all those tiny pieces.
Leave a little extra seam allowance past the dotted lines at the base of the ears – that bit will tuck under the head for a neat finish.
Peel off the freezer paper backs and assemble all the pieces (tucking the ears under the head) on one of your coaster squares. I like to swipe the backs with a little dab of fabric glue stick, but you can use pins if you don’t mind your thread snagging on them every other stitch. 🙂
Appliqué all the parts in place using whipstitch and two strands of matching thread.
Layer a plain back with the bear front, slipping a waterproof square between the layers if desired.
Here are the colors I used for my set. I used black for all the eyes and noses. I recommend shopping Benzie Design for felt. they have a HUGE selection of colors! One sheet of felt will make three coasters.
background – denim
bear – Tahitian sunset
muzzle and belly – copper
background – enchanted forest
bear – coffee
muzzle and belly – Tahitian sunset
background – vineyard
bear – copper
muzzle and belly – cobblestone
background – loden
bear – Tahitian sunset
muzzle and belly – cobblestone
background – blue snow
bear – white
muzzle – smoky marble
background – babbling brook
bear – licorice
muzzle – Tahitian sunset
My favorite is the one with the purple background. Jo’s favorite is the polar bear. Alan is still at San Diego Comic Con so he hasn’t claimed one yet. Which is your favorite?
Here are several free patterns that work with my basic 10-inch applique squares – no resizing needed!
Here are several free patterns that work with just some simple resizing. This post about making coasters has info about resizing an applique pattern that can be applied to any of these projects.
Cut the pieces out right on the solid lines. Where there’s a dotted line, leave a little extra seam allowance. You can see that around the face, and at the top of the hair, apron and dress pieces in the photo.
Soak the stabilizer away in cold water. Let the pieces soak for a good long time, then rinse the softened stabilizer off under cold running water. Hit any stubborn bits with the kitchen sprayer, but don’t rub the surface of the felt.
Set them to dry on a towel. Don’t wring, twist or even smoosh them. Just let them dry.
Use two strands of thread for all stitching. You can, of course, use any colors and stitches you like, but here’s what I used on each piece. . .
For the dress, backstitch the vines and stripes with DMC #601 and #958. The leaves are lazy daisy stitches with DMC #958 and the dots are French knots with DMC #726.
Backstitch the mouth with DMC #3371. The eyes use this stitch.
For the apron, the French knots are DMC #601. The drops are lazy daisy stitches in DMC #726.
The dots on the scarf are French knots in DMC #958. The flowers are lazy daisy with DMC #601. The little stars and the centers of the flowers are DMC #726.
That’s all the pieces. Time to applique! I use this simple whipstitch and two strands of matching thread for all applique.
Applique the flower to the apron. Then applique the center of the flower and the yellow drop.
Lay the apron over the dress and applique the edges down.
Applique the hair to the top of the face.
Then applique the scarf over the face. Depending on how much extra seam allowance you cut around the face, it may hang out past the edges of the sides of the scarf. That’s ok.
Flip the piece over so you can see your stitching line – the circle of purple stitches here. Trim away the excess felt as close to the stitching as possible so that nothing sticks out past the edge of the scarf.
It should look like this when you’re done.
Finally, lay the back piece down on a flat surface and use that as a guide to line up the face and scarf over the bottom half of the doll. Applique the last layers together.
You can applique this finished front to anything else, or you can sew it to the matroyshka back piece using whipstitch all around. Leave a small opening and add a tiny bit of stuffing – just enough to puff it out a bit. Finish sewing it closed and attach a hanging loop to the top if you like.
Finished!
You could make a set of these in lots of different colors and string them together into a garland. That would be so pretty!
If you like this, sign up for the newsletter! You’ll get exclusive free patterns, special discounts, and notification of new patterns and tutorials.
Mollie from Wild Olive knows how excited I am about her new book, Stitch Love: Sweet Creatures Big and Small. I’ve got it in my hot little hands right now and there will be a full review coming in a couple of weeks after I have a chance to make a project from it. In a nutshell – it’s exactly as fabulous as I thought it would be!
In the meantime, I jumped at the chance to be a part of this Valentine’s Day blog hop in celebration of the new book. Mollie is giving away a few special patterns that are like the patterns you’ll find in the book – but completely new and getting ready for Valentine’s Day. And a few bloggers got to play with them first!
I chose this little otter/ferret. 🙂
Mollie thinks of him as a ferret – I think of him as an otter. My way I get to make a terrible otter pun. 🙂
I immediately saw that envelope as a 3D pocket, with the whole thing appliqued in felt – so that’s what I did!
Tuck a bit of the ears and tail behind the body, and then whipstitch all around each piece. A tiny dab of fabric glue on the back of each piece holds them in place while you stitch. No irritating pins to grab your thread!
Now add the envelope. I traced it as one piece so I could fold it into a little pocket. Flat it looked like this. . .
And then I folded it and stuck it on the otter like this. . .
Stitch all the way around the outside edge of the envelope.
Next I added his paws so it looks like he’s holding the envelope instead of having it float in front of him. 🙂
Just cut them out, stick them in place, and stitch them down. They’re tiny. 🙂
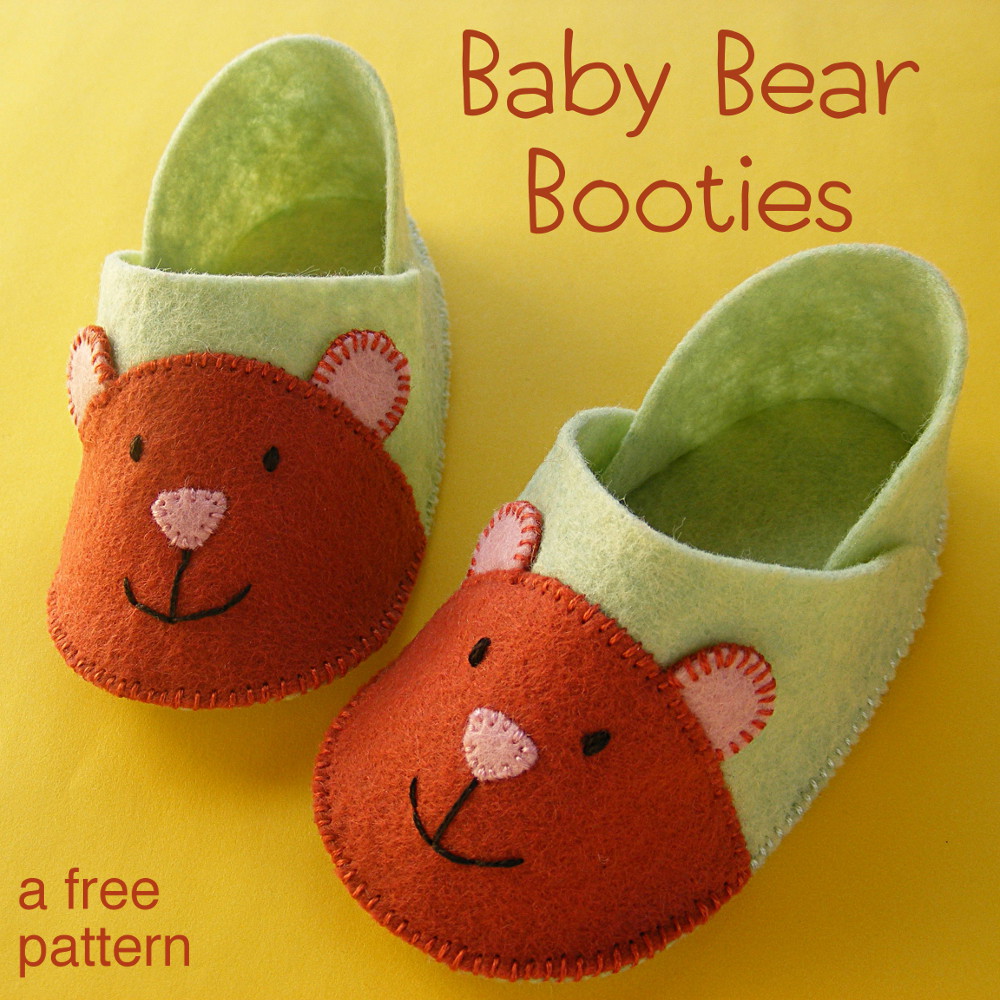
I’ve been meaning to make some little felt baby booties for a while now. A friend of mine just had a baby shower so the time was finally right for you all to get the free felt booties pattern I’ve had in my head for so long. 🙂
These were really easy to stitch up – and it was all handsewing so it was perfect to work on while I watched TV. (Foyle’s War and The Good Wife are our current obsessions.)
I used copper felt for the bear – and I think that color would look great with just about any color for the shoe – love bug blue, blue bayou, ragtime blue, fuchsia, shocking pink, lavender, banana cream, Georgia peach. They’d all be adorable!
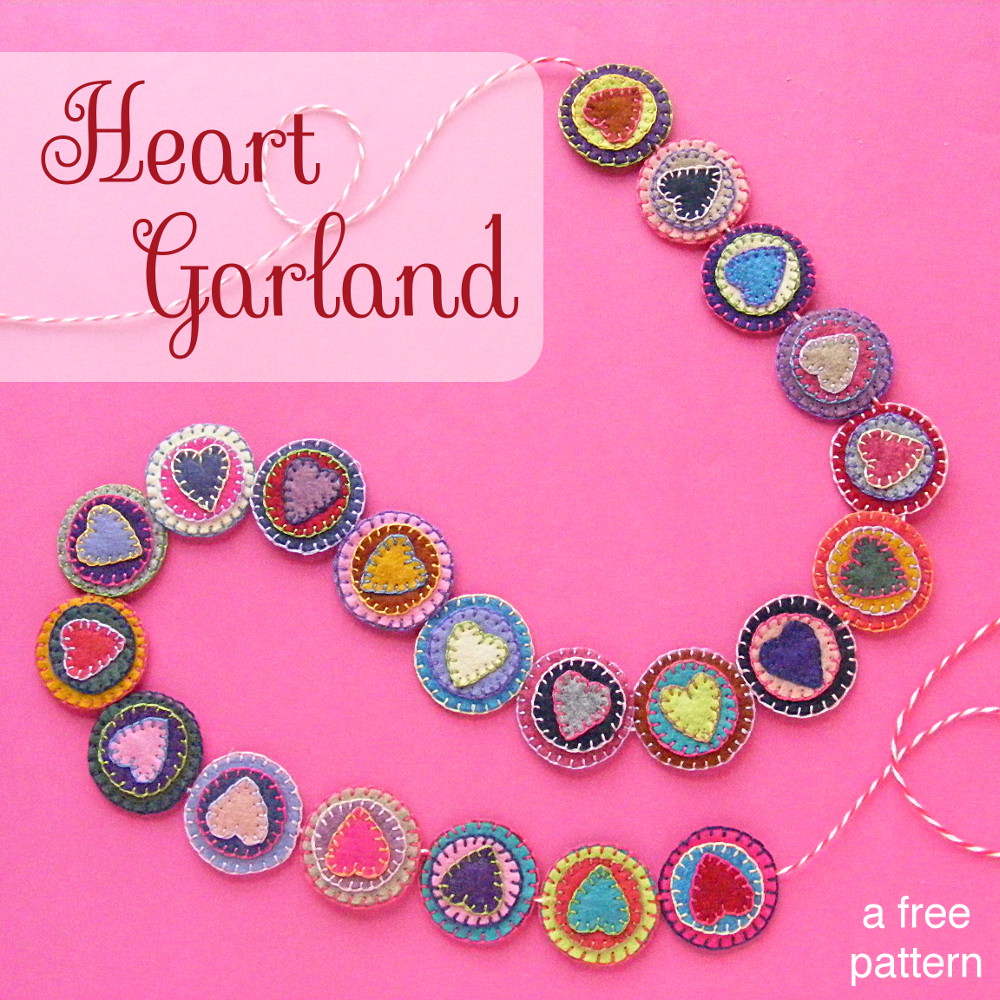
Crafting for Valentine’s Day is so much fun – especially since you don’t have to put the decorations away after the holiday’s over. Hearts never go out of season!
This pretty heart garland is easy to make (Just one stitch! And there’s a link to a video showing you how to do it!) and it’s a great way to use up tiny felt scraps and stray bits of thread. 🙂
Want the pattern? Here we go!
All stitching is done with two strands of embroidery floss.
Print them out at 100% size (or whatever size you like). I really like using freezer paper for small pieces like this. Just iron it down to the felt, cut out the shape, peel off the paper and reuse it for the next one.
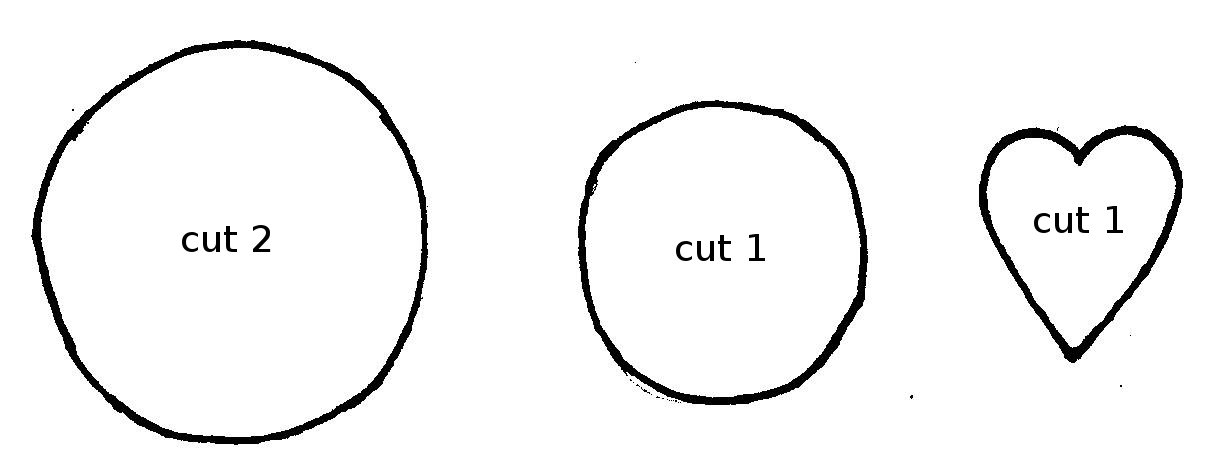
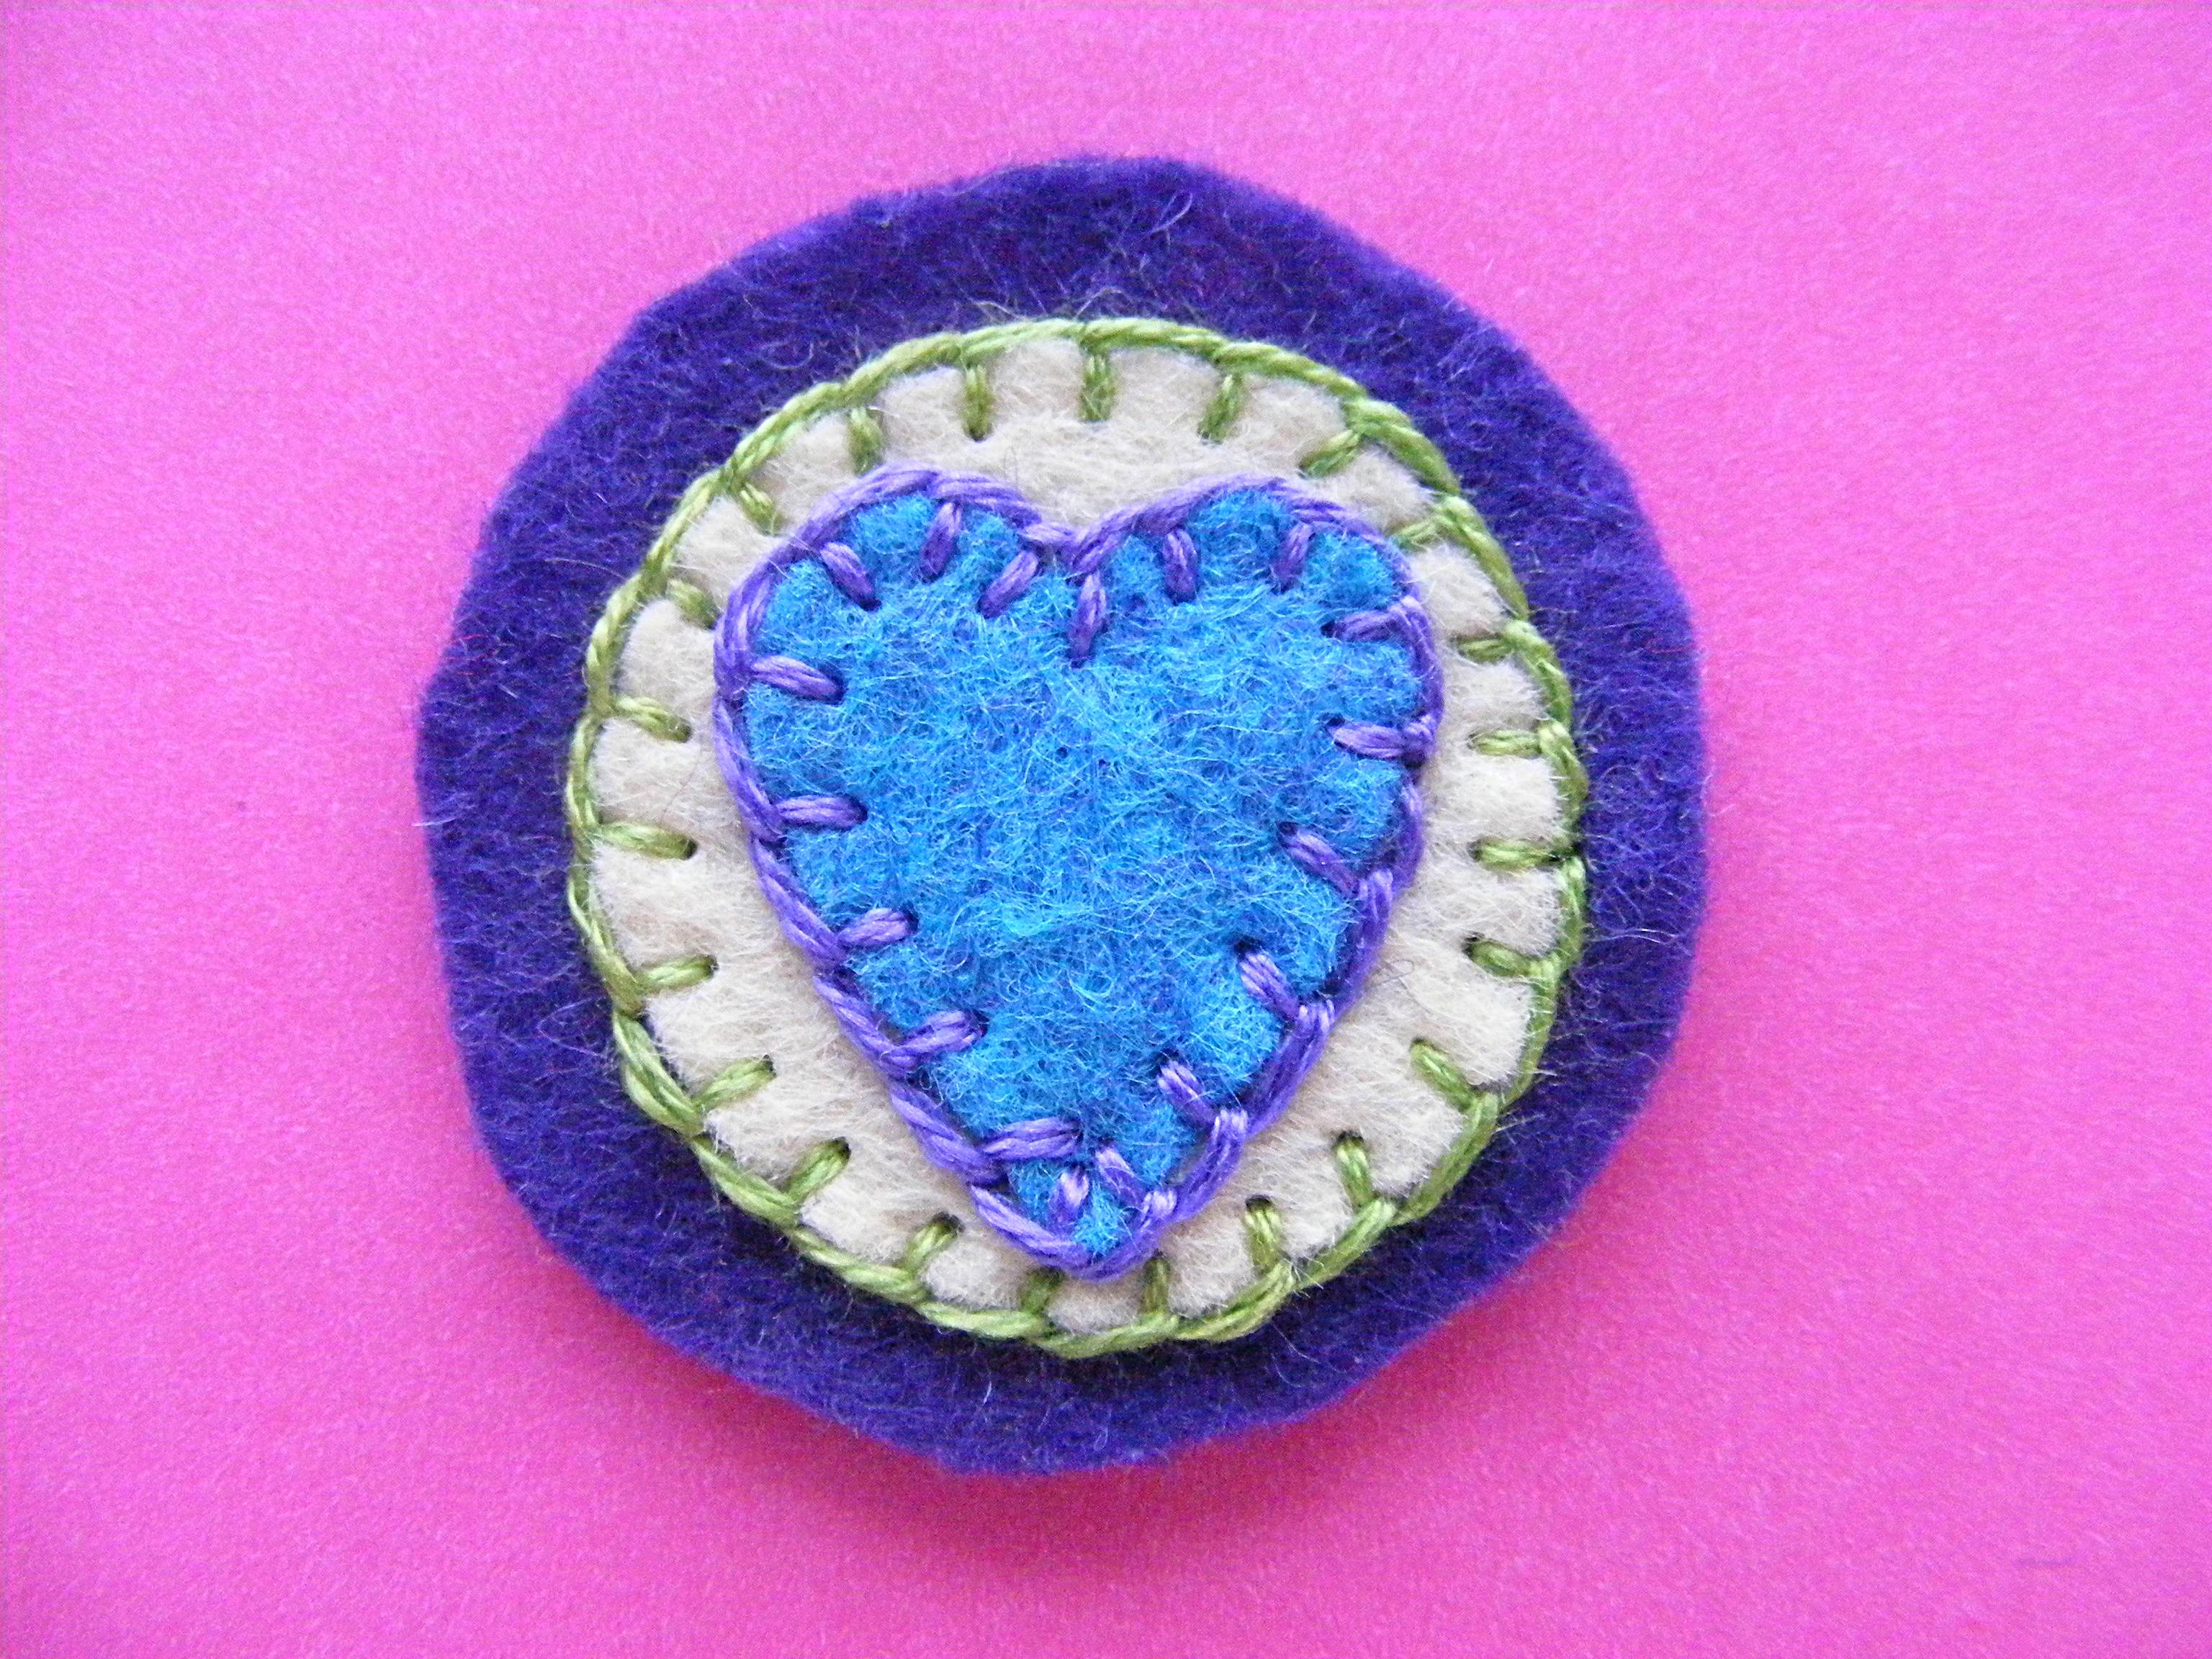
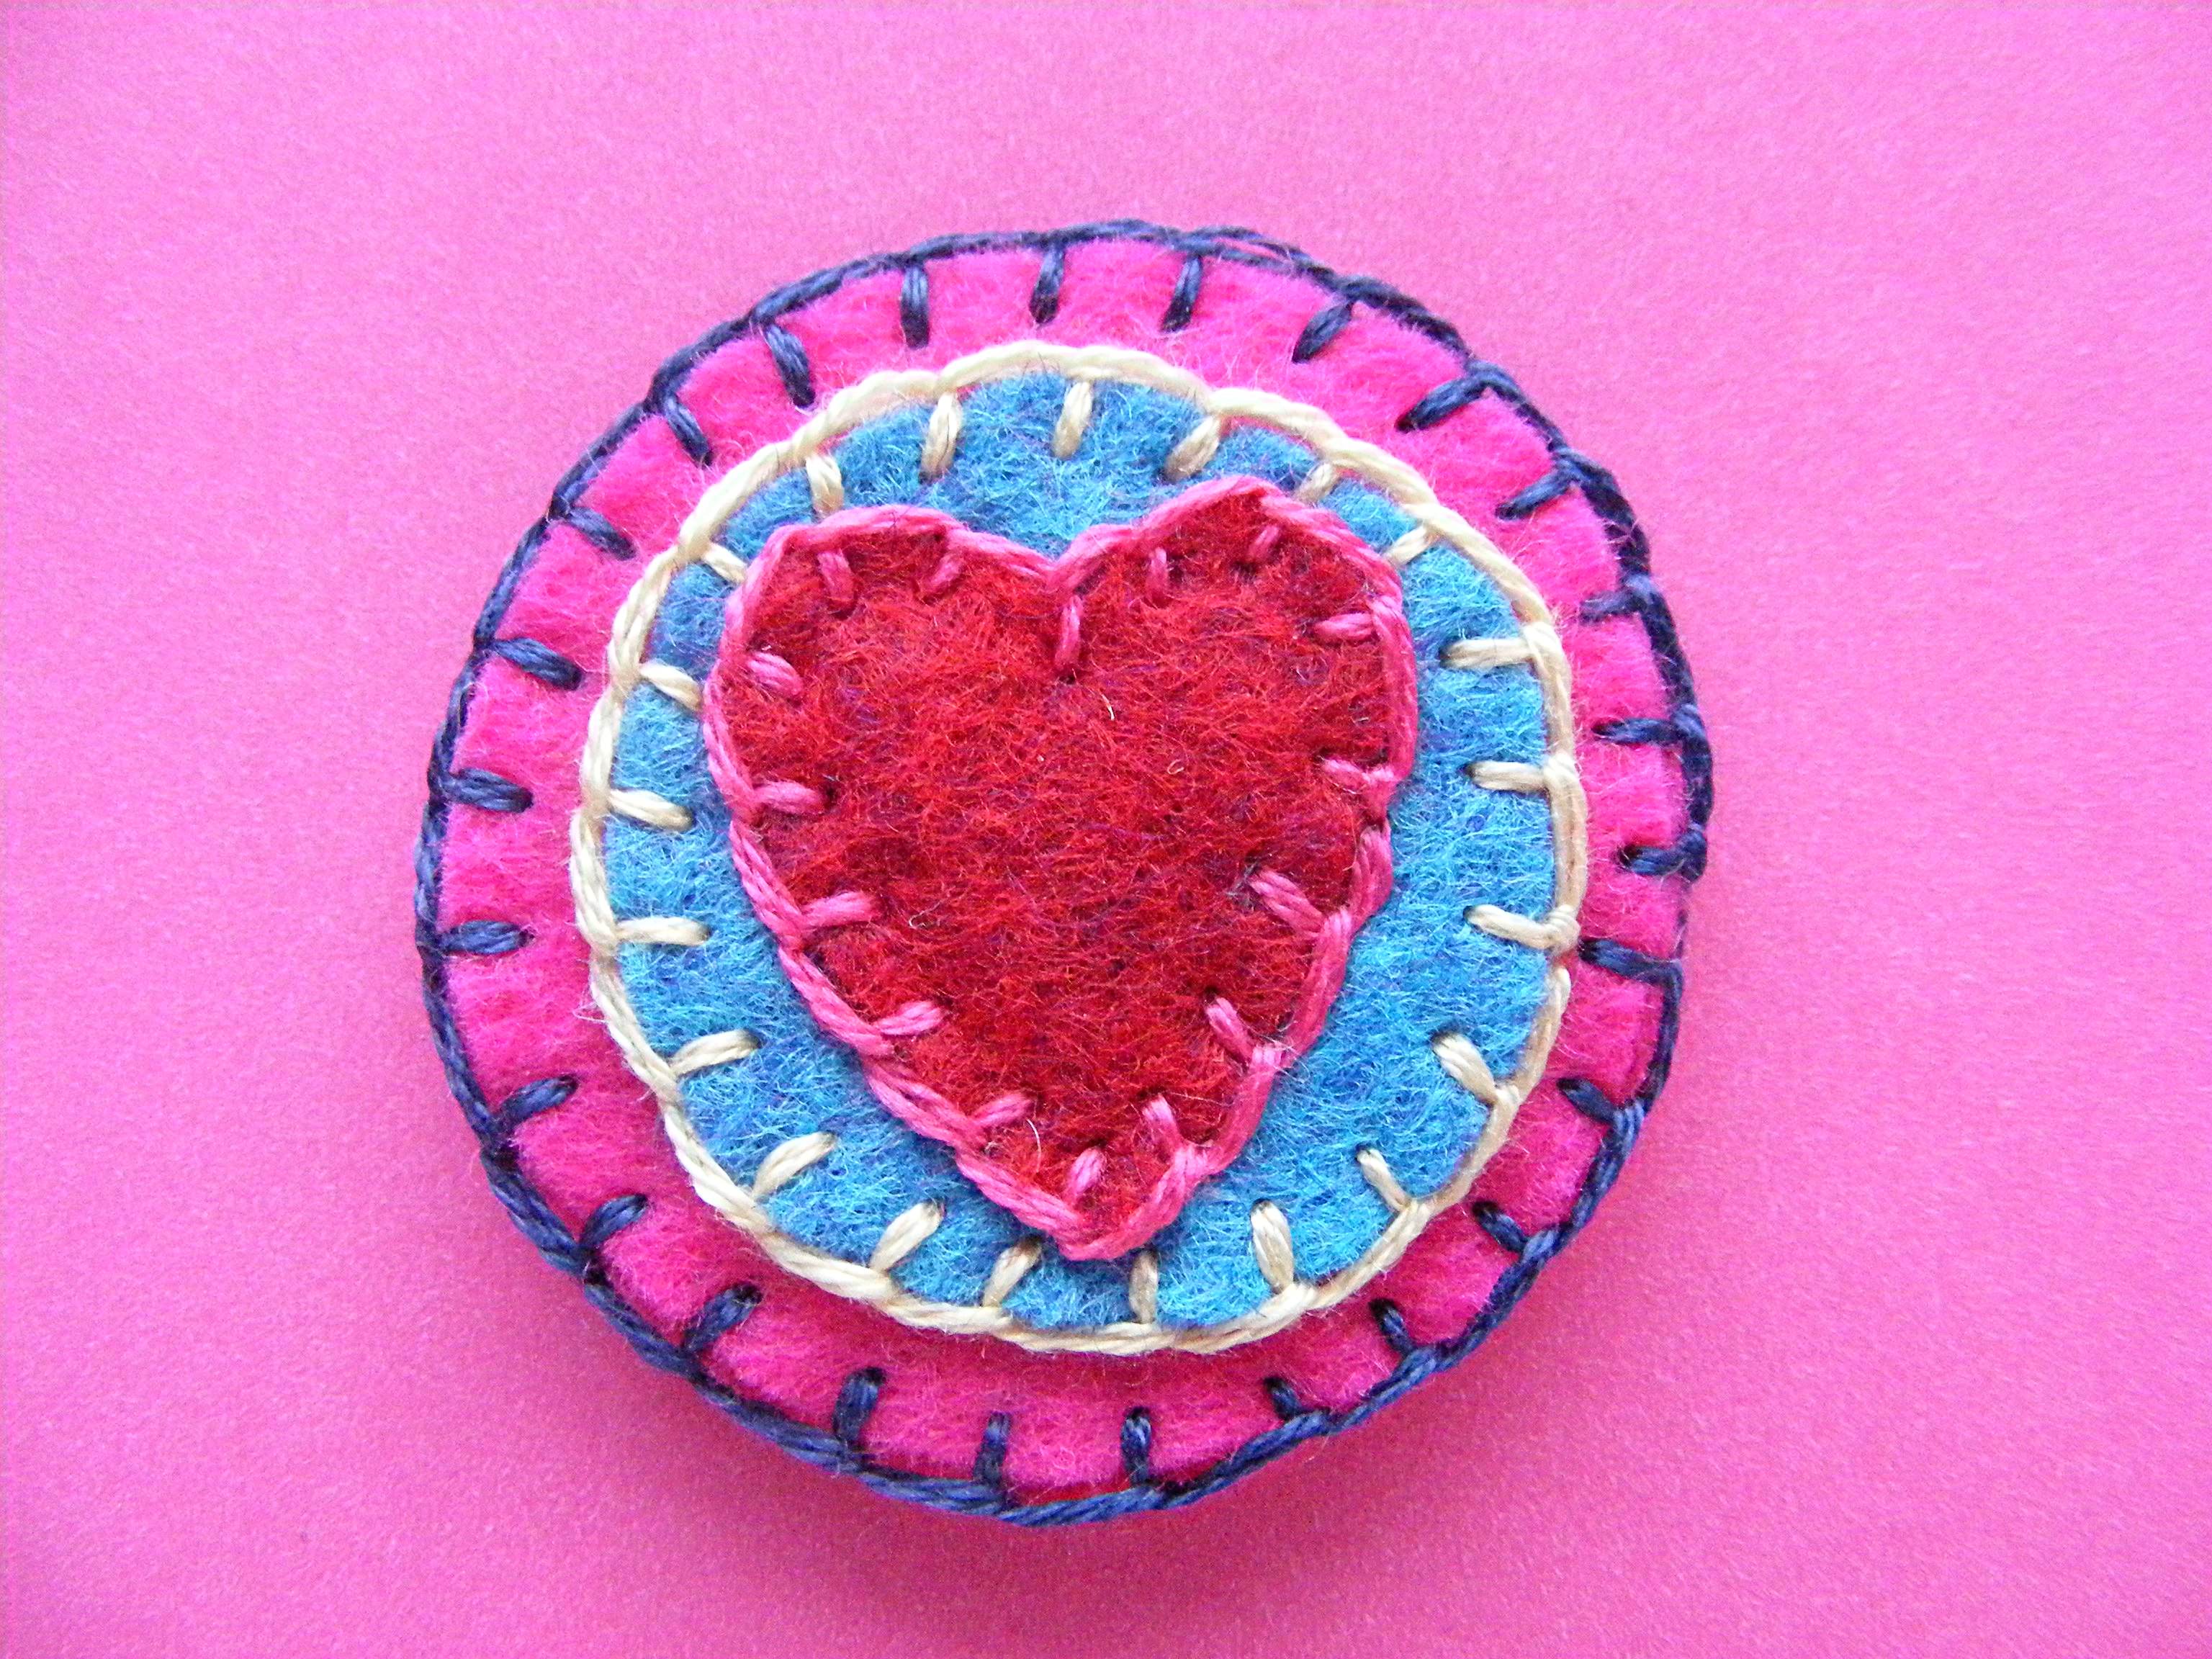
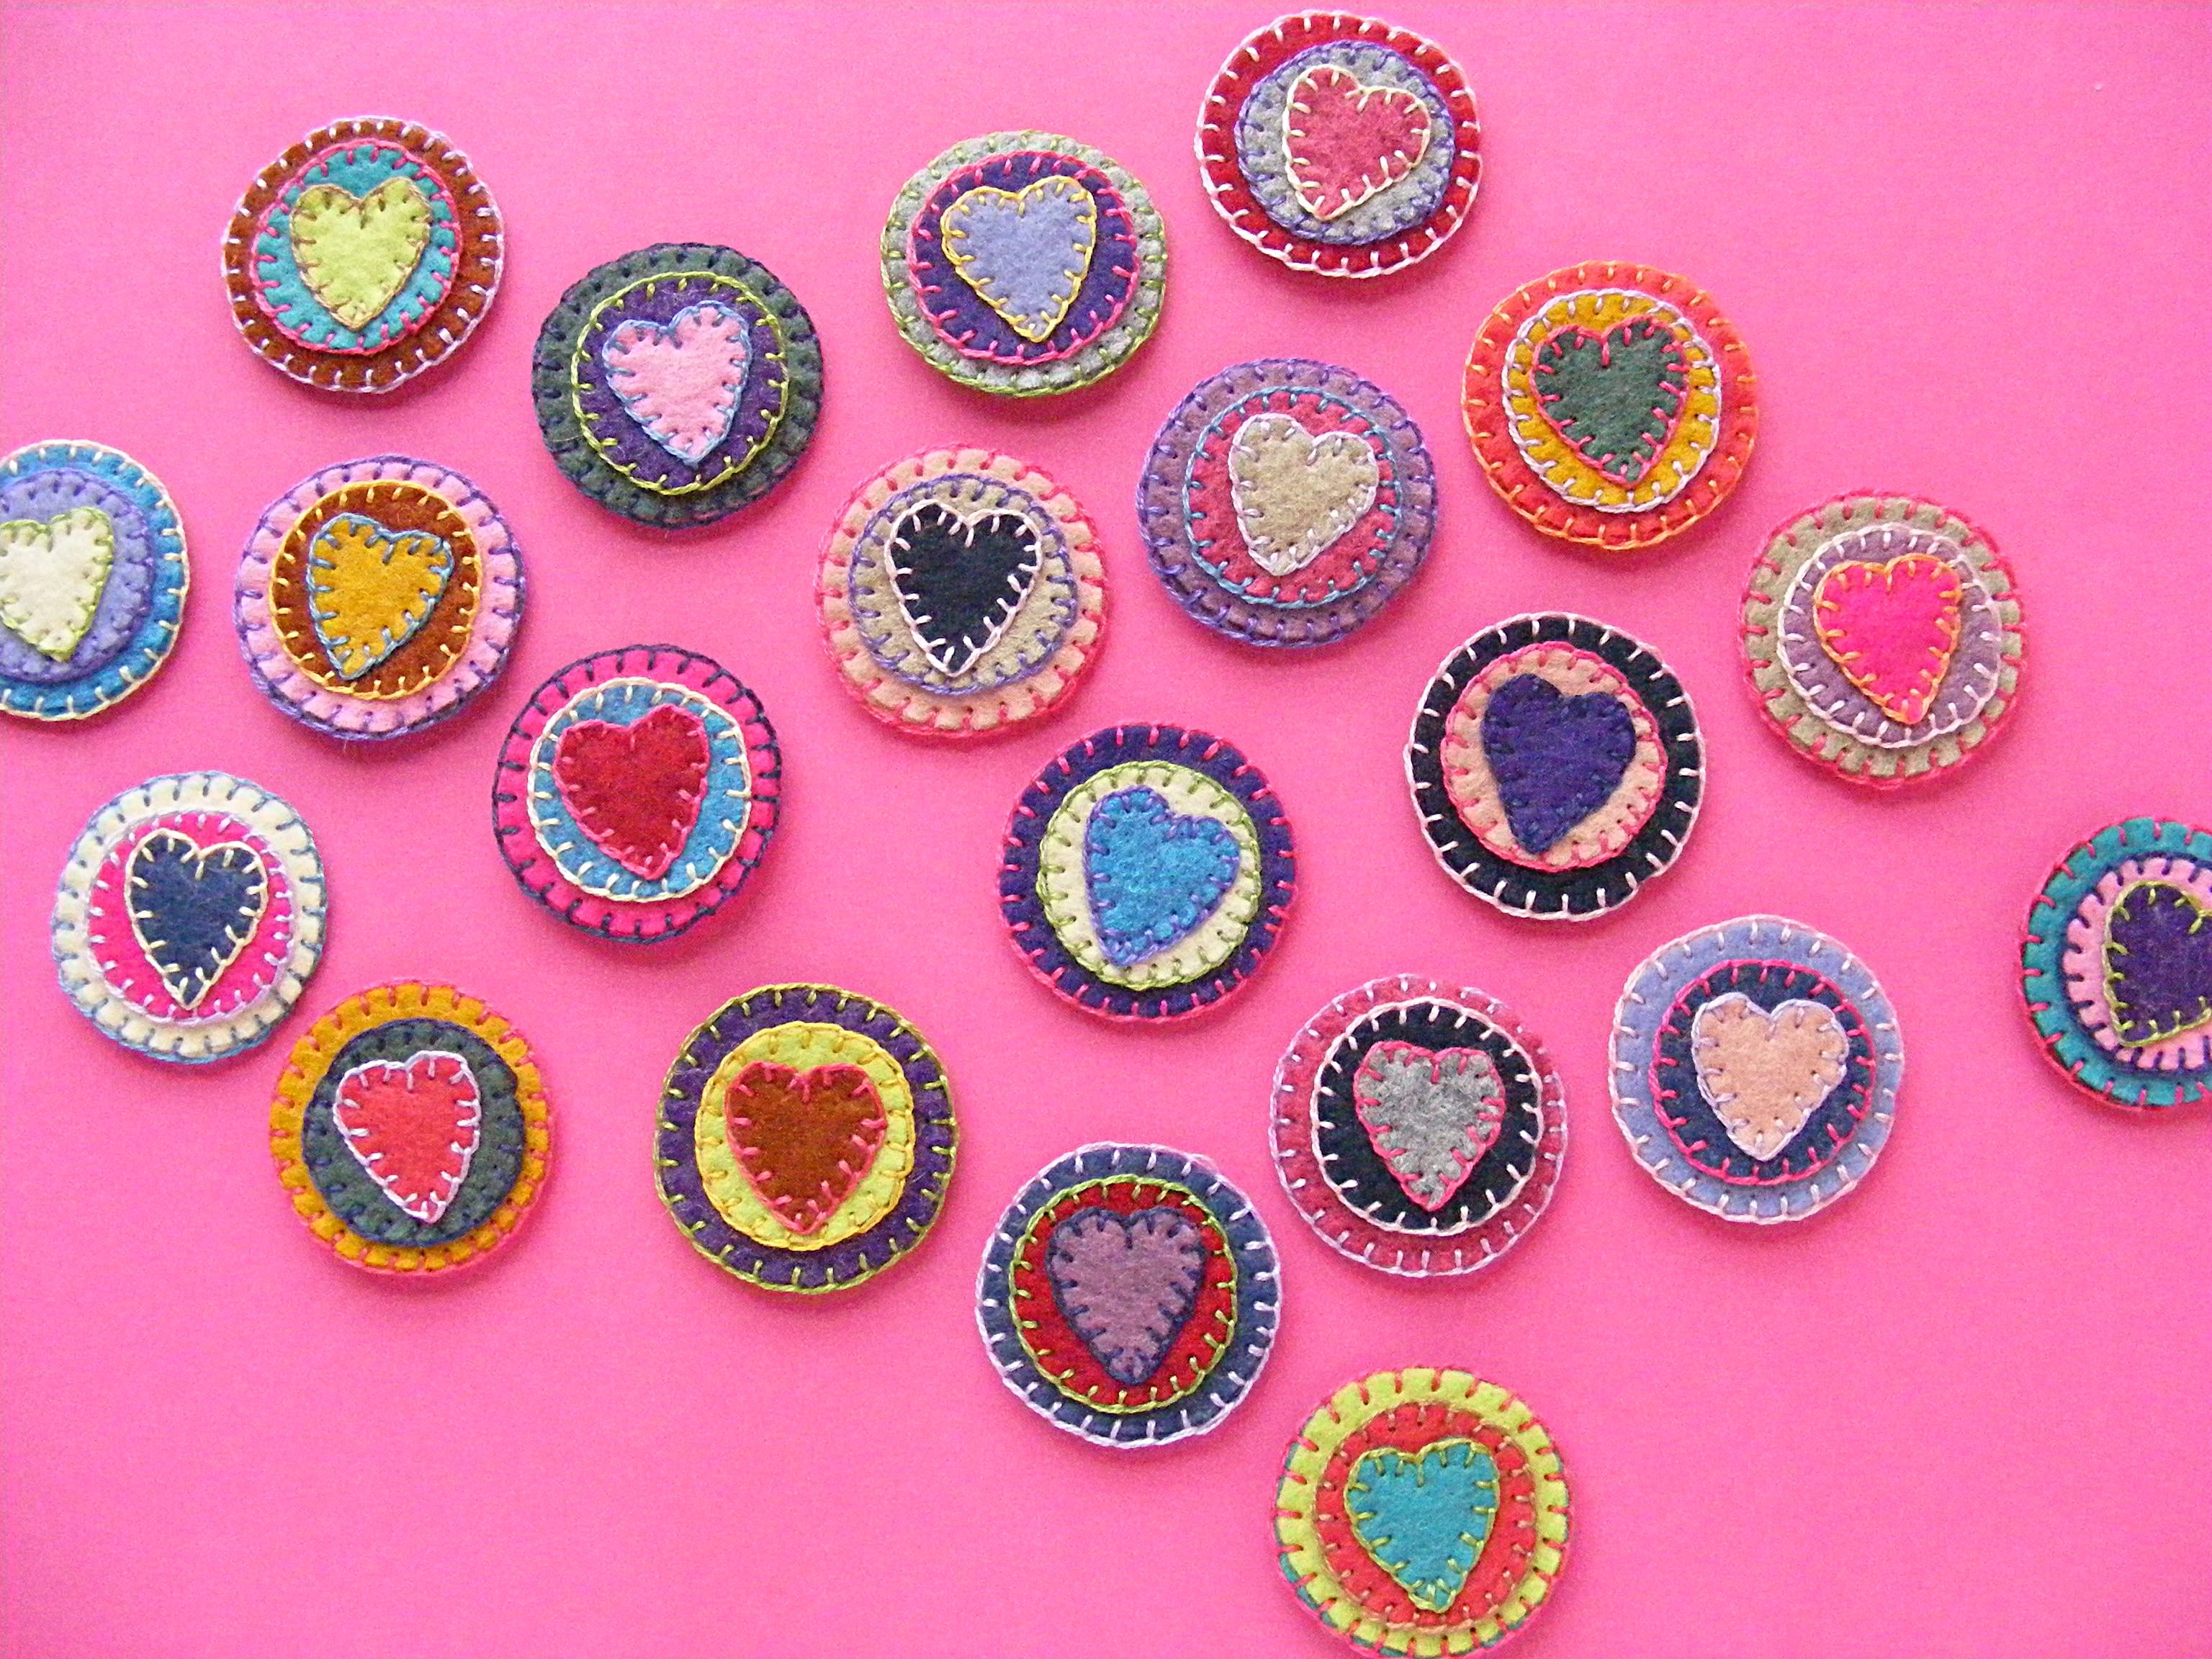
For each disc, cut out two large circles, one small circle, and one heart. I used lovely wool felt scraps for all of mine. (If you want your discs to have hearts on both sides, just cut out two of everything.)
For each foot of garland you’ll need 9 finished discs.
Step 2
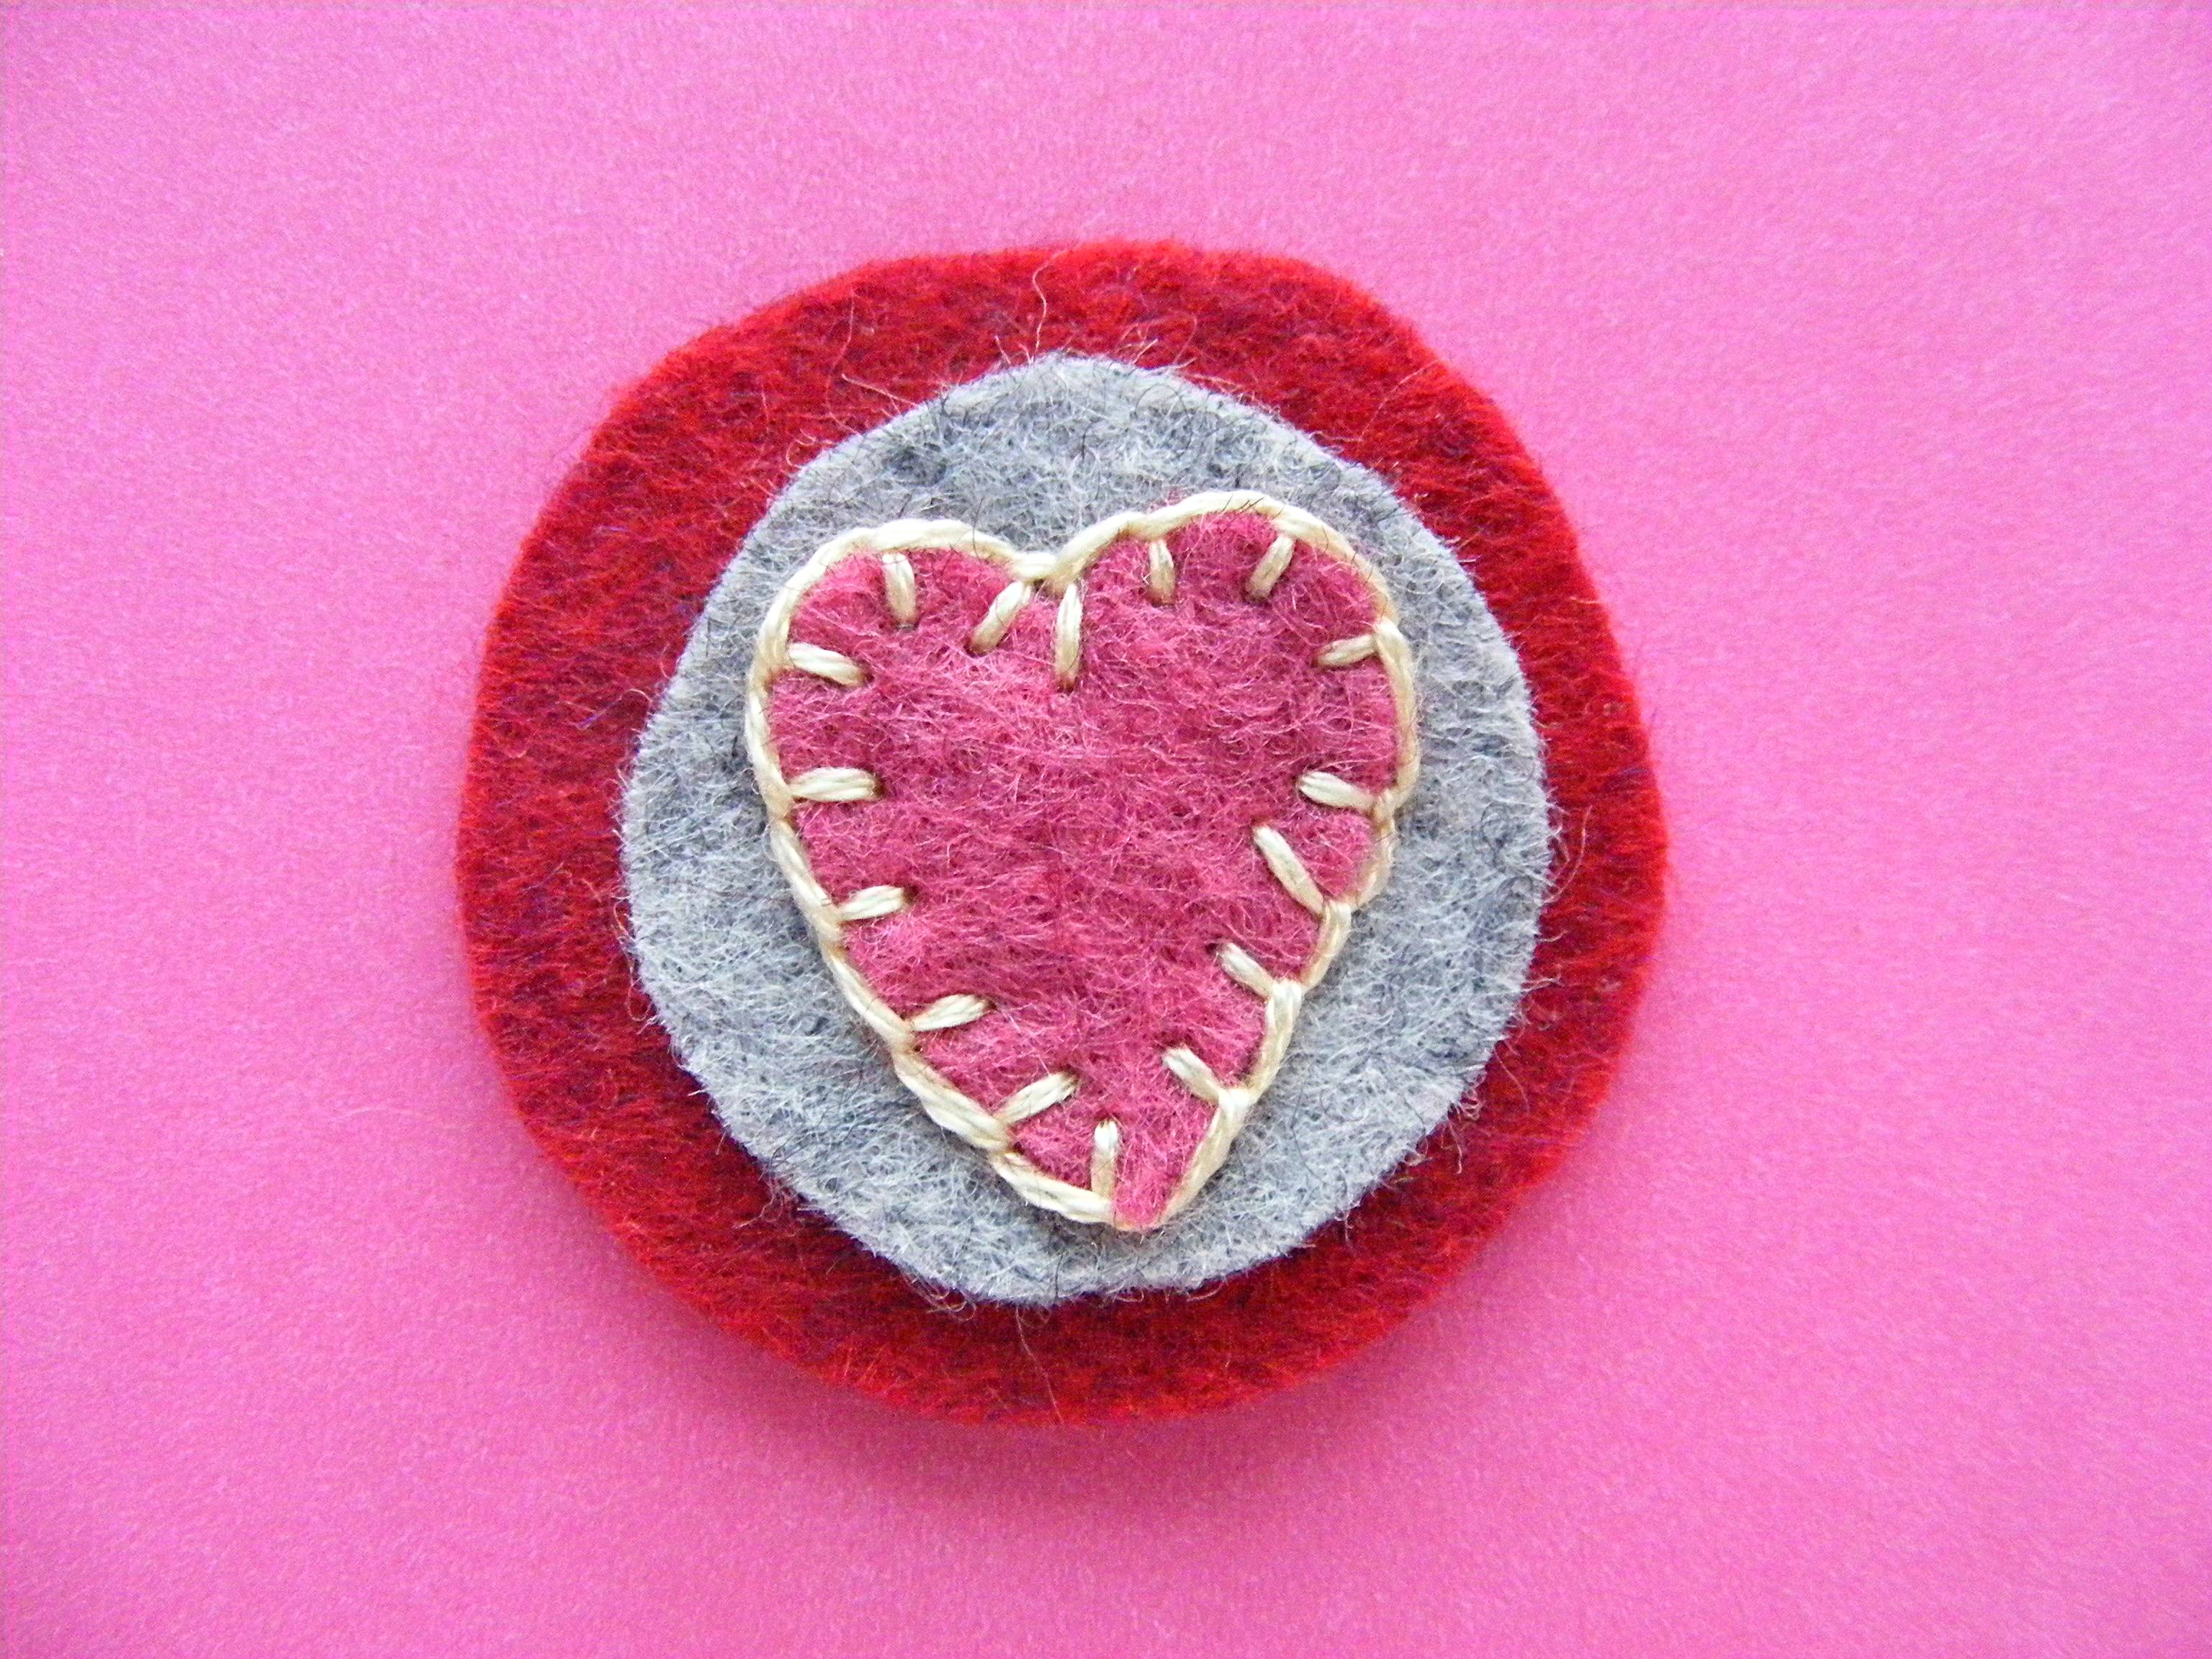
Stack one large circle, one small circle, and one heart.
Blanket stitch around the heart, stitching through all three layers of felt.
Step 3
Blanket stitch around the smaller circle.
You’ll be stitching through two layers of felt.
Step 4
Layer the second large circle on the back of the disc and blanket stitch around the edge of the two layers.
Now you won’t see the back of any of your embroidery. Neat and tidy!
Step 5
Make as many discs as you want.
Each foot of garland needs 9 finished discs.
Step 7
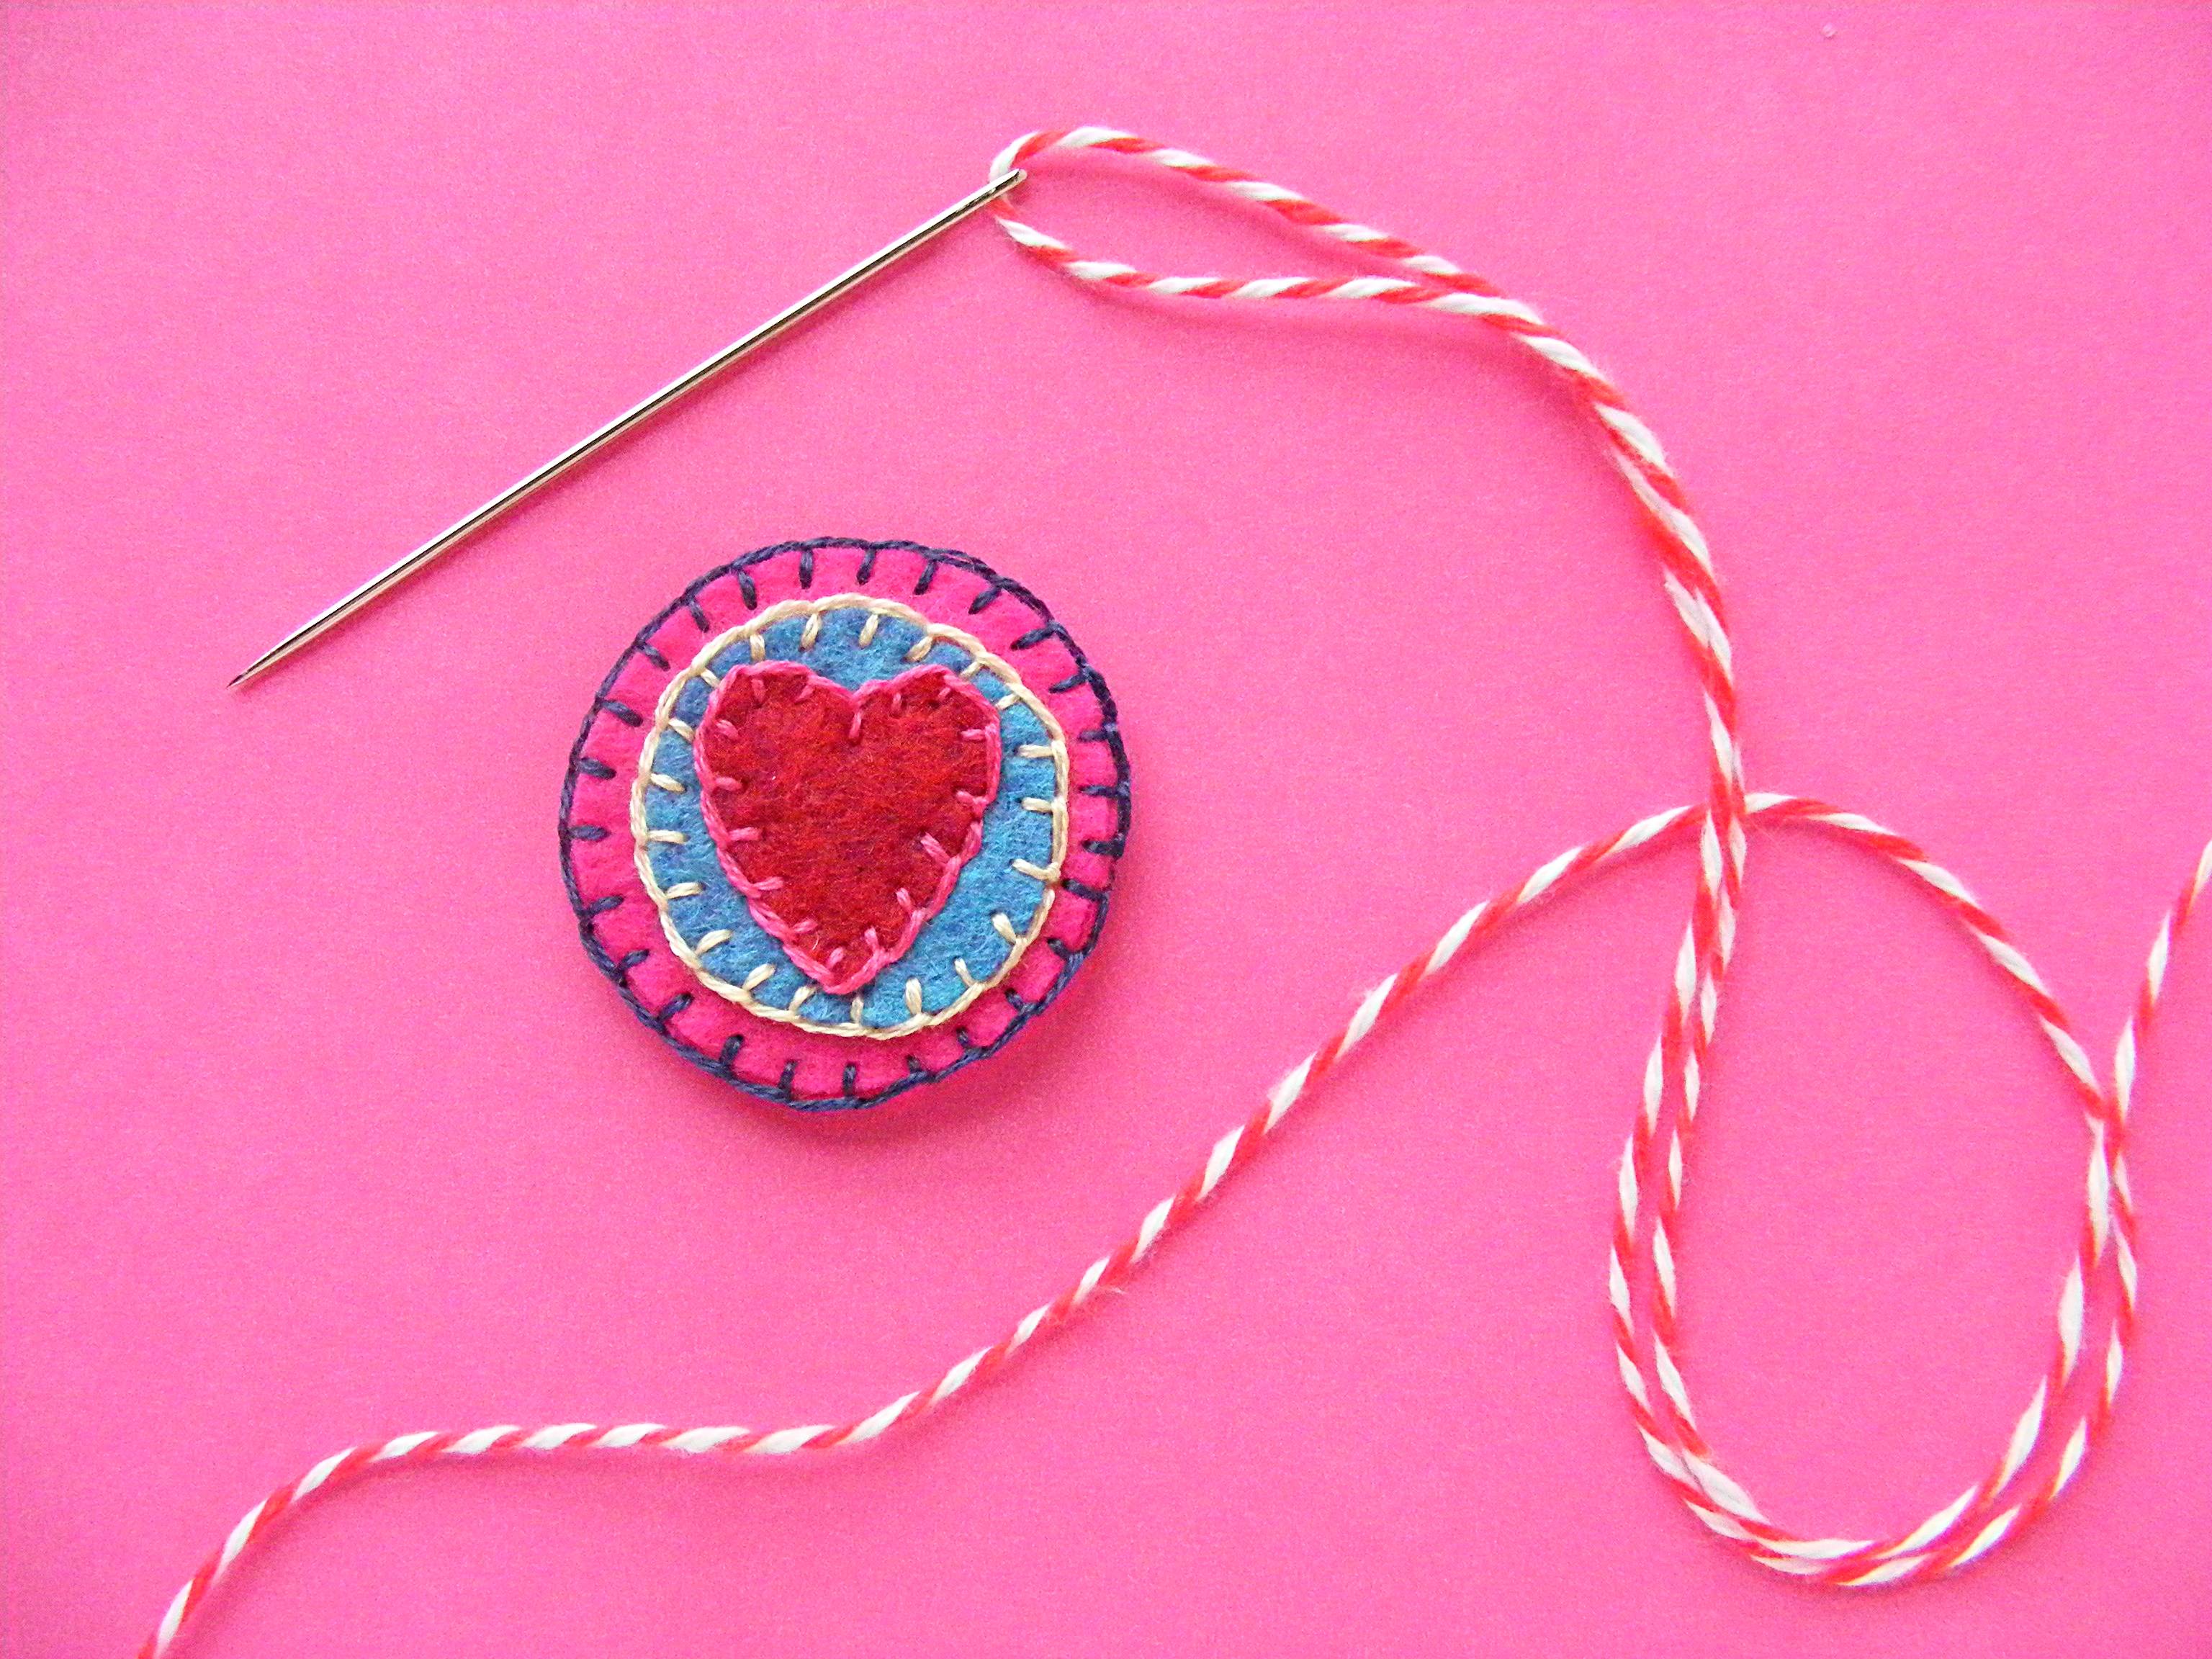
Find a needle that’s longer than your disc is wide. Cut a length of stringing cord - I used one yard of pretty baker’s twine.
Thread the needle with the cord.
Step 8
Thread the needle between the two layers of felt, stringing the disc onto the cord.
Step 9
Continue adding discs until your garland is finished.
Admire your work! Isn’t it pretty?
Now hang it somewhere where it will make you smile every time you see it. :)
Stitch up some love!
Have a great day, everyone!
If you like this pattern, sign up for the Shiny Happy News! Subscribers get a weekly newsletter full of sewing tips and tricks, free patterns, special discounts and more.
I’m a morning person. I really do wake up most of the time happy and excited to start my day.
I know this can be super annoying. I live with two not-morning people who speak in grunts for the first hour they’re up. By the time they wake up I’ve usually been working for a couple of hours and I have all kinds of things I’m excited to show them. I’ve learned to restrain myself until they’re past the grunting stage. 🙂
As Polyanna as it can be – my eternal optimism is part of who I am. It’s a part of me that I like – and a part that I fully embrace in my work. So my studio is a great place to hang this happy reminder of how I like to start every day!
I love happy words, felt applique, and embroidered details – so you KNOW I had a ton of fun stitching up this project. 🙂
I printed the reversed version of the pattern onto a sheet of freezer paper, then cut the letters apart and fused them to some of my smallest felt scraps. I cut out the letters and the freezer paper at the same time – it’s the best way to accurately cut small, detailed pieces like this.
I colored in the regular (not reversed) version of the pattern with some crayons first to help me choose a good balance of colors and make sure I didn’t end up with consecutive letters in the same color.
My scraps were ruby red slippers, loden, periwinkle, love bug blue, old gold, and copper. Use what you have! Your scraps will be in colors you love!
Arrange the letters carefully on your base fabric. I used black cotton twill.
The pattern shows the letters arranged in an 8-inch circle, with a dotted line showing the vertical and horizontal centers. That line can help you eyeball the arrangement of your words. I used a 9-inch hoop for a little extra breathing room – plus it’s what I had on hand. 🙂
You can pin the letters in place, but it drives me bonkers when my embroidery thread catches on the pins, so I glued each letter in place with a tiny dab from a fabric glue stick.
I love the look of whipstitch in matching color thread, but an outline in blanket stitch in contrasting thread would also be really nice.
I could have stopped there – and I almost did. I thought there was a real charm to the simple refrigerator-magnet-letter look. But I couldn’t resist adding a bit of extra fancification. 🙂 I did keep the extra stitching tone-on-tone so the effect wouldn’t be too wild or overwhelming. And I love the texture it adds!
Sometimes I just did little straight stitches across the letter.
Sometimes I made little stars out of simple straight stitches.
Sometimes I backstitched a stick letter right in the middle of the block letter.
And sometimes I did some extra little stitches across the backstitched letter for a “Frankenstein stitches” kind of look. 🙂
For the two i letters and the exclamation point, I stitched a star in the dot and a row of three backstitches in the line.
I didn’t plan anything out – I just did what would be easiest in each letter and tried not to do the same fancification in two letters right next to each other.
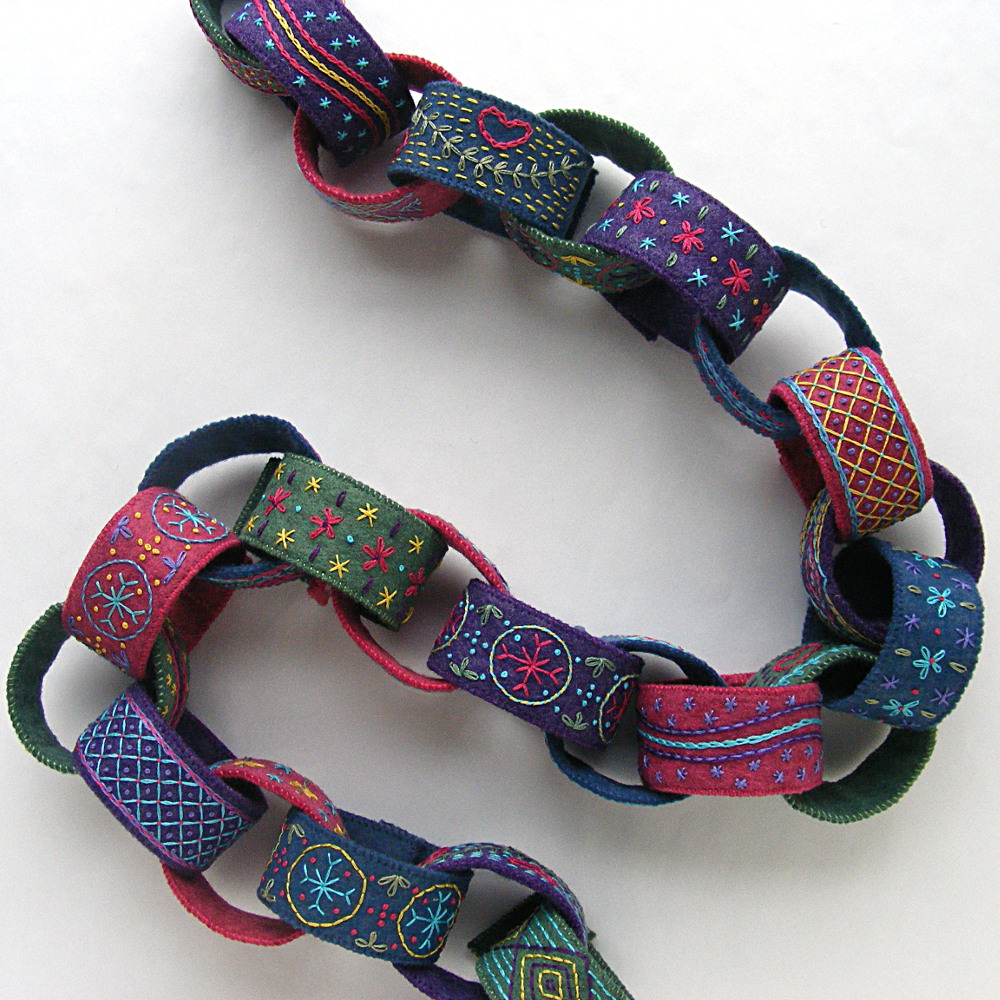
I mean – it’s lovely. A paper-chain inspired garland of hand-embroidered felt rings with hook & loop closures so you can store them easily. It’s sooooo beautiful and looks so warm and cozy and wintry. I’m absolutely enchanted with how it turned out!
But seriously. Hand-embroidered felt garland rings? Twenty-four of them? This is hours and hours and hours (and hours!) of hand embroidery. Of course, I enjoyed every minute of it. But I’d be the first to admit that I’m a little crazy about hand-embroidery on wool felt. This is a project that will keep your hands busy for a LOT of cozy evenings.
If I haven’t talked you out of it yet, here are the instructions. . .
The pattern includes six different band decorations and they all fit on one piece of Magical Embroidery Stuff (aka Sulky Sticky Fabri-solvy). So I did six bands each of four different felt colors for a total of 24 rings. That made a chain 42 inches long. For the materials below I’ll assume you’ll do the same crazy thing. 🙂
What you need
wool-blend felt – 2 sheets of each color you plan to use (I used grape jelly, babbling brook, denim, and ruby red slippers)
embroidery thread in matching and contrasting colors (I used DMC #550, 502, 336, 600, 3746, 522, 726 and 3846)
Sulky Sticky Fabri-solvy (optional, but very strongly recommended)
You can find a list of my favorite supplies (with links to where to buy them) here.
Throughout the pattern, the links go to video tutorials teaching that skill. If it’s a new stitch or technique for you, just click through to see how to do it!
Here’s how to make it. . .
1. Print the pattern.You can download it here. Print the pattern at 100% size onto four sheets of Sulky Sticky Fabri-solvy (aka The Magical Embroidery Stuff).
2. Peel the backing off and stick the stabilizer/pattern transfer onto the felt.
Cut the pieces out on the lines.
Embroider the designs right through the stabilizer.
I didn’t embroider the designs the same way every time – preferring instead to just play around. You should play too! You can find tutorials for plenty of stitches here. . .
cross stitch (the little stars are just cross stitches, with an extra stitch taken across the middle)
By all means – don’t be limited to these stitches! They’re just what I used. You can find lots more stitch tutorials here.
3. Soak off the Sulky Sticky Fabri-solvy. I soak mine in cold water for at least an hour, then rinse off the mushy stabilizer under cold running water. Don’t rub it to remove any stubborn bits – just hit them with a kitchen sprayer if needed.
Lay the pieces flat on a towel to dry. Do not wring, twist or even smoosh them. Just set them sopping wet on a towel and let them be. I promise they’ll dry. 🙂
4. Finish the bands. Cut second piece of felt for the back of the band. I just laid the front band down and cut around it so the back would match the front exactly.
Sew a small piece of hook & loop tape to the blank end of the top of the band, and to one end of the back of the band.
I used a sewing machine, but you could do it by hand if you prefer. I left enough space on the embroidered side to use the narrowest big-box-store hook & loop tape (like you see on the top band) but if you order one of my kits you’ll get the special less-bulky skinny hook & loop tape I prefer (like you see on the bottom band).
Put the front and back together so that the hook & loop tape is on opposite ends of the band and sew the pieces together around the edge. I used whipstitch, but you could certainly use a sewing machine – especially if you want to finish before the end of the year. 🙂
5. Wrap them into rings and build your chain.
In the photo above you see the six designs in the pattern, stitched up on purple felt.
Make this sweet little elf ornament! Hang her on your tree or attach her to a package for someone special.
It’s a free pattern!
Here she’s a Christmas elf. But she doesn’t have to be! I made a couple of “everyday” pixies that you can see here, along with their holiday friend.
Make a bunch of them in a rainbow of colors!
And did I mention they’re posable? They have a pipecleaner “skeleton” so you can bend and pose them however you like. This little cutie is sitting on a spool of thread.
Want the pattern? Here’s the link to download it. It’s free!