Most of the Dress Up Bunch dolls are human, but a few of them are critters with tails. And those tails need wagging room! Here’s how to add an opening to any pants or skirt pattern for the Dress Up Bunch dolls.
Cut out all the pieces as normal.
When you come to the part of the pattern where you sew the center back seam, jump in with these steps. . .
Measure down the center back seam 2 inches and mark with a pin.
Measure down 1 3/4 inches from that pin and mark with another pin.
Sew from the top to the first pin with a normal stitch length. Sew the space between the pins with a longer stitch length – the longest you can set on your machine. Switch back to the regular stitch length and sew the rest of the seam.
Make sure you backstitch (with the normal stitch length) a bit at the top and bottom of the section of long stitches. You’re going to cut those big stitches and this will keep the rest of the regular stitches from unraveling.
Press the seam allowance open.
Sew a tiny little rectangle around the section of long stitches to reinforce that opening.
(You’ll want to use matching thread, of course.)
Use a seam ripper to cut the large stitches inside that reinforced rectangle.
And voila! You have an opening for the tail! Continue with the rest of the pattern instructions.
This works for pants and shorts (as shown above) or with a skirt.
If you’re making Pip the Cat, Squeak the Mouse, or Spot the Dog this is a method you can use to adapt any of the clothing patterns to fit their tails. Have fun with it!
Did you know that you can use stretchy knit fabric to make extra cuddly and soft stuffed animals?
You can! And even though sewing with knits has a bad reputation – it’s really not any harder than sewing with woven fabrics.
Cloud 9 Fabrics – makers of all-gorgeous, all-organic fabric – recently released a line of deliciously soft knit fabrics perfect for comfy clothing, cozy pajamas, and cuddly soft stuffed animals. (That’s their adorable photo up there with the cozy jammie pants.)
They exhibited those knits at Quilt Market this fall and asked me to use them to make some squishy stuffed animals to add to their display. Fun!
I’ve used knits to make softies before (mostly old T-shirts to make Bartholomew Bunnies) and they make exceptionally soft stuffed animals. For this batch I decided to use patterns I had designed with fleece in mind. I love how they turned out!
My favorite is Franklin the Fat Cat made in an awesome striped knit that really accented his fatness. 🙂
Munch was also easy and fun and I liked playing with the different coordinating prints for him.
See how his shape nips in a little around the neck? He’s not one roundish shape like Franklin and Munch – and that’s what makes him slightly tricky. He’s not hard to sew – that’s easy. It’s the stuffing where you have to be careful.
What’s the right needle? Well – I sewed these guys all with a basic universal needle – and that’s usually what I start with. Sew a little test seam on some scraps and take a close look. Usually everything looks just fine and you can move on to your real project, but sometimes there are potential problems.
If you’re skipping stitches, switch to a stretch needle. It has a longer scarf (the groove that the thread rests in) and that helps prevent skipped stitches.
If you’re getting runs or snags in your fabric, switch to a ballpoint or jersey needle. It has a slightly blunt tip that makes the needle slide between the fibers instead of poking into them.
Those are the two potential problems to sewing with knits – both easily fixed with a new needle.
But the stuffing! The stuffing is where you really have to be careful. A softie made with woven fabric can sometimes be lumpy and bumpy – and that problem is a million times worse with stretch fabric where the fabric will just stretch around any lumpy stuffing. You must keep things smooth as you go. Also – usually understuffing is a problem with softies – but if you make them with knits you need to be careful of overstuffing. Use just enough stuffing to fill out the shape and keep it very smooth as you go.
That’s it! Use the right needle, don’t stretch the fabric while you sew, and keep things smooth while you stuff. The yummy Cloud 9 knits I used to make these cuties is in shops now. Make an extra squishy and soft stuffed animal today!
I don’t usually add sashing or borders to my quilts, but Controlled Chaos isn’t a typical quilt for me. I went back and forth for a long time, debating the need for sashing. Sashing finally won for two reasons. . .
I like that each little block is its own composition. In some ways I liked those compositions blending into each other and creating new shapes, but ultimately I decided I like the look of a little frame around each piece.
The thought of matching all those seams (necessary if I went without sashing) made me weep.
So – sashing it is!
Adding sashing isn’t hard – just think of it as another skinny block between each of the bigger blocks. Skip the border (for now) and just think about the strips in the quilt’s interior.
We’ll start with adding the vertical strips.
I decided to make the sashing strips the same width as one finished square in the block. I think that’s a good general guideline for balance. That meant cutting them 2″ wide. If you used 1/4″ seam allowance for your sewing, the finished blocks should be 15.5″ square, so cut 15 strips each 2″ wide x 15.5″ long.
Start assembling the rows of your quilt by alternating blocks with sashing strips. Here’s one row.
Repeat until you have all five rows.
One quick tip. The problem most people have when adding sashing is that the strip is the wrong length by the time they get to the end of the line of stitching. The longer the seam, the more likely (and worse) the problem is.
Using a walking foot when you sew will help prevent this, but the best way is good old-fashioned pinning.
Start by folding your strip in half and marking the center with a pin.
Match the center of the strip to the center of the block and pin.
Match the ends of the strip with the edges of the block and pin.
Fill in the rest of the length with pins until it’s all secure and evenly distributed.
Sew the seam.
Your strip and your block should still be perfectly lined up when you get to the end of the seam.
I wrote a whole post about what I call “Divide and Conquer” for pinning long seams here.
End tip. 🙂
Now you need to sew all five rows together with strips in between them, plus strips at the top and bottom for those borders.
Cut those strips 2″ wide x 65″ wide. You’ll need six.
When you sew your rows together, it should look something like this.
Use that same pinning tip to keep everything lined up.
All you need now are the final strips for the side borders. Cut them 2″ wide x 84.5″ long. You’ll need two.
Sew those strips to the sides and your quilt top is finished!
Okay, so you’ve gone through all of that work to knit or crochet a sweater… and now it’s time to attach the buttons. How do you make sure you sew on the buttons in exactly the right spot? I’ll show you how!
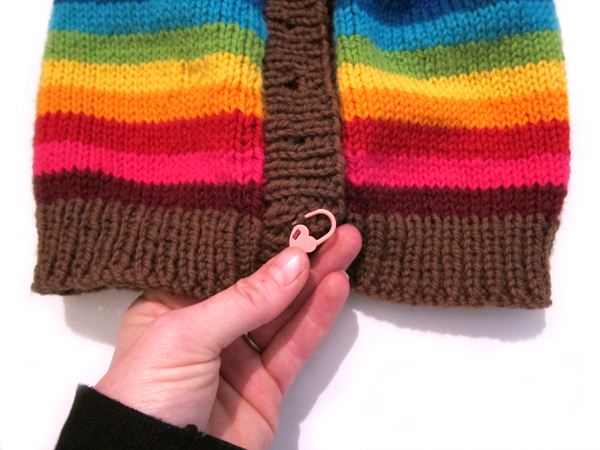
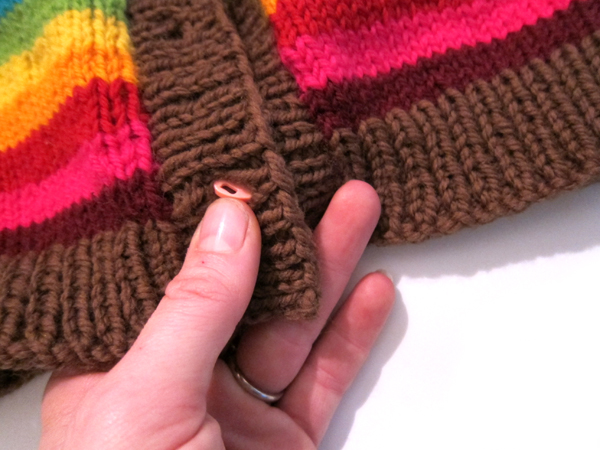
First, close your sweater so that the button band overlaps exactly how you’d want it closed when finished, with the holey side of the button band on top.
Starting at the bottom (or top), poke your locking stitch marker through the first hole, and attach to the solid side of the button band.
This stitch marker marks where your button will go! Lock the marker.
Notice that the holey side of the button band will pull off… the locking stitch marker goes right through the hole!
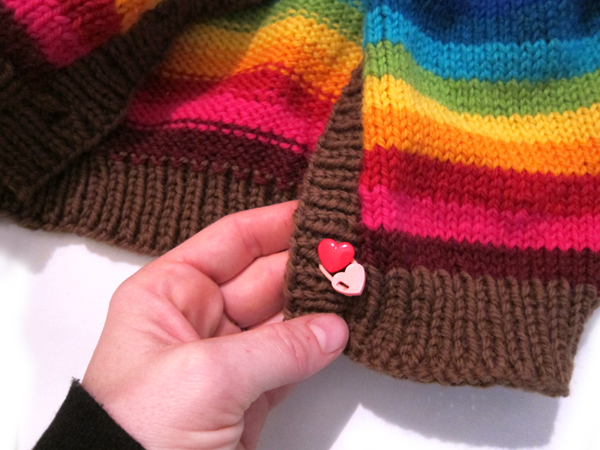
When you’re finished sewing (or at least have finished the first few, securing stitches), remove the stitch marker. It should just slip out once you unlock it.
Now it’s time for the other buttons! Repeat this trick for each button.
Each time, button up the buttons you’ve already completed so you can ensure they line up properly.
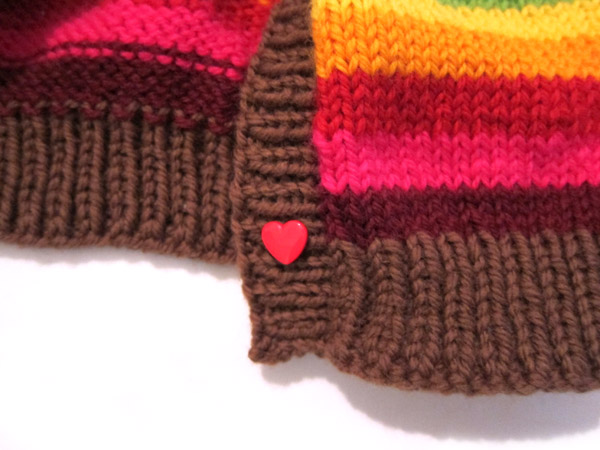
No more wonky button problems!
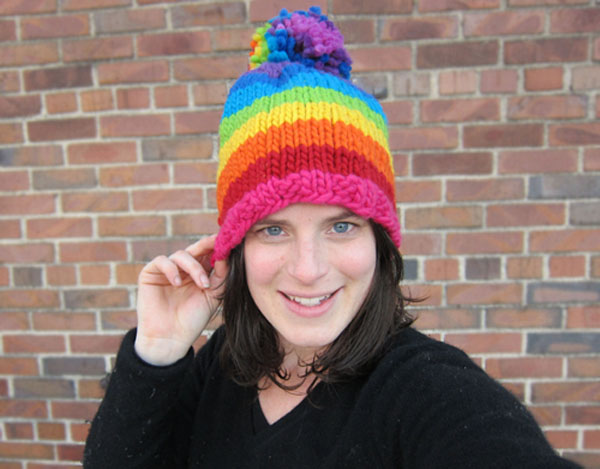
Sample sweater is Gramps knit using the Rainbow Yarn Sampler Pack.
The 2015 Christmas Collection is finished! All twelve fun and easy felt ornaments. 🙂
You’ll find two options for it in the shop. . .
The PDF pattern. All twelve patterns in one 85-page PDF. It has each pattern complete – plus the last few pages have all the pattern pieces for all the ornaments grouped for efficient printing. There’s one page to be printed on Sulky Sticky Fabri-solvy and six pages to be printed on freezer paper (grouped by color for easy ironing). Every single piece is labeled so it’s easy to group them back together again.
The PDF pattern + materials kit. It includes 10 sheets of my favorite wool-blend felt, 10 skeins of embroidery thread perfectly matched to the felt, all the pattern pieces printed out on Sulky Sticky Fabri-solvy or freezer paper (depending on what the pattern calls for), and the red and white baker’s twine I used for all the hanging loops. And, of course, you get an instant download of the entire PDF pattern. Handy dandy!
Cut a piece of fabric and a piece of batting 11″ square. Layer the fabric over the batting and quilt the two layers together.
Step 3
Roughly cut out all the pieces and fuse them to the wrong side of the fabric.
I used white felt for the snowman head, and Timeless Treasure prints for the rest of the fabrics: charcoal Sketch for the hat, red Pop for the ribbon, orange Sketch for the carrot, and solid black for the eyes.
Step 4
Hold the snowman face up to a window so you can see the face markings through the felt and mark the placement of the eyes, nose and the mouth.
Step 5
Cut out the pieces neatly on the solid lines. Where there’s a dotted line, leave a little extra seam allowance.
Step 6
Peel off the paper backing and layer the pieces on the background block. The bottom edge of the head should line up with the bottom edge of the block. The hat should overlap the top of the head.
Fuse the pieces in place.
Step 7
Stitch the edges of all the pieces down. I like to use a simple straight stitch and black thread.
This post originally appeared on November 20th, 2013. But it’s such a great cause, I’m reposting it with additional information!
What happens to a child in the foster care system when they turn 18? They’re ‘adults’, and are set out into the world alone, and without a network of family or social resources.
Sad, right?
If those kids are awesome enough to get themselves into college… who sends them care packages? Who do they call if they need an emergency $50 for a surprise textbook?
In most cases, they have no one to turn to.
Makes you sniffle, right?
That’s why I love Foster Care to Success, an organization that supports foster care children who have ‘aged out’ of the system. The organization collects money for emergency funds and runs other great drives to support this often-overlooked population.
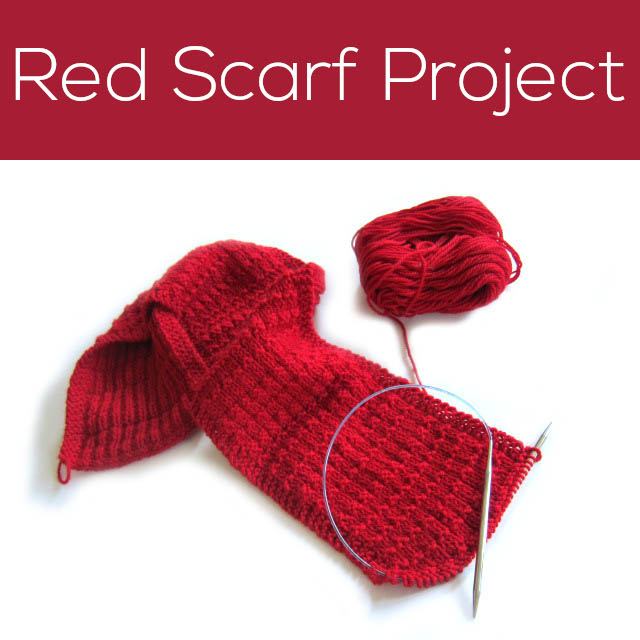
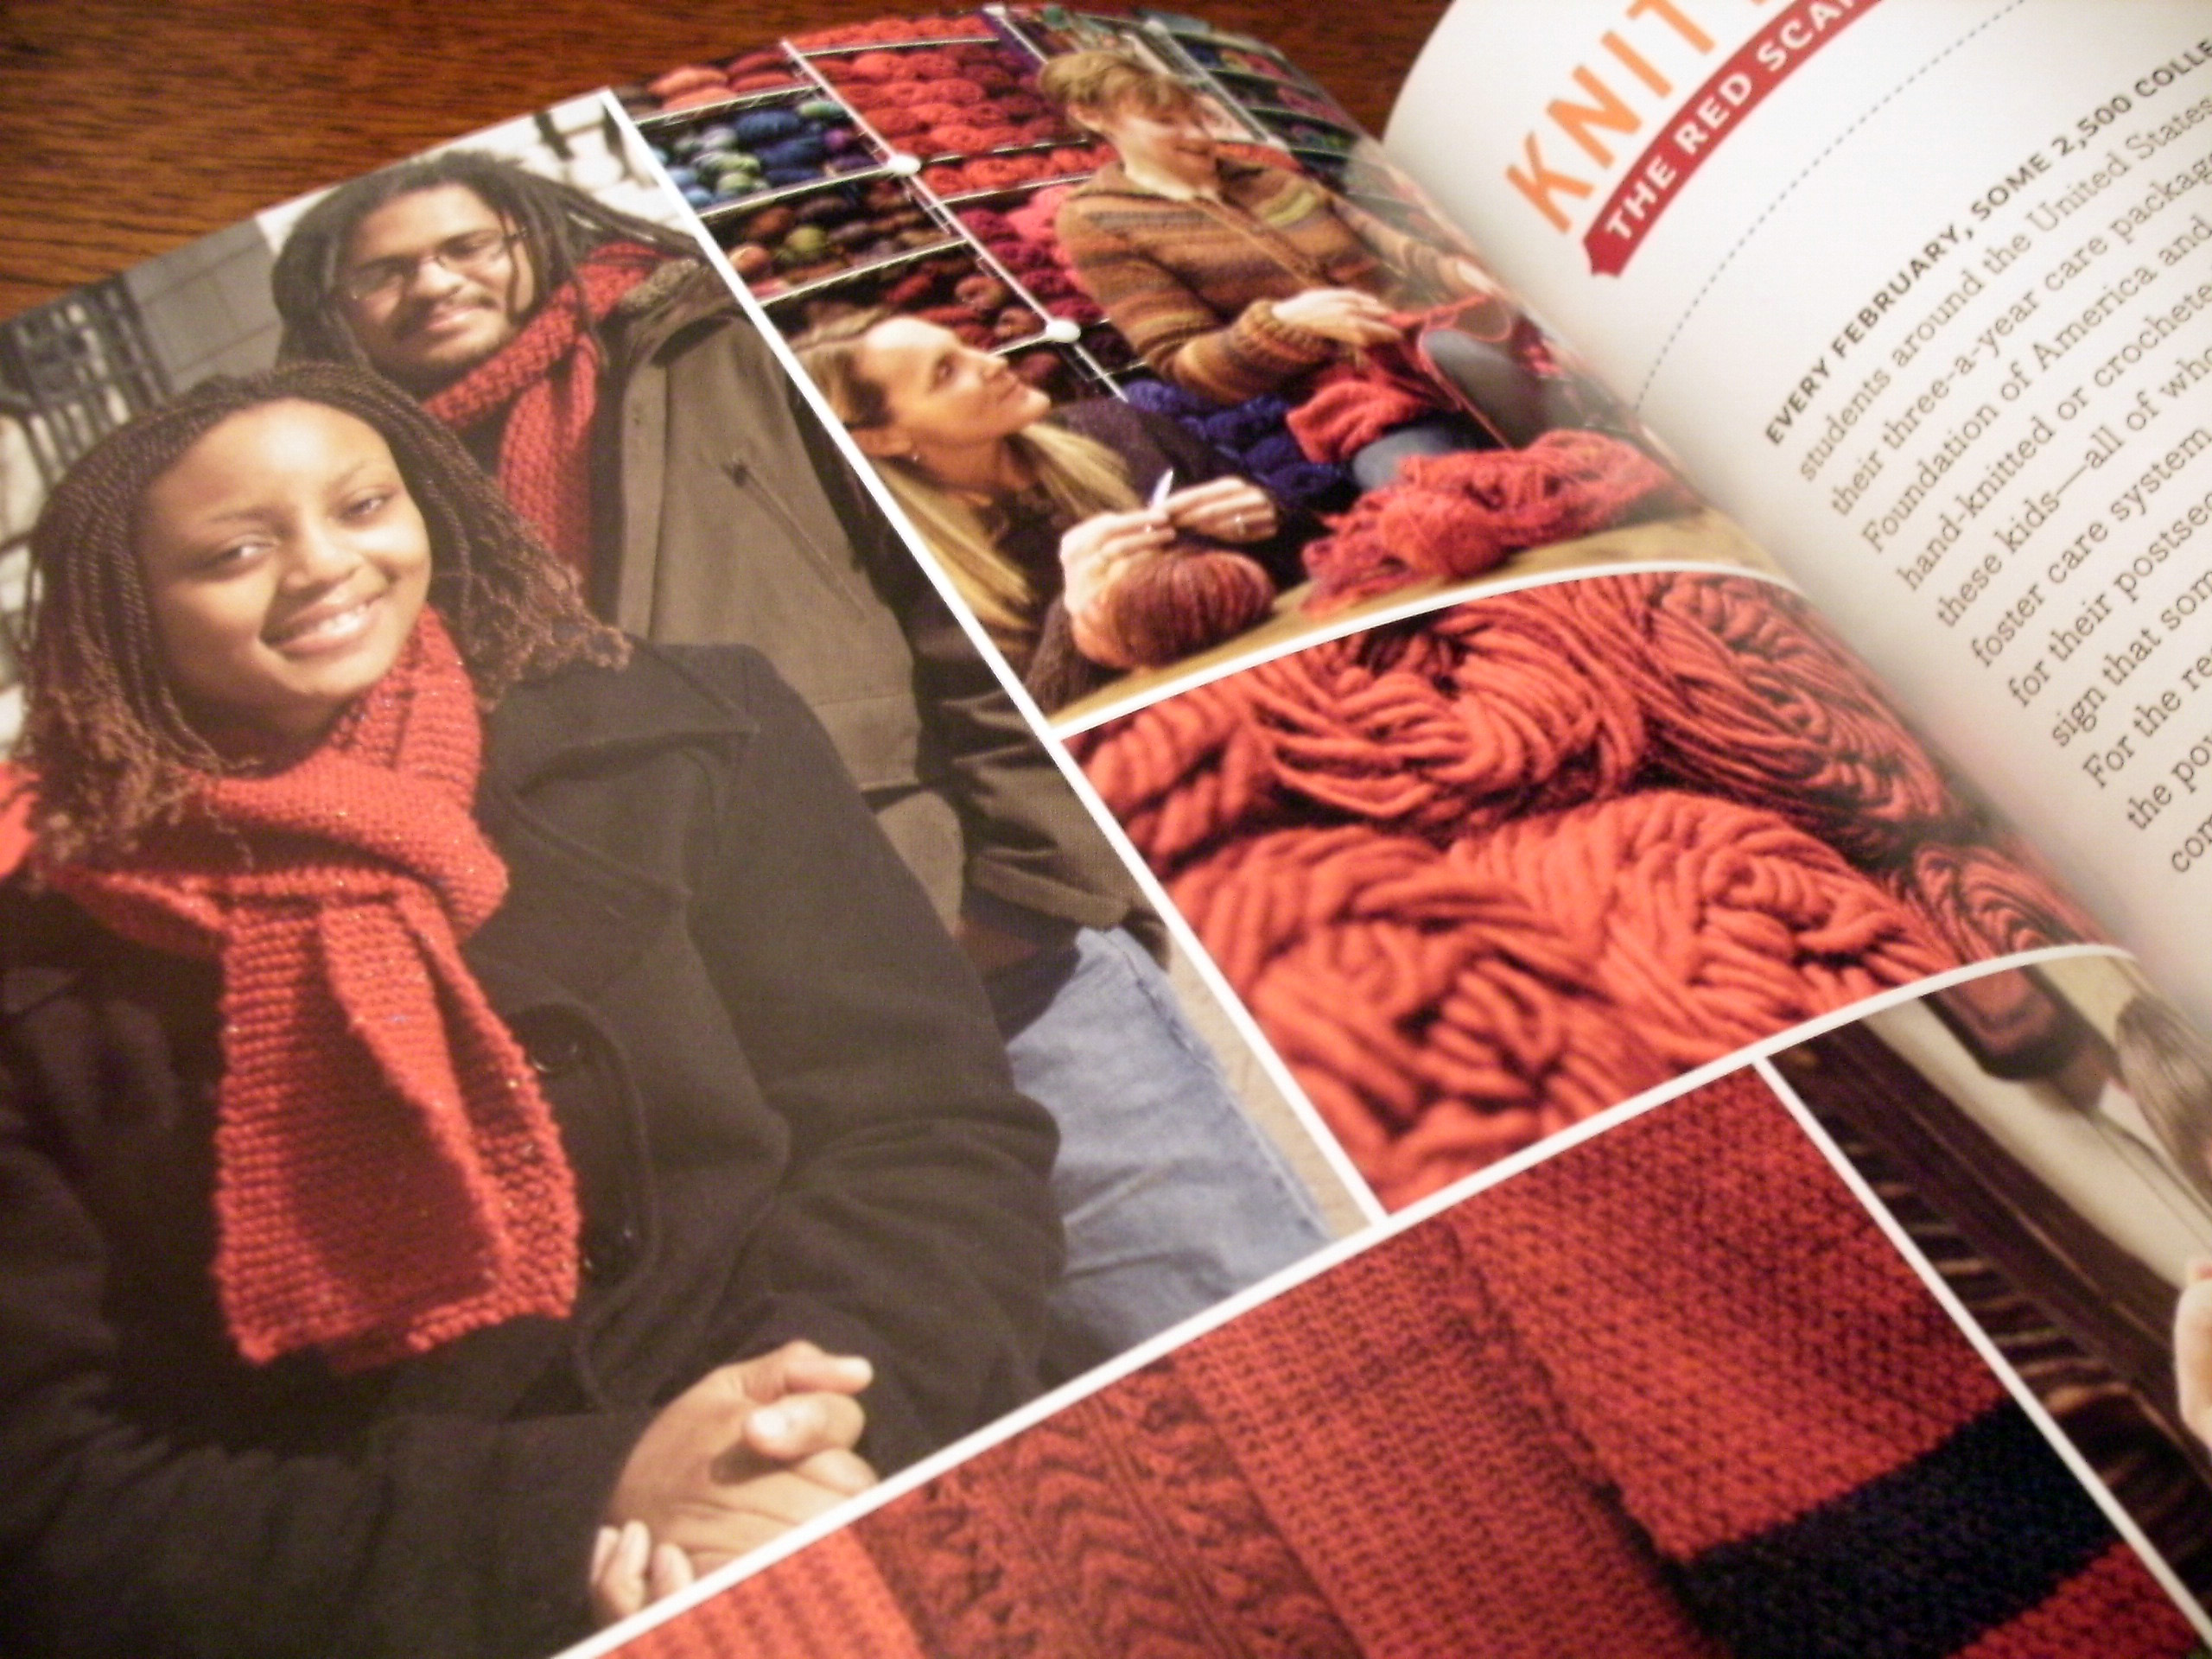
The Red Scarf Project collects scarves from September 1st – December 15th every year, and then distributes them to a foster student on Valentine’s Day.
Isn’t that sweet? Can you imagine how special you’d feel if a handmade scarf with a sweet note showed up on your door? And what a boost that would give to your semester?
That’s why I’m knitting one!
I didn’t feel like I had the time: the Kit Club packages, hosting Thanksgiving dinner, planning for the holidays… and then I told myself “Balarky! You can make the time! These college students don’t have families!”
And surprise… I’m finding the time!
Join in!
Can you spare the time?
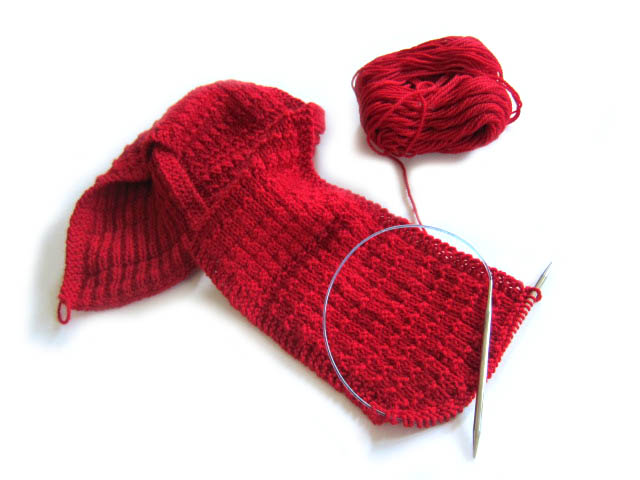
Nothing fancy is required, just a simple red knitted or crocheted scarf. Check out the guidelines, here.
This link tells you where to mail the scarves, as well as the not-too-hard guidelines (basically is red, gender neutral and about 60″ long). Pattern suggestions, too!
Sweet extras, such as a hand-written note, are welcome!
Use this simple stocking pattern with whatever embellishment you choose. Or none at all! The lined construction is easy enough for beginners, and it works with any quilt, appliqué or embroidery pattern.
Throughout most of the instructions I’m using this free Santa appliqué pattern, but you can use any decoration you like. Here’s the exact same stocking made with three different cats from this quilt pattern.
Here’s how to make the stocking. . .
Step 1
Download the stocking pattern here. The pattern pieces print on two pages. Overlap them so that the heart and the edges of the stocking line up and tape them together. There’s more info on joining pattern pieces like this here.
Step 2
Cut two rectangles 9″ wide and 19″ tall from your main fabric, your lining fabric, and 100% cotton batting. My favorite batting is Warm & Natural.
Step 3
Layer one main fabric rectangle with one batting rectangle and quilt the layers together.
I’m showing this from the back so you can really see the quilting. Any design will do – it just needs to hold the two layers together.
Repeat with the other main fabric and batting rectangles so you have two pieces.
Step 4
Layer the two quilted layers and the two lining layers right sides together and cut four stocking pieces – two main and two lining.
Step 5
Decorate the front of the stocking however you like. I used my favorite appliqué with fusible adhesive method. You can see how I do that in this video.
If you’re doing floating heads (like the cats) no adjustment is needed. Just print the pieces out at whatever size you like.
If you’re doing a head that’s cropped off at the bottom (like the Santa) you’ll need to make some adjustments because the bottom of the stocking slants.
On the original Santa appliqué pattern, the beard is cropped off at the horizontal dotted line. For the stocking I left a lot of fusible adhesive below that dotted line and fused the whole thing to the fabric. That extra fabric will accommodate the slant at the bottom of the stocking.
Arrange the pieces on the front of the stocking. Let that extra beard fabric overhang the bottom edge of the stocking.
When you’re happy with the arrangement, fuse it down, stitch around the edges, and then trim off the extra beard. You can use this same technique for any animal bodies that you want to use on the stocking from any of my quilt patterns.
Step 6
Now time to start putting the stocking together! Layer the lining pieces right sides together and sew around the edges using 1/4 inch seam allowance.
Leave the stocking top open, and also a place on the back seam for turning. The turning hole needs to be big enough to fit your hand through it.
Step 7
Layer the main stocking pieces right sides together and sew them around the edge using 1/4 inch seam allowance – just like the lining. Leave the top open, but do NOT leave a turning opening.
Turn the lining right side out. Slip it inside the stocking (the stocking should still be inside out) and line up the side seams.
Sew the stocking to the lining all the way around the top edge using 1/4 inch seam allowance.
Step 9
Turn the stocking right side out. This can be confusing if you’ve never turned a lined thing right side out before.
Start by pulling the lining out of the stocking. Then reach into the turning opening, grab the toe of the stocking, and pull the stocking right side out through that opening.
Keep pulling and the lining will start coming through too – right side out. Turn the lining completely right side out. Sew up the opening using ladder stitch, and tuck the lining down into the stocking.
Step 10
You have two options for the top edge. You can work the lining and the stocking so that the seam between them is right at the top edge of the stocking. You only see the lining if you peek inside. Press with lots of steam to set the fold.
(If you want to add a hanging loop like on this cat stocking, cut a loop of ribbon and slip it between the stocking and lining layers before you sew them together in Step 8. Be sure to catch the ends of the ribbon in the stitching as you sew those layers together.)
If you want a little bit of the lining to peek out of the top, leave the batting inside standing up (don’t fold it down) and use that as a guide to fold the lining down over it. Press with plenty of steam.
Finished!
Here’s a quick list of links to all the patterns I used. . .
The free alphabet pattern is here. I printed it at 90%. You might need to go much smaller for a significantly longer name, or arrange the letters the long way.
You could make the stocking even simpler by just using a really fun Christmas fabric – no fancification needed! Try embroidering a design instead of using appliqué. Or use a couple of leftover pieced quilt blocks for the main fabric.
Play around with this pattern! It’s completely open-ended so you can do just about anything with it!
Here are several free patterns that work with my basic 10-inch applique squares – no resizing needed!
Here are several free patterns that work with just some simple resizing. This post about making coasters has info about resizing an applique pattern that can be applied to any of these projects.