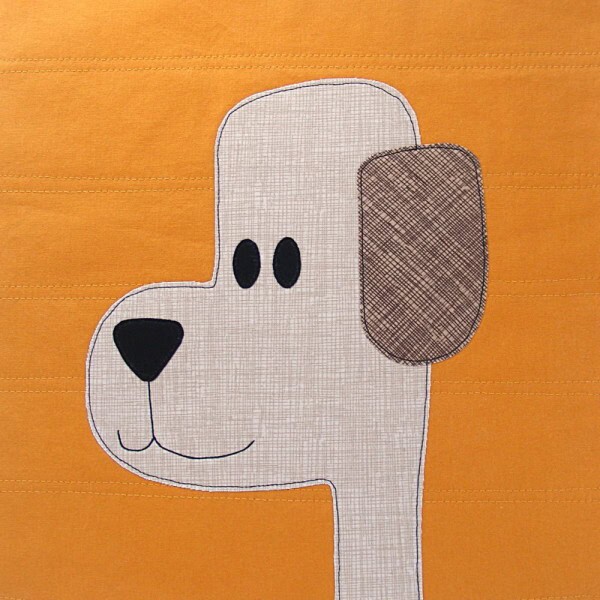
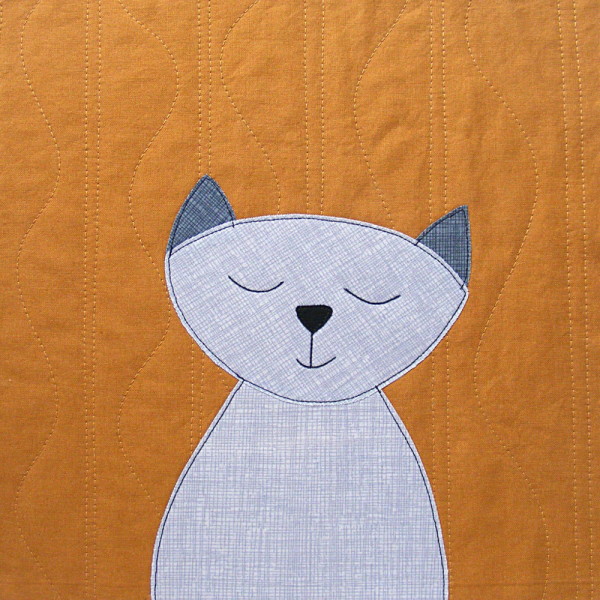
I usually use wool blend felt for the hair on my Dress Up Bunch dolls. It’s durable, easy to work with, and relatively inexpensive and it has a nice, classic look – even when I use non-traditional hair colors.
But you don’t have to use felt.
If you scroll through some of the photos in the Shiny Happy People group on Facebook you’ll find adorable dolls made with printed cotton fabric hair and cuddly fleece hair – but you can also use fun faux fur!
If you use a regular “hair-colored” fur you can make a doll with pretty realistic hair. If you use a more wild and funky fur (like the one I used) you can make a fun pixie. 🙂
Here are some tips to help you out. . .
Cut out the fur just like you would cut out the felt. Make sure the nap of the fur is running in the correct direction. To minimize flying fur bits, cut just through the fabric backing, as shown in this video – Intraux to Working with Faux Fur.
I stuck the fur piece for the bangs down to the top of the head using a glue stick, then appliqued the bangs edge with a wide and fairly open zigzag stitch.
After you get the bangs sewn in place, sew up the doll just like normal. You just need to make sure to smooth the fur into the seams. Here’s what the back of the head looks like – the fur is smoothed down between the back of the head piece and the back of the body piece.
Here’s how it looks when you clip the doll front to the doll back.
The fur on both pieces is smoothed between the layers.
Fur can be fat and difficult to pin. Sewing clips work really well with it.
And here’s my finished wild-haired pixie. 🙂
A couple more things. . .
I used Poppy’s bangs with this doll and they come down pretty close to her eyes. If you’re using a very long fur you might want to choose a doll with a higher hairline.
I skip the pigtails or the buns when I work with fur. They just don’t work very well with that fabric.
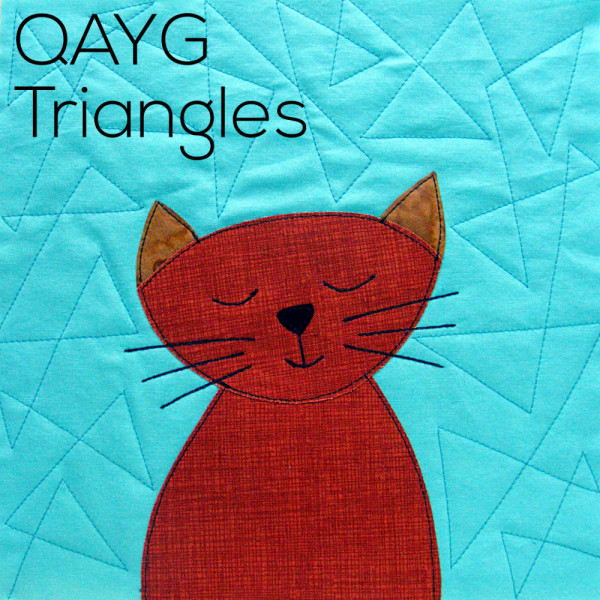
I usually follow these steps to make any of my Quilt As You Go applique quilts. . .
cut quilt blocks (and batting) 11 inches square
quilt the blocks
applique the blocks
outline stitch the applique
trim quilt blocks 10 1/2 inches square
sew the quilt blocks together
press seams open
baste to backing
quilt
bind
I’ve had several requests for more information about step 5 – specifically a video showing how to square and trim quilt blocks. It’s actually really easy – if you have the right tools.
Here’s how. . .
I don’t have very many rotary cutting rulers – but this is one that I really can’t imagine doing without. I highly recommend it if you do any quilting at all.
This is the exact ruler that I use to trim quilt blocks – the one you see in the video. It’s not inexpensive, but Joann’s always seems to have a good coupon and that can make a big difference. 🙂
For bigger quilt blocks (like the ones in this free Polaroid Quilt Block Tutorial) I use an even bigger ruler – one that’s a whopping 20 1/2 inches square! It’s a little unwieldy, so I only use it for the bigger blocks.
The Quilt As You Go lessons, videos and patterns are the most popular pages here at Shiny Happy World. That makes sense! It’s a super easy and fun way of quilting, and I don’t know of anyone else who does it quite the way I do.
Over time I’ve added a bunch of tutorials to answer questions, demonstrate specific steps, and make things as easy as possible. It’s time for one page to corral all those Quilt As You Go instructions!
If you want to work through these lessons in a systematic way, you can find them all here.
Every single lesson is free, and you can use any pattern to practice all your new skills!
I’m currently rewriting all of my patterns to these cutting instructions. . .
Cut the blocks and batting 11 inches square (or even a smidge bigger – it doesn’t have to be exact). This will give you a little wiggle room and I like wiggle room.
For half blocks (like adding words to your quilt) cut the initial blocks 11 x 6 inches. After quilting and applique, trim to 10 1/2 x 5 1/2 inches. Finished blocks will be 10 x 5 inches – exactly half the size of a full block. (Quilt Block Sizes for Alternate Grid Layouts has lots more info about half blocks and double blocks.)
Quilting Patterns
I get a lot of questions about how I quilt my blocks. Here are some specific answers. . .
I don’t baste the batting to the block. I find that the cotton fabric clings just fine to the cotton batting and I don’t have problems with shifting.
I don’t mark any of my quilting patterns – I just jump in and start doodling on the machine and it’s lots of fun.
I don’t use a special needle or thread – just a universal 80/12 needle and regular all-purpose thread.
I do set my stitch length a little longer – a 3 on my machine. I like the look of the bigger stitches and it makes the quilting go faster. 🙂
I do use a walking foot. All the quilting patterns I currently use work fine with the feed dogs and walking foot engaged – through I think this method would also work very well for people learning free motion quilting. That will be me someday. 🙂
You can watch how I do it and see a gallery of quilting pattern ideas in the following videos. . .
Piecing or Applique?
You can use QAYG for piecing or applique – but I especially love it for applique. I quilt all my blocks first, and then I applique over the quilting.
A lot of people ask – don’t the quilting lines show through your applique when you do the quilting first?
I’ve done a lot of experimenting with that and I’ve gotten to a place where that almost never ever happens. Here’s what to do. . .
Use 100% cotton fabric. The worst show through I’ve had is when I’ve accidentally used a piece of mystery fabric that turned out to have synthetic content. 🙁
Iron your quilted block nice and smooth and let it cool without moving before adding your applique. It’s an extra step, but it only takes a few seconds and it makes a big difference.
If you’re really worried about it, you can do the quilting after you applique. I give tips on that for lots of different patterns in these videos.
I usually outline all my pieces with all-purpose black thread and a simple straight stitch. I love the slightly cartoony look and I think it works well with the style of my applique designs.
Of course, you can use any decorative stitching you choose if that’s the look you want! I’m more likely to stick with the straight stitch and use a thicker thread if I want a heavier line. Read more about playing with different thread weights here.
I press my seams open to eliminate bulk. You do NOT need to trim the batting out of the seam allowance. That would very quickly turn this into a not-fun technique. 😛
Baste your finished quilt top to your back using whatever method you like. I have had nightmare experiences with spray basting, so I stick to pins. You can see how I baste a quilt here.
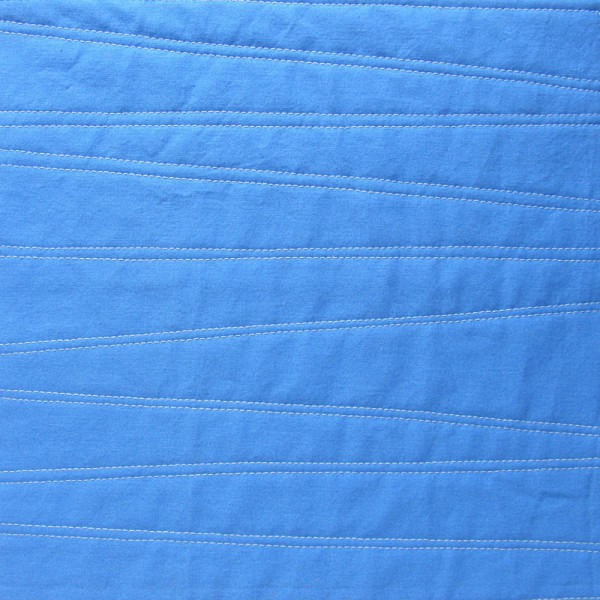
Quilt the top to the backing just along the major seam lines. Sometimes I stitch in the ditch using a straight stitch, sometimes I stitch 1/4″ to each side of my major seams. Sometimes I use a zigzag or decorative stitch to quilt those seams. All of those options work equally well.
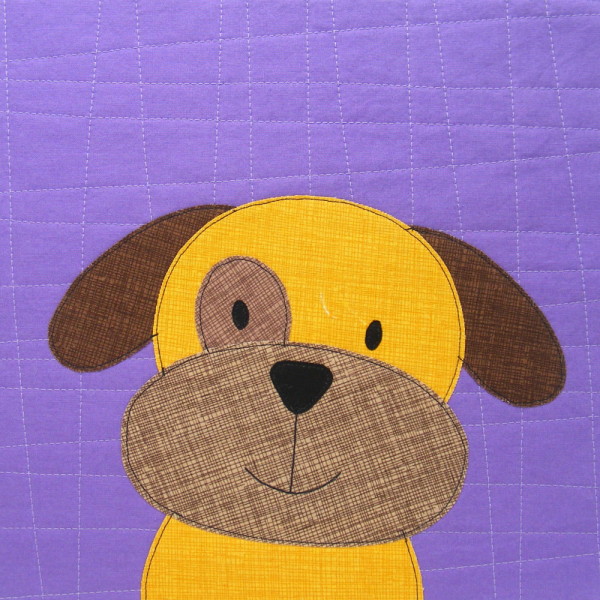
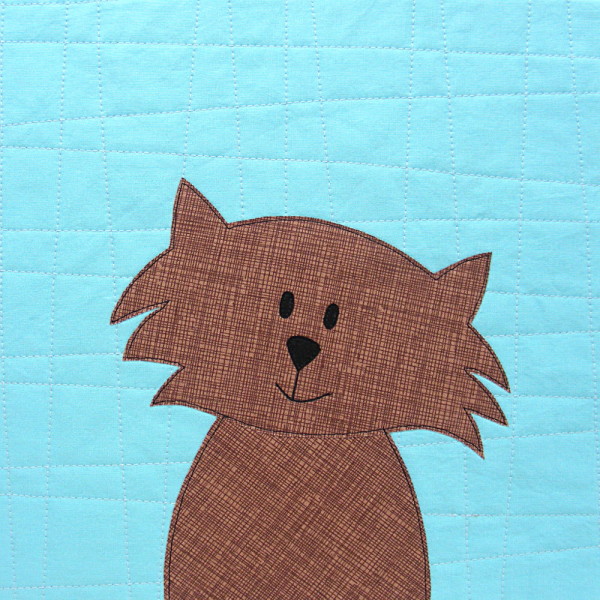
I’m putting the finishing touches on the new house block patterns going out this weekend and I thought I’d share a look at all my house blocks so far. Remember – I’m working on three different house quilts in three different styles and color palettes. Most people in the club are only making one. 🙂
Up top is my whimsical neighborhood – with houses in colors that most people don’t use in real life. I love them! There’s an extra house in this group because it’s what I used to make the video demo showing how to put everything together. 🙂
This is my more conventional neighborhood. The houses are still wonky and fun, but the colors are more like what you’d see driving down the streets of an actual neighborhood.
And this is my gingerbread quilt. 🙂 All the houses are gingerbread color with candy trim and lots of extras – like beading, extra stitching, buttons, and rickrack “snow” on the roof.
I’m having so much fun with these blocks! And it’s been absolutely fantastic to see the houses that members are making! Pop into the Shiny Happy People group on Facebook to see! Here’s just one fabulous example – this one from Terri.
Want to join the club? It’s never too late! If you sign up now you get instant access to all the pattern pieces and all the emails that have gone out so far. The next mailing goes out this Sunday 4/3.
Updated – The club has finished, so if you order the pattern now you get it all in one big download.
This post contains affiliate links. That means I make a little commission if you buy something after clicking through. All affiliate links are marked with an *.
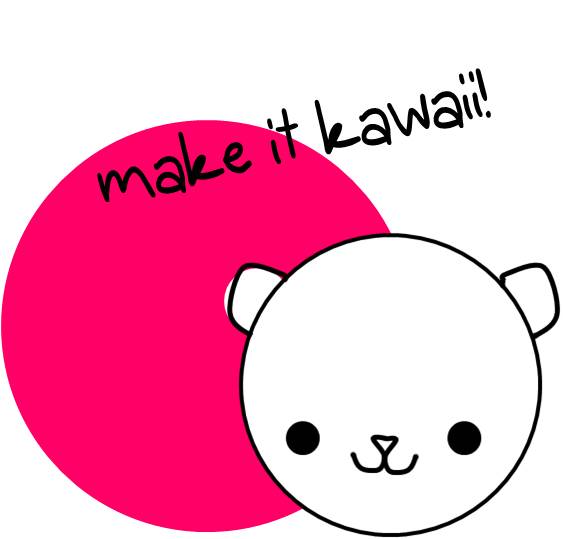
Kawaii means ‘cute’ in Japanese, and when it comes to amigurumi… there’s a lot in the face!
I make most of my amigurumi as bigger plush toys, that are cute… but not super cutesy. Real human people have their eyes at the halfway point of their face, and this is where I put a lot of my animal’s eyes:
Cute, right?
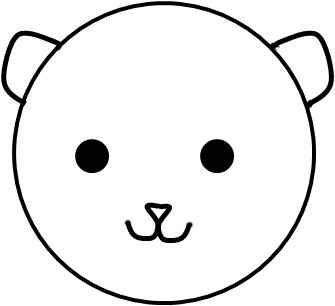
I’ve drawn up a little graphic of what it looks like to put eyes at the halfway point on a sample bear:
But what if you want to make your amigurumi even CUTER? Even more kawaii?
Try putting the eyes even lower on the face, and spaced further apart! Check out this cutie!
Even cuter! Squee!
Play around with eye placement on your next stuffed animal!
In these Quilt As You Go videos I showed the lines I was stitching on paper. I did this so you could get a bird’s-eye overview of the whole block, and also so you could see how to quilt around the applique, in case you choose to do things in that order. (I like to do my quilting first, then applique over it – but you can do it either way.)
But I’ve had several people ask for a video showing exactly how I sew these patterns at the machine. They want to know. . .
What kind of needle are you using?
How are you basting the block? Pins? Spray baste?
Are you using special thread?
What stitch length are you using?
What are you using to mark the lines?
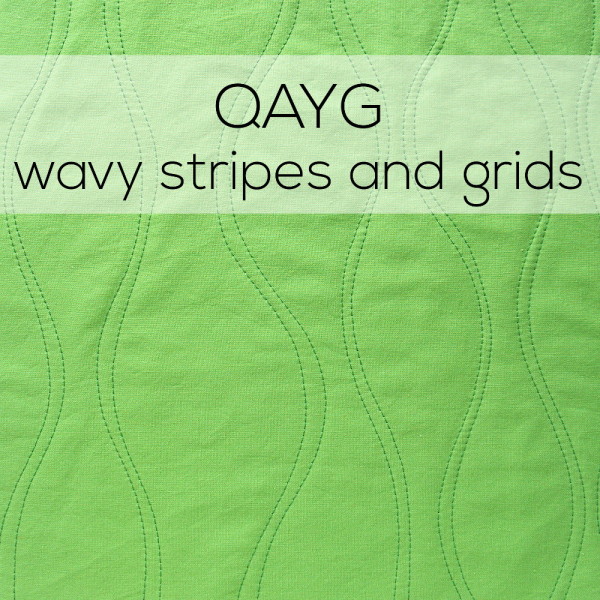
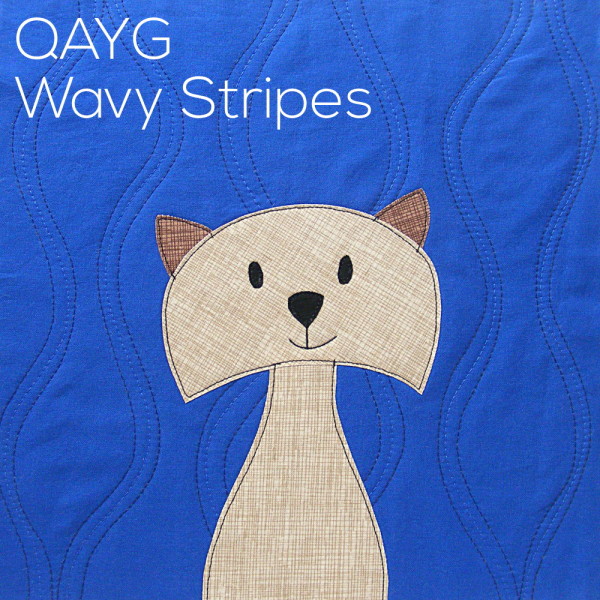
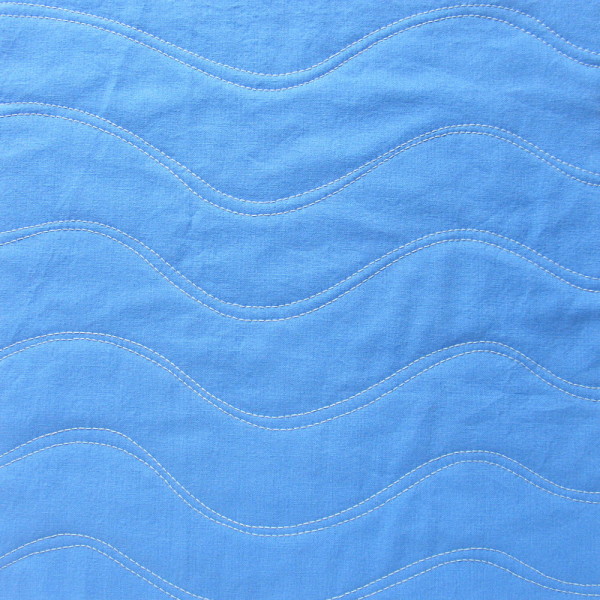
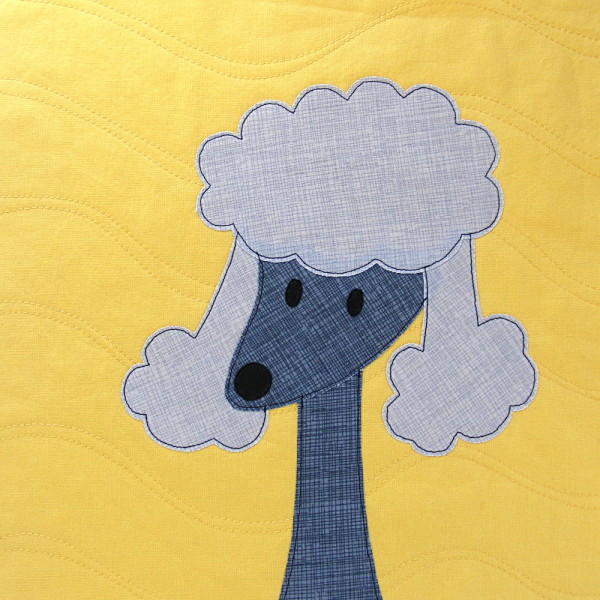
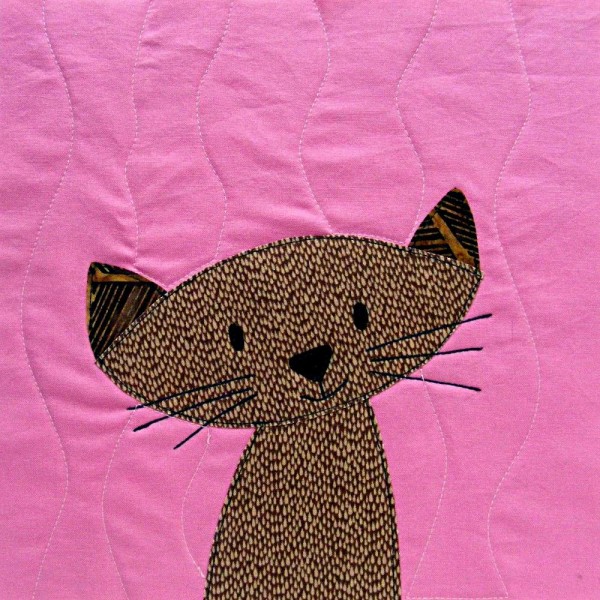
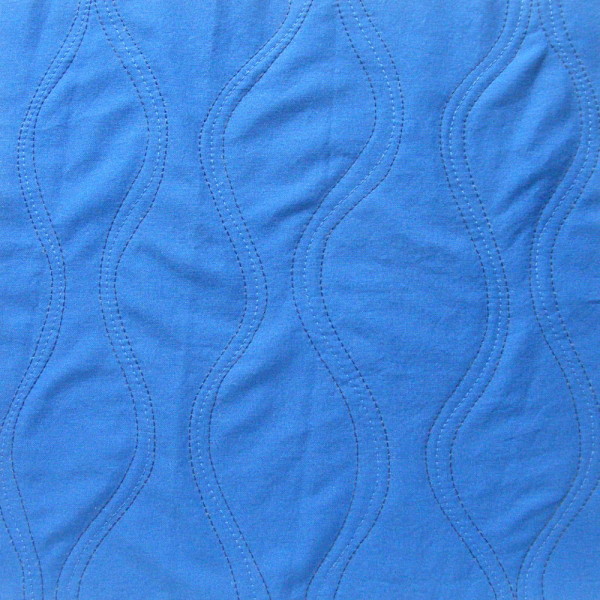
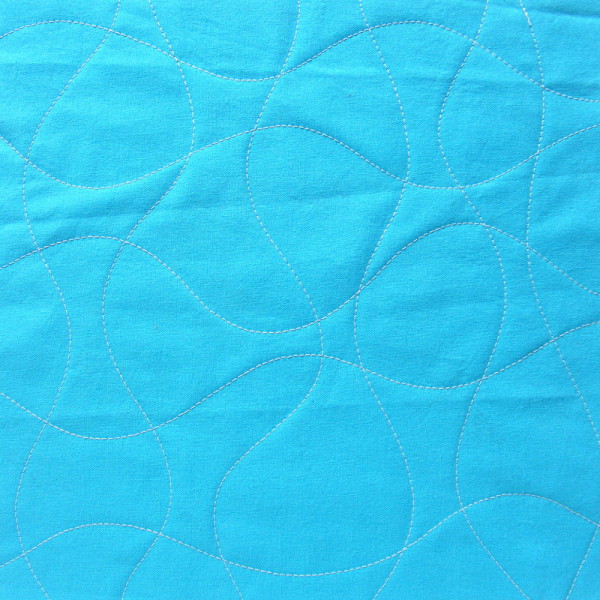
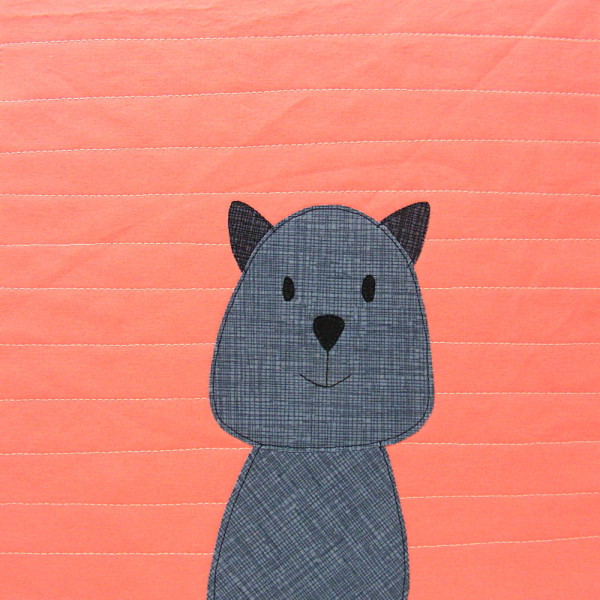
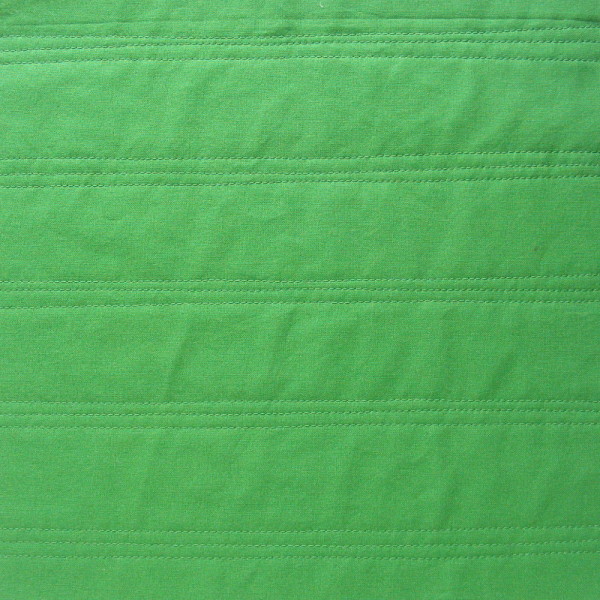
So here’s a video with all those answers! This one shows how I do Quilt As You Go with wavy lines – all the wavy stripes and grids that I love so much.
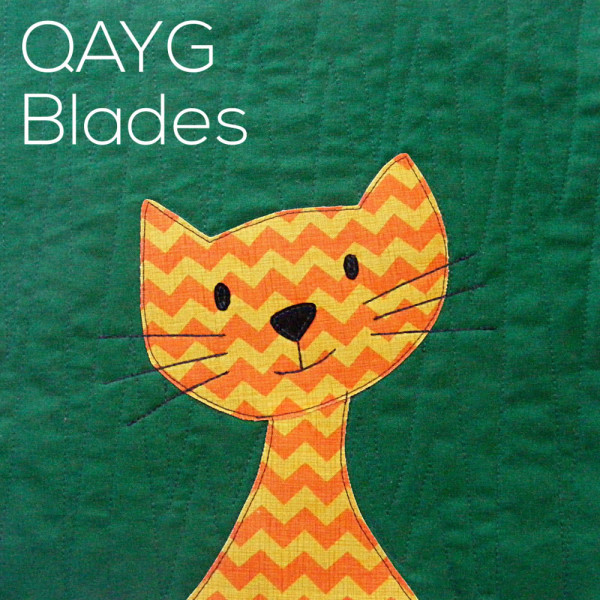
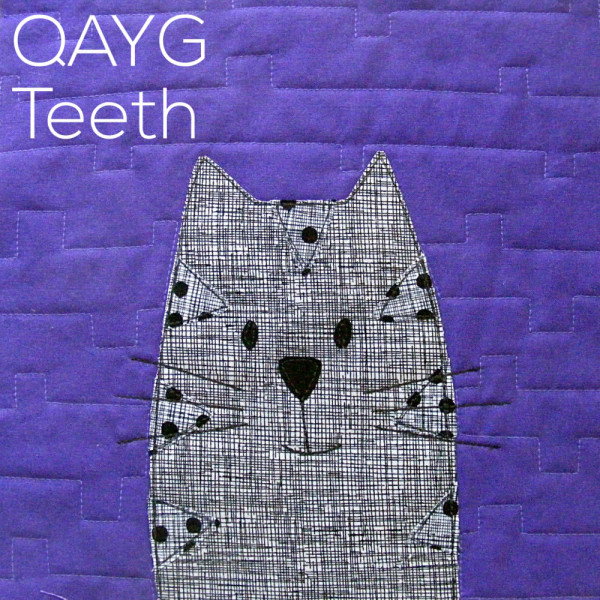
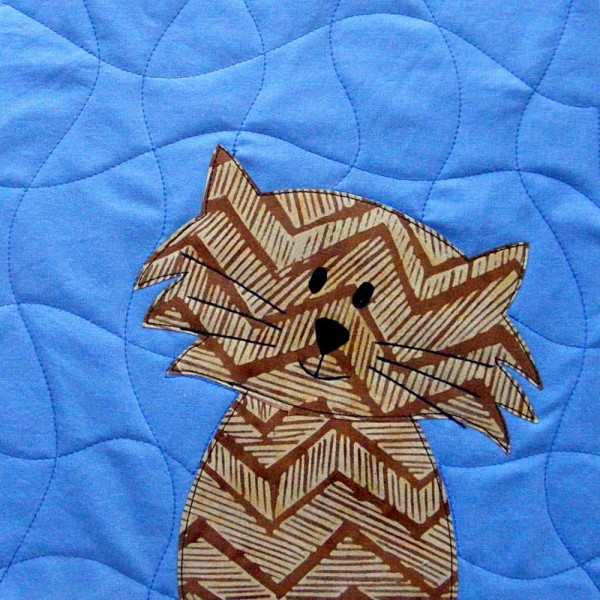
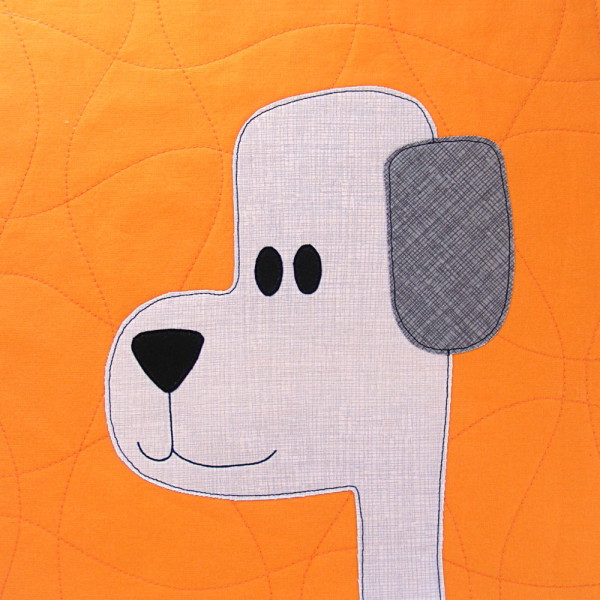
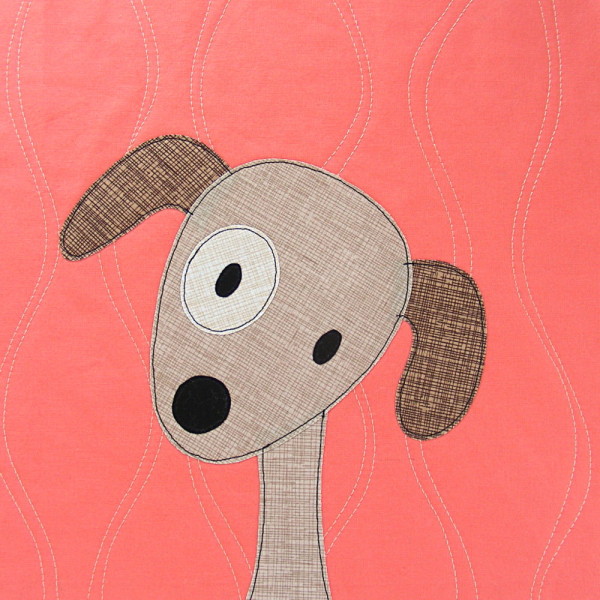
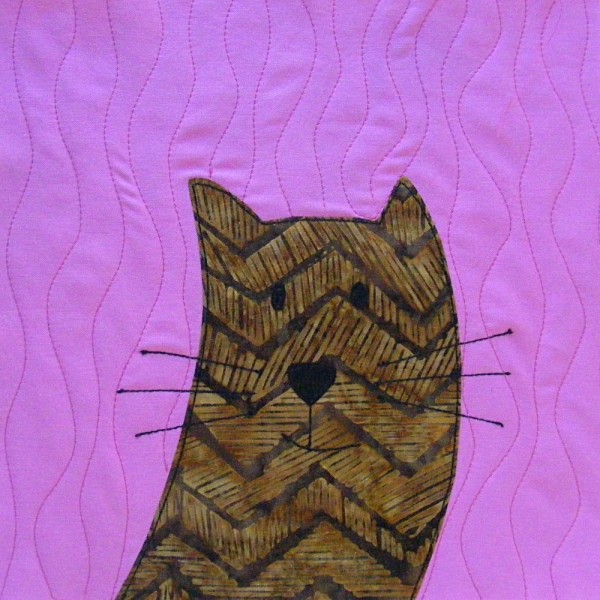
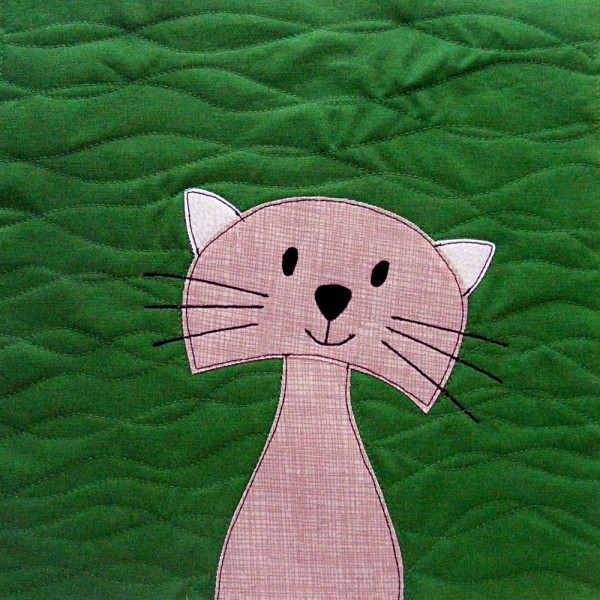
In the video I promised to show a gallery of quilt as you go designs – a menu of sorts that you can refer to when you’re looking for ideas. Here that is. If you click on any image you can see it a little bigger.
I almost always quilt my blocks before I applique. Some of these blocks are shown after the applique is added, but I did the quilting first. You can do it in any order you like, but if you quilt after you applique you have to go around the shapes.
Ready? Jump in and have fun! Quilt as you go makes your quilting super fun and easy.
But I’ve had several people ask for a video showing exactly how I sew these patterns at the machine. They want to know. . .
What kind of needle are you using?
How are you basting the block? Pins? Spray baste?
Are you using special thread?
What stitch length are you using?
What are you using to mark the lines?
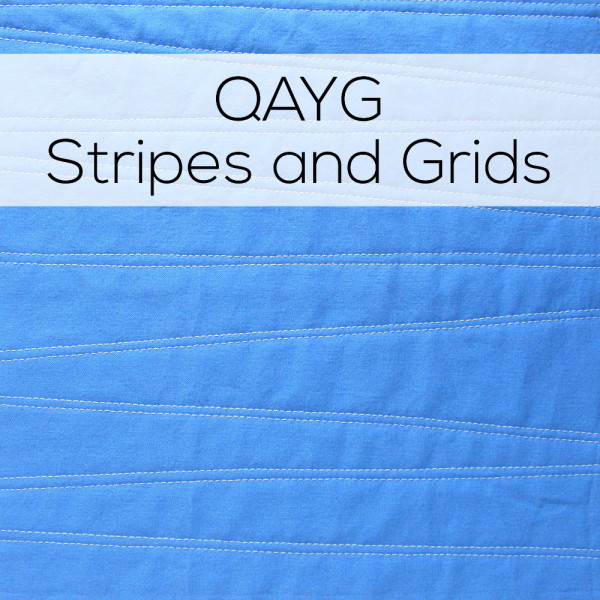
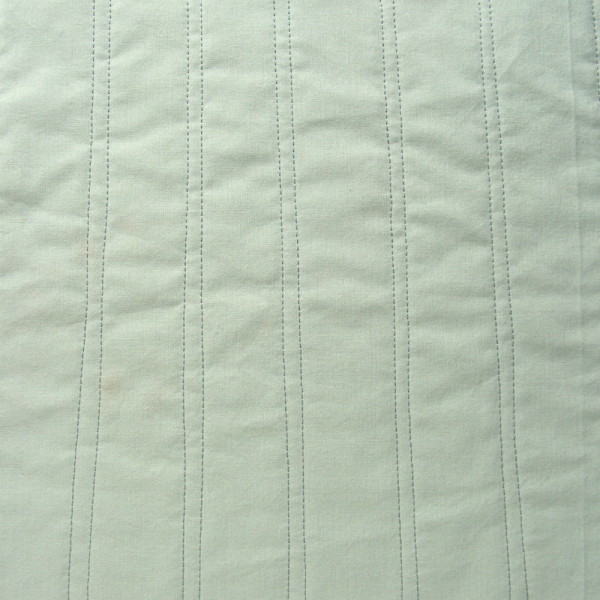
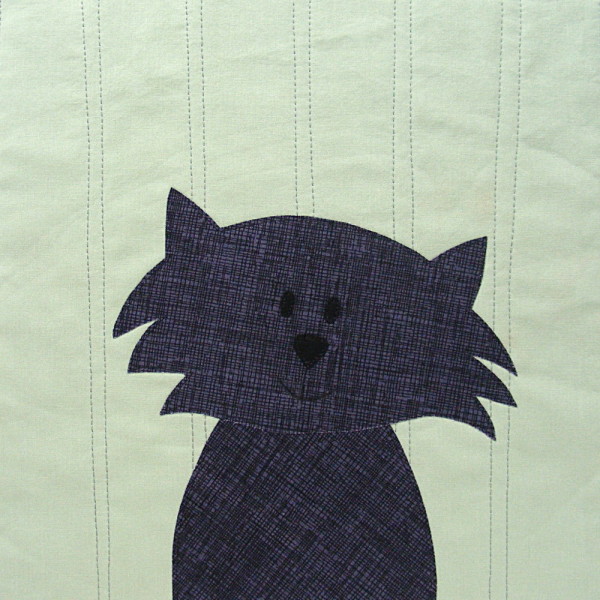
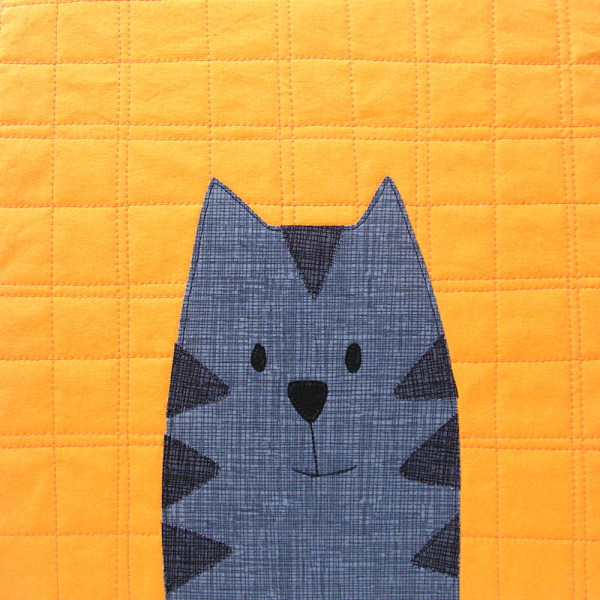
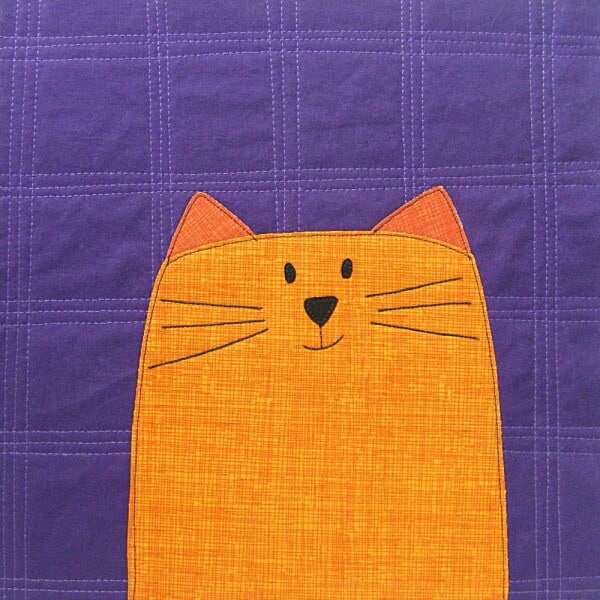
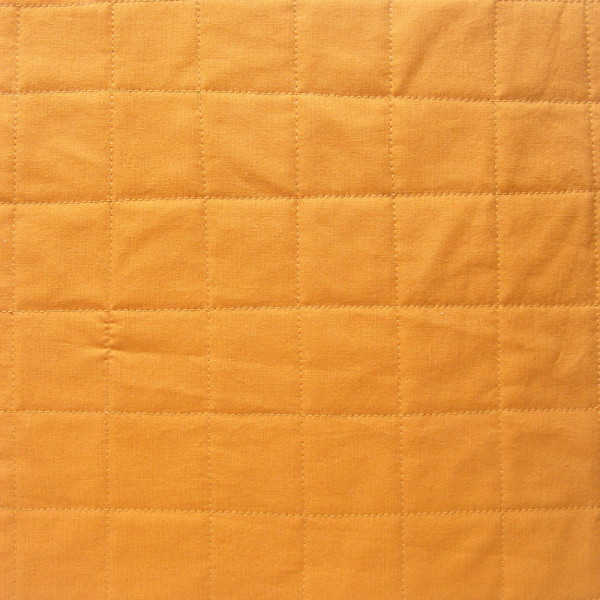
So here’s a video with all those answers! This one shows how I do Quilt As You Go with straight lines – all the basic stripes and grids that I love so much.
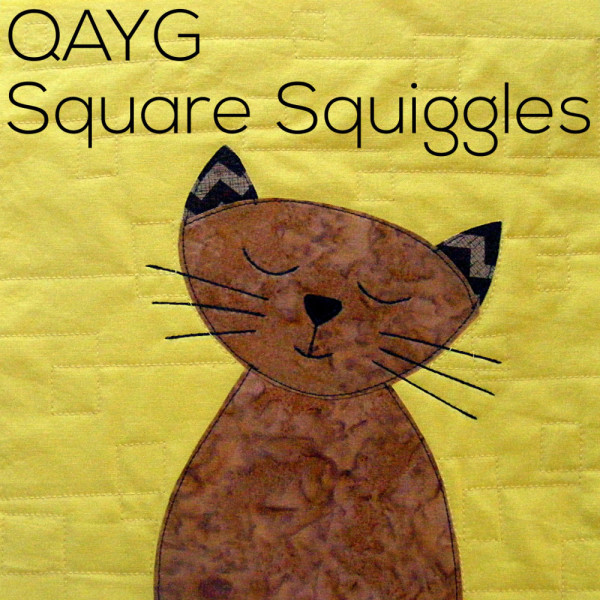
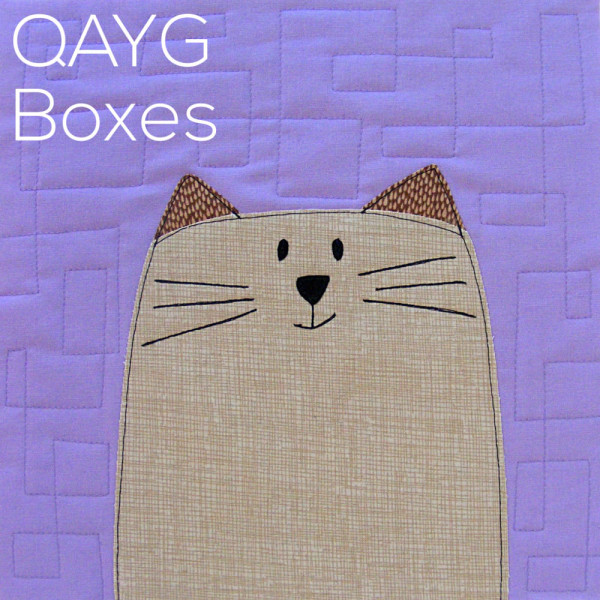
In the video I promised to show a gallery of quilt as you go designs – a menu of sorts that you can refer to when you’re looking for ideas. Here that is. If you click on any image you can see it a little bigger.
I almost always quilt my blocks before I applique. Some of these blocks are shown after the applique is added, but I did the quilting first. You can do it in any order you like, but if you quilt after you applique you have to go around the shapes. I show more about how to do that in this gallery of QAYG videos.
Ready? Jump in and have fun! Quilt as You Go stripes and grids are super fun and easy. 🙂
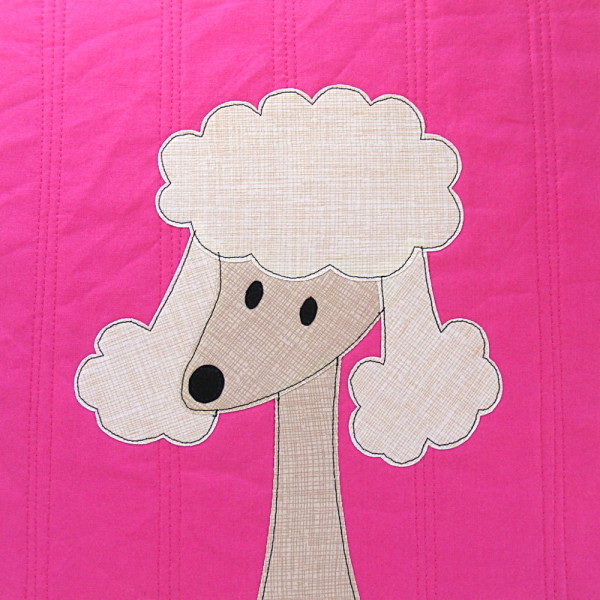
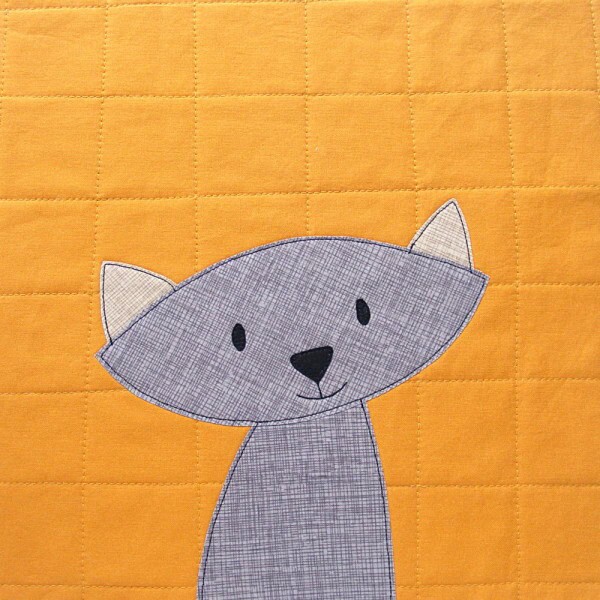
Did you know I have a class on Craftsy? (now called Bluprint) It’s called Fusible Applique Made Easy. You get the pattern for the Woodland Critters quilt you see behind me. That pattern on its own is a $14.99 value! But you also get videos showing . . .
How I choose fabric
How I true up my fabric and cut background blocks
How I quilt my blocks before adding applique
Fusible applique basics – my favorite products and how to use them
How I assemble every single block in the pattern
My tricks for marking faces and how to handle overlapping bits
Lots and lots of options for doing the eyes (the hardest bit)
How I outline stitch all the pieces
Fancy stitching options
How to appliqué on knits (you’ll see me appliqué a fox on an adorable baby onesie)
How to join those already-quilted blocks
How to back the quilt and finish quilting it
How to bind the quilt
It’s a terrific value!
Instead of showing you the quilts I made with the pattern, I thought I’d share some outstanding finished quilts and comments from students in the class. It has an average rating of 5 stars!
Suebee made this beauty. She writes. . .
Thank you so much for this class! I had a blast and am sure that I will using the techniques you have taught many more times! In fact, I have already started one of your flower quilts for my granddaughter!
Starbank64 made this lovely quilt. She writes. . .
So LOVED this class! I finished and learned a lot of nifty techniques. Thanks Wendi for sharing. I now have the knowledge and confidence to proceed with different appliqué quilts. ps thanks for the moose design will definitely go into the next woodland quilt, there will be another!
Look at the Woodland Critters quilt France Houde made! She even used the fox block as a starting point to create a skunk block! She writes. . .
This was so wonderful to have done this quilt. My first one in my life, and my daughter loves it very much. Thank you!!! When we went to the store to choose the backing & the binding, the person at the store asked us to participate to a quilting exposition, as they never saw a quilt like this before.
I love this quilt that gorillamama made. She added the moose, Buzz and the butterfly (three free applique patterns) and the mouse from the Noisy Farm quilt. I love it when people mix and match like that! She writes. . .
Best. Class. Ever! Learned so much, had tons of fun, and ended up with a project that I feel so happy to have made! Thank you so much, Wendi! You’re the bee’s knees!
If you want a tiny taste of what the class will be like and what kind of view you’ll have – watch this video.
Click here to read about why I love online craft classes – and the Craftsy platform in particular. In a nutshell – you can take the class any time you like and watch it as many times as you need to – and you always have a front row seat with a terrific view. 🙂
I’m especially proud of how many people made their very first quilt with this class!
You (yes, you!) can stitch up a lovely felt egg just like this one. What do you need? Some felt. Preferably wool felt. It’s dreamy to stitch on and you can find it in hundreds of gorgeous colors.
You’ll need embroidery thread. Use any colors you like – either an assortment of colors like the sample above, or one color for a very simple, classic egg.
You’ll need a needle. I stitched my sample with three strands of thread – for that I recommend a #5 or a #8 embroidery needle.
You’ll need the pattern – of course. Download that here. It’s full-sized, so no enlarging needed.
You’ll need a bit of stuffing. A handful of cotton balls will do the trick.
Finally, there are a couple of optional items that I strongly recommend to make your stitchy life better. Sulky Sticky Fabri-solvy is fantastic for transferring patterns to felt (as you’ll see below) and Thread Heaven just makes your thread behave really nicely.
You can find a list of my favorite tools and supplies (with links to sources) here.
Rough cut around each piece and stick it to the felt.
Step 3
Embroider the design. You’ll be stitching right through both the stabilizer and the felt. I used a combination of the following stitches – the links below take you to videos teaching you how to do them if you’re new to embroidery.
I used three strands of thread for all my stitching. It’s all white thread on Norwegian blue felt. The top sample used straw felt.
Repeat for all four wedge shapes.
Step 4
After you’re done with all the embroidery, cut the four pieces out neatly on the outline.
Step 5
Soak off the stabilizer. This is the magical part! Drop the pieces face down in a bowl of cold water and let them sit there for about an hour. The stabilizer will get all mushy and soft. Rinse it off under cold running water. If any bits are stubborn, just hit them with a kitchen sprayer and that should do the trick. Don’t rub the surface of the felt – just let the running water do its thing.
Set them flat on a towel and let them dry. Don’t wring them out, twist them, or even smoosh them. Just lay them sopping wet on a towel and let them dry.
Step 6
Place two egg pieces wrong sides together and stitch them together along one edge. I used running stitch, which leaves a nice ridge that I like along the seams of the egg. If you want a smoother finish you can use whipstitch instead.
Repeat for the second pair of pieces.
It’s easy to mix up the ends – one is a little pointer than the other and has a bit more lattice. Make sure you put matching ends together.
Step 7
Put your pairs together (make sure the matching ends are together) and sew the last two seams. Leave a couple of inches of the last seam open for stuffing.
It will be easiest to sew your egg together if you let it collapse into a deflated football kind of shape.
If you like this free pattern, sign up for the Shiny Happy News! Subscribers get a weekly newsletter full of sewing tips and tricks, free patterns, special discounts, and other things to make you smile. 🙂
New easy (and free!) doll clothes patterns for the Dress Up Bunch!
I redesigned the Play Clothes pattern for the Dress Up Bunch to get rid of the set-in sleeves and fussy collar facing on the shirt. Yay! The new shirt is so much easier to make!
These are the basic doll clothes patterns that are included with all of the human dolls so I was looking at replacing it in Every Single Doll Pattern – which would take forever. Instead I decided to just make it free for everyone!
Use 1/4″ for all seam allowances unless otherwise noted.
Doll Shirt Pattern
Step 1
Join the 2 shirt pattern pieces into one and cut it out. Place the shirt and shirt lining fabric right sides together and cut the single shirt pattern piece out of them at the same time. That way the pieces lines up perfectly. 🙂 .
It’s a weird-looking pattern. Here are some quick labels to help you make sense of it.
Please note! This pattern only works with non-directional fabric. Since it’s all one piece, whatever is right side up on the front will be upside down on the back – so choose something that looks good both ways. Those fizzy, swirly polkadots are from the perfectly-named Pop collection from Timeless Treasures, and the shirt lining and shorts are in my favorite Sketch.
Step 2
Sew the main shirt and lining (right sides together) up one front side, around the neck, and down the other side. Clip the curves and corners.
Carefully smooth out the curve around the neck, poke out the corners, and press. From this point on you’ll treat the two layers of fabric as one.
Step 4
Hem the sleeves. Turn up the raw edge 1/4” and press. Turn it up another 1/4” and press. Stitch the hem in place.
You can hem to the outside, so the contrasting lining shows (like I did) or hem to the inside for a more traditional finish.
Here’s a closer look at one of my sleeve hems.
Here’s a little trick so you don’t have to measure that skinny 1/4 inch. Sew the two layers together 1/4” from the raw edge. Use that stitching line as a guide for turning up the first 1/4.” No measuring! Then turn the second 1/4” and stitch.
Step 5
With the shirt inside out, sew the underarm/side seam.
Start sewing at the armhole so that edge is perfectly lined up and finish at the shirt bottom. Any unevenness there will be hidden once it’s hemmed. Clip the seam allowance in the curve.
Step 6
Turn the shirt right side out and press.
Almost finished!
Step 7
Hem the shirt bottom the same way you did the sleeves in Step 4.
Sew the center back seam using 1/4″ seam allowance.
If you want critters with tails to be able to wear the shorts, leave the tail opening (as marked on the pattern piece) unstitched. Make sure to backstitch at the top and bottom of the opening.
Step 3
Press the center back seam open.
If you are leaving a tail opening, stitch a box around the opening to stabilize it.
Step 4
Start to make the casing for the elastic. Turn the raw edge at the top of the shorts down 1/2″. Press. Turn it down another 1/2″. Press.
Don’t sew this yet. It’s just easier to measure and press when it’s one flat piece.
Step 5
Unfold the casing creases you made in Step 4.
Match up the center front edges and sew, using 1/4″ seam allowance.
Step 6
Refold the casing creases and stitch it down almost all the way around the top of the shorts.
Leave a couple of inches open at the center back seam so you can get the elastic in.
Step 7
Cut a 12″ piece of 3/8″ elastic and thread it through the casing. Overlap the ends of the elastic 1 inch and sew them together. Slip the stitched elastic up into the casing and finish sewing the casing closed.
Sew up the inseam/crotch of the shorts using 1/4″ seam allowance.
Press anything you can get to with the iron. 🙂
Finished!
And here’s a view from the back.
It’s Spot the Puppy wearing these and he likes to have room for his tail to wag. 🙂
So there you have it – three basic doll clothes patterns – all super easy and free. The shirt, skirt and shorts will fit any of the Dress Up Bunch dolls.
Happy sewing!
Best, Wendi
The Dress Up Bunch is a collection of cute and cuddly rag dolls. Get patterns for the dolls, plus all their fun outfits and accessories!