It’s been a little while since I released an embroidery pattern – and now you know why! I’ve been working on this set of four free patterns – commissioned by Sulky, the maker of the thread I used. I posted a review of the Sulky thread here.
Now they’re ready to see the world – and you can make them!
All the samples are framed in 5-inch hoops but you can easily enlarge or reduce the patterns to be any size you like.
Tweet
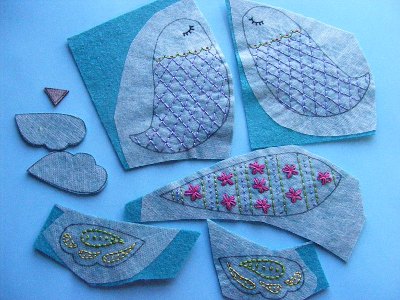
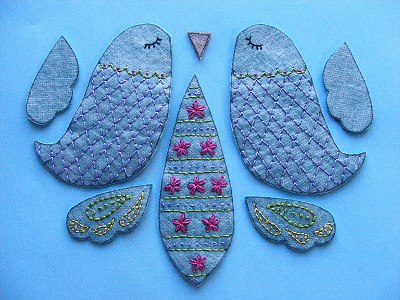
Tweet is a very pretty bird whose stitching looks more complicated than it actually is.
It uses just five very basic embroidery stitches!
If you’re just learning how to embroider, this is a terrific pattern to start with.
This single flower is a great way to practice your French knots. I love using them all clustered together as a fill stitch, like in the center of this flower.
I used variegated thread for a nice mottled effect without needing to change thread.
You’re not scared of French knots, are you? I used to be – but then I figured out The Trick and now I get a perfect knot every time. Watch this video and learn how.
She uses just five embroidery stitches – all of them very basic.
My favorite part is the polkadots outlined in a contrasting color. That seems like a tricky extra step – but it actually helps cover up any raggedy edges on your satin stitches. ***shhh. . . don’t tell***
Like all patterns from Shiny Happy World, the pattern has links to videos teaching you all the stitches and techniques used. And you can sell anything you make using the pattern – as long as you make it yourself. 🙂
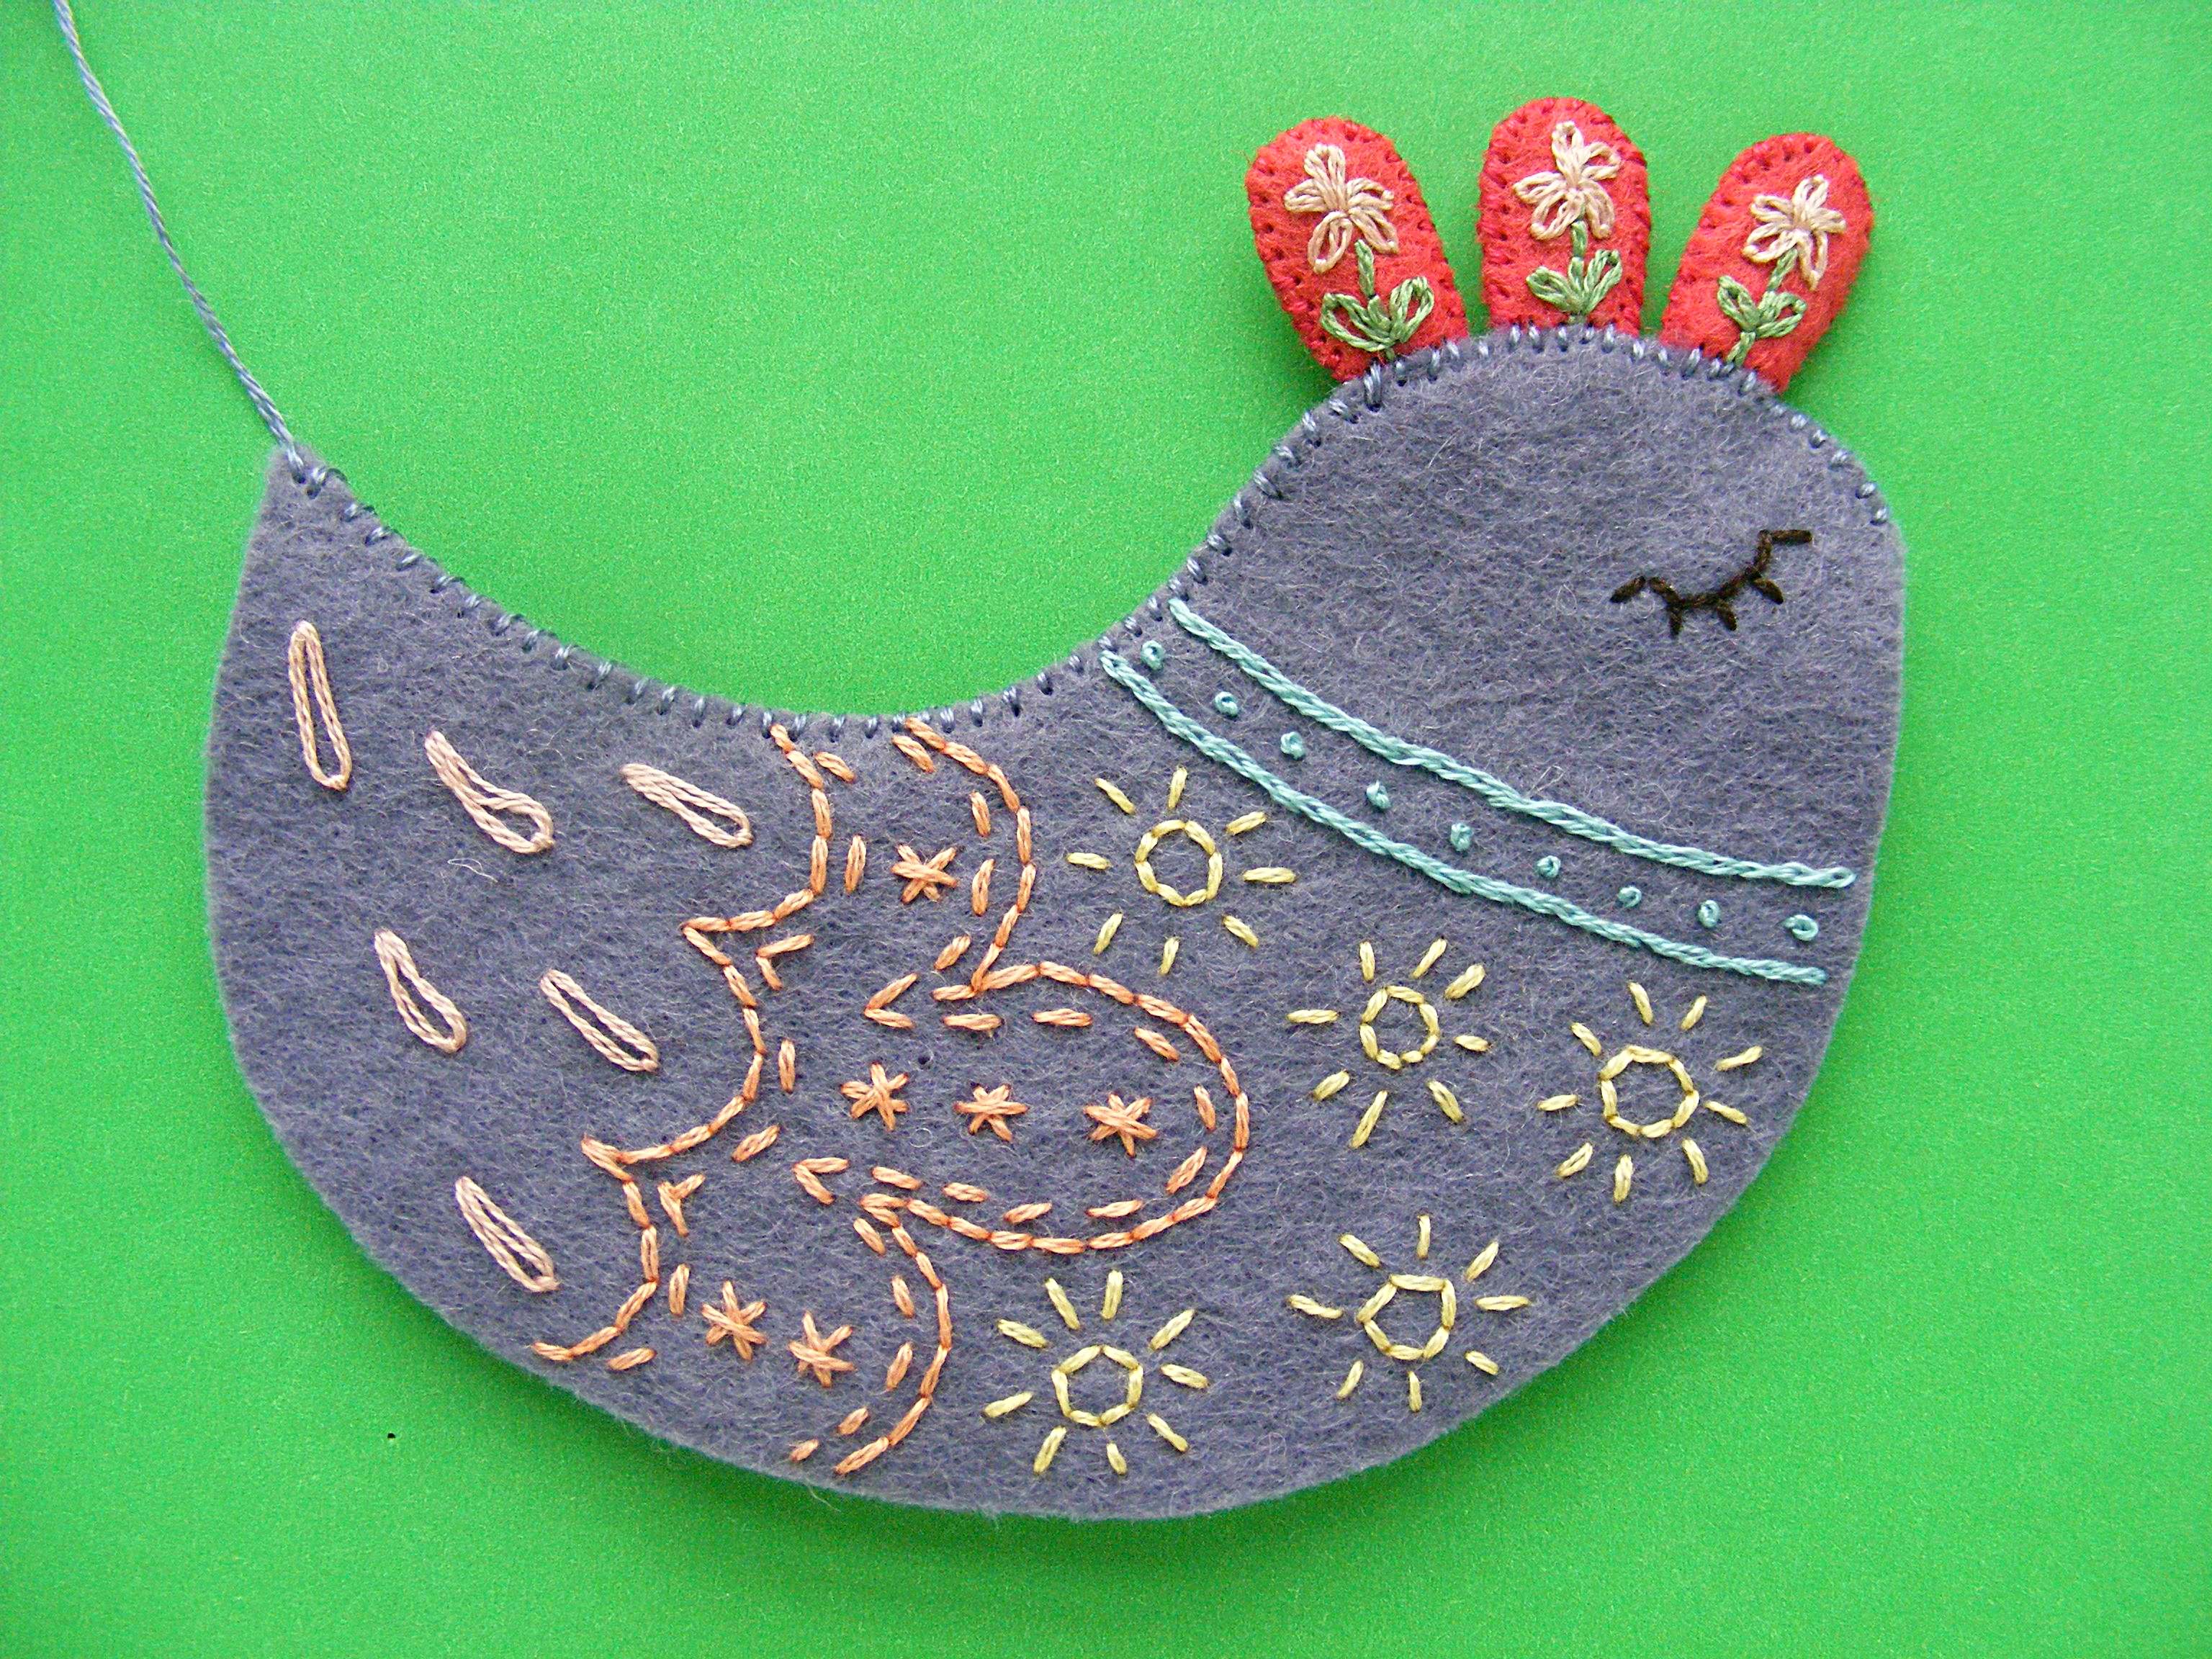
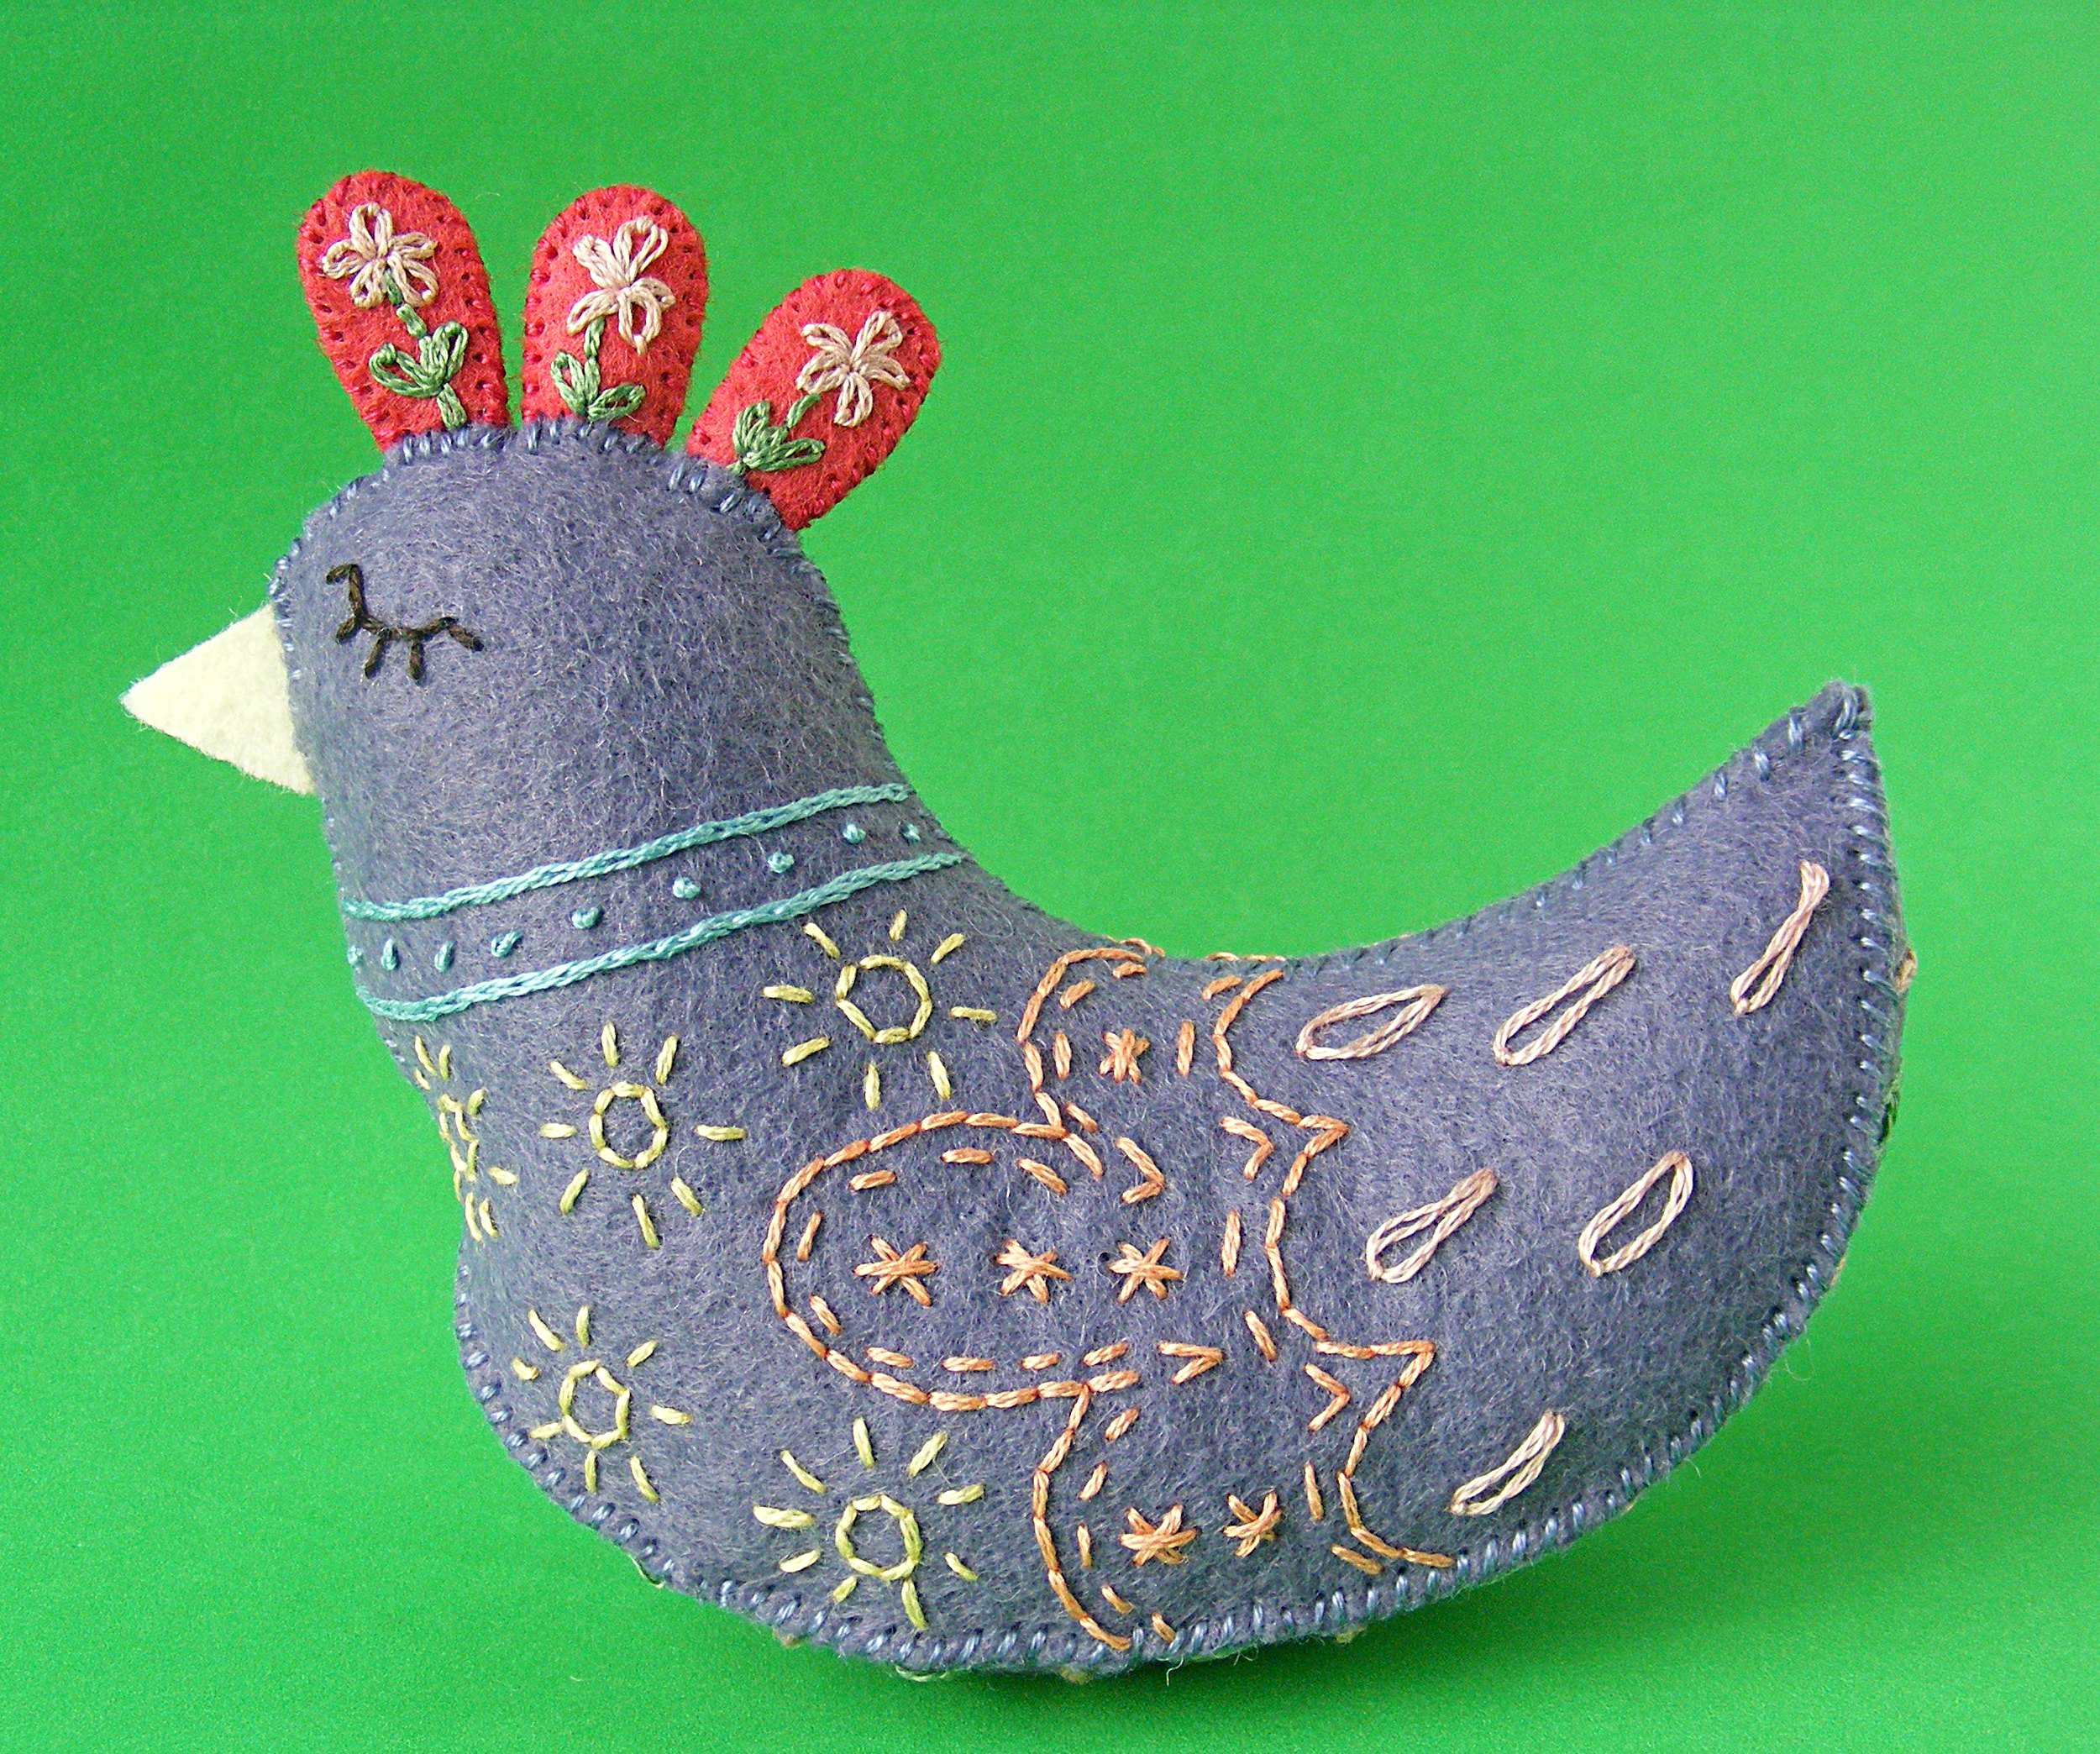
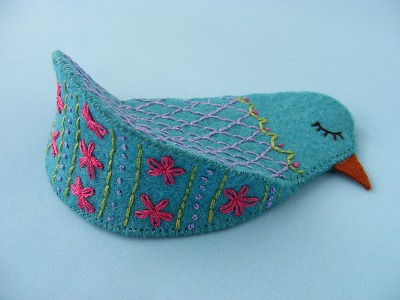
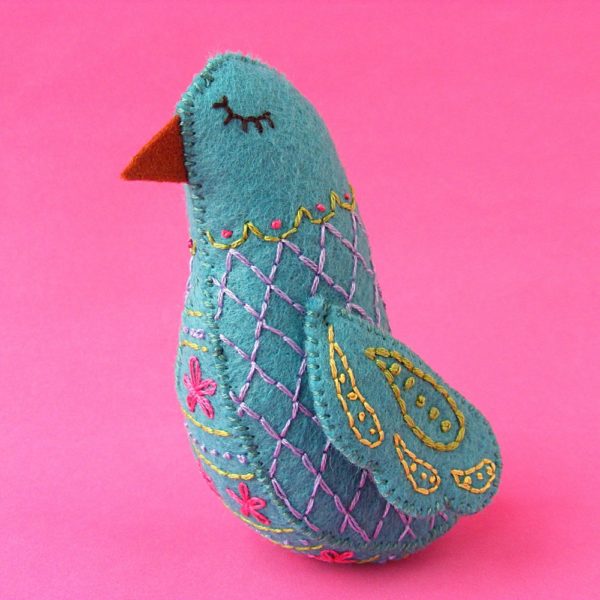
Here’s a free felt bird pattern for you to play with! Her name is Daisy. 🙂
Want to make her? All it takes is some felt, a bit of stuffing, and a few easy embroidery stitches. And a pattern, of course. 🙂
She uses just half a sheet of wool-blend felt for the body (I used purple sage, but it’s since been discontinued), a few small scraps for the beak and comb (I used strawberry dream and straw), and embroidery thread in your favorite colors.
You can find links to sources for all my favorite supplies here.
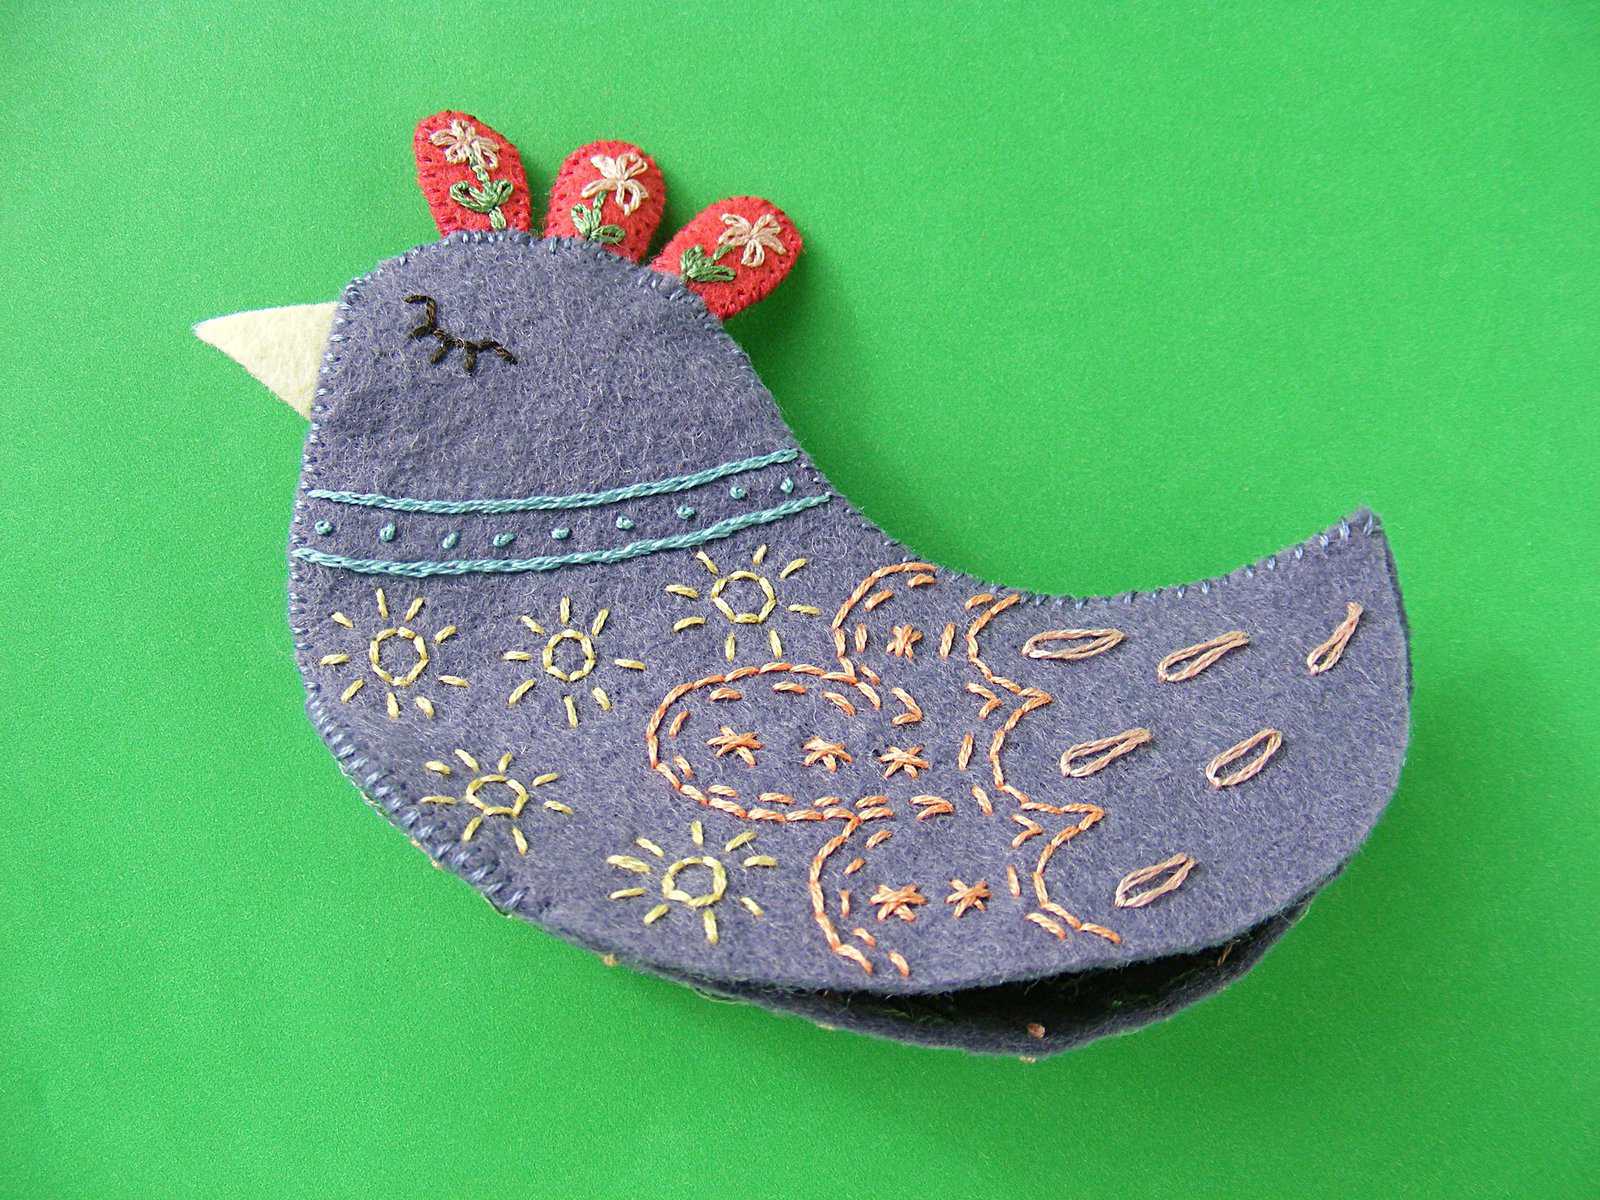
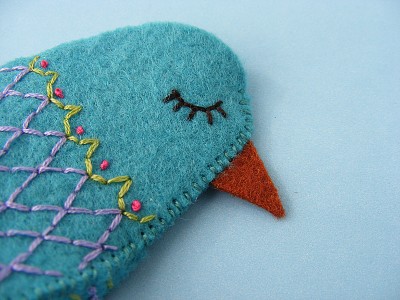
Comb - lazy daisy for the flower with DMC #152 and the leaves with DMC #320. Backstitch the stem with DMC #320.
Step 3
Cut out each piece carefully on the lines. Be sure not to cut into any of your stitching!
Soak the pieces in cool water to remove the stabilizer. I like to soak them for about an hour, then rinse off the mushy stabilizer under cool running water. Use a kitchen sprayer to get off any stubborn bits. Let them dry flat on a towel. Don’t wring them out - just lay them on a towel dripping wet. They’ll dry overnight.
From here on all the sewing is whipstitch around the edges of the felt. I used two strands of floss for all whipstitching. DMC #326 matches the strawberry dream felt I used for the comb, and DMC #161 matches the purple sage I used for the body.
Step 4
Put comb pieces together, right sides facing out, and stitch all the way around the edge. You’ll end up with three comb pieces.
Step 5
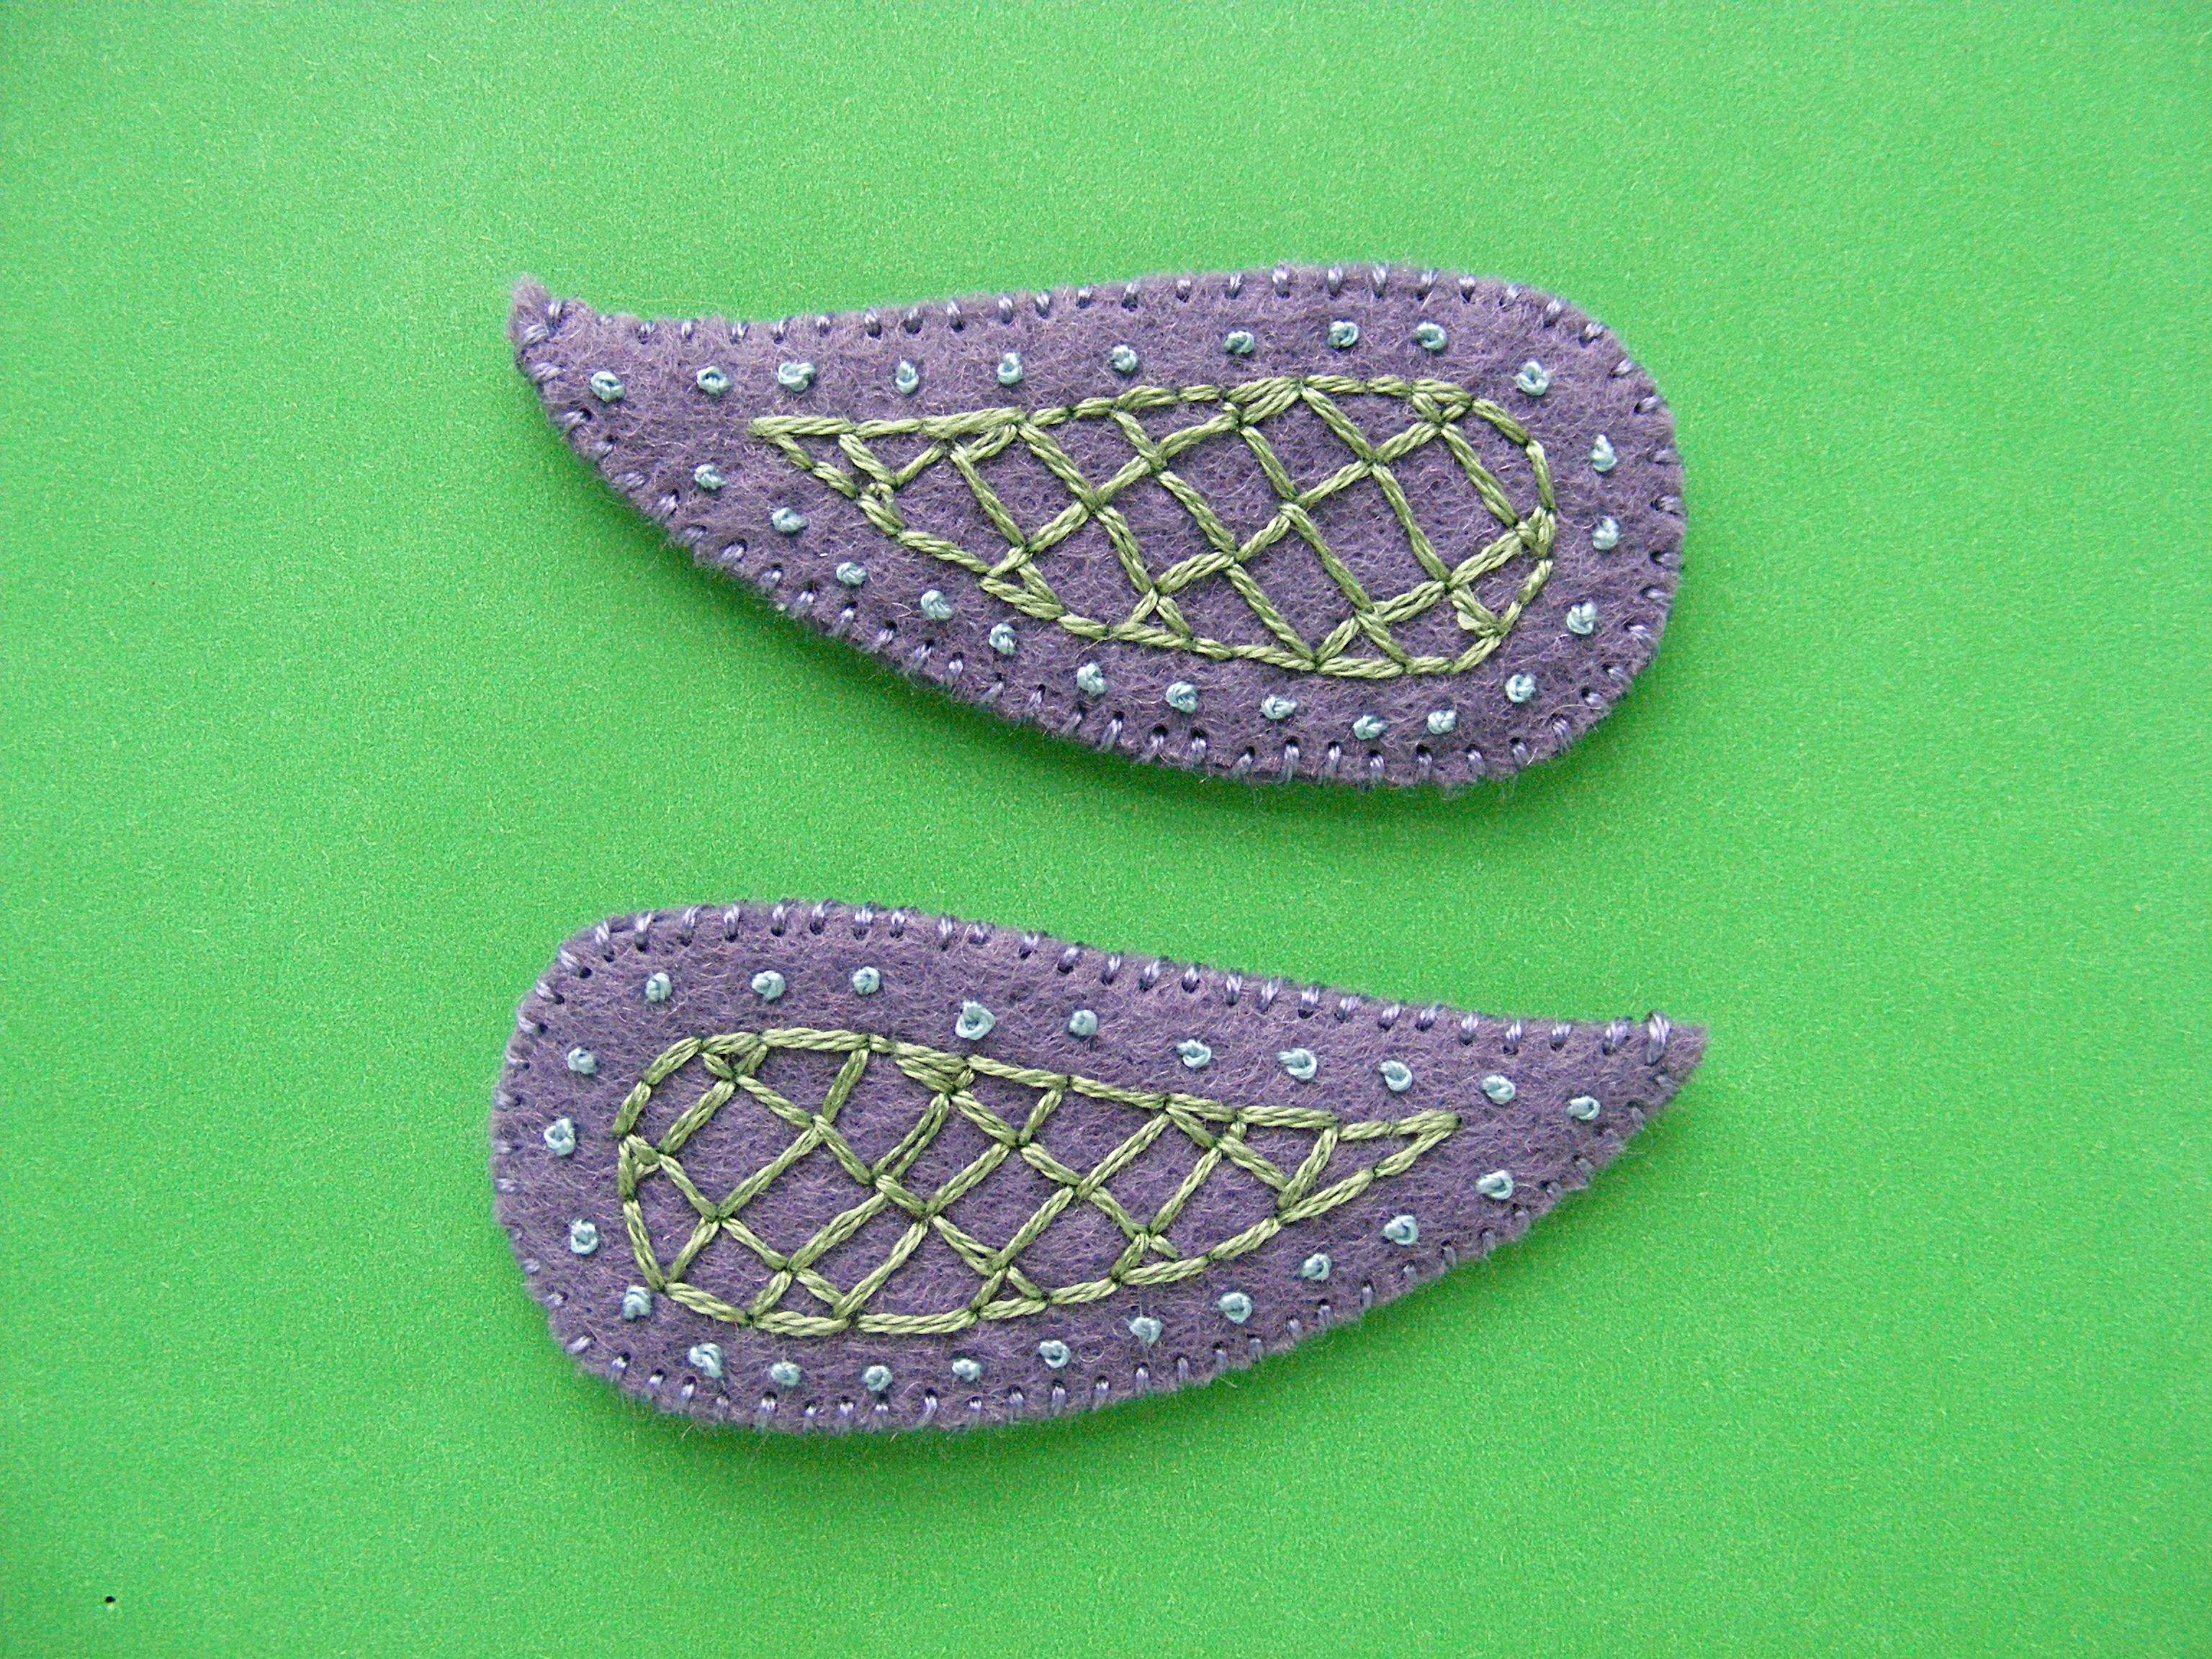
Repeat Step 3 for the wings, pairing one embroidered wing with one blank wing.
The blank sides of the wings will go up against the bird’s body where you can’t see them.
Step 6
Place the two body pieces right sides facing out, with the comb pieces sandwiched between the layers. Stitch the body pieces together along the top edge of the body. Stop when you get to the tip of the tail, but don’t tie off your thread.
When you get to the tip of the tail, slip the belly piece into place. The narrow end is the tail, and the wider end is the breast.
Stitch one body piece to one side of the belly piece. When you get to the front, stop stitching, but don’t tie off your thread.
Step 8
Go back to stitching the two body pieces together, this time stitching up the front of the face.
Slip the beak in between the two layers, right up at the top of the face, and stitch through it as you go.
Tie off your thread when you get to the top of the face.
Step 9
Flip the bird over.
Start a new piece of thread and stitch the free side of the body to the free side of the belly, starting at the front tip of the belly.
Stitch for a few inches, then tie off your thread.
Step 10
With a new piece of thread, stitch the rest of the body closed from the tail to the other side of the stuffing opening you started in Step 9.
Stuff the body neatly. You can add plastic pellets if you like, for weight, but this shape doesn’t need it for balance.
Step 11
Sew up the rest of the stuffing opening.
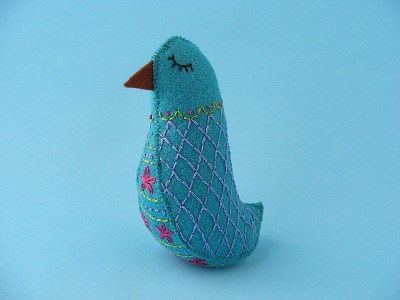
Now she’s just waiting for wings!
Thread a long needle and knot the end. Start sewing underneath one wing, near the front. Sew through the body and out the other side, through the opposing wing. Take a small stitch back into the wing, through the body and out through the first wing. Stitch back and forth like this a few times to secure the wings. Don’t pull the thread too tight or you’ll distort the shape of her body. Knot your thread underneath one wing and bury the tail.
Done!
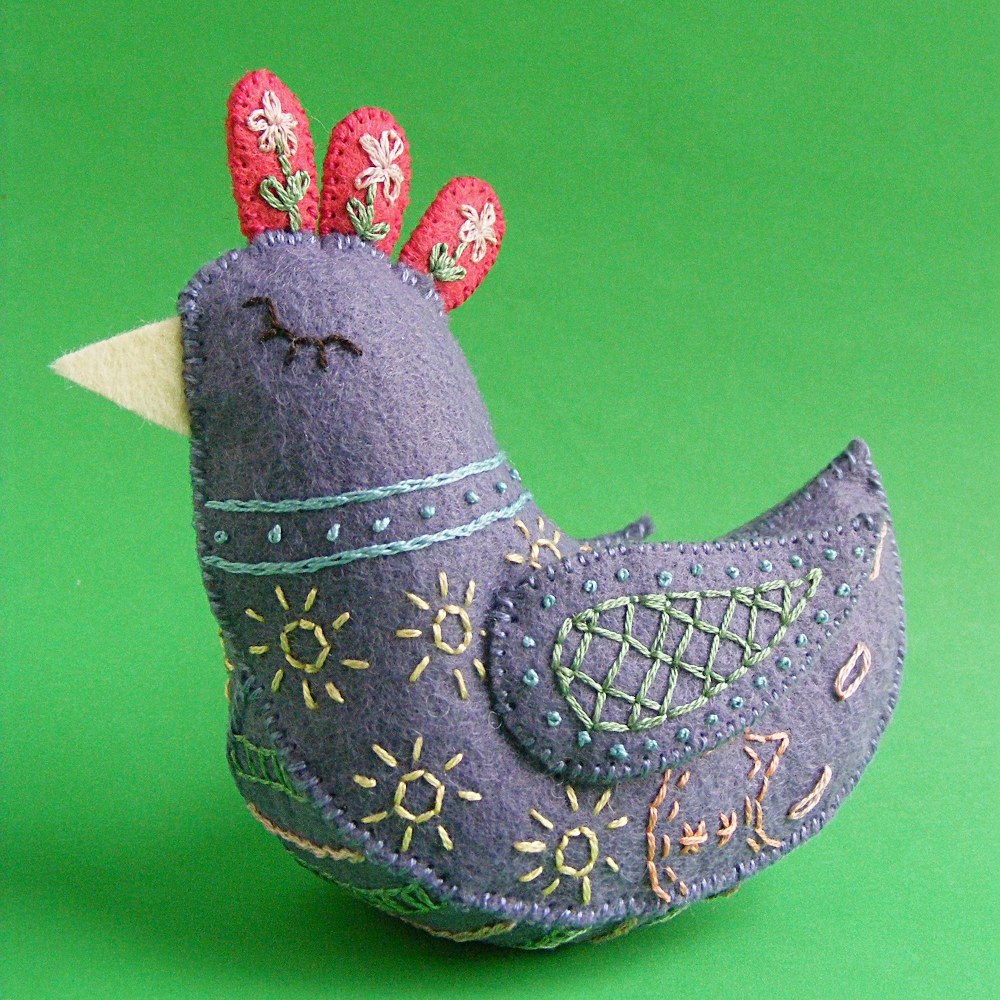
Isn’t she a beauty? I think this design would also be very pretty stitched up with a single color thread on a single color felt. White thread on this purple sage would be lovely! You’ll just have to make another. :)
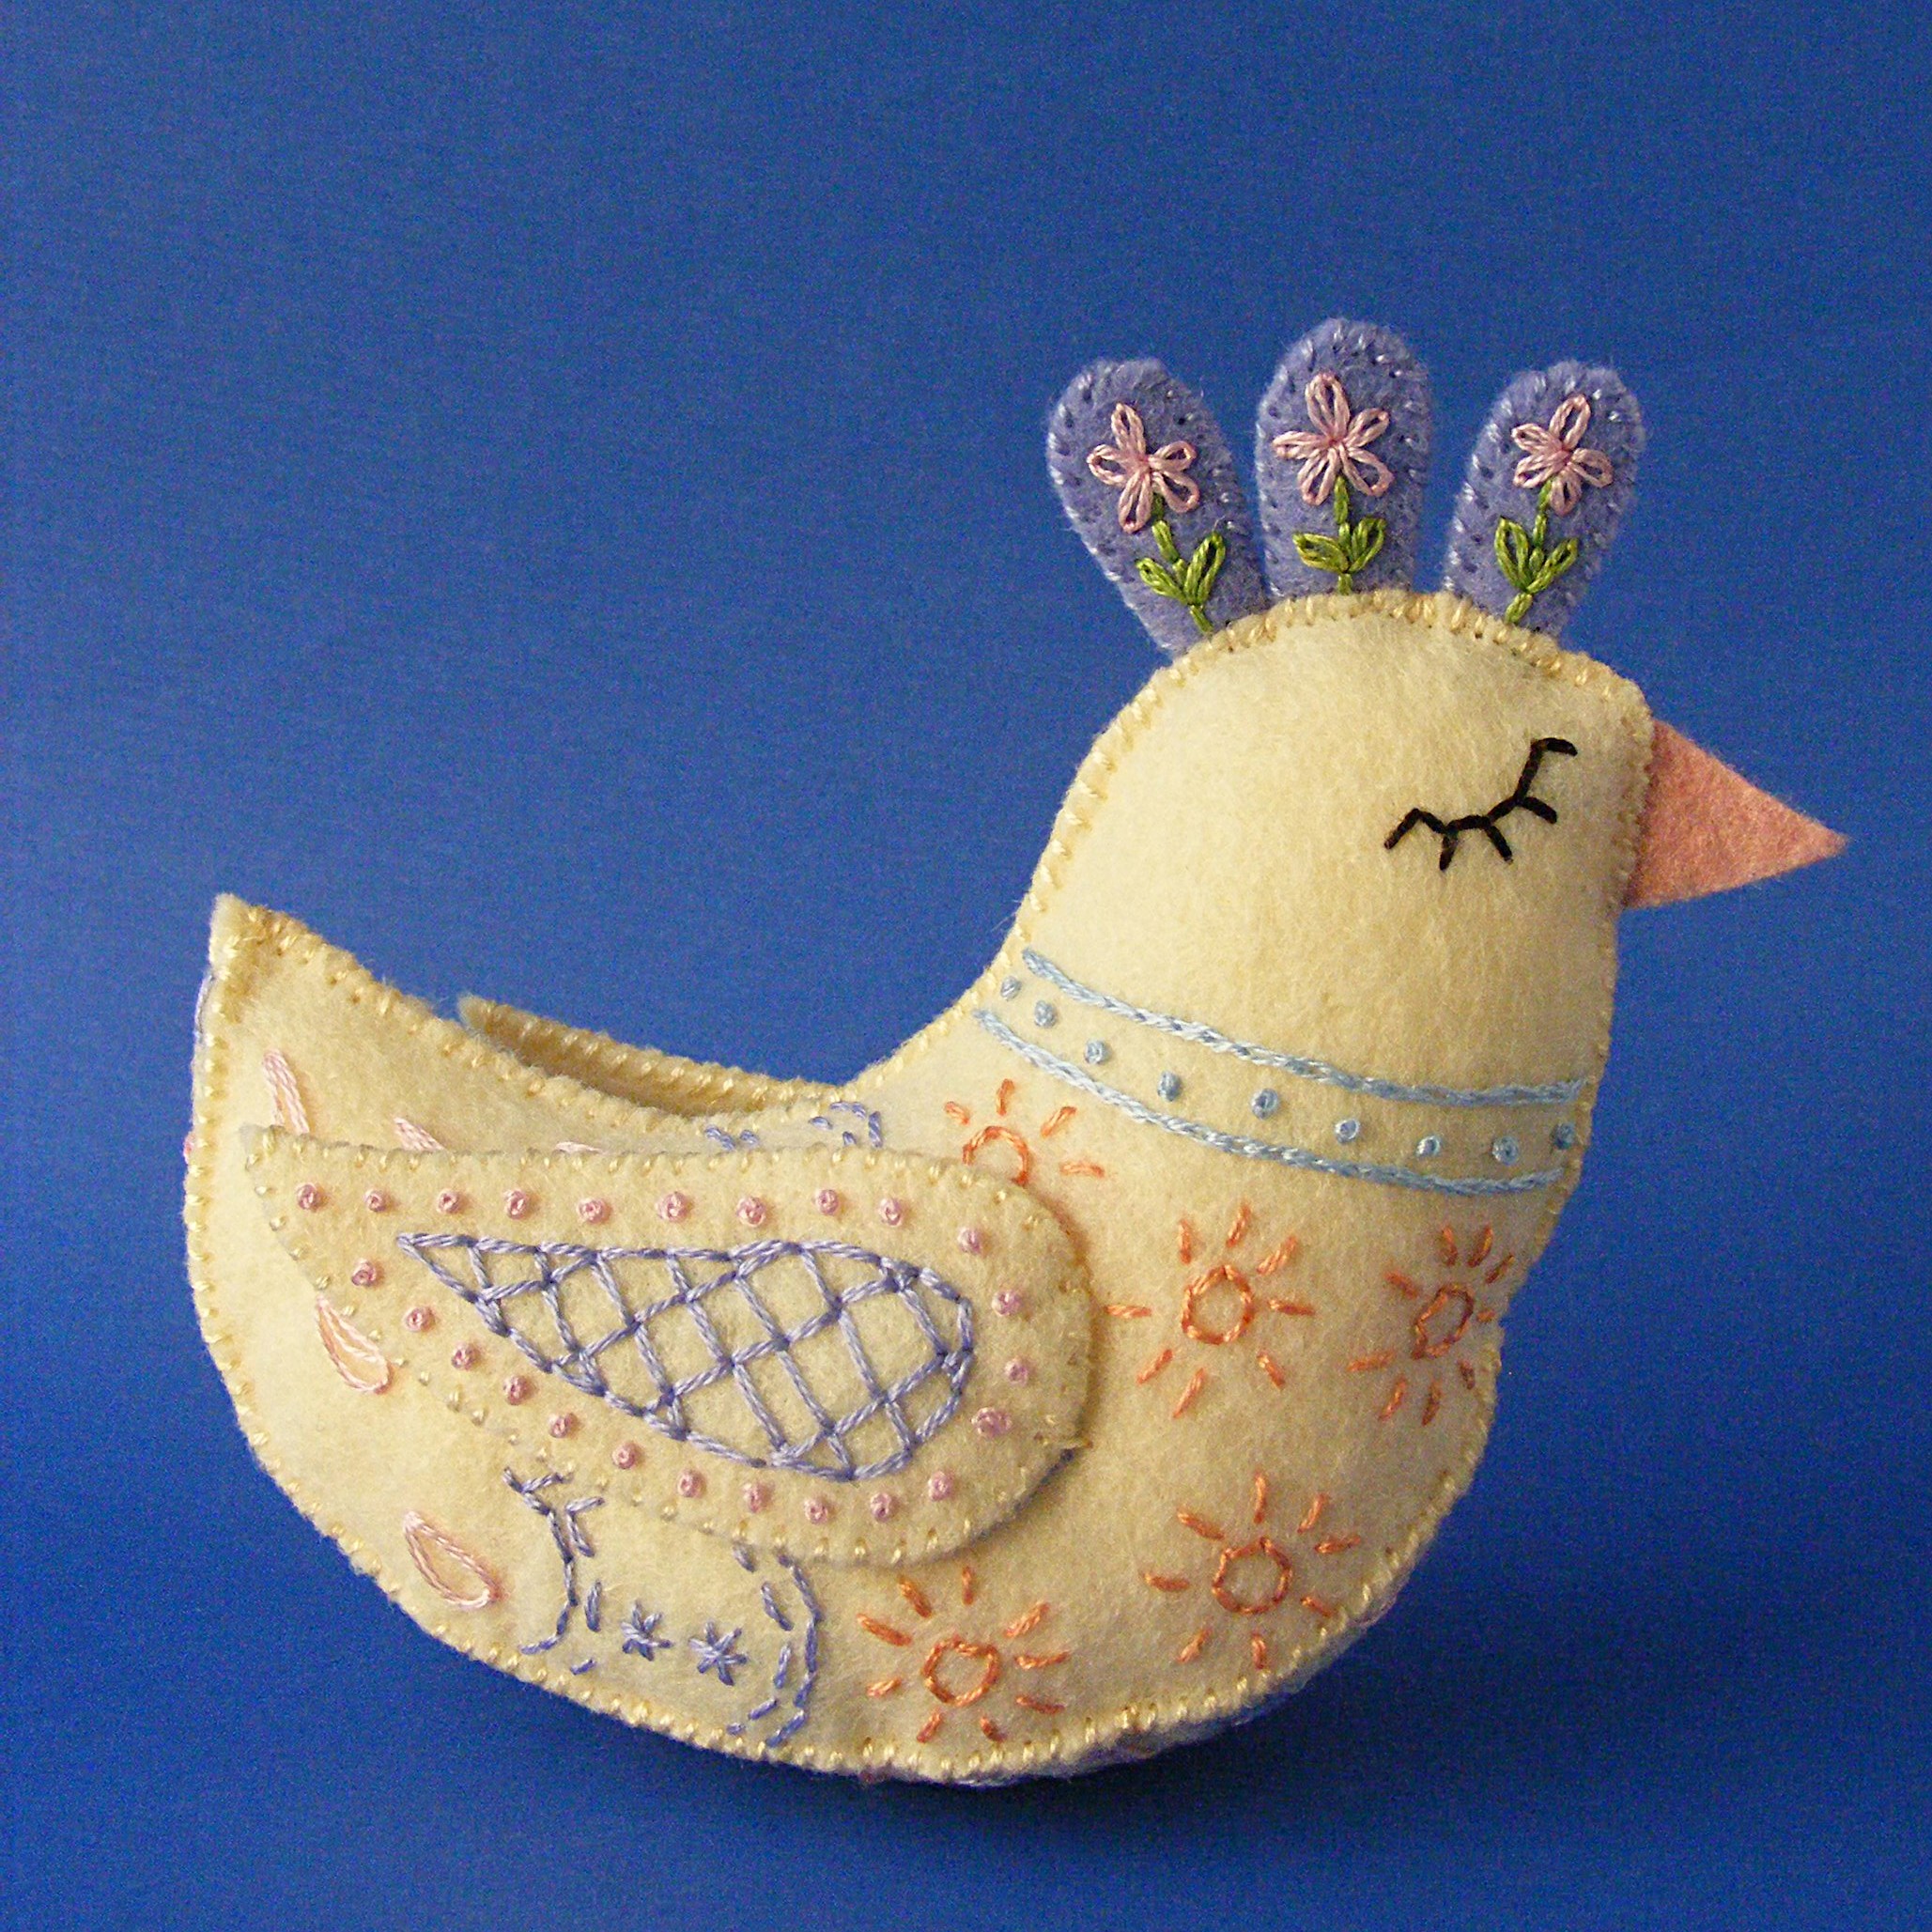
Update – I decided to stitch up a new version of Daisy with different colors. Look how pretty she is in this cream felt! (It’s actually called straw.)
Since she’s all hand-sewn, this free felt bird pattern is a great portable summer project. Take Daisy to the beach, to the pool, camping, on long car trips – you get the idea. 🙂
Happy stitching!
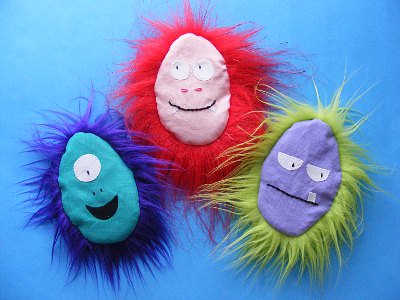
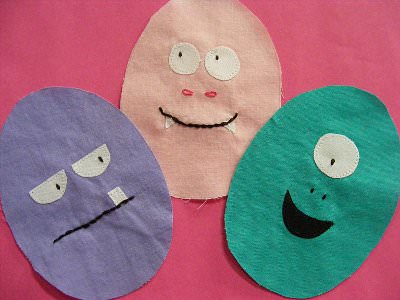
Play with some felt! Try the Oddballs – a fun pattern for silly monsters.
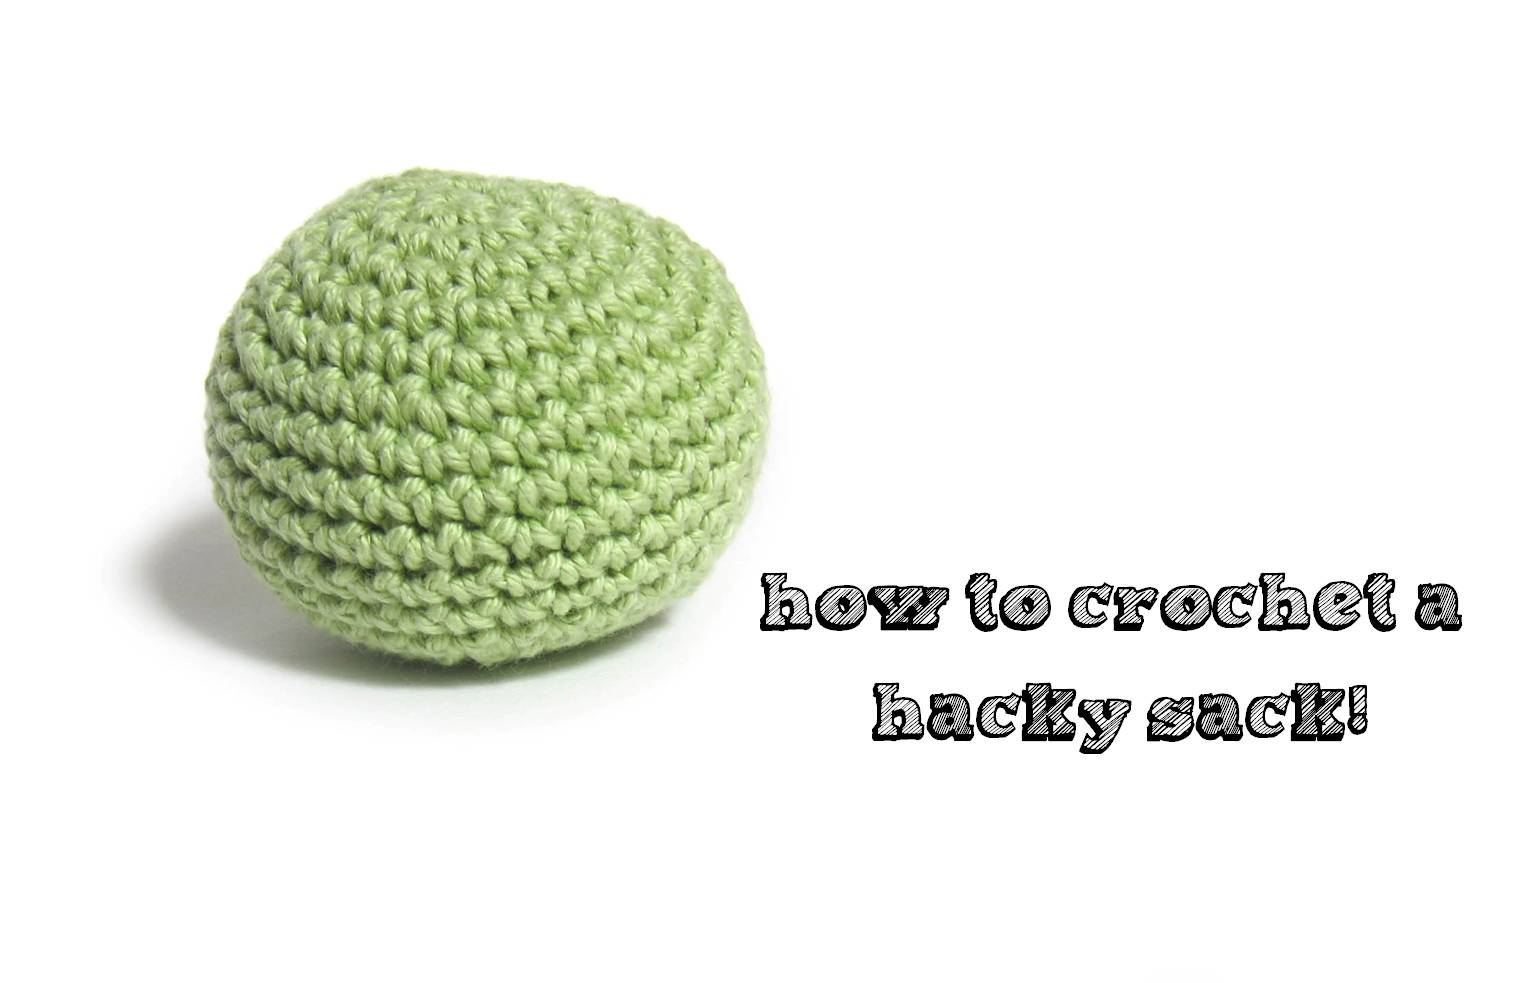
Now that summer’s rolling around, I bet you’re looking for excuses to get you (and your kids) outside! How about making a hacky sack? (Don’t know what playing hacky sack looks like? It’s worth having a look on YouTube!)
If you can single crochet, you can make a hacky sack! I’ll show you how!
Round 1: Sc 6 times in 2nd ch from hook. (6) Round 2: Sc twice in each st. (12) Round 3: *Sc twice in next st, sc in next st. Repeat from * 5 times. (18) Round 4: *Sc twice in next st, sc in next 2 sts. Repeat from * 5 times. (24) Round 5: *Sc twice in next st, sc in next 3 sts. Repeat from * 5 times. (30) Round 6: *Sc twice in next st, sc in next 4 sts. Repeat from * 5 times. (36) Rounds 7-12 Sc in each st. (36, 6 rounds) Round 13: *Sc2tog, sc in next 4 sts. Repeat from * 5 times. (30)
Remove hook…
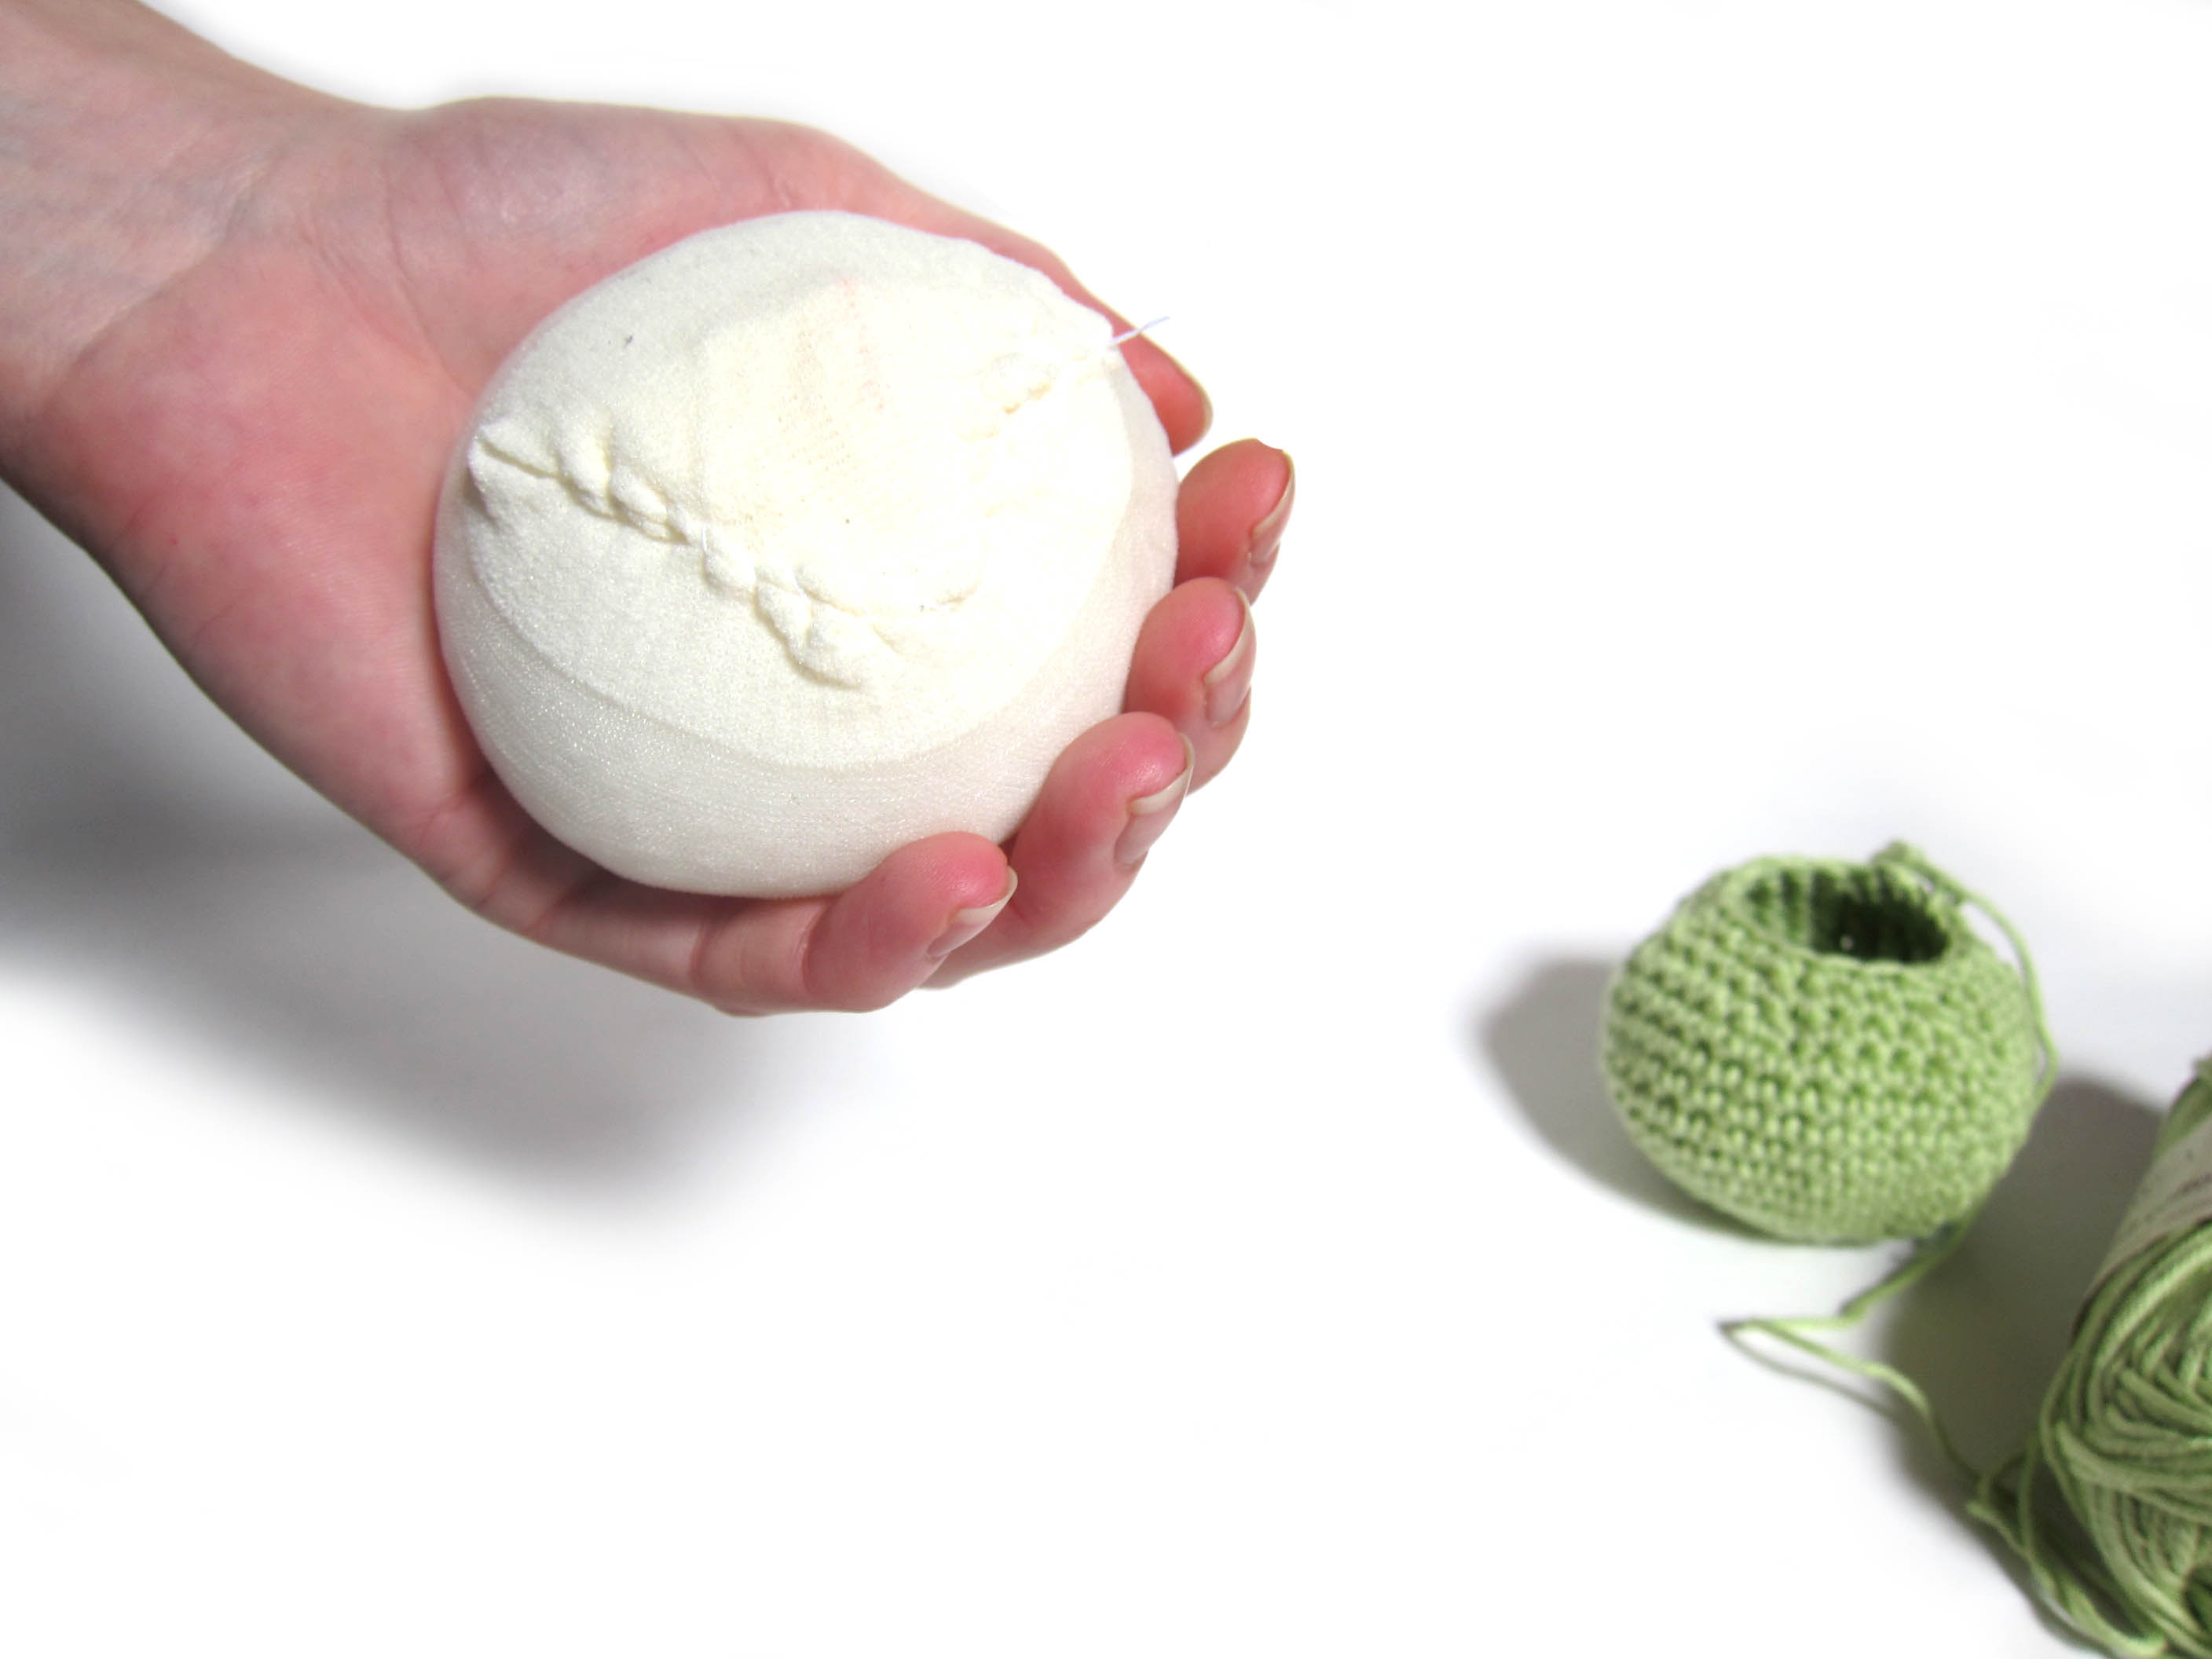
Place a handful of poly-beads in the nylon sock and sew it up. Your goal is to create a ball that will fill your hacky sack about 90% full:
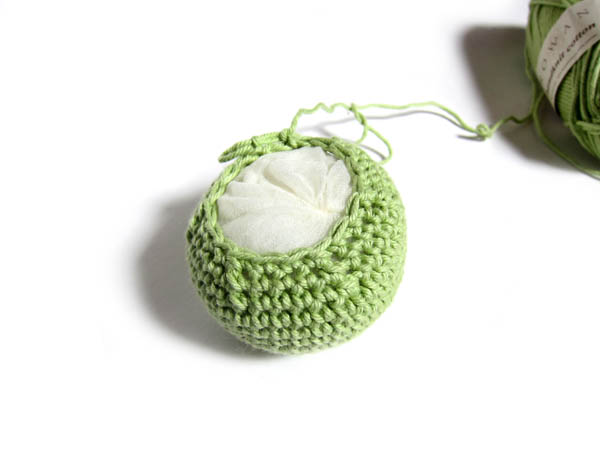
Place your stuffed stocking inside your crochet.
Continue crocheting…
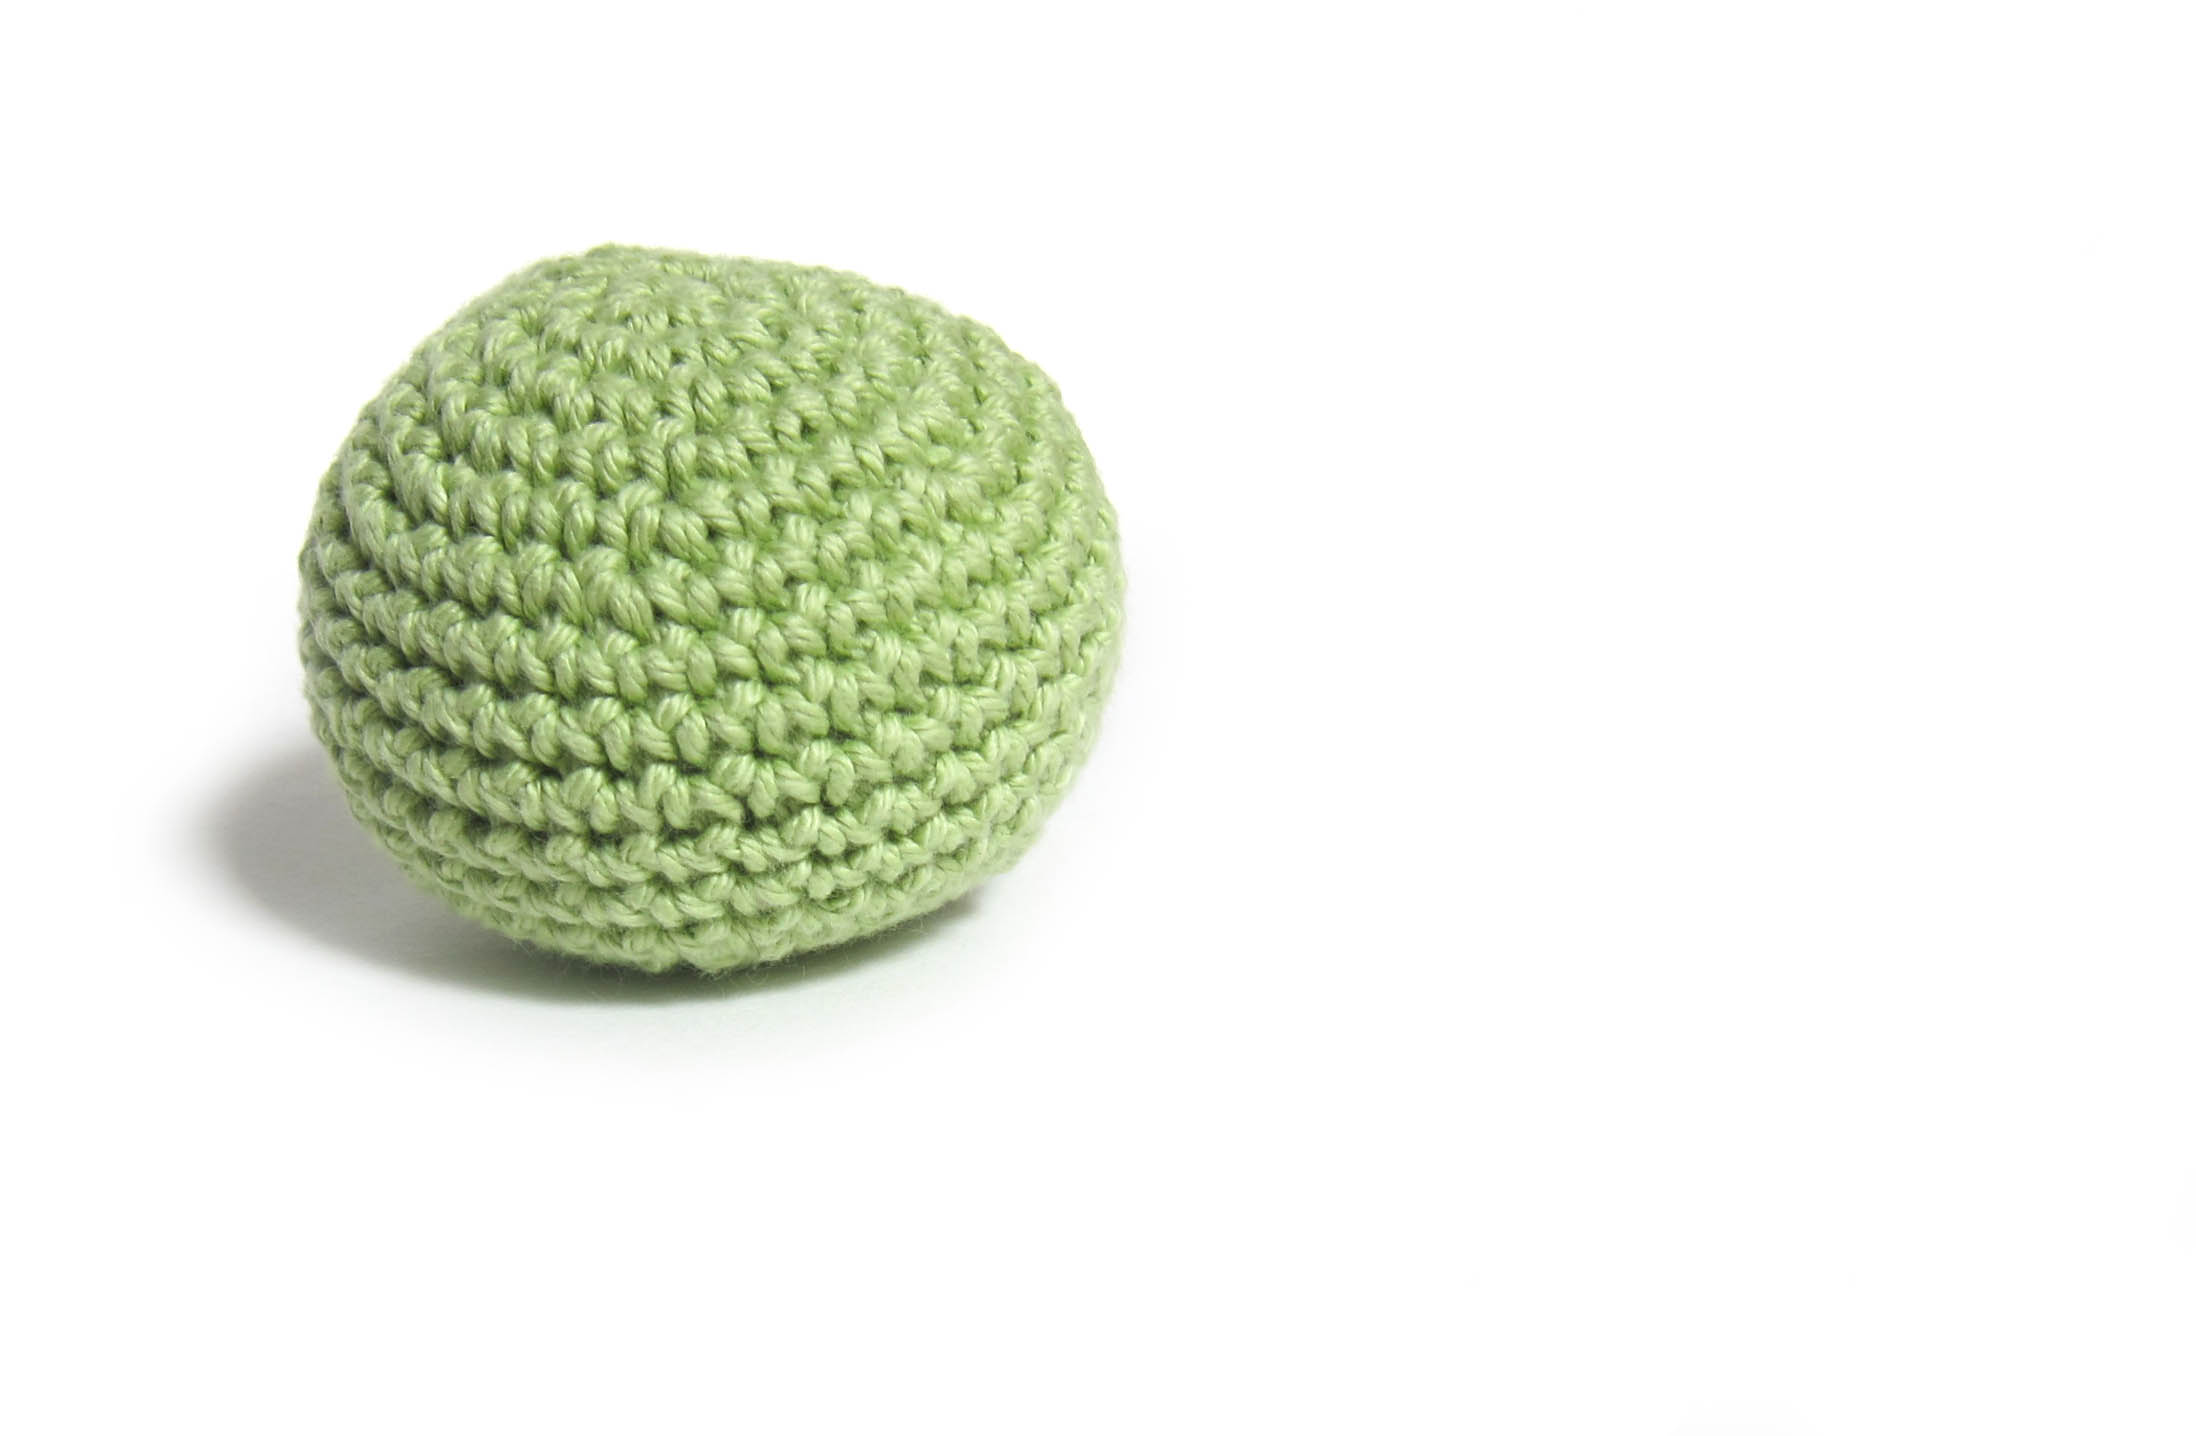
Round 14: *Sc2tog, sc in next 3 sts. Repeat from * 5 times. (24) Round 15: *Sc2tog, sc in next 2 sts. Repeat from * 5 times. (18) Round 16: *Sc2tog, sc in next st. Repeat from * 5 times. (12) Round 17: *Sc2tog. Repeat from * 5 times. (6) Round 18: Use the drawstring method to fasten off, and weave in the end!
Variations
Want to use a thicker yarn, like Lily’s Sugar & Cream? Simply skip rounds 6 & 13 (working fewer increase rounds), and use a size H (5.0mm) hook.
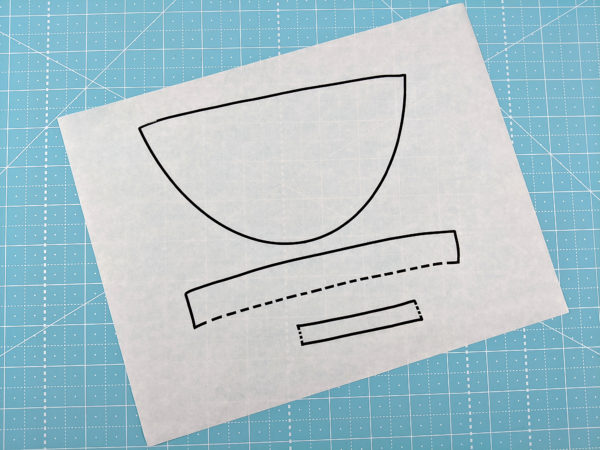
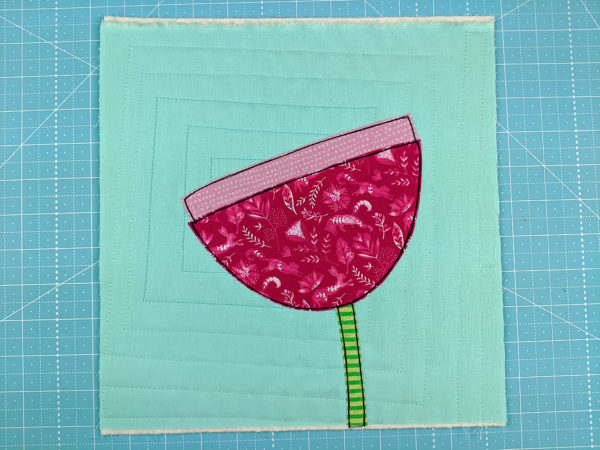
Print or trace the pattern onto the paper side of paper-backed fusible adhesive. I like to use Heat & Bond Lite.
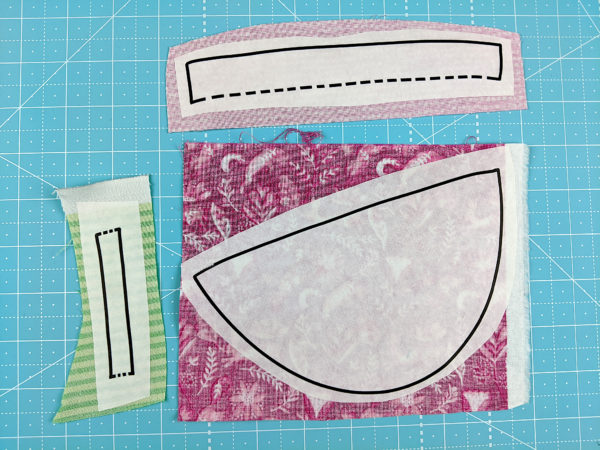
Roughly cut out all the pieces and fuse them to the wrong side of the fabric.
Cut out all the pieces neatly. Cut directly on all the solid lines. Leave a little extra seam allowance wherever there’s a dotted line.
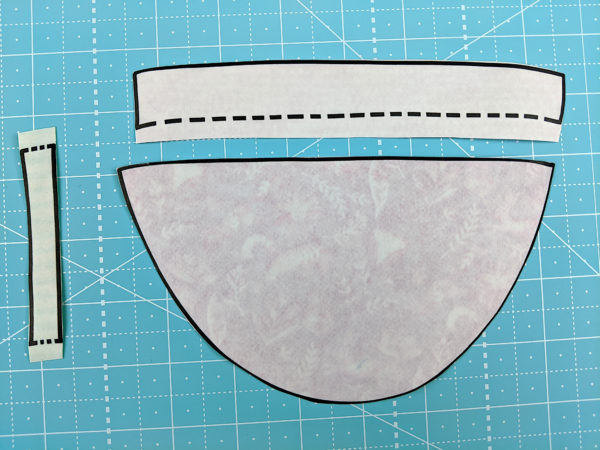
Peel off the paper backing and fuse the pieces onto your block. Tuck the seam allowance at all the dotted lines behind the adjoining pieces.
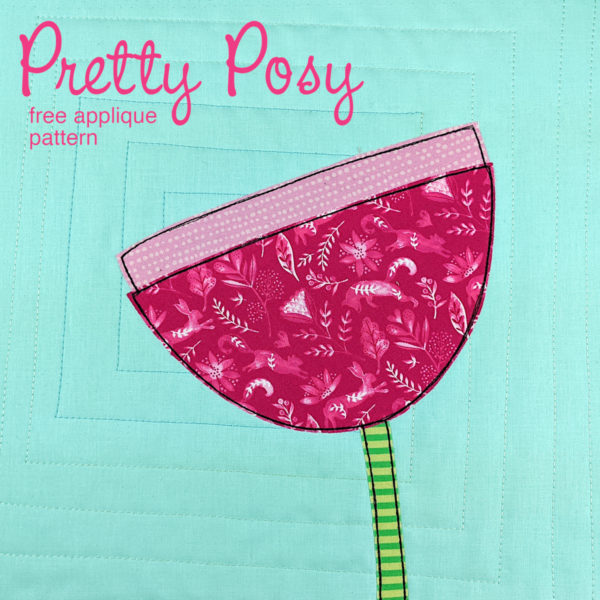
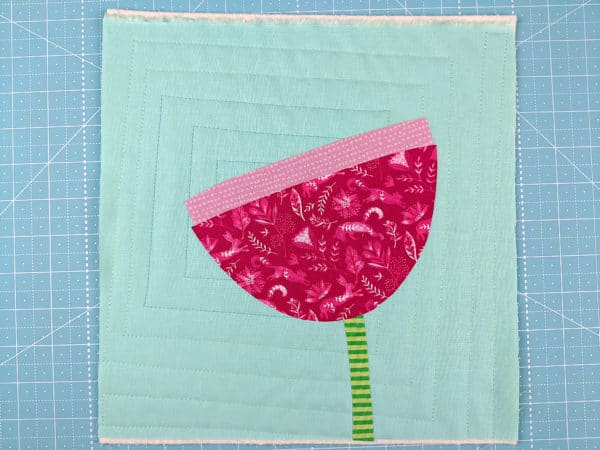
Outline all the pieces. I like to use black thread and a simple straight stitch for a fun cartoony look.
Finished!
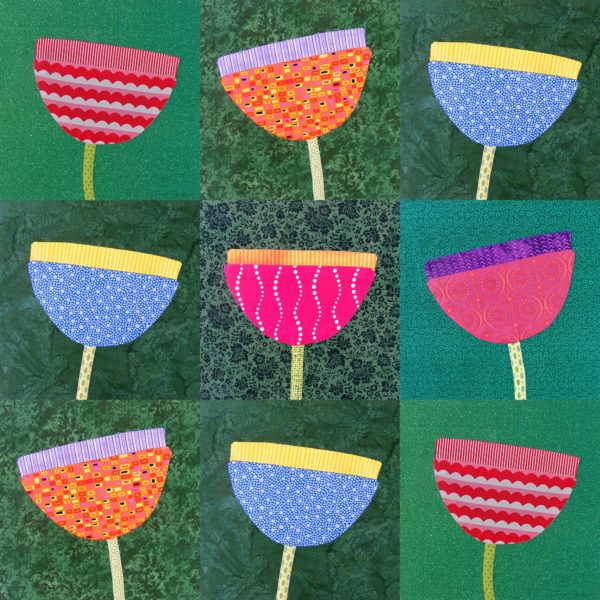
A lot of the fun of this pattern is in the fabrics you choose. You can also play around with the angle of the stem, and the flower at the top of the stem.
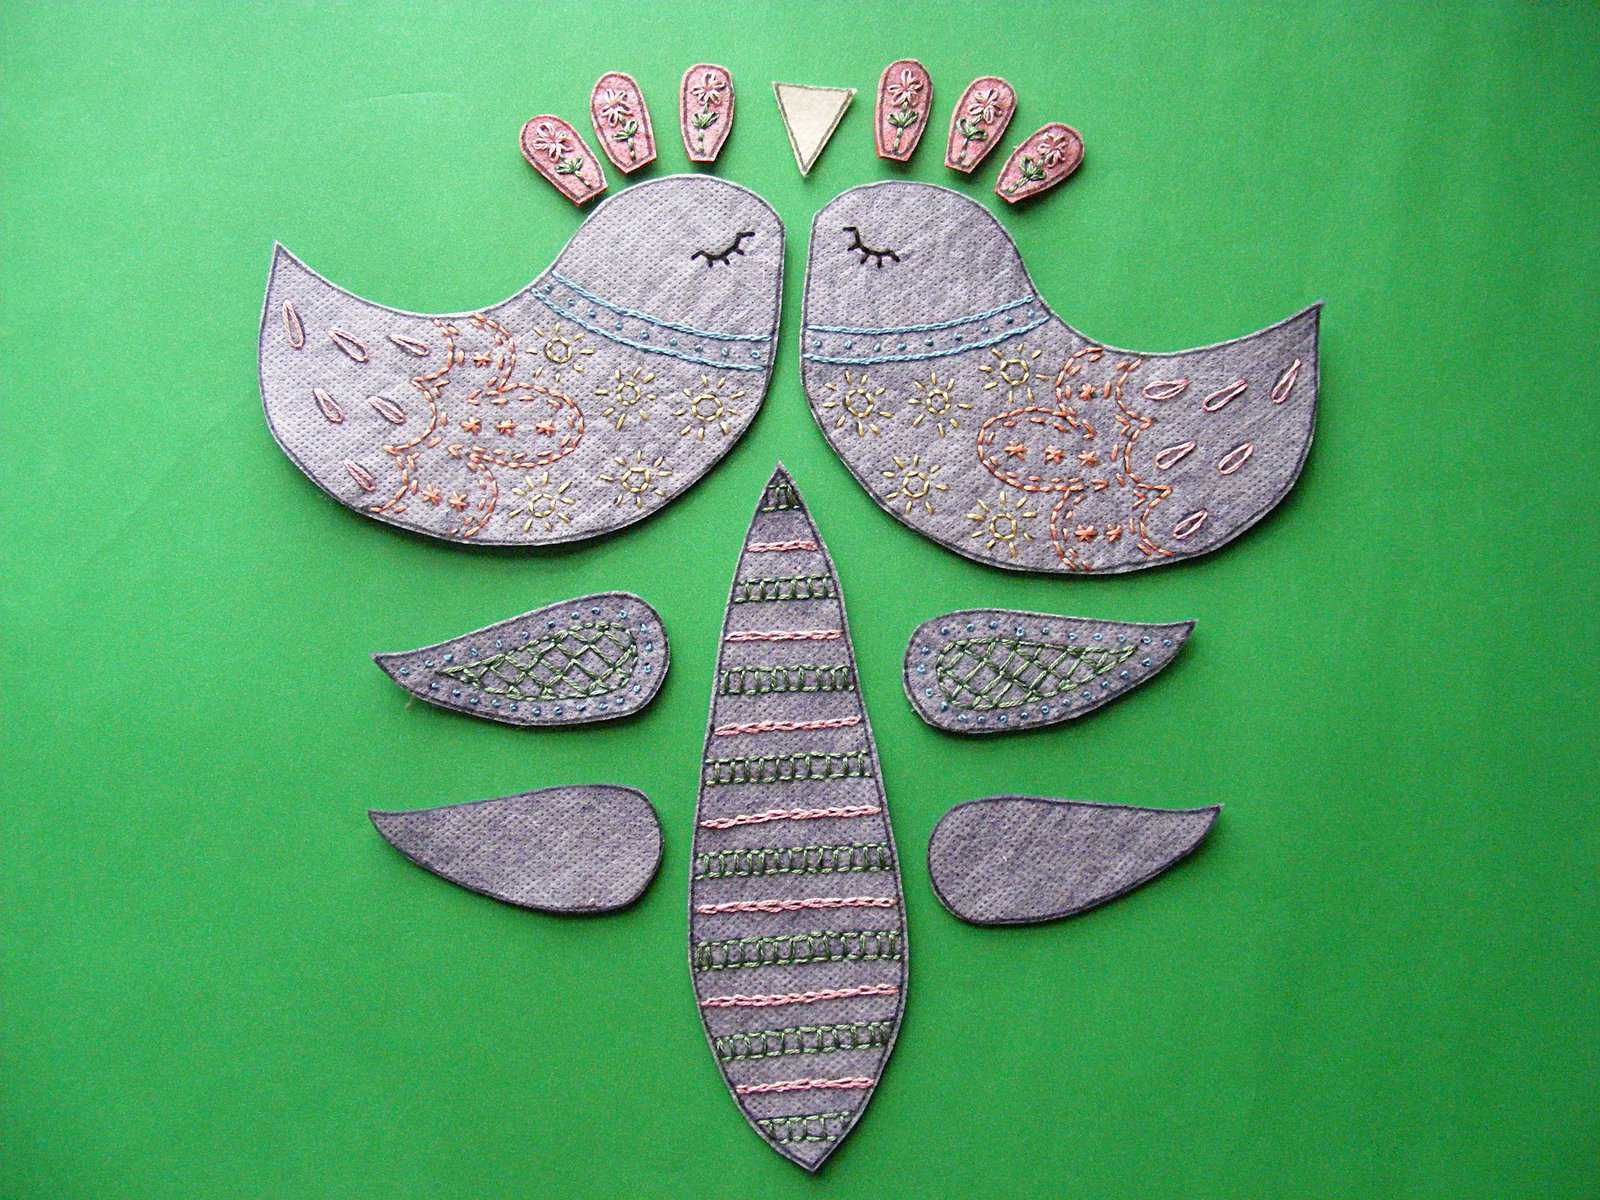
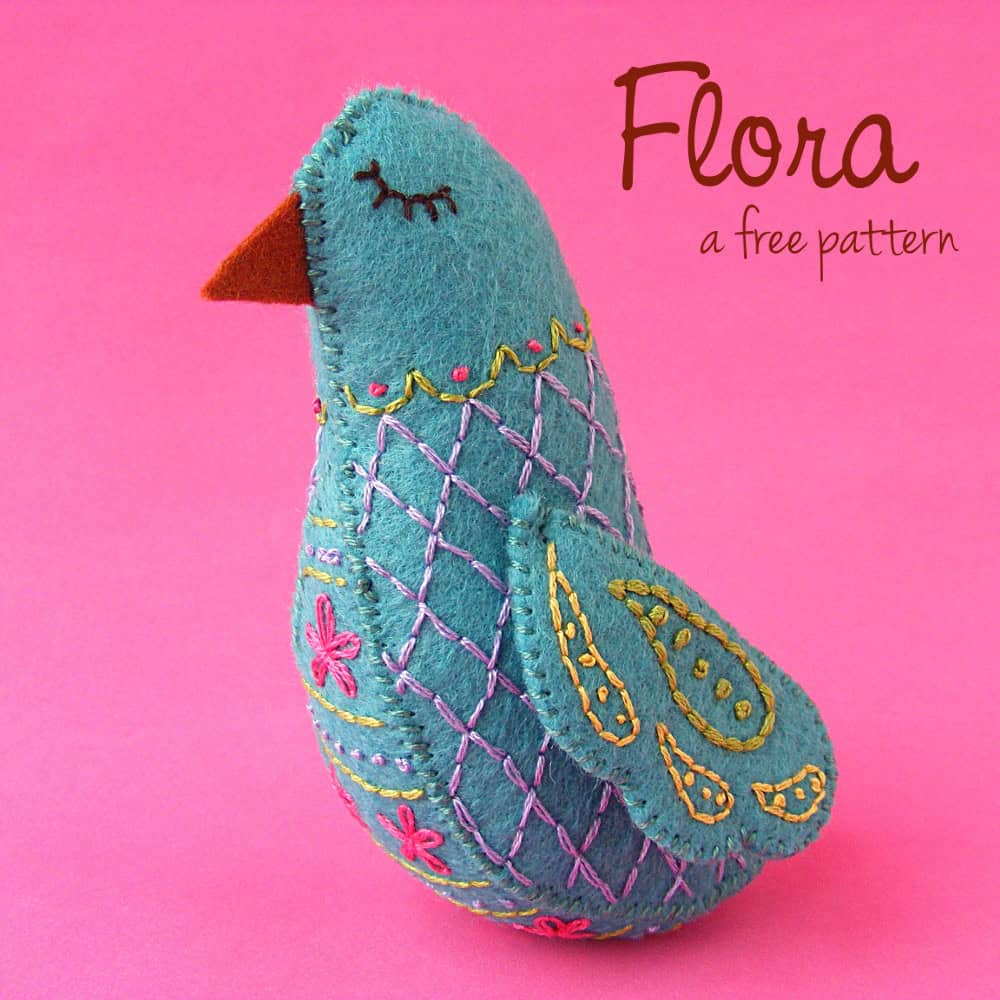
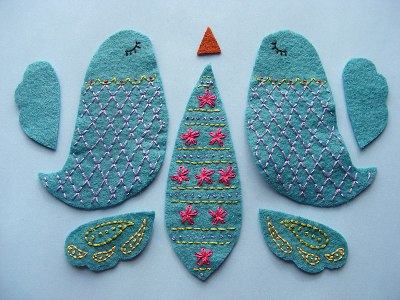
This little felt bird was such a delight to make! Seriously – I loved every minute of it. I want to make a whole flock of them in rainbow colors! And now you can make her too.
Flora is all hand sewn from wool blend felt and colorful embroidery thread, making her an easy, portable project, perfect for carrying around in your purse.
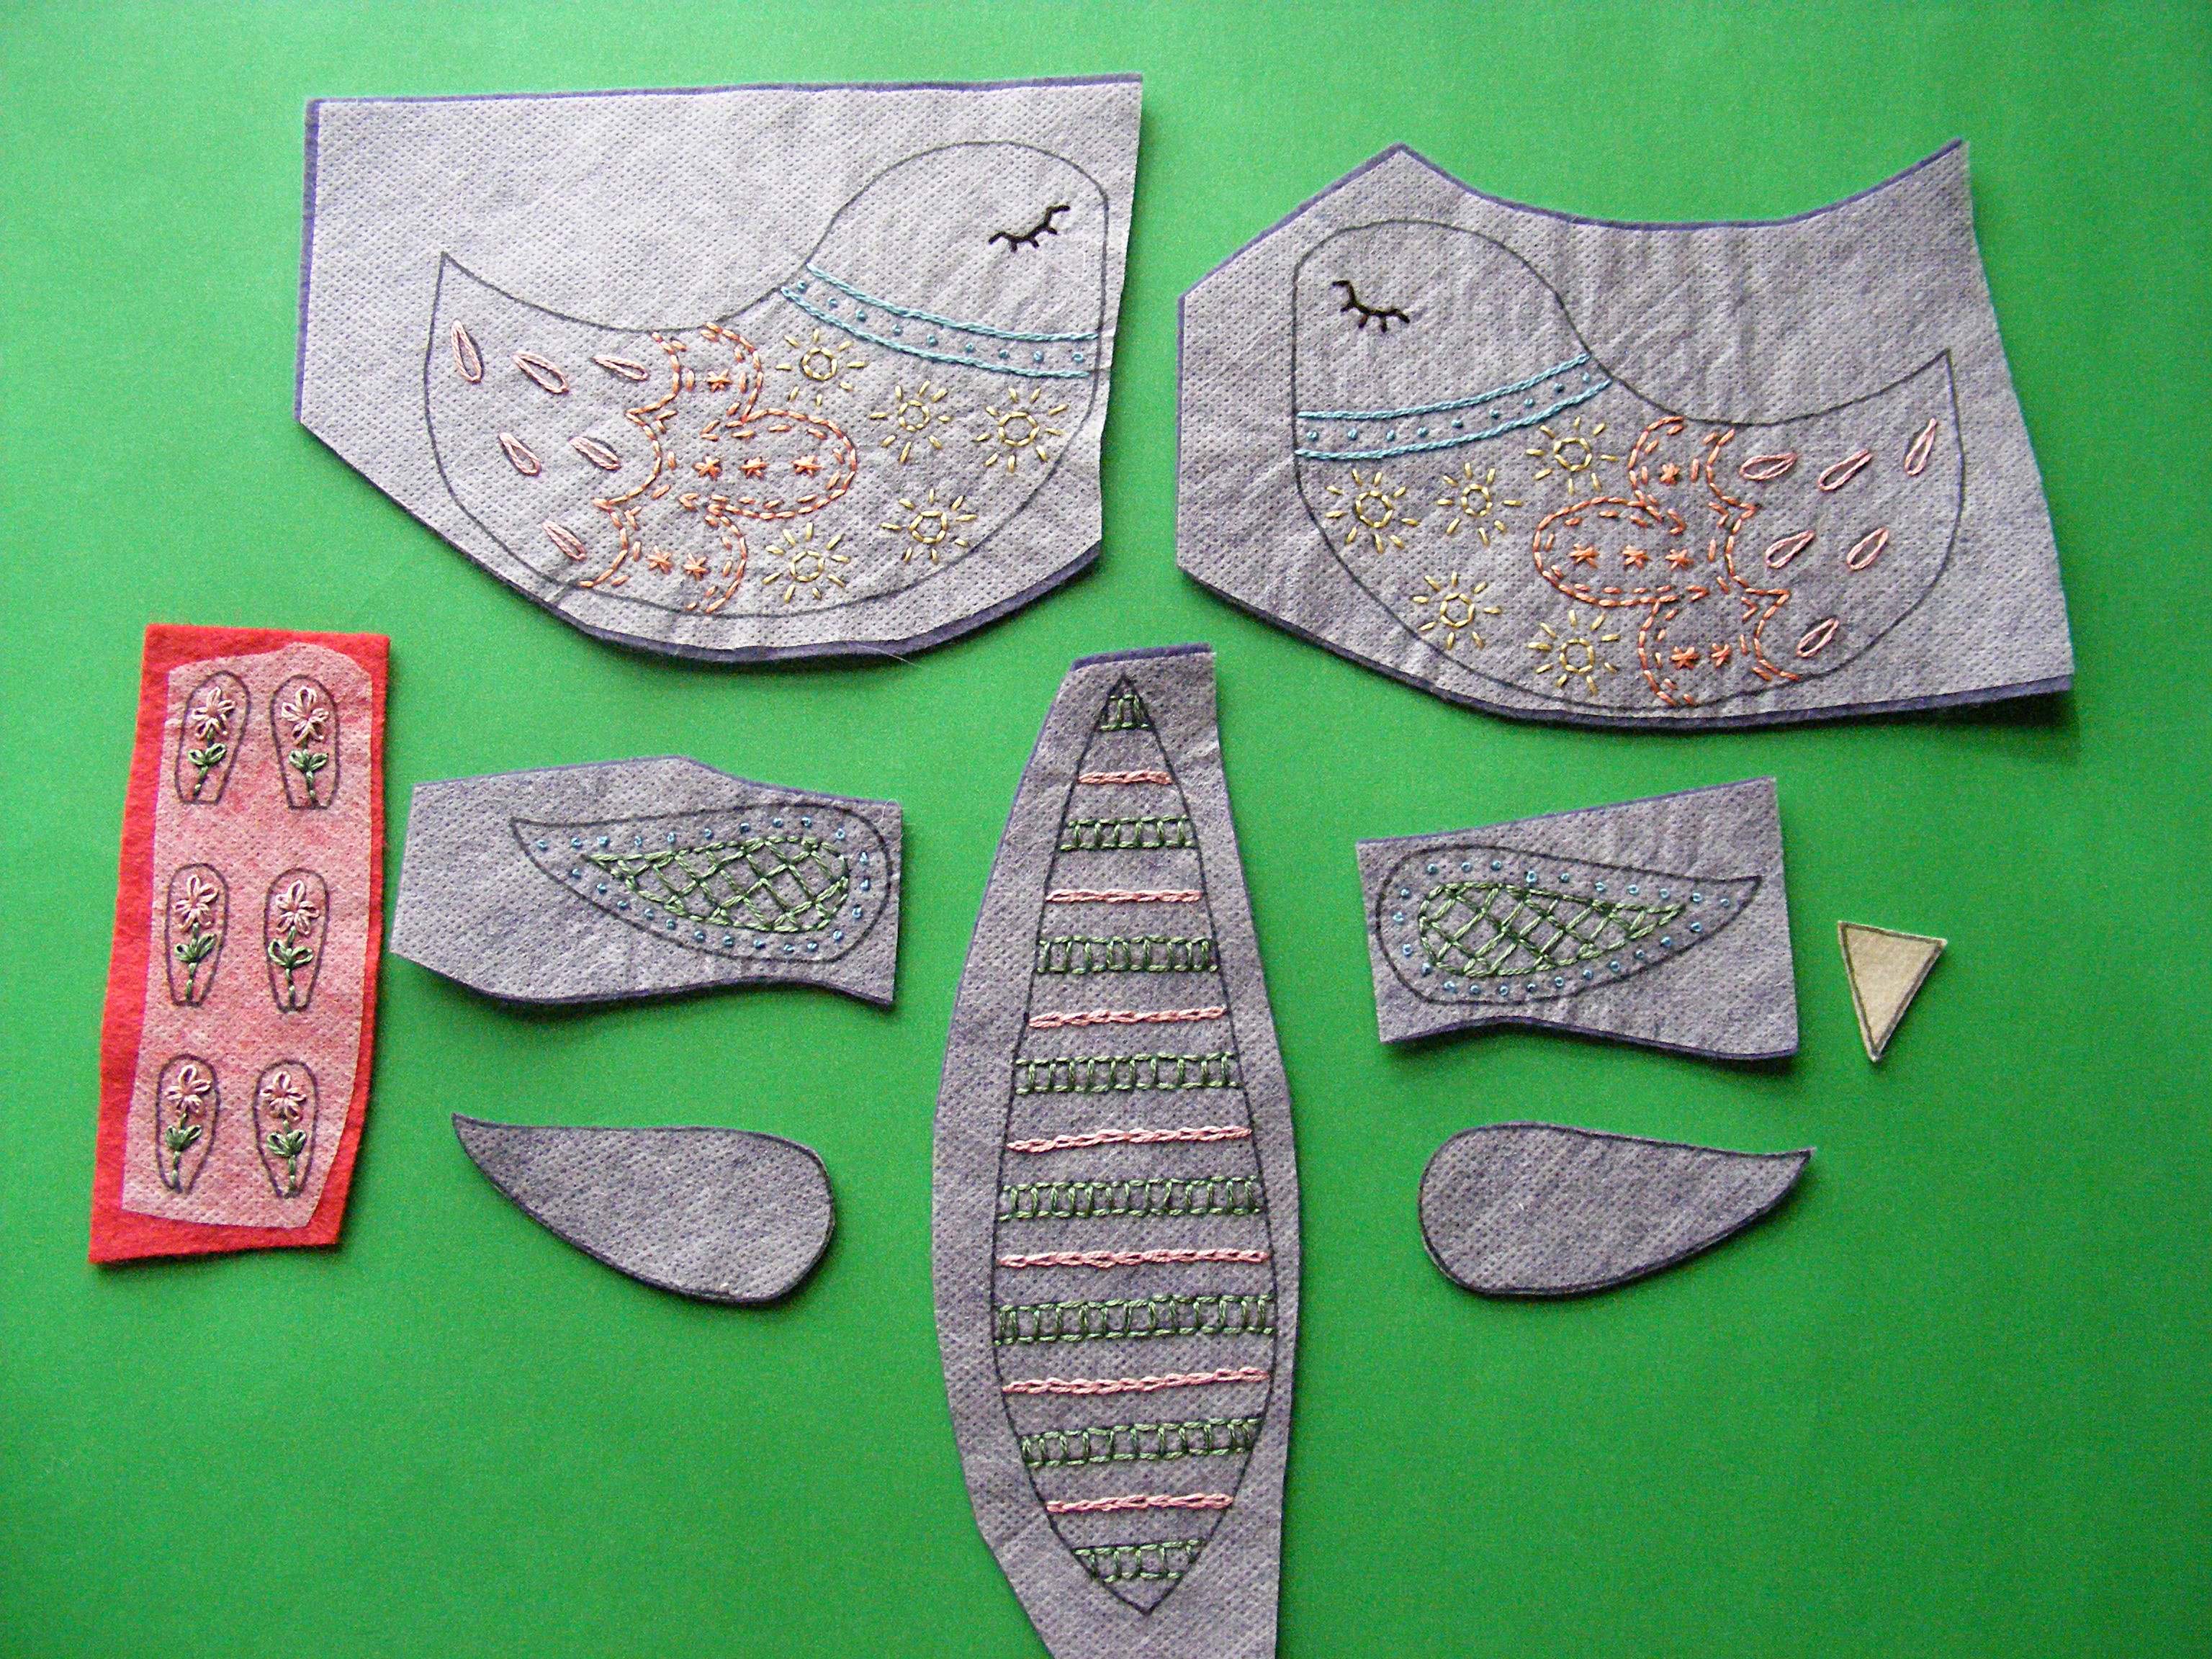
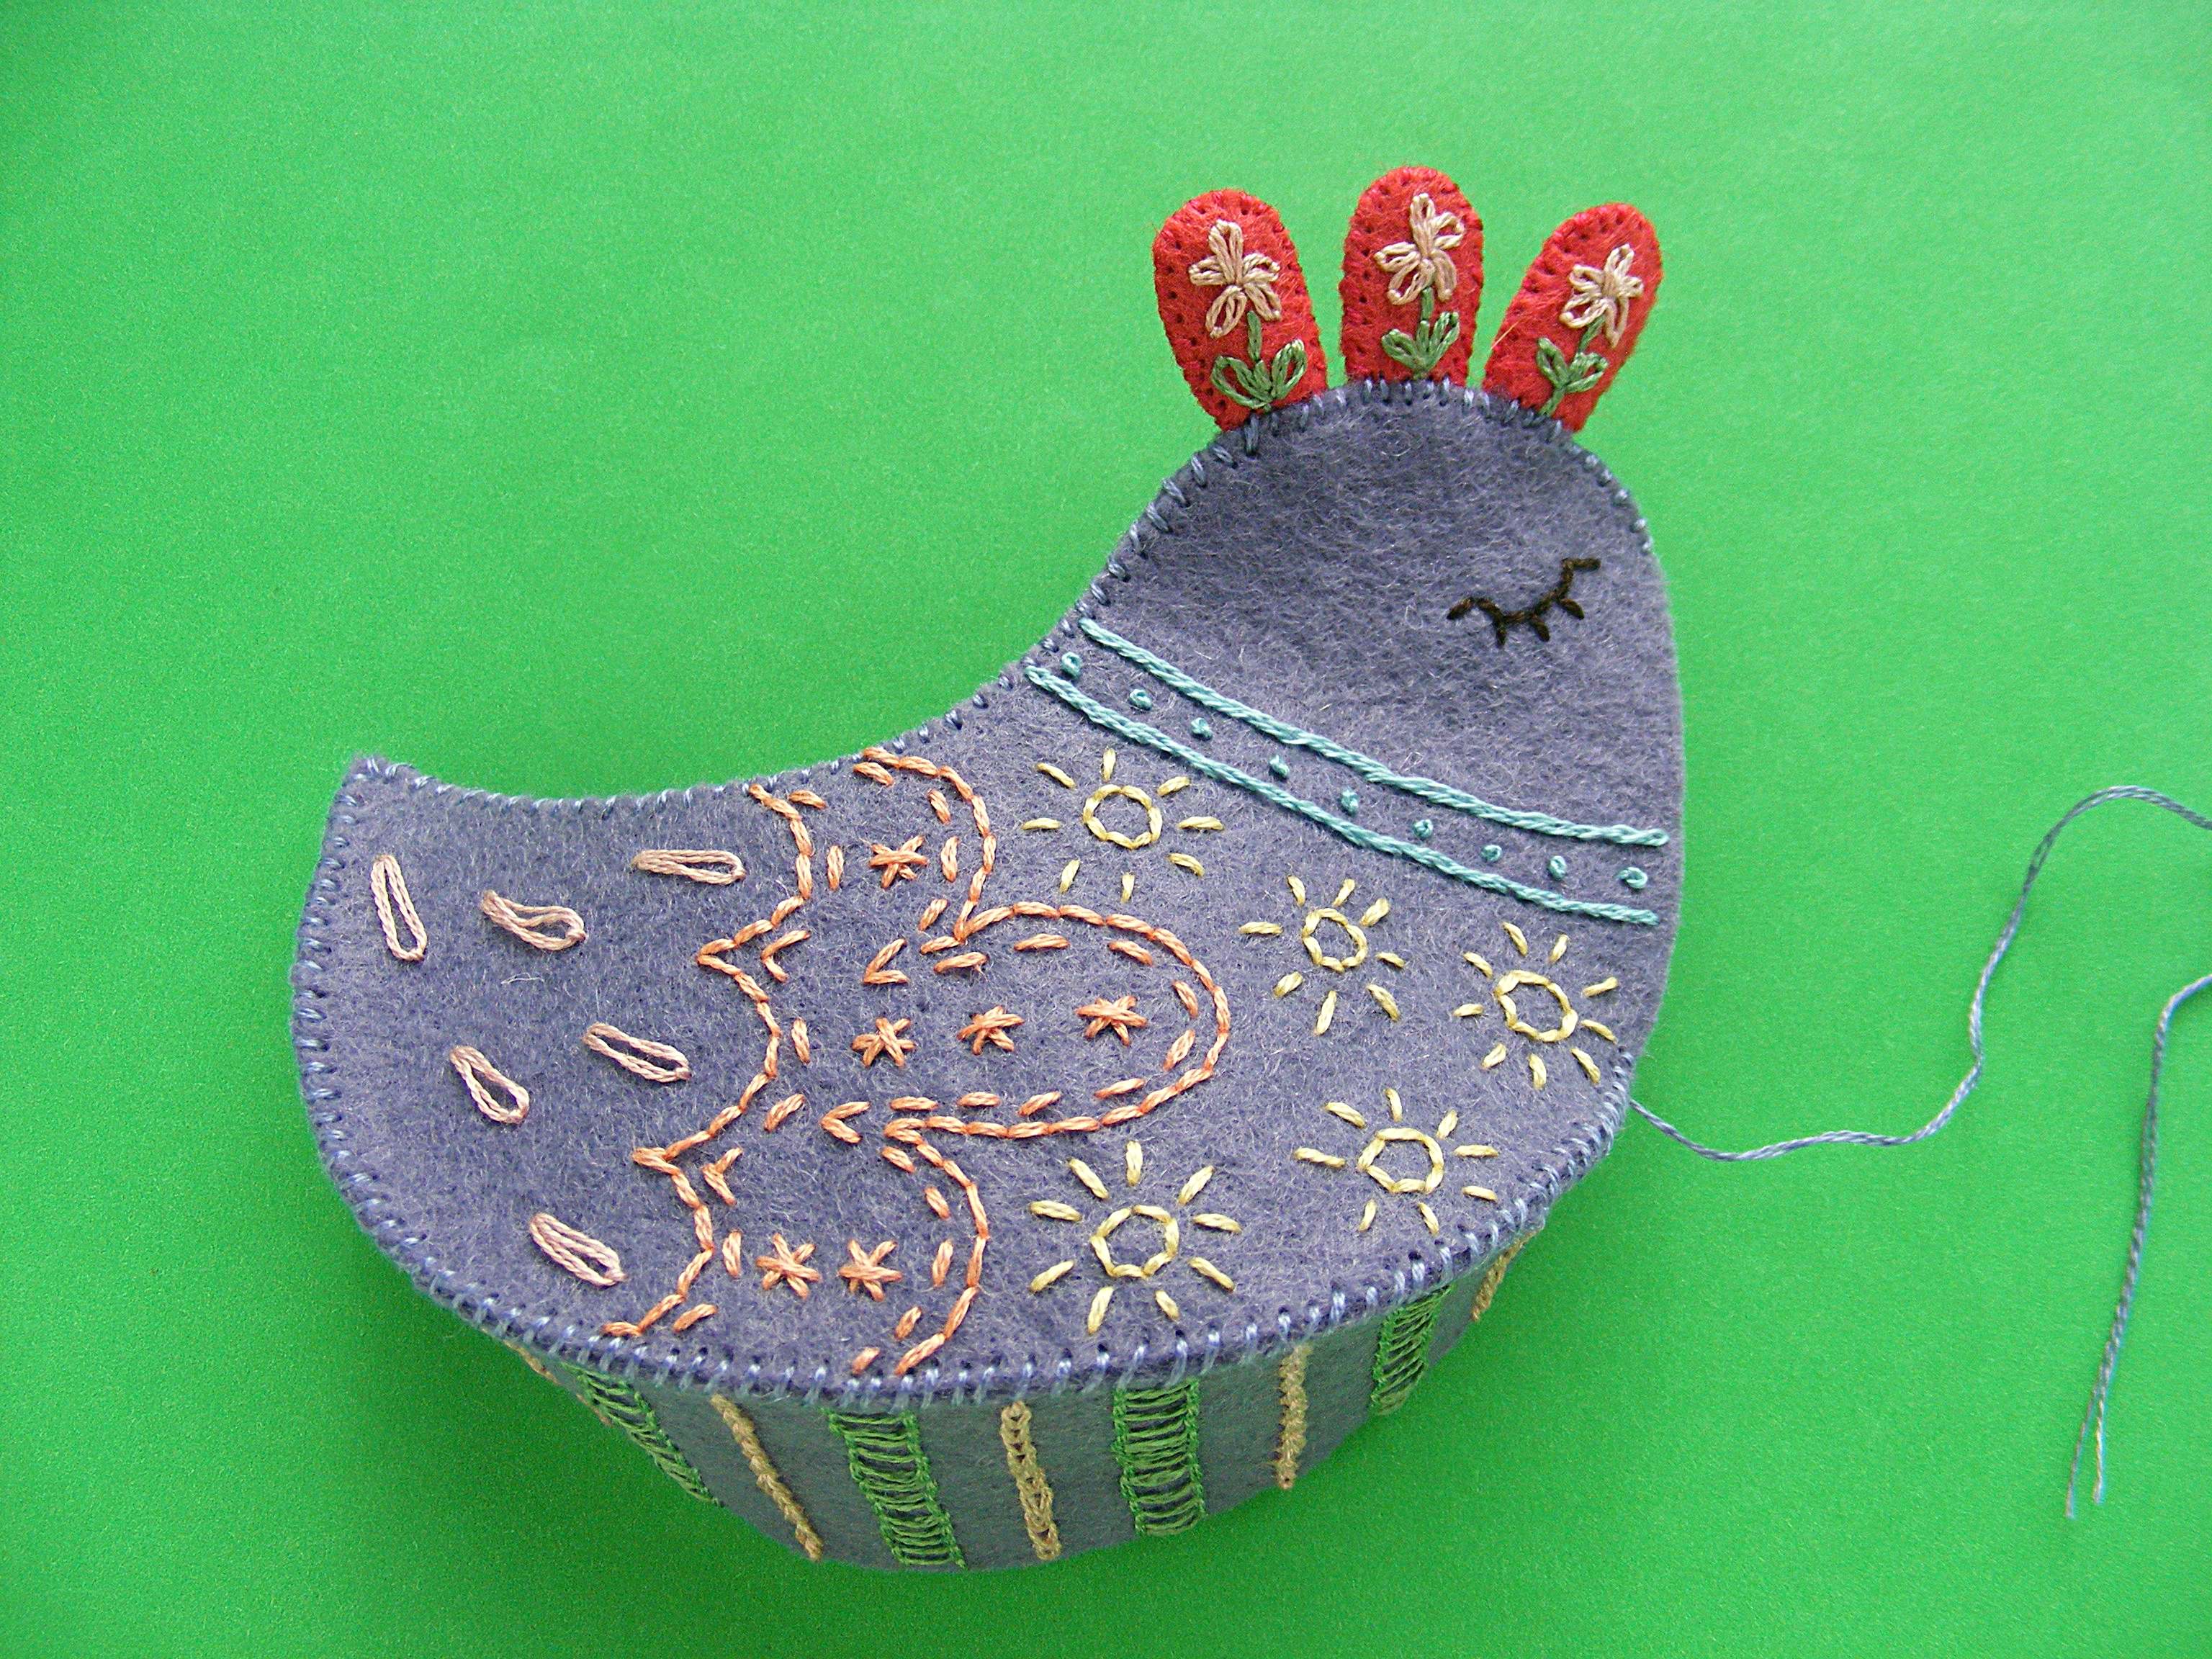
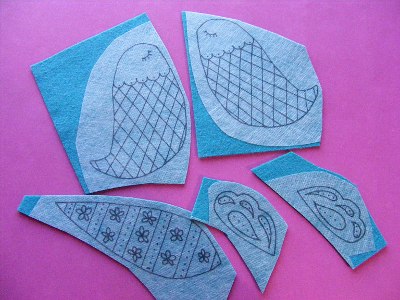
Transfer the pattern to the felt. When I discovered Sulky Sticky Fabri-solvy it changed my life. I made a video showing how awesome it is here. I call it The Magical Embroidery Stuff and I use it for everything. Here I’ve printed the pattern directly onto the Sulky Sticky Fabric-solvy, roughly cut around each piece, and stuck it to my felt.
Step 2 Stitch the design. I used two strands of embroidery thread and the following stitches: backstitch for all lines, French knots for all dots, lazy daisy stitch for the flowers. (Those links all go to video tutorials for each stitch.)
Stitch right through the stabilizer and the felt.
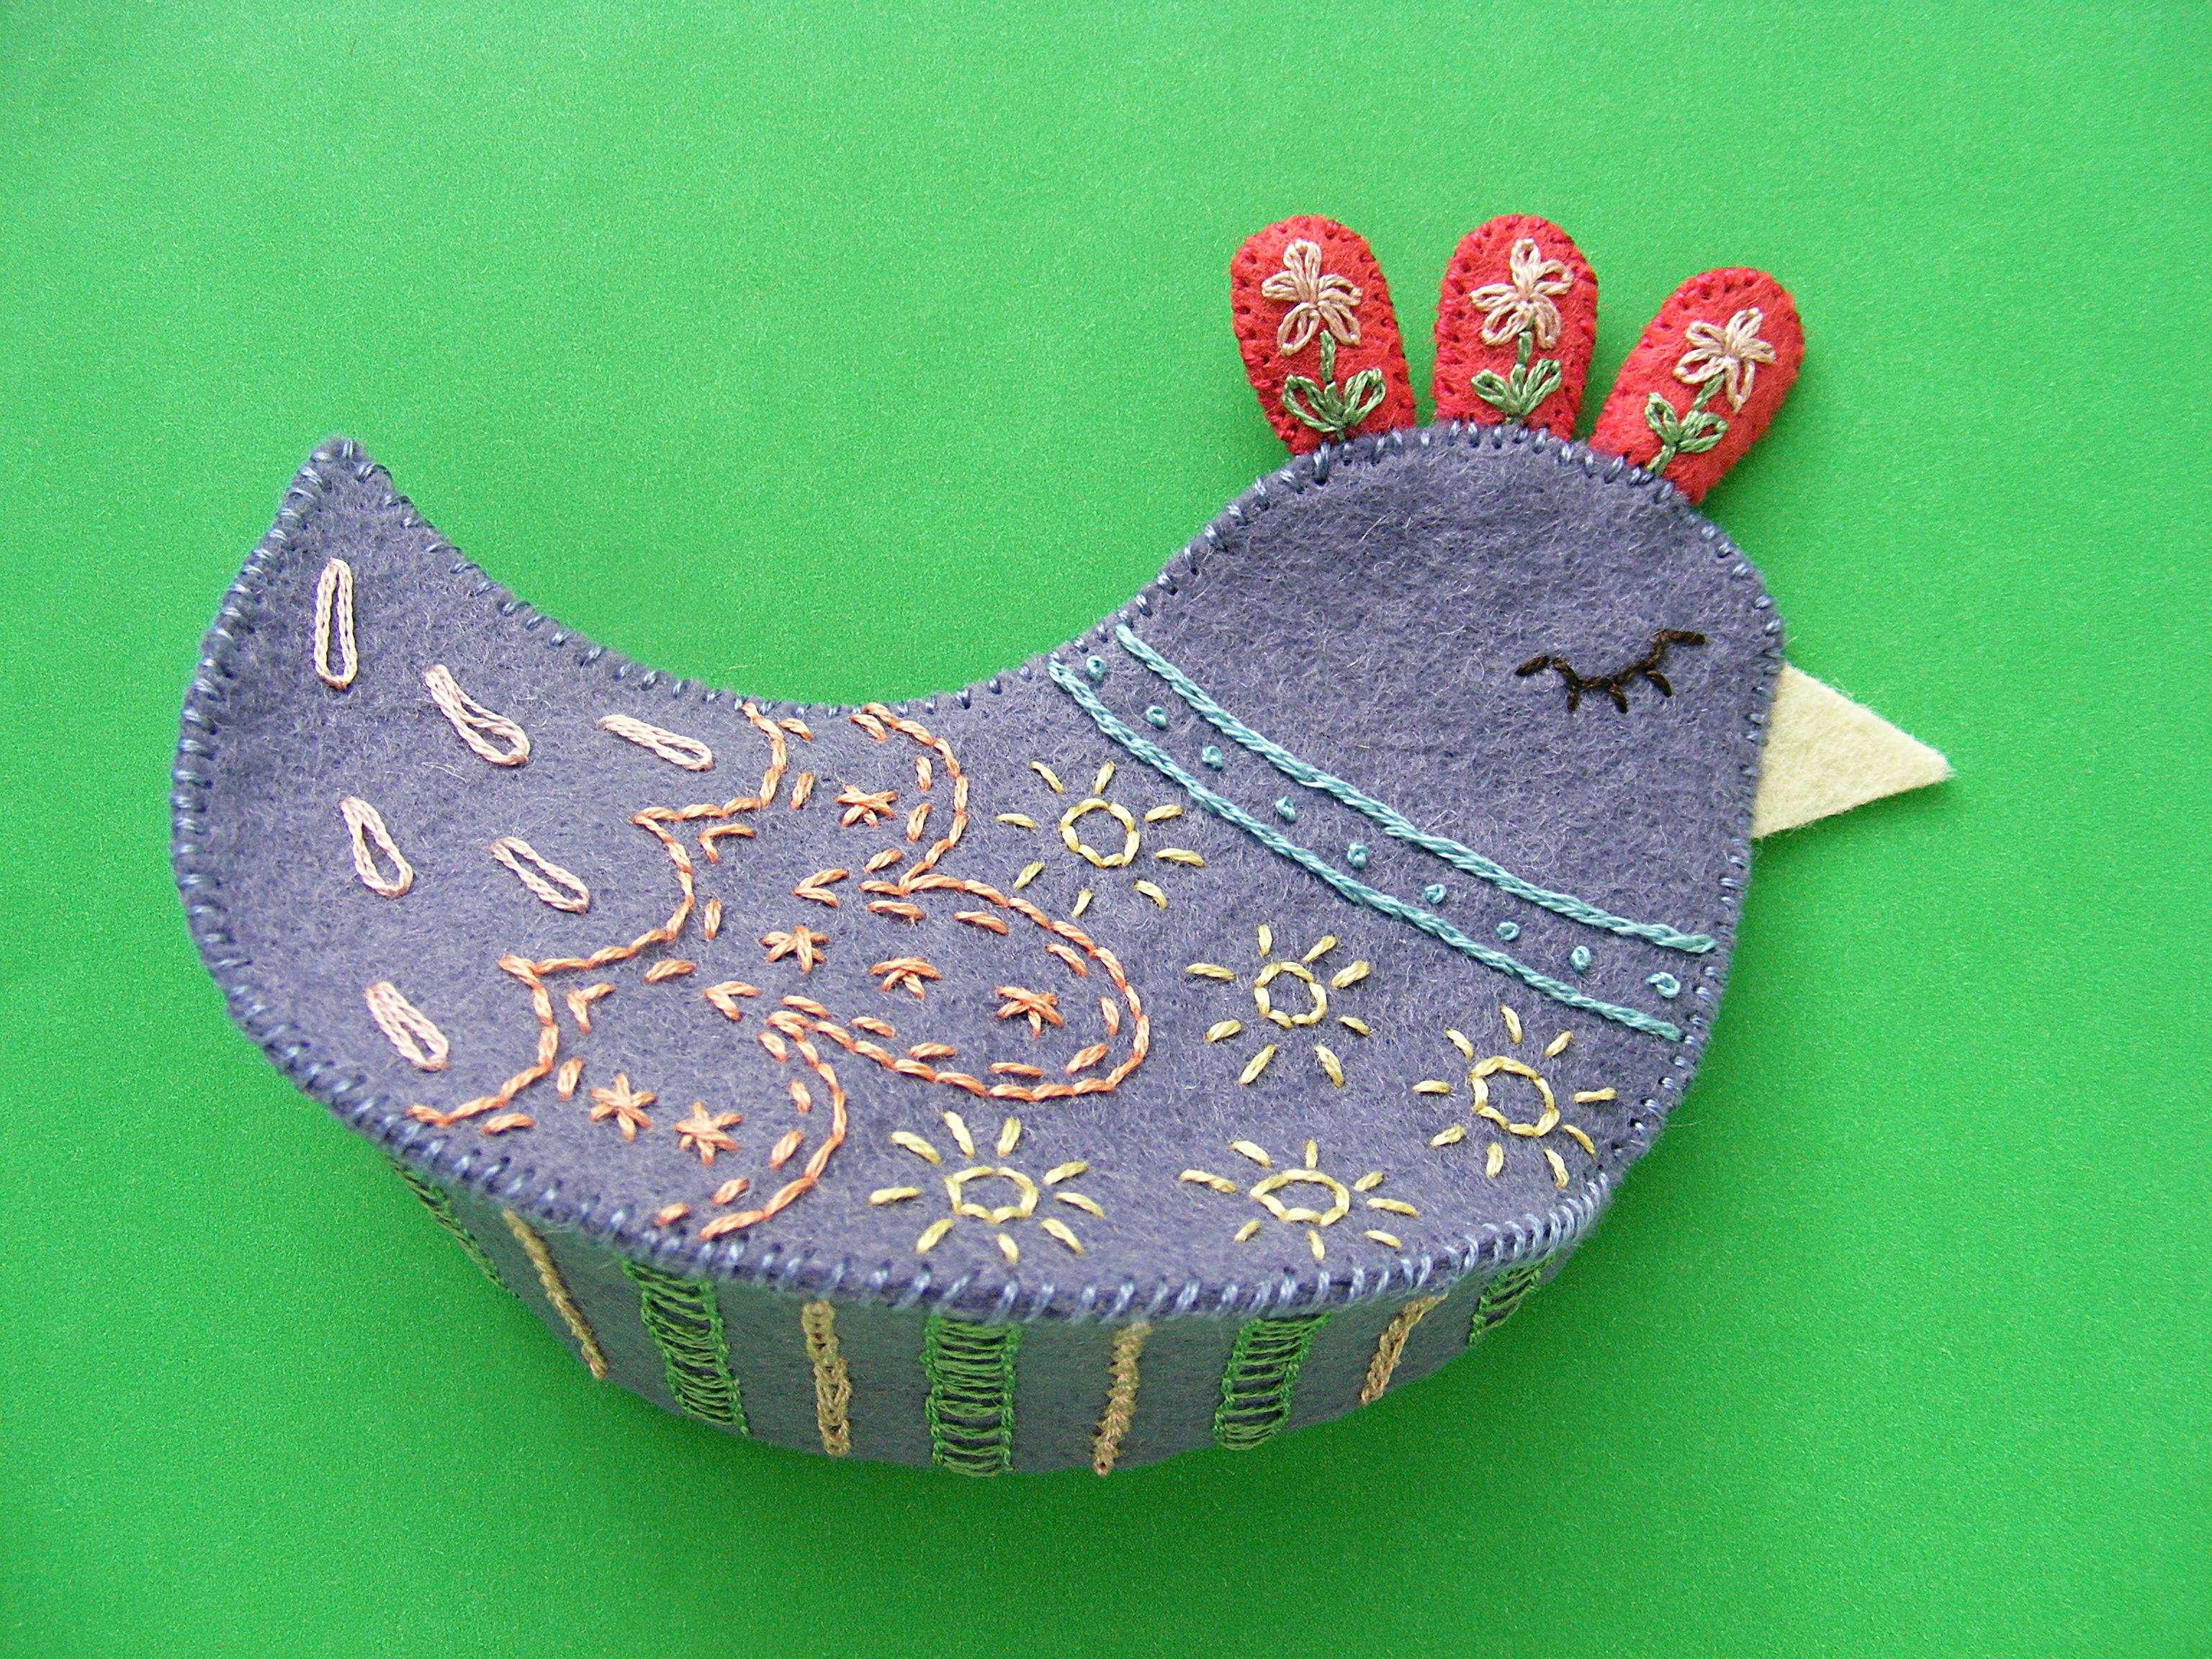
Step 3 Cut out the shapes.
Step 4 Soak off the stabilizer and let the pieces dry.
I lay the pieces face down in a bowl of cold water and just let them sit there for about an hour. Longer is fine – I’ve forgotten mine and let them soak overnight with no problem. The soaking will make the stabilizer all mushy and soft. Rinse it off under cold water. Use a kitchen sprayer if needed to get off any stubborn bits, but try not to rub the surface of the felt. Lay them out on a towel to dry. Don’t wring them, twist them or even smoosh them – just lay them dripping wet on the towel and leave them alone.
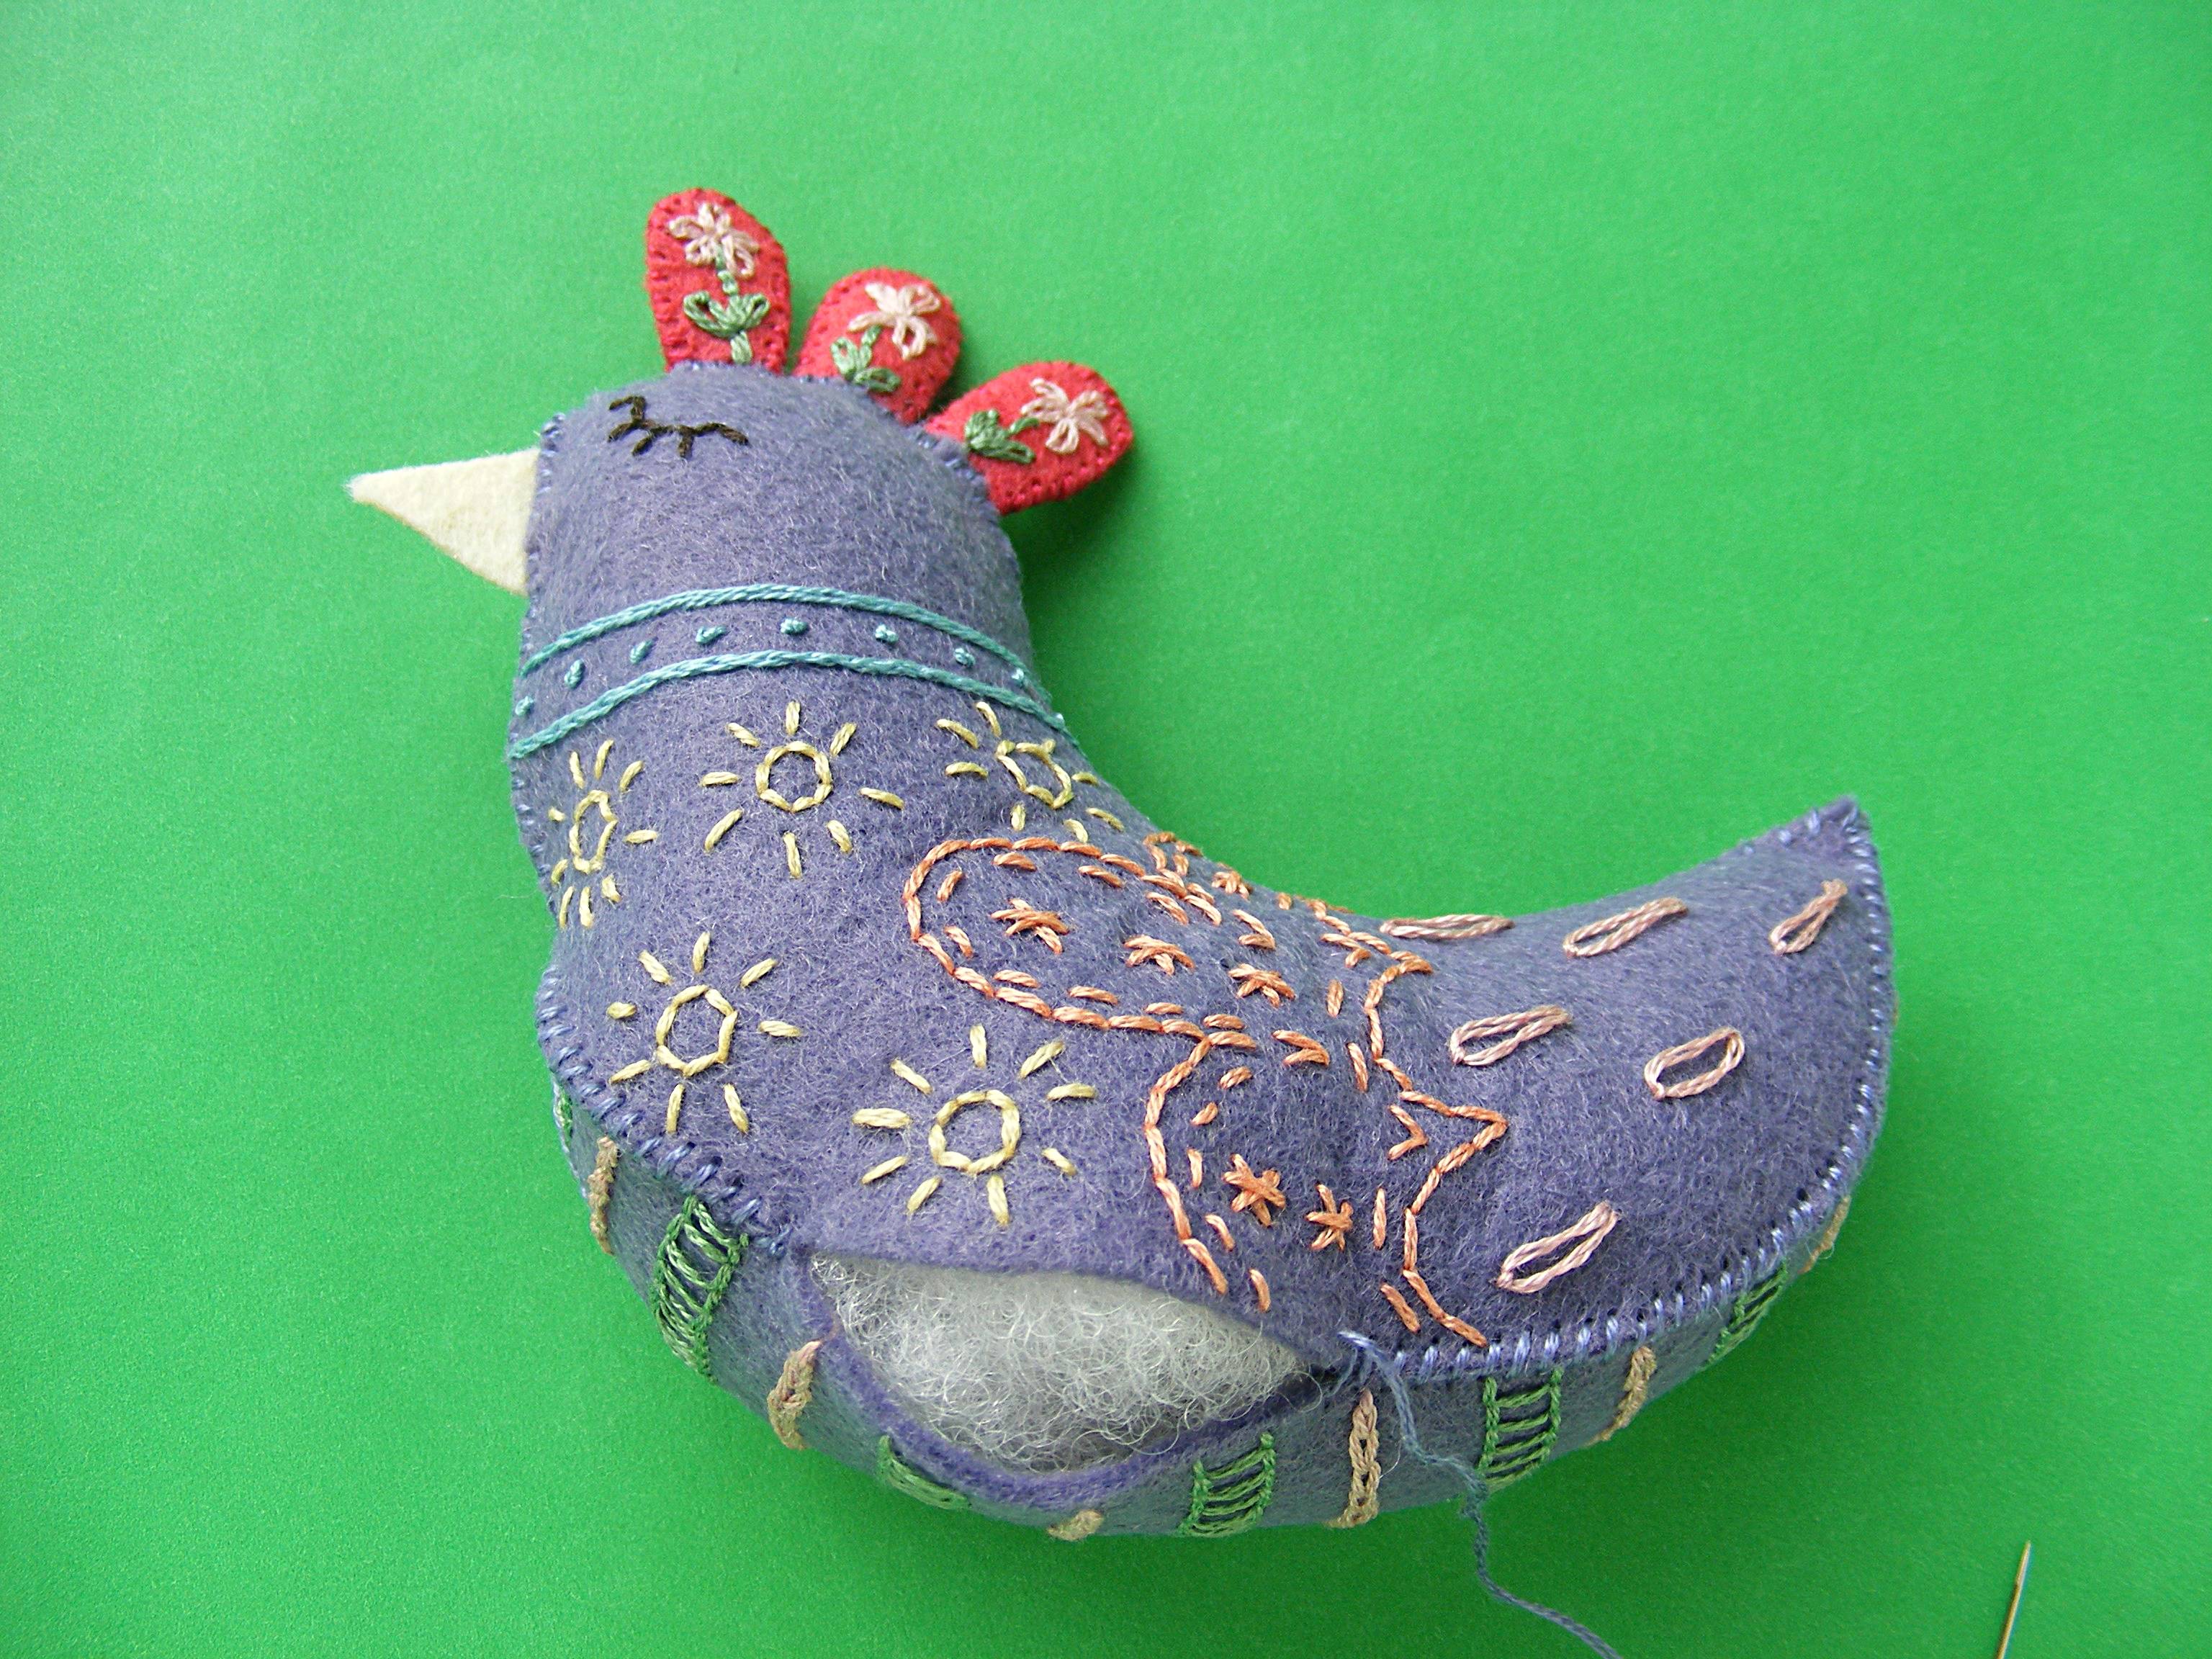
Step 8 Sew up the back, starting at the tip of the tail. Stop sewing about halfway up the back and stuff the tail. Mix a few large nuts (from the hardware store) into the stuffing to weight her bottom, otherwise she’ll tend to tip forward. Sew up a bit higher on her back and stuff in more stuffing. Finish sewing and stuffing until she’s nice and plump, and all sewn up.
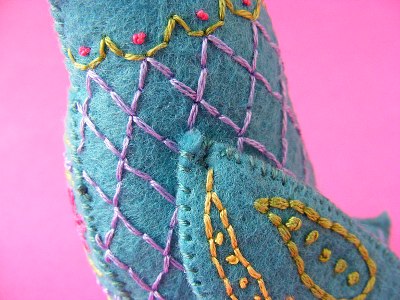
Step 9 Pin the wings in place, one on each side of the body.
Use the grid pattern you embroidered to line them up exactly. Thread a long needle and knot the end. Starting sewing underneath one wing, near the top. Sew through the body and out the other side, through the opposing wing. Take a small stitch back into the wing, through the body and out through the first wing. Stitch back and forth like this a few times to secure the wings. Don’t pull the thread too tight or you’ll distort the shape of her body. Knot your thread underneath one wing and bury the tail.
She’s finished! don’t you want to sew a whole flock of these beauties?
Everyone knows that a little Vicks Vapo-Rub smoothed onto a kid’s chest can help ease a cough and clear up a stuffy nose. But some kids (and some adults too) don’t like the sticky stuff smeared on their skin. And some grown-ups are concerned about using a petroleum jelly-based rub.
I recently had a major Mom-lightbulb-moment. I make rice bags for bedtime – usually scented with orange oil, cinnamon stick and cloves. I will sometimes put one on my “I don’t like sticky stuff on my skin” daughter’s chest to help ease a cough and soothe her to sleep when she’s sick. What if I make a special rice bag for sick times and scent it with the aromatics in Vicks VapoRub?
Awesome – if I do say so myself. Cue the chorus and trumpets please. 🙂
The pattern calls for 2 1/2 cups of rice. Before you put the rice in the bag, stir in 20 drops of eucalyptus oil and 20 drops of rosemary oil.
Put the rice in the bag and sew it closed. Ta daa!
The smell will be very strong at first – keep it stored in a ziplock bag to help preserve it. After a couple of months it will seem like it’s lost its scent, but microwaving will bring it right out again.
Microwave at 1 – 1 1/2 minutes (depends on the strength of your microwave and how hot you like it) and lay it on your child’s (or your) chest. The warmth will help soothe a cough, and the aromatics will help clear a stuffy head. No stickiness needed. 🙂
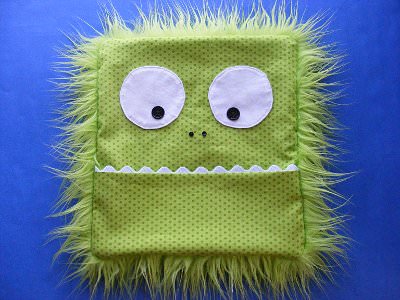
For extra comfort – sew up this rice bag cover.
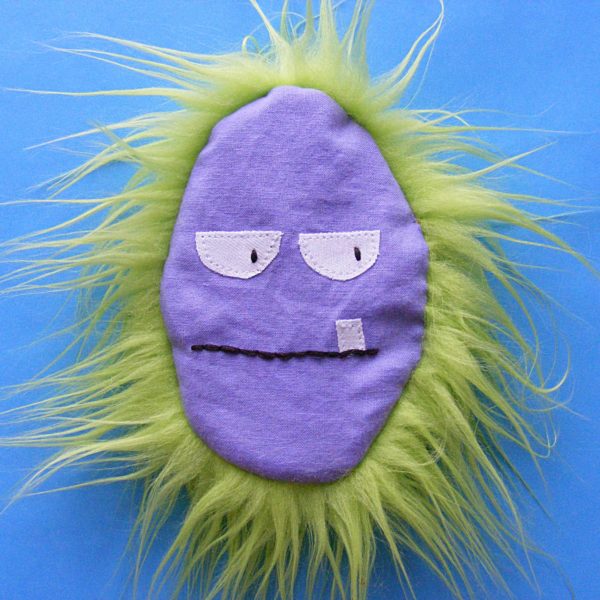
I designed it especially to fit the rice bag I linked to above. Sometimes having a special critter like this monster to help scare away a cold does as much good as the aromatics and the chicken soup. 🙂
Here’s how to make it. . .
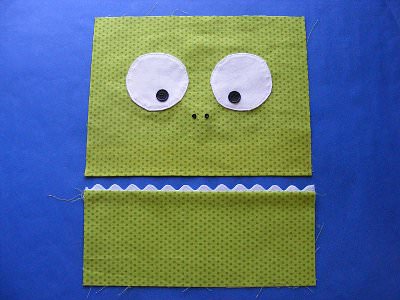
Step 1 Cut 1 square of fabric or faux fur 10 1/2 inches square, for the back of the rice bag cover.
Step 2 For the lower jaw, cut two rectangles, each 4 3/4 inches tall and 10 1/2 inches wide. Cut a piece of white jumbo rickrack 10 1/2 inches long.
Step 3 For the top of the face, cut one rectangle 8 1/2 inches tall and 10 1/2 inches wide.
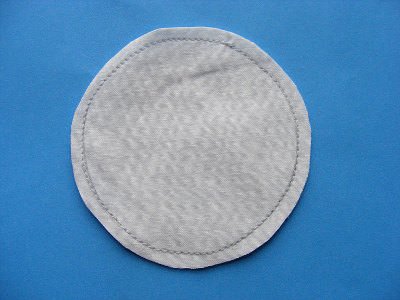
Step 4 Make the eyes. Trace a 3-inch circle on the back of one scrap of white fabric. (I used the inside of a roll of masking tape.) Layer that scrap and another scrap of white fabric right sides together. Sew around the circle, right on the line you drew. Sew all the way around. Trim away the excess fabric, leaving about 1/4 inch seam allowance all the way around. It doesn’t need to be exact.
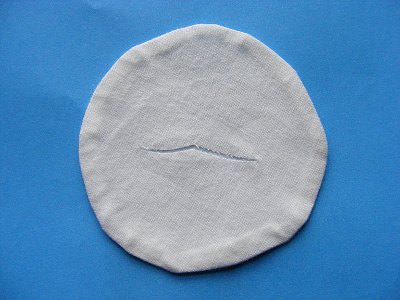
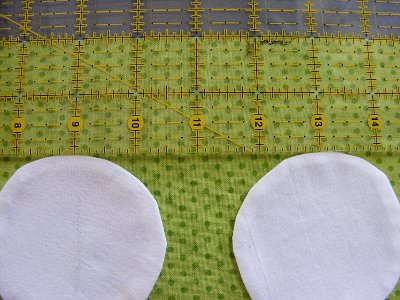
Pul the two layers of fabric apart slightly and cut a slit in the center of one of the layers. Turn the eye right side out through the slit, smooth out the curves, and press the eye flat.
You’ll need to add the rickrack teeth to the bottom of the face. Draw a line 1/8′′ from the long edge of one of the smaller rectangles, on the right side of the fabric.
Lay the rickrack on the right side of the fabric so the valleys line up with the line you drew. Stitch the rickrack in place along the 1/8′′
line.
Lay the second small rectangle over the first, right sides together, with the rickrack sandwiched between the layers. Stitch them
together using 1/4′′ seam allowance.
Flip the two rectangles right sides out and smooth them down where the rickrack comes out of the seam. Press. You can watch a video demonstrating the technique here.
Step 6 Hem the bottom edge of the larger rectangle for the monster’s face. Turn up the bottom edge of the rectangle 1/4 inch and press. Turn it up another 1/4 inch and press. Sew the seam in place. This video will help with that hem if you’ve never done it before.
Step 7 Position the eyes on the rectangle so they’re centered, and the top edge of the eyes is 2 inches down from the raw edge at the top of the face rectangle. Stick them in place with a quick swipe of fabric glue stick. Sew around the edges of the circles with matching thread. This video will help if you have trouble sewing those curves.
Step 8 Add a couple of black buttons (I used 5/8″) to make pupils in the eyes, and a couple of tiny black buttons (I used 3/8″) to make nostrils below the eyes. You’re almost ready to sew all the pieces together!
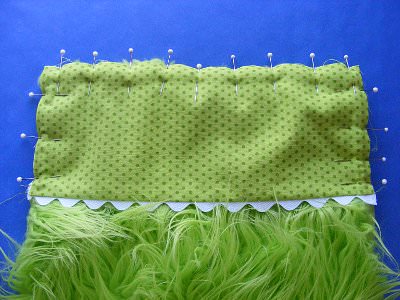
Step 9 Lay the back of the rice bag right side up on a flat surface. Layer the jaw rectangle over the fur so that the bottom edge of the jaw rectangle is lined up with the bottom edge of the fur square. Smooth all the fur to the inside, so it’s sandwiched between the two layers and pin or clip into place.
The bottom of the face is it the top of the photo here; I like to pin toward myself. See how all the fur is tucked inside the pinned edges? That’s what you want.
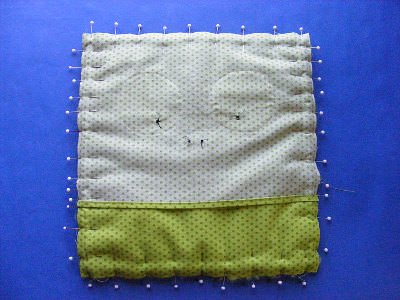
Step 10 Layer the rectangle with the eyes face down over the top of the fur. Smooth the fur to the inside and pin or clip into place. The bottom of the eye rectangle should overlap the top of the teeth rectangle.
Step 11 Sew all the way around the edge using 1/4 inch seam allowance.
Using 1/2′′ seam allowance, sew again up the two sides (not across the top and bottom). That will help reinforce the stress points at the sides of the “mouth.”
Turn the cover right side out and slip a warm rice bag inside!
Happy sewing! And to everyone fighting the cold and flu this season – get well soon!
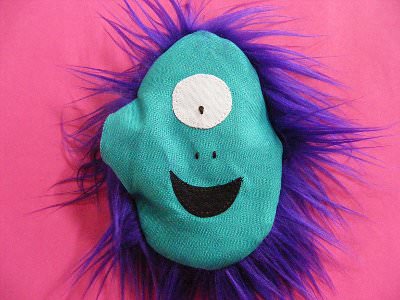
Unless you have these fire-breathing hand warmers, of course!
These pocket-sized monsters are easy to whip up, use scraps of fabulously fun faux fur, and are filled with rice so you can pop them in the microwave for hand-warming goodness. Add a few drops of essential oil or a bit of herb or spice to the rice and you get scented breath from your fire-breathing beasts!
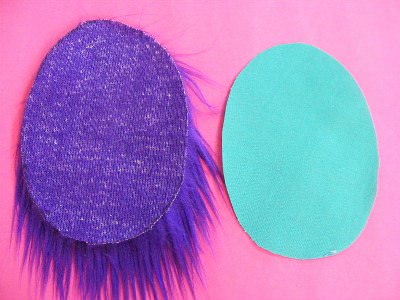
Trace around the pattern template (I like to glue mine to cereal box cardboard before I start) and cut out one oval from from the woven fabric and one from the faux fur. If you’ve never worked with faux fur before, watch this video before you cut to eliminate the flying furry bits.
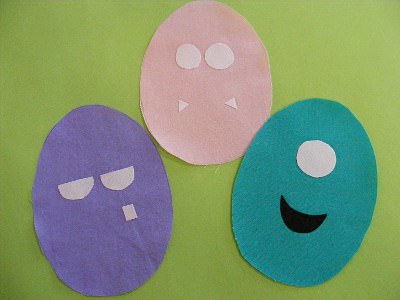
Trace the face onto the non-furry fabric. Use paper-backed fusible adhesive to applique eyes, teeth and/or mouth onto the face. If you’ve never used paper-backed fusible adhesive, you can see how to use it in this video.
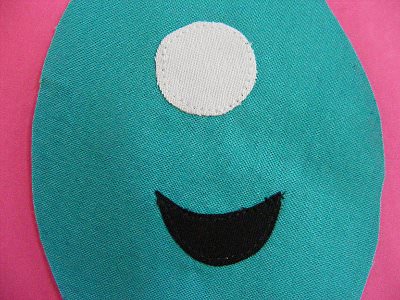
You’re going to heat these babies up, so be sure to stitch around them so the pieces don’t come unstuck when they get hot. I just straight stitched around all the edges in matching thread.
Use embroidery thread to hand stitch the pupils of the eyes, the line mouths and the nostrils. I used 6 strands of DMC #3371– a very, very dark brown.
Just take simple straight stitches for the pupils of the eyes and the small nostrils. Use lazy daisy stitches for the pink nostrils (this video shows how) and backstitch the mouths. Watch this video if you don’t know how to backstitch.
If you don’t want to fuss with hand embroidery, no problem. You can use satin stitch on your machine or even use a fabric marker. It’s all good.
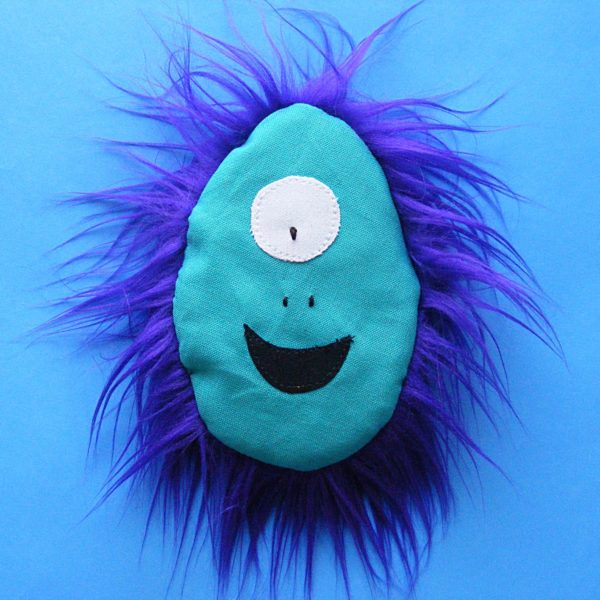
Pin the face to the furry back, right sides together. Tuck all the fur to the inside of the layers so you get a nice furry halo around the edge of your monster. Watch that Intraux to Faux Fur video to see how and why.
Sew the two layers together around the edge using 1/4 inch seam allowance. Leave a small opening on the side to turn it right side out. Keep that opening as small as possible – the faux fur is not fun to sew up by hand. I left about two inches.
That opening won’t be fun to hand sew, but the fur is totally worth using because…
Holy Wow! Look at that fur explosion! Tell me that’s not fun and totally worth the swearing you’ll do in a few minutes!
Fill him up with 1/4 cup of uncooked rice and any scents you want to add. This guy got 1/2 teaspoon of dried rosemary leaves (my daughter’s current favorite scent).
Sew up the opening. I think ladder stitch is the easiest to do on faux fur; watch this video to see how. Make sure you stitch through the backing of the faux fur, not just the furry pile.
Done!
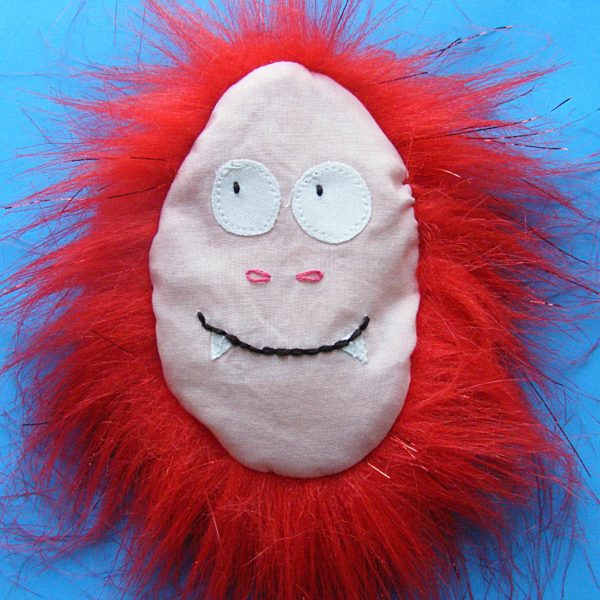
This fiery redhead has two drops of orange essential oil stirred into the rice, along with a few bits of broken cinnamon stick and some whole cloves. My favorite.
This guy looks grumpy so I gave him a less pleasant scent: a few peppercorns mixed in with the rice. Mustard seed is a good angry option too.
Recommended microwave times to heat them up will depend on the strength of your oven. I do mine for 15-30 seconds each.
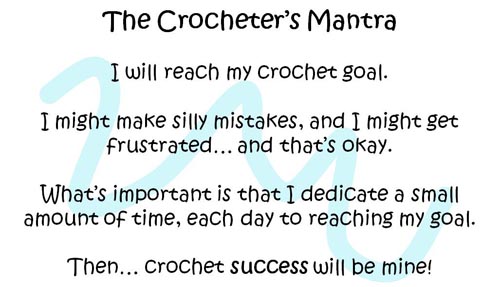
We all know that most New Year’s Resolutions fail. Do you know why? They’re too grand… too lofty. And they often seem impossible.
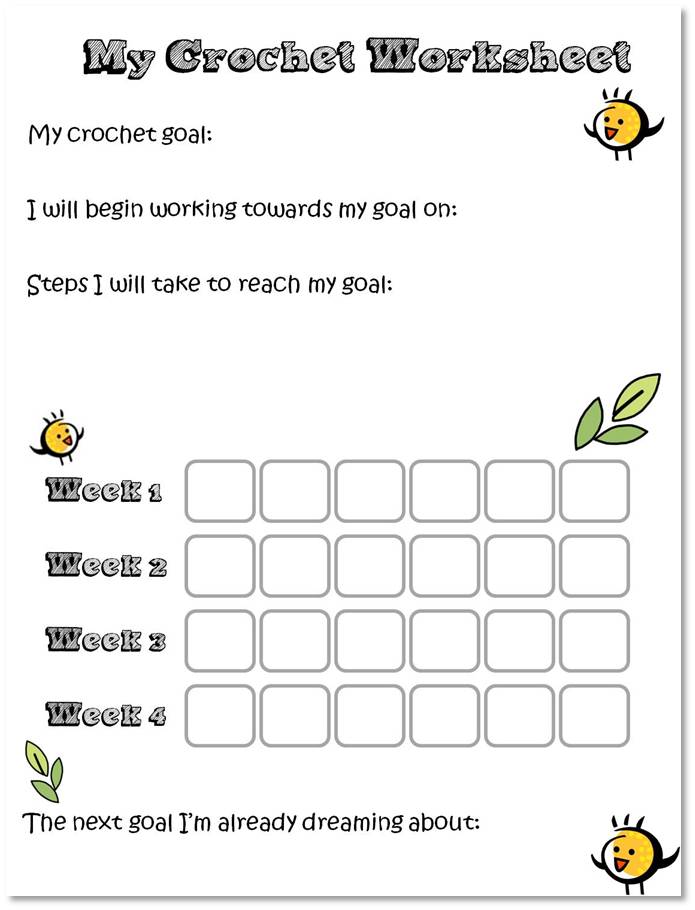
So here’s what we’re going to do: we’re going to set a practical crochet goal, and dedicate 10 minutes a day to reaching it. You have ten minutes a day, right?
And I’m going to give you a handy worksheet to use. Sounds do-able, huh?
Set realistic expectations, and remove roadblocks
If you’ve never knit before, then you’re probably not going to knit your first sweater this month. (Sorry if I’m the one who had to burst your bubble on that one).
But, there’s good news… the needle arts (knitting, crocheting, sewing) are all about putting in practice. I can pretty much guarantee you that if you practice in a consistent way (even if it’s not for huge blocks of time), you’ll get better.
So, step one: pick a realistic goal that you think you can accomplish in a month.
Okay, onto step two (and I think this bit is really important!). You’re going to remove any possible roadblocks that you can think of that might come in between you and your goal. How many times have you sat down, ready to work on a project… only to discover that you don’t have the right hook?
The best way to guarantee success is to solve all of your roadblocks in advance. Before you begin working on your goal, gather all your materials and tools. This means downloading your pattern, getting your supplies, and even bookmarking resources that you might need. Then, when you need help… you won’t be slowed down. You’re prepared.
Notice that there are 4 weeks, with 6 boxes each. Can you commit to spending 10 minutes a day, 6 days a week, to working towards your goal?
And if you find a little spare time… buy all means, keep going!
What’s important is that you consistently spend a little bit of time working towards your goal.
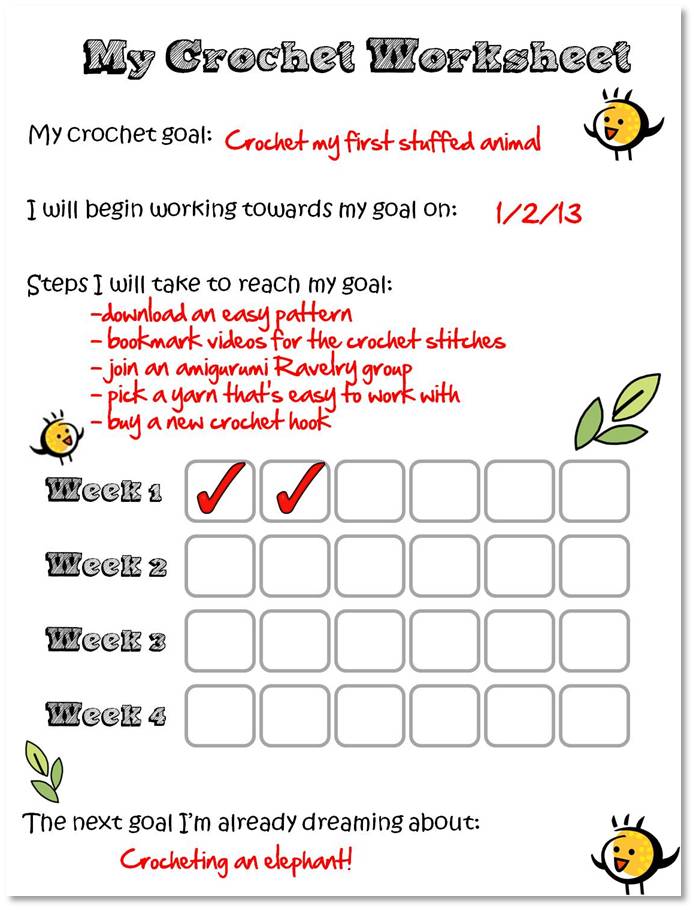
Let’s have a peek at an example:
Look at how I came up with a list of concrete and helpful steps that will remove roadblocks and help me reach my goal. Nothing crazy… just little things that will help make the goal easier.
What’s your goal?
Notice this worksheet isn’t about setting your goals for all of 2013… it’s about picking one thing that you’d like to do within a month. Easy. No pressure.
If you’re feeling daring, you can print out 12 worksheets, one for each month. But, that’s optional! Start with the first month, and see how you go!
Crocheting should be fun, right?
Tell me about what you’re going to start with… I’m excited to hear your goals!
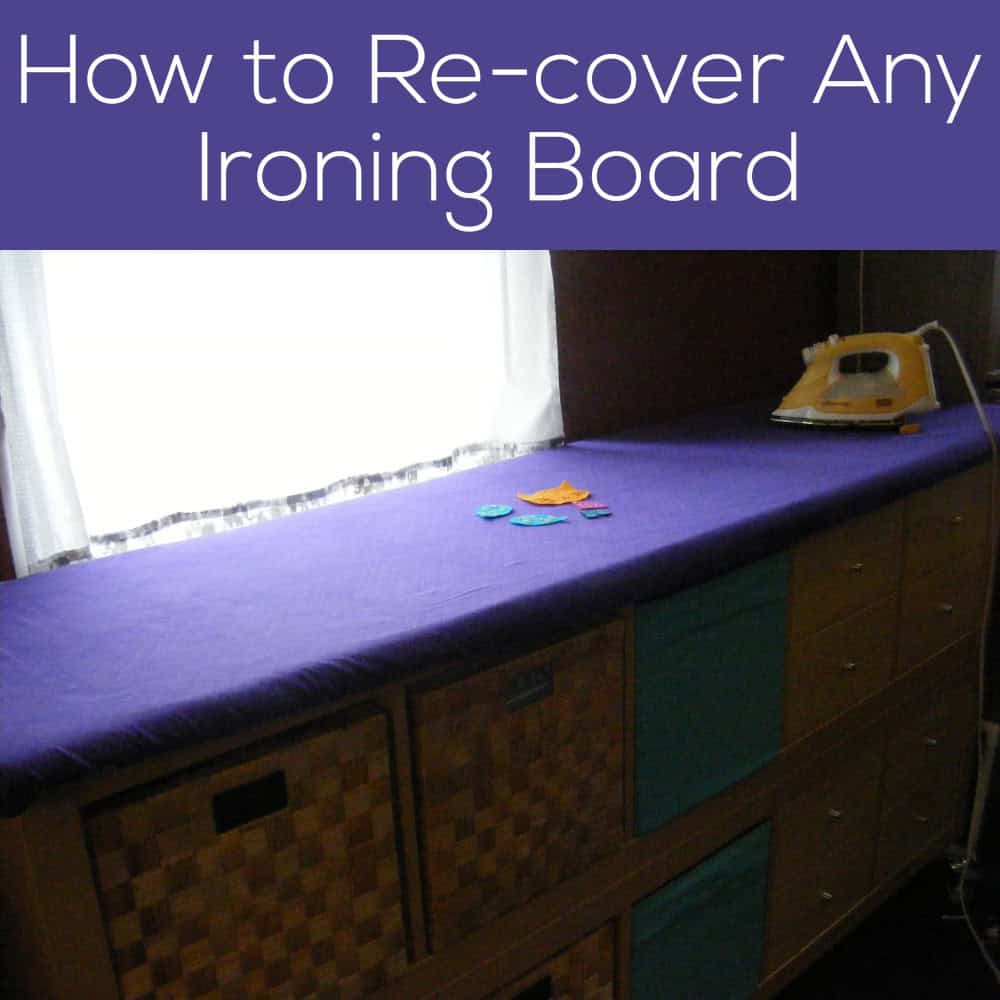
There’s no reason to settle for the bland fabric that comes on most ironing boards – making a new cover is super easy!
I loved my old ironing board cover, but it had gotten badly waterstained and really faded in the sun. Plus – I made all kinds of new sewing room accessories using the Ed Emberley Happy Drawing fabric collection and I wanted my ironing board to match. So time for a new cover!
This time I needed to replace the pad too, so it was a great time to shoot a video showing you how to do the whole thing from start to finish.
If you want even more padding, I recommend a couple of layers of 100% cotton terry cloth. A towel won’t fit the length of most ironing boards, but you can buy it by the yard at the big box fabric stores.
Here are handy links to all the posts about quilting tools and supplies.


 It’s been a little while since I released an embroidery pattern – and now you know why! I’ve been working on this set of four free patterns – commissioned by Sulky, the maker of the thread I used. I posted a review of the Sulky thread here.
 Blossom
 My Heart Is Full. . .
 Jackie