The Simplest Skirt Pattern

The Simplest Skirt - a free pattern from Shiny Happy World

Here it is – the simplest skirt you can possibly make and the best project I know for beginning sewists who want to make clothing.

Size this one up to fit adults – or down to fit dolls and stuffed animals. It’s all good.

What you’ll need

  • fabric (amount will depend on your measurements)
  • elastic
  • double-fold bias tape (optional)
  • sewing machine, thread, basic sewing tools
  • less than an hour. I mean it. I’ve never actually timed myself, but I think I can make one of these in 15 minutes.

Difficulty

Very, very, very easy.

Here’s how to make it.

Step 1

Measure around your waist and the desired length of the skirt.

waist _______________ length ______________

For a skirt with “average” fullness, cut your rectangle twice your waist measurement, plus 1 inch for seam allowance. This does not need to be an exact measurement.

My daughter’s waist is 24 inches. My target for the total length of my fabric rectangle was 49 inches, but the fabric was 44 inches wide. Did I piece in an additional 5 inches? No way. I just used the existing width of the fabric.

Anything from 1 1/2 – 2 1/2 times the waist measurement will look good and have some fullness, but you can go even smaller for a more fitted look, and even larger with a very thin fabric. Play around with it!

What width elastic will you be using?
You’ll need to add enough to your total cut length to make an elastic casing. Add the width of the elastic + 5/8 inch. That’s enough to turn it under 3/8 inch, press, then turn it under the width of the elastic + 1/4 inch.

You can see a video showing how to use elastic in a casing here.

Will you be adding a hem?
I usually add 1 inch hem allowance – enough to turn it under 1/2 inch, press, then another 1/2 inch, press, and stitch. Some people like wider hems. In this sample I didn’t hem at all – just bound the lower edge with bias tape. It’s up to you!

Cut your fabric rectangle.

Step 2

Fold your rectangle in half, right sides together, and stitch the short edge with 1/2 inch seam allowance.

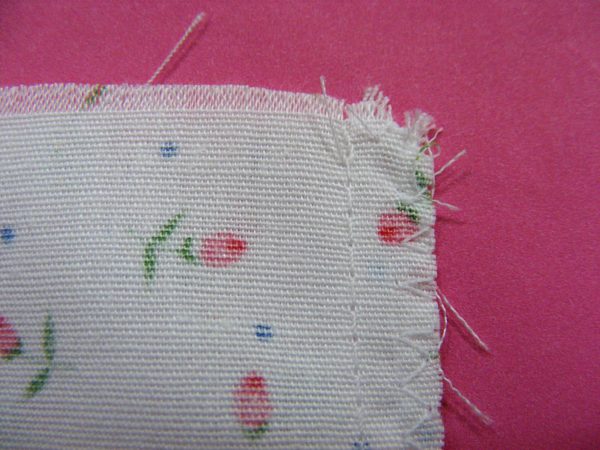
Finish the seam allowance. This was kind of a ravelly fabric, so I zigzagged the seam. You can see how to do that and another easy seam finish option in this video.

Step 3

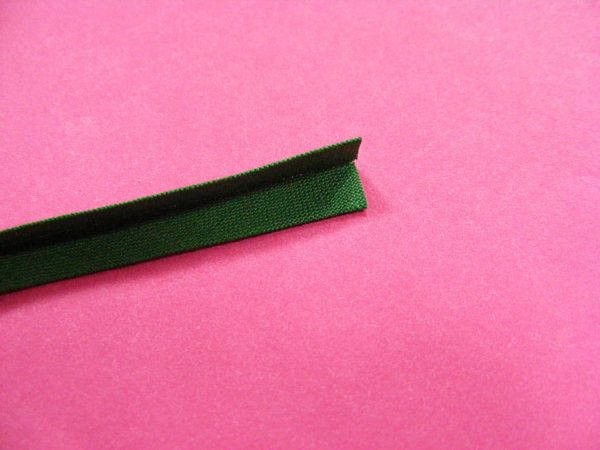
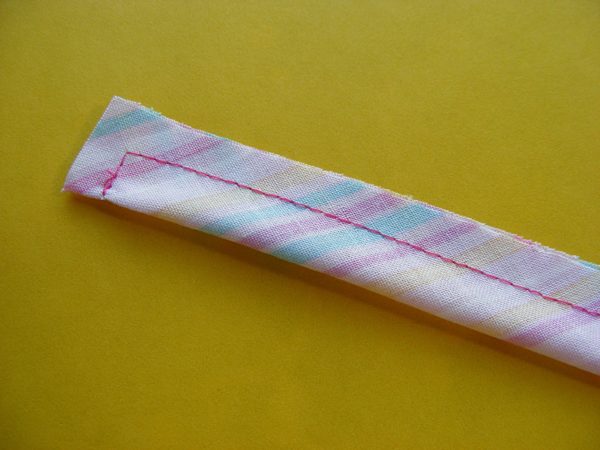
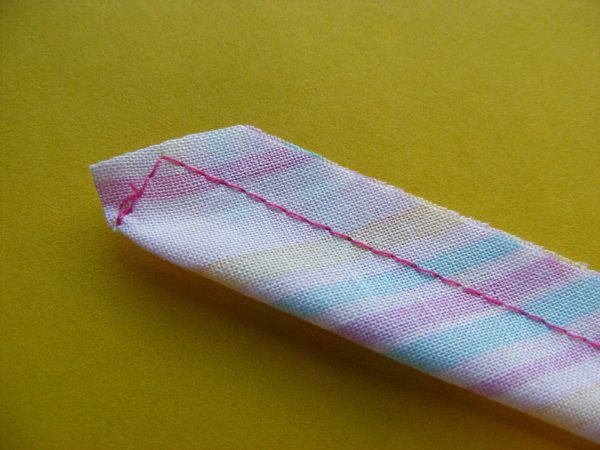
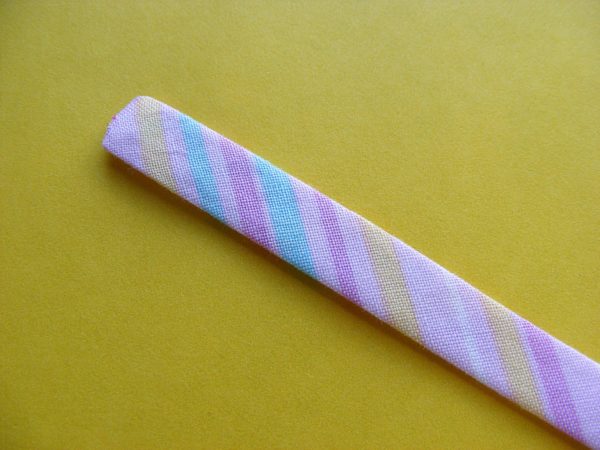
If you’re going to use bias tape to finish the seam, prepare it now. I found a packet of very old single fold bias tape that I wanted to use. Since it was single fold, I needed to fold it in half one more time and press it.

If you want to make your own and don’t know how – watch this video. For this project you can cut your strips on the straight grain.

Step 4

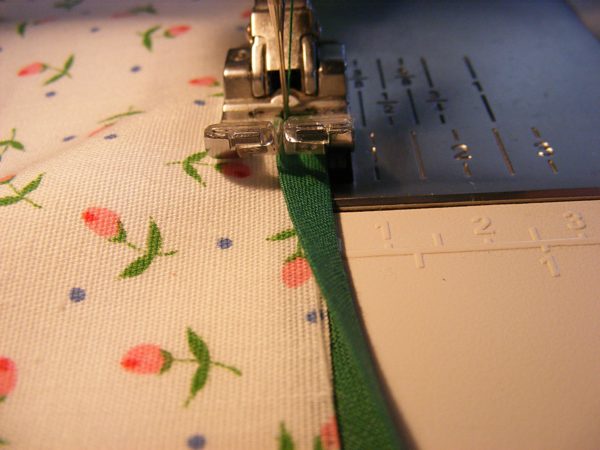
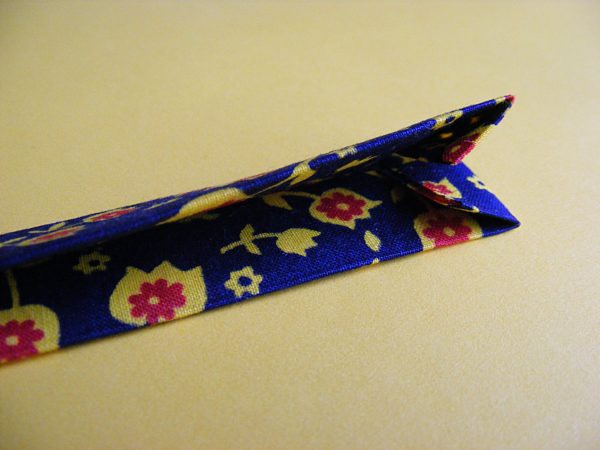
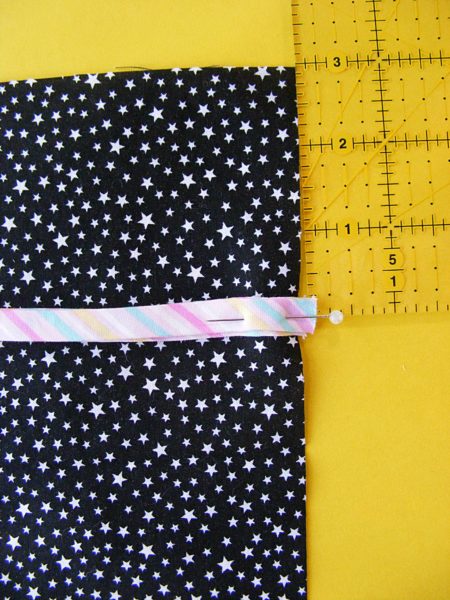
Attach the bias tape by folding it around the raw edge of the skirt fabric and stitching it in place.

Step 5

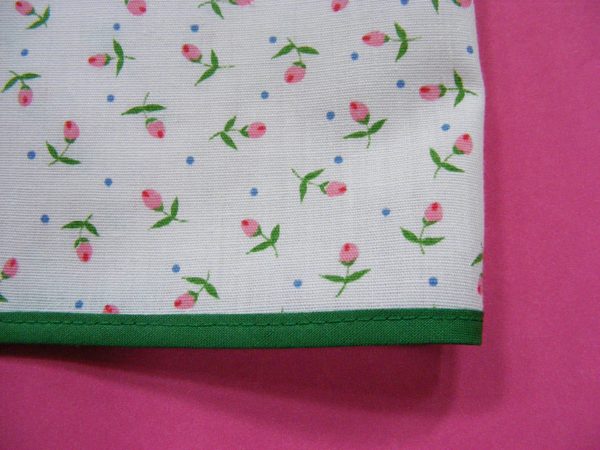
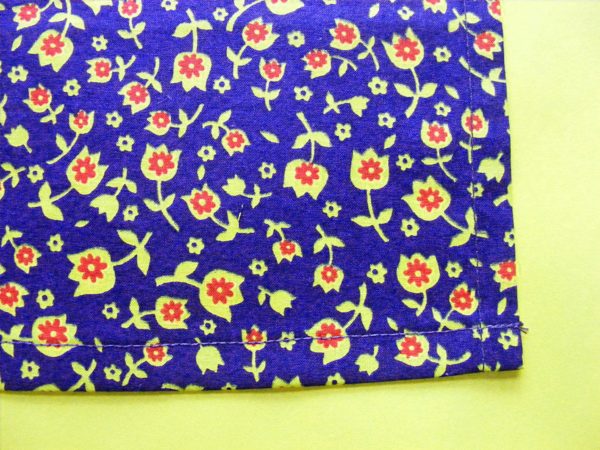
Here’s what your finished hem will look like.

If you want to do a regular folded hem instead, you can see how in this video.

Step 6

Fold the top edge under 3/8 inch. Press. Fold again the width of the elastic plus 1/4 inch. Press. (I used 1 inch elastic on this skirt.)

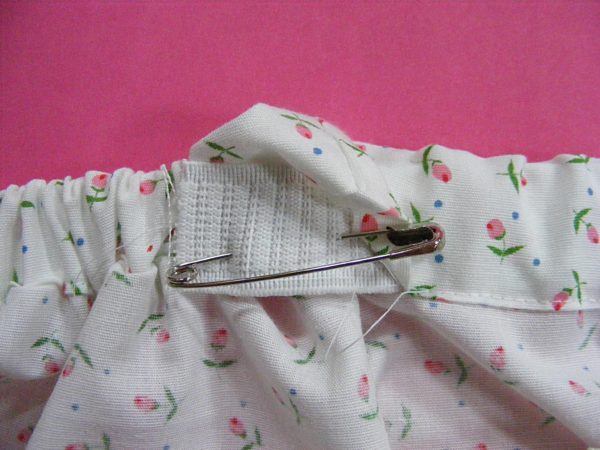
Stitch the casing as close to that folded edge as possible, leaving about 3 inches open for inserting the elastic. Thread in the elastic, pin the ends together and TRY IT ON.

If you want to see me do this step on this very skirt, watch this video.

Step 7

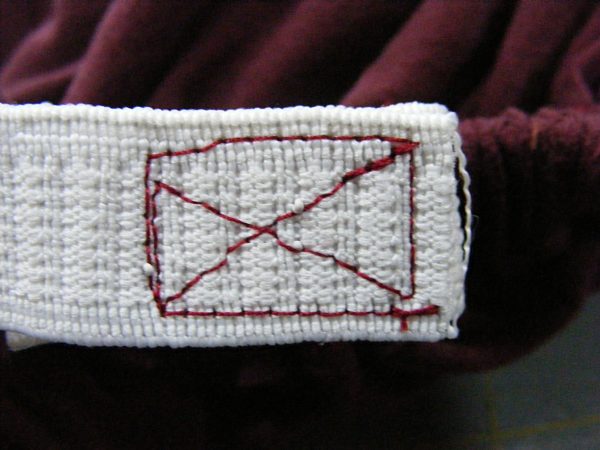
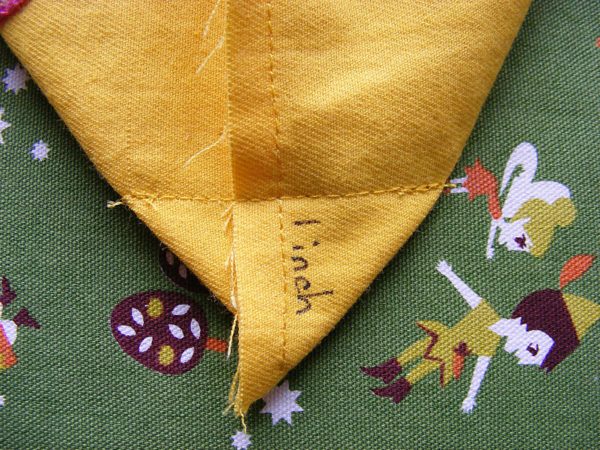
Once you know the fit is good, securely sew the ends of your elastic together. I sew a box around the edges of the overlapped bits, then sew an X across the box.

I’m showing you an example from another project because if I sewed this one in a thread dark enough to see, it would also show through the very thin white fabric of the skirt, and that would’t be pretty.

You can see all of this in the same video I mentioned in Step 6.

Step 8

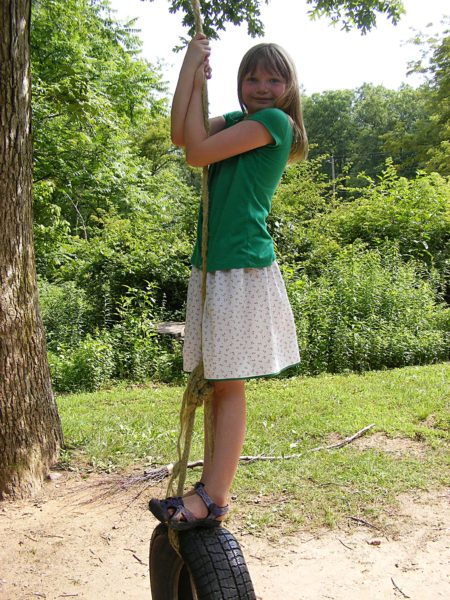
Let the elastic pop back into the casing, fold the casing back in place, and stitch that opening closed. Throw on the skirt and go play on a tire swing.

It really is that easy!

You can size this to fit anyone – though the shape isn’t terribly flattering on most adult women. Those of us with hips, anyway. 🙂

This is a great project for kids to make for themselves and also for their dolls and stuffed animals – easy to sew, easy on and off, and really inexpensive.

Want to see what some kids have made with this basic pattern?


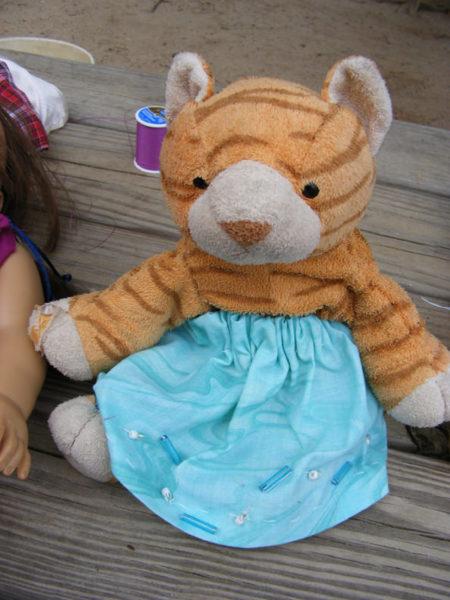
This skirt got some fancy beading.

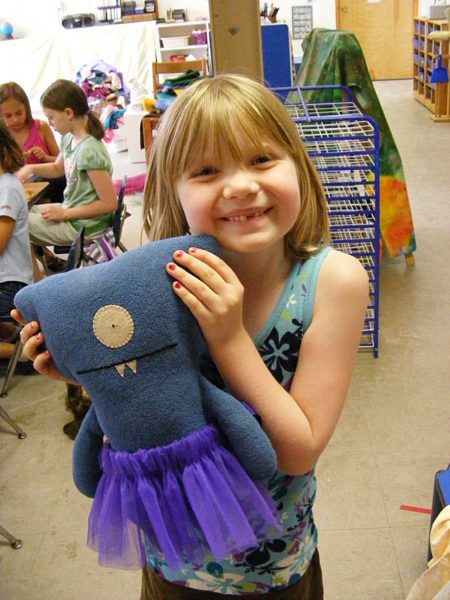
And I love the tutu on this Ugly Doll – made with tulle and no hem needed.

And, of course, the gap-toothed kid holding it! 🙂

These were all from a Summer Camp I taught a couple of years ago.

Best,
Wendi

Easy Apron – Free Sewing Pattern

Easy Apron - a free sewing pattern from Shiny Happy World

Aprons.

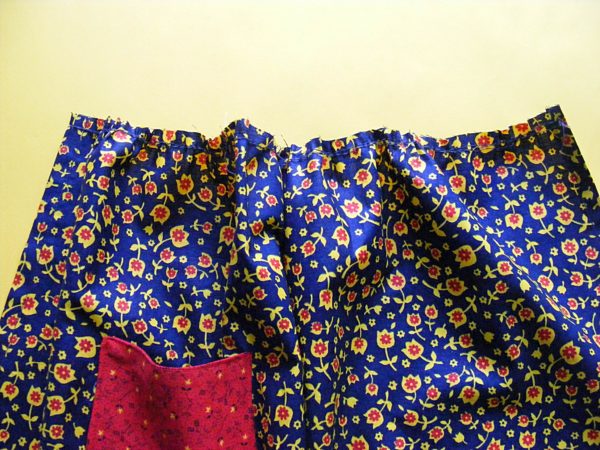
This is about the easiest apron you can possibly sew. A rectangle of fabric, gathered at the top, and edged with double-fold tape that also serves as a tie.

Easy peasy!


Follow this pattern to whip one up in an afternoon, and you’ll be an expert – ready for some really fun variations – patchwork aprons, ruffled aprons, and frilly, fancy, useless aprons.

But first – an easy apron.

What you’ll need

  • fabric for the main apron and pocket (amount will depend on your measurements)
  • sewing machine, thread, basic sewing tools
  • 1-2 hours

Step 1

Cut the following pieces. . .

For the main apron piece, measure all the way around the waist, and measure from the waist down to the desired length (usually anywhere from mid-thigh to the knee, depending on the look you prefer).

Cut a rectangle of fabric the width of the total waist measurement, and the height of the desired length plus 1 inch.

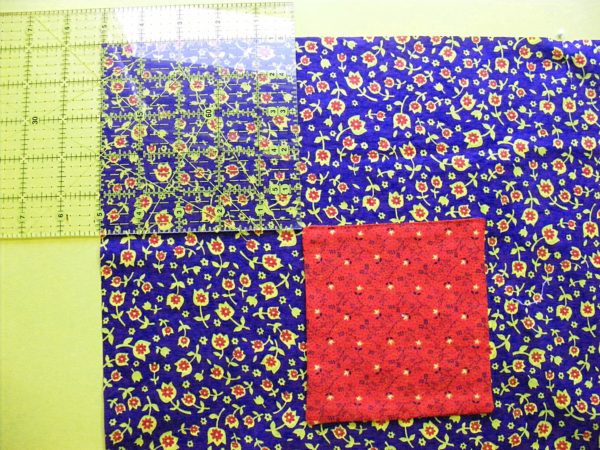
For the pocket, cut two squares of fabric, both 6 inches square. This will make one pocket. If you want to make two pockets, cut four squares.

For the wasitband/tie, cut strips (on the straight grain) 3 inches wide. You’ll need to cut multiple strips and join them together to get the desired length.

  • For a girl’s apron that ties in the back, you’ll need a total length of 58 inches. To double-wrap and tie in the front you’ll need 84 inches.
  • For a woman’s apron that ties in the back you’ll need 72 inches. To tie it in the front you’ll need 96 inches.

Step 2

Place two pocket squares right sides together.

Easy Apron - a free pattern from Shiny Happy World

Using 1/4 inch seam allowance, stitch almost all the way around the edge, leaving a two-inch hole to turn it right side out. (If you’re new to sewing, this video shows how to sew straight lines and turn corners.)

Don’t forget to backstitch at the beginning and end of your stitching.

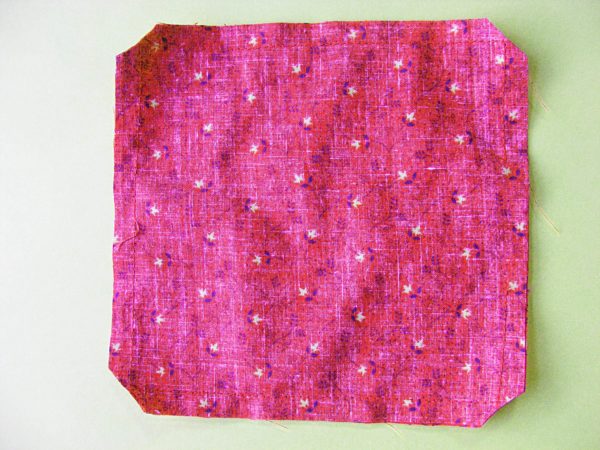
Clip the corners close to, but not into the stitching.

Step 3

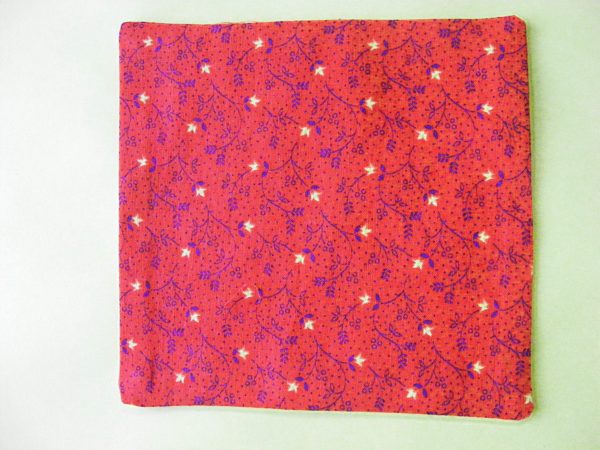
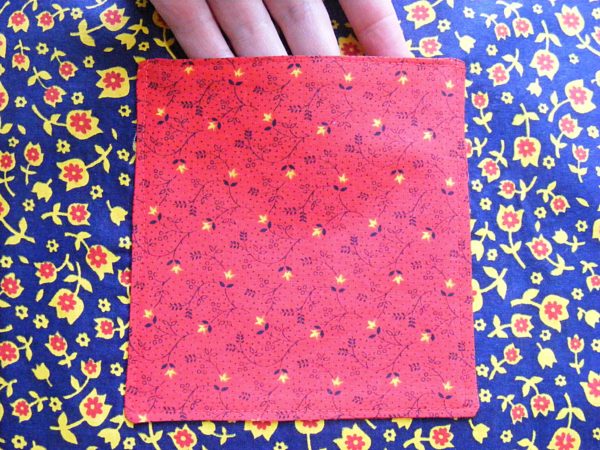
Turn the pocket right side out. Tuck in the raw edges at the opening you used for turning and press all the edges flat.

Easy Apron - a free pattern from Shiny Happy World

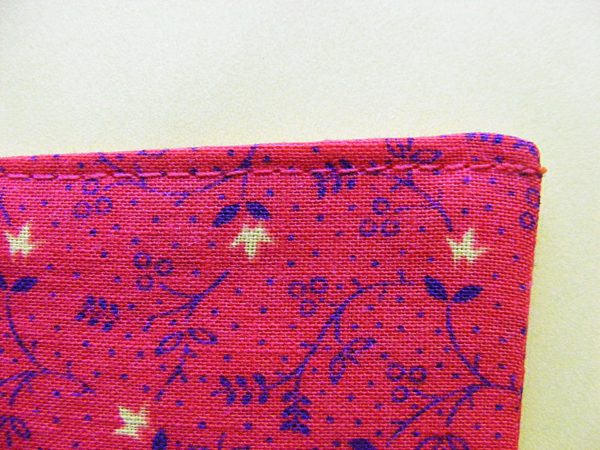
Stitch along the top edge of the pocket, as close to the edge as possible.

Easy Apron - a free pattern from Shiny Happy World

Repeat for a second pocket, if you choose.

Step 4

Position the pocket so that the top left corner is 5 inches down from the top edge of the apron piece, and 5 inches in from the left edge of the apron piece.

Easy Apron - a free pattern from Shiny Happy World

Stitch the pocket in place, very close to the edge of the pocket. Stitch down one side, across the bottom (closing up the opening you used for turning), and up the other side.

Easy Apron - a free pattern from Shiny Happy World

It’s VERY important to remember to backstitch at the beginning and end of your stitching. Otherwise your pocket will eventually come loose and fall off and you’ll be sad.

Step 6

Hem each side of the main apron piece.

This video shows how to hem.

Turn the edge under 1/2 inch. Press. Turn under another half inch. Press. Stitch down very close to the folded edge of the fabric.

Easy Apron - a free pattern from Shiny Happy World

Repeat with the second side.

Repeat for the bottom edge of the apron.

Step 7

Time to prep the waistband/tie. Essentially – we’re going to make some wide double-fold tape. There’s a video here showing how.

Easy Apron - a free pattern from Shiny Happy World

Use a 1 1/2″ bias tape tool to turn your 3″ strip into double-fold tape. If you don’t have the right tool, just do it by hand.

Fold the strip in half the long way. Press.

Fold each long edge into the center. Press.

Refold the center. Press.

The tool is handy, but doing it the old-fashioned way doesn’t take long. 🙂

Open up the center fold and turn the short end under 1/4 inch. Refold and press. Now you’ll have a neat end to your tie.

Step 8

Gather up the top edge of the apron (using either a gathering foot or the basting-stitch method from this video) until it’s the desired width, usually a little more than half of the total waist measurement.

Easy Apron - a free pattern from Shiny Happy World

This isn’t rocket science, so don’t tear out your hair (or your stitches) if you end up a little longer or shorter than you wanted. A little bit of variation won’t look bad.

Step 9

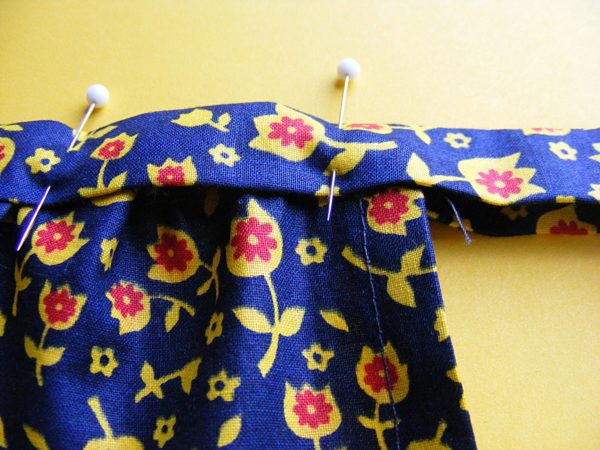
Fold your double-fold tape over the raw, gathered edge of the top of your apron.

Easy Apron - a free pattern from Shiny Happy World

If you pin the center of your tie to the center of your apron piece and work your way out from that center point, it’s very easy to get everything even with no measuring.

Pin the double-fold tape in place.

Step 10

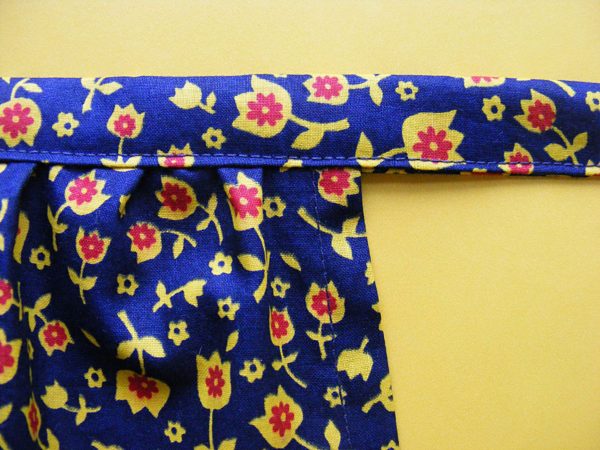
Stitch the folded edges together, the whole length of the waistband/tie.

Easy Apron - a free pattern from Shiny Happy World

Start at one end. Stitch the short end together. Turn the corner and stitch all the way down the length of the tie, enclosing the gathered edge of the apron top in the fold. Sew slowly, making sure that you are catching the back fold of the tape in your stitching. Turn the corner and stitch the other short edge.

Finished!

Easy Apron - a free sewing pattern from Shiny Happy World

You’re done! Tie on your new apron and get ready to make another. Now that you have the basics down you’re ready to try all kinds of fabulous variations!

Brag a little!

Don’t forget to take a picture of your finished apron! Post it to the Shiny Happy People group so everyone can see and be inspired by your work. Sharing is fun!

Happy stitching!

Best,
Wendi

Free Sewing Pattern – Zippered Bag

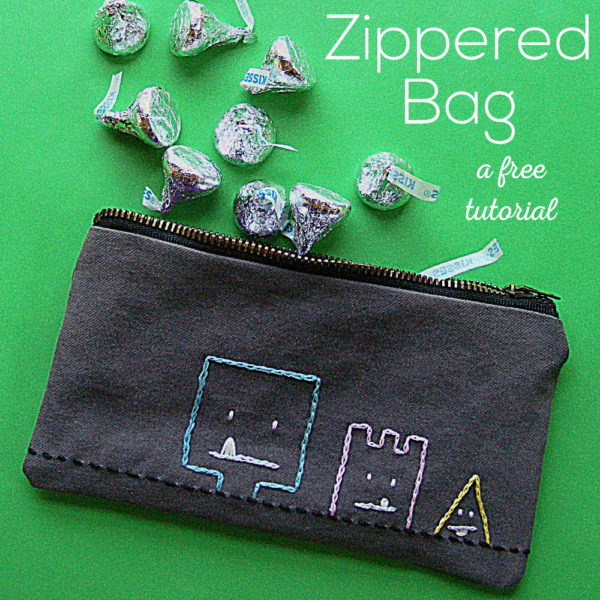
How to Make a Zippered Bag - free tutorial from Shiny Happy World

Let’s learn to make an easy zippered bag!

I cut up a lot of old clothes to reuse the fabric.

I can’t stand to throw anything away, and I end up turning a lot of the zippers into handy-dandy zippered bags like this one.

Make them in grown-up fabrics to hold make-up, money, membership cards, etc.

Make them in kid-friendly fabrics to hold candy, money, colored pencils and a little notebook, tiny toys, rocks, etc.

(Why does everything I make end up holding rocks?)

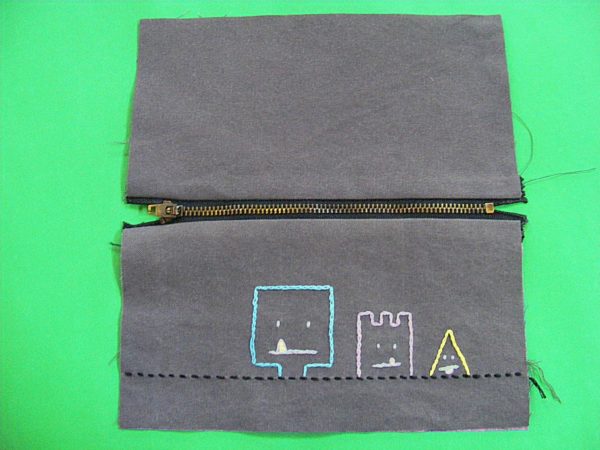
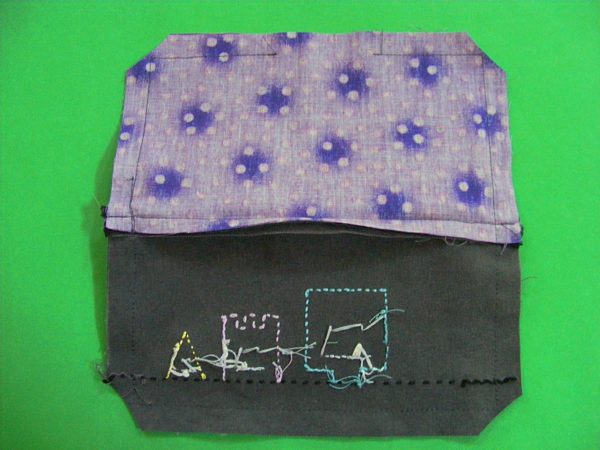
Anyway. . . make it in a plain fabric and fancy it up with some applique or embroidery. I chose three monsters from the Monster Mash embroidery pattern to stitch on this one. Or make it in a stunning fabric that sings on its own.

Make one zippered bag according to the pattern and you’ll have the skills to make as many as you want – in any size and shape you need. And as if that wasn’t enough – it’s a great project for launching into the brave new world of ZIPPERS!

If you’ve been nervous about trying zippers this is a great first project using them.

And did I mention it’s lined?

Materials

  • scraps of fabric for the outside and the lining
  • 7 inch zipper
  • embroidery thread for embellishing (optional)
  • sewing machine with a zipper foot, thread, basic sewing tools

Step 1

Cut two rectangles – each 8″ x 4 1/2″ for the outside of the bag.

Cut two more identical rectangles from your lining fabric.

If you want to add embroidery, applique or some other decoration to the front of the pouch, now is the time to do it. I chose three monsters from the Monster Mash embroidery pattern and stitched them to the front rectangle.

Step 2

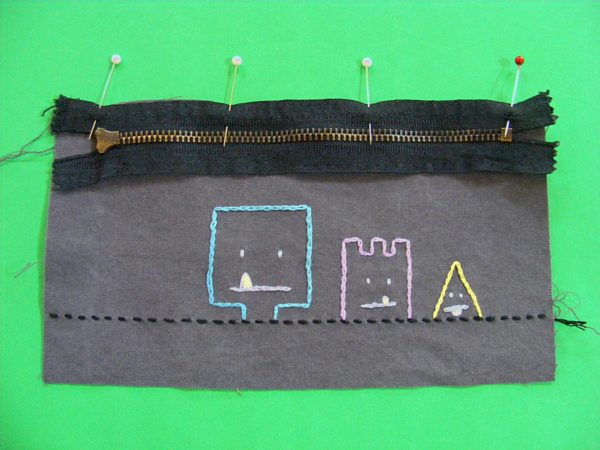
Lay the rectangle that will be the front of the pouch right side up. Lay your zipper right side down on top of it.

How to Make a Zippered Bag - free tutorial from Shiny Happy World

Pin along the top edge.

Step 3

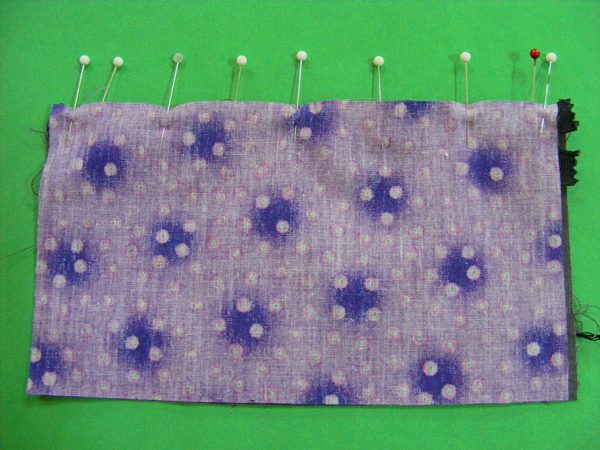
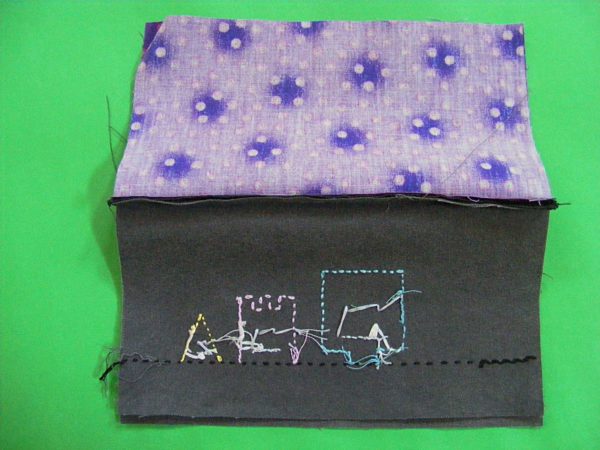
Now lay one of the lining pieces face down over the front piece, with the zipper sandwiched between the two layers. Pin so that all three edges are lined up at the top.

How to Make a Zippered Bag - free tutorial from Shiny Happy World

After you get the hang of this you can combine steps 2 and 3, but it’s helpful for beginners to do them as two separate steps.

Step 4

How to Make a Zippered Bag - free tutorial from Shiny Happy World

Put your zipper foot into your machine and sew the three layers together as close to the teeth of the zipper as your zipper foot will allow.

Watch this video first if you’ve never worked with zippers before.

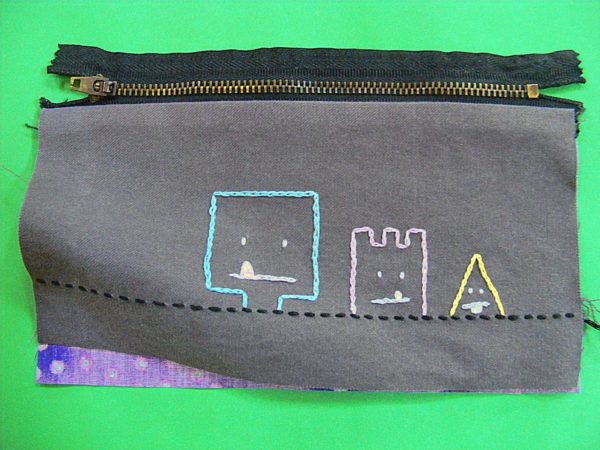
Flip the pieces right side out so it looks like the photo.
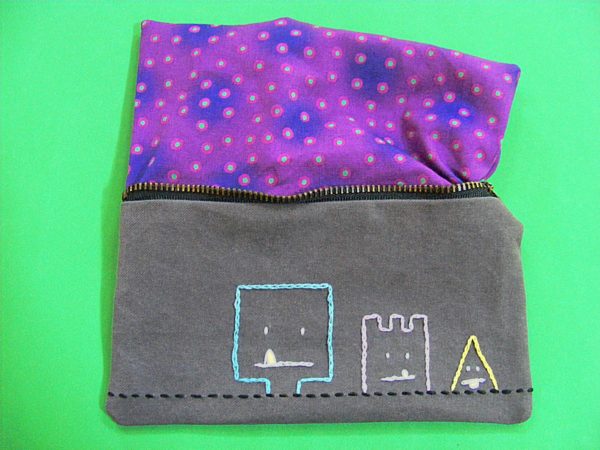
How to Make a Zippered Bag - free tutorial from Shiny Happy World

Step 5

Repeat for the other side of the zipper.
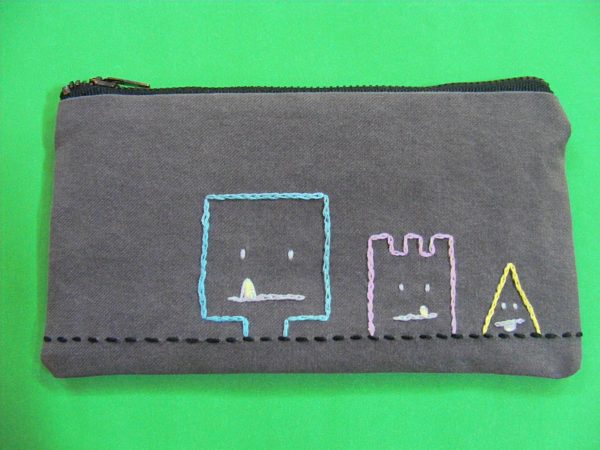
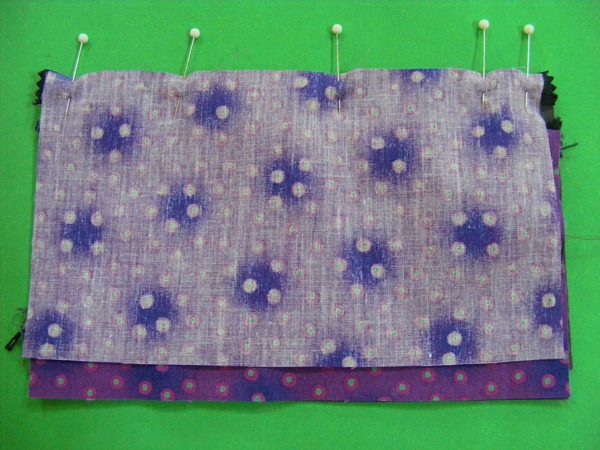
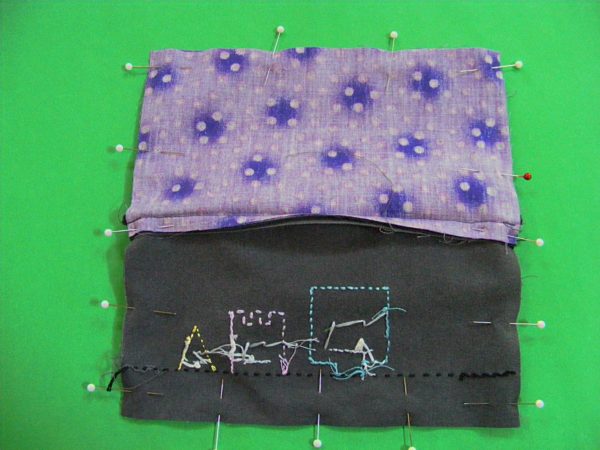
Lay the outer rectangle face up. Lay the zipper (with the other outer and lining pieces sewn to it) face down. Lay the lining piece face down.

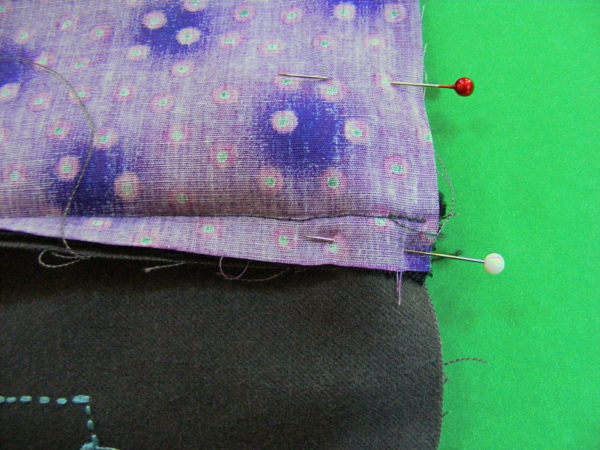
Pin all along the top edge and sew.

How to Make a Zippered Bag - free tutorial from Shiny Happy World

Step 6

Now when you flip everything right side out it will look like this.

If you turn it over you should see the right sides of both lining pieces.

Press the seams on either side of the zipper flat.

How to Make a Zippered Bag - free tutorial from Shiny Happy World

Step 7

Now unzip the zipper about halfway. If you skip this step you will be VERY unhappy – so please do it now.

Flip things around so that the right sides of the outer fabric are facing each other, and the right sides of the lining pieces are facing each other.

Step 8

How to Make a Zippered Bag - free tutorial from Shiny Happy World

Pin all the way around the outside edge. You’ll want to leave a 3 inch opening in the lining seam so you can turn everything right side out.

How to Make a Zippered Bag - free tutorial from Shiny Happy World

Pay special attention to which way your seam allowance is facing. You want to flip it toward the main fabric.

This will make the teeth of the zipper inside tend to point toward the lining fabric and that is very important. Check those teeth before you sew. Are they pointing toward the lining? Good!

How to Make a Zippered Bag - free tutorial from Shiny Happy World

Step 9

Using 1/2 inch seam allowance, stitch all the way around the edge, leaving a 3 inch opening in the lining seam.

Remember to backstitch at the beginning and end of all your stitching.

Clip your corners close to, but not into, your stitching.

Step 10

Ready for some magic? Turn the whole thing right side out through the opening you left in the lining. (See why you had to unzip that zipper?)

Ta daa!

Use a stick or other tool to poke your corners out nice and smooth. Press everything flat. If you added embroidery be sure to press around it, otherwise you will squish it and then you will be sad.

Step 11

How to Make a Zippered Bag - free tutorial from Shiny Happy World

Sew up the opening you used for turning. I used the ladder stitch but beginners might opt for whipstitch instead. (Those links go to videos teaching how to do both stitches.)

Tuck the lining inside the zippered bag.

Finished!

Now that you’ve made one you can make as many as you want, in any sizes you want. Just remember to cut your fabric rectangles to match the length of the entire zipper tape – not just the toothed part. Using a 1/2 inch seam allowance will usually butt your side seams right up to the top and bottom of the zipper teeth, but double-check to make sure.

Happy stitching!

Free Cat Embroidery Pattern

Sly Cat - a free embroidery pattern from Shiny Happy World

Want to learn the basics of hand embroidery with an easy online workshop – totally free?

Sign up for Embroidery 101 here. You’ll learn how to get started, the tools and supplies you’ll need, the four most basic stitches, how to transfer your pattern and how to display your work.

If you already know the basics – sign up for Embroidery 201. It’s also free! You’ll learn how to stitch on specialty fabrics like felt and stretchy T-shirts. Plus you’ll learn lots and lots and LOTS more stitches – all my favorites!

Here’s a free cat embroidery pattern for you to play with!

My daughter has been drawing cat faces all over the place.

It’s her new favorite doodle.

She drew one recently in chalk on a slate stone in our yard and I loved the effect – so that’s what I was going for with this simple line drawing.

The image is just under 6 inches square. It would be cute on a tote bag or T-shirt – or a towel. It also fits perfectly into a 7″ hoop.

This is a great pattern for beginners. You only need one stitch and there’s nothing too fussy or detailed about it.

I stitched it in a pale (chalky) color on a dark background and with a slightly thicker thread than I usually use.

Here’s how to do it. . .

Download the pattern here.

Transfer the pattern to your fabric. I always use Sulky Sticky Fabri-solvy to transfer all my patterns – it’s especially awesome for dark fabrics like this. You can see it in action here.

(If you use an iron-on transfer method, remember that you’ll need to reverse that pattern image.)

Stitch your design. I used backstitch for all the stitching, and a full 6 strands of DMC #519 on a dark grey fabric.

Soak out the stabilizer and iron it dry.

Finish it up however you like! You can use this free cat embroidery pattern on a T-shirt, tote bag, pillow cover, and more.

Happy stitching!

Mini Tote – Free Sewing Pattern PDF

Mini Tote Bag pattern - free from Shiny Happy World

Here’s a free tote bag pattern!

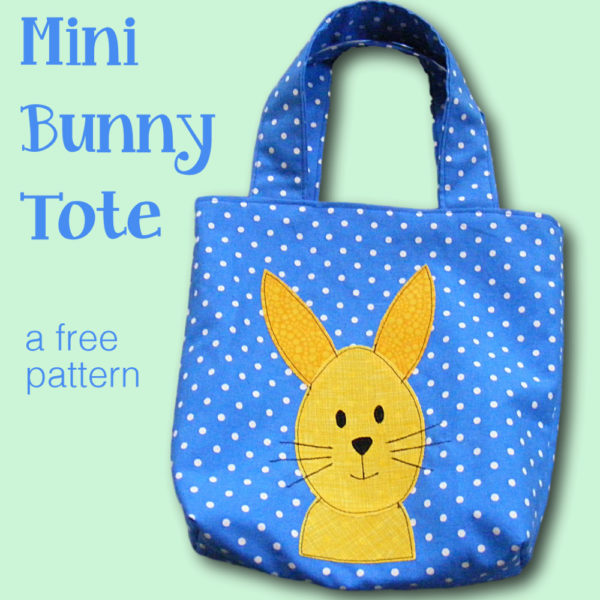
This mini tote bag measures 6 inches wide x 7 inches tall x 2 inches deep.

It’s the perfect size for packing your lunch, carrying a few books, or toting some toys.

And it’s easy to make!

You can decorate your bag any way you like. For that adorable bunny bag (perfect for Easter egg hunting) I used one of the blocks from this Woodland Critters quilt pattern, with the size reduced.

If you’re looking for free bunnies, I’ve got those too. Click here for the free Mix & Match Bunny applique pattern with several super cute bunny appliques. For all of these you’ll need to print the pattern pages at 60% to get the right size for the bag.

If you’re using a different pattern or your own design (or maybe a child’s drawing for an extra special bag) just make sure that the image is no more than 5 inches wide and 6 inches tall.

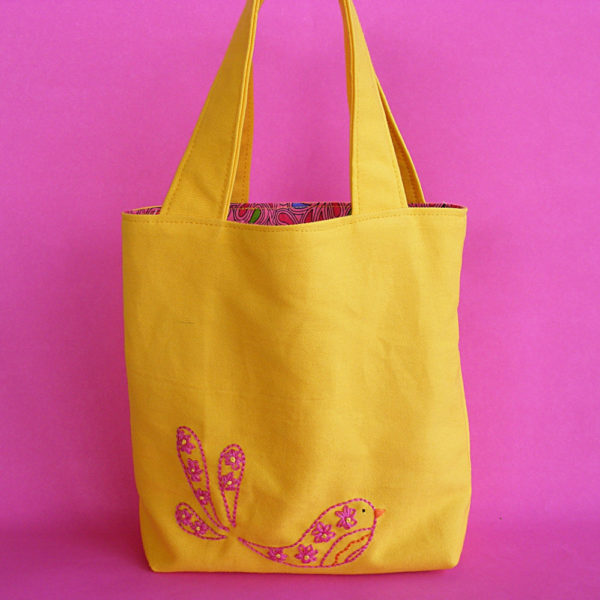
On the sample bag I used for the step-by-step photos below, I embroidered one of my favorite birds from this Bird Sampler pattern onto a solid fabric before sewing it up in Step 3. You’ll see the pretty bird in the final step. 🙂

You could also use a fabulous print that needs no extra fancification.

Choose a fun coordinating color for the lining and you’re ready to sew!

It’s a totally versatile tote bag pattern that you can use in so many different ways. Have fun with it!

What You’ll Need

  • one fat quarter of the main fabric
  • one fat quarter (or less) for the lining fabric
  • any additional materials you want for optional embellishing

Step 1

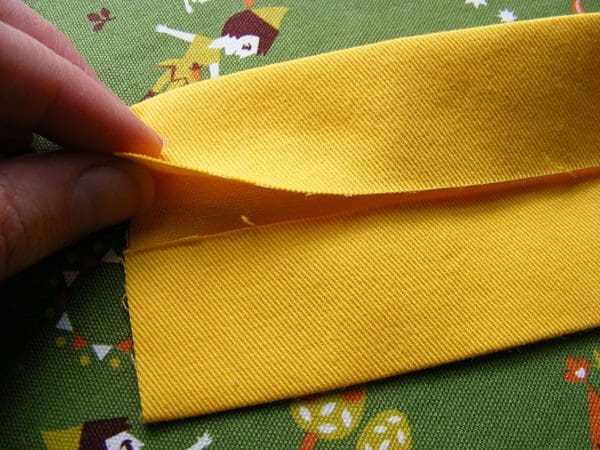
We’ll start with the handles. Cut two strips of the main fabric, each 5 x 12 inches. Fold one of the fabric strips in half the long way, right sides facing out. Press. Open the strip back up and fold each long edge in toward the center fold. Press.

preparing the handles

There’s a video showing how to make double­fold bias tape here. And if you’re new to rotary cutting, there’s a video here that will get you started.

Step 2

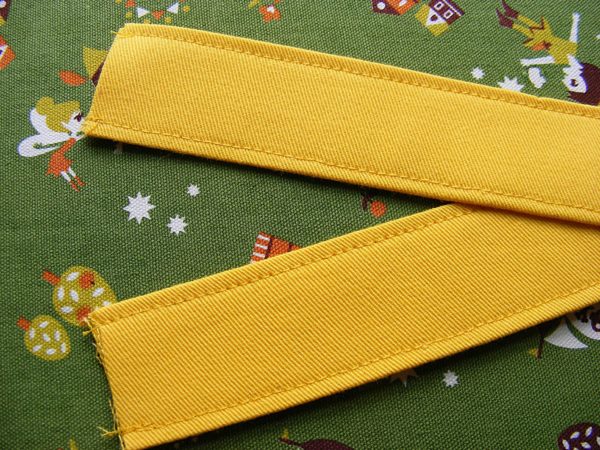
Fold in half again along the center fold so that you have one long strip, four layers of fabric thick. This makes a nice, sturdy strap. Press.

Topstitch along both long edges, about 1/8 inch from the edge.

topstitched handles

Repeat for the second handle.

Step 3

Now for the bag. Cut two 9 inch squares from the main fabric, and two from the lining fabric. If you’re going to embroider your bag (or embellish it in any other way) ­do this now before you sew the pieces together.

Pin the two main fabric squares right sides together. Using 1/4 inch seam allowance, stitch around both sides and the bottom of the bag.

Is this your first sewing machine project? This video will show you how to sew straight lines and turn corners. 🙂

Repeat for the lining pieces.

Step 4

Open out one bottom corner of the bag so that the side seam and center bottom seam line up, and the corner of the bag makes a point. Measure up one inch from the tip of the stitching (NOT the tip of the fabric triangle) and stitch a line perpendicular to the side seam.

boxing the corners

Repeat for the other corner.

Repeat for the lining.

There’s a video showing how to box corners here.

Step 5

Turn the main bag right side out. Leave the lining inside out.

Pin the edge of one strap to the top edge of the bag, 1 1/2 inches in from the side seam.

positioning the handles

Repeat for the other end of the strap.

Repeat with the second strap on the other side of the bag.

Step 6

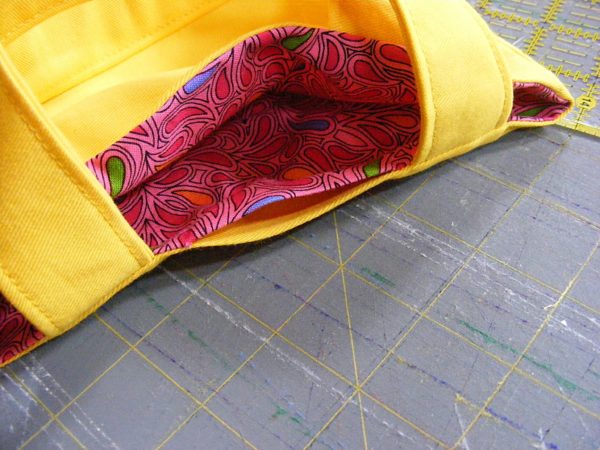
Put the main bag (right side out) inside the lining (wrong side out), with the straps sandwiched between the two layers.

The bag and lining should be right sides together.

Line up the side seams and pin the layers together around the top edge of the bag.

handles pinned in place

Step 7

Using 1/4 inch seam allowance, stitch almost all the way around the top edge of the bag. Leave the space between the two ends of one handle unstitched, so you can pull the bag through the opening.

The easiest way to do this is to start sewing right at the inside edge of one handle. Sew through that handle, around the side seam, through both handles on the other side, around the second side seam, and through the last handle. Stop as soon as you sew over the last handle.

leave an opening to turn the tote bag right side out

Be sure to backstitch at the beginning and end of your stitching. This is a pretty small opening and there will be some pressure on the edges as you pull the bag through.

Step 8

Reach into the opening and pull the main bag through. Pull through the handles, then pull the lining right side out and tuck it into the bag.

Press around the top edge, being especially careful to press the open edges evenly.

pressed opening

Step 9

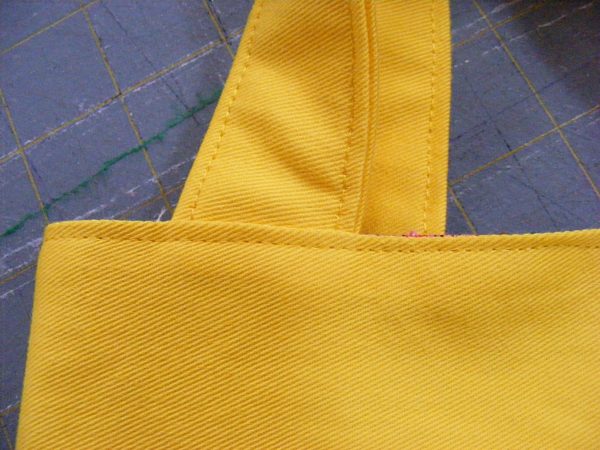
Topstitch around the bag, about 1/8 inch from the top edge.

topstitched tote bag

Be sure that the folded edges of the opening you used for turning are lined up and that you catch both layers in the topstitching to hold them together. No hand stitching needed. 🙂

Mini Tote Bag pattern - free from Shiny Happy World

Finished!

Here are several free patterns that work with my basic 10-inch applique squares – no resizing needed!

Here are several free patterns that work with just some simple resizing. This post about making coasters has info about resizing an applique pattern that can be applied to any of these projects.

Return to the main Let’s Make a Quilt Table of Contents.

Happy sewing!

Goody Bags – Free Sewing Pattern

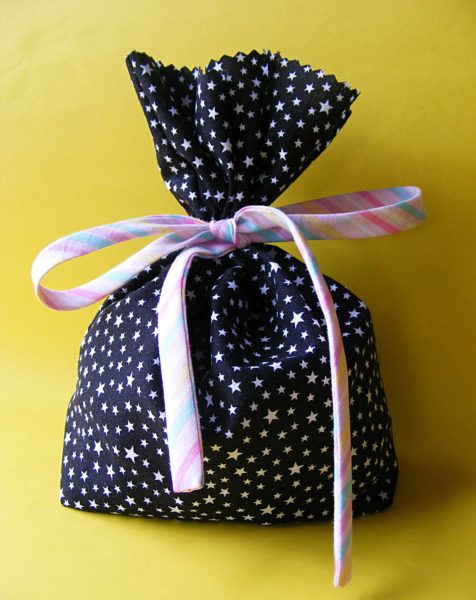
Goody Bags - free sewing pattern from Shiny Happy World

A couple of years ago I started building up a stash of reusable fabric gift bags – and working down my stash of gift wrap.

This little bag is one of my favorite sizes – roughly 4 inches wide x 7 inches tall x 2 inches deep.

It’s perfect for small gifts – and it goes together quickly and easily enough to make up a big batch and use them as party favor bags.

This batch is kind of girly looking, but a simple change of fabric will completely change the look. Try making some up in a favorite team’s colors!

Once you get the hang of making them, it’s really easy to adjust the pattern to be any size you want.

Have fun with them!

What you’ll need

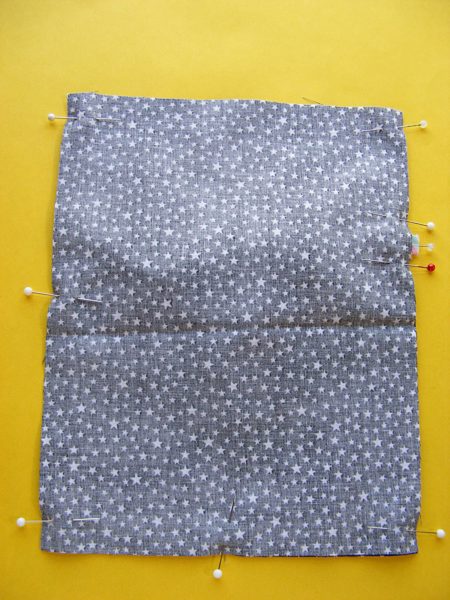
  • two 7 x 9 inch rectangles for the bag
  • two 1 1/2 x 12 inch strips for the ties (or use 1/2 inch ribbon)
  • sewing machine, thread, etc.
  • less than an hour

Difficulty

Very easy – this is all straight line sewing. It’s a great first sewing project.

Step 1

We’ll start with the ties. Fold one of the fabric strips in half the long way, right sides together. Using 1/4 inch seam allowance, sew along one short side and down the long open side, leaving the other short end open.

Free Goody Bag pattern from Shiny Happy World

Remember to backstitch at the beginning and end of your stitching.

If you’re a beginning sewer, this video will help you with sewing straight lines and turning corners.

Step 2

Trim away the excess fabric at the corners of the stitched end.

Free Goody Bag pattern from Shiny Happy World

Be careful! Cut close to – but not into – the stitching.

Step 3

Turn the tube of fabric right side out. Press flat.

Free Goody Bag pattern from Shiny Happy World

Repeat for the second tie.

This video shows my favorite way to turn tubes of fabric right side out.

Step 4

Lay one of the bag pieces so that it’s a tall rectangle.

Free Goody Bag pattern from Shiny Happy World

Pin the raw ends of your two ties to the edge of the bag, 3 inches down from the top edge.

Step 5

Layer the second bag piece face down over the first, with the ties sandwiched between them. Pin in place.

Free Goody Bag pattern from Shiny Happy World

Make sure to tuck the ties into the center of the bag so they only are stitched into the seam where you pinned them.

This video has more info about how to embed ties (and other things) in a seam.

Step 6

Using 1/4 inch seam allowance, sew together both sides and the bottom of the bag, catching the ties in the stitching where they’re pinned. Don’t forget the backstitch at the beginning and end of your stitching.

Step 7

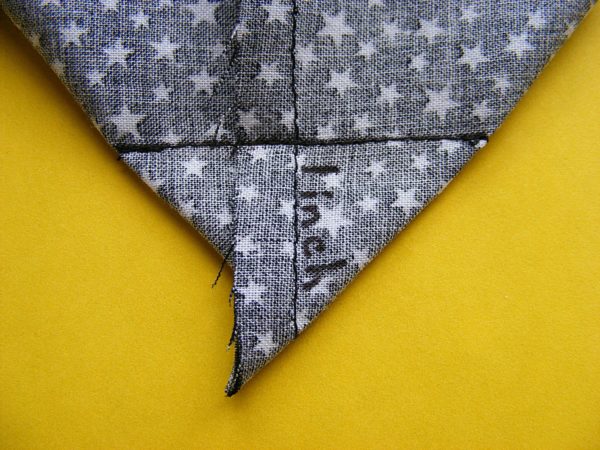
Now we’re going to box in the corners of your bag so it has some depth.

Flatten and fold one corner of your bag so that the side seam is lined up with the bottom seam. It should come to a point at the bottom.

Measure up one inch from the tip of the stitching line (not the point of the fabric) and mark a line perpendicular to the stitching line. Stitch on that line from edge to edge, backstitching when you start and stop.

Free Goody Bag pattern from Shiny Happy World

Repeat for the other corner.

Step 8

Turn the bag right side out. Finish the top edge however you like. I like to just trim the edge with pinking shears, but you could hem it if you prefer.

Free Goody Bag pattern from Shiny Happy World

This is a great size for small gifts or party favors, but you can easily make the bag bigger for larger gifts. Have fun with it!

Happy sewing!


Carrot Full o’ Candy – Free Pattern

Carrot Full of Candy - free pattern

I was inspired by Chez Beeper Bebe’s remake of the classic paratrooper dimestore toy (You haven’t seen it? Well go check it out, for goodness’s sake! It’s fabulous!) and I decided to remake those carrot-shaped cellophane bags you find filled with candy at Easter.

My version is made from fabric – thus hiding what kind of candy is inside. Is it M&Ms? Is it jellybeans? Oooh – the suspense! Plus it’s reusable and feels so much nicer than the plastic bags. And – it’s oh so easy.

What you need

  • scraps of orange fabric
  • scraps of green fabric
  • sewing machine
  • thread
  • candy
  • less than an hour

Carrot Full of Candy - an easy and fun (and free!) fabric carrot pattern from Shiny Happy World

Step 1

Download the pattern templates here.

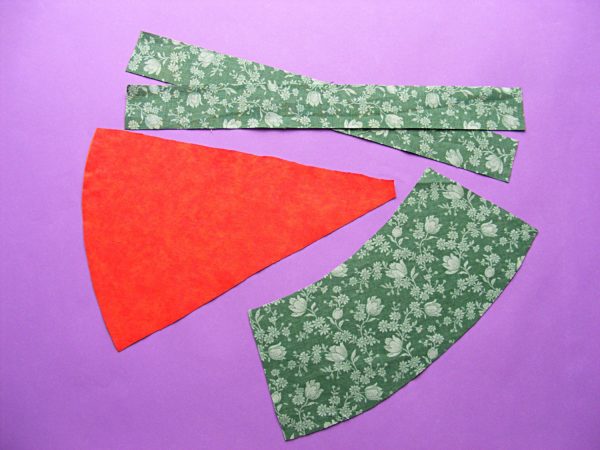
Press your fabric and cut out all your pieces as shown on the pattern page. You should have one orange wedge, one green piece, and two strips for ties.

Carrot Full of Candy - an easy and fun (and free!) fabric carrot pattern from Shiny Happy World

Step 2

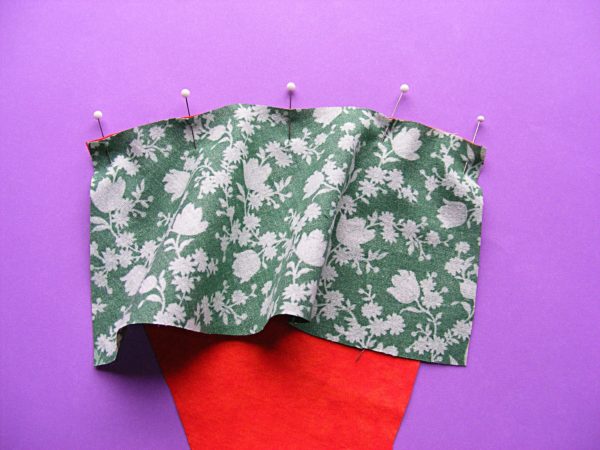
Pin the carrot to the green, right sides together. You’ll be pinning a convex curve to a concave curve, so the green part will be floppy at the bottom. Sew using 1/4 inch seam allowance.

Carrot Full of Candy - an easy and fun (and free!) fabric carrot pattern from Shiny Happy World

Step 3

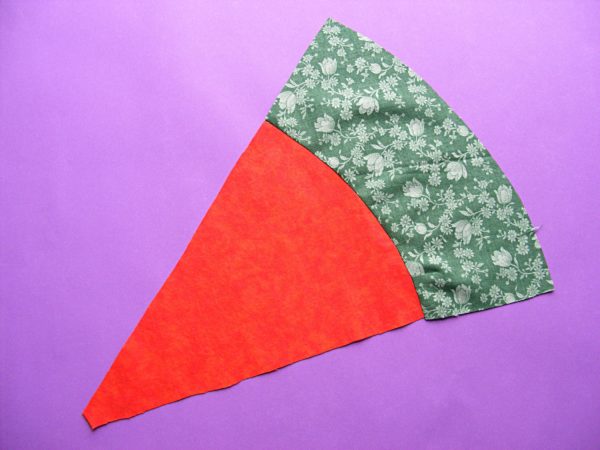
Open the carrot up and press the seam allowance toward the green.

Step 4

Fold one strip in half the long way and stitch along the long edge and one short edge. Turn the tube right side out and press flat. Repeat with the second strip.

Carrot Full of Candy - an easy and fun (and free!) fabric carrot pattern from Shiny Happy World

Step 5

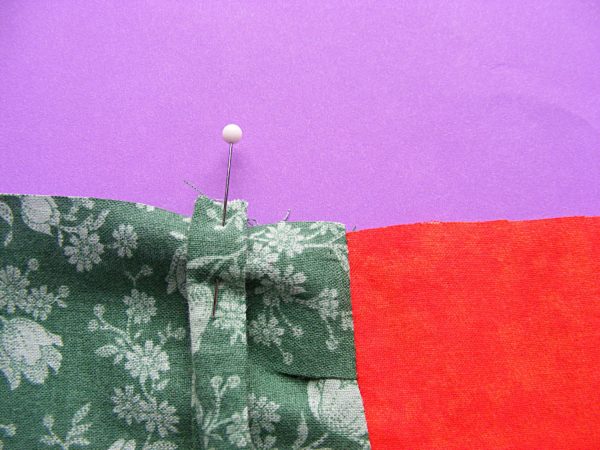
Pin both strips to the green, 1 inch from the seam between orange and green, with the raw edges of the strips lined up with the raw edges of the green.

Fold the carrot wedge in half the long way, right sides together, with the strips sandwiched between the layers.

Stitch up the long seam using 1/4 inch seam allowance.

Step 6

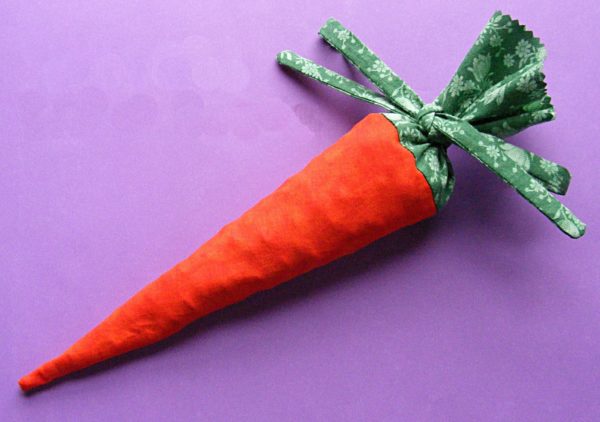
Trim away any excess seam allowance from the tip of the carrot and turn it right side out. Press the seam flat. Trim the raw edge of the green with pinking shears, fill the carrot with candy, and tie it closed.

Carrot Full of Candy - an easy and fun (and free!) fabric carrot pattern from Shiny Happy World

Finished!

Happy stitching!

Best,
Wendi

Free Embroidery Pattern – Vroom Vroom!

Vroom Vroom - free embroidery pattern

Want to play with a free embroidery pattern? Here’s one that’s great for beginners.

It’s super easy – just a bunch of backstitching and one lone French knot – which you can replace with a tiny straight stitch.

I colored the image in with colored pencils before stitching, but you could certainly fill with the fancy stitch of your choice.

If I were doing this again I would probably do all the outlining in DMC #3371 – I love that whimsical cartoony look. But I already showed you all an example of that here and I wanted to let you see the different look you get by outlining with matching thread.

Remember – one of the great things about embroidery is that you get the image – but you can make it look however you like with your choice of color and stitches.

Here’s how to do it. . .

Download the free pattern here.

Transfer your pattern to whatever fabric you’re using. My favorite method is using Sulky Sticky Fabri-solvy – there’s a video here that shows how it works.

If you want to make yours look like the image on the cover, here are the thread colors and stitches I used.

  • Car – backstitch with 4 strands of DMC #311
  • Tires and tailpipe – backstitch with 4 strands of DMC #310
  • Exhaust cloud – backstitch with 4 strands of DMC #317
  • Bird eye – French knot with 2 strands of DMC #3371
  • Bird – backstitch with 4 strands of DMC #166
  • Hat – backstitch with 4 strands of DMC #801
  • Bird beak – backstitch with 4 strands of DMC #900

Remember – if you enlarge or reduce the pattern, you may meed to use more or fewer strands of thread.

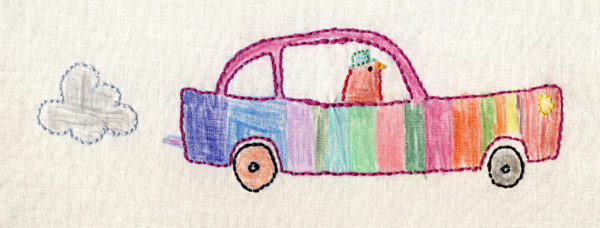
Here’s another fun version made by my daughter when she was (I think) 8 years old.

Vroom Vroom - a free embroidery pattern from Shiny Happy World

I love that crazy rainbow car!

Happy stitching!

Toy Snakes – free beginner sewing pattern

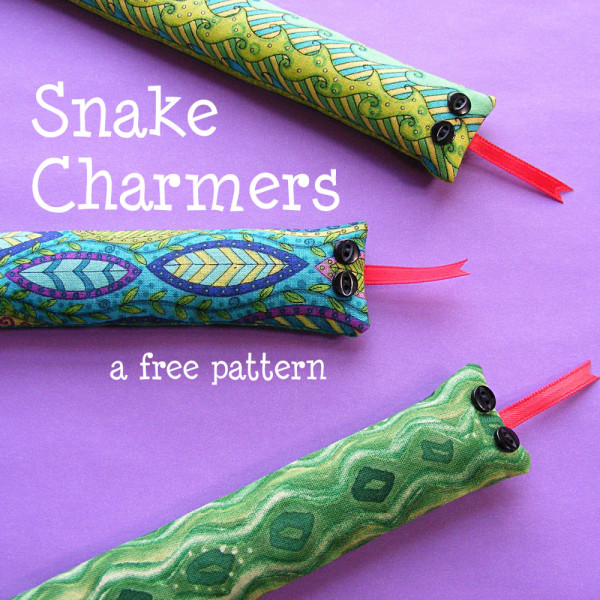
Stuffed Toy Snakes - a free easy sewing tutorial from Shiny Happy World

These stuffed toy snakes are one of my most popular free patterns! They’re lots of fun for all ages to make.

Years ago I made a book weight – a simple tube of fabric filled with heavy metal pellets.

It was designed to hold a book open, but my daughter immediately saw it as a toy.

Of course.

She played with it all the time so I finally made a toy snake just for her – bright and colorful, with button eyes and a forked tongue, and filled with plastic pellets instead of expensive metal shot.

pink and yellow beanbag snake with yellow button eyes

She still has that original snake. And she still plays with him all the time. Her response when I asked her about him was, “Well, you never know when you’re going to need a snake.”

How true.

Jo helped me make some modifications to the original design. The seams are on the inside now “to make him more smooth and snakelike.” The tongue is made of ribbon so it’s less likely to tear away. I asked her about rounding the head and tail to make him (somewhat) more realistic and got a resounding thumbs down. Okay then. Square-headed toy snake it is.

And so I bring you the new and improved – and FREE – Snake Charmers. These toy snakes are quick and easy to stitch up, small enough to fit in a pocket, and have a pleasing drapability (if you don’t fill them too full). They’re a good size to interact with action figures and all kinds of dolls. They’re surprisingly versatile little guys who make their way into all kinds of situations. I hope you enjoy them!

Do make more than one. When I told Jo she could have all the samples I made her response was, “Cool! Now I can have an invading horde attack my American Girl dolls.”

Cool indeed. 🙂

The links in the pattern all go to video tutorials that show that skill in more detail.

Toy Snake Pattern

Materials needed for each snake. . .

  • scraps of fabric -­ I use different prints for the top and the belly
  • two small buttons (1/4 ­- 3/8 inch)
  • scrap of red ribbon (1/4 or 3/8 inch wide)
  • plastic pellets for stuffing (I like Fairfield brand Poly Pellets)

Step 1

Cut two rectangles of fabric, each 2 inches x 9 inches. Click here if you want to learn how to use rotary cutting tools.

Step 2

Sew the eyes in place, with the centers approximately ­1/2 inch in from the cut edge of the fabric.

green snake fabric with black button eyes

This post has some tips about getting different looks from the way you place the button holes.

Step 3

Cut the ribbon 1 1/2 inches long and snip a fork into one end.

red ribbon tongue with forked end -  cut for beanbag snake

If the ribbon seems like it’s going to fray, use a bit of Fray Check or clear nail polish on the forked end.

Step 4

Pin the ribbon in place with the flat edge lined up with the cut edge of the fabric and centered between the eyes.

pin the tongue in place

Step 5

Layer the belly piece of the snake face down over the top. Pin the layers together, sandwiching the ribbon tongue between them. Leave the tail open for filling.

green fabric skinny rectangles pinned together

Step 6

Leaving the tail end unstitched, sew around the other three sides of the snake. Use 1/4 inch seam allowance. Don’t forget to backstitch at the beginning and end of all your stitching.

inside out fabric snake in progress - clip the corners after sewing

Watch this video for help sewing straight lines and turning corners. Clip the corners up to, but not into, your stitching.

Step 7

Gently (don’t tear off the buttons!) turn the snake right side out and use a stick to poke out the corners.

green fabric snake - waiting for stuffing

Step 8

Fold in the raw edges of the tail and press in place.

fold in the raw edges of the tail and press

Step 9

Fill the toy snake with up to 3 tablespoons of plastic pellets.

beanbag snake filled with plastic pellets

Don’t overfill him! He’ll end up stiff instead of bendy and fun.

Step 10

Sew up the opening using the whipstitch or ladder stitch.

green rectangle closed with ladder stitch

Now make a bunch more!

Three finished toy snakes made with a free pattern from Shiny Happy World

Toy snakes (like real ones) love to gather in packs. You’ve seen Indiana Jones, right?

Extra Bonus Sewing Skills! I used this pattern in a very cool project. You can use your sewing machine to decorate the fabric you use to make your snakes! It’s a great way for beginners to practice their sewing machine skills and make something extra cool at the same time. My daughter Jo (age 11 at the time) shows you how to make all those slithery snakes in this video.

Teach your kid how to use a sewing machine and make these super fun stuffed snake toys!

Have fun making these easy stuffed toy snakes! And happy sewing!

Best,
Wendi
Applique Wendi (with fabulous hat)

Edit – Over on Flickr, Curlysue7795 commented on the fabrics I chose, and that reminded me that I meant to mention that in the post. For these snakes I chose fabrics that had wiggly stripes on them, and I centered the stripe so it ran down the backs of the snakes. You certainly don’t have to do this, but I think it’s a nice effect.

Free Pattern – Make a Gizmo Cozy

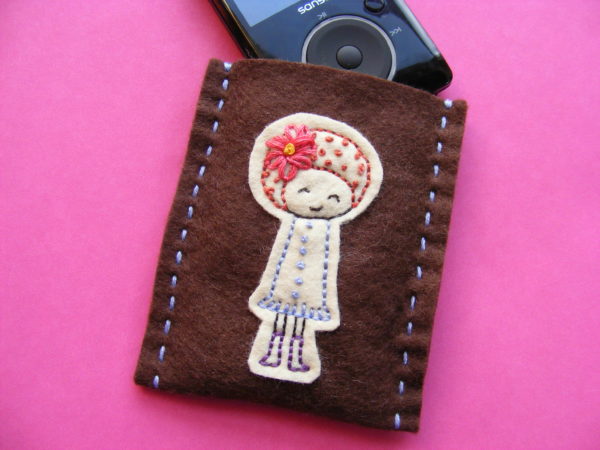
free felt pattern - gizmo cozy

Keep your electronic gizmos from getting scratched up – and also keep them warm and cozy (and cute!) with a super-easy felt cozy.

In this free pattern I teach you how to measure and fit any device – so you can make cozies for your MP3 players, your cell phone, your tablet, your e-reader – even a laptop!

You can sew by hand or by machine. You can embellish with embroidery, or applique, or beadwork, or anything else you know how to do.

It’s a totally open-ended project, perfect for playing and experimenting. Have fun with it!

What You’ll Need

Difficulty

The measuring and construction of the cozy is super easy – just simple running stitches. You can make the embellishment as fancy as you like.

Measure Your Device

First we need to do a little math. All these gizmos are different sizes so you’ll have to customize the pattern for each device.

Width

Measure the width of your gizmo. You’ll need to account for the thickness of it too – so measure up one edge, across the surface, and down the other edge. I use a flexible tape measure so I can do this all in one step, but you can use a regular ruler and add the three measurements together.

To the width measurement you’ll need to add some seam allowance. I like 1/4 inch on each side, so add a total of 1/2 inch to your width. Write it down.

______________________ = cutting width

Length

Now measure the length of your device. It won’t need to wrap around the top, so this time measure up the bottom edge (to get the thickness) and then across the surface to the top edge. This will be your length measurement.

You won’t be sewing the top or bottom edge, so no need to add seam allowance to this measurement. But we do need it to cover the front AND the back of your device. So multiply your length measurement by 2. Write it down.

_____________________ = cutting length

Cut and Decorate

Cut a single rectangle of felt that is the cutting width x the cutting length.

Now – decorate it if you want to!

Remember – the front of the cozy will be the top half of the rectangle you cut. You can, of course, decorate both the front and the back. But if you want an image centered on the front, fold your felt rectangle in half and center your image on the top half.

See where I put the image on my rectangle?

If you want to embroider on your cozy, here’s how I did mine. . .

Step 1

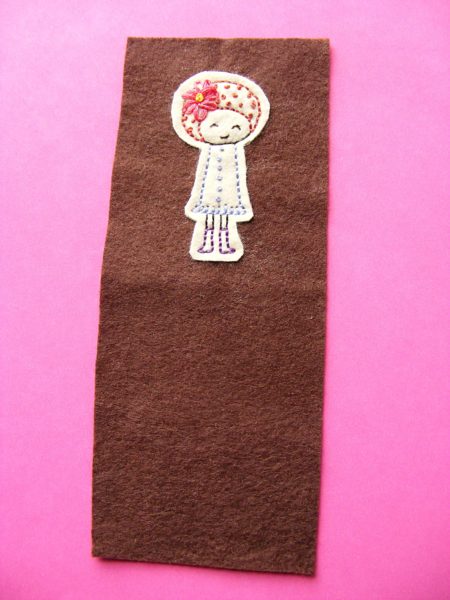
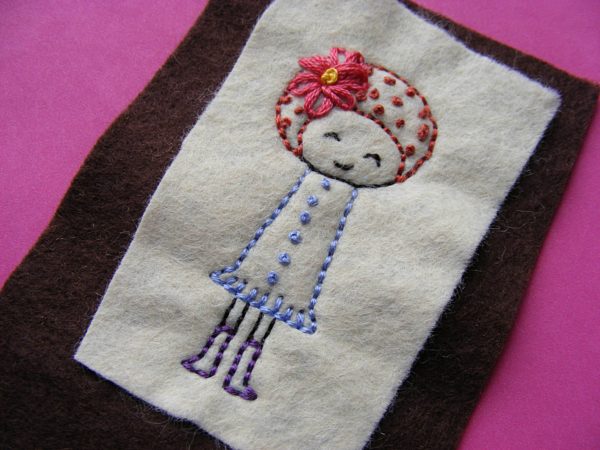
Choose an image to embroider. I used one of the Rainbow Girls, but anything will do. Find all my embroidery patterns  here.

Transfer the image onto a second piece of felt.

Step 2

I like my embroidery to sink in around the edges and make the felt more three-dimensional, so I started by embroidering just the inside of the design on the small felt piece. For this design I stitched the French knots in her hair and on her dress, her eyes and her mouth. Nothing else – yet.

Step 3

After I finished the “inside stitching” I centered the scrap of felt on the top half of the rectangle of felt I cut in Step 5 above.

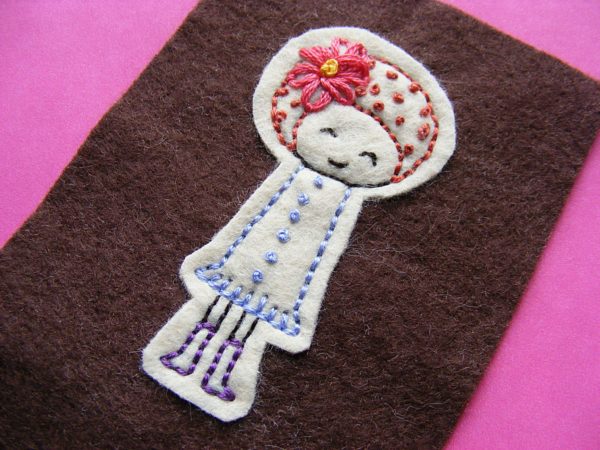
I attached the design to the cozy by embroidering the outline of the Rainbow Girl (the outline of her hair, her chin, the outline of her dress, and her legs and boots) through both layers of felt.

Going through both layers for the outline makes her hair, face and dress all look slightly puffy and rounded – and it also attaches the two layers together. If you want to do all the embroidery before you attach the design to the cozy – you can do that. Just use a glue stick to attach them together after you’re done stitching, or whipstitch all around the edge.

If you want to do all the stitching through both layers – that’s good too. It just gives you a subtly different look. Play around and experiment!

Step 4

Use a sharp pair of scissors to trim around the design, leaving a little extra around the edge.

One of these days I’ll get myself a pair of applique scissors (the bottom blade has a rounded tip so you can’t accidentally cut through the bottom fabric) so I can do this without having a nervous breakdown, but for now I just go very slowly and very carefully.

Sew It Up!

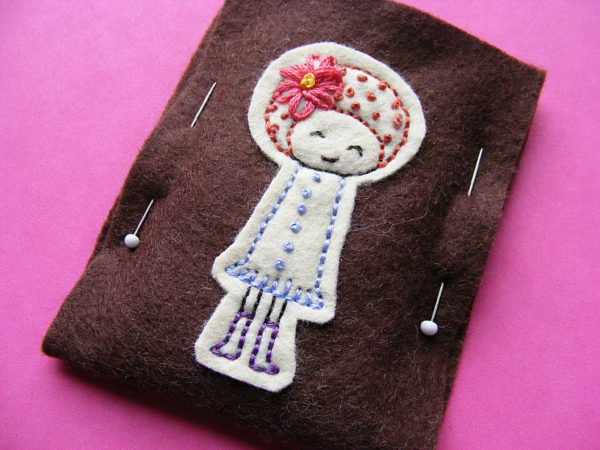
Fold the cozy in half, carefully lining up the edges. Pin it together on each side, 1/4 inch in from the edge.

Slide your gizmo in to make sure it fits. Fuss with the placement of the pins until you’re happy with the fit on your device. You want it snug – but not too tight. The device should still slide in and out easily.

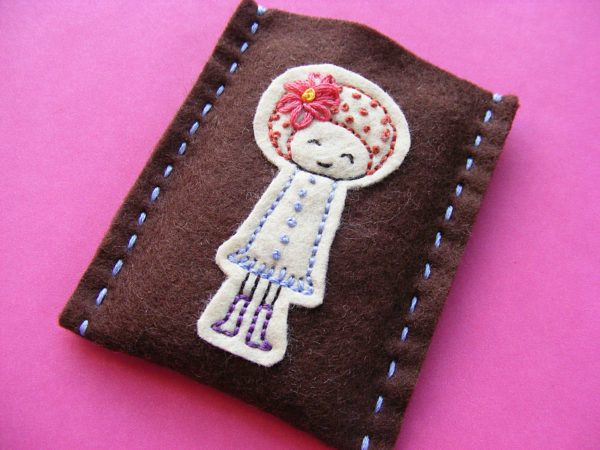
Stitch up one side. I wanted big, chunky, visible stitches so I used fat embroidery thread and a running stitch by hand. Blanket stitch would look nice too. You could also use a sewing machine instead – with matching or contrasting thread.

Check the fit one more time before you sew up the other side. Make any necessary adjustments – and sew.

Trim away some of the seam allowance if you want to – but don’t get too close to the stitching or your seam won’t hold.

Finished!

Happy stitching!
Best,
Wendi

Applique Wendi (with fabulous hat)