Which way should my knitting go?

Tip Tuesday

You put down your knitting in the middle of a row, and then… how can you tell which way you were going? Has this ever happened to you?

No worries! I’m here to help. I’ll show you how to pick up your knitting and keep going without confusion!

For today’s blog post, I’m assuming you knit right-to-left (the way most right-handed and some left-handed knitters knit). If you knit the other way… then reverse the right/left instructions!

Check your yarn (left/right)

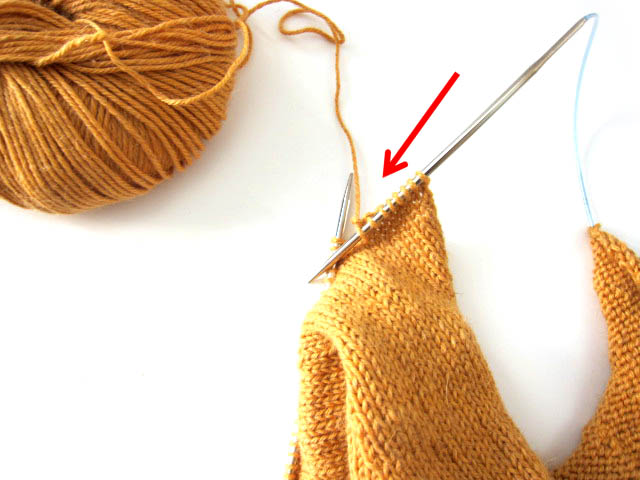
When you pick up your work, look at where the piece is attached to the yarn.

You want the yarn to be attached to the right needle:

knitting with yarn on right side

See how the yarn is coming out of the last stitch on the right needle? That’s what you want!

If the yarn coming out of a stitch on the left needle… just turn your work around!

Putting your yarn in its place (front/back)

You know that your yarn should be in the back for knitting and the front for purling… but what were you doing?

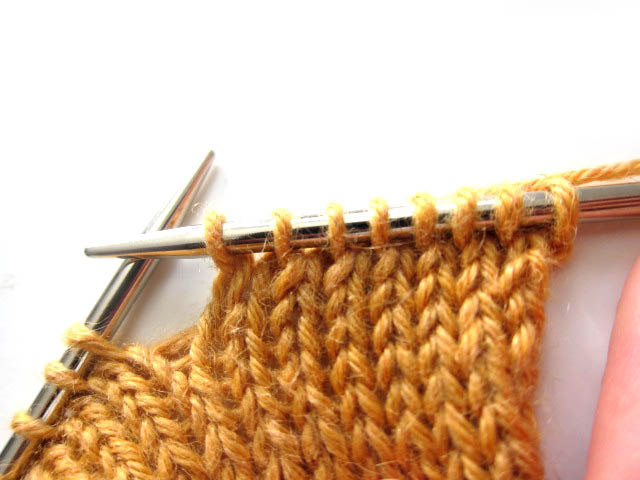
Have a look at the last stitch on the right needle. You want there to just be one piece of yarn in that stitch:

yarn in back for knitting

Here, I was knitting, and holding the yarn in the back is the right way to go.

Does it look like you have two yarns in your stitch? Check this out:

trouble with yarn

This means that you are holding the yarn on the wrong side of the needles. Just move it to the other side!

August Photo Contest Winner

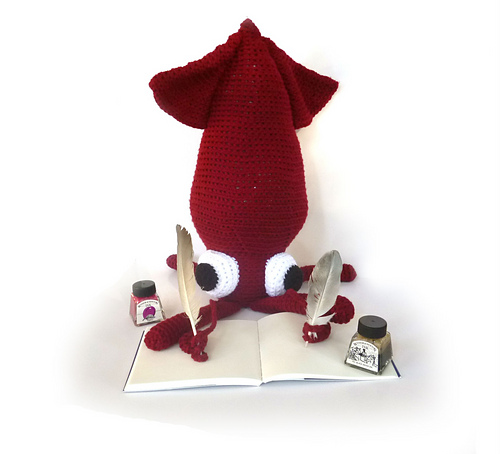
The winner of August’s photo contest is Chloe, with her awesome back-to-school squid!

Squid with ink

Congrats, Chloe!

Free Pattern! A Simple Skirt for The Dress Up Bunch

Free Simple Skirt Pattern for The Dress Up Bunch

The Dress Up Bunch dolls now have a quick and easy skirt pattern you can make.

And it’s FREE!

Psst! I designed the skirt especially to fit all the dolls in The Dress Up Bunch collection – but it’ll also fit a ton of other dolls. It fits the American Girl dolls really well, and I guarantee it’ll also fit a bunch of random teddy bears and softies piled on any kid’s bed.

It pairs really well with the shirt from the free Play Clothes pattern.

So. The skirt. IT’S SO EASY!

Bean in free skirt pattern
No trim – just fabulous fabric.

You can make it super basic – with no trim. That’s what Bean is wearing here on the right. Just choose a fabulous fabric and you’re done.

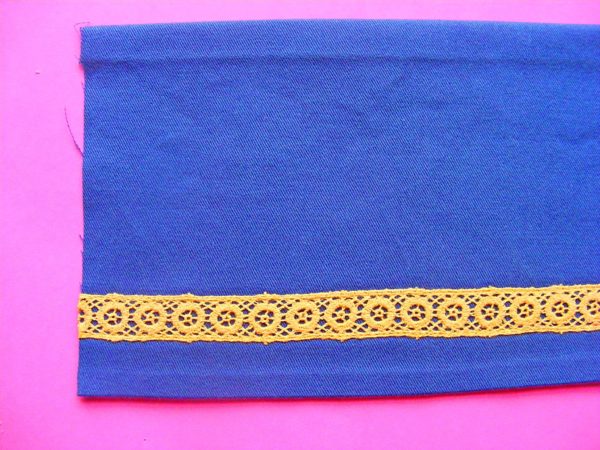
Poppy’s skirt – the one you see on the cover – is made from mid-weight cotton twill and has a band of trim added above the hem. That’s a great way to add flat trims, like lace or rickrack or pretty ribbon. The pattern includes instructions for adding these. Of course.

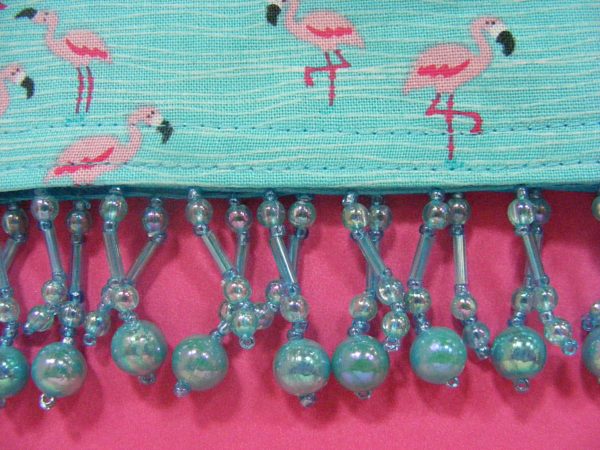
The pattern also includes instructions for adding trim to the hem at the bottom of the skirt. That’s where you’d add any dangly trims, like fringe, tassels, pompoms, or these pretty beads.

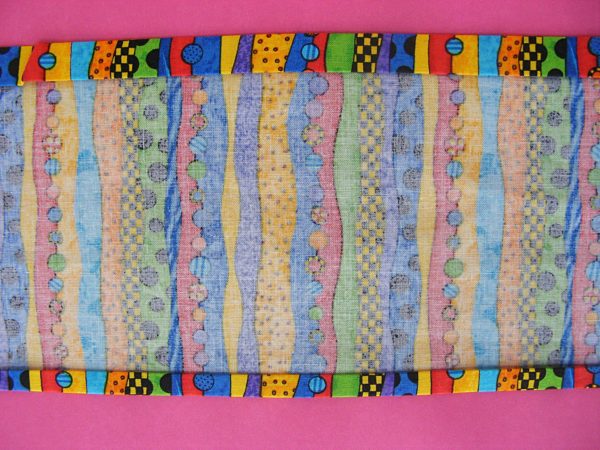
pretty beaded fringe on the free Simple Skirt Pattern for the Dress Up Bunch
Ohh! Pretty beaded fringe!

I love the shiny blue beads with these tiny flamingos. Very beachy and fun.

Of course, like all my doll clothing patterns, there are instructions for leaving a tail opening for the critters in the collection. They like to have their waggin’ room!

Ready to make a fun skirt? They’re so easy – I bet you can’t make just one! 🙂

Materials

  • less than 1/4 yard fabric
  • 12 inches 3/8″ elastic
  • 24 inches fancy trim (optional)

Step 1

Cut a rectangle 7 inches tall x 24 inches wide.

Step 2

Prep the top and bottom edges for hemming.

Turn the top edge down 1/2″ and press. Turn it down another 1/2″ and press. Turn the bottom edge up 1/4″ and press. Turn it up another 1/4″ and press.

Don’t stitch the hems down yet ­- it’s just easiest to do all the pressing while it’s one flat piece.

Step 3

If you want to add trim to the middle of the skirt (like Poppy’s on the cover) now is the time to add it.

Sew it in place all along the 24 inches of the skirt. For wider trim like this, stitch it down at the top and the bottom. For something like rickrack I might use a zigzag stitch down the middle. It depends on the trim and the size. Use your best judgment.

Step 4

Unfold the creases you made in Step 2.

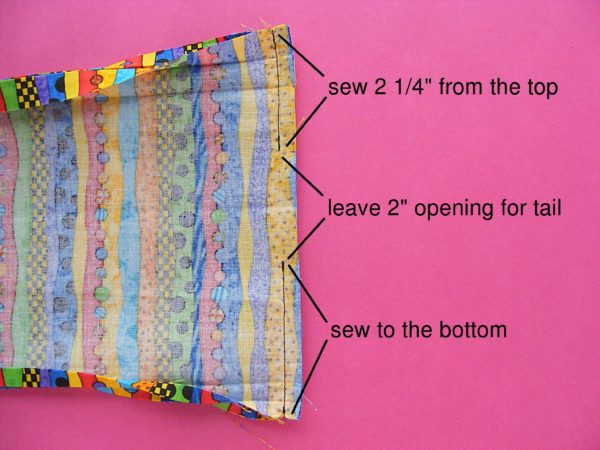
Sew up the center back seam of the skirt using 1/4″ seam allowance.

If you’re not leaving an opening for a tail, just sew the whole edge.

If you’re leaving a tail opening for critters, sew as shown in the photo.

Make sure to backstitch at the top and bottom of the tail opening so it’s nice and strong and holds up to lots of dressing and undressing. :­-)

Step 5

Press the center back seam open.

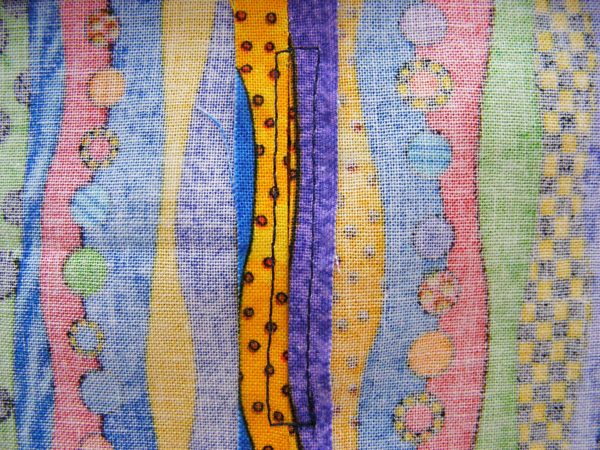
If you are leaving a tail opening, stitch a box around the opening to stabilize it.

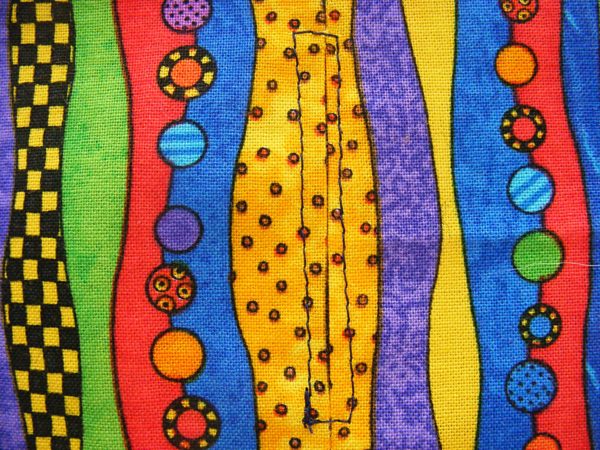
Here’s that boxed­-in tail opening from the outside.

You’ll probably use a matching thread color ­ I just wanted to make sure you could see the stitching. 🙂

Step 6

Refold the creases.

Stitch the hem down all the way around the skirt. If you’re adding trim to the bottom of the skirt, now is the time to add it.

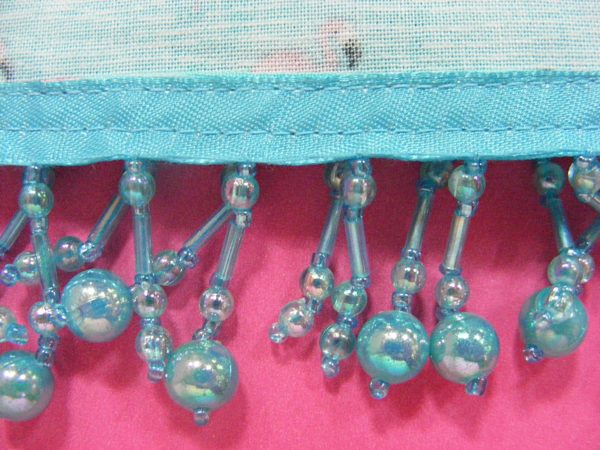
I sewed this beaded fringe in place as I stitched down the hem. The beads are attached to a ribbon. I just laid the ribbon down over the folded hem and stitched through all the layers at once.

Here it is from the inside.

I stitched along the top and the bottom of the ribbon. I needed to use a zipper foot to stitch along the bottom of the ribbon, so I could get that close to the beads.

I could have sewed it so the ribbon was on the outside of the skirt. Use your best judgment based on the trim you’re using.

Step 7

Sew the casing at the top of the skirt.

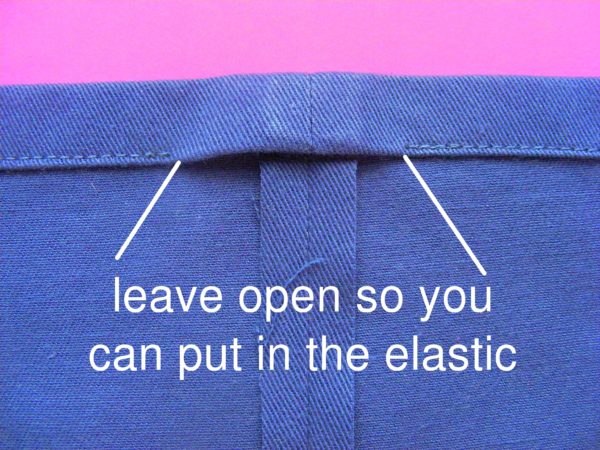
Leave a couple of inches open at the top ­- at the back seam -­ so you can put in the elastic.

Step 8

Cut a 12″ piece of 3/8″ elastic and thread it through the casing. (A bodkin is SO MUCH EASIER than the safety-pin method I used to use!)

Overlap the ends of the elastic 1 inch and sew them together. Slip the stitched elastic up into the casing and finish sewing the casing closed.

Watch this video for more info on using elastic in a waistband.

Done! Press everything neatly, turn the skirt right side out and try it on.

With trim or without, these skirts are so quick and easy to make!

Need that shirt pattern? There’s a free pattern for the shirt (and a pair of shorts) here.

Have fun! And happy stitching!

Designing a Rag Doll – a Peek at the Design Process

Designing a Rag Doll - a Peek at My ProcessToday’s post is part of the Let’s Talk Process Blog Hop! Eight different designers are each choosing a recent project and talking about the process of designing that project. Our approaches are all likely to be really different – and all inspiring! I love peeking behind the scenes at the process that goes into a finished design – and I always come away with some ideas I apply to my own work.

I’ll be writing about the new Dress Up Bunch rag dolls. Years ago – back when Shiny Happy World was about selling finished dolls and softies instead of patterns – I had the idea to design a dressable rag doll. I already had a rag doll that sold well, but I wanted one that was designed to be easier to dress, with a large wardrobe of possible clothing patterns. It wouldn’t hurt if she was easier (and faster) to make, too. 🙂

That idea sat on the back burner for a long time while I transitioned to selling patterns and  teaching, but a few months ago I finally got serious and designed what would become The Dress Up Bunch.
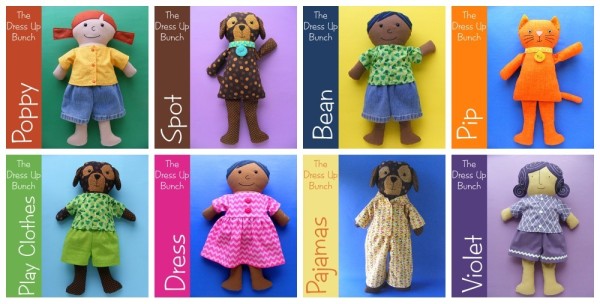
dress up bunch collage

The Dress Up Bunch – so far

I had a LOT of time to think about what I wanted from this pattern collection.

  1. Very easy to make.
  2. Arms and legs that would go in any direction for easy dressing.
  3. Cute, playable and fun.

Any time you design something, even something simple (especially something simple) there are countless small decisions to make along the way.

In many cases there are several good options – but one is the best choice for that particular project. I like to start with a list like this that I can use as a reminder to keep myself on track.

The Old Rag Doll Pattern

Abigail Darcy full

Usually I start with a blank page – but this time I had a successful rag doll pattern that I could use as a jumping off point.

This is Abigail Darcy. I think she’s adorable and the pattern had been a strong seller for me. I love her gangly coltishness, her subtle asymmetry, her cartoony face, her striped tights, her changeable skirt.

But she’s not Very Easy to Make.

She’s more of an advanced beginner pattern and I wanted something that would also work for people who are still getting acquainted with their sewing machines.

The way her arms are attached also greatly limits their movement – making her harder to dress and play with.

Very Easy to Make

The number one problem I see with handmade softies is that people don’t put enough stuffing in them. On some designs it doesn’t really matter, but with dolls it can matter quite a lot because less stuffing makes the necks go floppy very quickly. I gave the Dress Up Bunch dolls wider heads, wider bodies – and especially wider necks – so they would be forgiving of being too lightly stuffed.

If you don’t add enough stuffing, this doll still looks good and functions well.

The wider body also solved another problem.

There is a point in the original rag doll pattern where she looks like this.

17 an unholy mess

Her body is so skinny that it won’t hold all the arms and legs and they have to hang out the stuffing hole while sewing up the outside.

It looks worse than it is, but it’s definitely not fun and I want every step of my new pattern to be easy and fun.

The same stage in the Dress Up Bunch rag doll pattern looks like this.

16 pin back

See how neatly (and easily) all the parts fit inside the body?

In addition to making the head, neck and body wider, I also made the arms and legs shorter so they’d fit more easily inside the doll. The arms, in particular, are quite short. In real life a human’s head is much narrower than the shoulders, the neck is much narrower than the head, and hands hang down past the hips.

I decided against anatomical accuracy in favor of a body type that was easier to make.

One more detail you can see in this photo is the center back seam. Most rag doll patterns don’t have that, but I added it for two reasons. One – a stuffing opening in a nice straight seam like this makes the final handsewing a snap. I find it significantly easier than sewing up a seam in the side of the body – especially if that body is well-stuffed. Two – it provides a great seam where makers can easily and securely attach a waggy tail to the animal bodies.

Usually more seams means more complicated, but this is a case where adding a seam actually made the construction easier – in two ways!

Finally – I made the Dress Up Bunch doll pattern symmetrical. I love the casual charm of a little bit of asymmetry, but skin colored fabrics and felt have no easily identifiable front or back. It was very easy for pattern pieces to get flipped over during construction so they didn’t all match up at the end.

For this pattern – where Very Easy to Make was my #1 guideline – I was happy to sacrifice quirky asymmetry for ease of construction.

Super Flexible Arms and Legs

Pip - a kitty cat doll softie pattern for The Dress Up Bunch

On the old rag doll pattern you can see that her arms are attached at an angle. That’s pretty typical of rag dolls – but it definitely limits the flexibility of those arms. It’s hard to raise them over the doll’s head and the seams have a tendency to tear under the arms. It also makes them hard to dress.

Now look at Pip over there on the left. I left the tops of his arms completely unstuffed and attached them at a right angle to the side of the body. Bingo! Arms that can go in any direction – making for fun play and easy dressing. They don’t look as neat and tidy as the typical angled arm attachment of a rag doll, but they function much better.

Neat and tidy was not on my list. Easy dressing and playing was.

I originally tried sewing elbow and knee joints into the arms and legs (like on the legs of the old rag doll) but my daughter said they looked ugly – like sausages. I tried them unjointed, but very lightly stuffed and with some plastic pellets added to give them good flop. She pronounced that version “very huggable and soft, good for playing, and not ugly.” Success. 🙂

Playability

Spot in jammies back

This was a big one for me. I’ve watched kids play with my dolls for years and I’ve seen how they interact with them. They want to carry them around by the arm (another reason the arms need to be flexible). They want to cuddle them. They want to sit them up and have them stay sitting. They want their arms and legs to bend. And if they have tails – they want to wag them. 🙂

A lot of dressable animal dolls have no tails – or they have applique tails that are covered by the clothing. I wanted actual waggable tails.

It added an extra few steps to the construction of the critter dolls – and their pants – but it adds a ton to the playability. It’s always a balancing act.

In this case I was happy to add a tiny bit of difficulty to the construction in order to have a doll that would be a lot more fun to play with.

The Process is Never Done

Old Violet - a Dress Up Bunch doll from Shiny Happy World

The first human doll in The Dress Up Bunch was Violet. Here she is.

I love her purple curls, but when I got ready to make the second doll in the collection I realized that the face still needed some work.

The new, wider body shape was chunky and cute, but she still had the smaller/finer features of the original rag dolls. They didn’t go together.

I played around so much with the face for the second doll!

(I have a whole post here about how I test faces on my prototypes).

I drew and erased and drew and erased and drew and erased until the face was a yucky grey mess. Then I flipped it over and did the same thing with the back of the head.

Spot - Dress Up Bunch Dog Softie Pattern

I had a nose and mouth I liked – but the eyes were killing me. No matter what I did they were too small. I tried pinning on some felt eyes, but I wasn’t happy with any of them. I had used plastic safety eyes for Spot – and I loved them – but I had it stuck in my head that they would look bug-eyed and goofy on a human doll.

Finally – in desperation – I grabbed a seam ripper, poked a hole where the prototype’s eye should go, and stuck in a safety eye to test it out.

The whole face suddenly came to life.

Poppy face

It didn’t look bug-eyed or goofy! The larger size looked friendly and young. And the shiny half-domes had a sparkle to them that I hadn’t gotten with felt eyes. I loved them!

So this is the new face of The Dress Up Bunch.

Try everything – even things you’re pretty sure will fail.

I redesigned Violet so she would have the younger, cuter face that the newer dolls have.
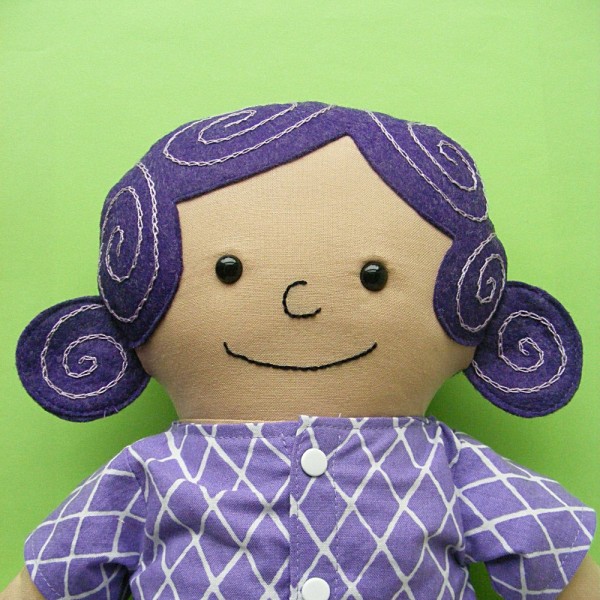
New_Violet_Rag_Doll_Face

One More Bit of Advice

I do all my prototyping with white muslin.

  • It’s cheap and easy to find.
  • It’s the least forgiving fabric I could possibly sew with – pieces that could be stretched to fit with fleece will not match up with muslin. I’ll know there’s a problem that needs fixing.
  • You can draw and write on it – like I do when I’m designing faces.
  • Every mistake will show. My daughter might not have noticed sausage-looking arms on a patterned fabric, but she sure hated them on the white prototype.

If your project looks good in white muslin it will look good in any fabric. 🙂

Let's Talk Process blog hop
I hope you enjoyed this look at the design decisions that went into a single project. Ready to see the approaches of some other designers? Take a look at the other posts in today’s hop and gather up enough tips and inspiration to keep you designing for weeks.

Happy stitching!

Best,
Wendi
Applique Wendi (with fabulous hat)

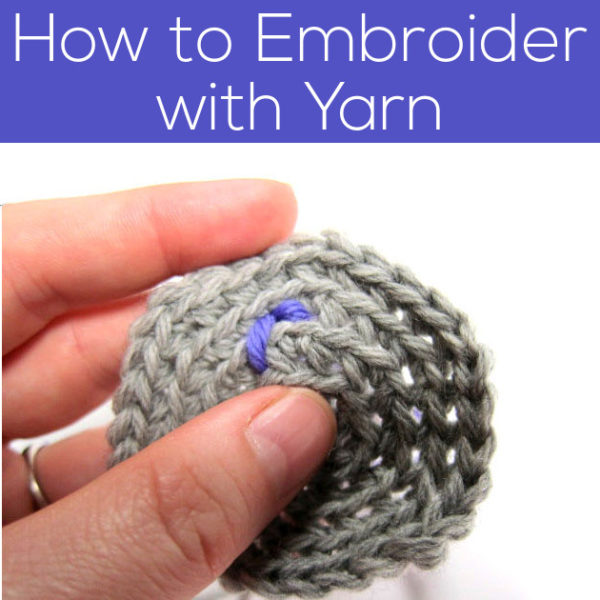
How to Embroider with Yarn

How to Embroider with Yarn - tips for stitching amigurumi faces from FreshStitches and Shiny Happy World

Today, I’m going to show you how I embroider features on my stuffed animals. It’s a little different than regular embroidery… because you stuff the inside of an animal, there’s no need to worry about tying knots!

There’s a video at the end of this post too – for those who want to see every step in action. 🙂

My technique makes a slip-proof knot and creates a double-thickness of yarn, so your embroidery will stand out!

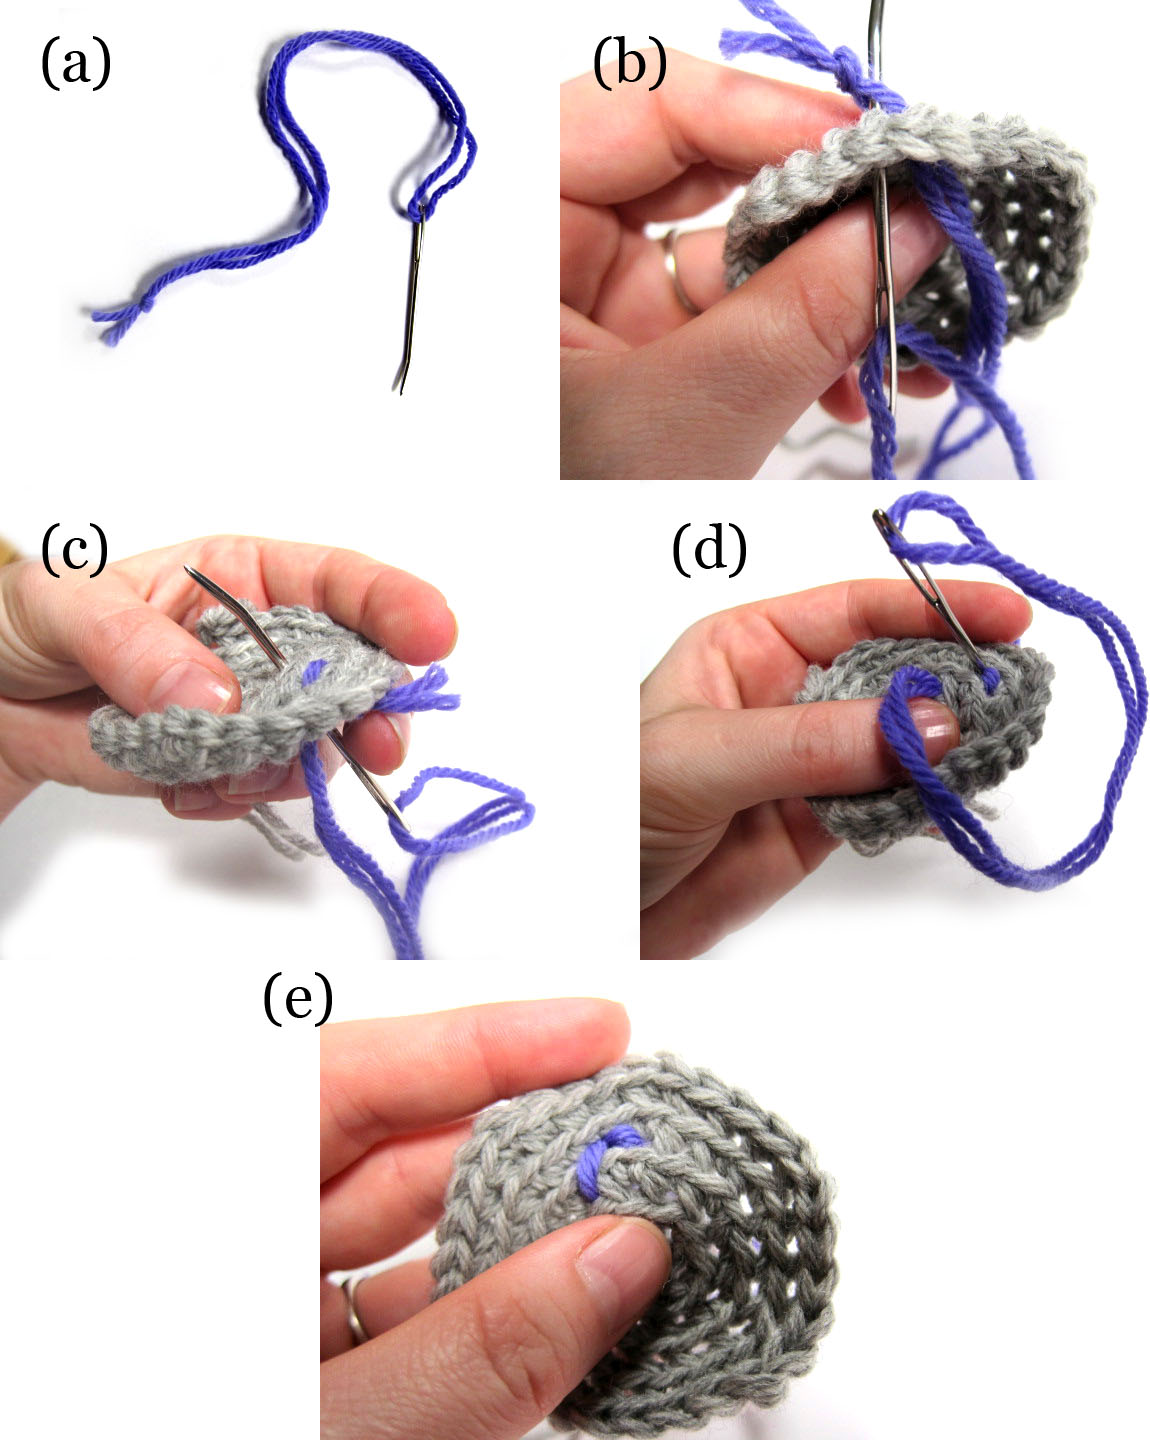
Step 1: thread the tapestry needle with a length of yarn (about a foot or two). Tie the two ends of the yarn together with a knot, as pictured in (a).

how to embroider with yarn

Step 2: pull the needle through to the the front of the work, leaving about an inch between the knot and the back of the work, and then poke the needle from front to back, and through the loop created (between the knot and back of work) by the two pieces of yarn, as shown in (b). Tug, and this anchors your work!

Step 3: to do a stitch, put the needle (from back to front) where you’d like the stitch to go (c), about 1/4 inch (5mm) from where your previous stitch (or knot) is anchored.

Step 4: to finish the stitch, push the needle from front to back, connecting the stitch to your previous work (d). Continue stitching (following steps 3 and 4) according to the desired pattern.

Step 5: to finish, cut your yarn-loop in half, and use the two ends of yarn to tie a knot!

Easy, huh?

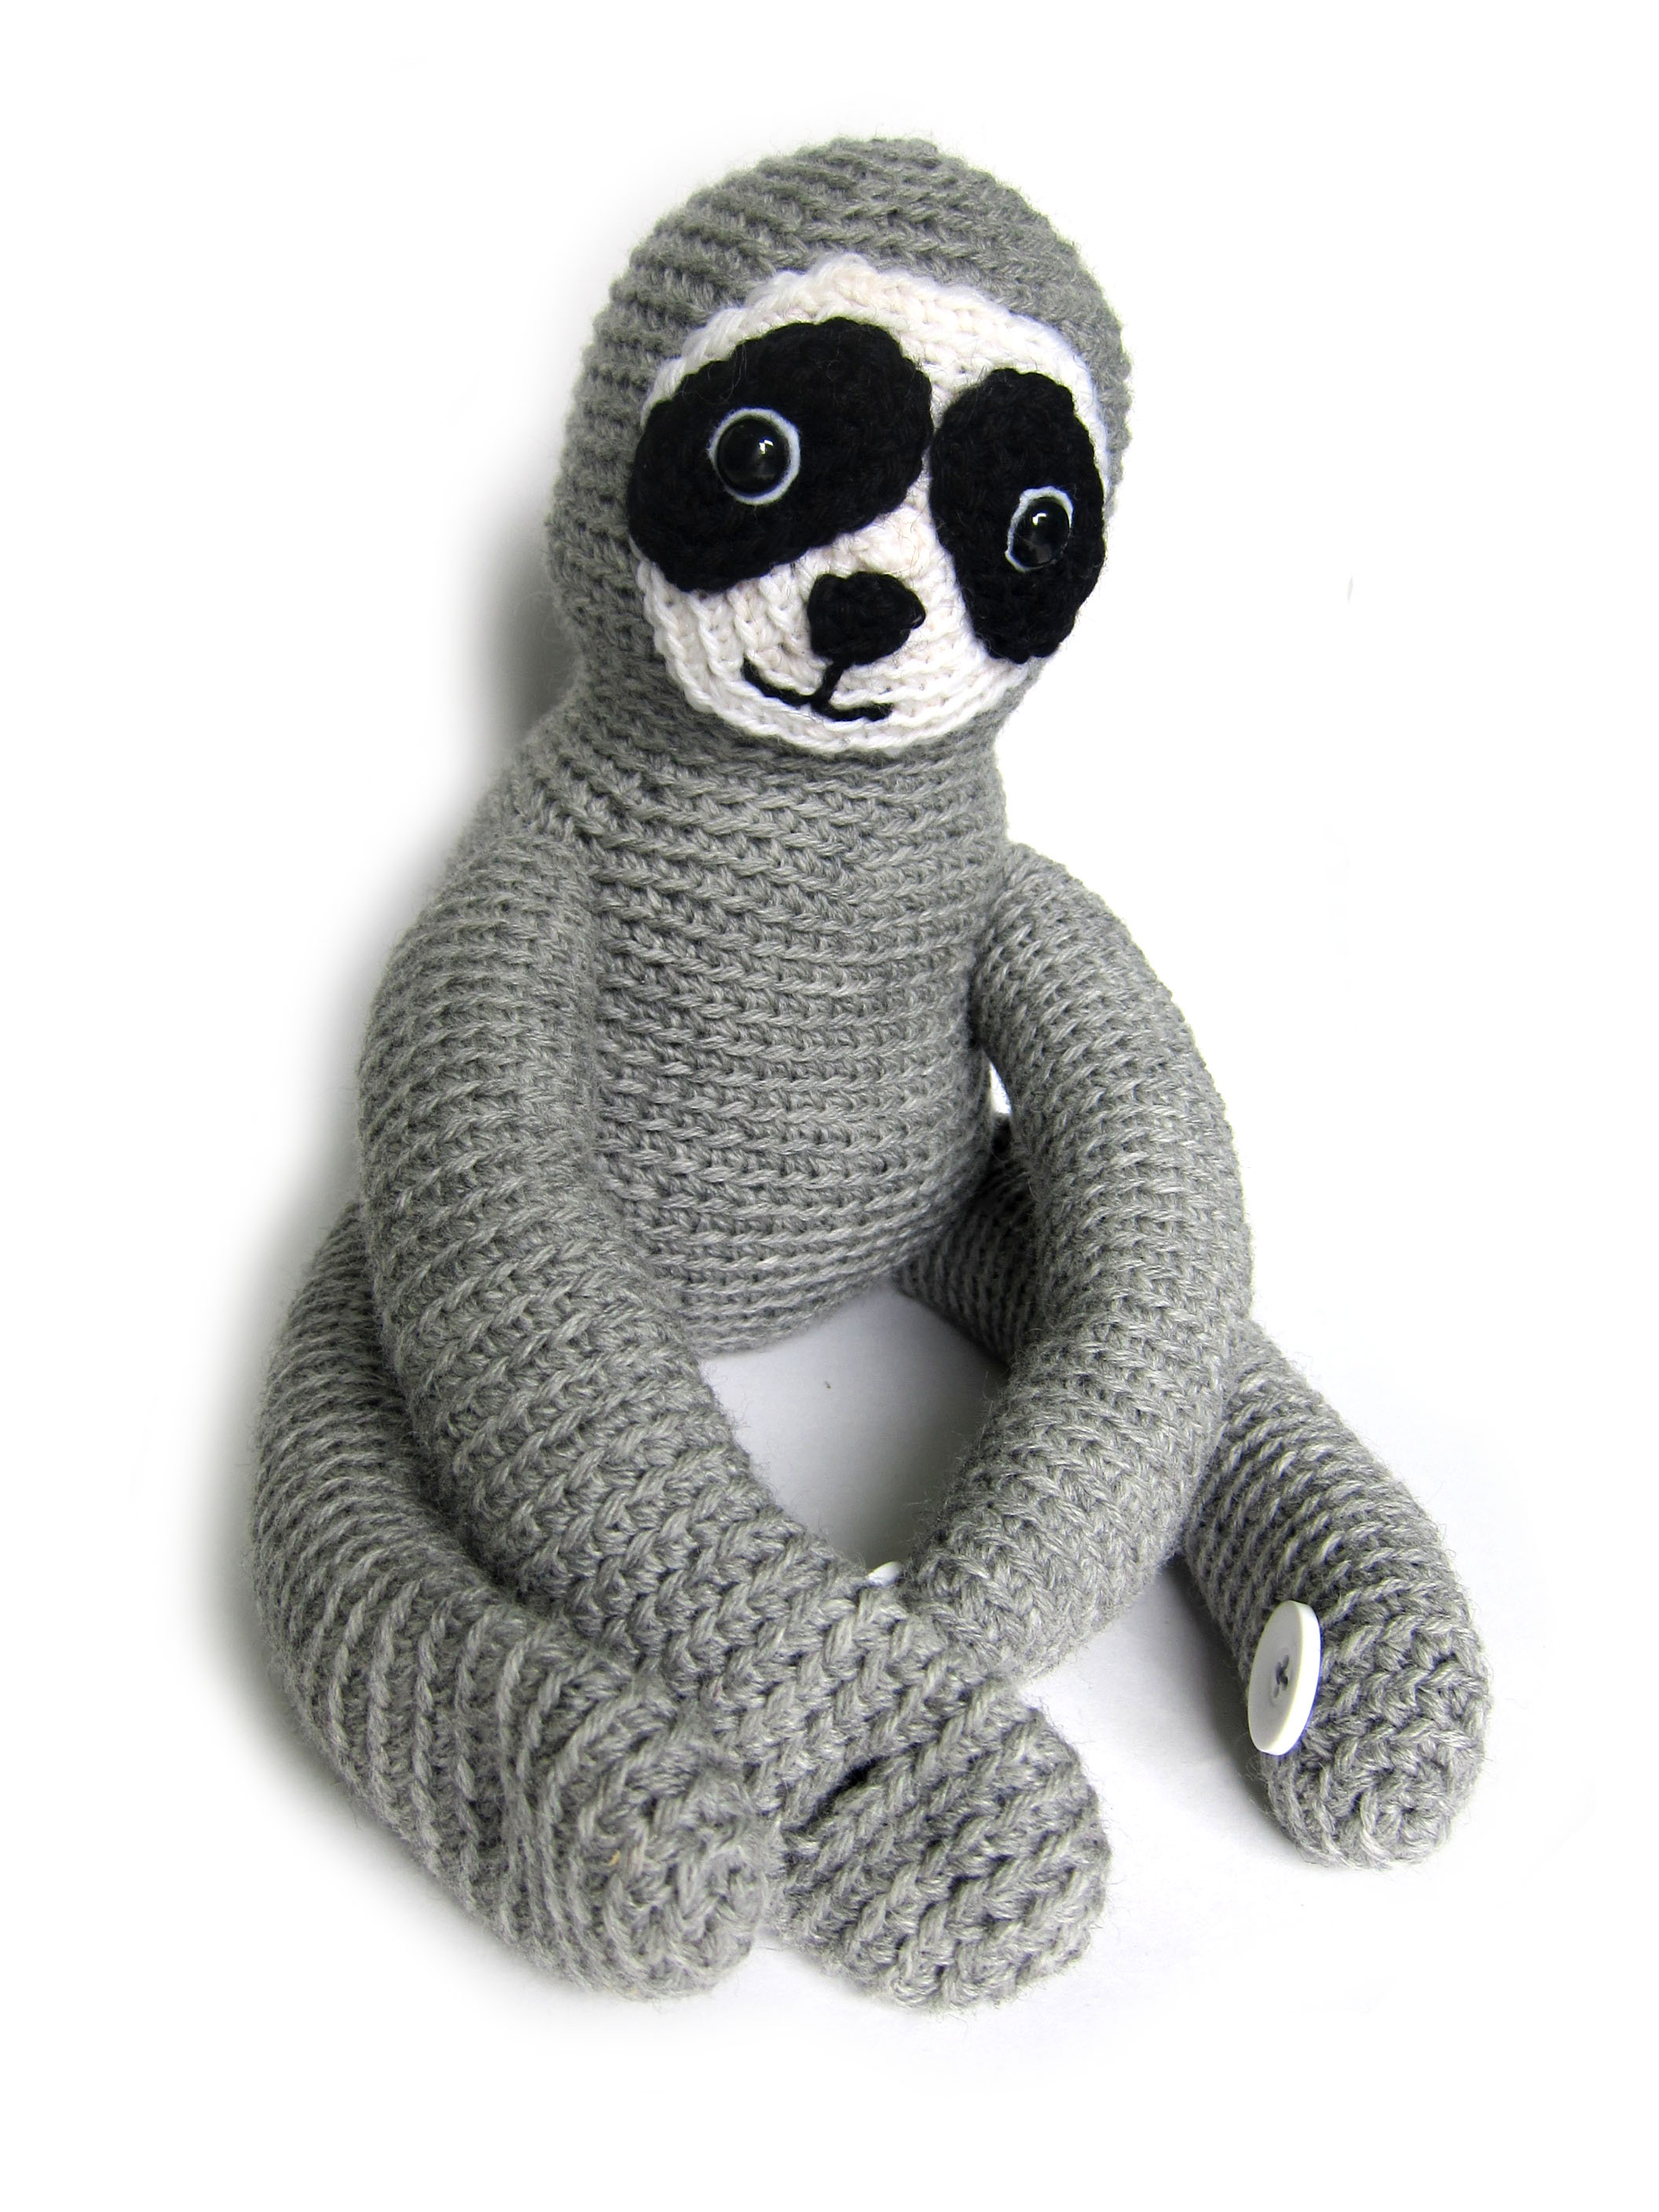
Sloth

See the embroidery that makes this sloth’s mouth? Cute!

Now here’s the video.

Give it a try!

Here are handy links to all the posts about faces and details. . .

Return to the main table of contents for Let’s Learn to Crochet Amigurumi.

Move on to the lessons about eyes.

Happy stitching!

My Derecho!

Remember how I frogged my Color Affection and then started Derecho? And kept working on it?

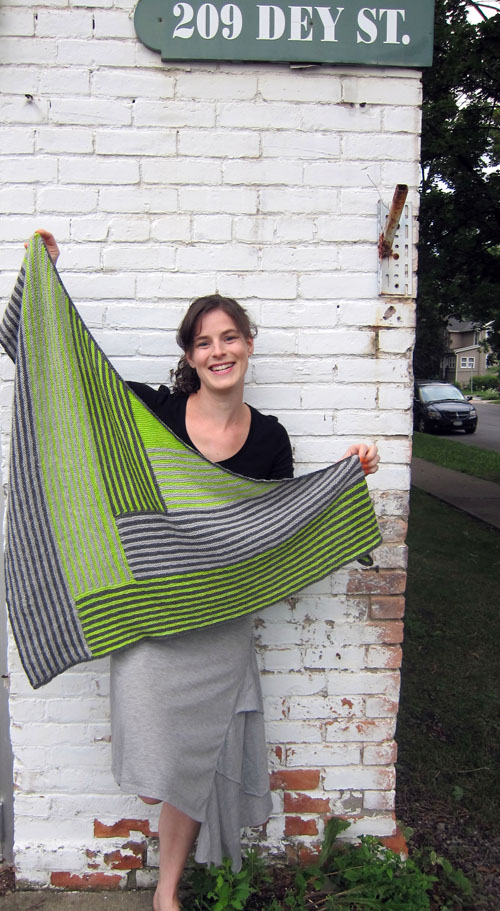
Now it’s done… and I couldn’t be happier! It’s beautiful!

Derecho Shawl by Laura Aylor

The lime green yarn from Candy Skein really makes the whole project pop, don’t you think?

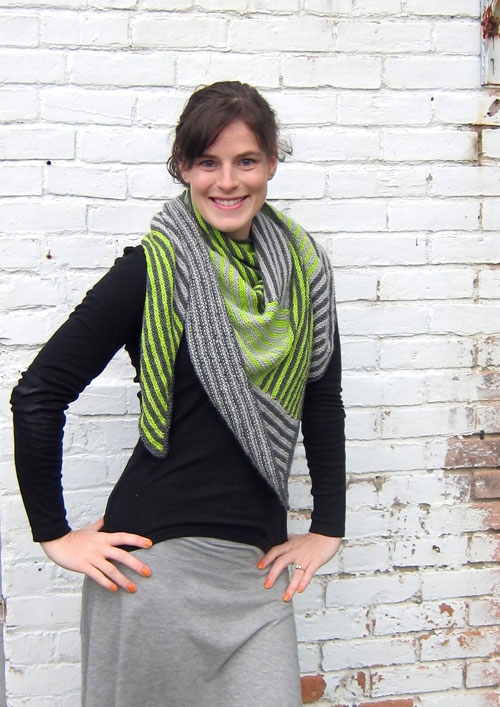
I had such a blast knitting this… and the best part is that it’s totally wearable. You can even still see the design when I’m wearing it! Love that.

Knitted striped shawl Laura Aylor

This one’s a keeper!

Thanks for stopping by and reading!

If you want to see more great finished items… make sure to visit Tami’s Amis blog, the organizer of this great FO Friday theme!

I hope you have an awesome and craft-filled weekend!

My mom and step-father are visiting this weekend, so I’m going to be getting into some semi-crafty house updating projects!

Embroidery Thread Review – 12 wt. Sulky Cotton Petites

A review of Sulky Petites 12-weight thread

Remember when I said I found lots of great things at Quilt Market?

This is one of them.

You know I love Sulky products! I use Sulky Sticky Fabri-Solvy on almost every single embroidery project.

So, of course, I had to pop by the Sulky booth to see what was new. 🙂

These were new.

Sulky makes thread for hand embroidery!

Now – in spite of my love for Sulky stabilizers and pattern transfer tools, I’ve never tried their thread. I thought it was for just machine embroidery and I don’t do that.

But these are for hand embroidery!

It doesn’t snag!

Tweet - a free bird embroidery pattern

I took away a little sample and tried it. I tried it in the early summer when my hands were all gnarly from putting in my garden – a time when I rarely embroider because I hate snagging individual strands of thread on my gnarly hands.

I did not snag any threads!

A single strand of the Sulky 12 wt. is the same thickness as two strands of regular 6-stranded floss. I think that gave it just enough extra weight not to snag and pull individual strands loose. Plus it’s very smooth, which helped a lot.

Nice!

It’s very round and has a nice sheen

Blossom free embroidery pattern

I told the folks at Sulky that I liked my sample. They offered to send me more so I could put it to a real test – a whole embroidery project.

Here’s why it took so long to get this review to you. After all – Quilt Market was back in May!

I figured as long as I was going to do some test stitching, I might as well design some new patterns. Small patterns that would let me test out a few different things – bigger stitching, tiny stitching, fill stitching, etc. Ooh – and I could make them free patterns!

So I stitched up some samples. And I loved it even more! It has a beautiful sheen to it. Not shiny – but sheeny (if that makes any sense).

And it’s rounder than regular 6-stranded floss. That makes it sit up nicely on the surface of the fabric, which I really like. It’s subtle, but I definitely noticed the difference in the finished work.

No more tangled mass of embroidery thread!

Jackie cover 1000 px

Ok – I know this may sound dorky – but love the little spools! It keeps everything so neat and tidy! And since there are no strands to separate I don’t have itty bitty bits of leftover floss that I need to store. And the color numbers are right on the spool so they don’t get separated from the floss (unlike the little bands that slide so easily off an almost-done skein of thread). And there are no kinks like you get from winding on bobbins or cards. It’s pure awesome.

Excellent price

The price for each spool is $1.69. That seems expensive at first – but each spool has 50 yards on it – as opposed to 8.7 yards in a skein. Even when you account for the fact that the thread skeins are thicker you’re still getting about twice as much thread on the spool as you get in a skein. And I found that I have much less waste working with the spools.

Lovely colors!

Right now they have 66 solids and 14 Blendables or variegated threads. Plenty to choose from – and they have plans to add more!

So I give the Sulky 12 wt. Cotton Petites Thread a big thumbs up! You can find it here.

All the embroidery patterns you see in this post are FREE! Click here to get the patterns for them – plus one more.

Update – a couple of years after writing this review I found another great use for this thread. It’s absolutely perfect for Big Stitch quilting! That link goes to a video showing how.

Here are links to all my posts about embroidery tools and supplies.

For Beginners

Specialty Fabrics

Threads

Stabilizers and Pattern Transfer Tools

Return to the Learn to Embroider main Table of Contents.

Move on to the posts about working with patterns.

Four Free Embroidery Patterns

Free Embroidery PatternsIt’s been a little while since I released an embroidery pattern – and now you know why! I’ve been working on this set of four free patterns – commissioned by Sulky, the maker of the thread I used. I posted a review of the Sulky thread here.

Now they’re ready to see the world – and you can make them!

All the samples are framed in 5-inch hoops but you can easily enlarge or reduce the patterns to be any size you like.

Tweet - a free bird embroidery pattern

Tweet

Tweet is a very pretty bird whose stitching looks more complicated than it actually is.

It uses just five very basic embroidery stitches!

If you’re just learning how to embroider, this is a terrific pattern to start with.

Download the free Tweet pattern here.

Blossom free embroidery patternBlossom

This single flower is a great way to practice your French knots. I love using them all clustered together as a fill stitch, like in the center of this flower.

I used variegated thread for a nice mottled effect without needing to change thread.

You’re not scared of French knots, are you? I used to be – but then I figured out The Trick and now I get a perfect knot every time. Watch this video and learn how.

Download the free Blossom pattern here.

Full Heart cover 1000 pxMy Heart Is Full. . .

This is a great pattern to practice tiny stitching.

I made it sampler-like, with each row of pattern in the heart showcasing different stitches.

None of them are very complicated stitches – but they’re small. 🙂

Download the free My Heart Is Full. . . pattern here.

Jackie cover 1000 pxJackie

Jackie is another great pattern for beginners.

She uses just five embroidery stitches – all of them very basic.

My favorite part is the polkadots outlined in a contrasting color. That seems like a tricky extra step – but it actually helps cover up any raggedy edges on your satin stitches. ***shhh. . . don’t tell***

Download the free Jackie embroidery pattern here.

Like all patterns from Shiny Happy World, the pattern has links to videos teaching you all the stitches and techniques used. And you can sell anything you make using the pattern – as long as you make it yourself. 🙂

Happy stitching!

Best,
Wendi
Applique Wendi (with fabulous hat)

Online Tools to Help with Your Colorwork

You probably already know that you can add stripes to almost any knit/crochet pattern… and it’s a great way to use up leftover yarn! Another fabulous way to use up leftover yarn is to make an afghan using medallions (like a granny square) will all of your extras.

But if you’re like me, the hardest part about colorwork isn’t the actual knitting/crocheting… it’s putting the colors together in an aesthetically pleasing way!

Today I’ll share two amazing online tools that will help you plan your colorwork. Thanks so much to the folks in my Ravelry Group for pointing me to these great sites!

First, pick your colors

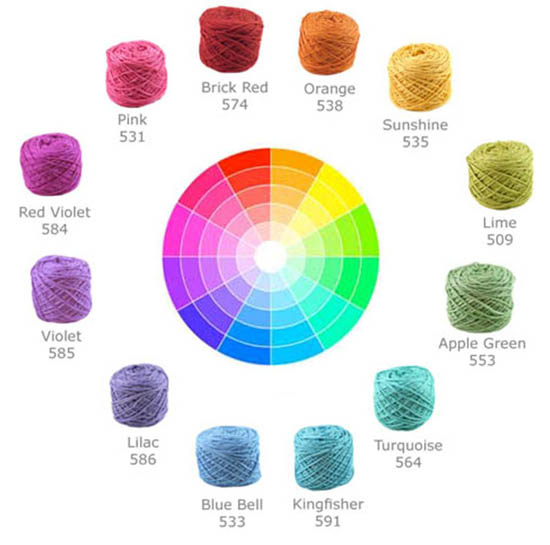
For a successful colorwork project, you’ll want to group colors that go well together.

Color Theory

We all have our favorite colors, so chances are that a lot of your stash already coordinates! If you want a little more help, read this post on color theory.

Random Stripe Generator

Okay, let’s say you want to throw stripes into your project. Getting random-looking stripes can be tricky (since us humans are pattern-seekers and tend to go into a pattern even if we don’t want to). That’s why I love the Random Stripe Generator over at Biscuits and Jam!

The website allows you to input the colors you’re using and maximum stripe thickness. Then… presto!

Random stripe generator

Here are the stripes it generated for me! Isn’t that neat?

The page also provides a text pattern in addition to the image.

Granny Square Generator

Selecting colors for granny squares poses a similar problem: you don’t want like colors touching, but you still want a look of randomness to it.

Fortunately, Granny-Square-Colors.com has you covered!

Input the colors of yarn you have available and you get back a chart:

granny square generator

Follow the image for each square, and assemble as shown. Nifty!

The number of colors per square is a parameter in the generator, meaning that you can use this same generator for any number of medallion patterns, not just granny squares!

Aren’t these fun?

Give them a try and tell me what you think!

Zsa Zsa Loves the Bling on Her Collar

Zsa Zsa - kitty cat rag doll pattern for The Dress Up BunchThis is Zsa Zsa.

Am I dating myself that when someone suggested a collar with bling I immediately thought of Zsa Zsa Gabor? 🙂

Anyway – I made Zsa Zsa using the Pip pattern, a shortish pile white fur, and a couple of scraps of pink satin for the ear linings.

I made Zsa Zsa to show you a few things.

How to Make a Fancy Collar with Bling

I bought that ribbon with the jewels already sewn on it. Fancy and easy. 🙂

But it was kind of flimsy.

To make a sturdy collar that could withstand lots of play, I made the regular collar from the Pip pattern, then sewed the blingy ribbon onto it.

I had to make the collar a little wider so it would accommodate the full width of the ribbon. You can do that too – just cut your fabric strip 4 times the width of the ribbon you want to use.

I also had to use a zipper foot to sew down the edges of the ribbon. The zipper foot let me keep the presser foot out of the way of the bumpy bling. If you don’t have one you can just sew the ribbon on by hand. The easiest and strongest way would be to whipstitch it around all the edges. Use this tutorial to see how.

You Can Use Fake Fur to Sew a Zsa Zsa from the Pip Pattern

Zsa Zsa - kitty cat softie doll patternYou don’t have to make any adjustments to the pattern.

You can find all my video tutorials about working with faux fur (along with other special fabrics) here.

I recommend using the optional muzzle applique piece included in the pattern. Otherwise the cute embroidered smile will get lost in the fur.

The pattern includes instructions for how to prepare the muzzle piece and how to applique it onto fur.

Please get the good stuff!

It’s going to take you a couple of hours to make this toy and someone is going to love it. Make it out of materials that feel good and will last!

I sewed Zsa Zsa up with junky fur that I had on hand for some reason. It’s white – which is exactly what I wanted for this project – but that’s the only good thing I can say about it. I bought this at Joann’s and it’s awful. It feels like plastic. I can tell it’s going to get terribly matted if this toy actually gets played with. The backing fabric is so thin that you can see my light pink pattern-tracing lines right through it. Awful stuff! I gave the leftovers to Jo to use for making rugs in her doll house. That’s the only thing it’s good for. 🙁

But you’ll use the good stuff, right?

You can find info about my favorite source for faux fur here. I haven’t tried all their furs – not by a long shot – but every single one I’ve tried had been terrific quality.

So – ready to make a furry cat?

Get the Pip pattern here.

Happy sewing!

Best,
Wendi
Applique Wendi (with fabulous hat)

Schaefer Yarns Outlet: Interlaken, NY

Last month, I was driving up Route 96 in the Finger Lakes region of NY. And guess what I saw by the side of the road?

Schaefer Yarn Outlet

I had heard that Schaefer Yarns had been in the area, but I didn’t know that the owner opened an outlet after shutting closing her dyeing business.

So… I turned off the road (with my fabulously agreeable husband) to check it out.

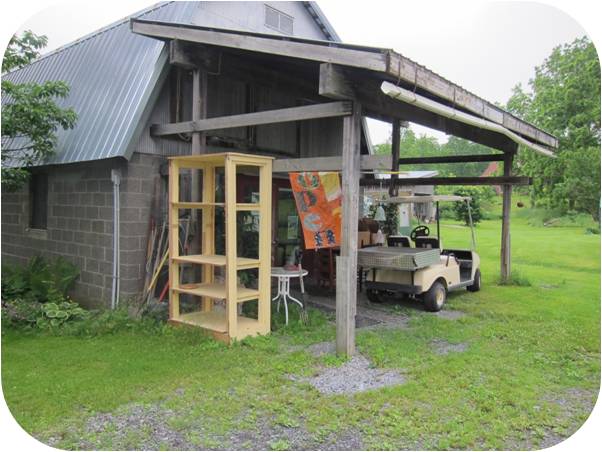
Here is the outlet:

barn

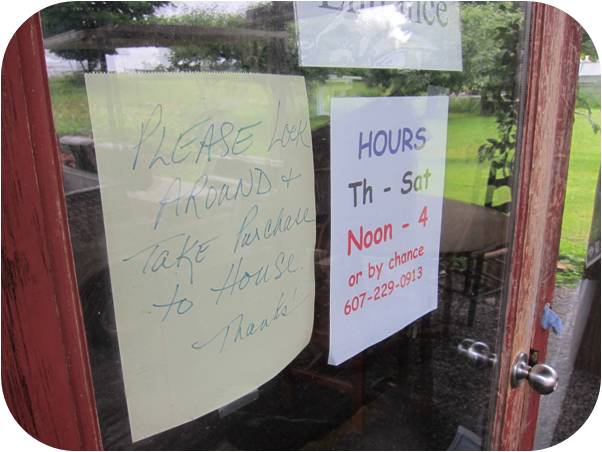
And here are the hours:

hours

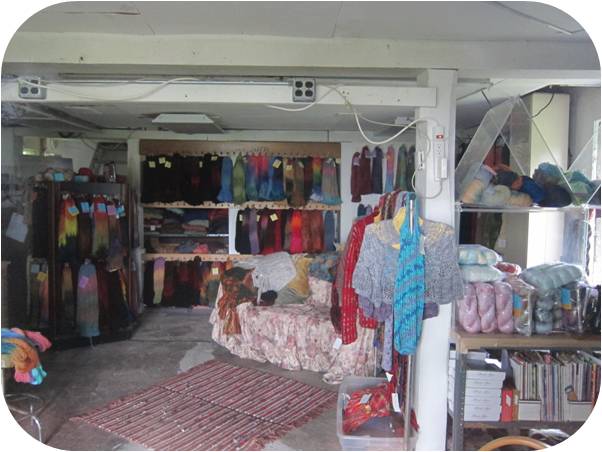
I suppose luck wasn’t on my side, because the shop wasn’t open. But, I did take a peek inside:

Schaefer Yarn Outlet

According to this news article I found, the outlet is leftover inventory, and it’s unclear if new stock is being added.

I can’t vouch for the yarn (or prices) of what’s inside… but what I can offer is directions! (since the address/directions are missing from the outlet’s webpage…)

road sign

From Ithaca, NY: drive north on 96 for about 20 minutes and turn left on Kelly’s Corner Road. Go a minute or two, and you’ll see a sign outside.

From I-90, drive south on 96 and turn right on Kelly’s Corner Road. Go a minute or two, and you’ll see a sign outside.

Directions for Schaefer yarn Outlet

If you’re in the area during some lucky hours… then stop by for a visit!

SHARE THIS