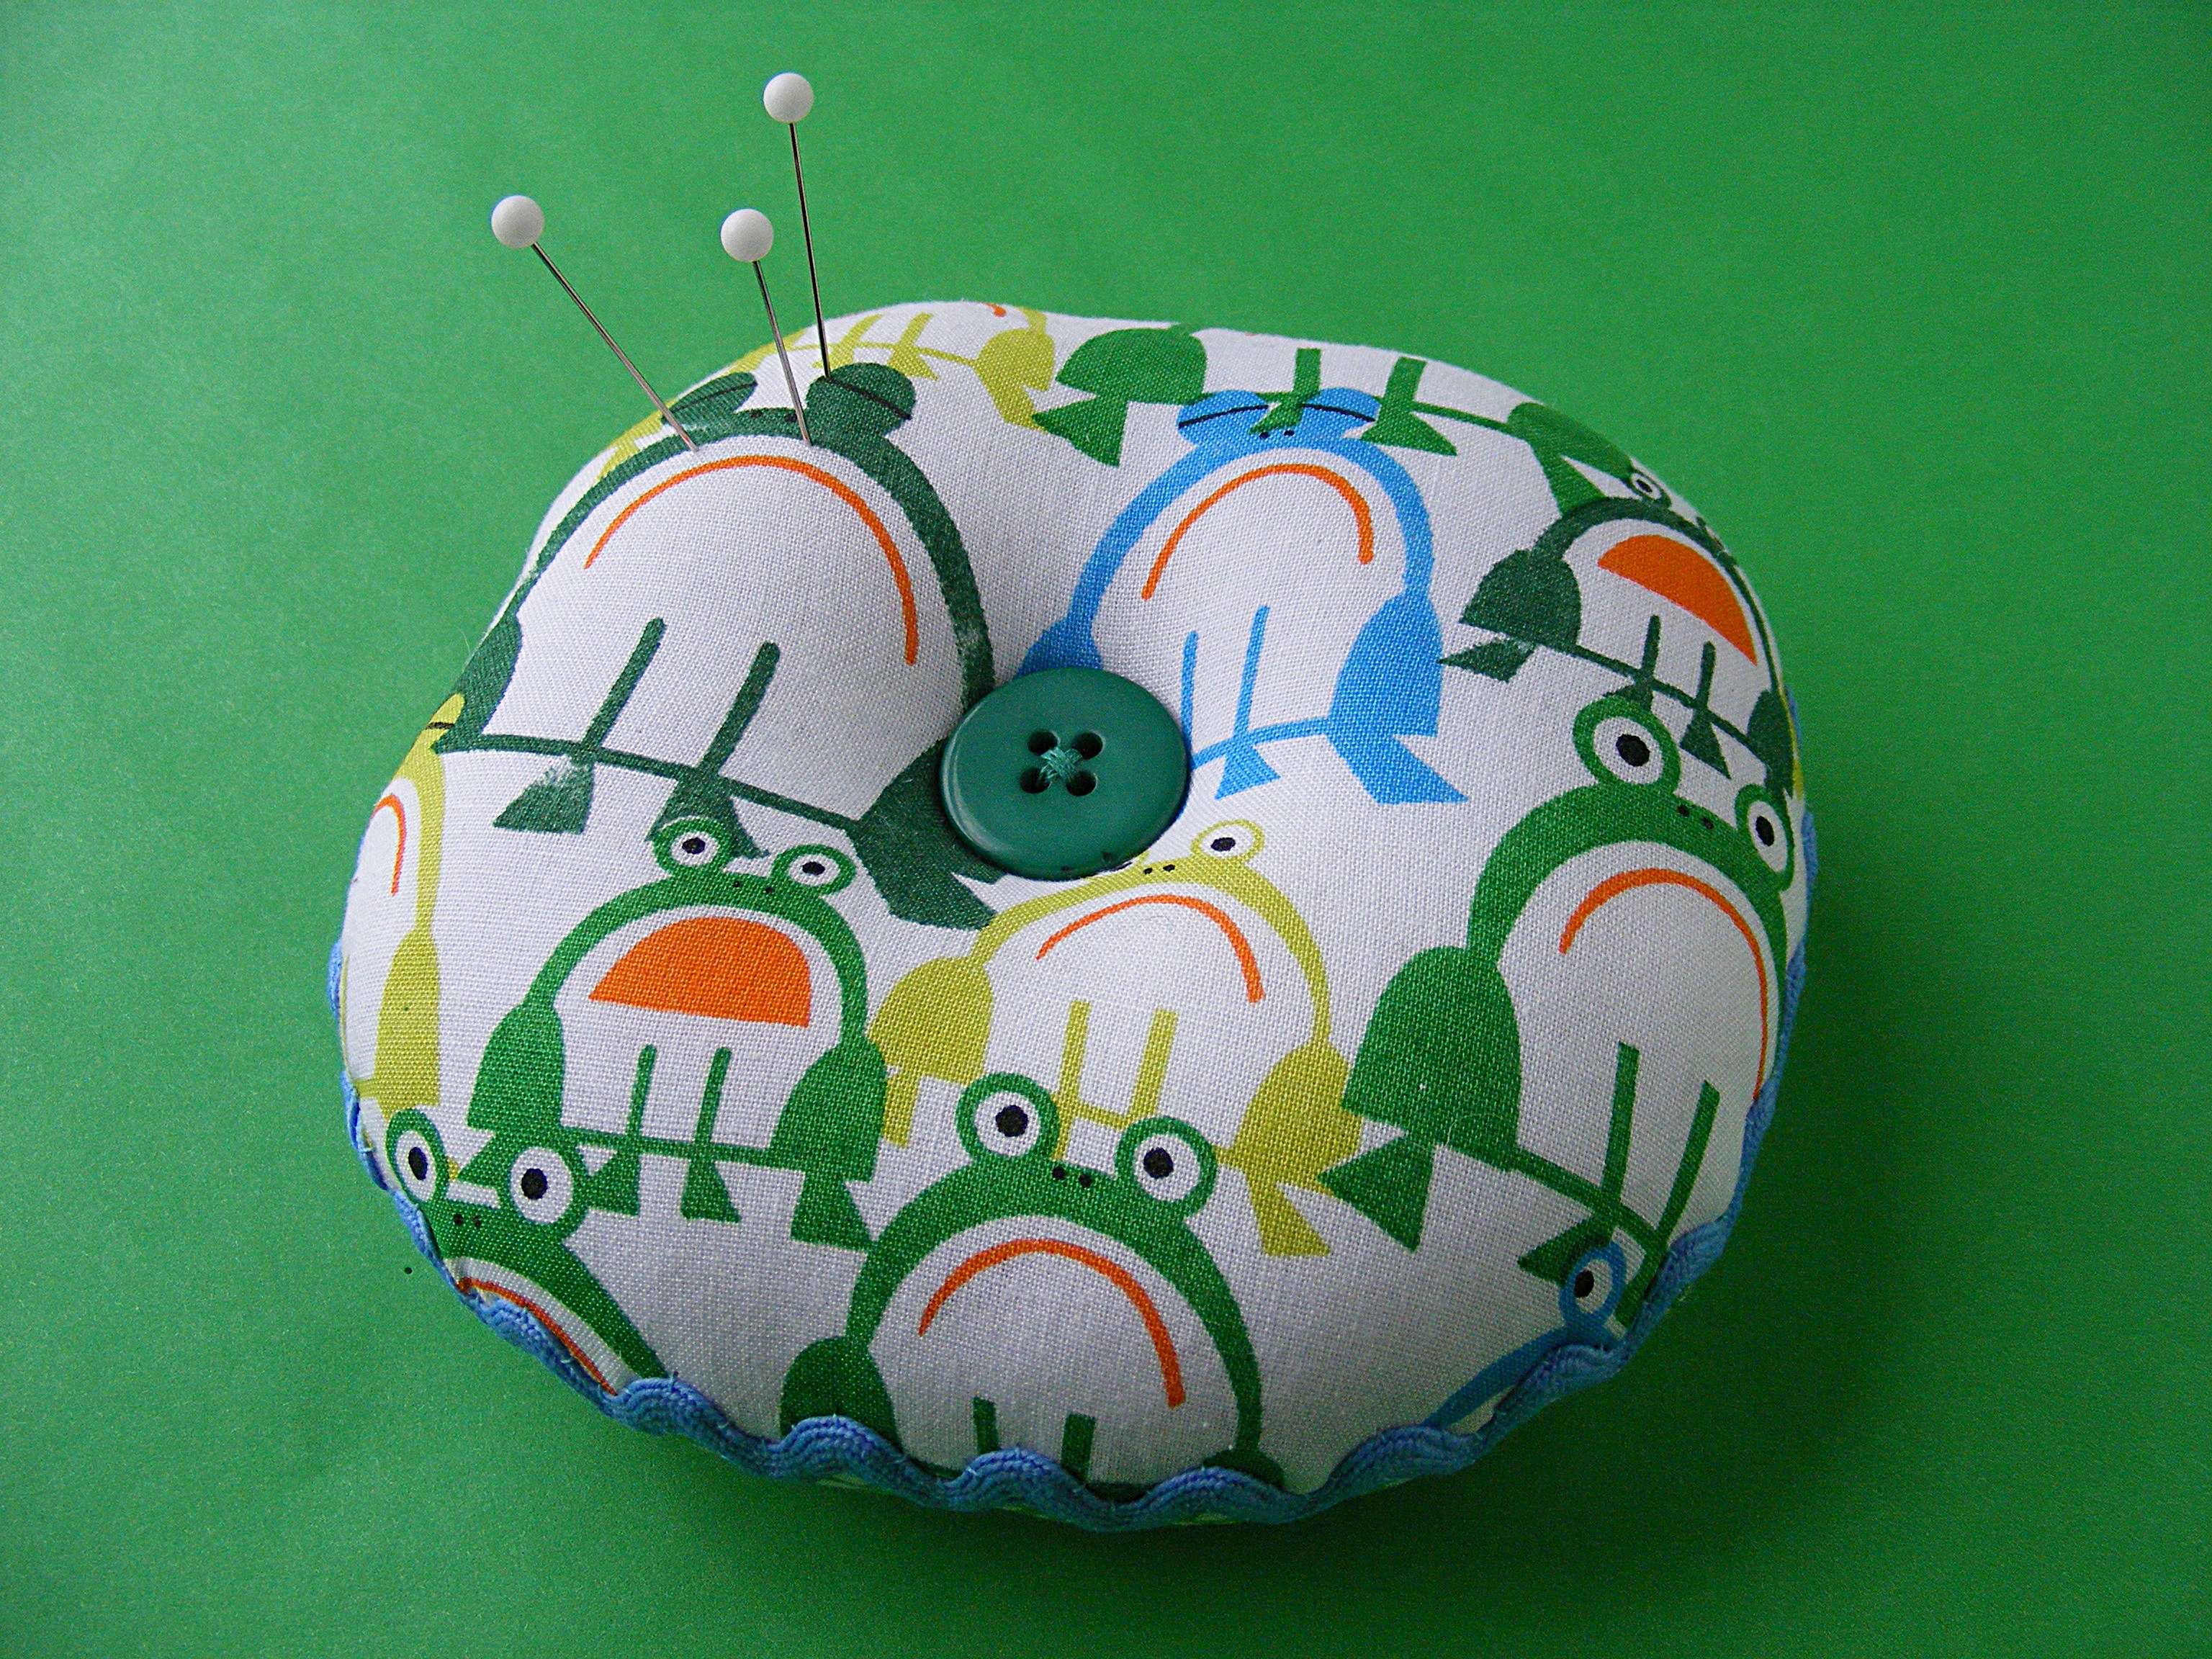
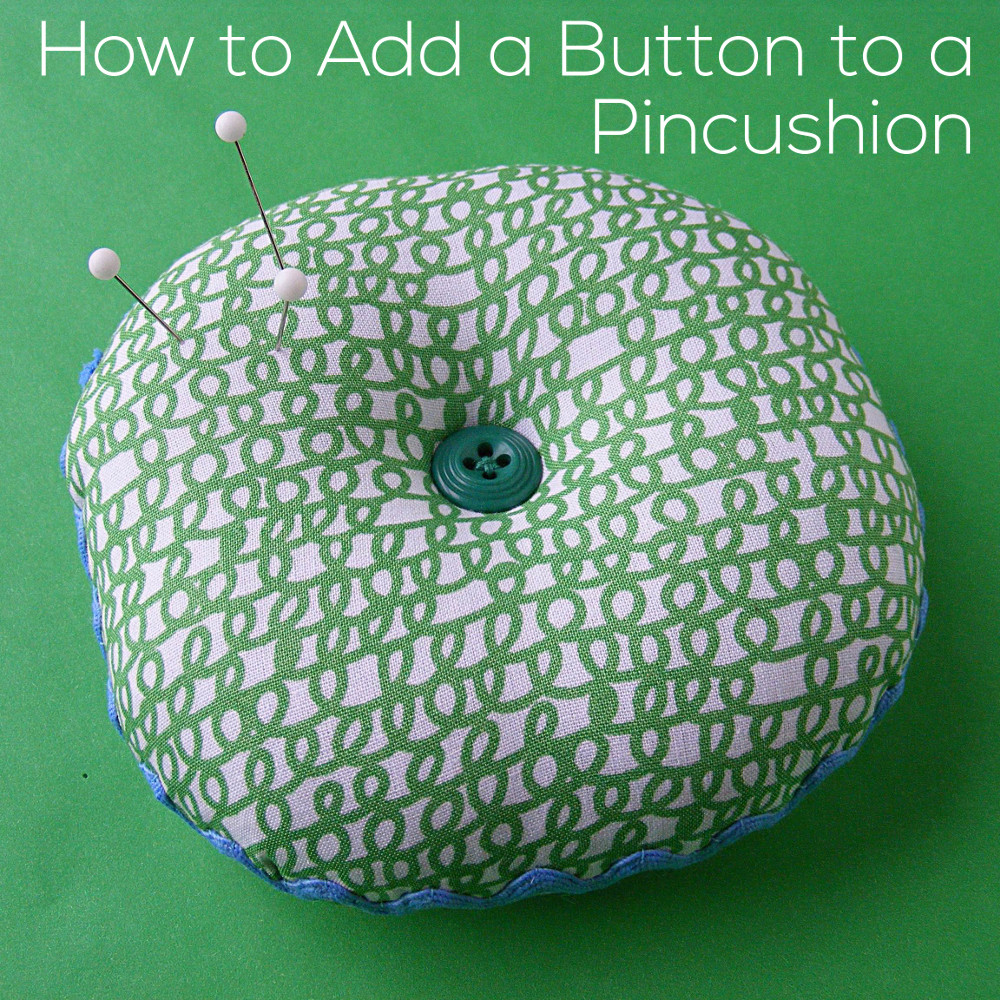
The button dimples on the top and bottom make it sit nice and flat.
The two colors for the top and bottom are fun.
And the rickrack around the seam?
Rickrack always makes me smile. 🙂
I’m love the Ed Emberley Happy Drawing collection from Cloud 9 Fabrics – it’s making my sewing room an even happier place. And you know I’m all about the happy. 🙂 This uses the frogs on one side, and the green scribbles on the other.
It’s an easy pattern – the hardest thing is packing in enough stuffing to make it really firm.
Here’s how to make it. . .
Materials
two scraps of fabric, at least 6 inches square
approx. 17 inches of rickrack (get the big or jumbo size – they’re easiest to work with)
lots and lots of stuffing
two buttons (I used 3/4″ and 5/8″)
sewing machine, thread, basic sewing tools
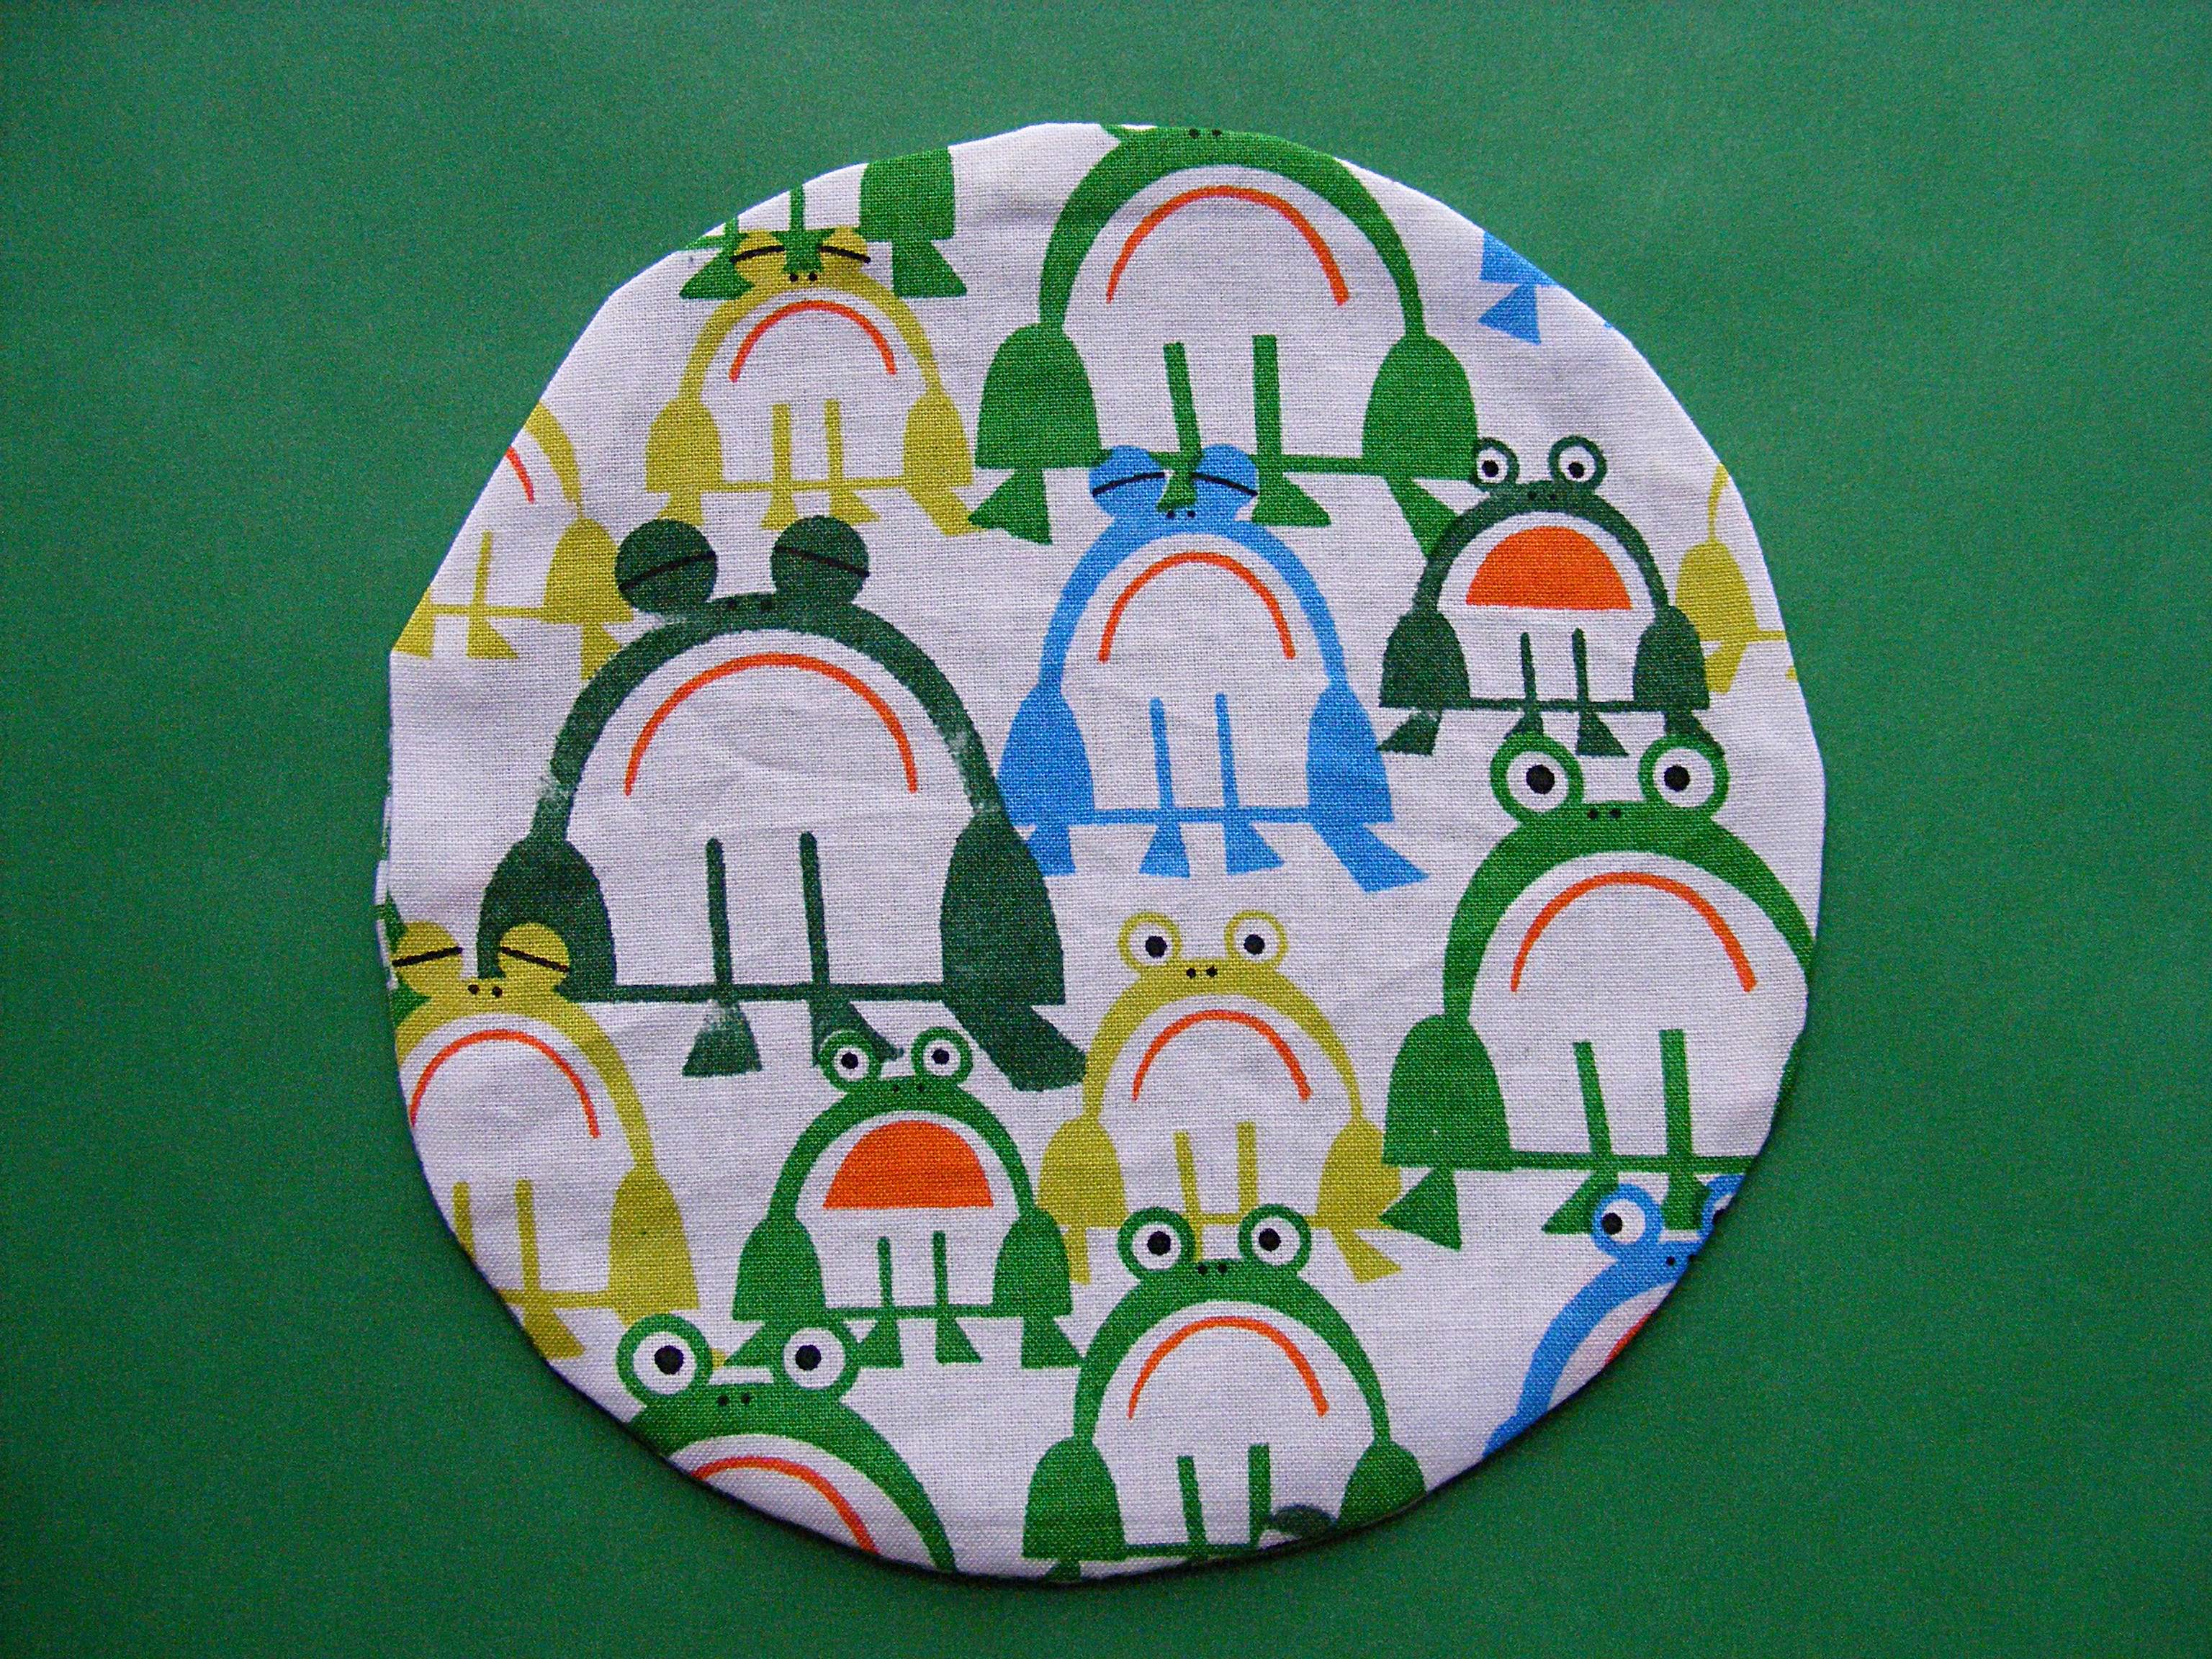
Step 1
Cut one circle from each fabric. The circles should be about 6 inches in diameter. You can measure it with a compass or do what I did – trace around a dessert plate. 🙂
Step 2
Put the two circles right sides together and sew almost all the way around the edge. Use 1/4 inch seam allowance and leave a few inches open for stuffing.
Don’t forget to backstitch at the beginning and end of your stitching.
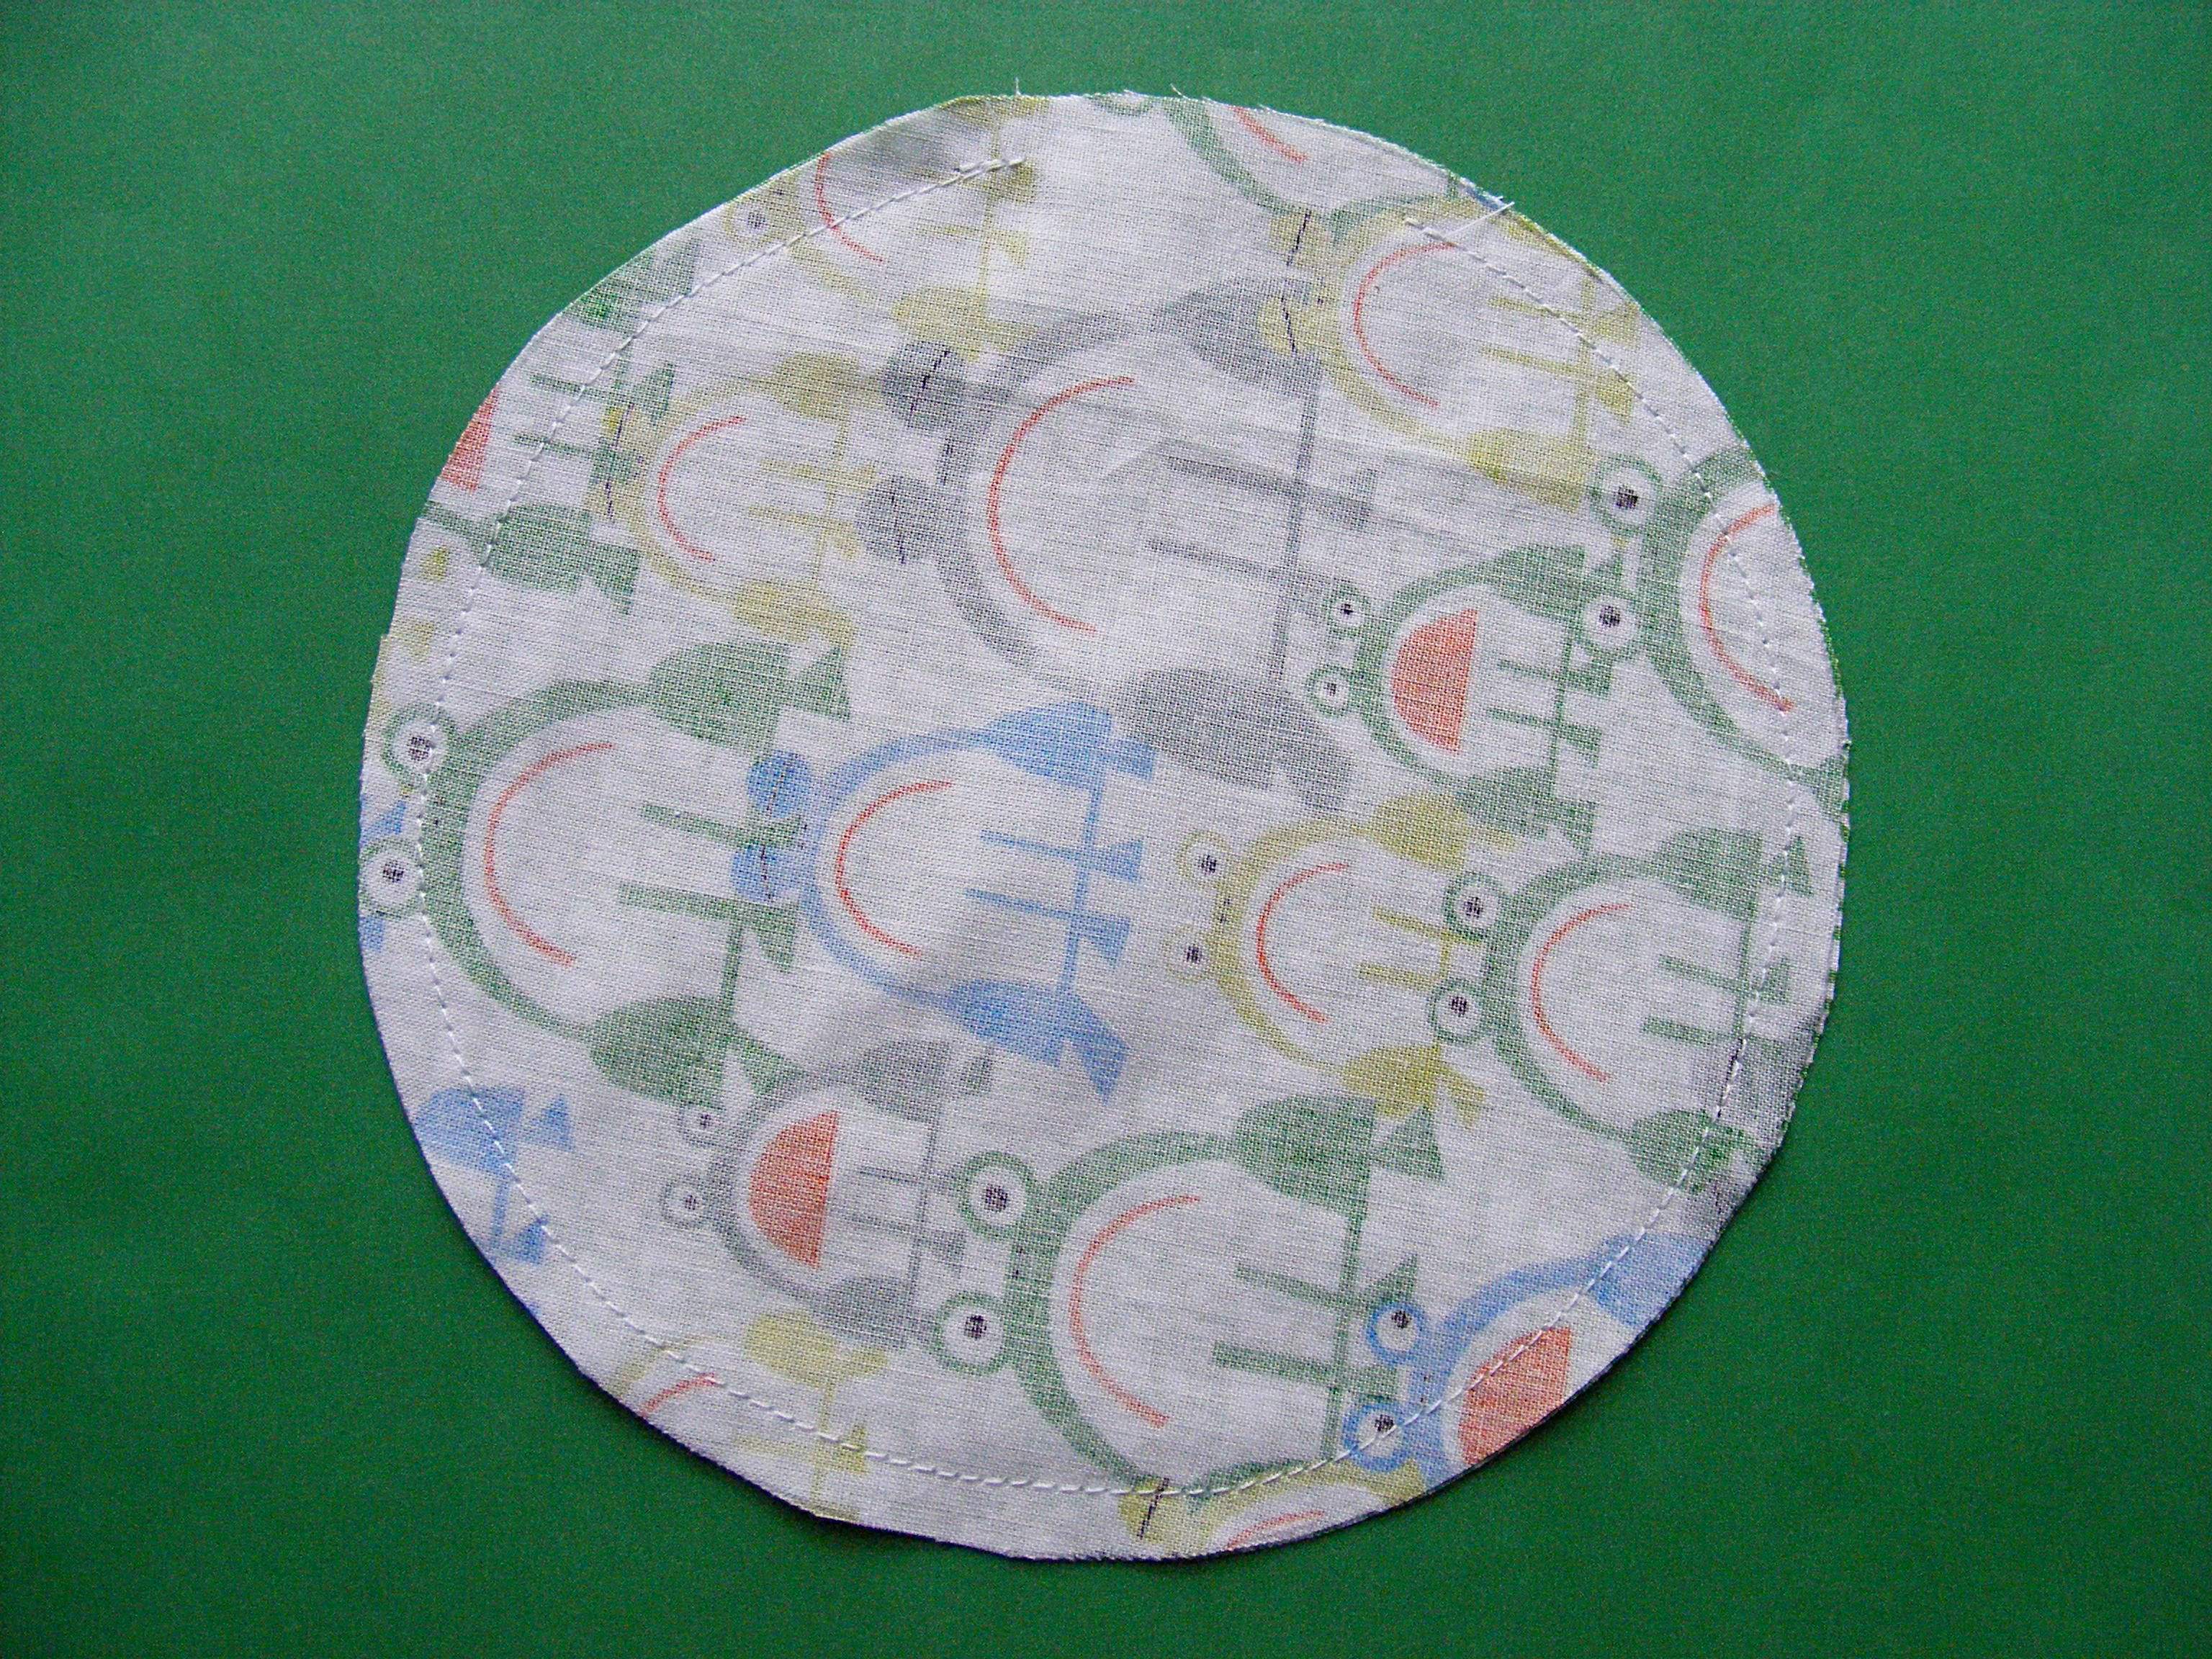
Step 3
Turn it right side out. Press the raw edges around the stuffing opening flat. This will really help you when you’re ready to sew up the stuffing opening.
Step 4
Fold your disk into fourths to find the exact center and mark it with a small marker on the top AND bottom.
Stuff the heck out of it. I’m not kidding here – the best pincushions are REALLY hard. It gives the pincushion weight AND makes the pins slide in and out with no resistance. A loosely-stuffed pincushion tends to “grab” the pins. Stuff. Stuff. Stuff until you can’t get any more stuffing in.
Sew it closed using whipstitch. You’re going to cover up the seam line with rickrack so there’s no need to get fancy with ladder stitching.
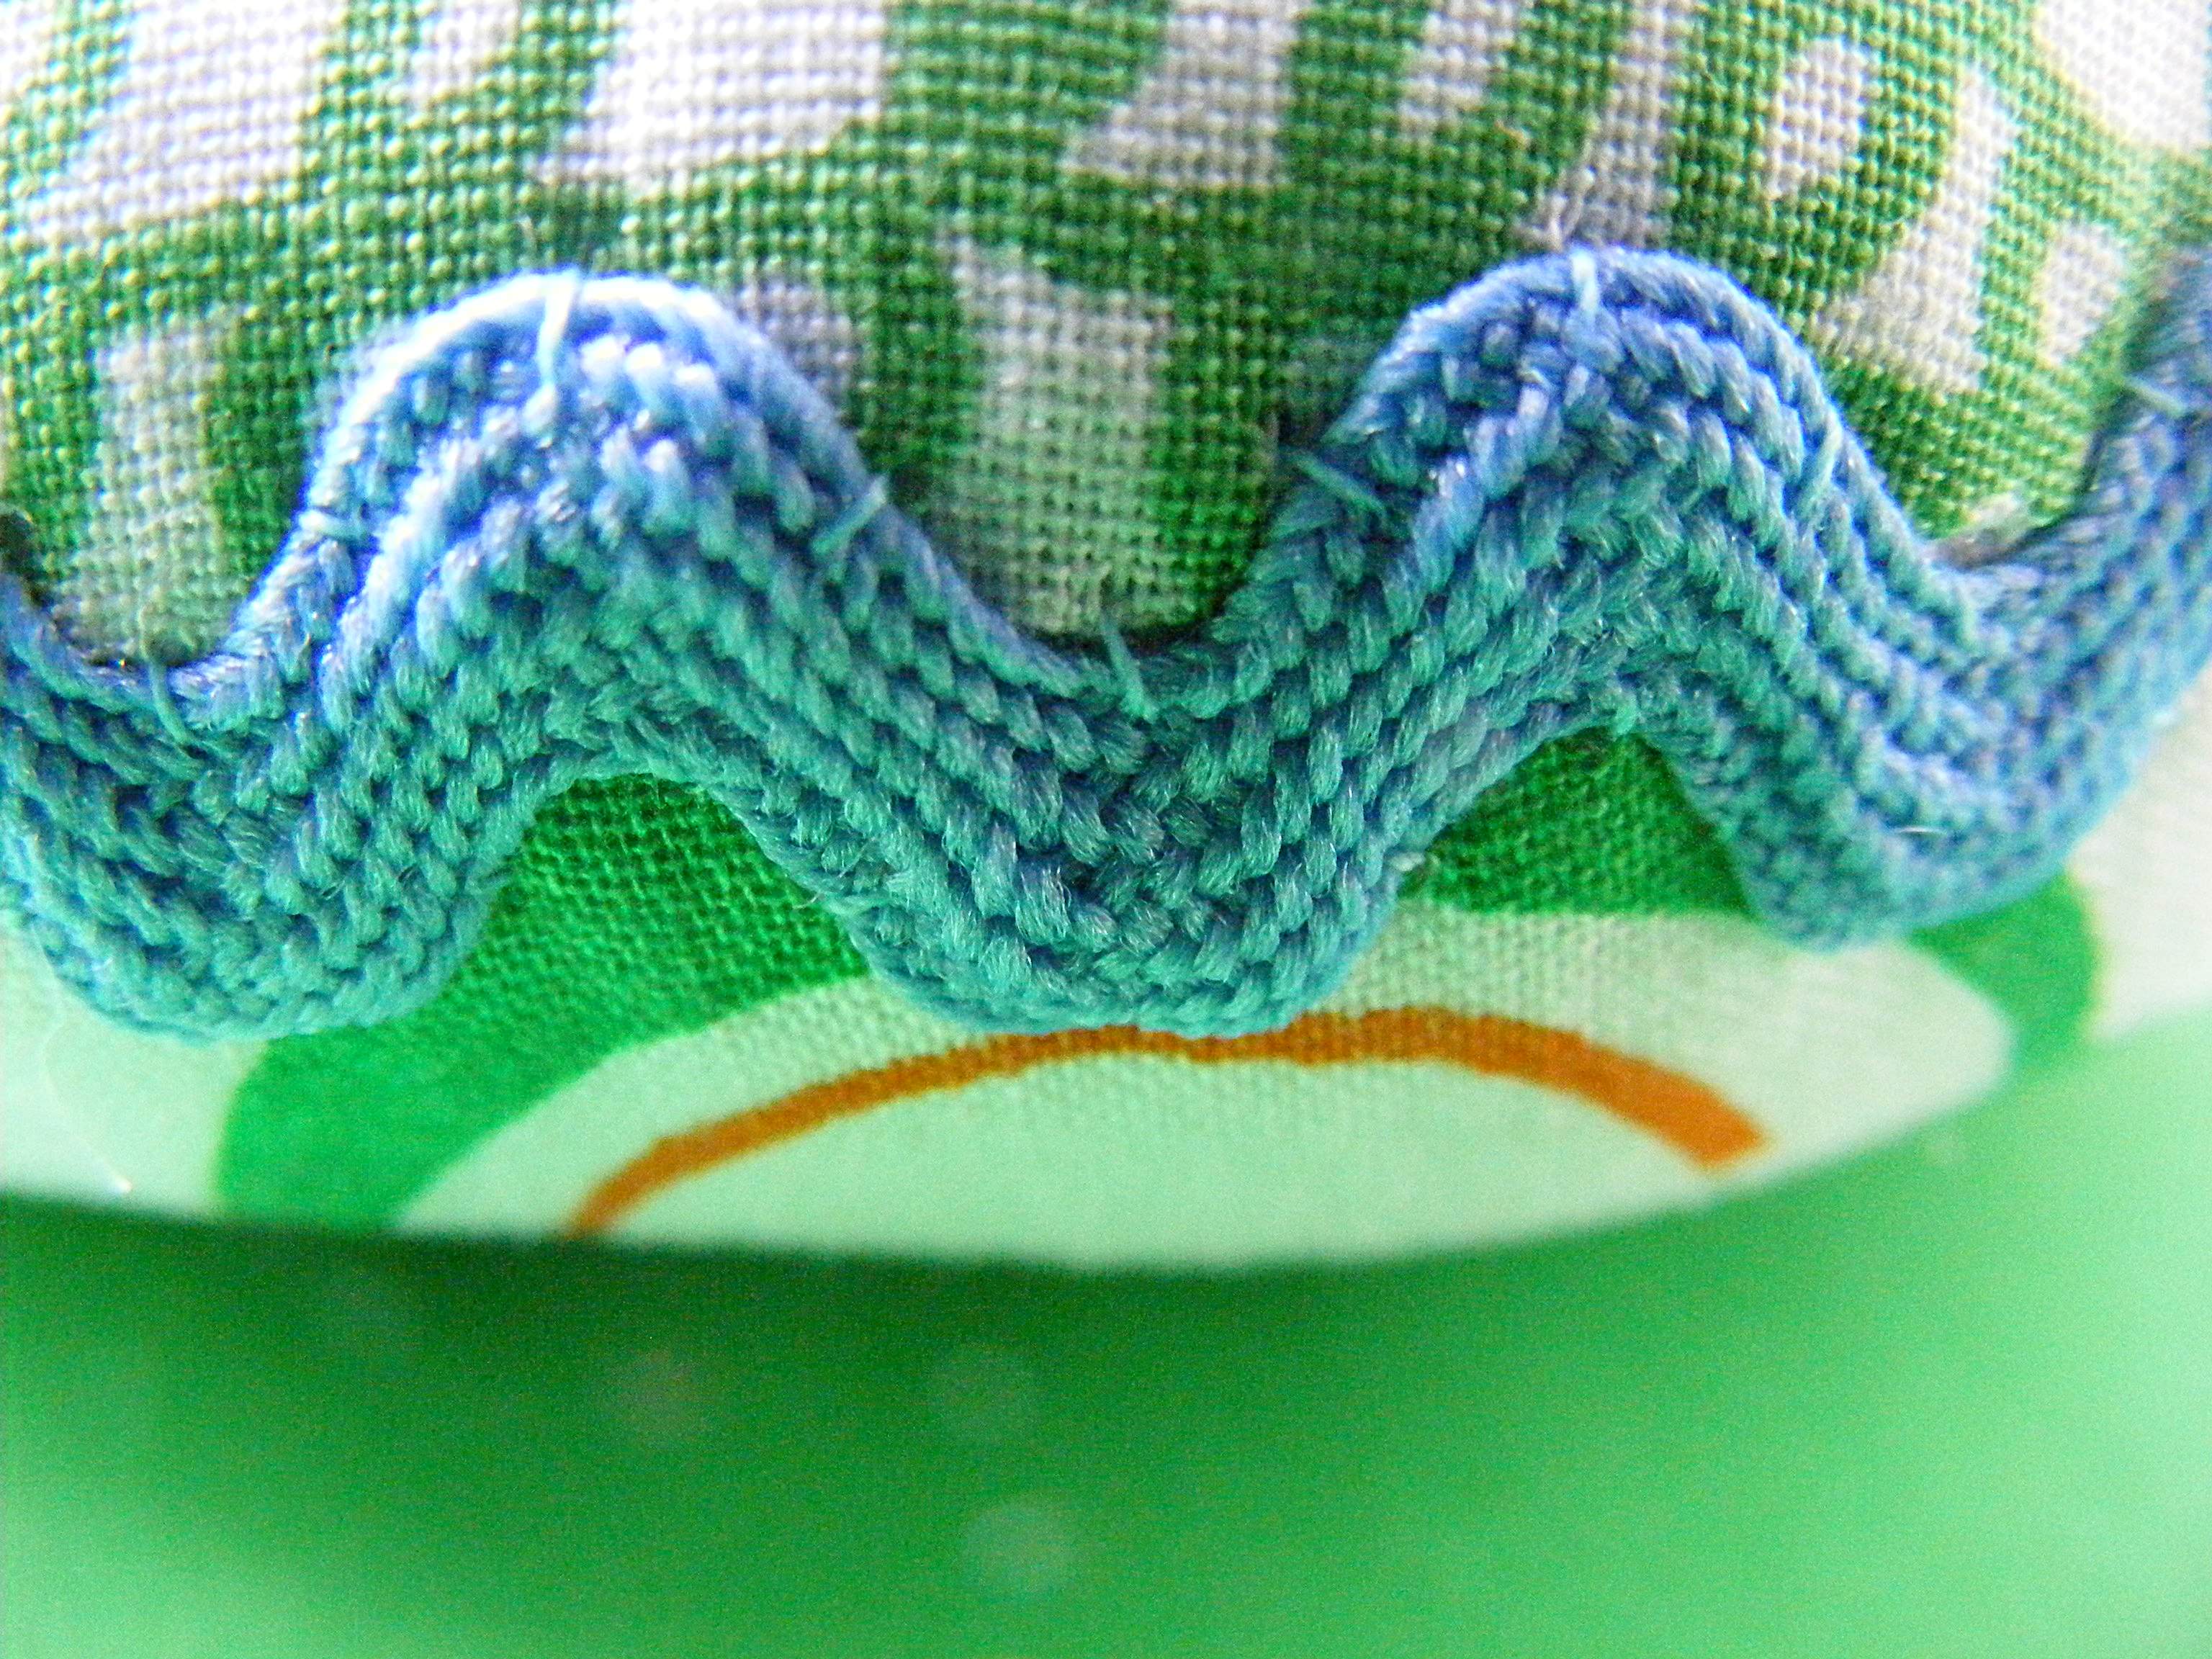
Step 5
Hand sew the rickrack over the seam.
I take a tiny stitch at the top of each peak, the bottom of each valley, and midway up and down each hill. I do that on the top and bottom edge of the band of rickrack. Trim off the frayed ends of the rick rack and hit them with a dab of Fray-check or clear nail polish.
Step 6
Using the center marks you made in step 4, sew buttons to the top and bottom of the pincushion – pulling tight to make the pincushion dimple in at the center on both sides. This is the trickiest step of the whole project – watch this video to see how to do it without swearing.
Finished! Stick in some pins and put it to work. Then make another. I keep one at my sewing machine, one at my cutting table, and one at my ironing board. You can NEVER have enough cute pincushions. 🙂
You could even make yourself a pincushion to match your other sewing room accessories. Here are links to the free patterns for all those other projects. . .
This is my favorite pincushion style. For the best results you want to stuff it REALLY hard – but that makes that nice dimpled button in the center a bit tricky. And how do you knot it off? I don’t want to see the knot anywhere.
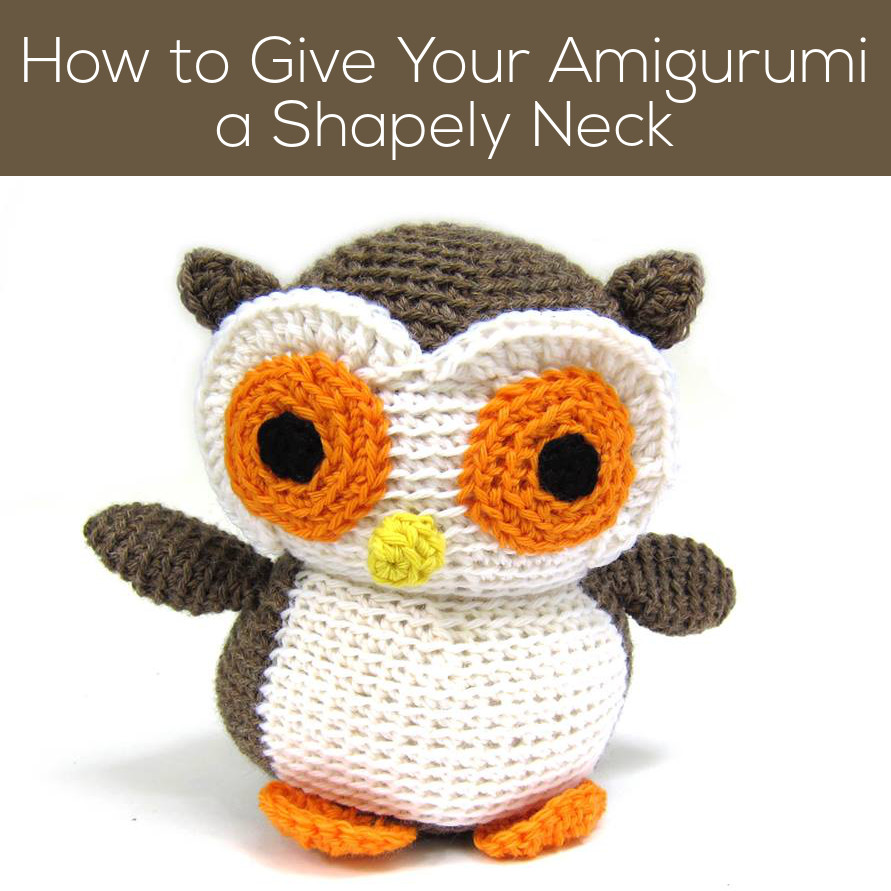
Is it long shapely legs? A bikini-ready body? Of course not! It’s a nicely defined neck!
Fortunately, creating a shapely neck is easy!
How to create a shapely neck
Sometimes, amigurumi come down with ‘Thick Neck Syndrome’… it’s not their fault, and it’s up to you (their maker) to help them out a little bit.
The secret to creating a defined neck is to tug the yarn tight every few stitches when you’re attaching the head to the body.
Step 1: Begin attaching with the whipstitch
To attach the head to the body, you’ll use a whipstitch (as instructed in the pattern): using a tapestry needle to stitch through one stitch on the head and the corresponding stitch on the body:
Whipstitch the head and body together for about 3-4 stitches.
Step 2: Tug!
Now that you’ve done a few stitches… tug! That’s right, just pull on the yarn and the neck will cinch up a little bit.
Step 3: Repeat steps 1-2
Continue stitching and tugging as you work your way around the neck:
See how I’m tugging? And see how the neck is becoming defined?
Why so much tugging?
You may be asking yourself… why is it important to tug every few stitches? Can’t you just wait until the end?
It’s risky.
If you wait to do a HUGE tug at the end, one of two things can happen:
The yarn will break (trust me… this is really sad! It means you’ll have to start all over with attaching the head)
The neck will be very gathered close to the end, but not very shapely towards the start- since the tugging won’t evenly distribute
Doesn’t your amigurumi deserve the best?
Don’t you want him to have the most shapely neck possible? Then treat him well… follow this trick and he’ll be the envy of all of his friends!
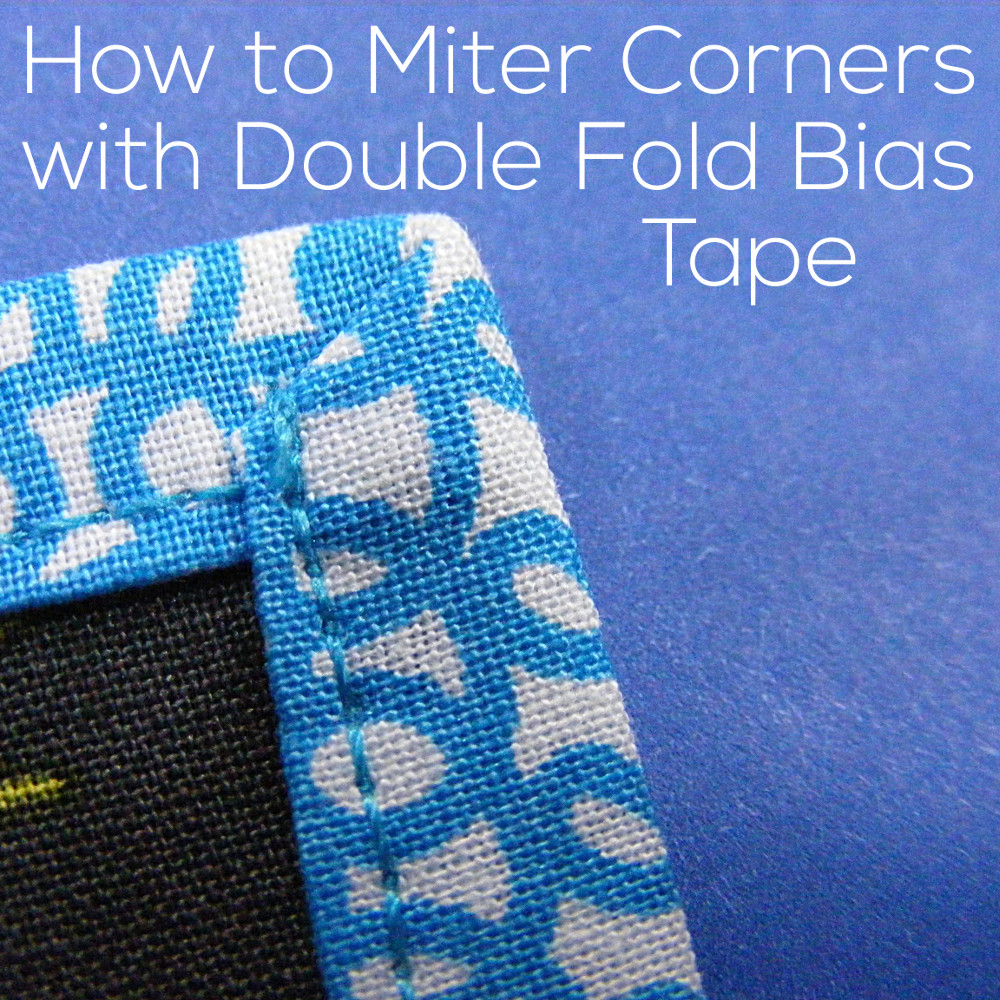
Ever since I did this video showing how to make bias tape I’ve been getting questions about how to miter corners neatly when you use it. How do you get that neat corner? Do you wrap the whole thing and pin it and then start to sew? Do you sew one side at a time? How do you pivot at the corner?
So many questions!
Here’s a video showing how to miter corners with any double-fold tape.
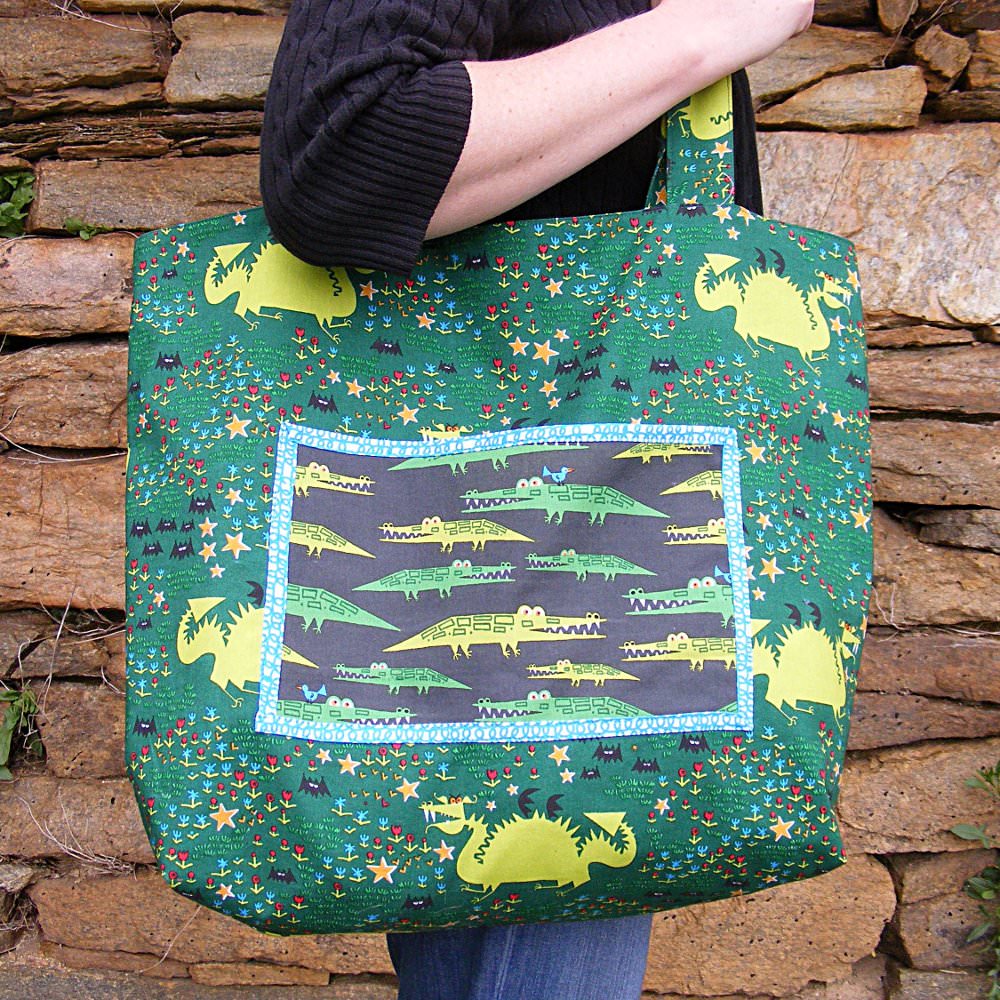
I used this technique just recently when I made this roomy tote bag. (It’s a free pattern! Get it here.)
I used custom bias tape and mitered the corners to bind the edges of the big pocket on the side.
Here’s a close up of the towel, showing how I mitered the corners neatly.
You can even use this technique to bind the edges of your quilt entirely my machine!
(Full disclosure – I don’t. I use a half-machine/half-hand binding method that makes an absolutely perfect and durable double-layer quilt binding. This video shows how I bind my quilts.)
I hope you’ve had an awesome time with Kool-Aid Dye Week… I know I’ve had a blast experimenting! Did you give any of the techniques a try? If so… show it off!
In case you missed it…
I’ve posted tutorials for quite a few ways of using Kool-Aid to dye your yarn! If you missed them, don’t worry… here’s a wrap-up:
Click on any of the following links to zip to the tutorial!
While I made a few knitted & crocheted swatches for Dye Week, I couldn’t wait to get started on a project! And since my favorite technique is dyeing the long colorways, I started with that skein, first!
Check out my socks!
EEE! Don’t you love it! In retrospect, I might have dyed smaller sections to get narrower stripes, but I’m not complaining… I think these are super-fun!
Show me what you’ve got!
I wanna see it!
Share your experiences with Kool-Aid dyeing in the comments section!
Better yet, write a blog post showing off your awesome yarn, and share the link in the comments! Then we can all see what awesome work you’ve done!
We’re going to ply our already-dyed yarn together… and it results in a great effect!
Step 1: Start plying!
Pull one strand from the center and one from the outside of your ball:
This way, you’ll always have two strands of equal length!
And then, begin plying! I’m using my spindle…
That’s all!
Swatches
This yarn is beautiful!
The advantage to this technique is that it obscures some of the ‘splotchy-ness’ that can happen with the simple multi-colored skein. Here’s how it looks in knitting and crochet:
Having fun?
I’ve been having a blast showing you new techniques for using Kool-Aid to dye yarn! I hope you’ve been enjoying it! Come back tomorrow to have a peek at some projects!
a new shipping tote (which always hangs in my sewing room waiting to be filled with your lovely orders)
a new lap quilt for those chilly mornings
Michelle at Cloud 9 was kind enough to send me some early cuts of the fabric and I’ve been sewing away with it. (If you’re also following along on Facebook you’ve seen photos of some of the work in progress.)
Now I’m starting to finish layout on some of the patterns – so be prepared for a slew of patterns to help you make stuff for your sewing room. All stitched up in Ed Emberley awesomeness.
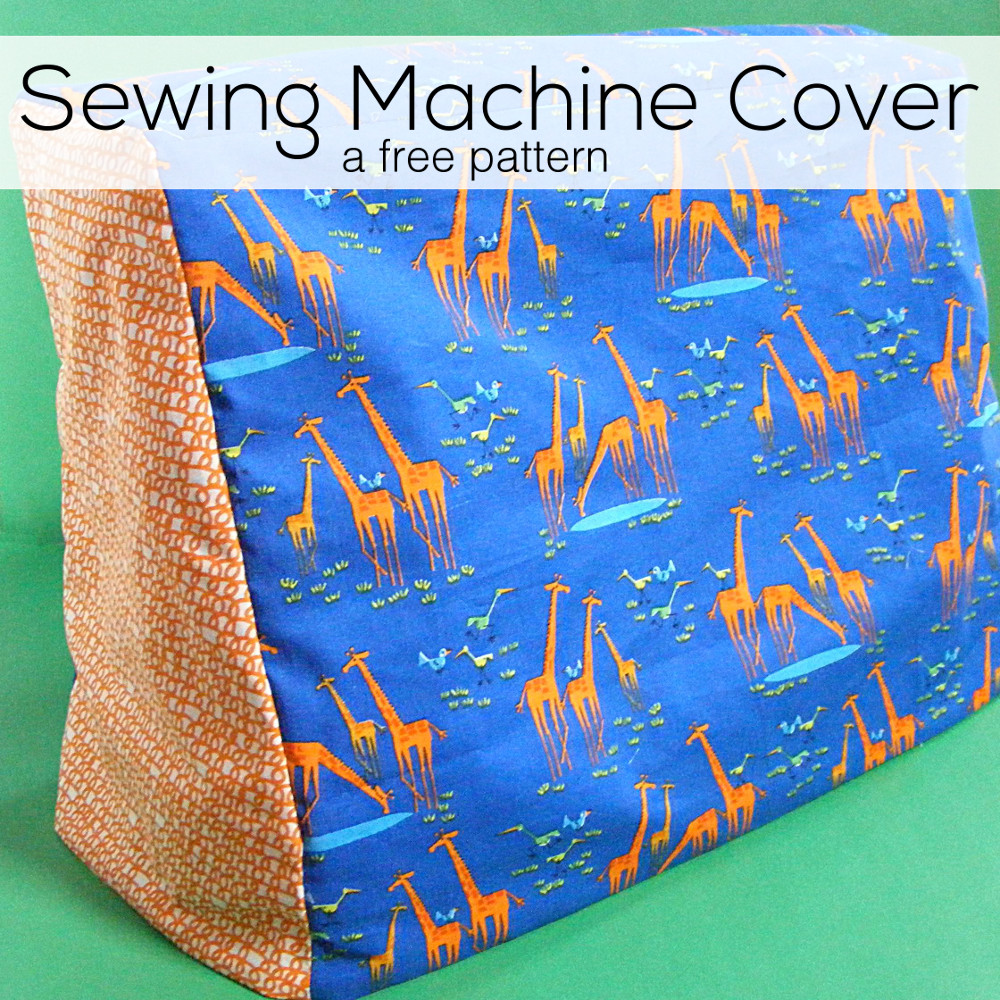
First up – a reversible sewing machine cover. Why reversible? Well – I wanted to make it in the giraffes fabric, but I also wanted to show you how you could use the basic pattern and really have fun with the front panel. You can piece it, applique it, embroider it, bedazzle it – play with it any way you like. (My daughter just got a Bedazzler. I have rhinestones on the brain.)
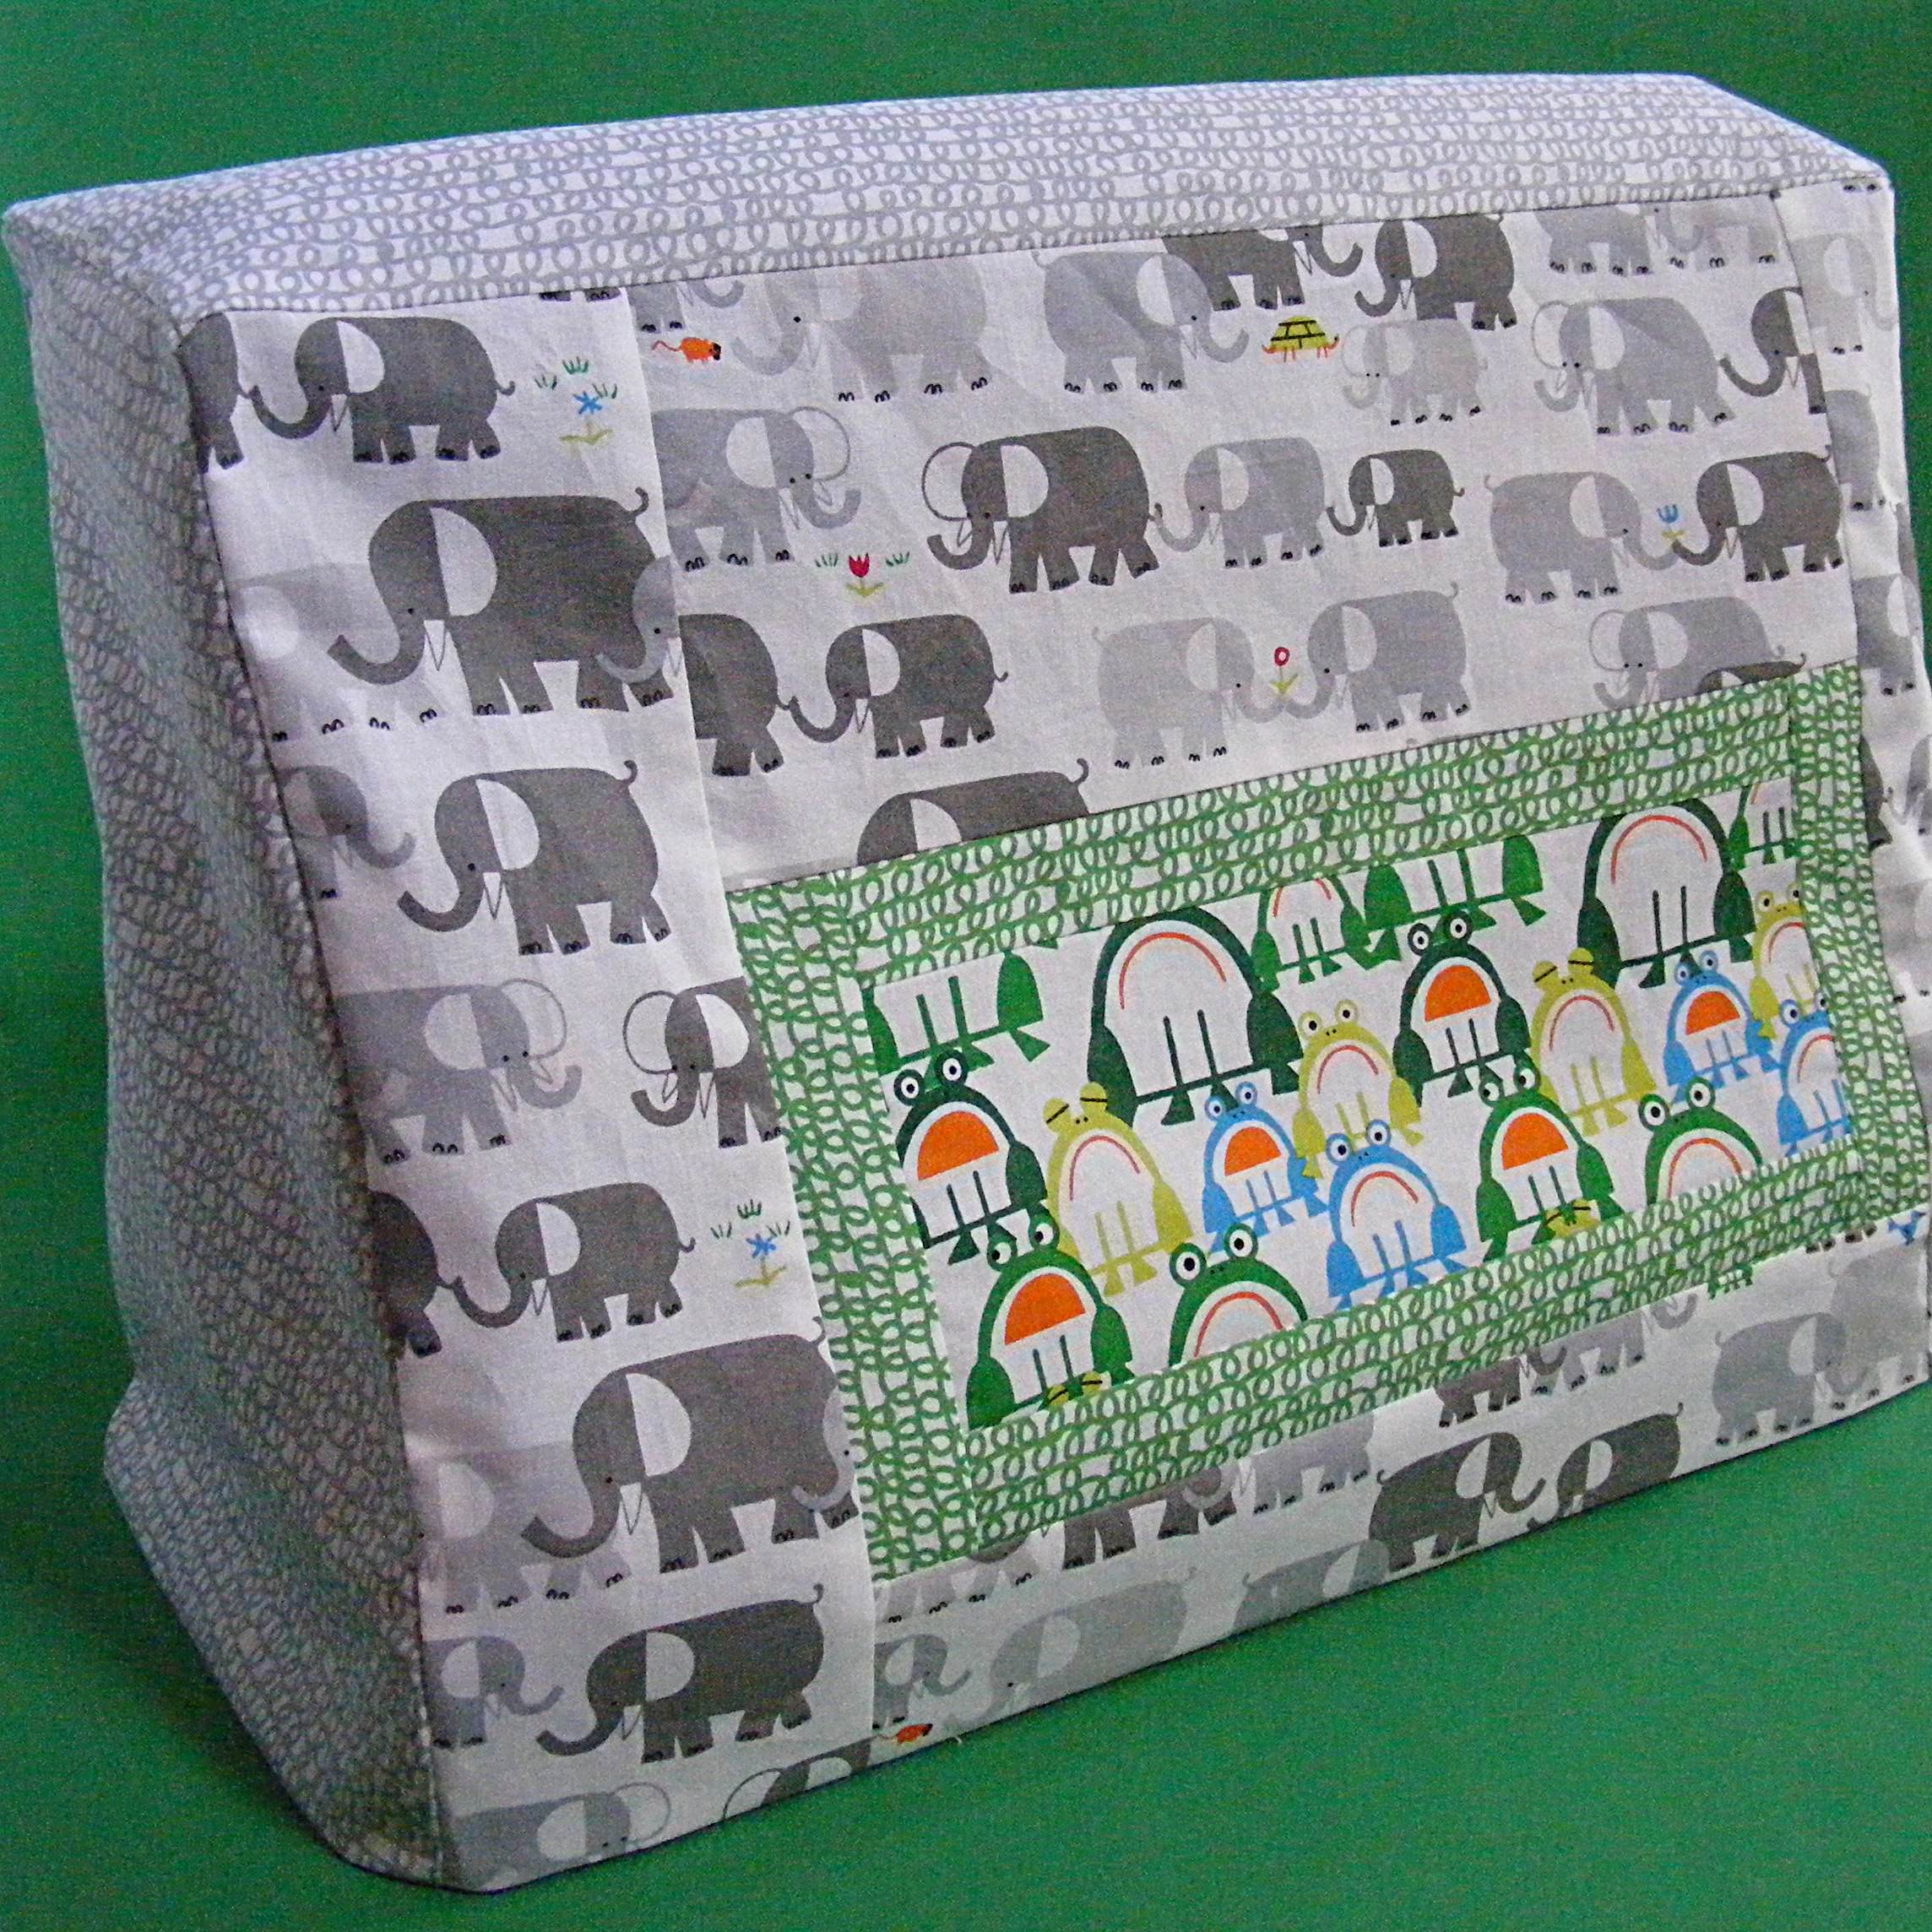
Making it reversible also gives the cover some heft without having to use interfacing. Nice! Plus it allows me to change my mind about which color I want to see. Here’s the reverse.
See? A totally different look. 🙂
Anyway – most sewing machine cover patterns are essentially boxes, but I show you how to make this slightly fitted. See how the top is a bit narrower than the bottom? It’s an easy extra step that makes the whole thing look nicer. Totally worth doing and still easy enough to be a beginner pattern.
Ready to make your own?
Materials you’ll need
depends on your design, but roughly 1/2 yard fabric for front and back, and 1/4 yard fabric for the sides
sewing machine, thread, basic sewing tools
Step 1
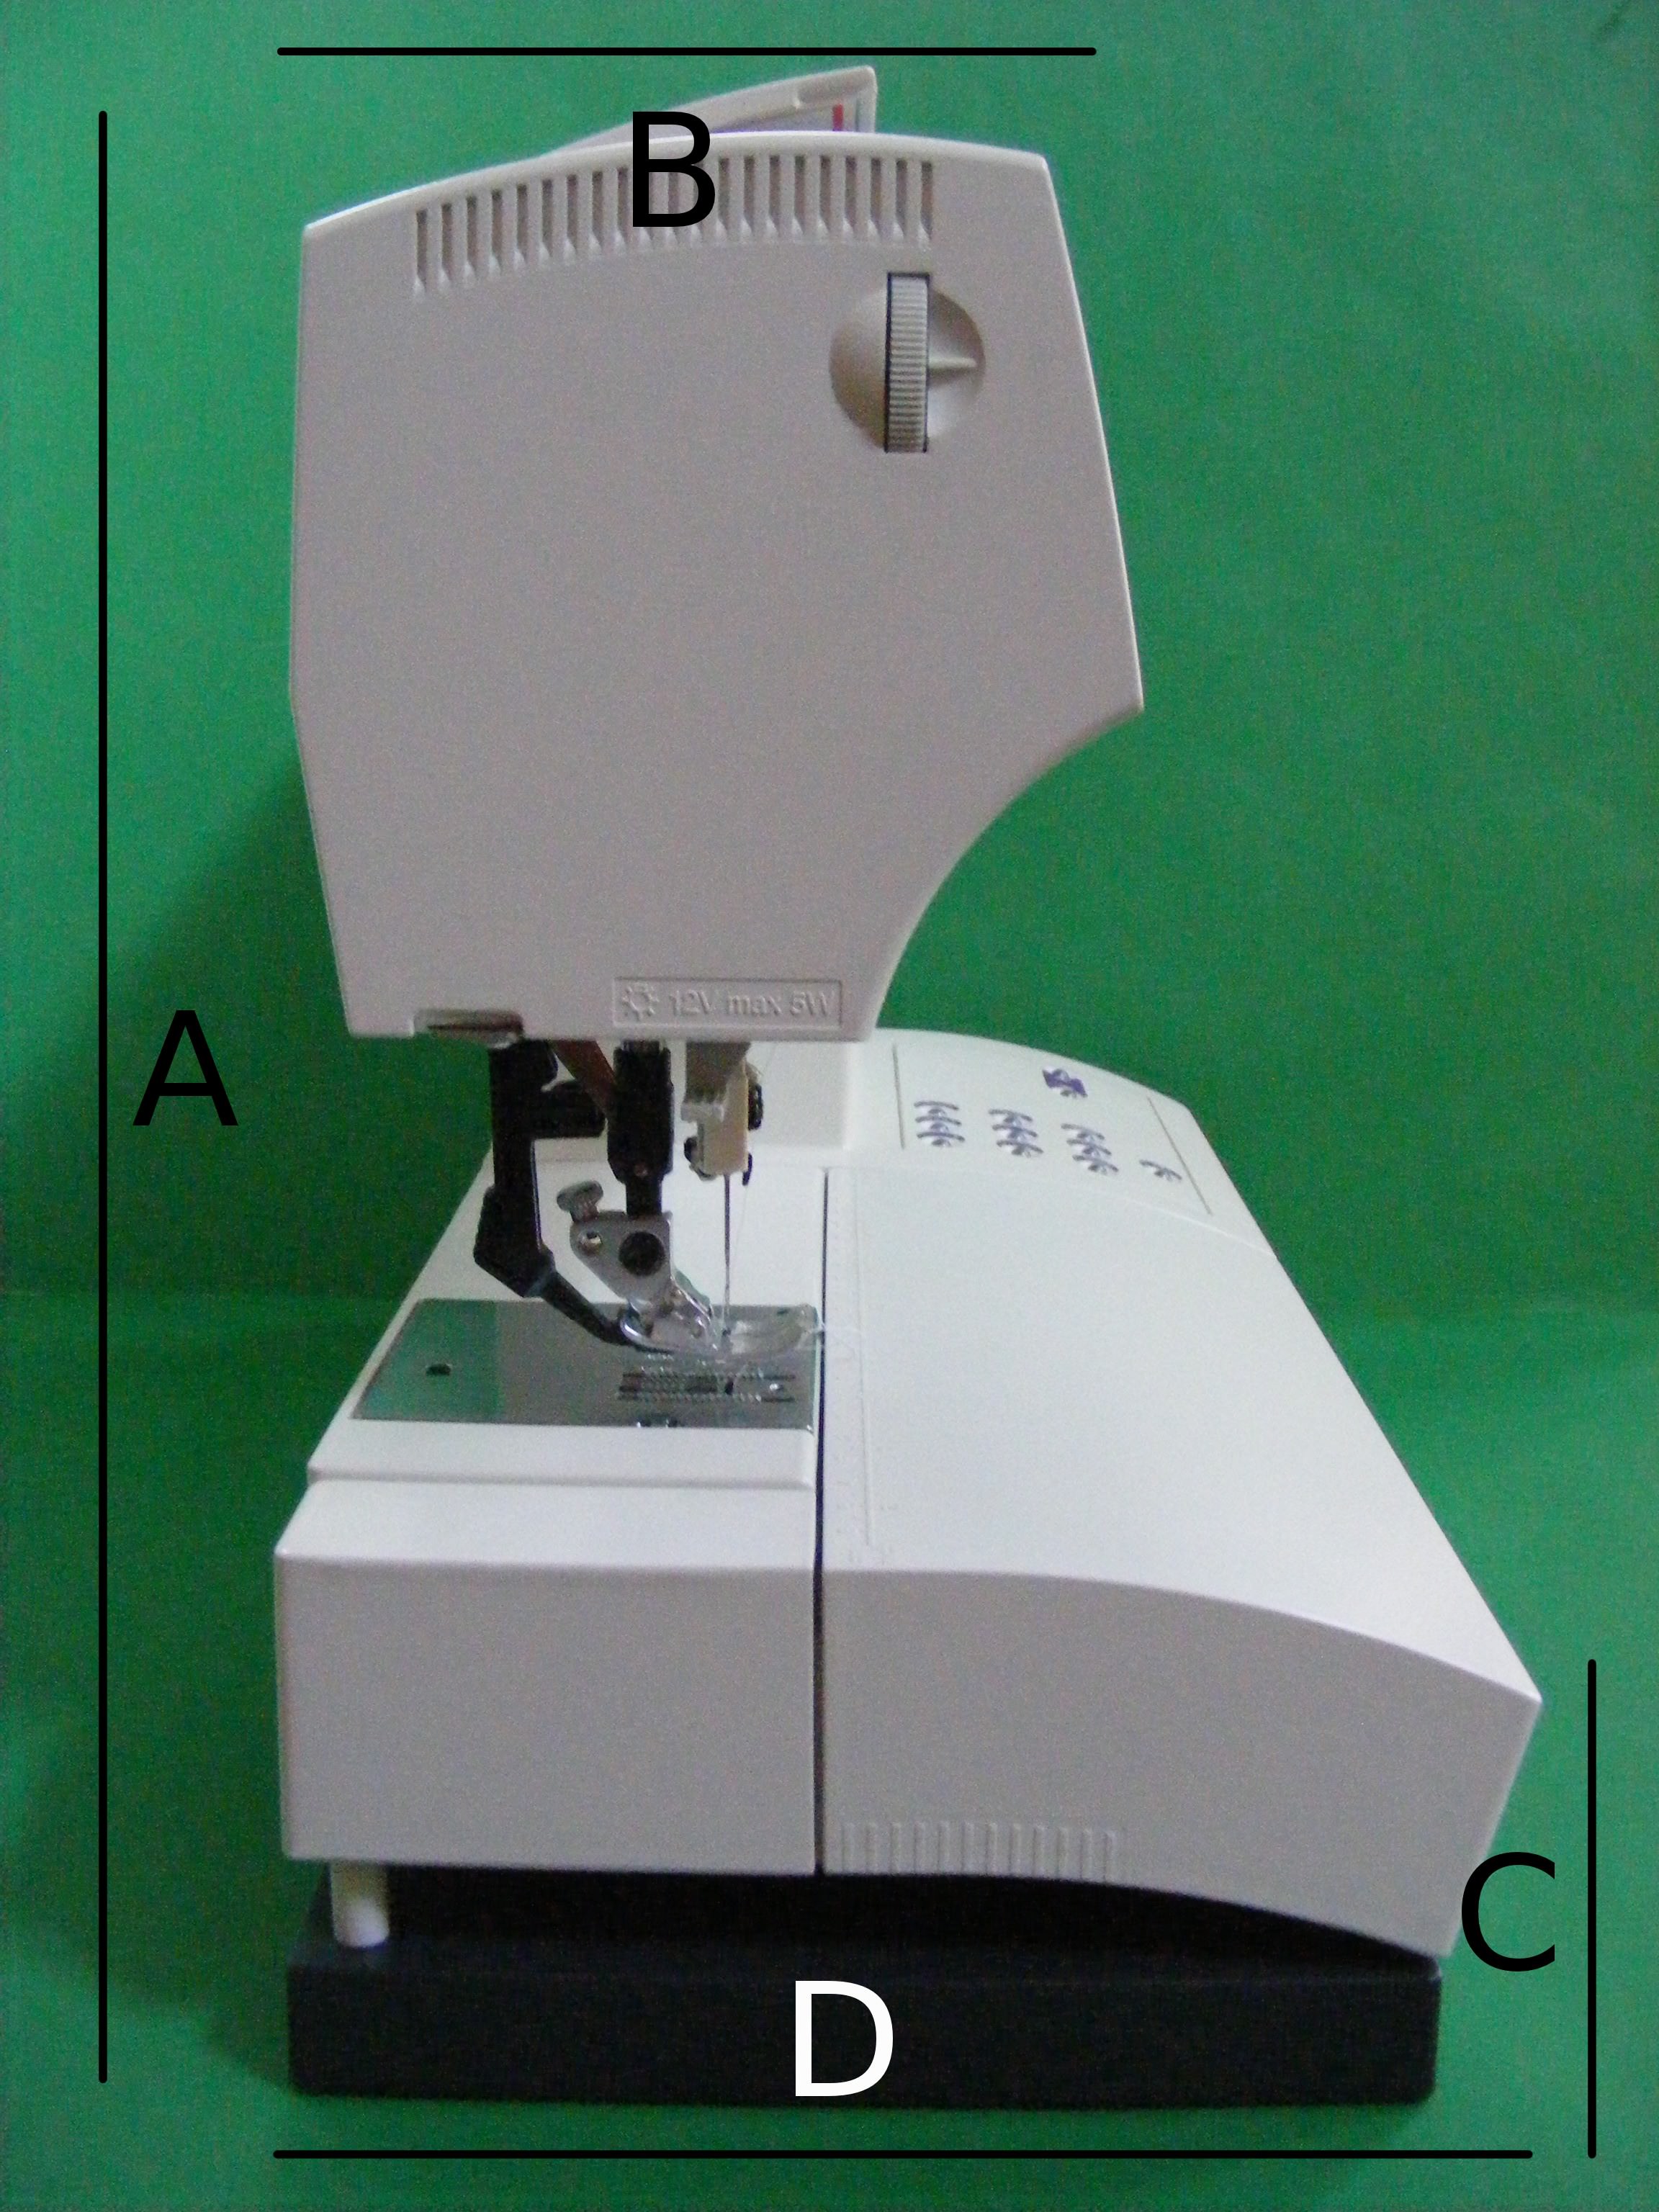
Measure your machine.
A __________ total height B __________ depth of the top C __________ height of the front D __________ depth of the bottom
E __________ total width (Not labeled – but be sure to include the wheel that controls the presser foot)
Step 2
Calculate the size of your pattern pieces.
Front and Back Pieces = E + 1 inch (seam allowance and ease) x A + 1 inch (seam allowance and ease)
Top Piece = E + 1 inch x B + 1 inch
Sides = A + 1 inch x D + 1 inch (you’ll cut the angle out of the front later)
Now you have some decisions to make. . .
You can cut your fabric to the dimensions in step 2 and skip ahead to step 8.
You can get fancy with any of these pieces. I’m going to go on and give you instructions for piecing the front panel, but you can really do anything you like. Piece it. Applique on it. Embroider it. Bedazzle it. Just make sure that when you’re done, the finished dimensions of your creation are what you calculated in step 2.
Whatever you choose, you’ll need a front, a back, a top and two sides for each version of your cover. Remember – this is a reversible cover so you’re really making two. Make them coordinate or make them wildly different. It’s totally up to you.
If you want to piece your cover like my elephants and frogs, move on to step 3. If you’re using solid fabric or doing your own thing, skip ahead to step 8.
Step 3
I’m going to have to give you some general directions here, because the measurements of individual pieces will vary from machine to machine.
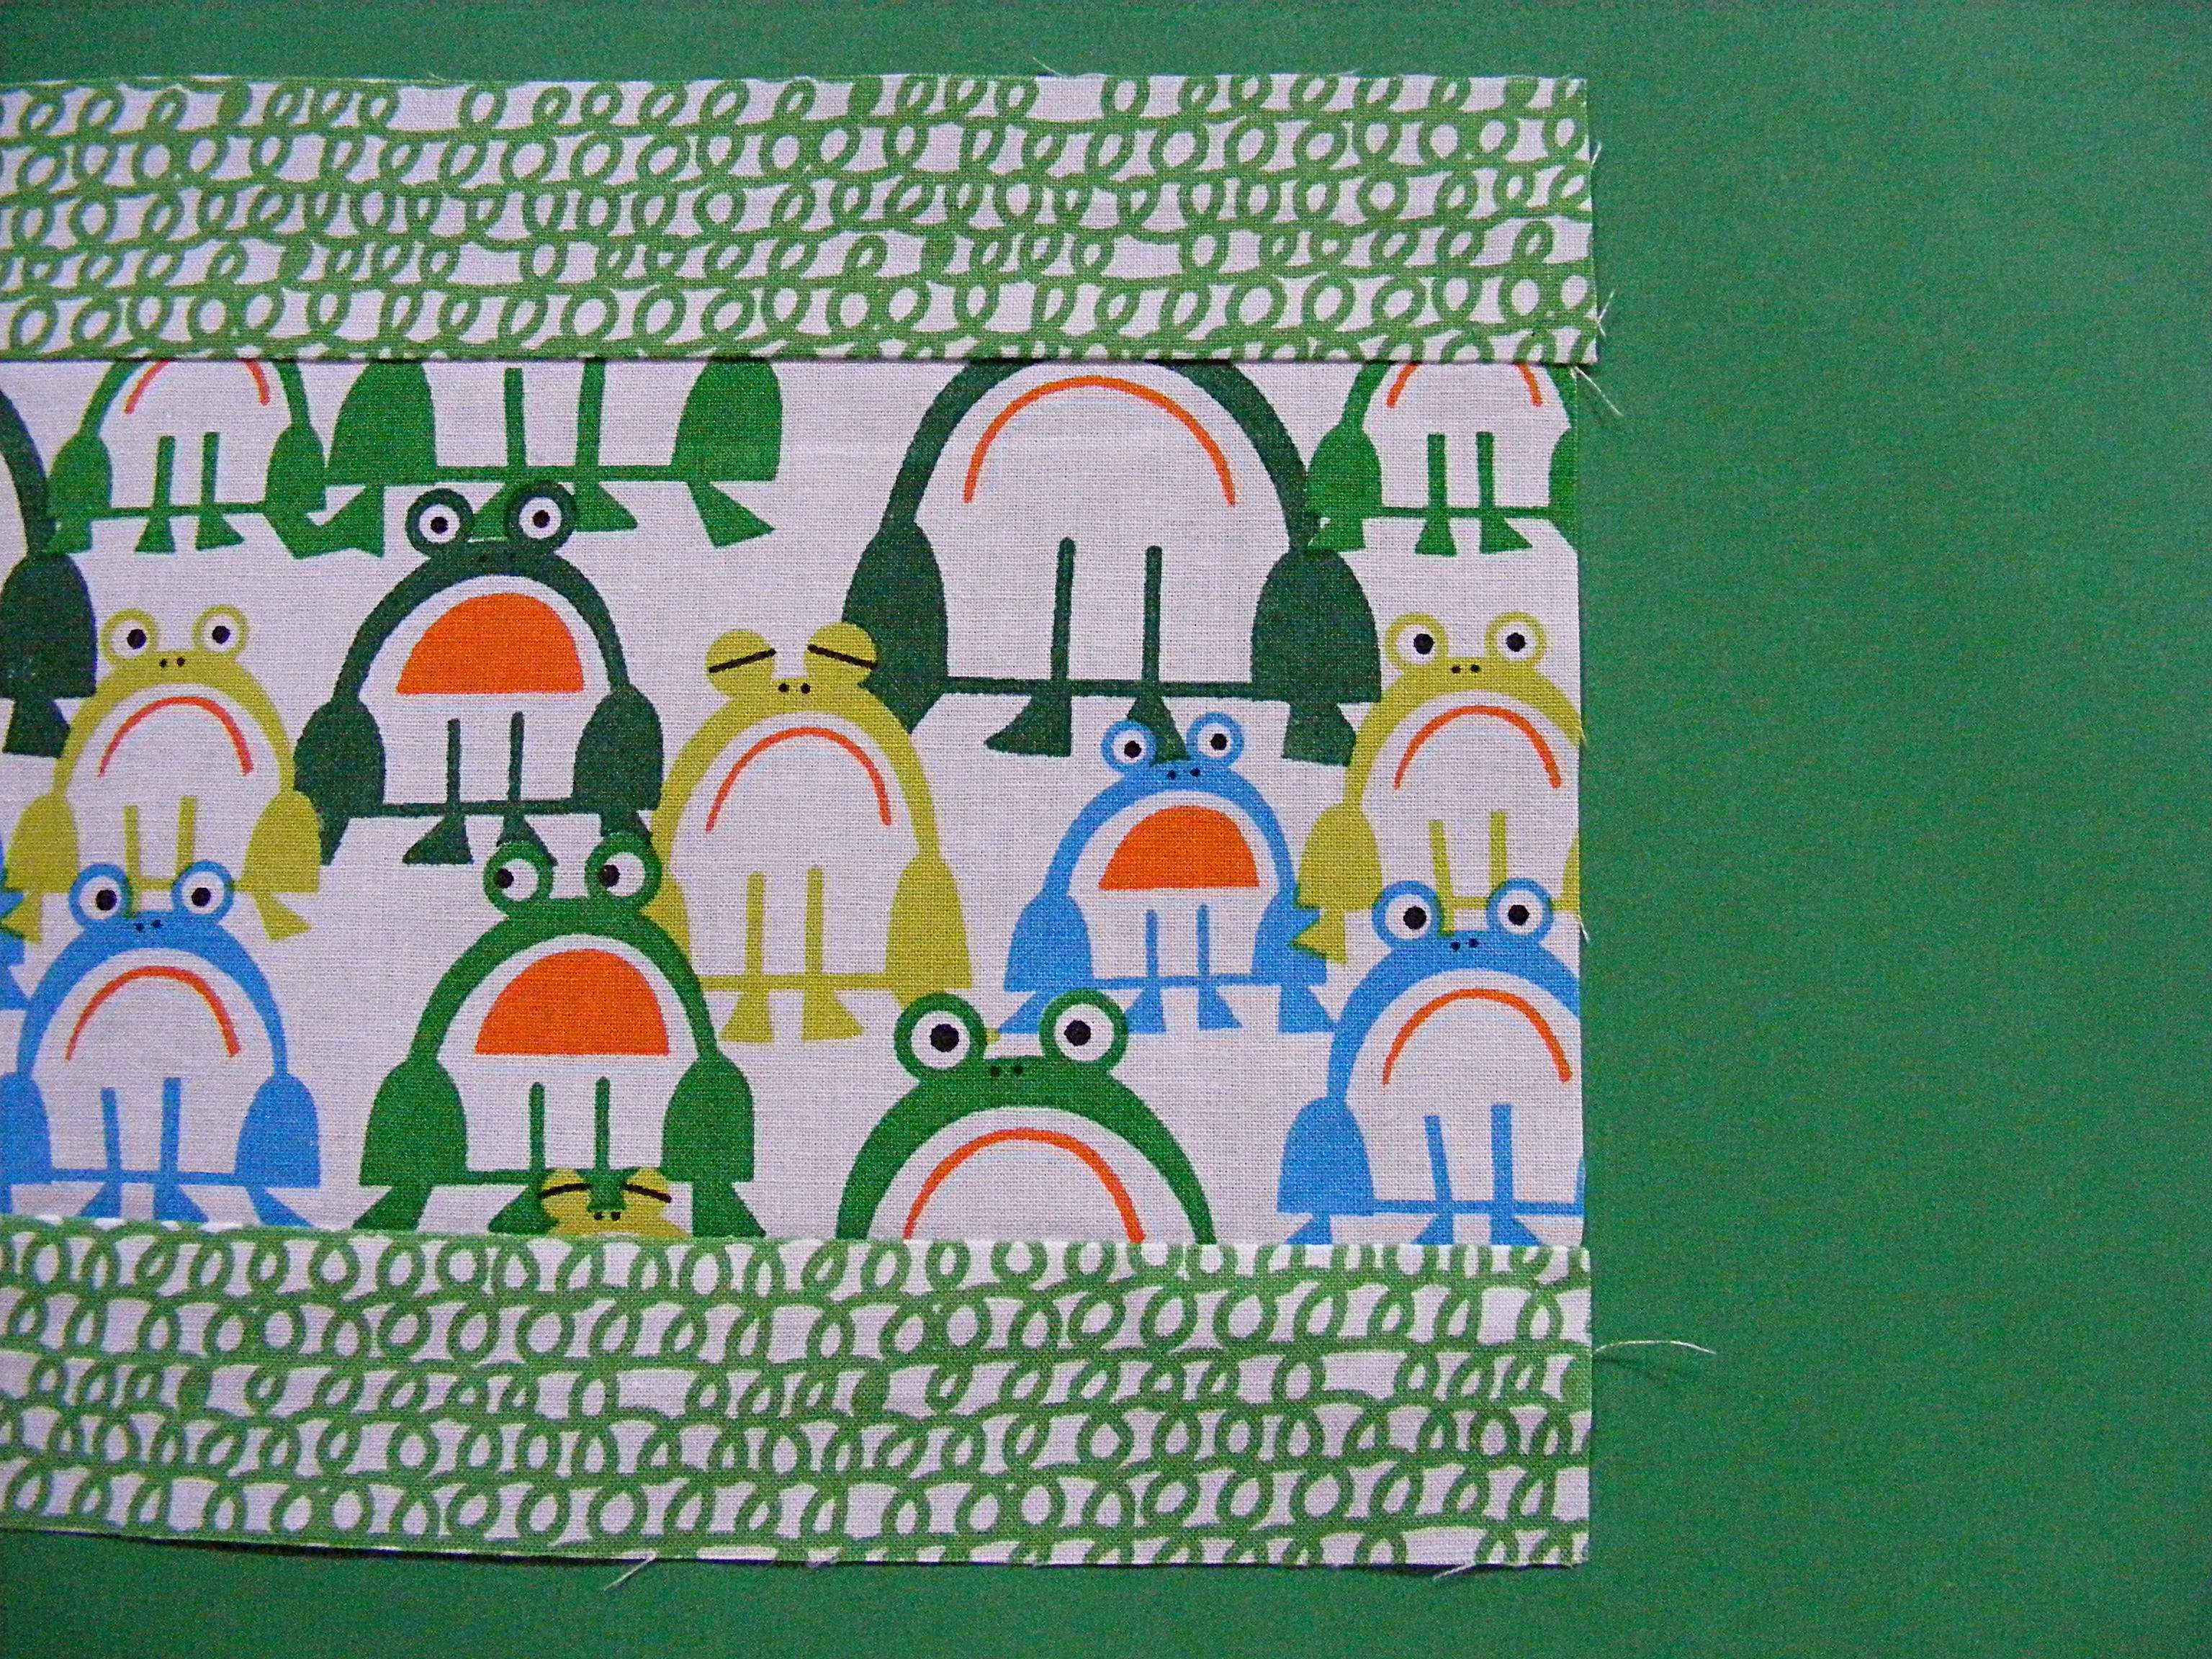
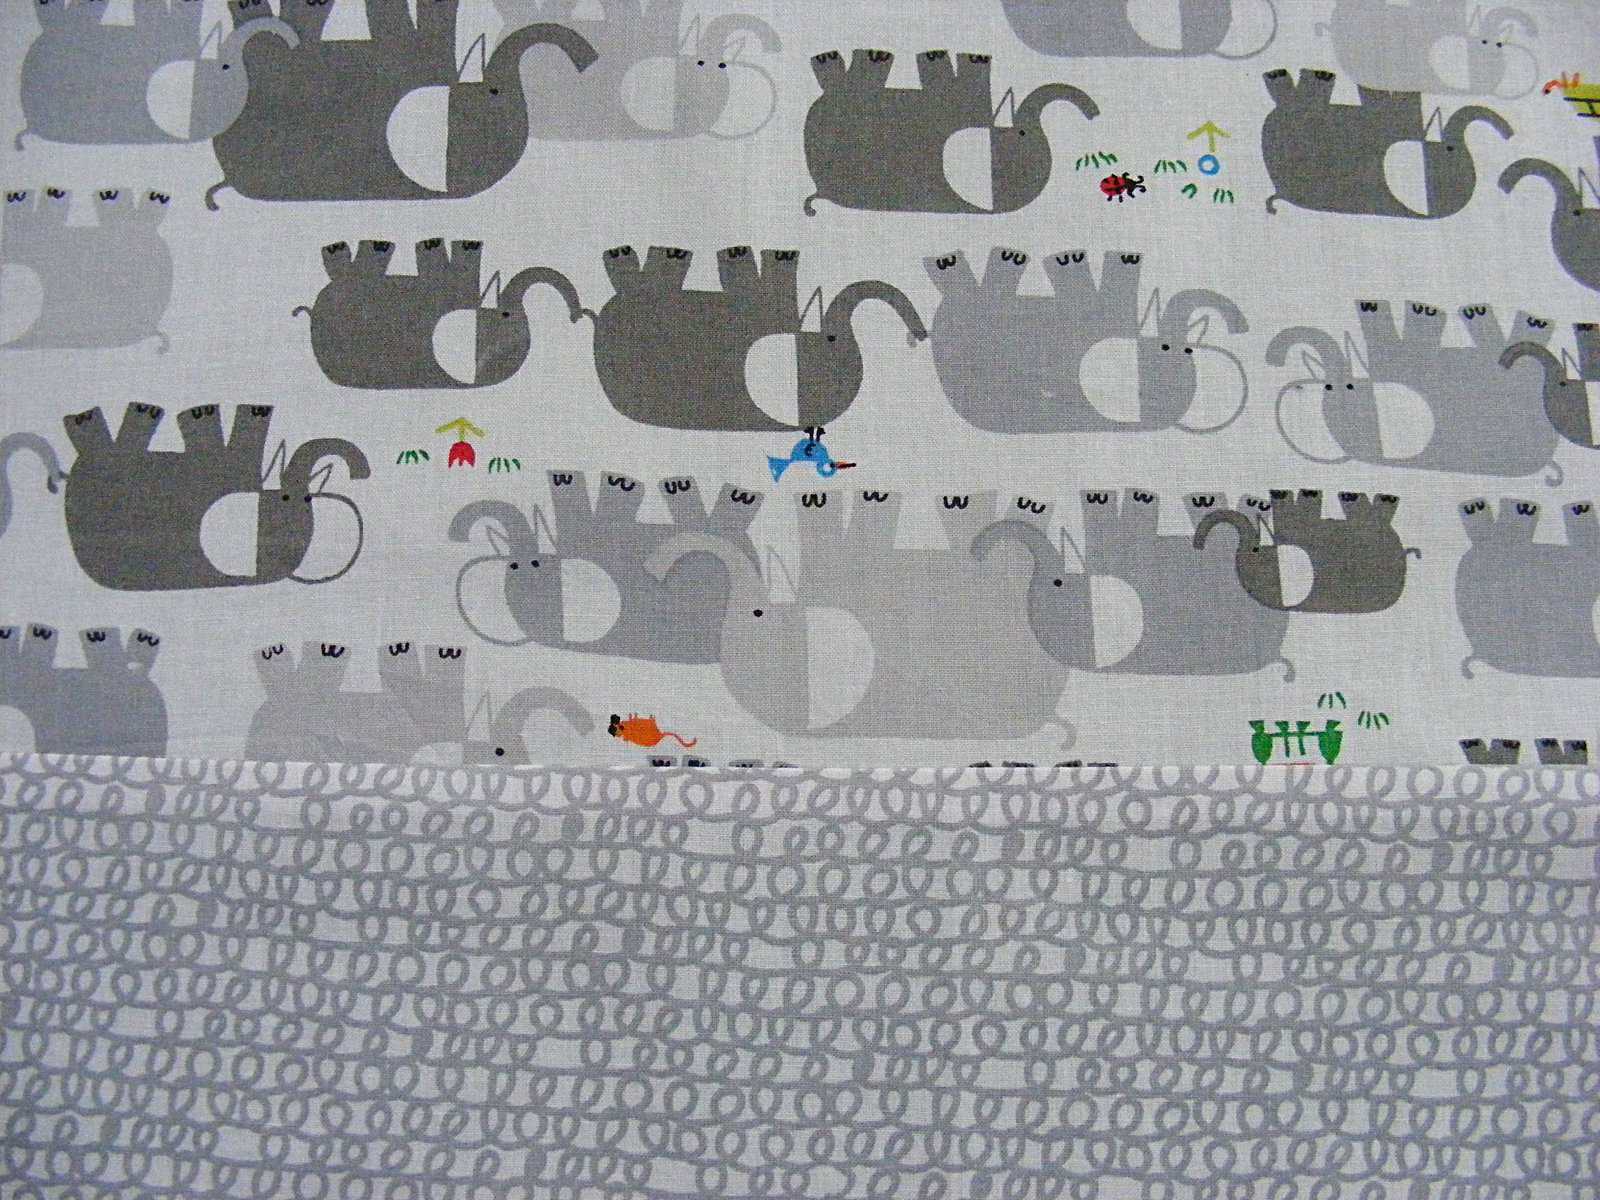
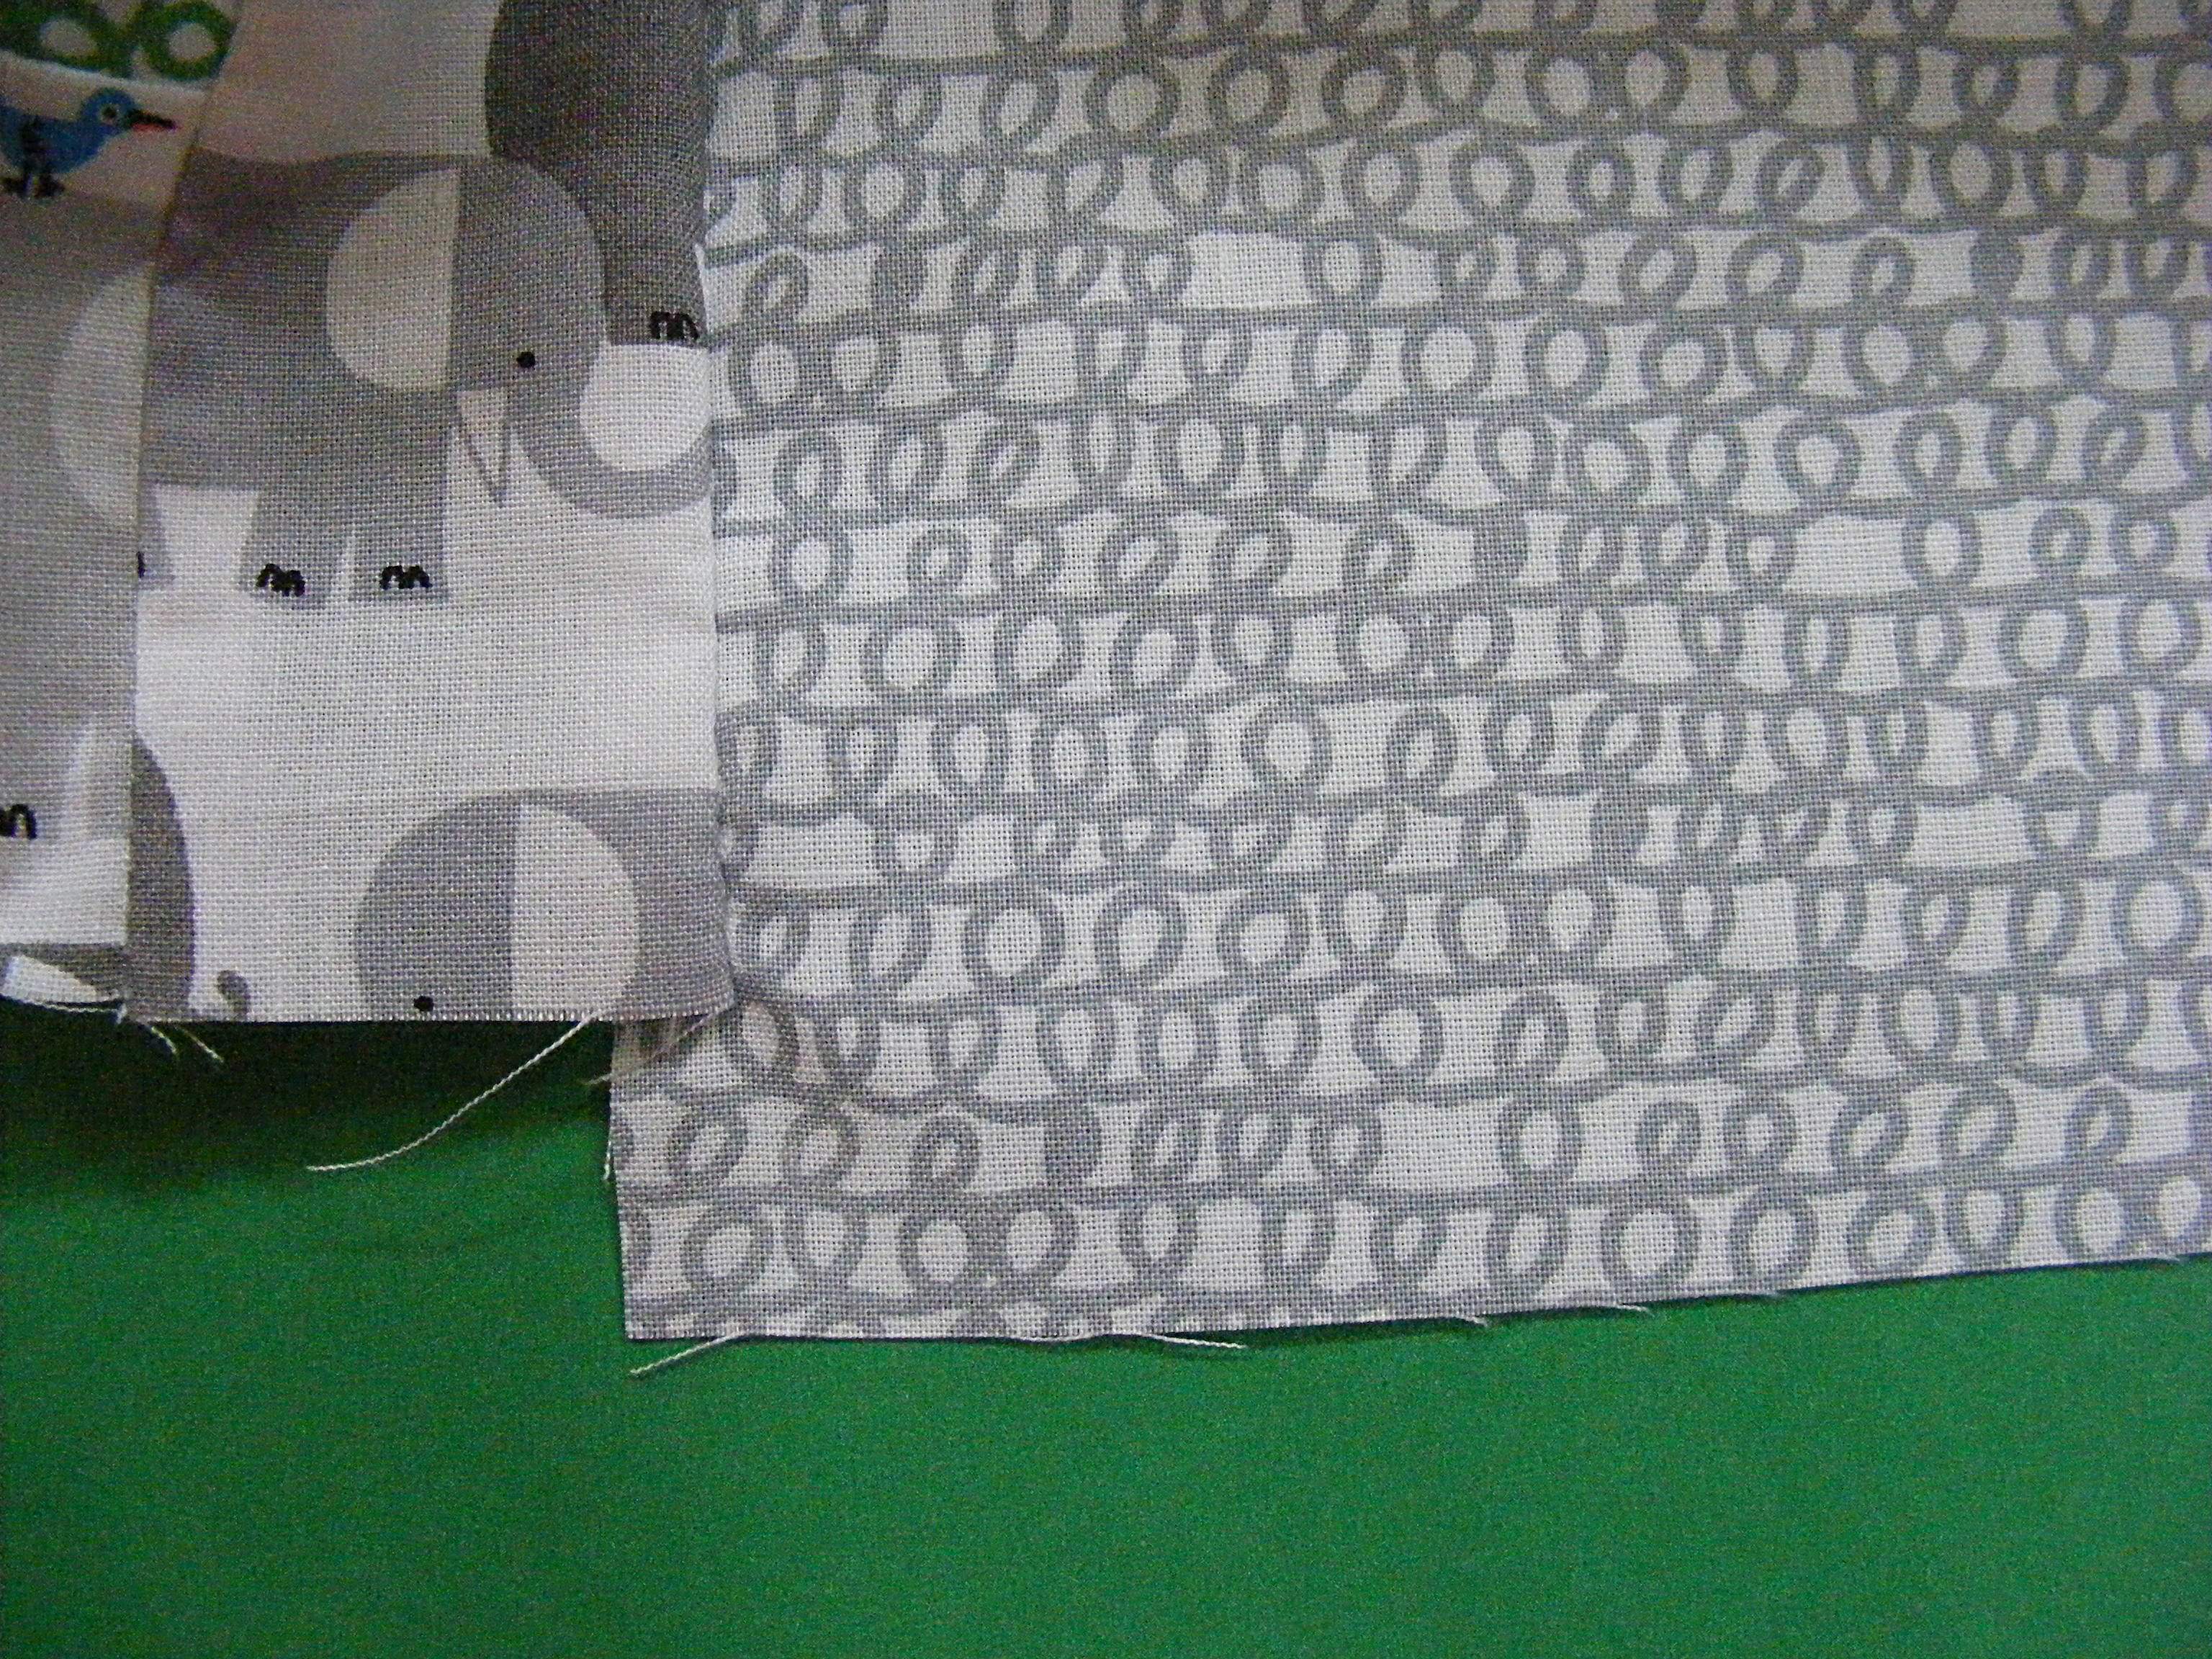
If you look at the finished pattern cover you’ll see a froggy rectangle surrounded by a thin frame of green scribbles, surrounded by elephants. Cut your inner rectangle (the froggy piece) 10 inches wide and 4 inches tall.
Cut 2 strips of frame fabric 10 inches long and 1 1/2 inches wide. Cut 2 more strips of frame fabric 6 inches long and 1 1/2 inches wide. Don’t cut the final (elephant) pieces yet.
Step 4
Sew the long framing strips to the top and bottom of the center rectangle. Use 1/4 inch seam allowance.
Press your seam allowance toward the darker color.
Step 5
Sew the short framing strips to the sides.
If your seam allowances in step 4 were exactly 1/4 inch, the strips should fit perfectly. If not, trim off the extra bits to even things up.
Press seam allowances to the darker color.
Step 6
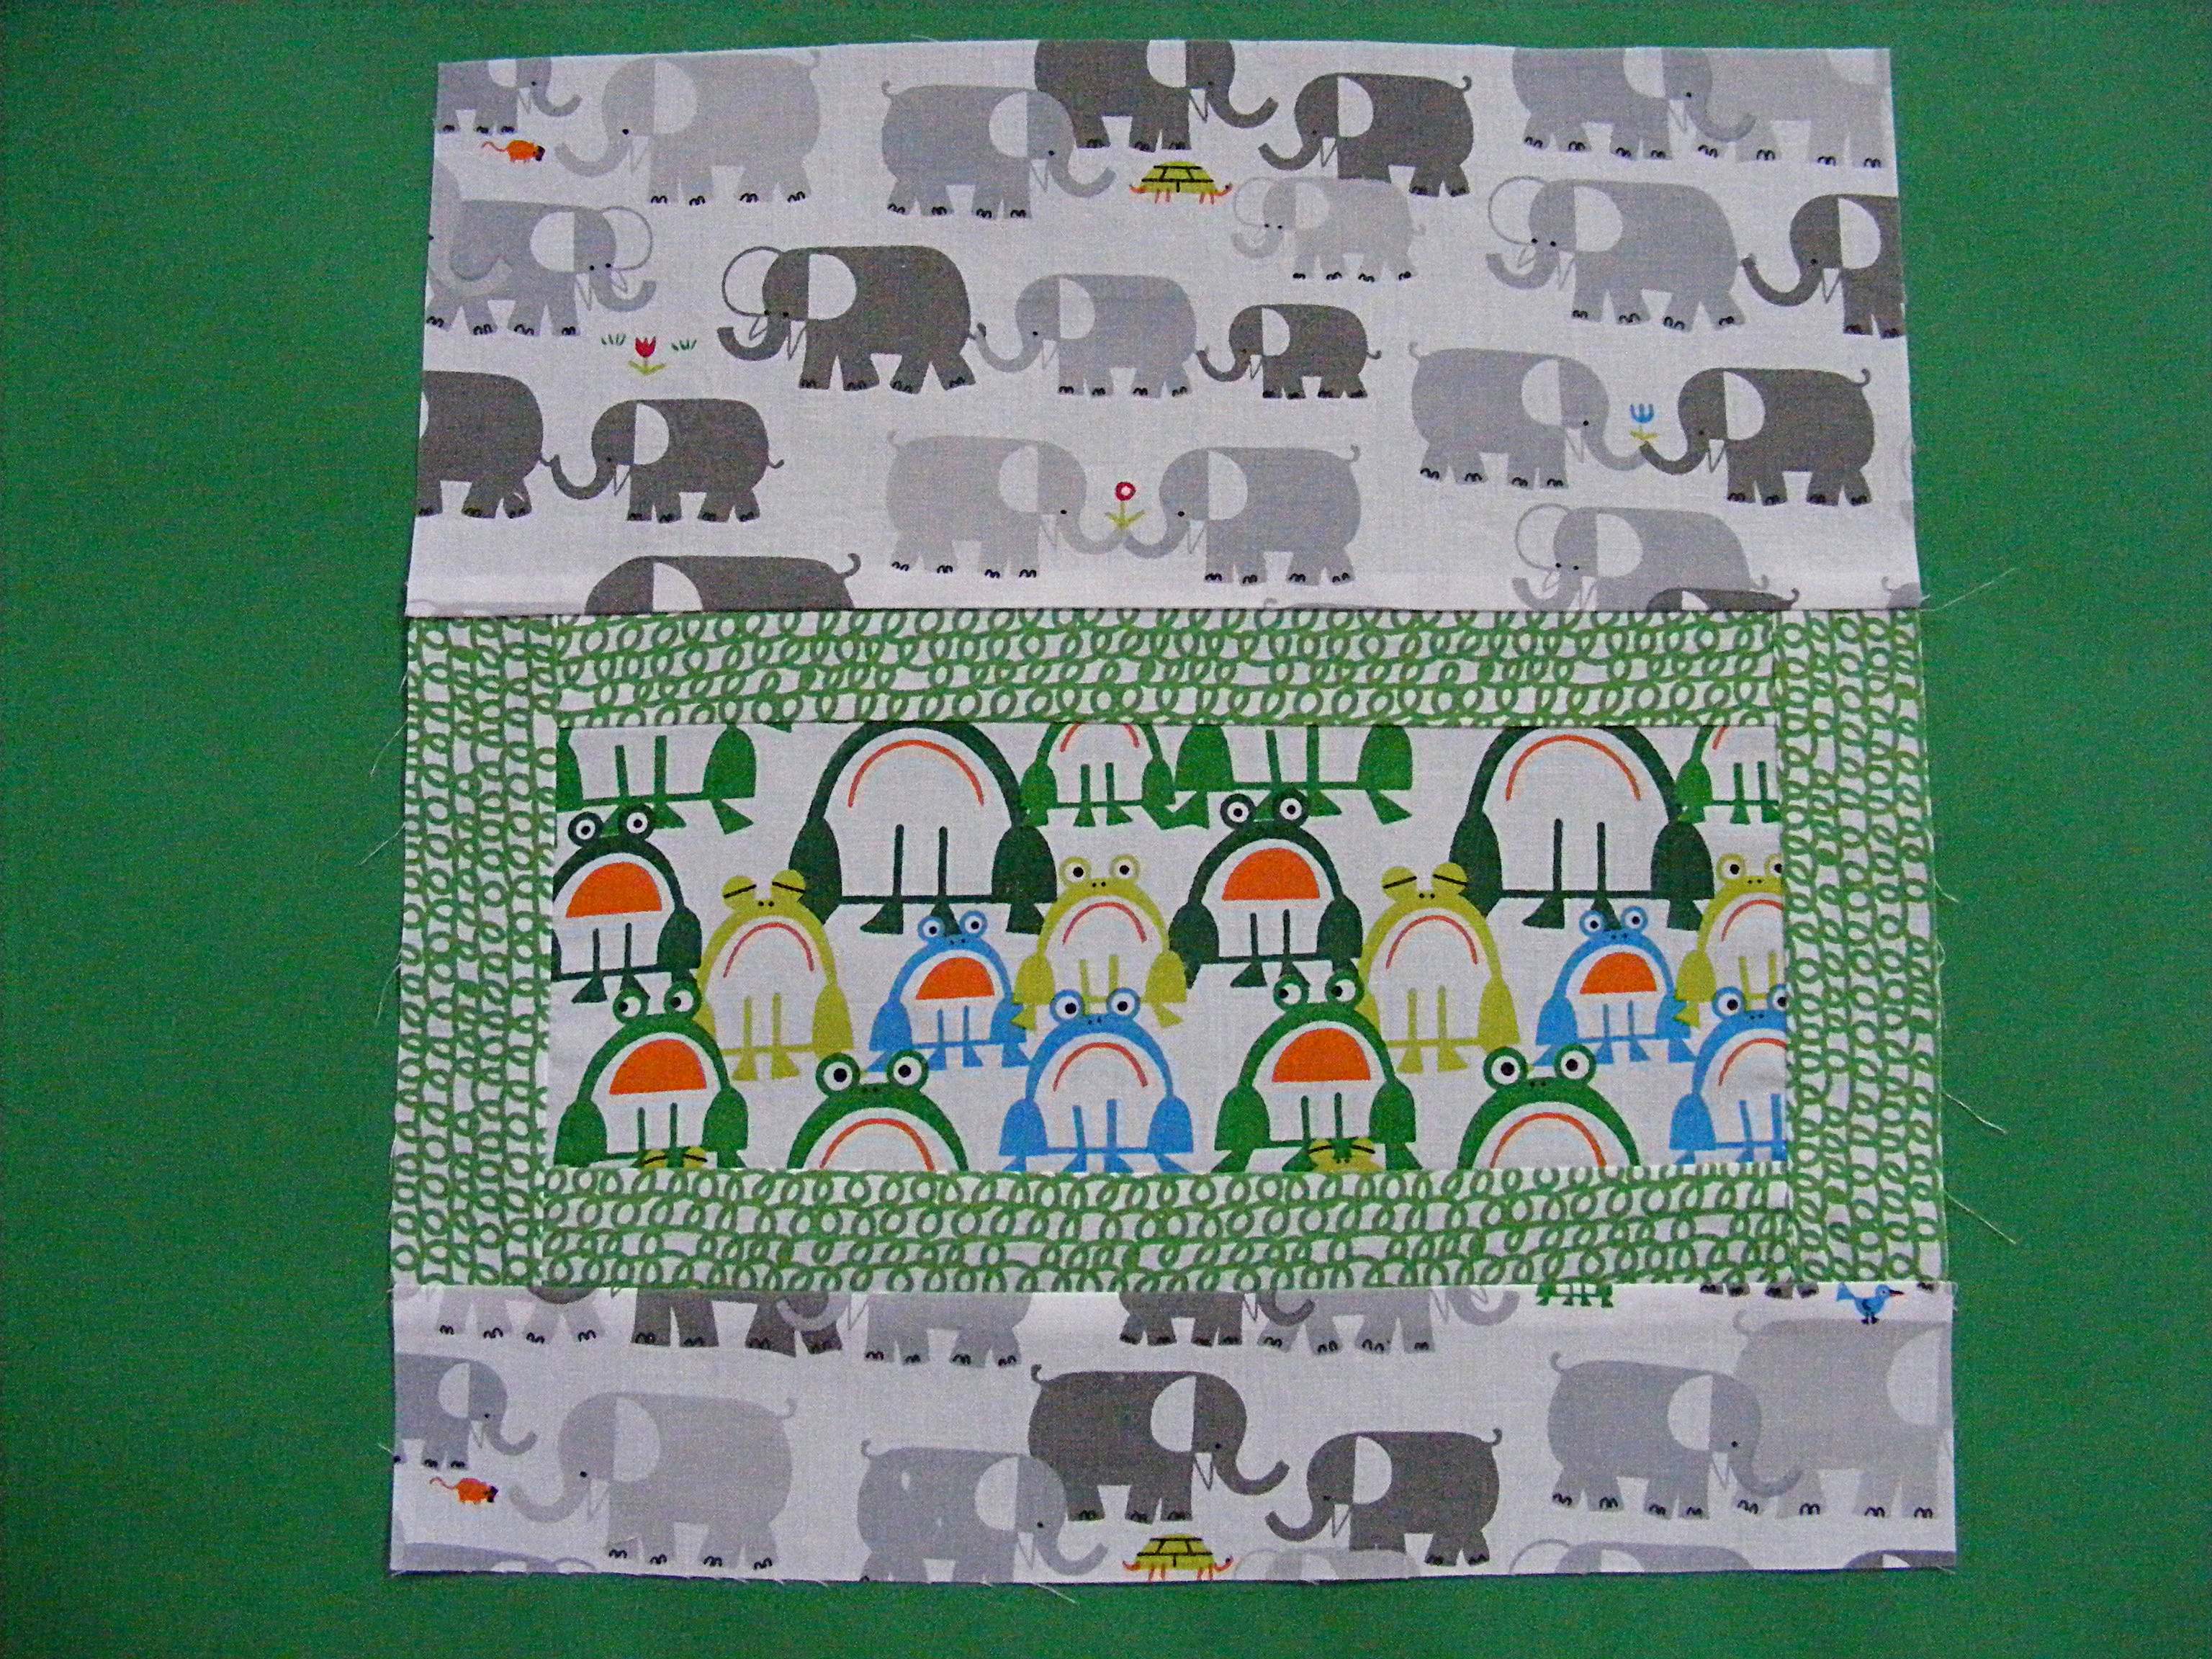
Now you’re going to need to do a little math to make this fit your machine. Add strips to the top and bottom of your inner rectangle to make it equal the total height of your machine + 1 inch for seam allowance and ease.
Notice that I didn’t add the same amount to the top and the bottom. I wanted the inset panel to sit a little lower than the center of the front.
Step 7
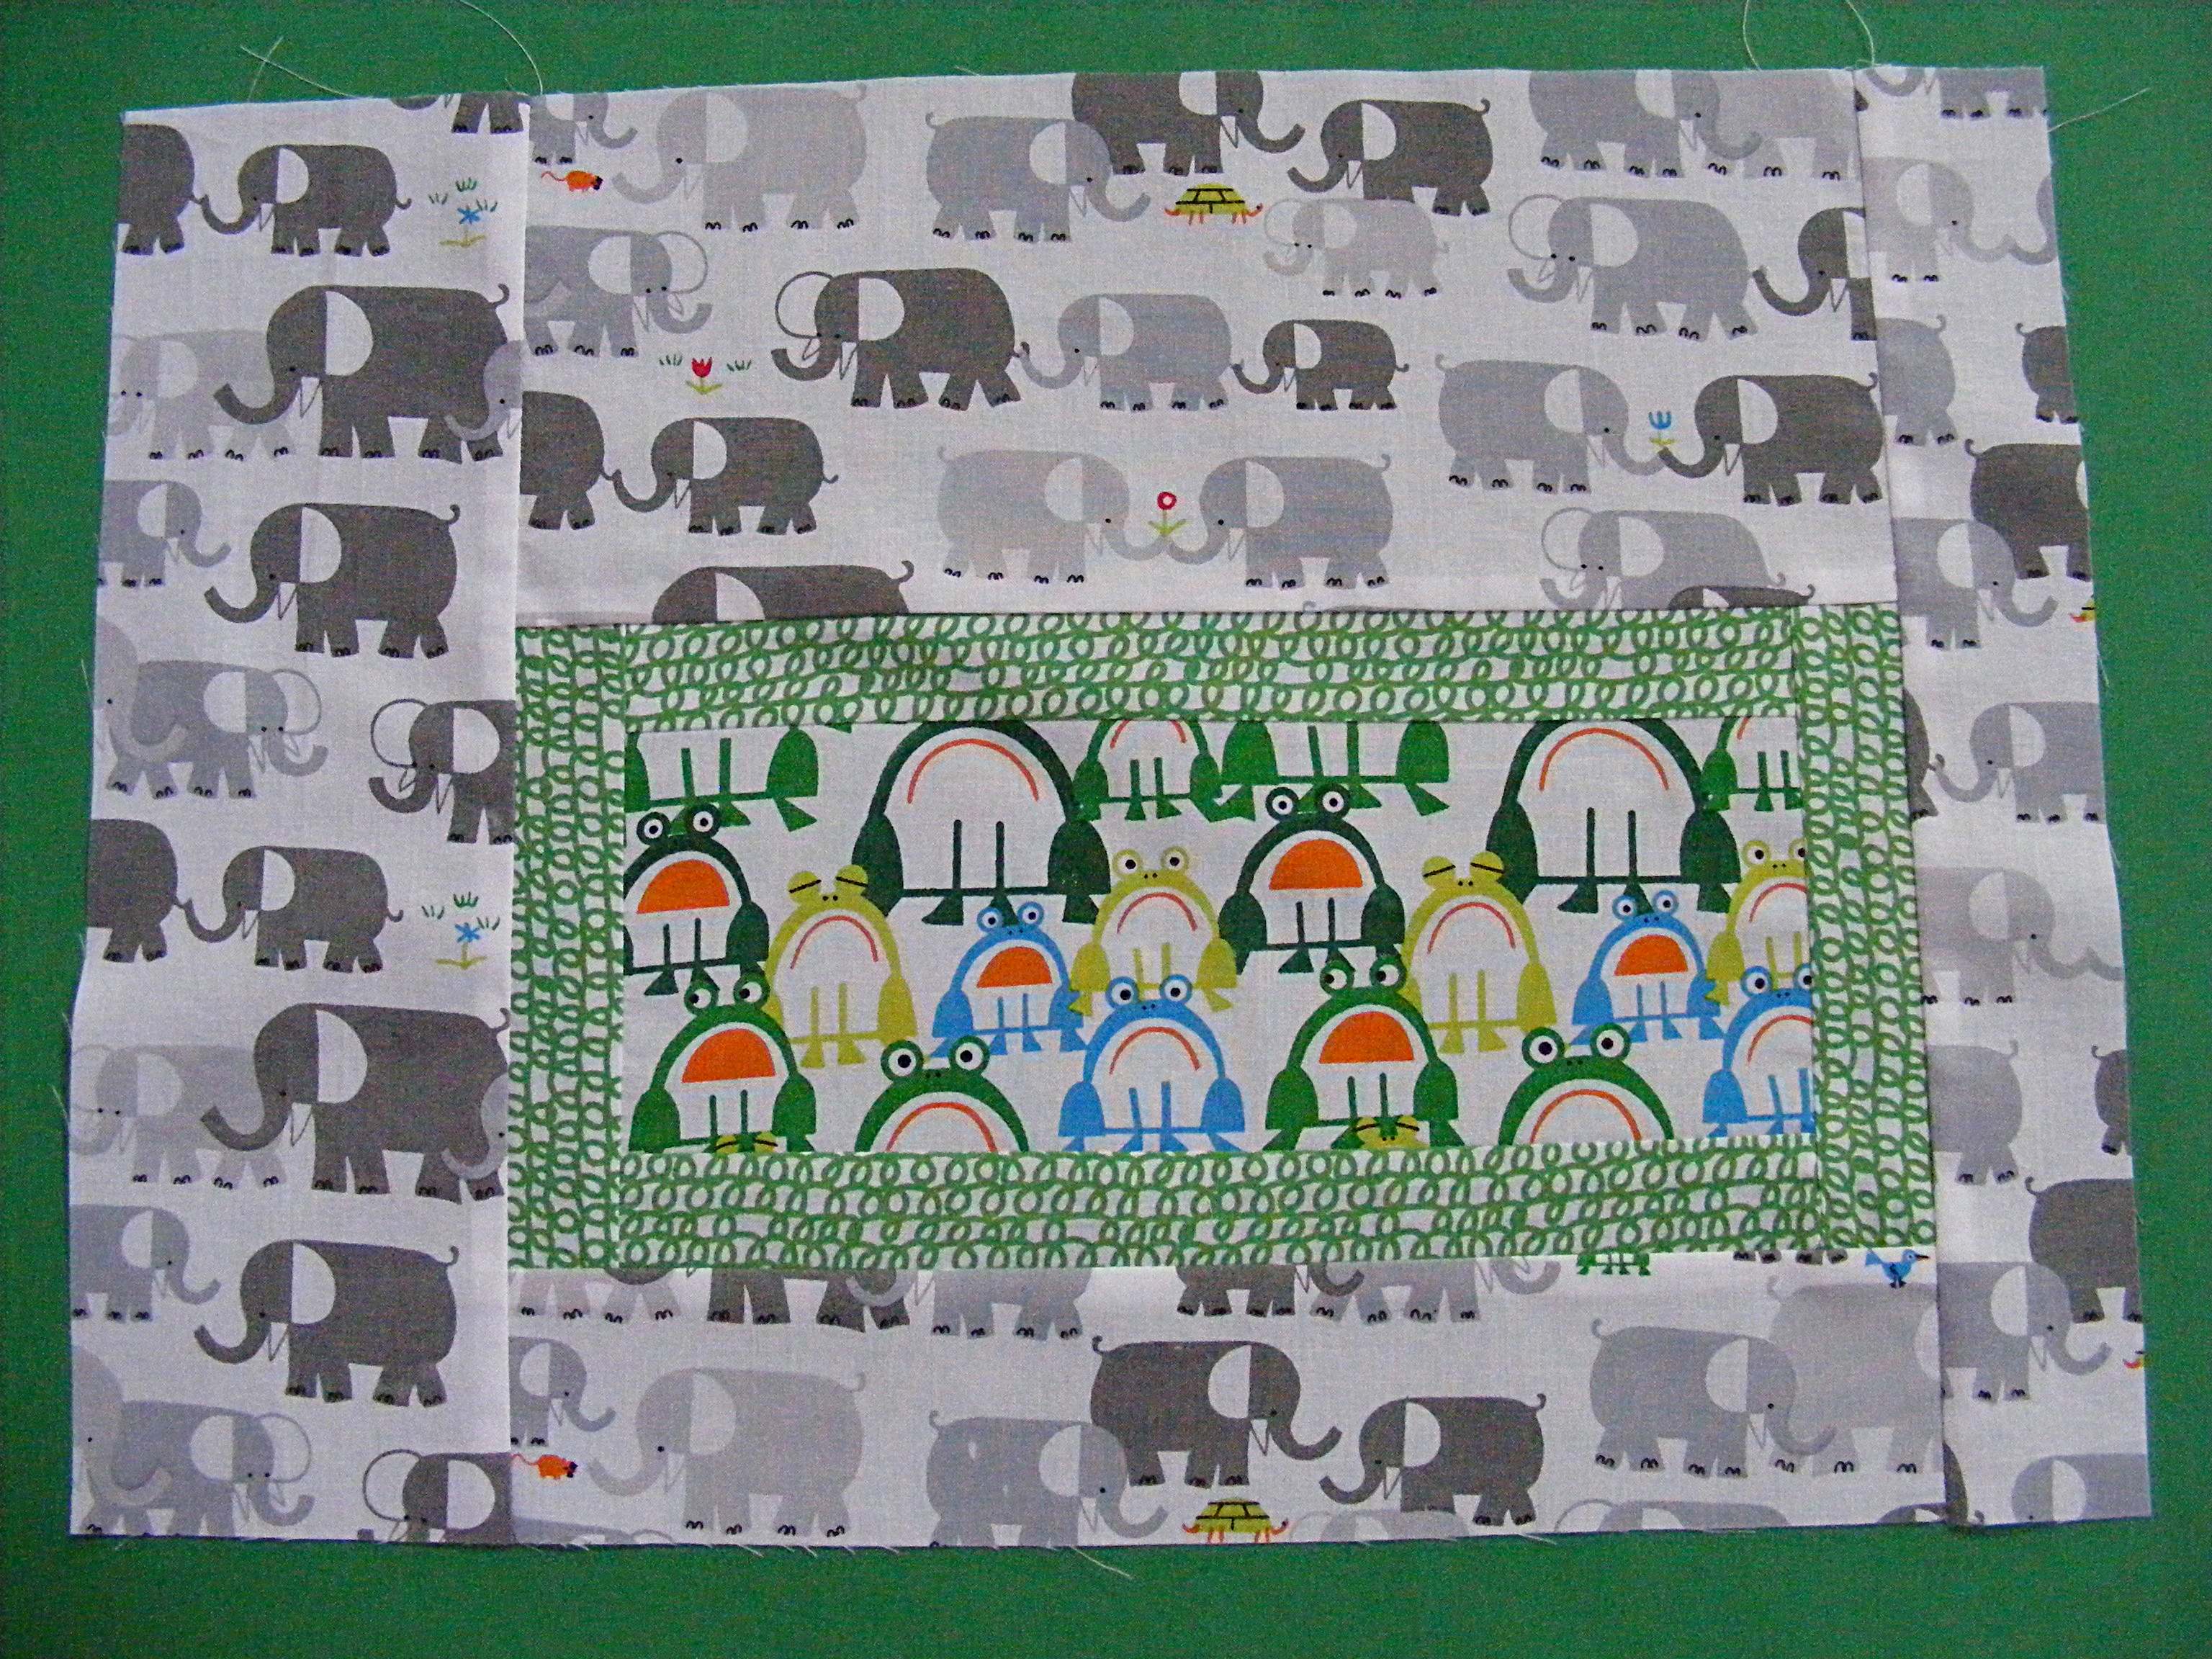
Now add strips to the sides to make the total width equal to the width of your machine + 1 inch for seam allowance and ease.
Again – I didn’t add the same width to each side. I wanted the inner panel to sit toward the lower right corner. Play with this and have fun.
You might want to add extra-wide strips in steps 6 and 7 and then cut it down to size, playing with the placement of the panel.
Step 8
One more piece to prep and then you’re ready to put it all together.
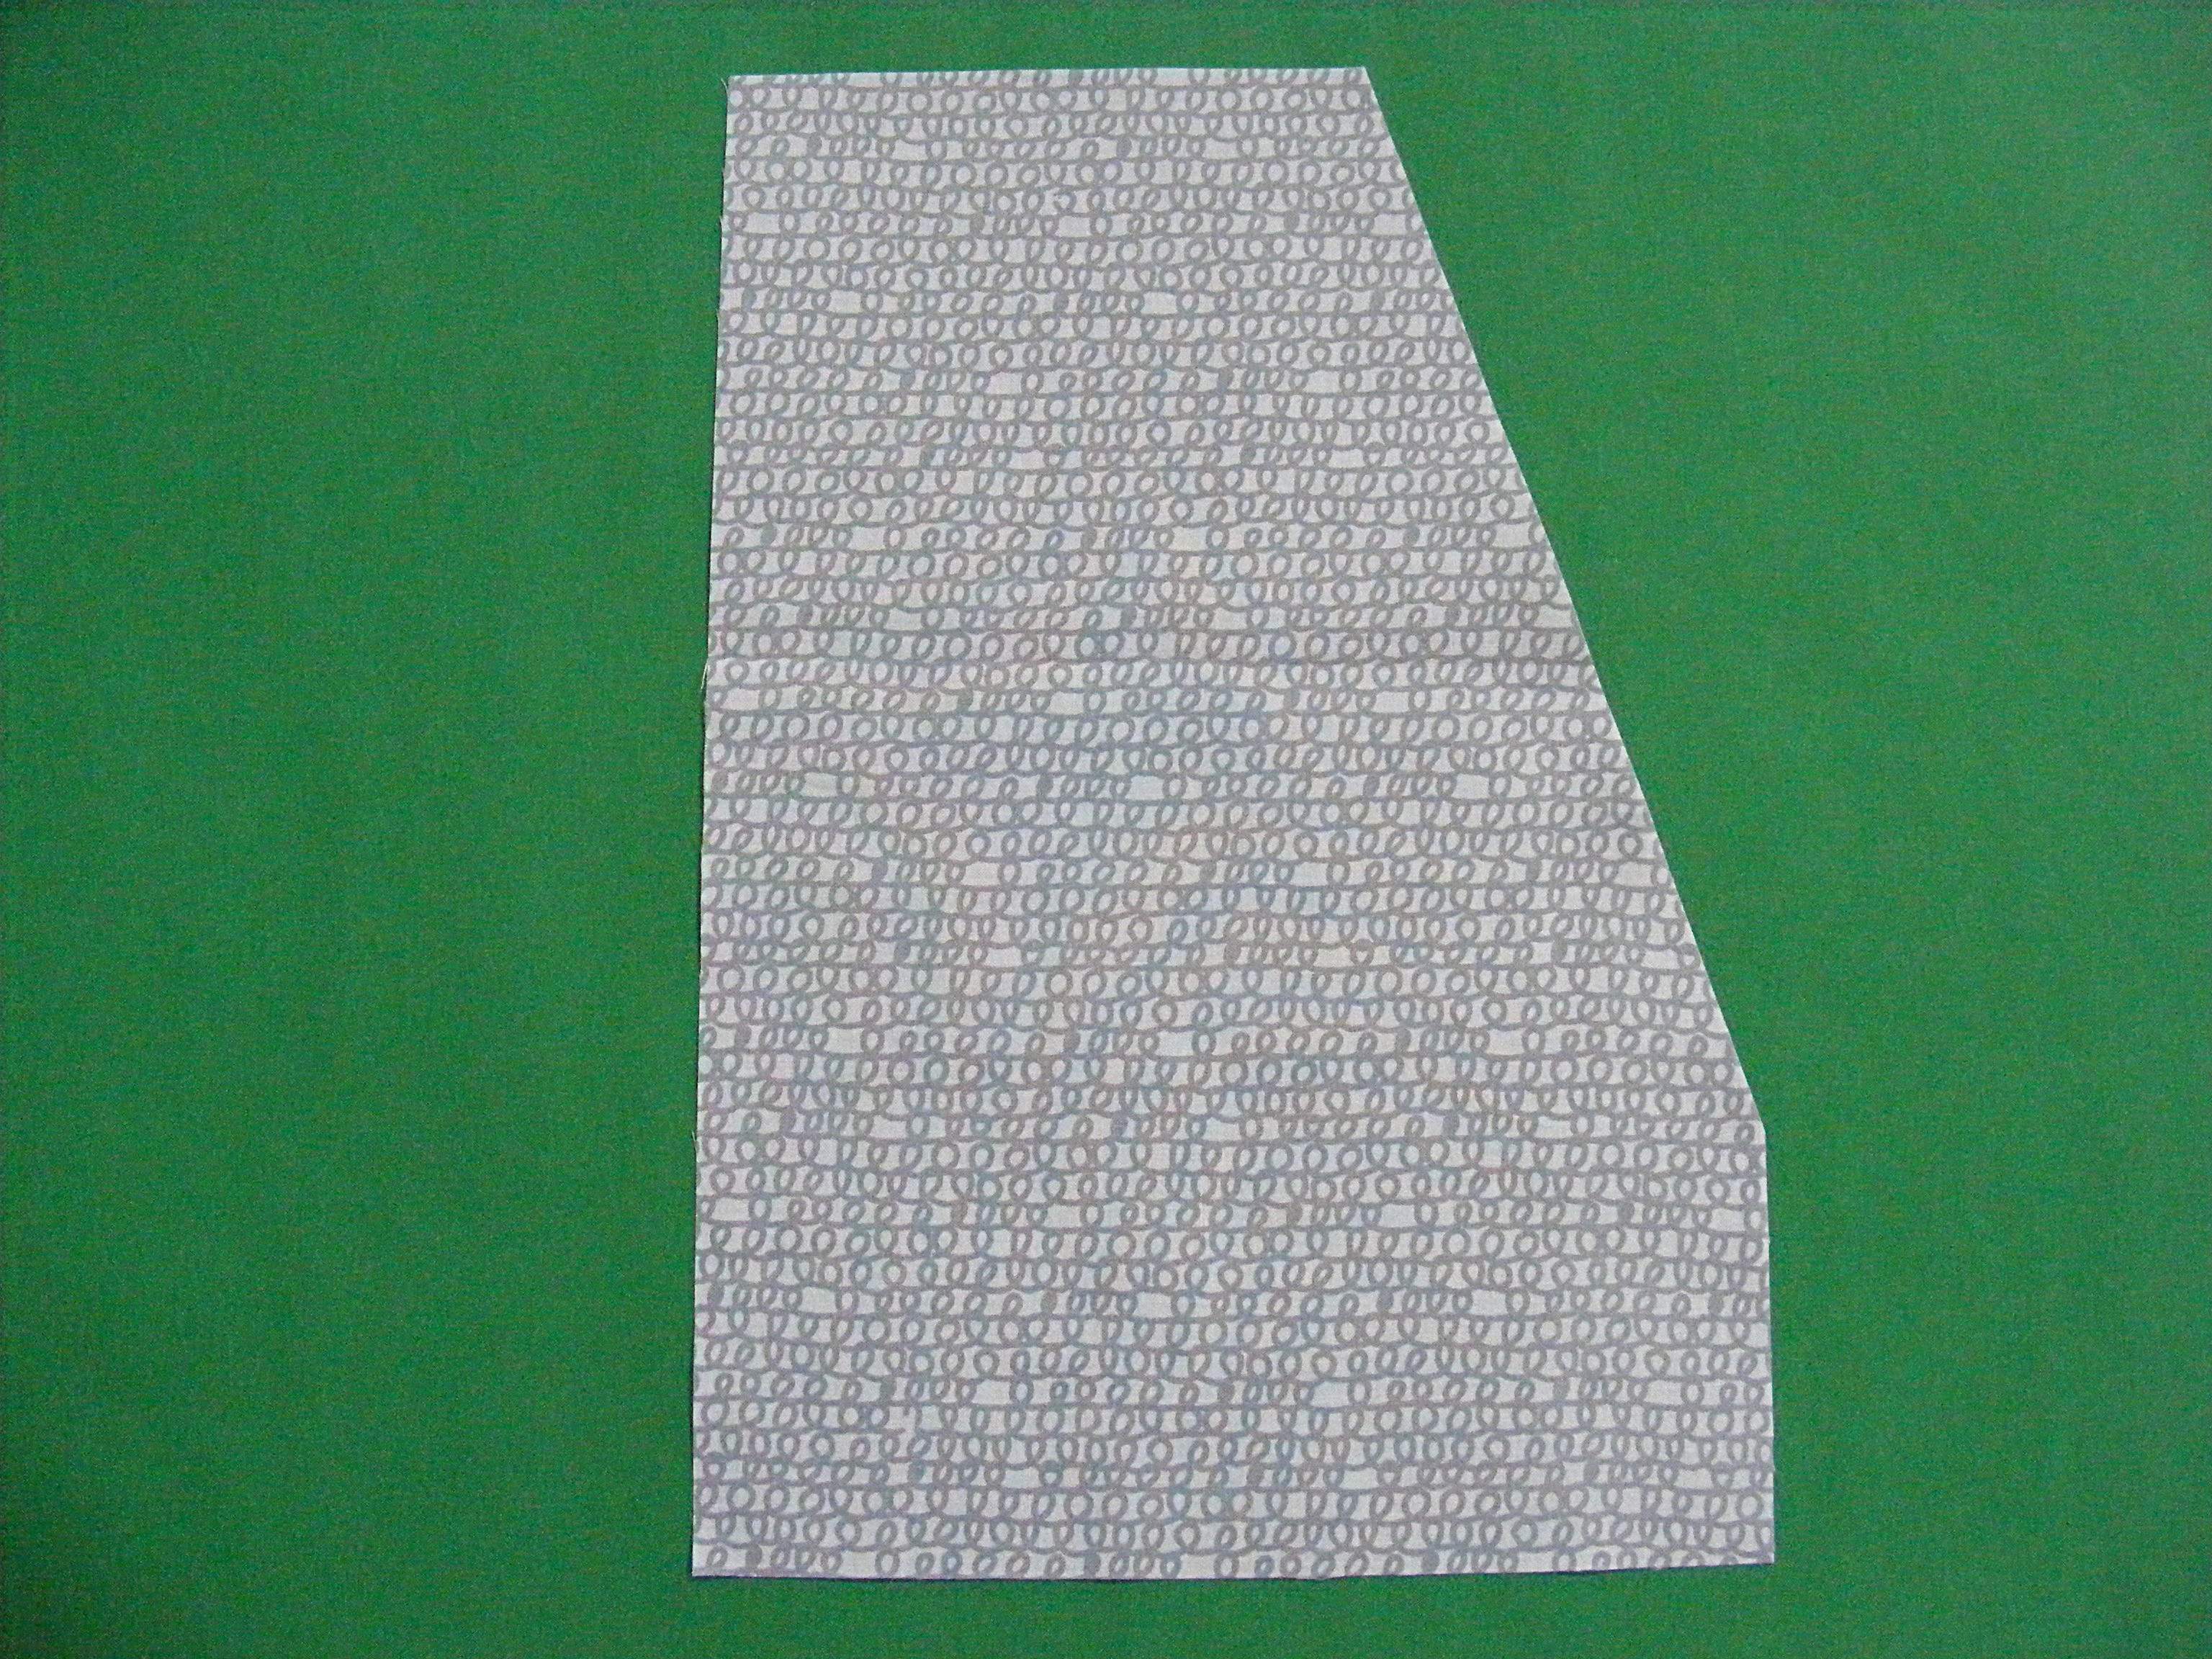
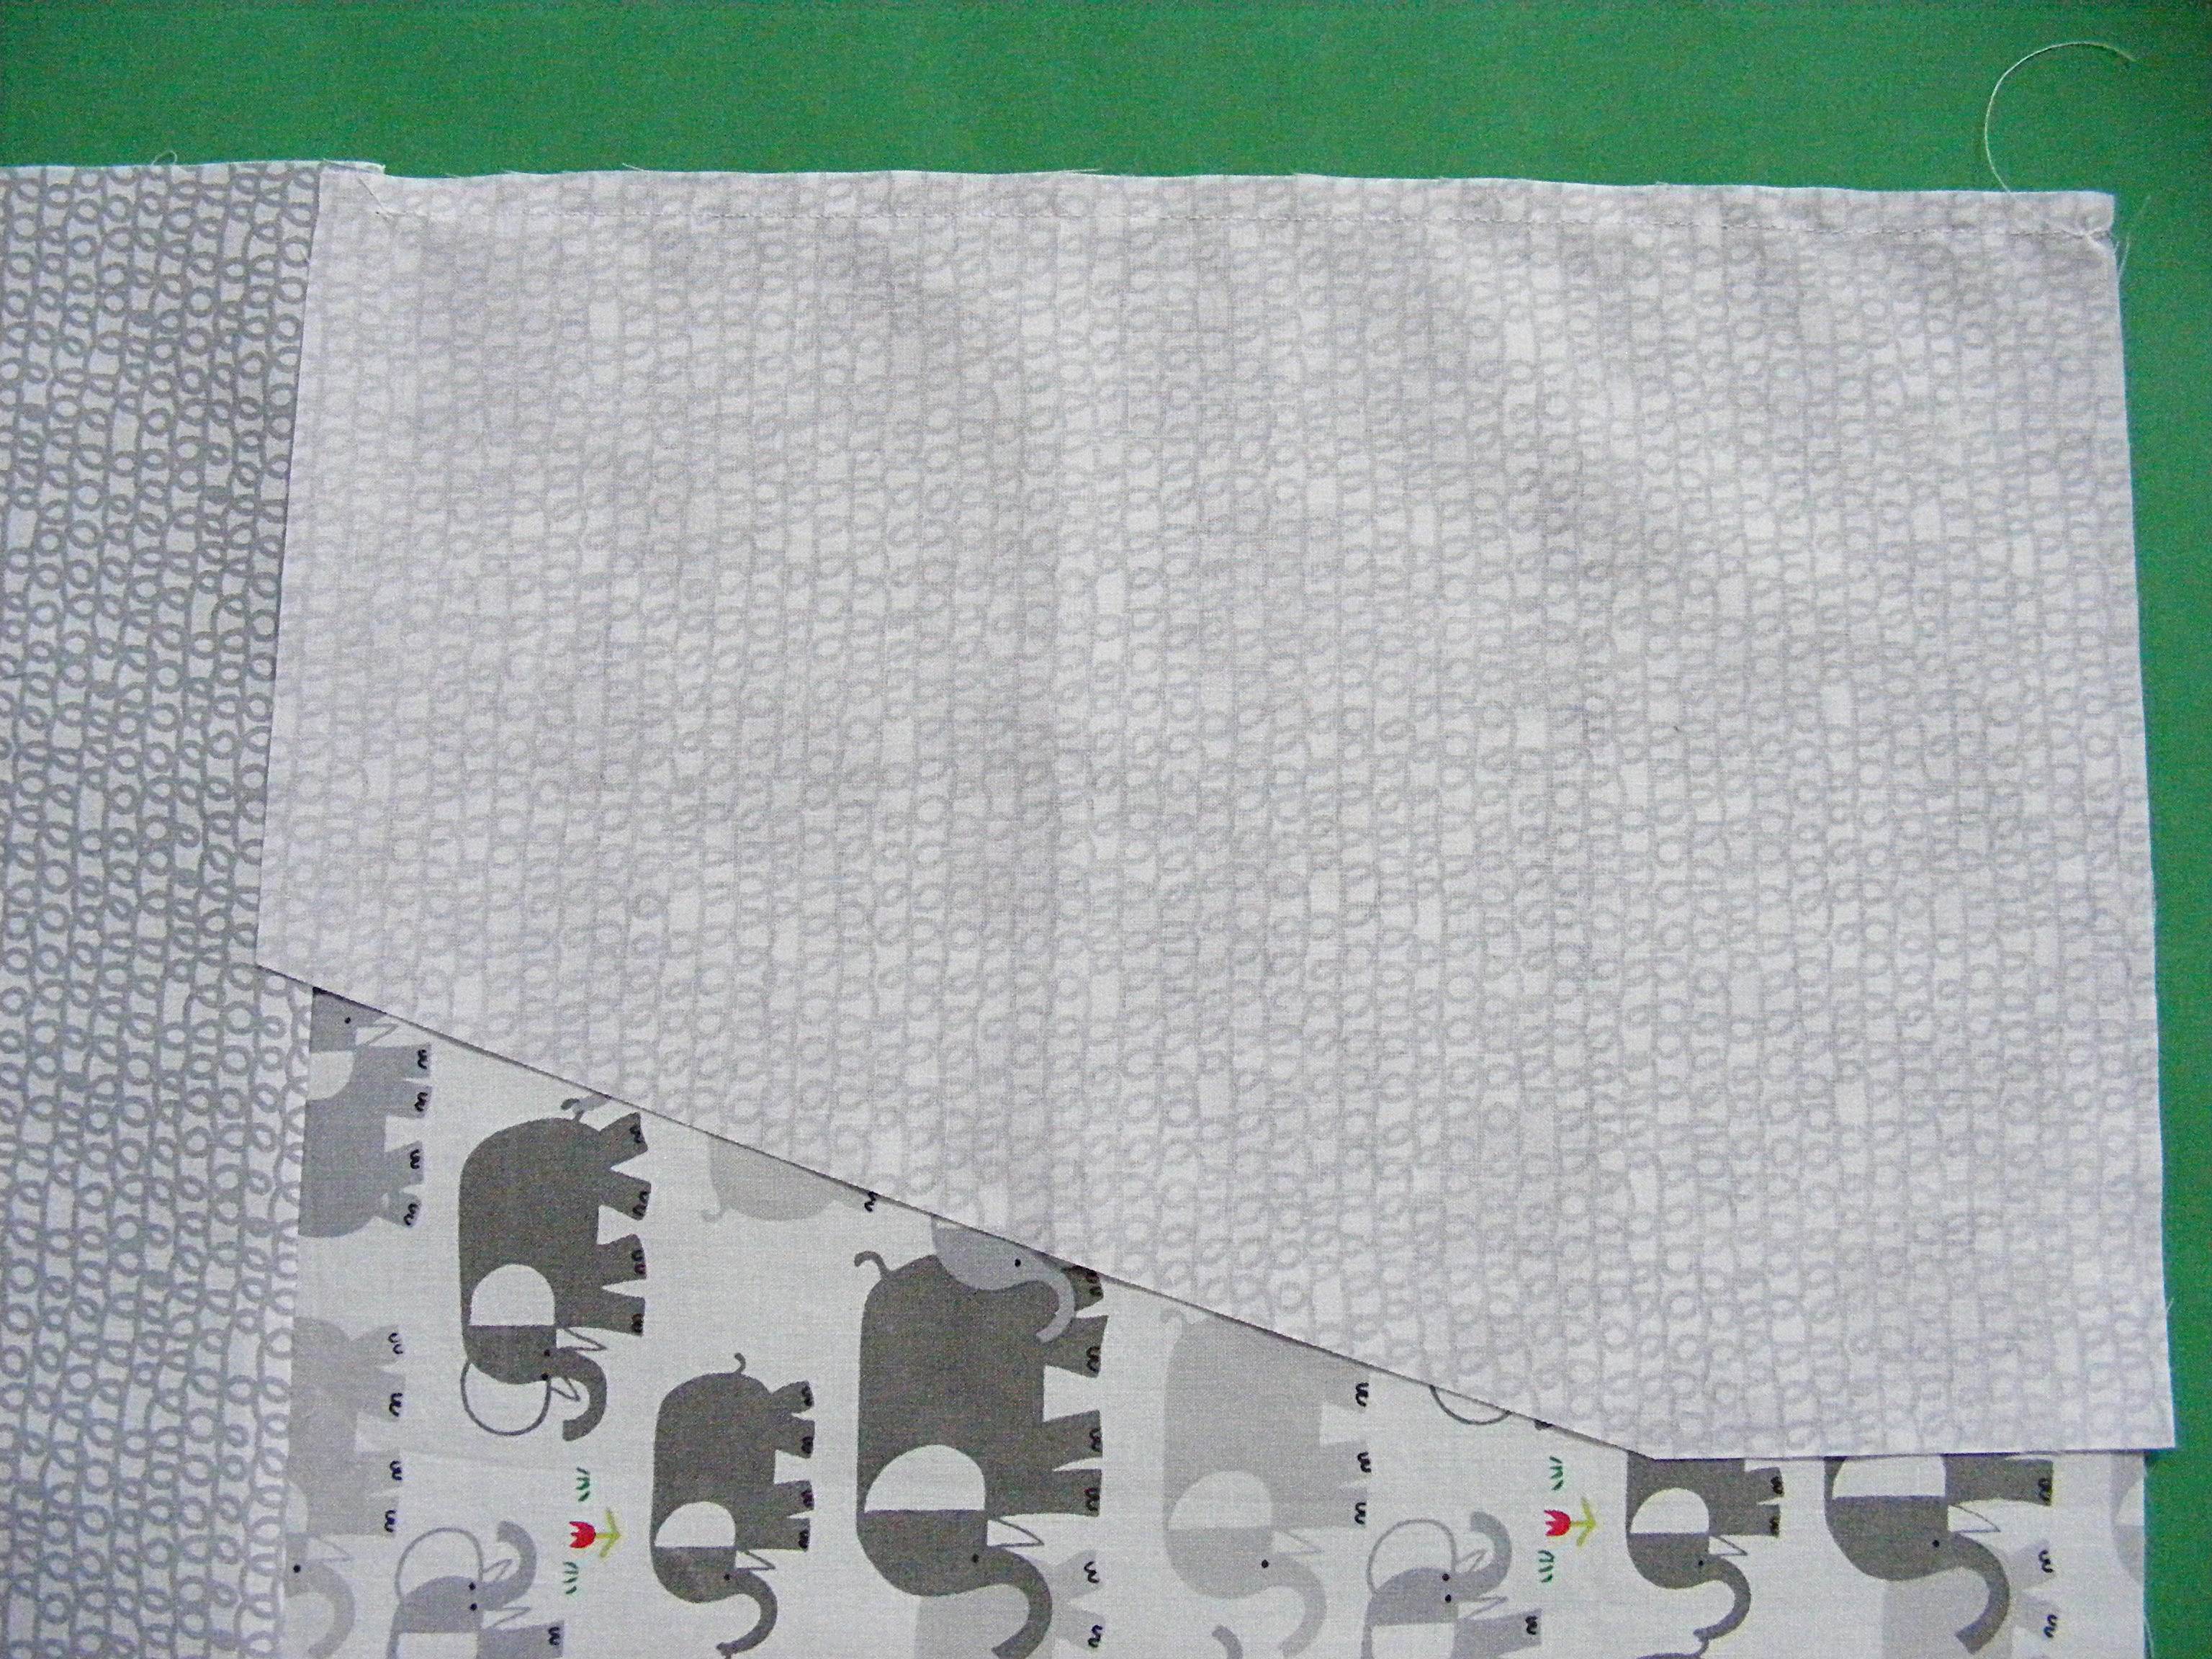
Put the side pieces face to face. From the top left corner measure over the depth of the top of your machine (B) + 1 inch.
From the lower right corner, measure up the height of the front of your machine (C) + 1 inch.
Connect those two points and cut the resulting triangle out of the top right corner of your side pieces.
Step 9
Using 1/4 inch seam allowance, sew the front and back pieces to the top piece. If your fabric only works in one direction (like these elephants) make sure you’re sewing the top of the panel to the top piece, so that the elephants are right side up on the finished cover.
Press seam allowances toward the darker color.
Step 10
Lay the side panel face down on the back panel, so that the long edge of the side panel is lined up with the short edge of the back panel.
Step 11
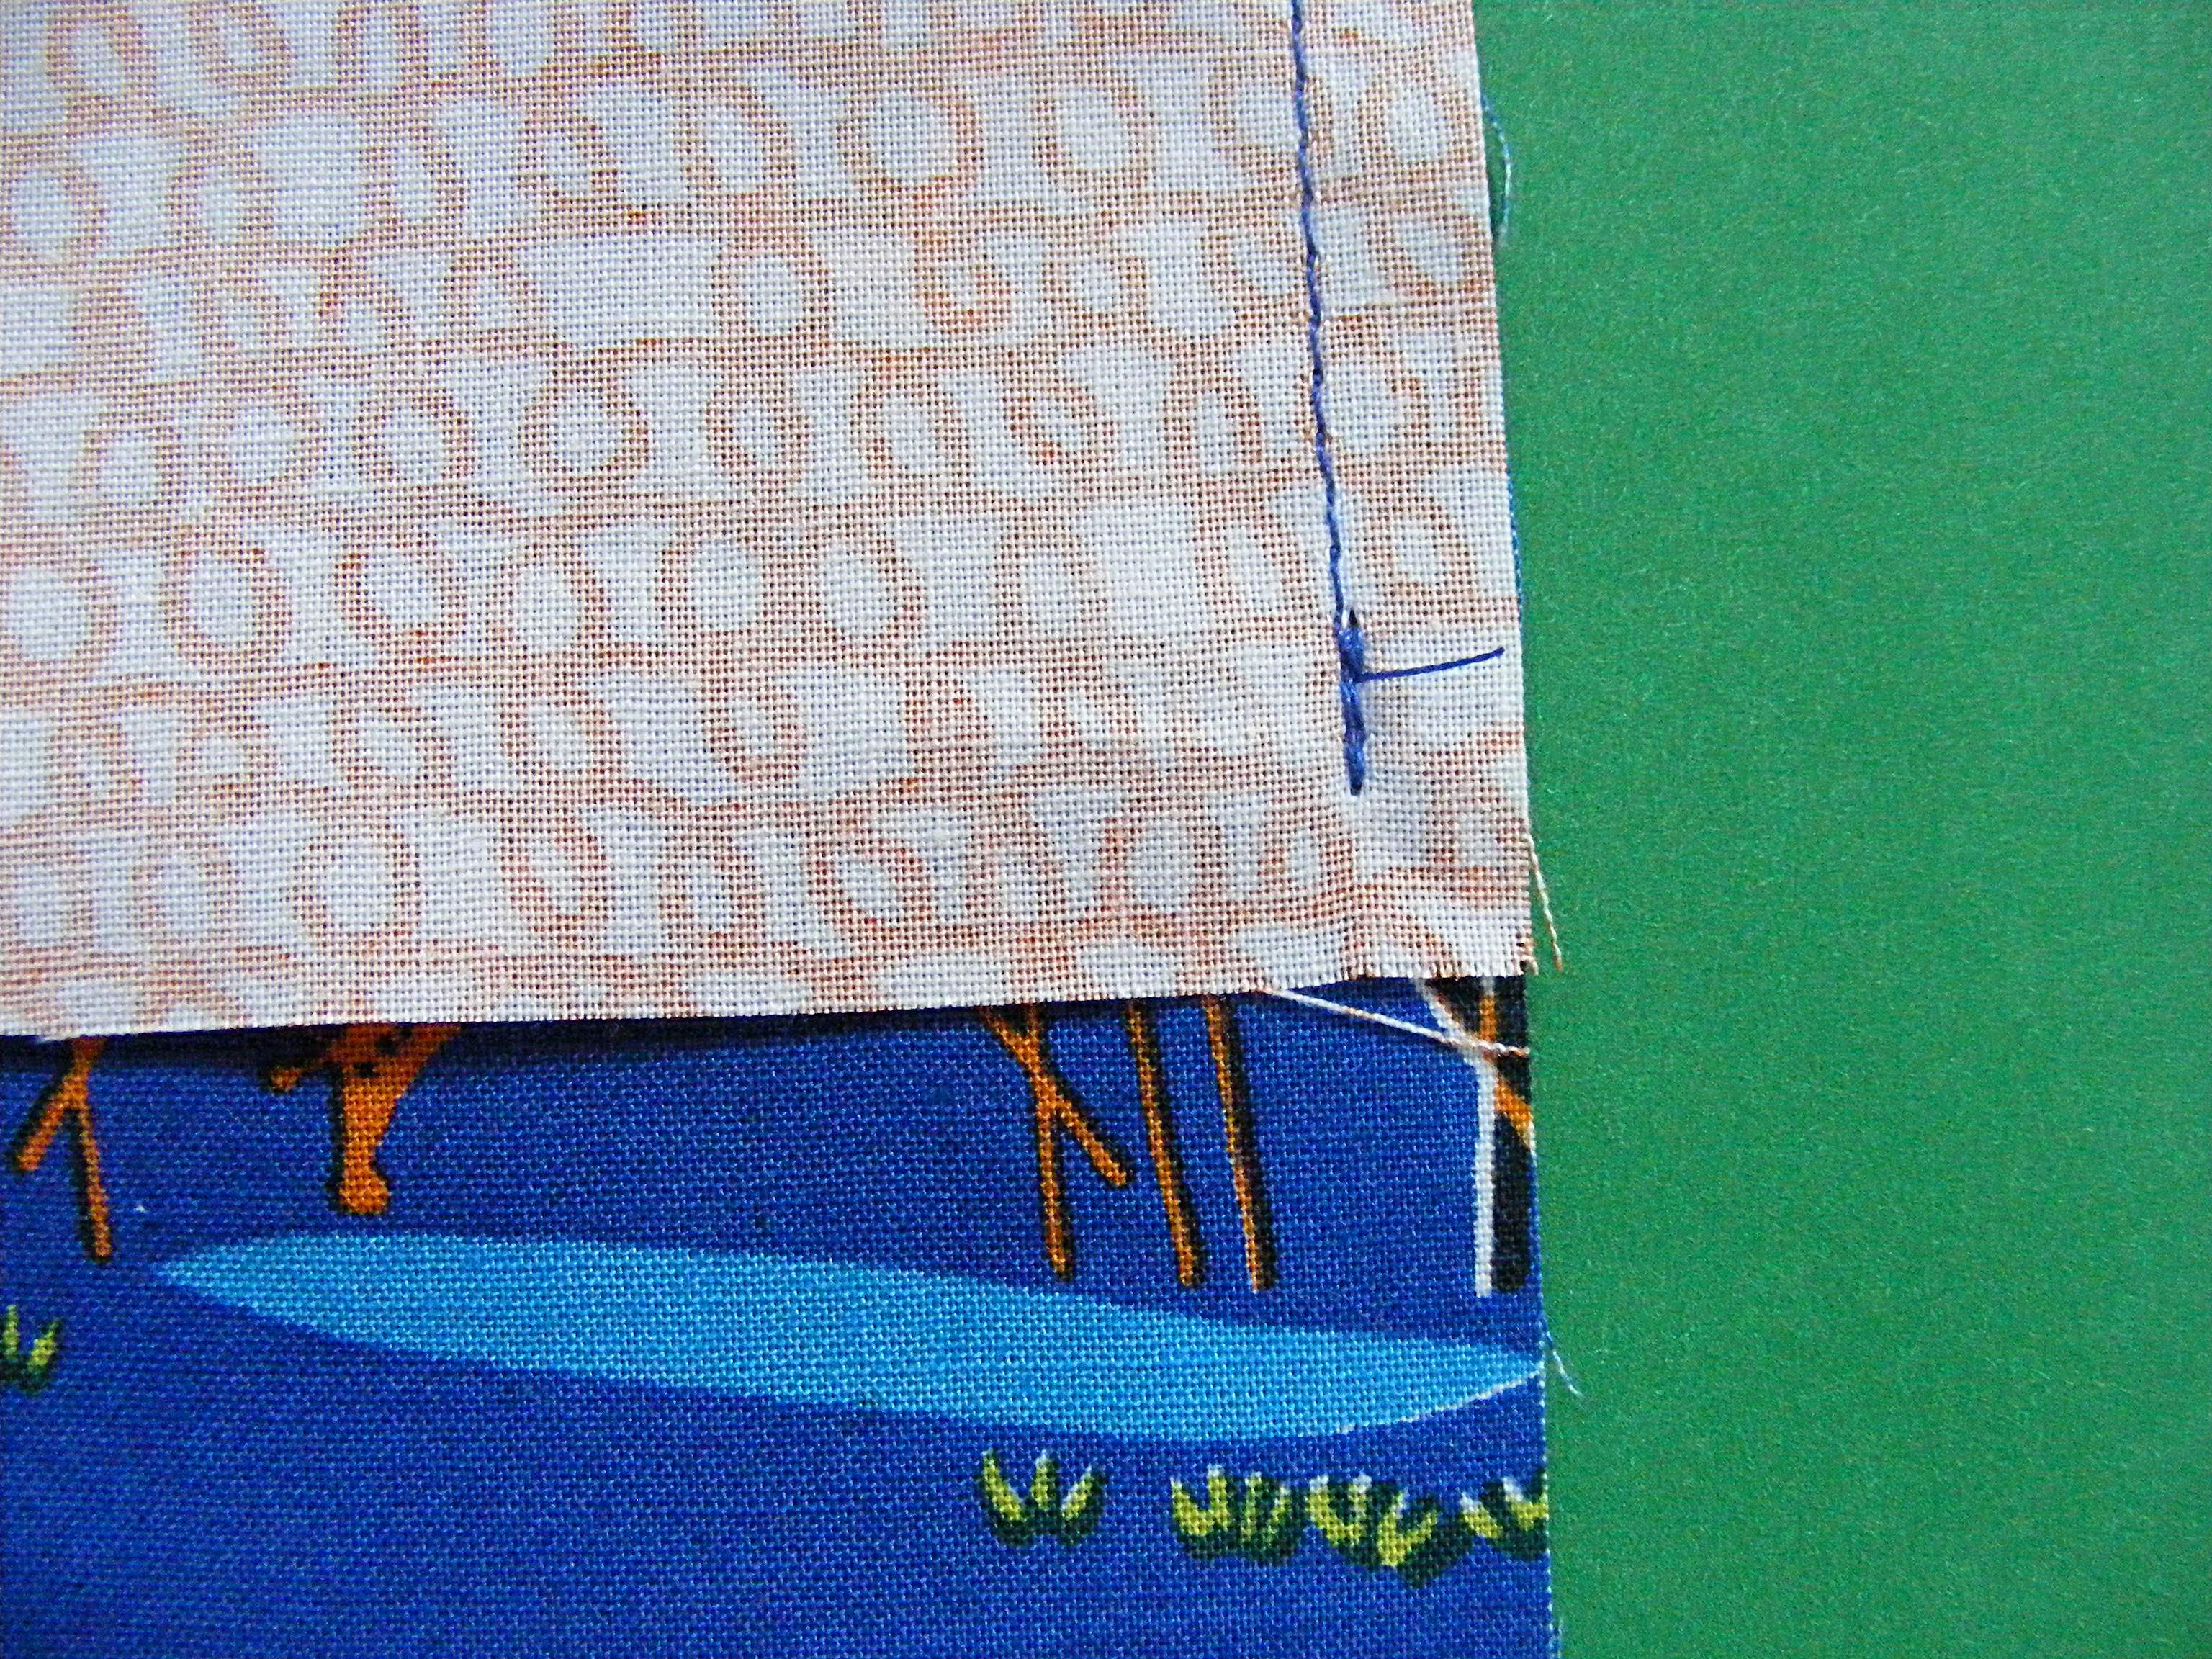
Using 1/4 inch seam allowance, sew the side panel to the back panel. Stop sewing 1/4 inch from the end of the side panel (this will be at the seam between the back and top panels). Backstitch and remove from the machine.
(I changed fabrics here because the colors worked better for showing the stitching line.)
Step 12
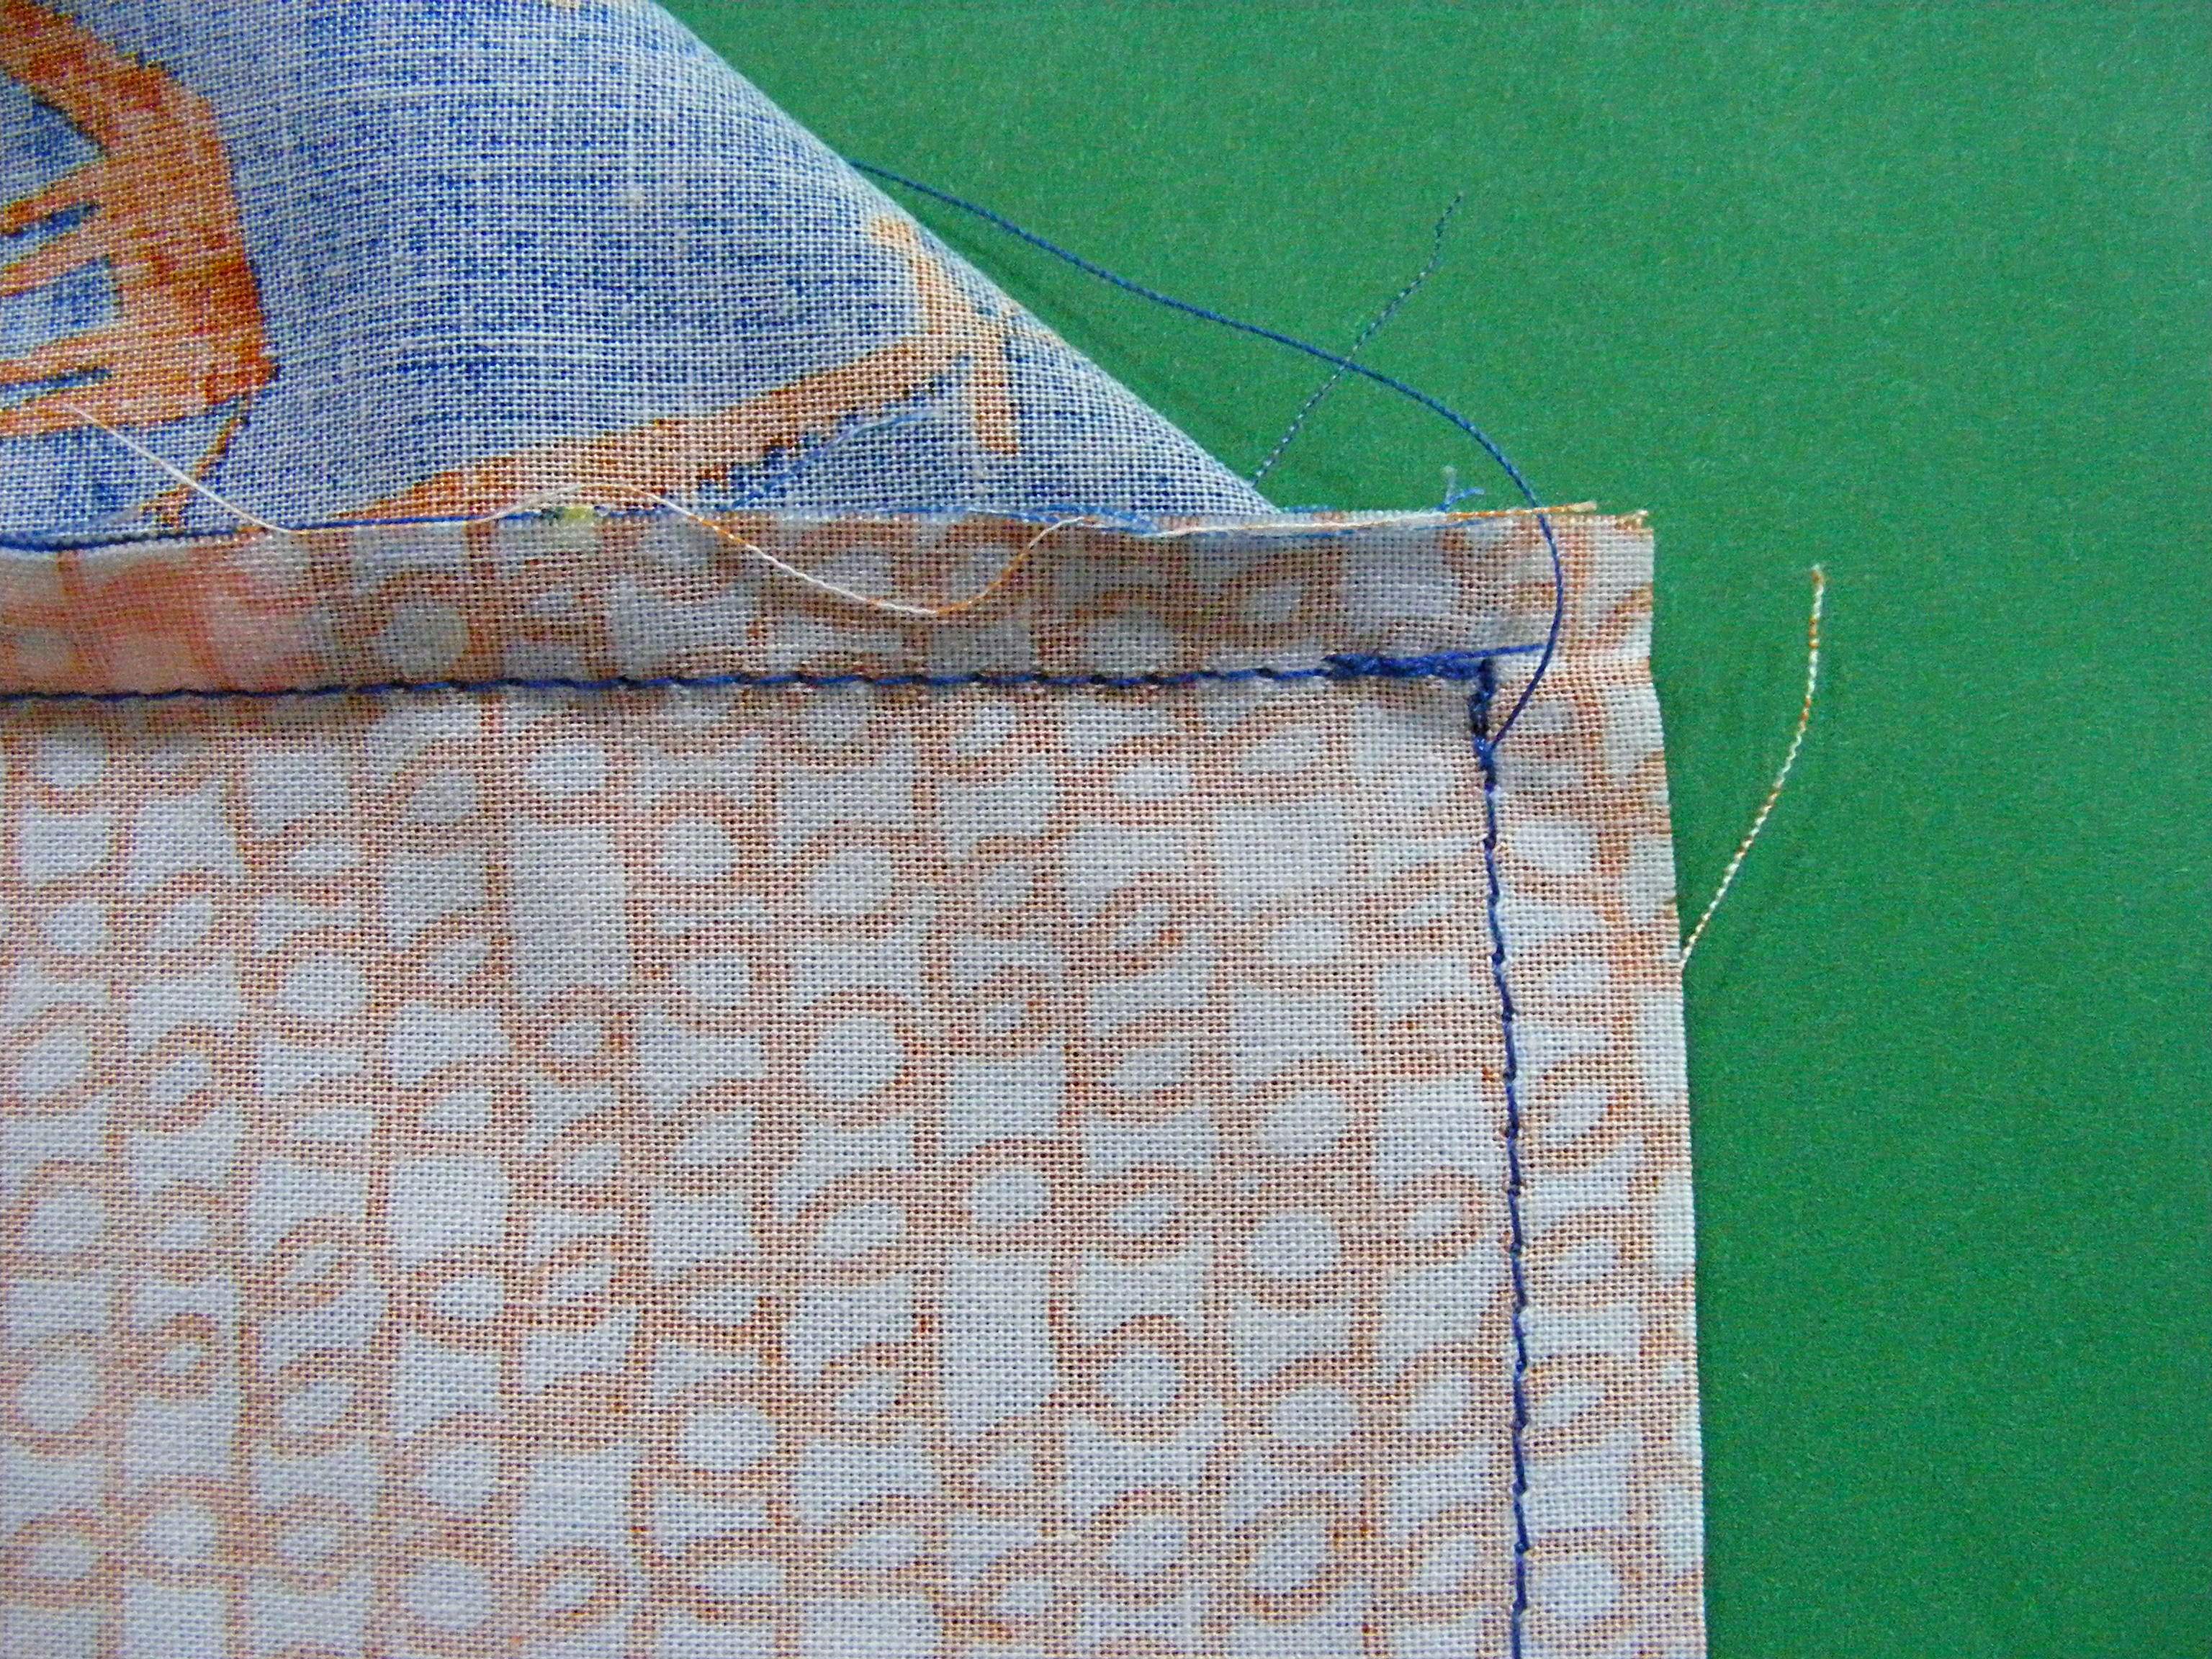
Flip your fabrics around so that the short edge of the side panels is lined up with the short (raw) edge of the top panel.
Start sewing where the previous stitching left off. Stop sewing 1/4 inch from the edge, just as you did in step 11.
Basically, you’re avoiding stitching in the seam allowances. This will let you get nice crisp points when you turn the whole thing right side out.
Step 13
Repeat steps 11 and 12 at the corners as you stitch across the top, along the angled front piece, and down the short bit at the bottom.
Your side panel will end up a little longer than your front panel (the amount of extra fabric depends on the angle that you cut into the side panel in step 8). Just use a pair of scissors to trim off the excess on the side panel and even things up.
Step 14
Repeat steps 10 – 13 for the other side panel.
Boom! You’re done with the outside of your cover.
Now repeat steps 9 – 14 to make another cover.
Everything should be finished on both covers except the bottom edge.
Step 15
Turn the inside cover right side out. Turn the outside cover inside out. Put the inside cover inside the outside cover so that their right sides are facing each other. Make sure the front panels are facing each other.
Line up the raw edges of the two covers, matching the seams all the way around. Pin.
Using 1/4 inch seam allowance, sew the two covers together at the bottom edge, almost all the way around. Leave about 4 inches open so you can turn everything right side out.
Step 16
Turn the whole thing right side out and flip things around so that the inner cover is the liner of the outer cover. Work at the bottom seam allowance and press it nice and flat.
Either hand sew the opening closed or topstitch all the way around the bottom edge to close it and stabilize the edge.
Step 17
Put it on your machine. Admire it. Reverse the cover and admire it some more. You’re awesome!
Here are handy links to all the posts about quilting tools and supplies.
Alrighty, folks! Remember, we’re in the middle of dyeing a fabulously long colorway?
If you missed it, check out yesterday’s post to catch up. I’m in the middle of showing you how to get a fab yarn like this:
And we left off with our yarn in bowls, like this:
Okay, so let’s keep going!
Step 5: Completely dye each section
When you’re dyeing lots of pieces, you want to make sure each part soaks up the color. You might need to use a spoon (or your finger, if you don’t mind an orange finger) to press the yarn into the water:
Here’s where we are:
Notice that there are little bits of white yarn between the bowls? If you leave those, you’ll have white between each stripe. So, to get rid of those, gently dunk each bit into a color:
Step 6: Rinse
(from here on, the photos get a little crappy… since I had to re-locate to the bathroom. Sorry!)
Now you need to rinse and squeeze water out of your yarn. This is harder than it looks… you can not just dump all your yarn out, or you’ll end up with a tangled mess!
You need to lift out each section gently (this is the time-consuming part I warned you about!) and place in the tub (since it’s still soaking wet):
Remember, the goal is to avoid tangles!
Now, begin at the start (the center of your first ball), and wind your yarn around something large (I’m using the lid of a storage container). As you wind, you can squeeze the extra water out with your fingers.
If you’ve been careful, one ball should go right to the center of the next ball… and tangles will be avoided.
Avoid the temptation of using a ball-winder, here… the yarn needs to be in a skein to dry completely.
When dry, you can wind it up:
Are you going to give it a try?
Isn’t it fabulous? Don’t forget that we’re all going to be flashing our Kool-Aid projects on this Sunday’s blog post… so I want to see what you come up with!
Squee! Can you believe there are so many ways to dye yarn with Kool-Aid?
Today, I’m going to tell you how to dye yarn go get long colorways, or self-striping yarn. It’s the technique I used to get the colors for this shawl:
Don’t you love the stripes? It’s a time-consuming technique, but in my opinion, well-worth the result! I’ll be showing you the technique over two days, since it’s a lot of steps… but follow along, because I know you’re going to want to try it for yourself!
Materials
You’ll need:
yarn made from natural animal-fibers (undyed is best), wound into a center-pull ball
a few packets of Kool-Aid (see yesterday’s post about testing colors)
a glass bowl or dish for each different color
boiling water
The Process
Like I said, this process takes quite a few steps… but none of them are very difficult. Besides, you already know all the basics!
Step 1: Add packets to your bowls
You’ve seen this step before! Add your color to your bowls… in this case, I’m doing orange and blue stripes, so I have a bowl for each:
Add boiling water to your bowls.
Step 2: Divide up your yarn
Remember I said to wind your yarn into a center-pull ball? (You may want to have a ball winder.)
That’s because a center-pull ball will make it super-easy to divide up your yarn into small sections. I’ve used dividers to mark off where I want each color to be, but you can eyeball it, if you’d like.
Step 3: Dye the first section of yarn
So, here’s what do to… pull out your first little section of yarn, and put it in your first color:
Keep in mind that the size of this section will determine your color repeat! So, if you pull out 20 yards, your stripe will be 20 yards long. If it’s bigger, your stripe will be longer.
Step 4: Continue dyeing each section
Now, pull out the next little bit and put in your 2nd color of yarn:
Continue doing this with each subsequent section of yarn.
And keep going…
Things to keep in mind:
It sounds obvious, but the order that you put your yarn in colors is the order they’ll be in the yarn! I’m using 2 colors and want alternating stripes, so I’m putting a ball in blue, then orange, then blue…
If you want do use more colors (like the shawl I showed at the start), then plop one ball of yarn in your first color, the next in your second color, then your third…
The length of the stripes you want depends on what you’re knitting. If you’re making socks, then the color repeat doesn’t need to be as long as it does to get stripes on a shawl.
It’s very important to not get your yarn tangled. Be careful, be neat… and just don’t get it in a knot!
Okay folks… we’re only halfway through. I’ll give you a sneak peak of the end result:
I’m loving all the fun techniques you can do with Kool-Aid… are you having a blast?
Today, I’m going to tell you about how to dye those multi-color skeins you so often see from Indie Dyers! It’s a great chance to play around with color!
I’ve dyed my skein red, orange and yellow (and left a little bit white!). I’ll show you how to do it, plus show you how to calculate the length of the color repeats that you’ll get in your final yarn.
Materials
You’ll need:
yarn made from natural animal-fibers (undyed is best), in a skein
a few packets of Kool-Aid in any colors you want! (see this post about testing colors)
a glass bowl or dish for each different color you’re using
boiling water
The Process
Step 1: Prepare your color
Remember how I told you last time that you had two choices for setting your color? You could either use boiling water, or regular water and then microwave the yarn. Since this technique requires dunking sections of yarn in different posts of color, I’m going to recommend the boiling water technique. It makes life easier… and we all want that, right?
To prepare, mix your Kool-Aid packets in boiling water… one color in each dish.
Step 2: Dye your first section
In this technique, you’re starting with a skein of yarn (you know, that big yarn loop?):
Chances are, if you’re purchasing undyed yarn, it’ll come this way. If not, it’s no big deal. Just wind it around a box and make your own!
To dye your first section, dunk a part of the skein in your first color:
You can dye as much or as little of a section of the skein as you want, but keep in mind that the more colors you want to use, the smaller each section will have to be.
Step 3: Keep going!
Now, dip an undyed section of your skein in your next color:
In my yarn, I try to keep the dyed sections from overlapping- which will result in a nice, crisp color changes!
Keep doing this for as many colors as you want to use!
Step 4: Rinse and let dry
Hooray, you’re done!
Determining Color-repeat Lengths
This technique is great for getting lots of colors, but it doesn’t result in very long lengths of color. You can tell this when I wind my yarn into a ball:
So, how do you tell how long each color repeat is going to be? By measuring your skein!
Here, I’ve laid out my (dyed) skein, and set a ruler to the length of red:
My length of red is 12″ long.
I know from experience that when I single crochet, I use 1.8″ per stitch. This means that using this yarn, I’ll crochet about 6 stitches before the yarn turns to a new color.
This is helpful info to know when planning a project! It means that using this technique, you won’t get stripes, but small puddles of color. (Tune in tomorrow, where I’ll show you how to get stripes!)
You can alter the length of your color repeats either by dyeing larger/smaller sections of your skein, or by winding your skein into a larger/smaller loop. The possibilities are endless, so give them a try!