I’ve had a LOT of people asking me how to iron their finished embroidery. There’s a little trick to doing it without smooshing your stitches – and that’s what I show you in this video. Don’t worry – it’s easy and doesn’t require anything special. 🙂
Seriously – every time I try this stuff on something new I’m even more impressed with it.
Here’s the scoop on using it with wool felt. . .
Print your pattern onto the stabilizer. Stick it to the felt. Rough cut around each piece.
See? It’s easy to transfer your pattern. And it sticks very well to the felt.
Stitch right through the felt and stabilizer. (Don’t zone out and stitch the outside lines – those are your cutting lines. Not that I’ve ever done that. ahem.) You don’t need a hoop for this – the felt is sturdy enough to stitch through without it. After you’re done stitching, cut the pieces out on the cutting lines.
See? Beautiful stitching and nice, accurate cutting.
Soak off the stabilizer.
See? Not a trace of stabilizer and no ugly marks. All ready to sew!
The soaking. I know this is the part that you’re worried about. Normally I soak it off in a bowl of warm water, then rinse it under running water. I do the same thing for felt, only the water is cold. I don’t want to pebble the surface of the felt by getting too warm with it. I fill a bowl with cold water, then drop the embroidered felt in face down and let it sit for a long time – sometimes as much an an hour or more, depending on what else I get busy with. When I come back the stabilizer is all swollen and mushy and, depending on how much stitching there is, kind of clinging to the felt. Time to rinse.
I rinse it under running water – again cold. The stuff does cling a bit more to fuzzy felt than it does to smooth cotton, but the running water takes it off pretty well. It comes off really fast if I switch my kitchen faucet to the sprayer, but just regular running water will work in time.
After all the gunk comes off, just lay it on a dry towel. For the best results I don’t wring it, twist it, or even press it. Just set it sopping wet on the towel and leave it alone. It will dry – I promise. And look how pretty the results are!
I left the picture nice and big – click on it to really zoom in and look at the texture of the felt. No pebbling! No stray marks!
So – no more frustration transferring your pattern to lovely-to-stitch-on but impossible-to-trace-through and difficult-to-write-on fuzzy felt. Use Sulky Sticky Fabri-solvy and feel only peace, joy and felty happiness. 🙂
Want to learn the basics of hand embroidery with an easy online workshop – totally free?
Sign up for Embroidery 101 here. You’ll learn how to get started, the tools and supplies you’ll need, the four most basic stitches, how to transfer your pattern and how to display your work.
If you already know the basics – sign up for Embroidery 201. It’s also free! You’ll learn how to stitch on specialty fabrics like felt and stretchy T-shirts. Plus you’ll learn lots and lots and LOTS more stitches – all my favorites!
The Kiddie Cameo pattern was made for the pendant frames in the shop. I decided to also record this video showing just how to assemble the pendants – and it also gives a sense of the size because you see them in my hands.
That flower image in the video is from a new pattern called Bitty Blooms – 30 tiny little flower patterns sized especially to fit in the pendants as well.
I’ll be adding more patterns especially for these frames – all will show the images in the frames on the pattern cover so they’ll be easy to spot among all the embroidery patterns. 🙂
Are any of you stitching these up for Mother’s Day? I’d love to see them!
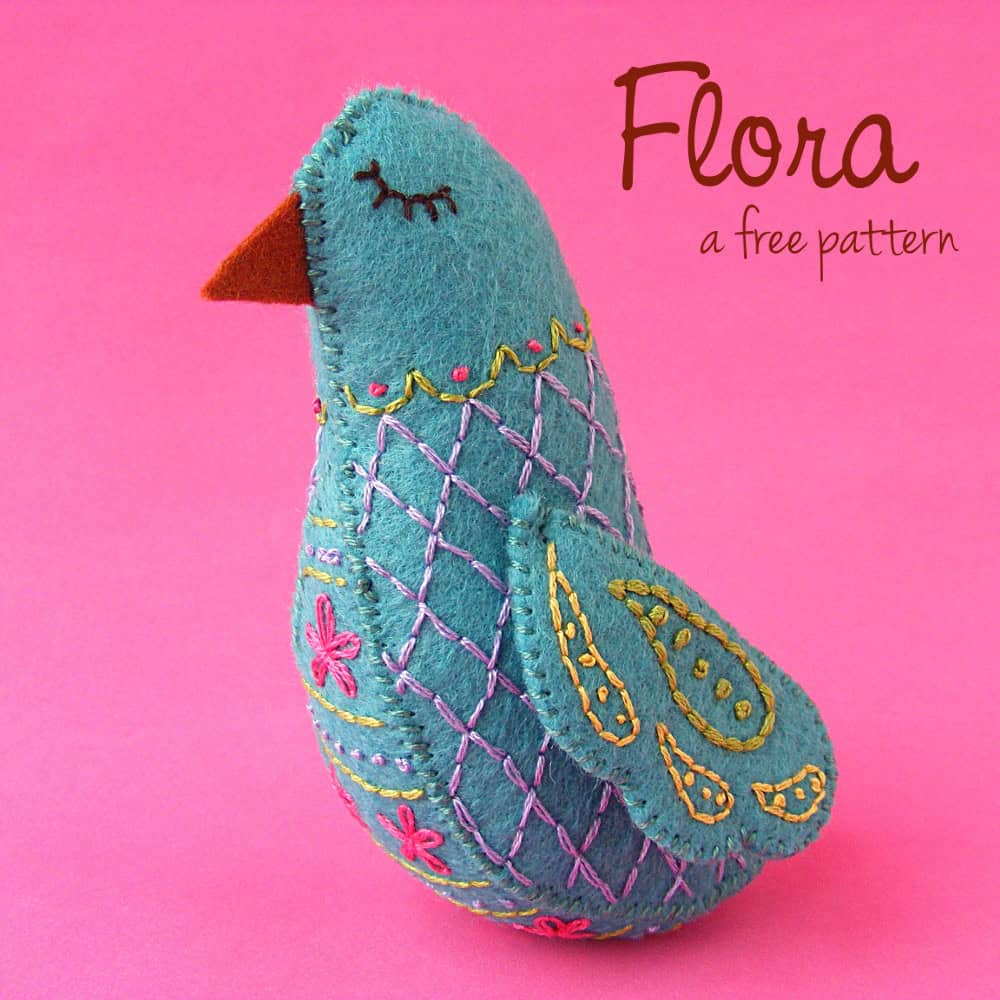
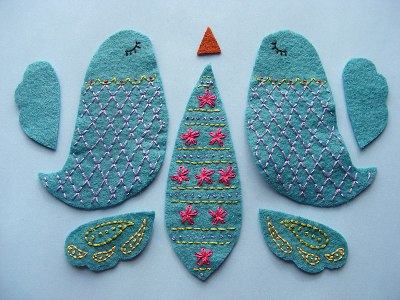
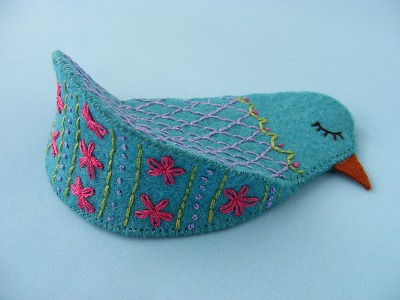
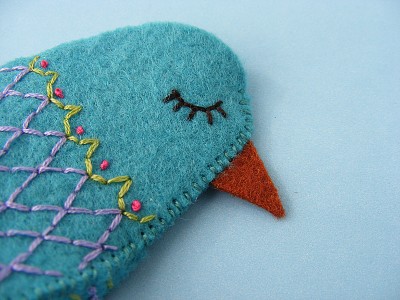
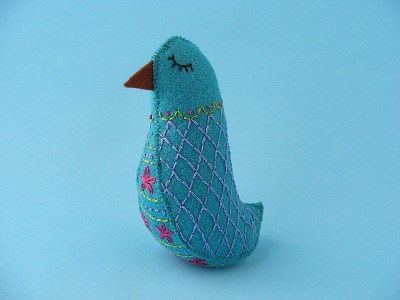
This little felt bird was such a delight to make! Seriously – I loved every minute of it. I want to make a whole flock of them in rainbow colors! And now you can make her too.
Flora is all hand sewn from wool blend felt and colorful embroidery thread, making her an easy, portable project, perfect for carrying around in your purse.
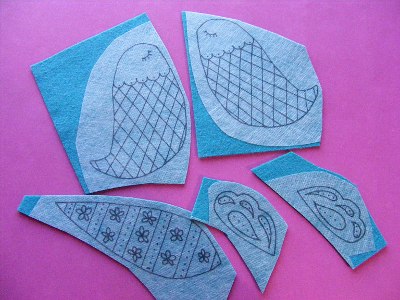
Transfer the pattern to the felt. When I discovered Sulky Sticky Fabri-solvy it changed my life. I made a video showing how awesome it is here. I call it The Magical Embroidery Stuff and I use it for everything. Here I’ve printed the pattern directly onto the Sulky Sticky Fabric-solvy, roughly cut around each piece, and stuck it to my felt.
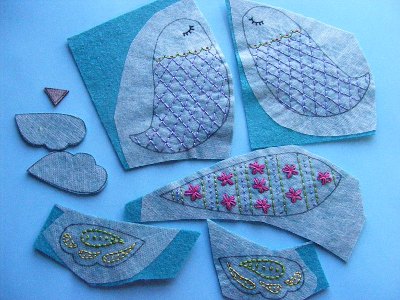
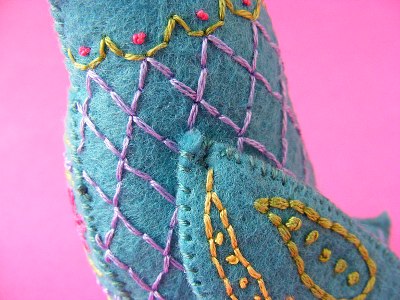
Step 2 Stitch the design. I used two strands of embroidery thread and the following stitches: backstitch for all lines, French knots for all dots, lazy daisy stitch for the flowers. (Those links all go to video tutorials for each stitch.)
Stitch right through the stabilizer and the felt.
Step 3 Cut out the shapes.
Step 4 Soak off the stabilizer and let the pieces dry.
I lay the pieces face down in a bowl of cold water and just let them sit there for about an hour. Longer is fine – I’ve forgotten mine and let them soak overnight with no problem. The soaking will make the stabilizer all mushy and soft. Rinse it off under cold water. Use a kitchen sprayer if needed to get off any stubborn bits, but try not to rub the surface of the felt. Lay them out on a towel to dry. Don’t wring them, twist them or even smoosh them – just lay them dripping wet on the towel and leave them alone.
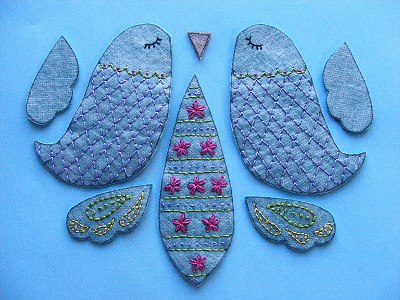
Step 8 Sew up the back, starting at the tip of the tail. Stop sewing about halfway up the back and stuff the tail. Mix a few large nuts (from the hardware store) into the stuffing to weight her bottom, otherwise she’ll tend to tip forward. Sew up a bit higher on her back and stuff in more stuffing. Finish sewing and stuffing until she’s nice and plump, and all sewn up.
Step 9 Pin the wings in place, one on each side of the body.
Use the grid pattern you embroidered to line them up exactly. Thread a long needle and knot the end. Starting sewing underneath one wing, near the top. Sew through the body and out the other side, through the opposing wing. Take a small stitch back into the wing, through the body and out through the first wing. Stitch back and forth like this a few times to secure the wings. Don’t pull the thread too tight or you’ll distort the shape of her body. Knot your thread underneath one wing and bury the tail.
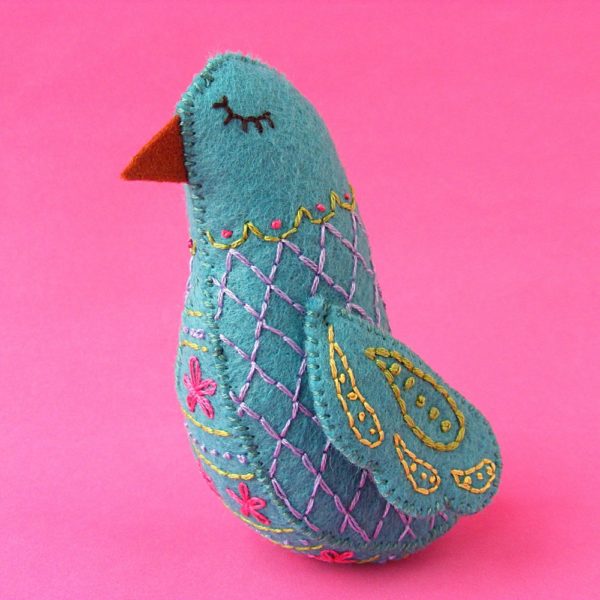
She’s finished! don’t you want to sew a whole flock of these beauties?
When it comes to embroidery, the thread is like the gorgeous silk blouse hanging in your closet. It’s pretty. It’s colorful. It’s touchable. It’s lovely.
But try wearing that silk blouse without the right undergarment and – unless you’re a very lucky woman – the results will be. . . not so lovely. 🙂
Stabilizers are the undergarments of the embroidery world.
Different outfits require different undergarments. Sometimes a little chemise or a slip are all you want. Sometimes you need a supportive bra. Some outfits call for head-to-toe Spanx. 🙂 It all depends on what you’re wearing and the look you’re trying to achieve.
Same with stabilizers, so here’s a little overview of which stabilizers serve what purpose.
Let’s start with my favorite, shall we?
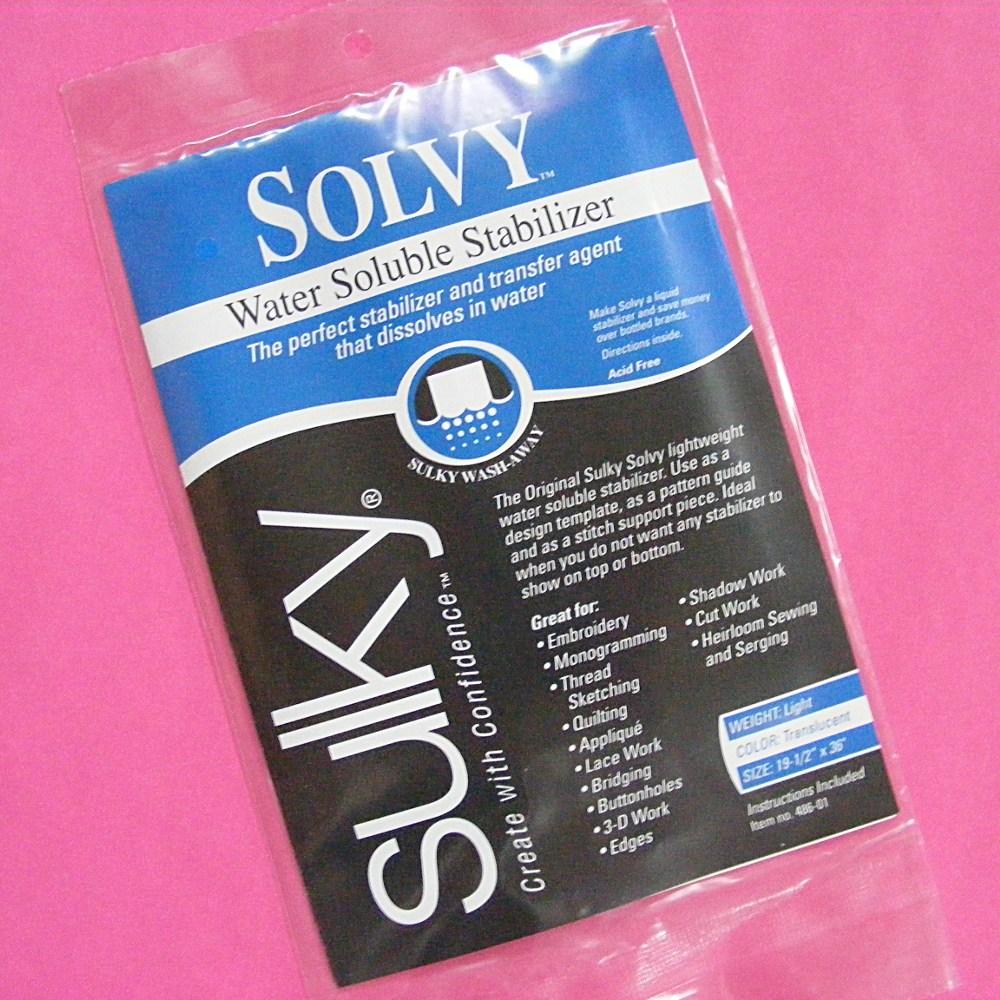
It’s Sulky Sticky Fabri-Solvy – which is quite an unwieldy mouthful. Sulky also offers it as Stick & Stitch, so you’ll find both names in shops.
It’s my everyday bra – good for just about any situation. 🙂
It’s a pattern transfer and stabilizer all in one – and you can print directly on it, which is awesome for all of us who use a lot of digital patterns. I recorded a whole video showing it in action and what’s so great about it, but here’s how I use it. . .
To transfer a pattern to any fabric. That includes fleece, felt, and dark colors – all the tricky little buggers.
To stabilize stretchy fabric for stitching. That’s mostly T-shirts, but could be any stretchy fabric.
It’s my go-to stabilizer. I’ll tell you right now – I rarely use anything else. But I admit it’s a little pricey. It costs a little bit more than $1 a sheet. I’m totally ok with spending that – just like I’m happy to spend $40 on a bra that’s well made, won’t fall apart in the wash, fits right, doesn’t pinch, doesn’t itch, and will work under almost everything I wear. Heck – I’d happily pay $100 if I could find all that.
But maybe you want some less expensive (though also less all-purpose) alternatives?
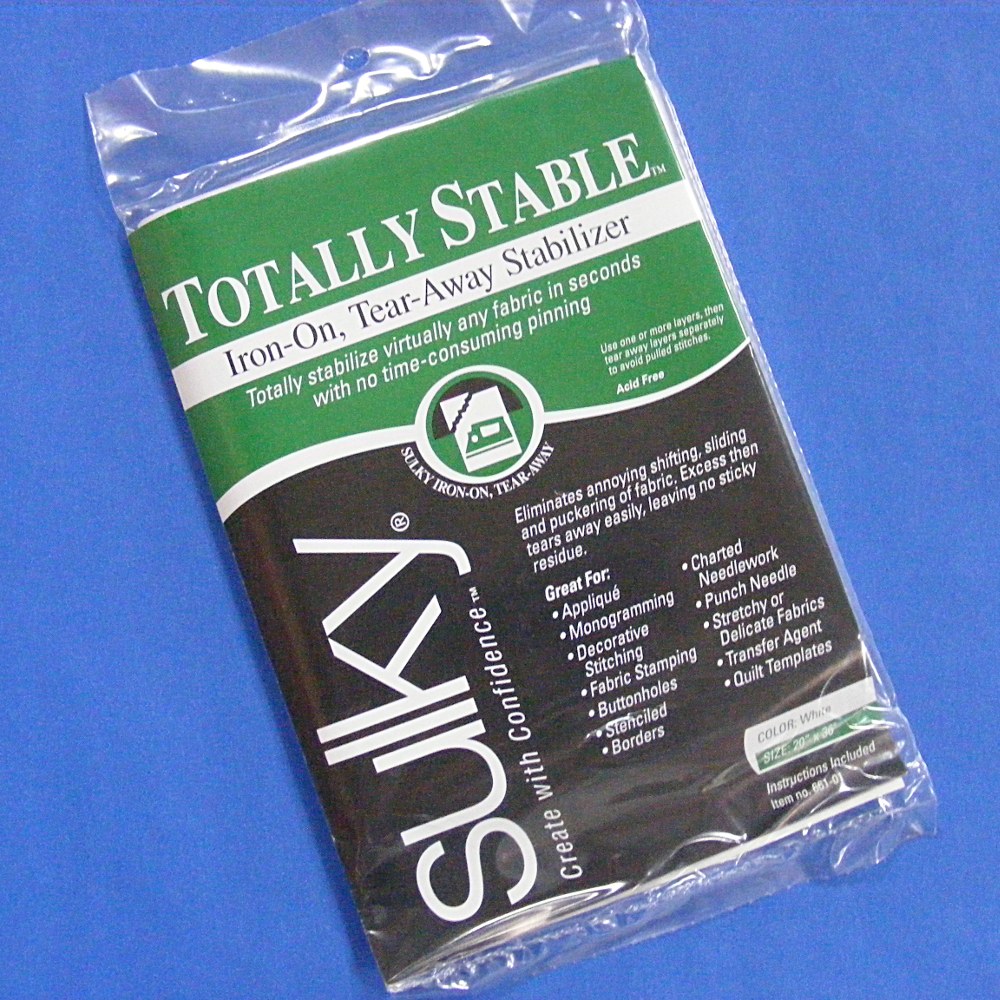
Sulky Totally Stable is great for stabilizing stretchy knits and only costs $5 for a pack. You can see it in use in this video.
This is the girdle of the bunch – all about control and not really meant to be seen.
You’ll need to transfer the pattern separately – this is a stabilizer only. It goes on the inside of the shirt. You stitch right through it and then tear away the excess after you’re done stitching. It works very well and I used it on lots of T-shirts before I fell hard for The Magical Embroidery Stuff.
Sulky Solvy is technically a stabilizer, but I’ve always used it for pattern transfers. (It’s also a great deal at $5 a pack.) Like a slip under a sheer skirt, this can help you with tricky fabrics.
It’s a clear film – not sticky.
You can easily trace your design onto it, then hoop it right over the surface of your fabric.
You stitch through it, then rinse it away. I used it on all dark-colored T-shirts (in combination with the Sulky Totally Stable) and also on fleece and felt if I didn’t want to use iron-on transfer pens. You can see it in use in this video.
It’s like a chemise or tank that you can wear under your most casual clothes instead of a bra. You’re not asking it for much – it just makes your day a little more comfortable. 🙂
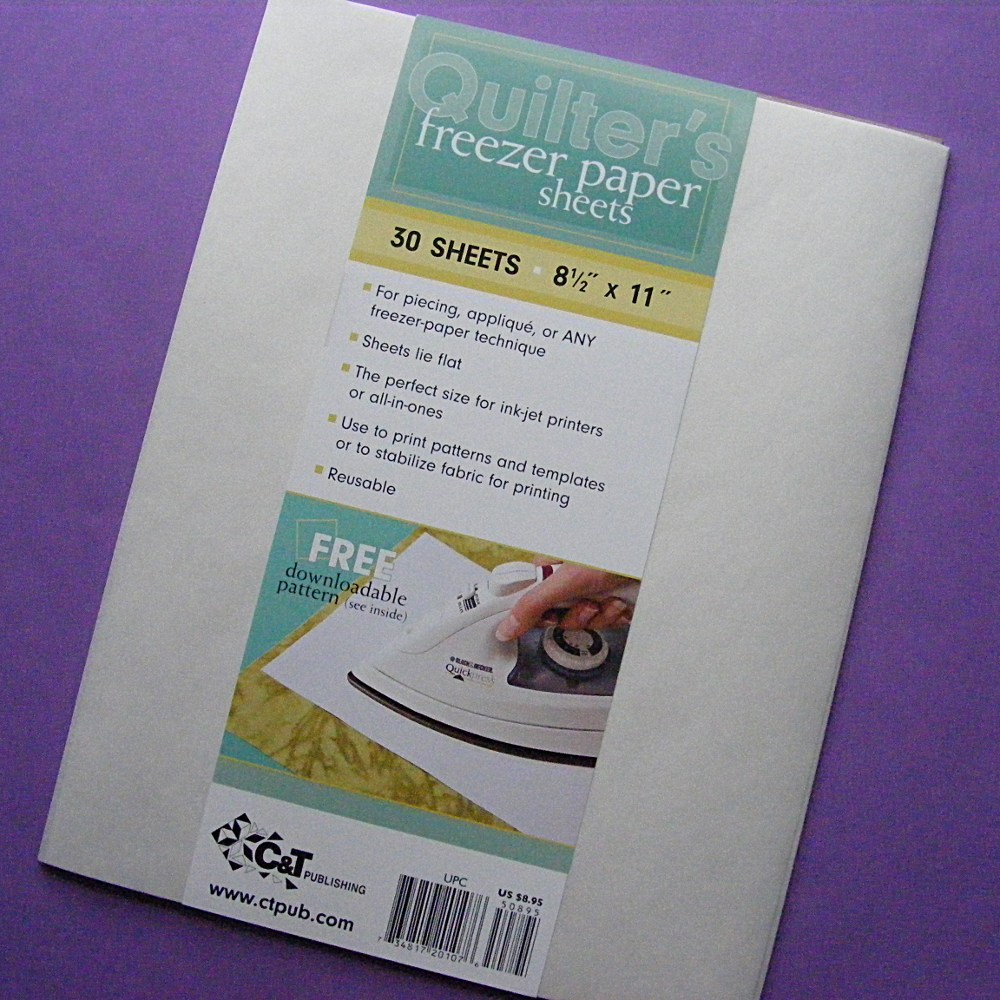
I use this occasionally for freezer paper applique and all the time for cutting out felt pieces that don’t require any embroidery.
I don’t think they’re what most people think of when they talk about stabilizers, but they certainly stabilize your work and improve the look of your stitching.
I can’t imagine stitching without them – does that make them the underpants of the embroidery world? 🙂
So there you have it! A rundown of all my favorite stabilizers – and probably too much information about my underwear. 🙂
Here are links to all my posts about embroidery tools and supplies.
Want to learn the basics of hand embroidery with an easy online workshop – totally free?
Sign up for Embroidery 101 here. You’ll learn how to get started, the tools and supplies you’ll need, the four most basic stitches, how to transfer your pattern and how to display your work.
If you already know the basics – sign up for Embroidery 201. It’s also free! You’ll learn how to stitch on specialty fabrics like felt and stretchy T-shirts. Plus you’ll learn lots and lots and LOTS more stitches – all my favorites!
You all liked this adorable little Oddball with his bunny slippers, his teddy bear, and his blankie. But you have to blanket stitch around the edge of the blankie and several of you reminded me that I haven’t done a video for that yet (even though you’ve been asking very nicely).
Done!
Not only do I show you how to blanket stitch – I show you how to do it without any knots. No knots! So it looks perfectly perfect everywhere! And for those who are really obsessed with perfection, I show you how to mark the fabric before stitching so all your stitches are perfectly spaced.
Here’s the video. . .
I show this on felt because I’m currently obsessed with felt, but you can use the same technique on fleece if you like.
Ready? Go blanket stitch something! Here’s the Floyd pattern if you want to start with his blankie. 🙂 And here’s some felt if you have a different project in mind.
Happy stitching!
Best, Wendi
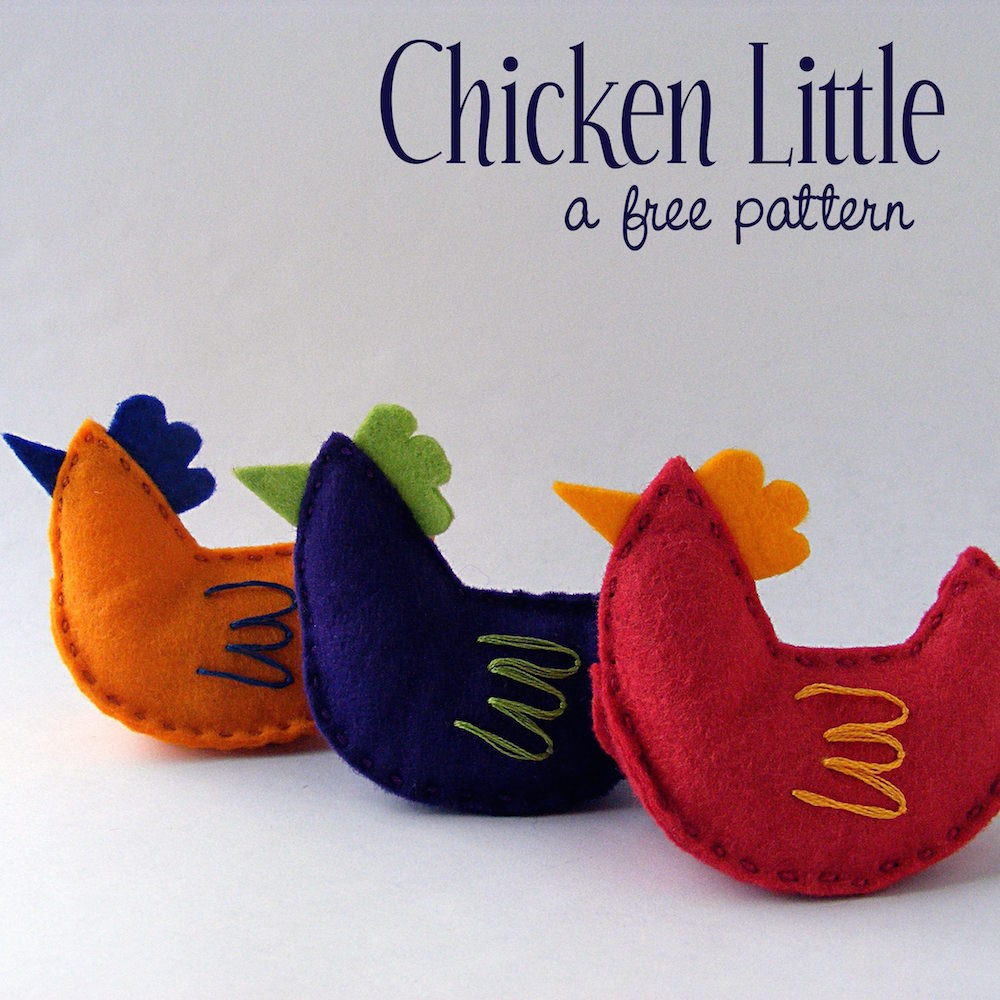
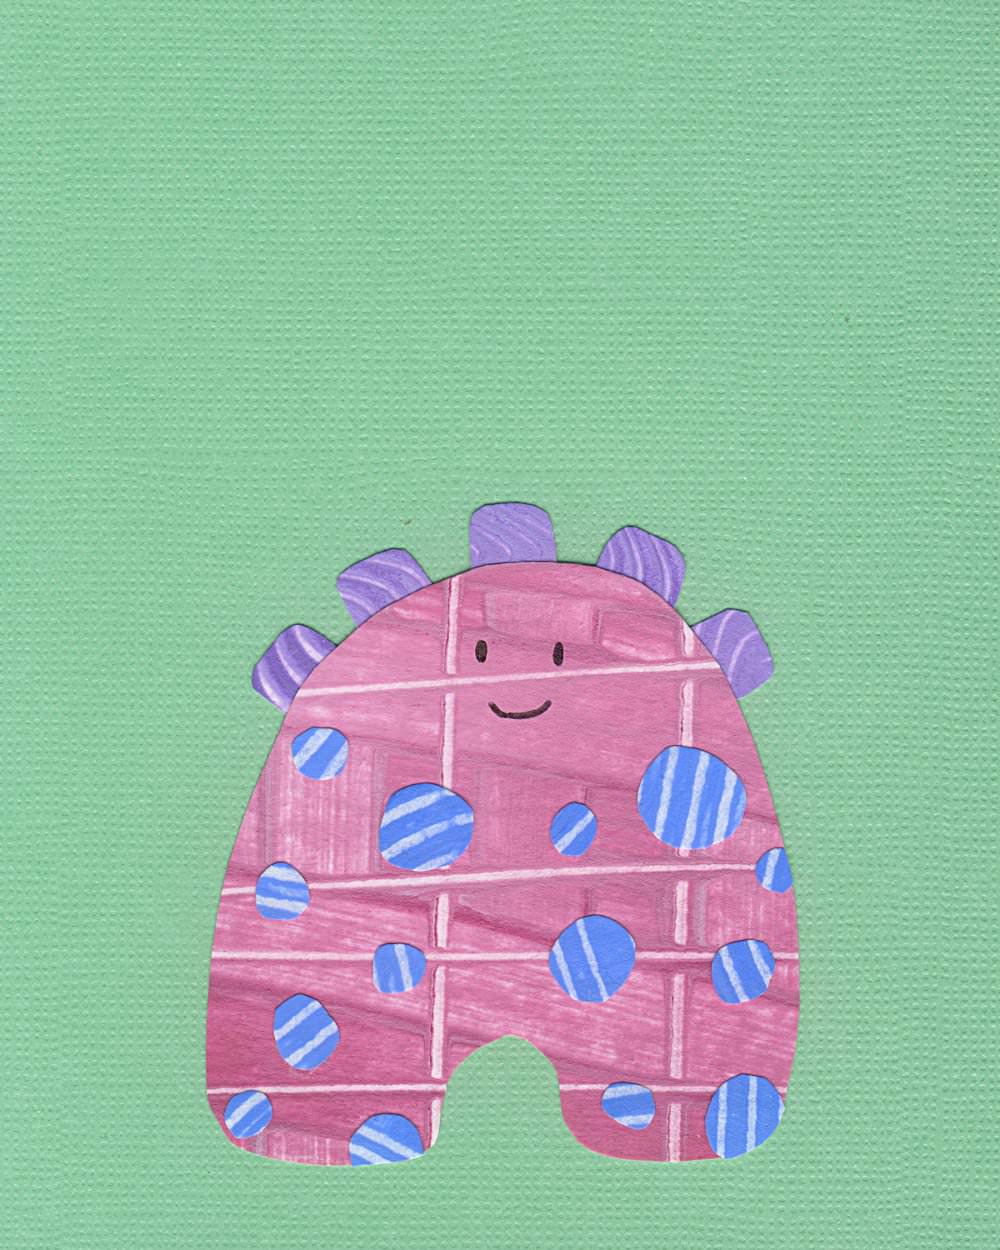
Play with some felt! Try the Oddballs – a fun pattern for silly monsters.
Jo informs me that this is a bird – not a monster. I told her that any bird big enough and smart enough to drive a car is totally a monster. Big birds (but not Big Bird, of course) scare me. 🙂
I’ve searched through all of my embroidery encyclopedias and can’t find this stitch mentioned in any of them, so I have no idea what it’s called. I always think of it as a U stitch, so that’s what I’m calling it here. If any of you know the official name, please chime in in the comments!
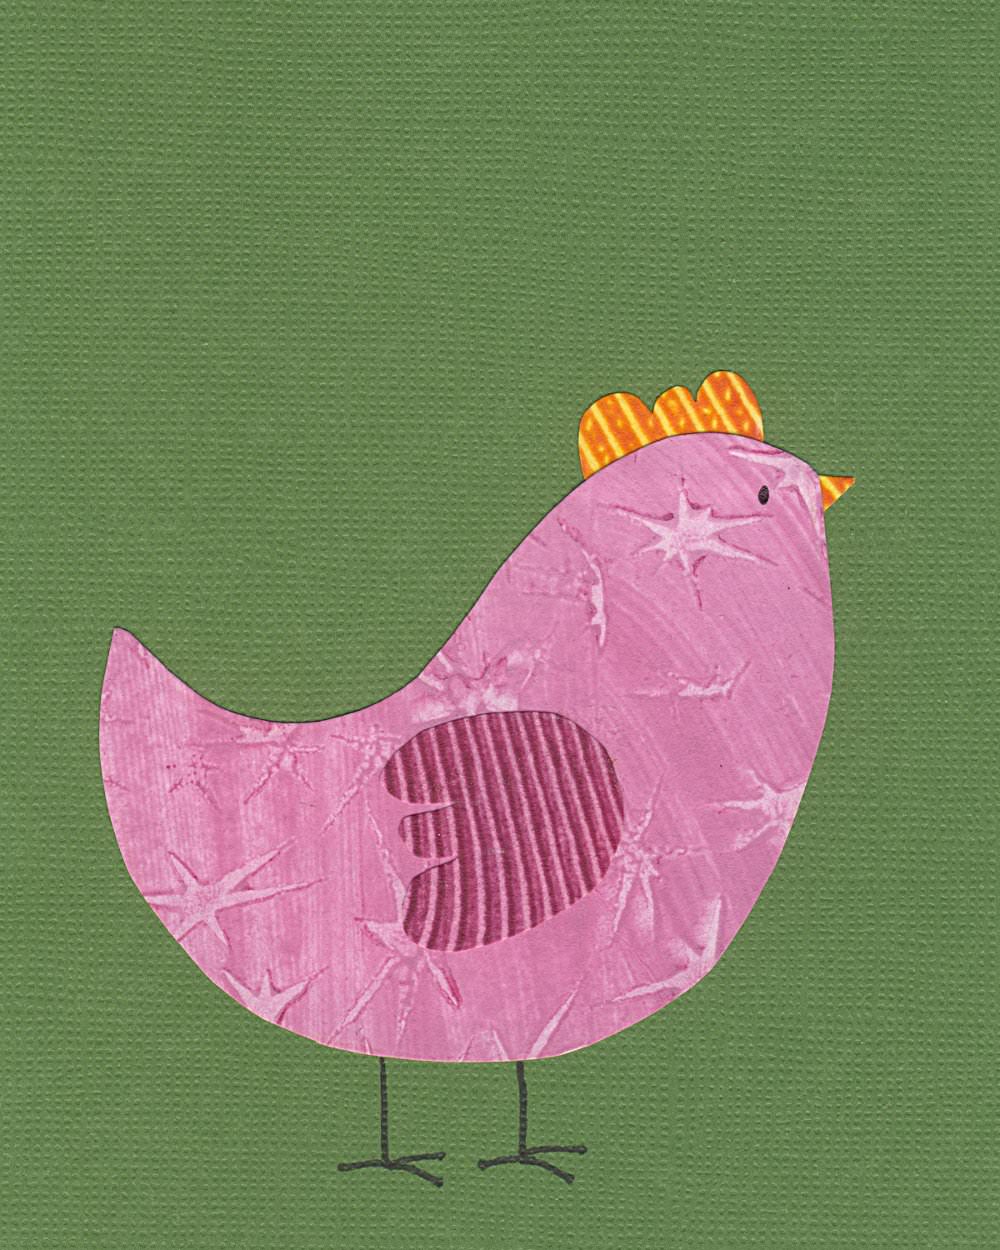
The U stitch stitch is worked exactly the same way as a lazy daisy, but instead of a closed petal, it’s an open U. It’s almost a fly stitch, but the holding stitch at the bottom of the U is tinier than it is in fly stitch.
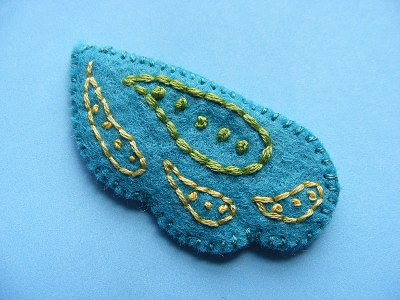
It’s really easy and makes great feathers, scales and petals. I used it for the wings on these hens.
See? Doesn’t the U stitch make perfect little wings?
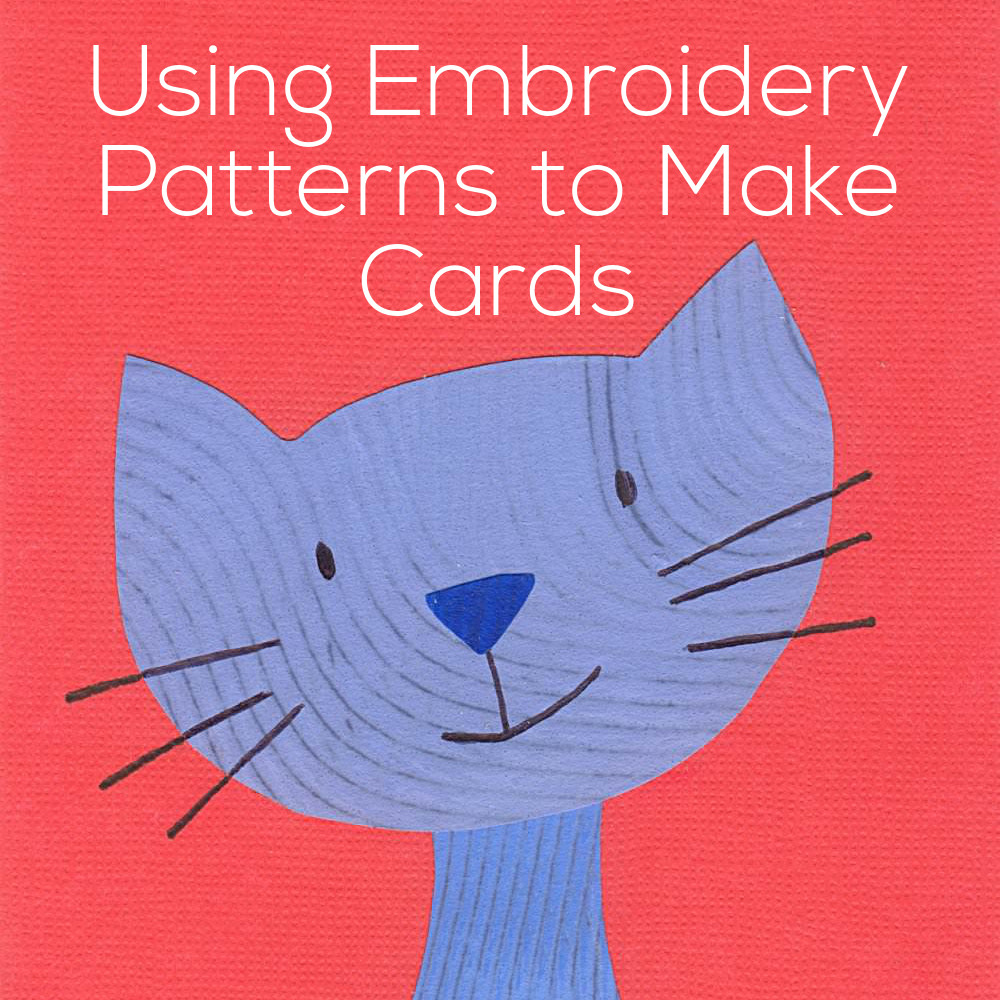
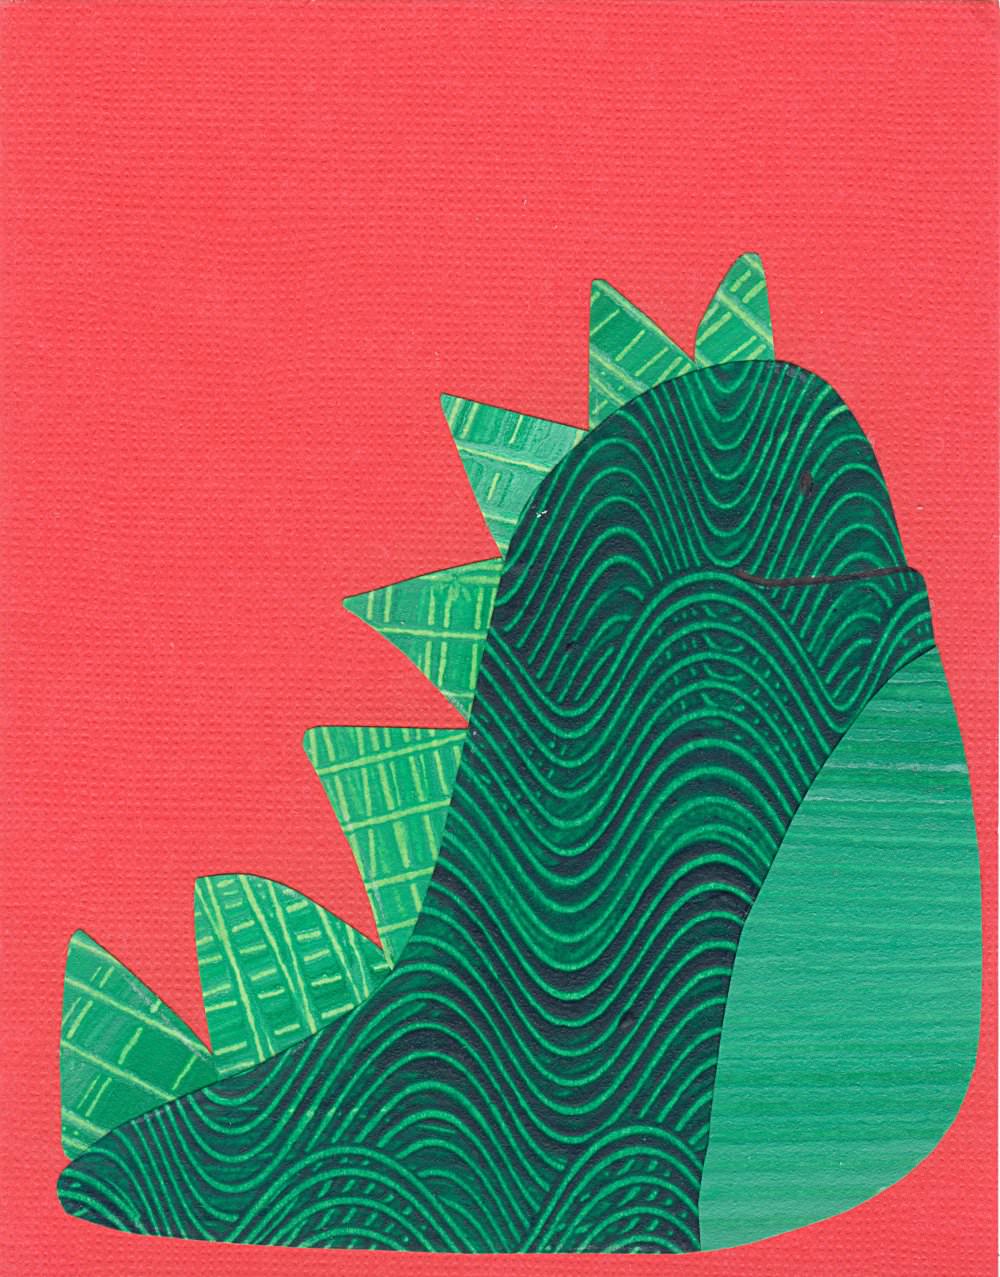
Jo’s been at summer camp for the last two weeks – hopefully loving every minute of it. 🙂 Last year I sent her cards made from my embroidery and applique patterns (see them here and here, and watch a video showing how to stitch on paper here) and this year she asked me to do the same thing. I thought I’d share them here with you so you could see a non-stitchy way to use embroidery patterns.
I use paper that I painted with simple patterns, but you could use magazines, the linings to security envelopes, giftwrap – any paper scraps really. You could also use the same patterns for applique – especially easy with fusible adhesive. Just enlarge them to whatever size you like!
That blue cat up there at the beginning is one of the cats in this embroidery set.
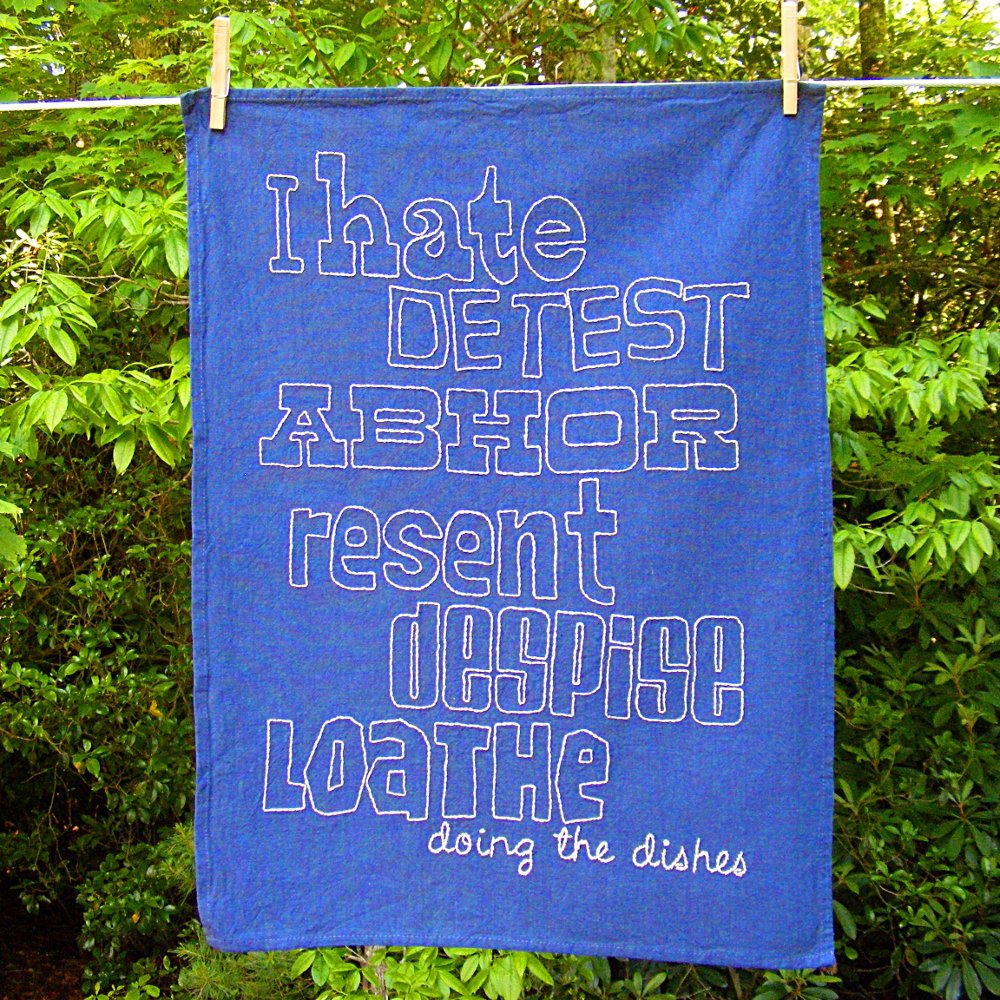
A few weeks ago I released a pattern called It’s a Dirty Job – all about how much I hate doing the dishes.
I used stem stitch for that little bit of script at the end – and I promised a how-to video soon. Well – here it is! How to stem stitch.
This is a really common outline stitch that I hardly ever use. I’m not sure why – it’s certainly very easy. It’s just that I always default to back stitch or split stitch. But if you need to outline tight curves – stem stitch is definitely the way to go. It’ll give you the smoothest curves around cursive letters or twisty vines.
Here are all my lessons for outline embroidery stitches.