Book Review: The Knitter’s Curiosity Cabinet

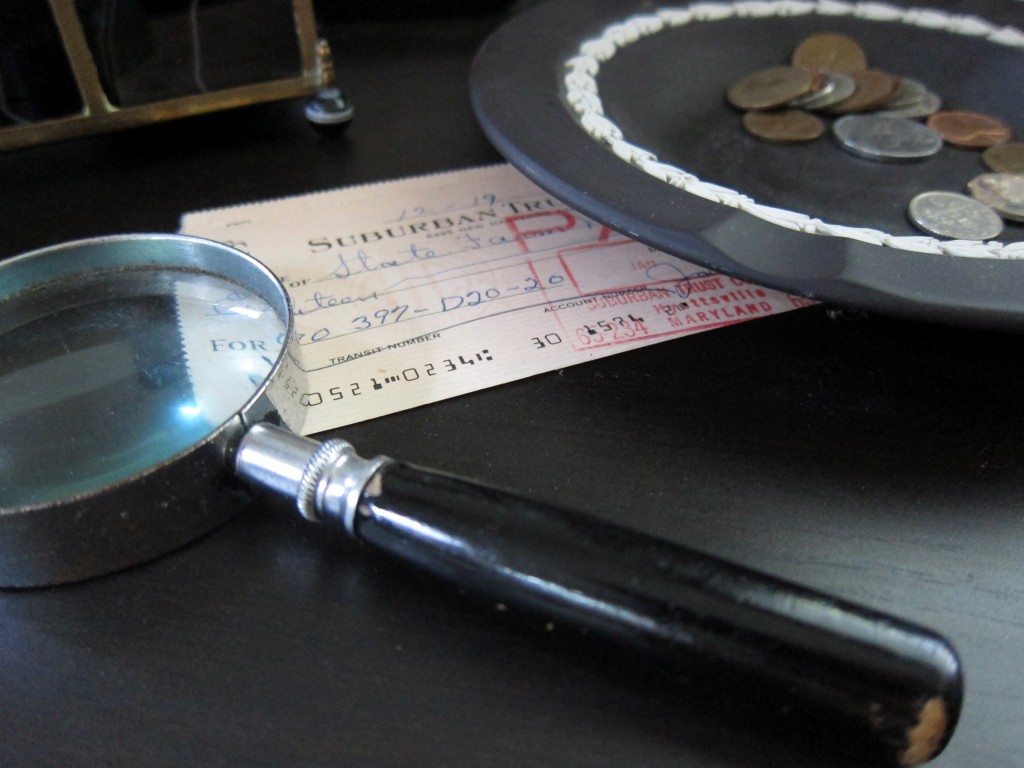
I’m no stranger to keeping mementos out around the house. They’re pieces that serve as decorations, but also contain little memories… organized in my favorite manner: by color. There’s my ‘Poppop corner’, which contains my Grandfather’s magnifying glass, a cancelled check that he wrote and a lovely Wedgewood dish of change that fits the color scheme:

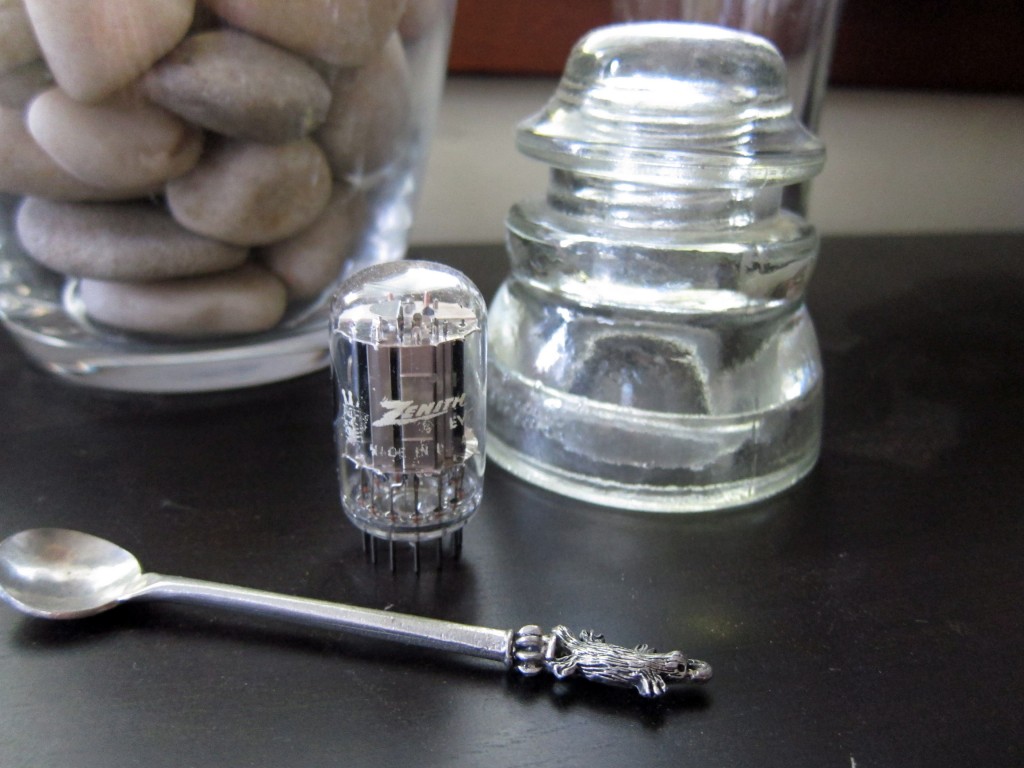
I have a collection of ‘clear glass & silver’: an old insulator cap, a weird thing-y from an old tv, a platypus spoon from Australia and some vases:

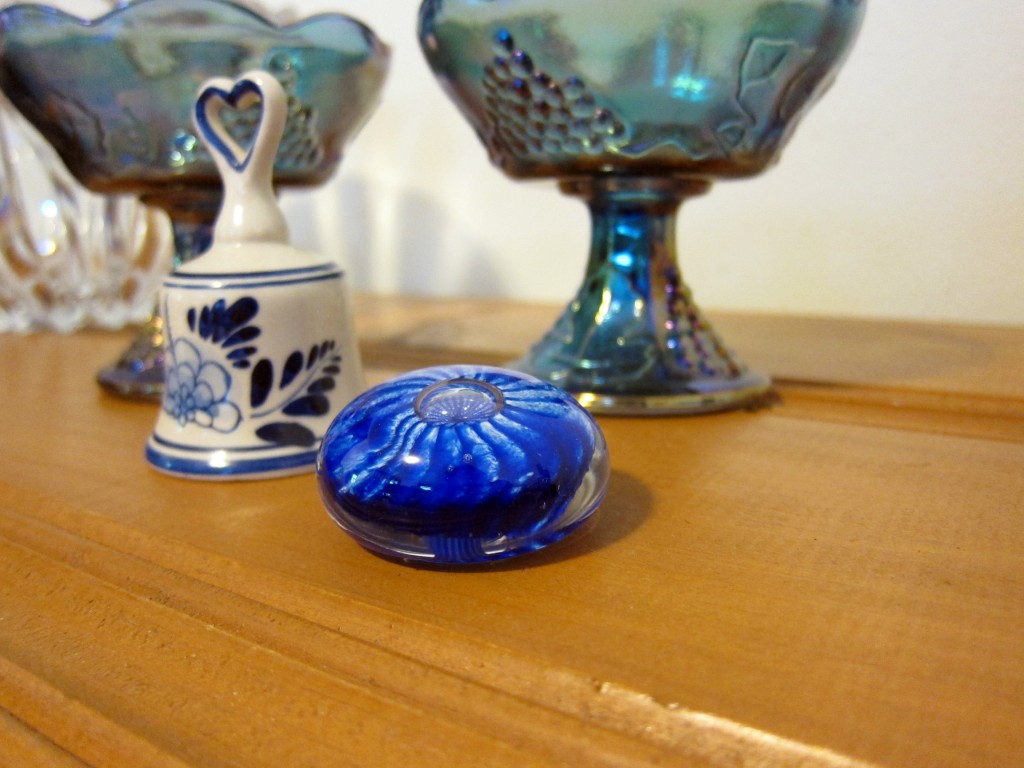
And of course, there’s some blues… a paperweight I got from a glass-blowing shop in Bermuda, a bell from Holland and some candlestick holders that were my Grandmother’s:

They’re things I look at every day: reminders of pleasant memories and conversation points when friends come to visit.

The Curiosity Cabinet

In contrast to my mementos out for all to see, Curiosity Cabinets (a tradition dating back to the 17th century) contained personal collections usually kept closed in a cupboard. These cabinets contained trinkets from exotic locales (like my Bermudan paperweight!) or perhaps an interesting sketch.

I didn’t know about curiosity cabinets until Hunter Hammersen’s delightful description of the concept in her book, The Knitter’s Curiosity Cabinet. Hunter has unlocked the secrets of these oft-mysterious collections and developed a series of knitting patterns based off of the botanical illustrations one could expect to find inside.
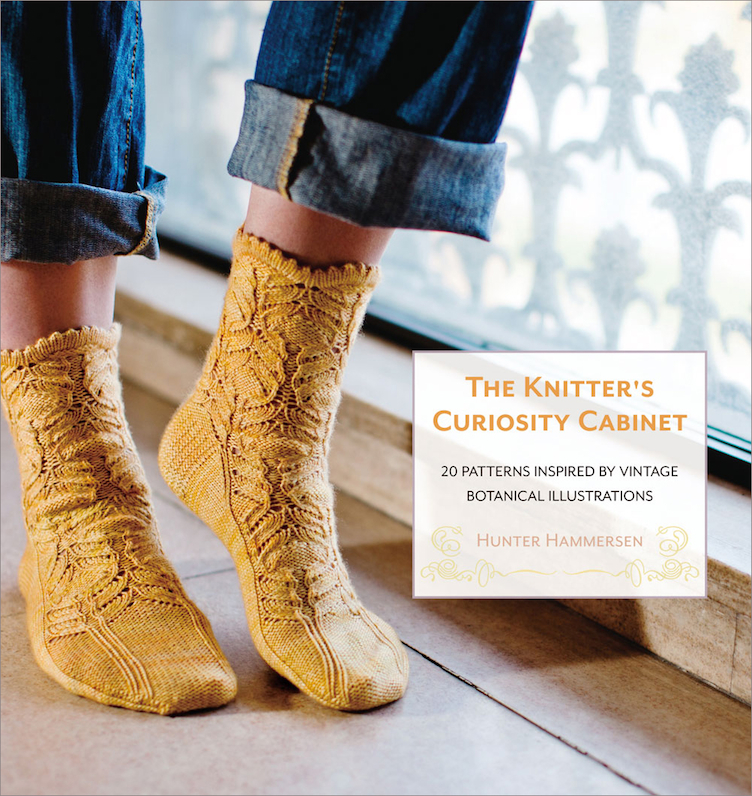
The book contains 10 botanical illustrations, each inspiring a sock and an accessory pattern. What transpires inside this book is part history lesson & part botany lesson, inside a book of knitting patterns teeming with Hunter’s passion for vintage botanical prints.

Interview with Hunter

Don’t you want to get to know the woman who’s clever mind created an entire book of knitting patterns… inspired from the vintage botanical illustrations found in curiosity cabinets? I do!

I love the idea of a Curiosity Cabinet! Tell us about a few items in yours.

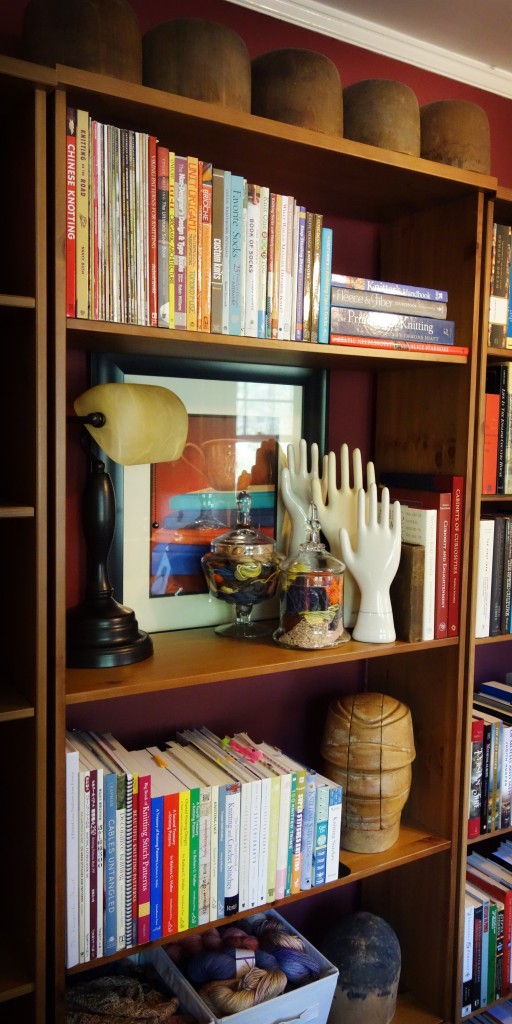
I have such conflicting feelings on this one. A big part of me is almost alarmingly minimalist. I have a habit of going around my house and getting rid of stuff I don’t need whenever I’m in a bad mood. The vast majority of the house is more or less totally free of little bits of stuff. But, I also have magpie tendencies. I am forever picking up all sorts of wee treasures. I indulge this tendency to collect in my office. I’ve got one bookcase in particular that we refer to as the home for wayward knitting props. I have a whole array of old hat forms and old glove forms. They’re totally practical (by far the best way to block and display hats and cuffs), but I love them just as art objects. I’ve more or less convinced myself I have enough hat forms, but I’m still officially on the look out for more of the hands.

I can totally relate! If it’s a display item that has a function… then it’s okay, right?
This book contains a lot of sock patterns, so I have to know: what’s your favorite way to knit socks? Dpns? Two circs? Magic Loop?

DPNs all the way! I’ve tried both (Cat Bordhi herself snatched my DPNs away, put circulars in my hands, and supervised the process), but I just like the feel of DPNs better. The circulars always seem too small and flimsy. Besides, all those sharp points and flailing sticks look suitably impressive to non-knitters!

Wow! Dpns despite explicit instruction from a sock-goddess… you’re hard-core! What characteristics do you look for in a good sock yarn?

Tight twist! It makes all the difference. Also, I’m a big fan of nylon in sock yarn. It dramatically extends the life, and I don’t find that it compromises the look or the feel. If I’m making socks, I more or less insist on it (though I will occasionally hold a strand of woolly nylon along with the yarn for the sole of the foot if I’m overcome by the beauty of a slightly unsuitable yarn).
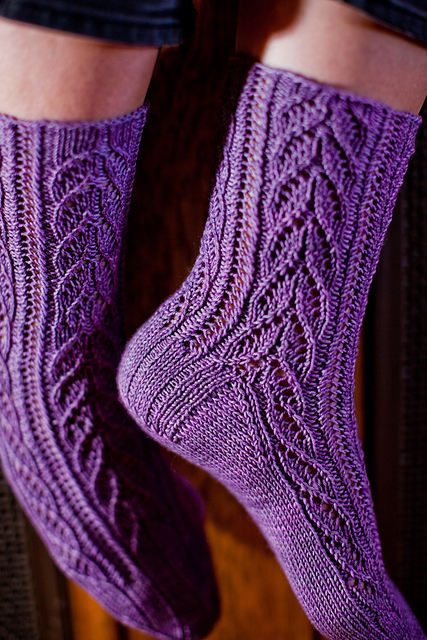
I also like what I tend to call fat sock yarns. Something with a bit more heft to it (I have big feet and I’m impatient…fat yarn helps the socks go faster). The secret to long lasting socks is making a tight fabric. That’s easier to do (for me at least) if I use a fatter yarn. Some of my favorites are Nichole by Schaefer, Casbah by Handmaiden, and Everlasting by Dream in Color (that one doesn’t have nylon, but it’s so yummy it’s worth it).

Describe a bit about the process of designing lace patterns inspired by botanical designs. Did you draw your own sketches? Or just get straight to knitting/charting?

It’s sort of a hard process to describe. It usually starts with doodling on the botanical print (well…on a photo copy of it…not on the print itself). That lets me see which parts of the print I want to play with. After that, there’s a long period of playing with graph paper (sometimes with the aid of a handy collection of stitch dictionaries) to try and capture those aspects of the print in stitches. The best of the graph paper doodles eventually get worked up in yarn.
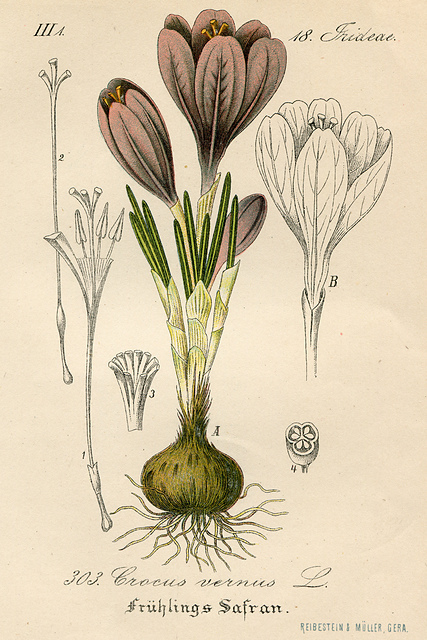
That leaves me with some neat stitch patterns, but that’s only half the project. Then you have to figure out what to do with them…how to take the stitches and turn them into knitted objects. That means a bit of math and quite a bit of planning. Somewhere along the way it’s also important to pick out yarns and swatch the stitch with the actual yarn you plan to use for the piece itself (don’t ever ever ever skip this step).

The whole thing happens in sort of a non-linear fashion too. It’s not like you can plow through each print in turn from start to finish. There’s a fair bit of scattershot experimentation and switching from one project to the next with wild abandon. In the end it all gets done though!

Do you have any advice for knitters who might be new to charts? Tell us a bit about why you used charts (over written directions).

I am a huge proponent of charts. They just make so much more sense than written directions. I know they can seem a tiny bit intimidating the first time you see them, but I promise they’re worth getting used to. I really think learning to use charts is the trick to becoming a comfortable and confident knitter.

Remember, charts are stylized pictures of what your knitting will look like. So you can look at a chart and see…actually see…’oh hey, look, this line of decreases goes like so and it’s a mirror image of that line of decreases over there.’ That means you’re less likely to make mistakes in your knitting, because you know ahead of time what sort of shapes and lines you should be expecting. It also makes it easy to get into that lovely zen state where you’ve really understood the stitch pattern and you can just sit back and knit, rather than struggling to read a list of abbreviations. You totally owe it to yourself to try them, you’ll be glad you did!

Tell me a bit about your workspace!

Alrighty…for you, I’ll vacuum and dust! My office is a long, narrow room, painted a lovely rich red, and filled to the brim with books and yarn. The red part means it’s awfully hard to take a decent picture, but maybe this will do. What you see there is the view from my desk (if you, you know, stand up and peer over the computer monitor).
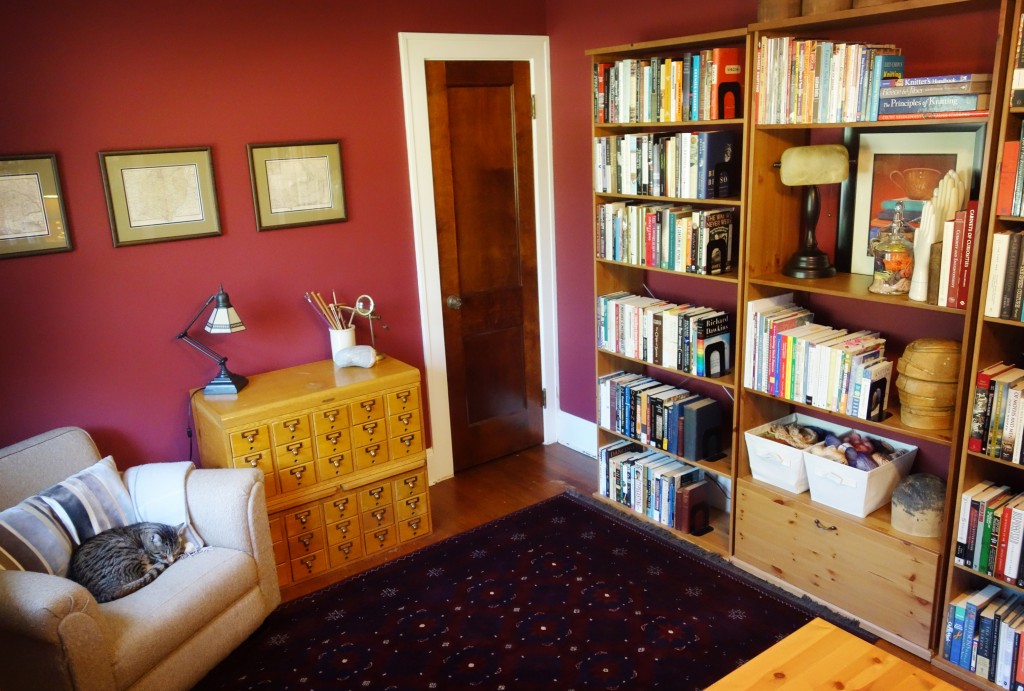
I wasn’t kidding about the books part…there are a few more bookcases behind the desk that didn’t quite fit into the picture. Acquiring books is something of a family curse. Not one of us can leave a bookstore unscathed.
Given these tendencies, I think the card catalog makes perfect sense. It’s one of my favorite things in the whole house. It holds my sock yarn. Well…most of my sock yarn. It’s actually quite well suited to the job. Each drawer holds 2 big skeins. I may just possibly have been known to organize it in rainbow order when I had the flu and needed to pet yarn but was too sick to do anything more useful. The closet holds the rest of the stash (it is not nearly so tidy) and other crafting supplies like my poor neglected sewing machine.

Then, of course, there is the all important comfy chair. If I’m in the graph paper stage of working on new patterns, that’s where you’ll find me, (colored pencils in hand and cup of tea by my side). It’s where I do a fair bit of my swatching too, hence the crock of various needles at the ready. Barry the Wonder Cat has graciously offered to keep my seat warm for me while I’m not there.

What’s currently on your knitting needles?

Will you think I’m terribly boring if I confess that I’ve only got one lone pair of socks going at the moment? And that they’ve been waiting for the toe (of the second sock) for the better part of a week now? Shameful I know. In my defense, I did just finish up a project for the next book! It’s a lovely smooshy purple thing, that must (alas) remain secret for a bit longer yet. I’m starting to feel a hat-knitting urge though. I’ve got some yarn on hand that is destined to become a hat for my husband, and it’s been whispering to me for the last few days.

That’s not boring at all!

Thanks so much for coming over and having a chat, Hunter!

Find Hunter and the book!

Get the book here!
Stranding yarn in color changes in amigurumi, part 2

Want to learn how to make adorable crocheted stuffed animals with an easy online workshop – totally free?

Sign up for Let’s Make Amigurumi here. You’ll learn how to get started, the tools and supplies you’ll need, and how to make an easy amigurumi from start to finish using simple crochet stitches.

It’s a fun, inexpensive, and totally portable craft. You can do it!


Before I start chatting about today’s tip, I want to thank everyone for making the FreshStitches Celebration Sale such a success! Deals were had far and wide… and the most popular pattern snagged was… you guessed it! The Choose Your Own Dragon Adventure pattern! Looks like we might have some more folks joining in on the CAL… yay!

Okay, back to the business at hand. On Tuesday, I talked about how to strand your yarn as you changed colors for long color changes (like for the dragon’s tummy).

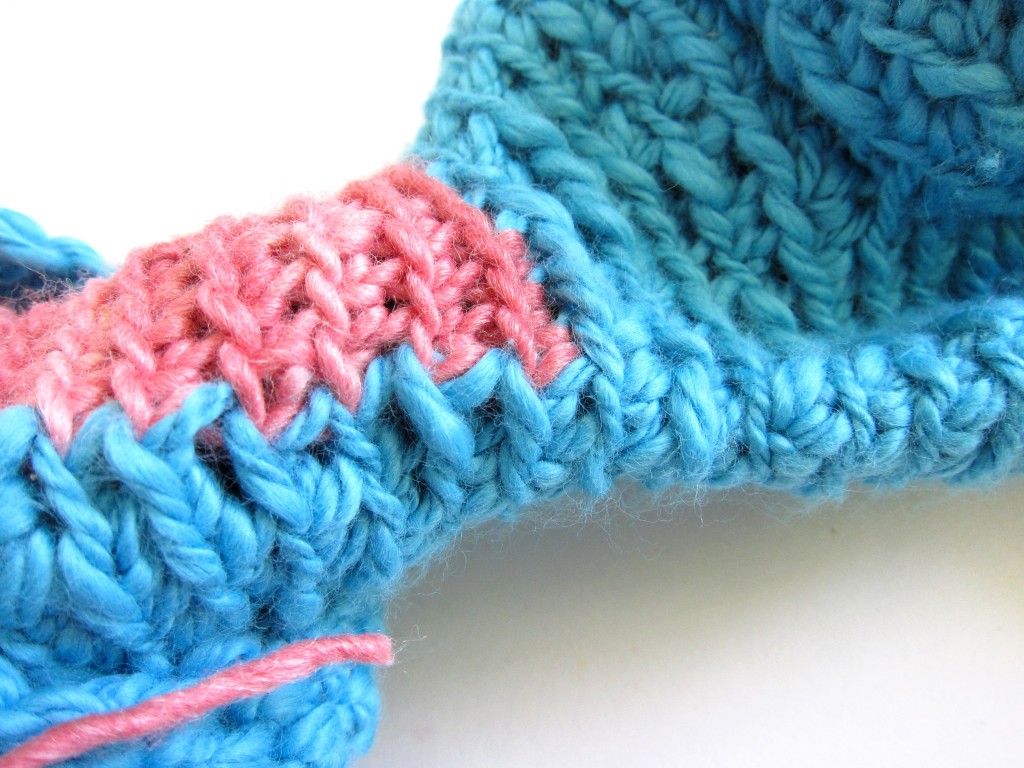
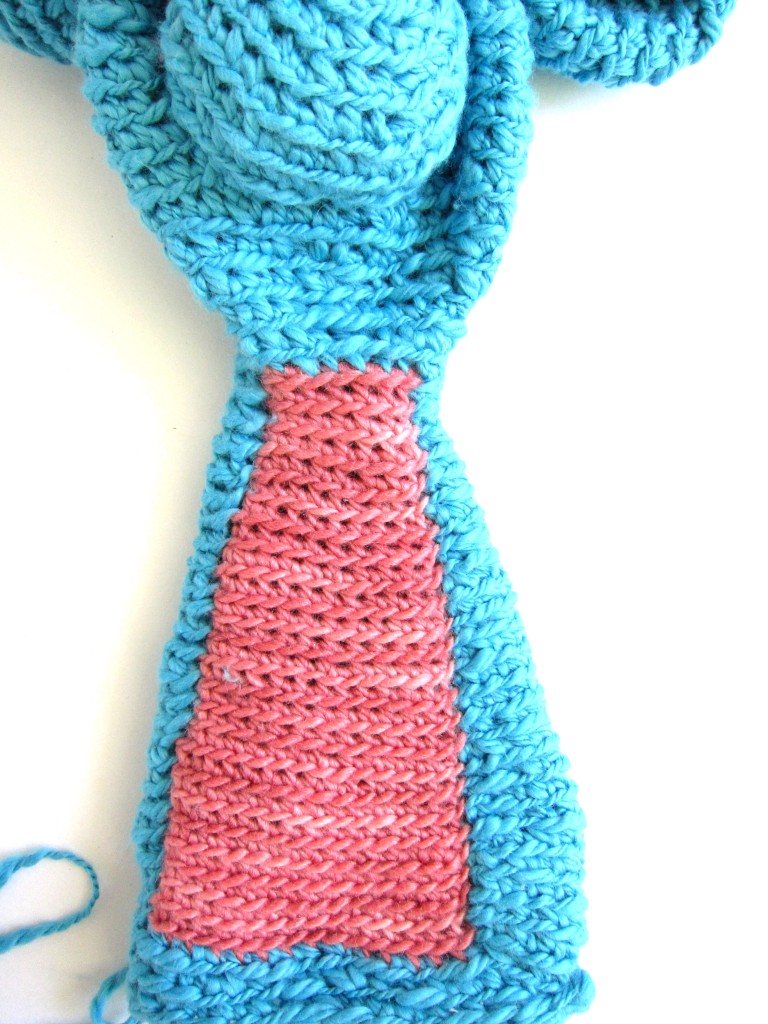
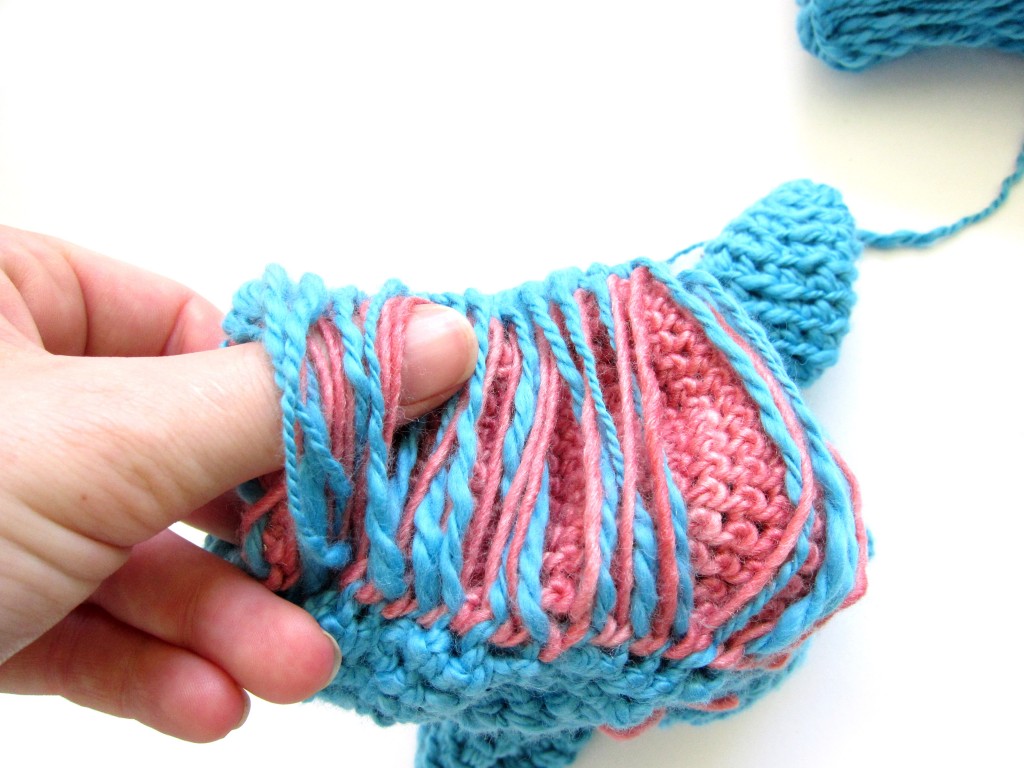
Have you done that, yet? Good! Now, we can’t just leave it like that for two reasons. One, the stranding prevents the fabric on the tummy from stretching when you stuff the body, so you won’t get a nice, plush look. Two, the looseness of the stranding has probably left you with some goosey looking color changes:

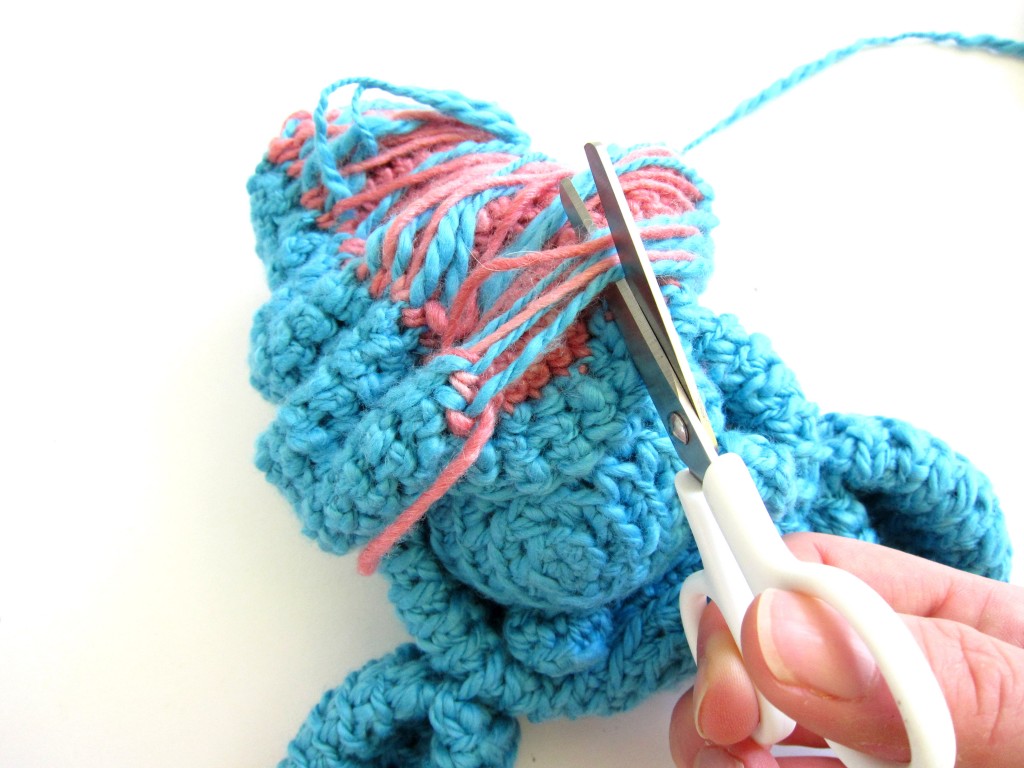
Look familiar? We’d like those to look a little neater. So, what we’re going to do is cut the strands down the center:

Now you can see why it was important to make those strands at least 3″ long, right?

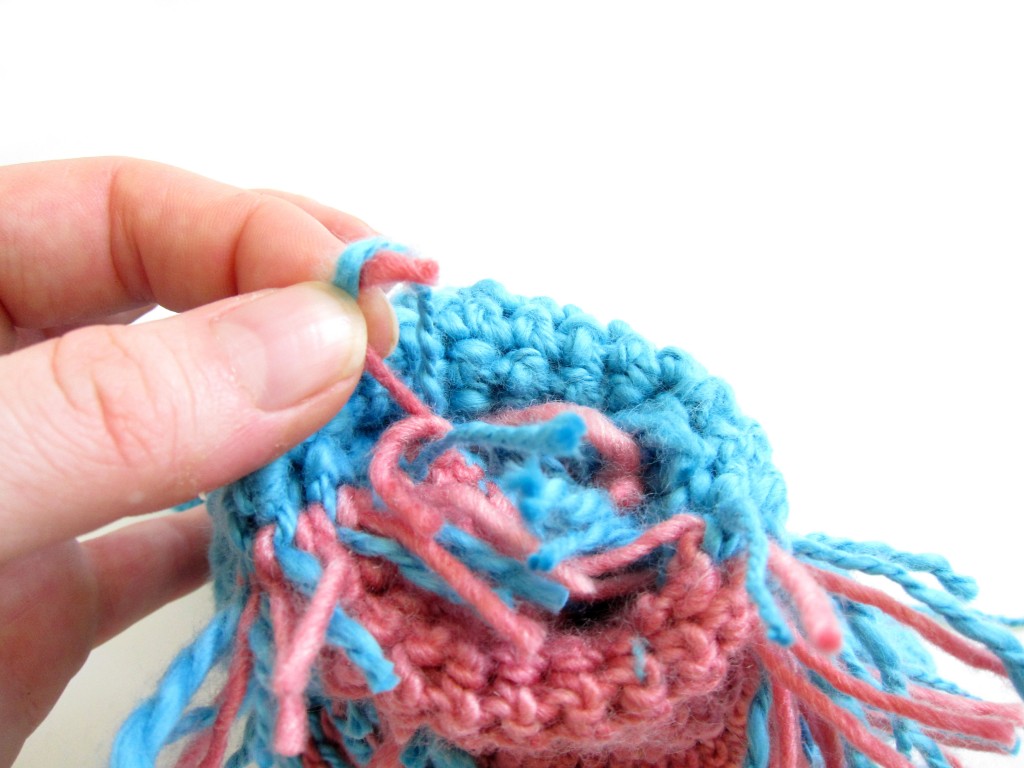
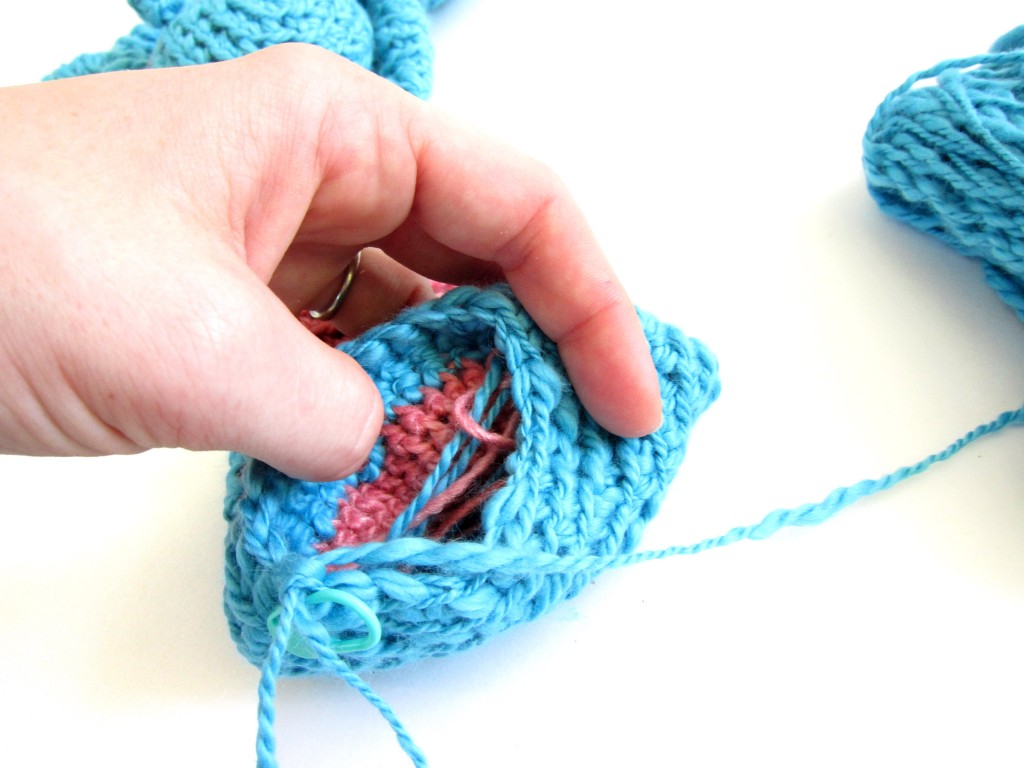
For the next step, we’re going to tie together (using a simple square not) each color-change pair: one MC tail and one CC tail:

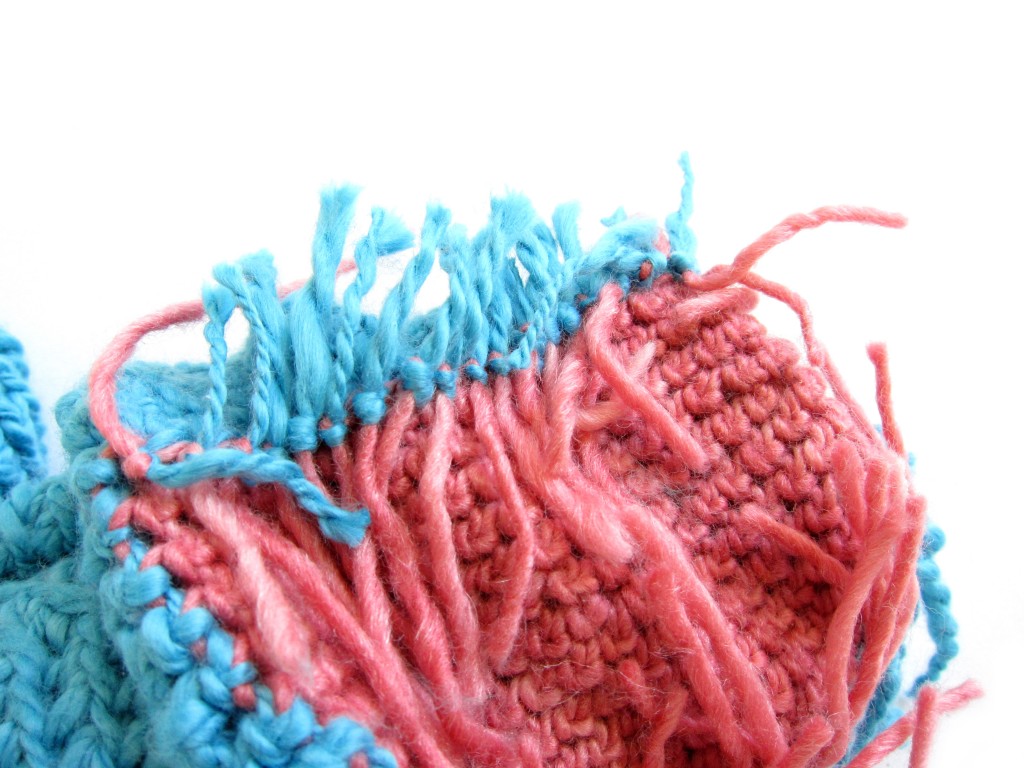
When you’ve tied off all of the tails, the inside of your dragon will look like this:

And the outside will be beautiful and tidy!

Yay!

Happy stitching!

Changing colors and stranding yarn in crochet colorwork

Crocheting the dragon’s tummy

This dragon sports a differently colored tummy, which may seem hard, but is actually quite easy once I show you some helpful tips. There are two important pieces to getting a nice looking tummy:

  1. Changing colors cleanly so that you have a nice edge along the sides of the tummy.
  2. Managing the not-in-use color of yarn so that you don’t end up with a mess.

I’ll show you how to do both today, so that you can finish crocheting your dragon’s body! On Thursday, I’ll show you a third part, how to snip and knot the ends so that you can stuff your dragon nicely.

Do you want to know how to change colors?

Of course you do!

So, I made this little video of me doing the first color change: (click on the square icon in the lower right corner of the video to view it in full screen)

Not so hard, is it?

How to carry your yarn

There are lots of ways to manage your yarn when you’re doing color changes, but the technique I’m going to recommend is stranding your yarn, and then cutting and knotting it. The advantage to this technique is that it’s comfortable for crocheting (i.e., you aren’t interrupted by cutting the yarn twice every round) and it achieves the desired look.

If you’ve crocheted Nelson the owl, then you’re probably familiar with the technique. But, I’m going to review it, here… because the dragon adds in some complicating factors!

When you get to a color change, you want to carry the unused color of yarn along the back. But, since we’re going to cut this yarn later on… you need to make sure you have at least 3″ carried along the back. See how loose my pink strand is?

If you pull the yarn tightly, you won’t have enough yarn to cut and tie the ends, later!

So, keep doing this (carrying the unused color of yarn across the back of the work) every color change. You’ll start to get lots of strands:

By the end… you’ll have a lot!

In this post I show you how to snip & tie off these ends – including why you don’t want to just leave them as is!

Frequently asked questions

My stitches on the edges look very loose and icky. What did I do wrong?

Nothing went wrong! That’s normal. It’s just because we’re doing the strands so loosely… we’ll clean them all up tomorrow!

The dragon’s tummy looks crooked, what gives?

When you work in the round, the crochet stitches always bias a little bit to the right (if you’re right-handed). This actually happens all the time, but you don’t really notice until there’s a color change to show it off. There are some ways to fix it, but honestly, they’re a bit of a pain. I like to think of the curving tummy as a feature… it gives the dragon some sassy character!

This color change thing is really annoying.

That’s not a question! Anyway, yeah, I know. There’s no shame in crocheting the dragon’s body all in one color, and skipping the color changes. In fact, I’ve already spotted some finished dragons in our Ravelry group that did just that… and they look fantastic! Your crochet shouldn’t annoy you – do what works for you!

How to attach a folded ear to amigurumi

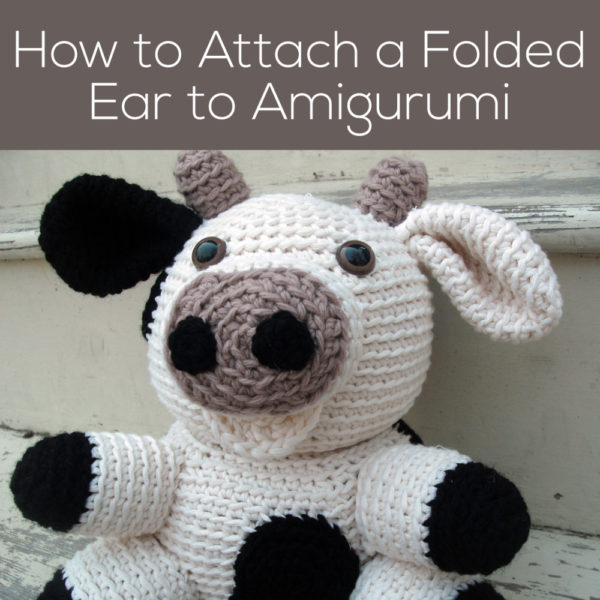
How to Attach a Folded Ear to Amigurumi - a tutorial from FreshStitches and Shiny Happy World

Today I’m going to show you how to attach a folded ear when making amigurumi. There are two kinds of folds you’ll see a lot.

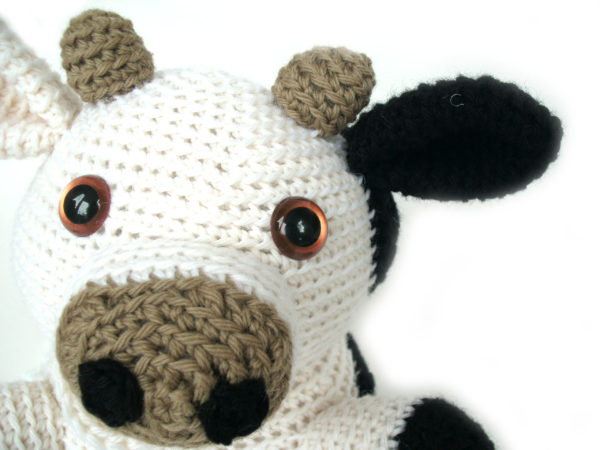
You can fold the ear in half, like you see here on Jackie the cow. . .

close-up shot of the face of a crocheted cow, made with the Jackie the Cow pattern

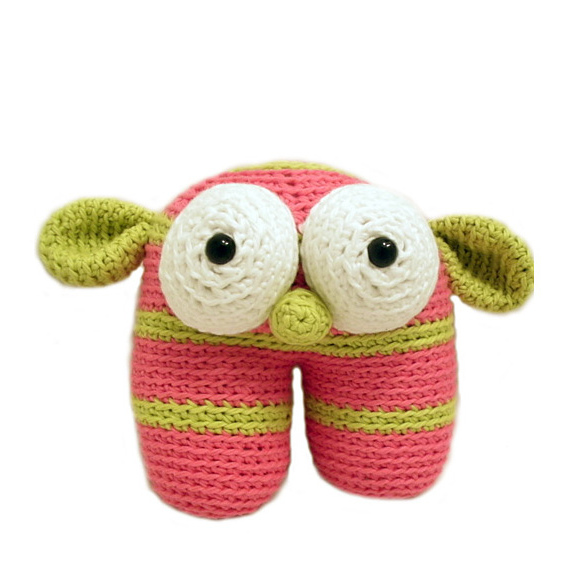
. . . and also here on Roosevelt the Monster.

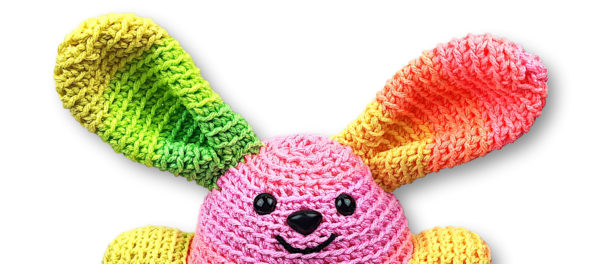
I also really like ears that fold from the side into the center. You can see both sides folded to the center here on Boone Bunny. . .

. . . and also just one side folded in to the center on this Maxwell Monster.

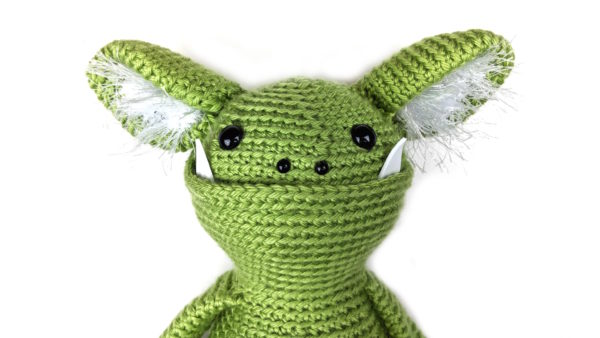
green crocheted monster head with hairy ears

However you decide to do it, folded ear is a great technique. It looks complicated, but it’s all about the attaching.

Okay, let’s assume that you’ve crocheted the ear as instructed.

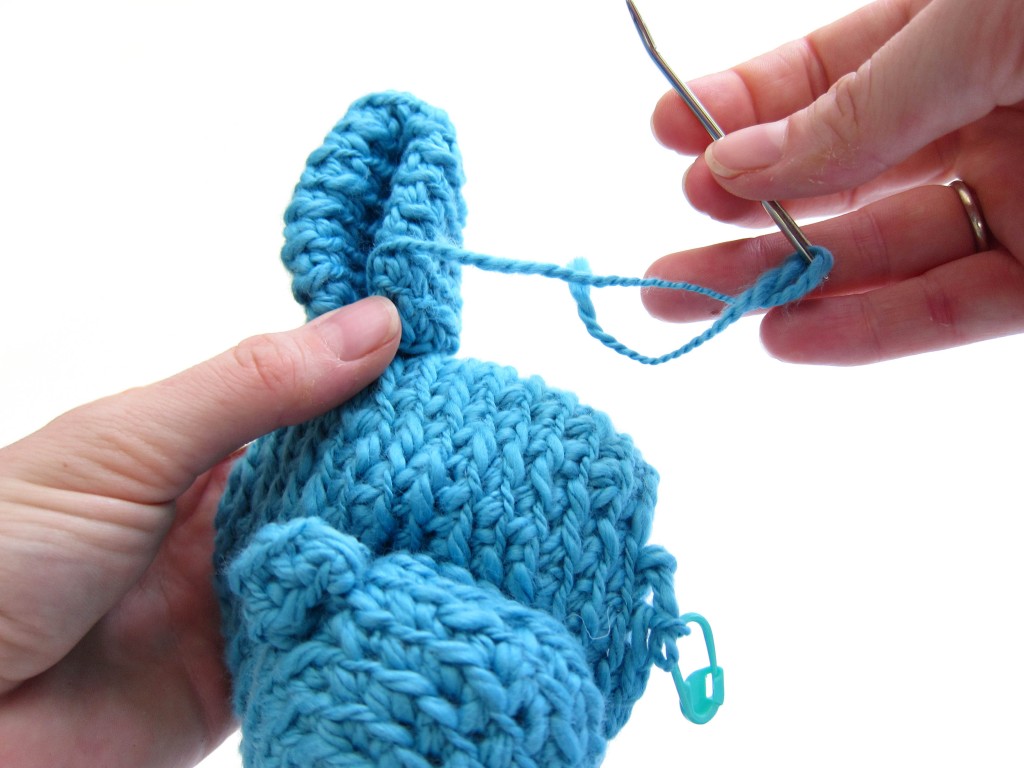
Whipstitch the opening of the ear closed

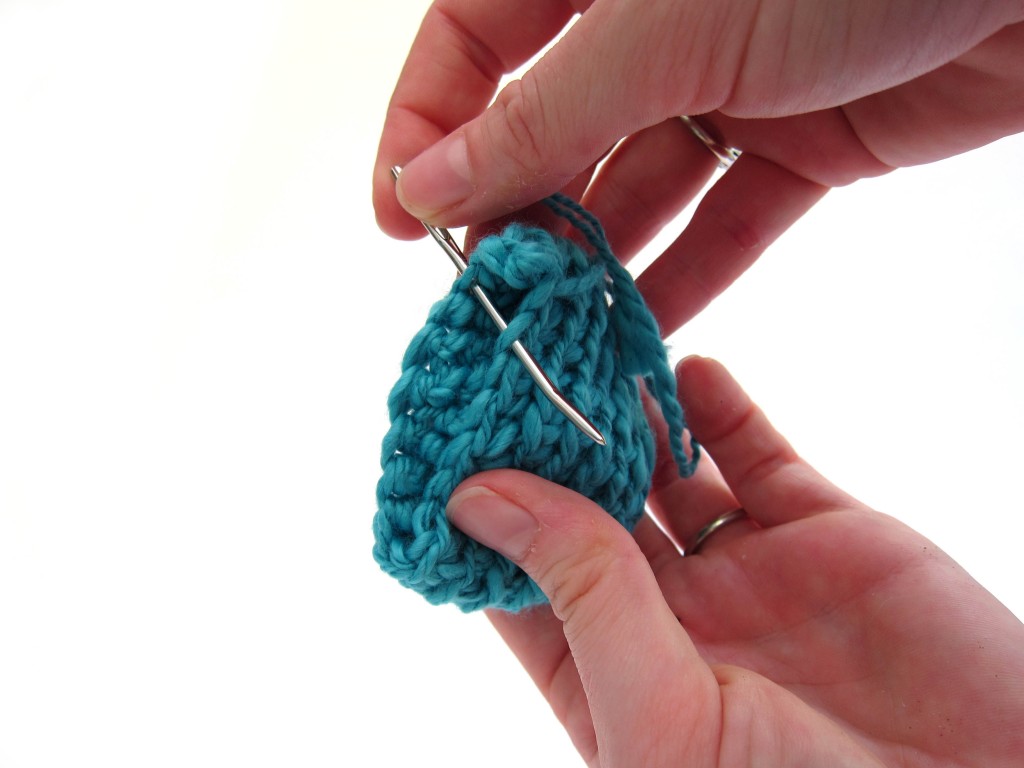
Press the opening of the ear flat, and using the long tail and a tapestry needle, whipstitch the opening closed. I stitch through one stitch on the top of the opening, then one stitch on the bottom of the opening, until I’m the whole way across.

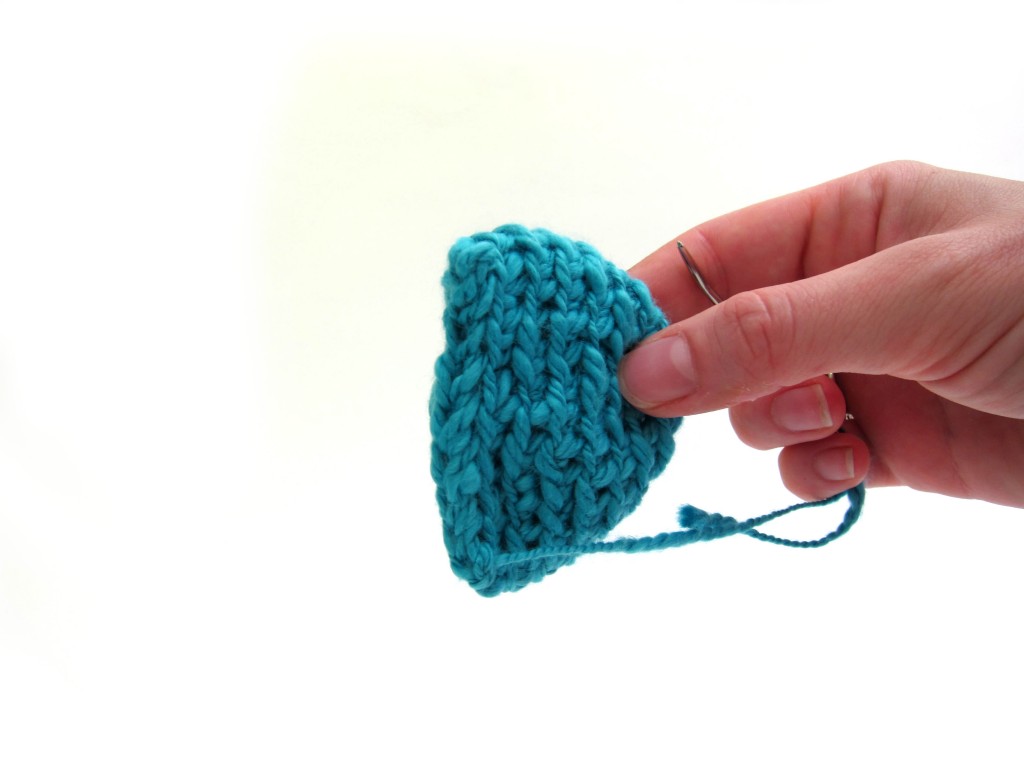
It’ll look like this when you’re finished.

Don’t cut the tail… you’re still going to use it!

Fold the ear

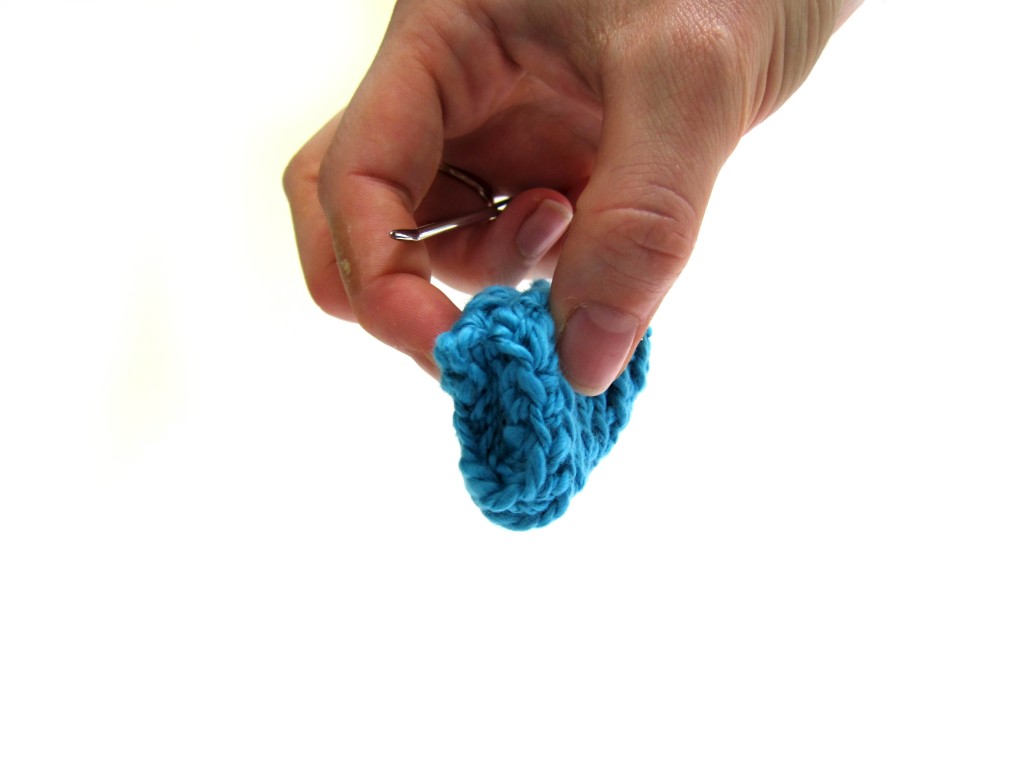
Just like it sounds! Fold the ear however the pattern, along the edge you just whipstitched. This is an ear from the Mix & Match Dragon pattern and I’m folding it in half.

Remember that tail you have? It should be on one corner of the ear. I like to run the tail (with tapestry needle) through the other corner, so that the fold stays closed.

Attach the ear to the head

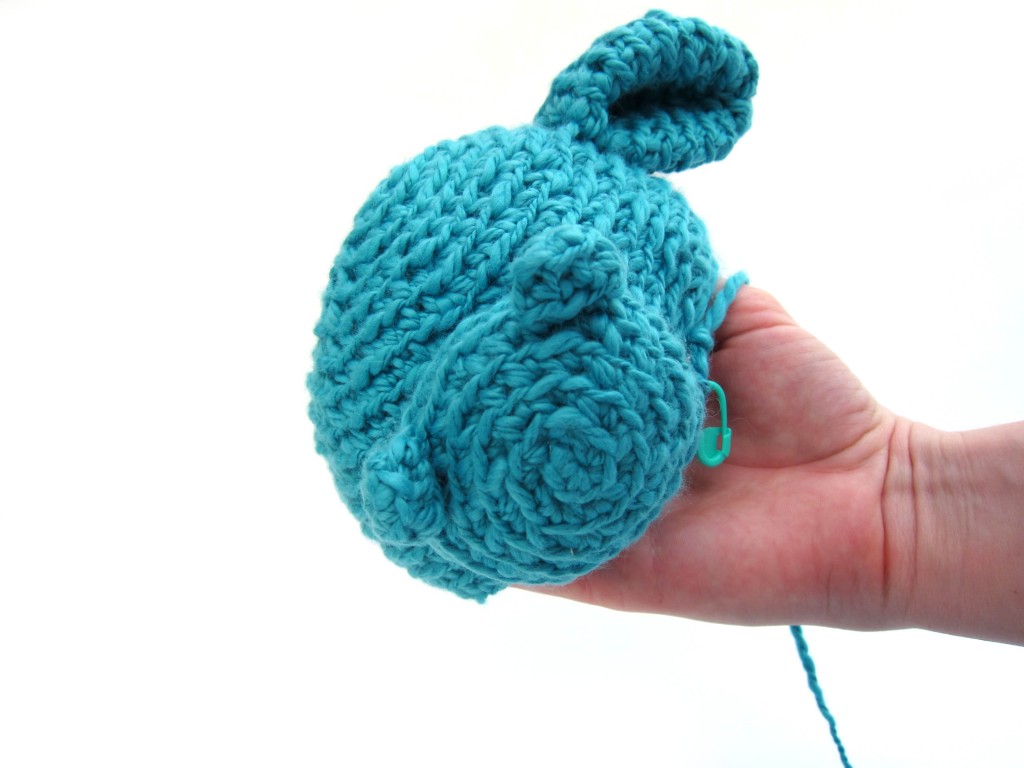
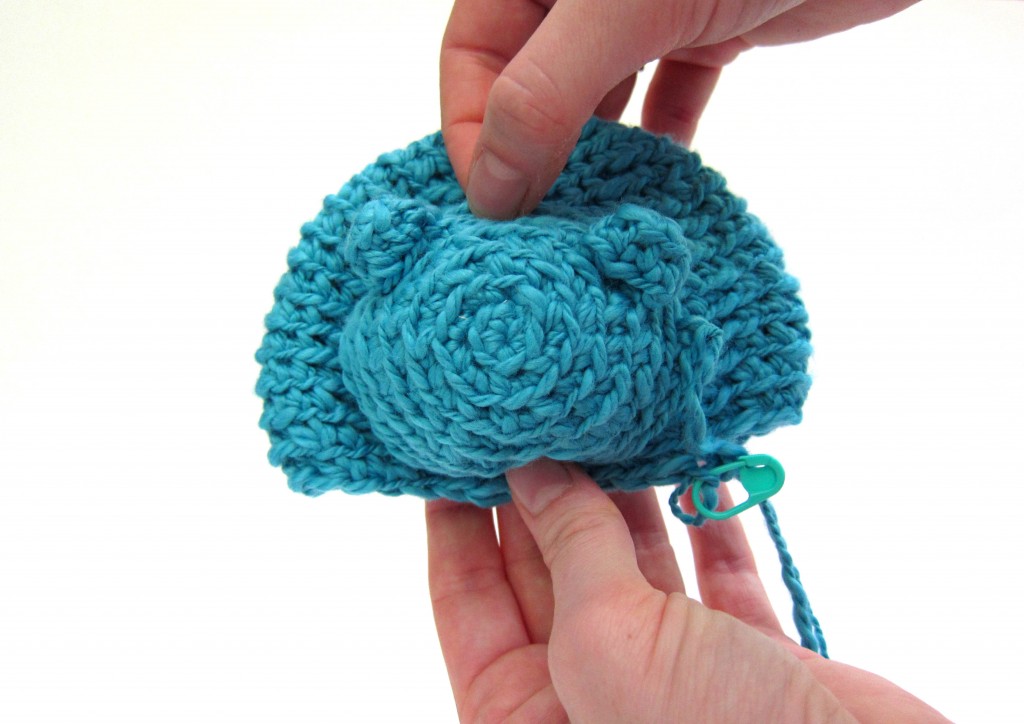
Now, just attach the folded ear to the head using whipstitches all around. Take one stitch in the ear, then one in the head. Repeat, working your way all the way around the base of the ear.

If the piece seems to get away from you, I recommend using locking stitch markers to hold it in place while attaching.

Once the ear is attached, tie a knot, and you’re done!
This method makes a fairly floppy ear. If you want an ear that stands up more, take a look at this tutorial showing how to attach a folded ear to two rounds of the head.

Attaching an ear that’s folded may look complicated, but it’s just a few simple steps, and gives a really cute result!
Here are handy links to all the posts about attaching parts. . .

Return to the main table of contents for Let’s Learn to Crochet Amigurumi.

Move on to the lessons about faces and details.

Happy stitching!

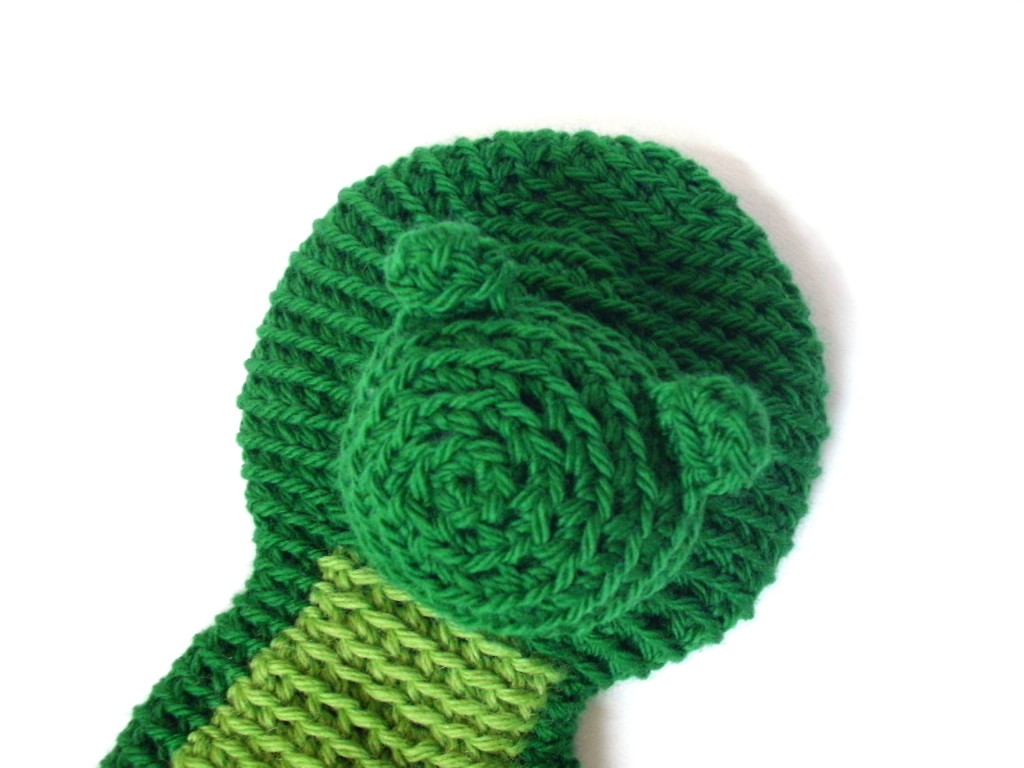
How to position the snout on your dragon

One of the trickiest parts of crocheting this dragon is positioning his snout so that it lines up with the color changes on his tummy… since there’s a temptation to attach the snout before you’ve crocheted the color changes on the body. How do you know where to put it?

I have three possible solutions… and I’ll tell them all to you, since different ones might work for different people.

Option 1: Attach the snout after crocheting the color changes on the body

This is my favorite option. If you look closely at the progress photos in the pattern, you might be able to spot that this is what I did when crocheting the original sample:

The downside to this technique is that you’ll need to squeeze your hand into the tiny neck. However, you only need to get inside the head for tying the knot to secure the snout… since the rest of the attaching is done from the outside.

The advantage of this method is that you’ll know exactly where to position the snout, since you’ll be able to see the color changes. Also, I find the crocheting of the body easier without lots of heavy head features attached… but that might just be me!

Option 2: Visualize the color changes

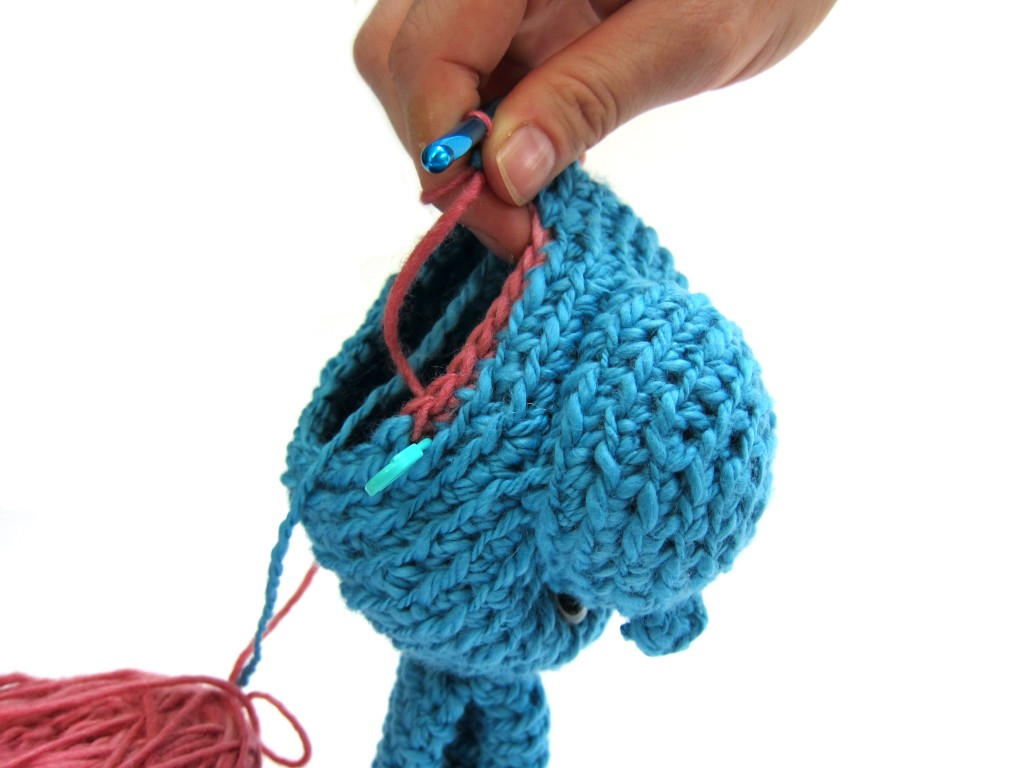
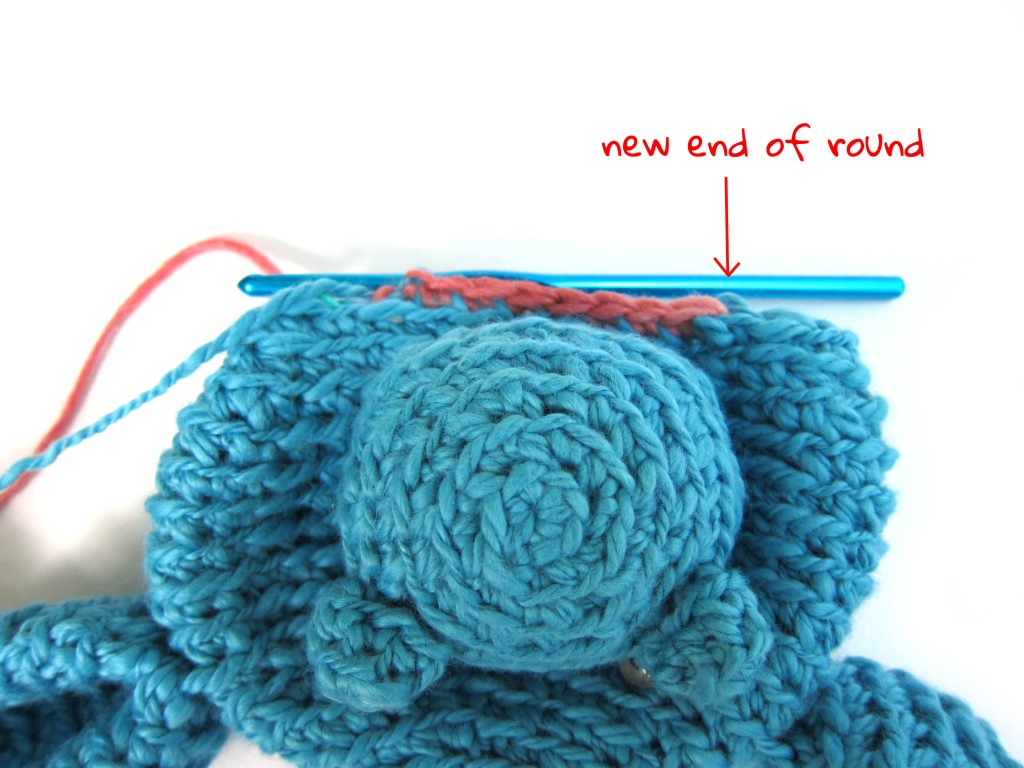
I’ll be honest: this blog post was going to be about how to use your locking stitch marker to mark the end of round and visualize where the color changes would be so that you can attach your snout properly.

I took all of the nice step-by-step photos…

And then I realized that I visualized the color changes as being on the wrong side! Gah!

So, here’s the theory: the color changes for the tummy happen on the first 1/3 of the stitches after the end of round marker. If you’re good at spatial orientation, then it’ll be a snap for you to look at the stitch marker and picture where the snout should go.

But if you’re not… well, this option is going to be frustrating. Move onto option 3 (which is what I ended up doing to fix the photo-shoot!)

Option 3: Move the end of round

For the spatially-challenged (like me), this option is by far the easiest!

Attach all of the features to the head. Your end of round marker (the point where your round begins/ends) could be anywhere… it doesn’t matter. You’re going to move it!

Once you have the head attached, continue crocheting until you get to the round with the color changes. Instead of changing colors where you are (which may be at the back of his body), keep crocheting with the main color until you’re up to the snout.

Move your marker, and that’s you’re new start of the round! Continue following the pattern like nothing happened. In the grand scheme of things, the extra 10 or so stitches you’ve added won’t matter… and your tummy will be in the right place!

Do what works for you!

One of these options will work for you (sorry, I can’t tell you which one will be your favorite)! Hopefully, attaching the snout in the right place (after reading this post) will be no problem!

Choosing color combinations

One of the most exciting parts of starting a project is picking out your yarn colors, right? Even though the pattern shows the item made up in a sample color (or maybe even a range of sample colors), you don’t have to follow the pattern!

Today, we’ll pick out some amazing colors for our dragons as we crochet-a-long!

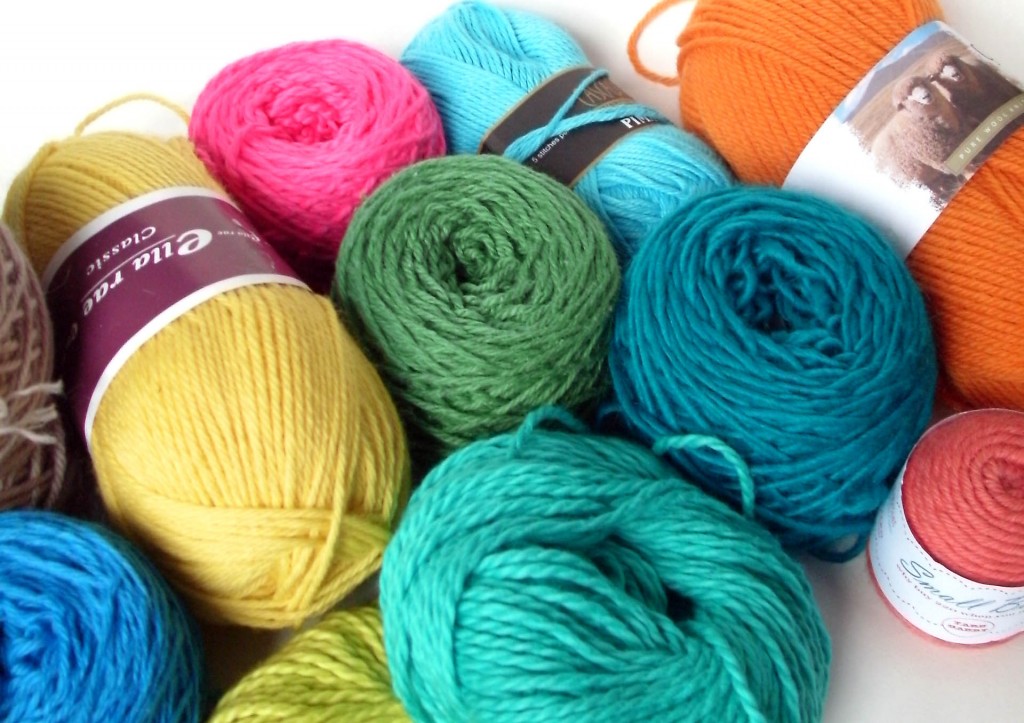
Raid your stash

Selecting yarns for a project is a balancing act… you want to come up with a great color combination, but also use up yarns that you have in your stash, if you can!

If using up yarn that you already have is one of your goals for this project… then you’re going to have to drag your yarn out and look at it! If you’ve cataloged your yarn using Ravelry’s Stash Feature, then you can look at all of your yarn virtually, and not make a big mess on your living room floor.

Pull together any yarns that are the weight/fiber that you want to use. Eliminate any balls of yarn that aren’t enough yardage for the project (read this post on how to determine yardage by weighing the ball) and then you’re down to your options!

Pick a great color combo

Now that you know what you’re working with, you can plan your colors! The Choose Your Own Adventure pattern that we’re using only calls for 2 colors… but you don’t need to follow those rules! Do you want different colored wings? (or, do you want to use up a tiny ball of yarn?) Then go for it!

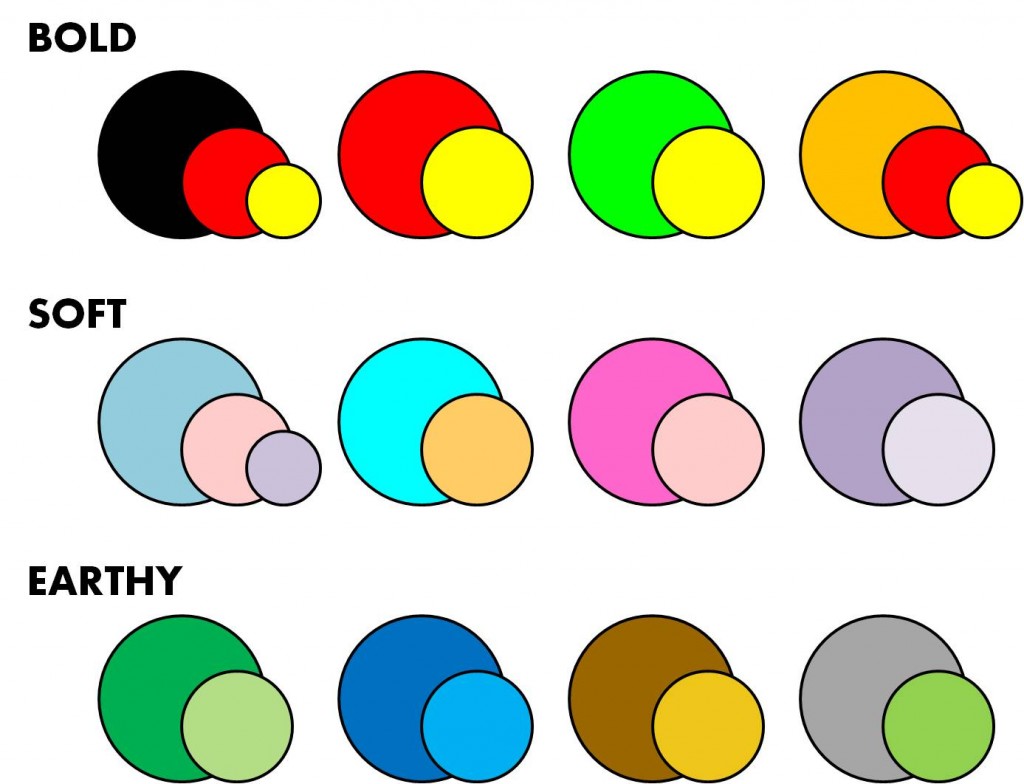
Here are some color palettes that I’ve put together that I think would make fabulous dragons:

Sometimes (when you’re trying to use up stash yarn), you might find that you have a fabulous color palette in mind, but need to buy a skein of yarn to make it all work… and that’s okay! If you’re buying the yarn for your project all at once, you might find it helpful to stick to one line of yarn: colors for a line are often developed so that they coordinate well together!

So, what’s your palette?

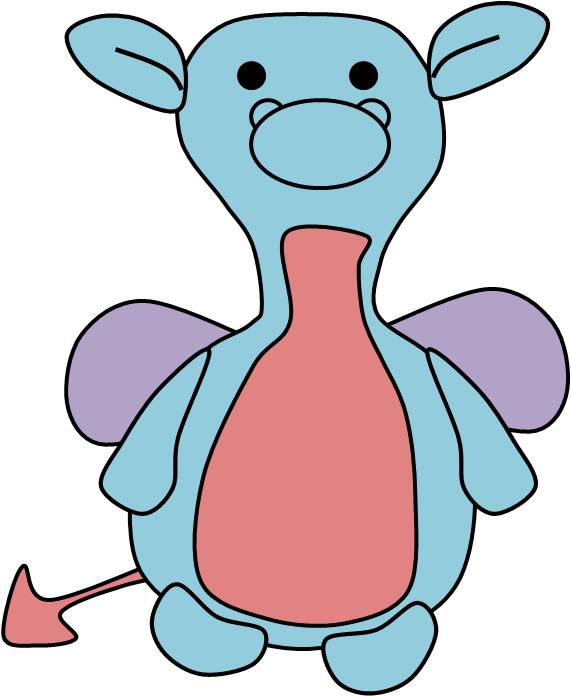
I’ve decided to go with using 3 colors: blue, pink and purple. Here’s my sketch:

What’s your combo?

If you’re not crocheting along with us yet, it’s not too late to start! Click here for details on the crochet-a-long. All month long, I’ll be posting helpful tips on how to crochet your dragon, so if you’re feeling a little nervous about crocheting an animal, this is a great time to get lots of help & support!

Bead Crochet, part 2

Continuing to Practice Bead Crochet

Remember a couple weeks ago when I learned bead crochet? I was instantly hooked… so I’ve kept at it!

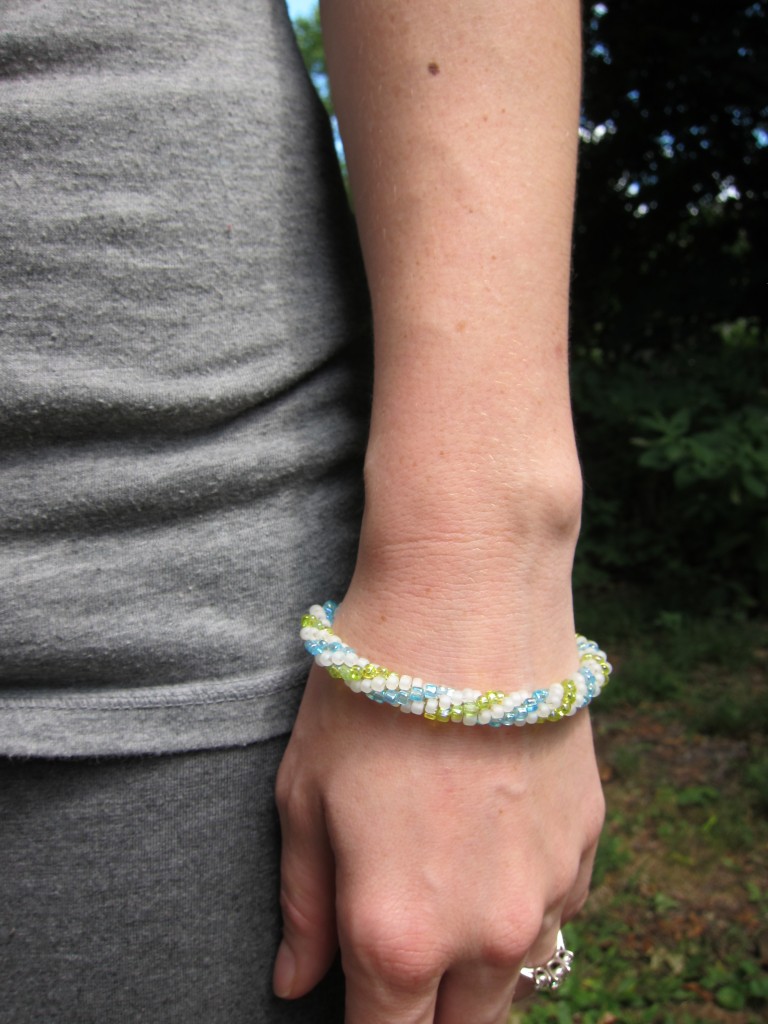
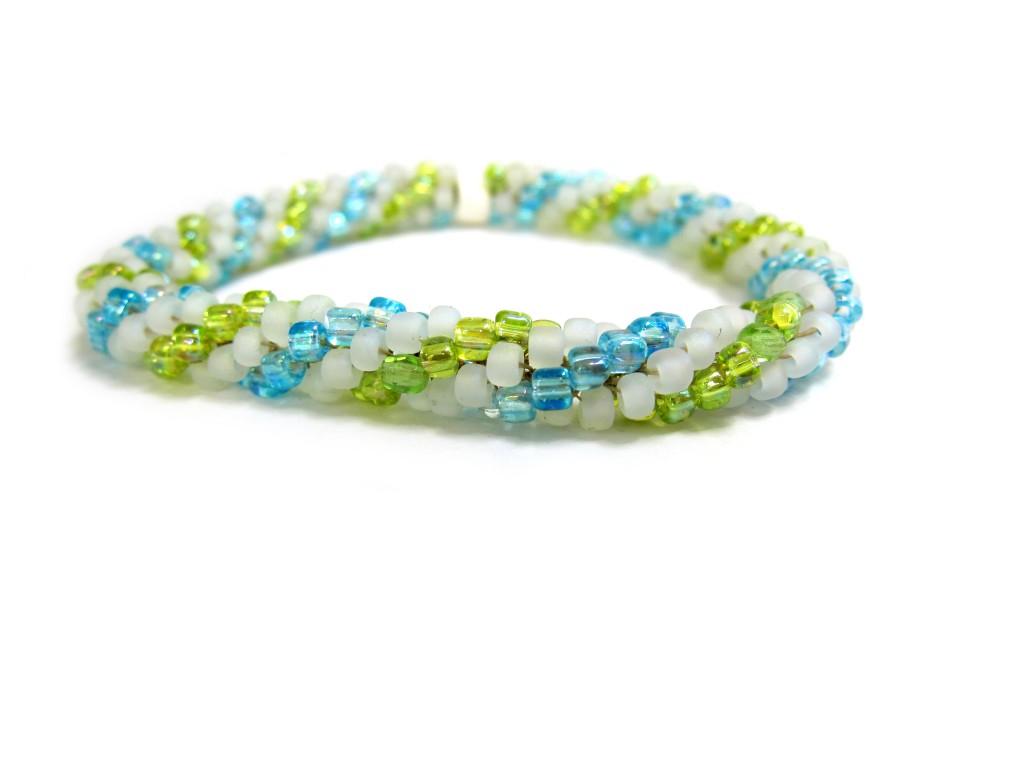
Last time, I made a very small piece, but not a full piece of jewelry. This week, I stepped up to a bracelet project from Bead Crochet Jewelry… and I’m very proud!

It’s in fabulous summer colors… and let me tell you, I’m hooked!

Lessons and Future Plans

I love my bracelet, but having a ‘bangle’ without a clasp is a little tricky: it needs to be large enough to fit over your hand, but then it seems quite large on the wrist. This means that it sorta gets in the way while wearing it… since I’m the type who moves around a lot!

My future plans are:

  • A bracelet with a clasp
  • A lariat (a necklace that’s just a long rope that you fasten by tying)

It’s so much fun… I didn’t think I’d take to it like a duck to water! I highly recommend Bead Crochet Jewelry… the great explanations are what made it so easy for me to get hooked!

Have a fabulous crafting weekend… do tell me what you’re up to!

Try adding pupils to your amigurumi eyes!

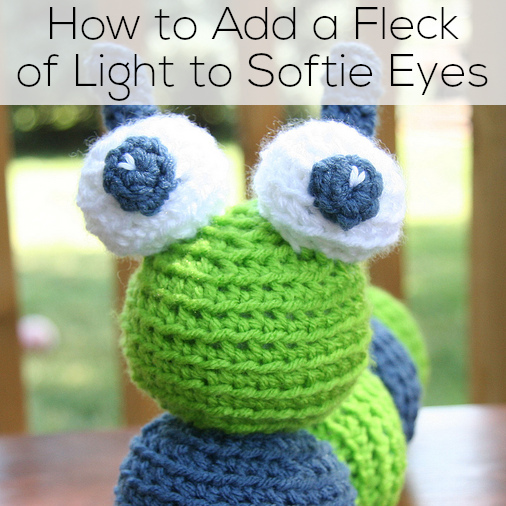
They say that eyes are the window to the soul. Maybe your crocheted stuffed animals don’t have souls, but the eyes add quite a bit of character! Today I’m going to share a great tip for giving your crocheted eyes some extra pizazz.

Eye Options

You have lots of options for eyes on your amigurumi! You can. . .

Plastic eyes reflect a bit of light already. It gives them a nice, lifelike sparkle. But what about baby-safe felt or crochet eyes?

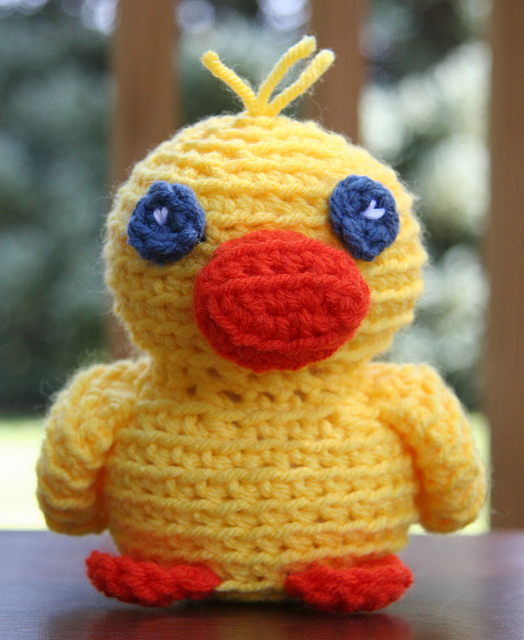
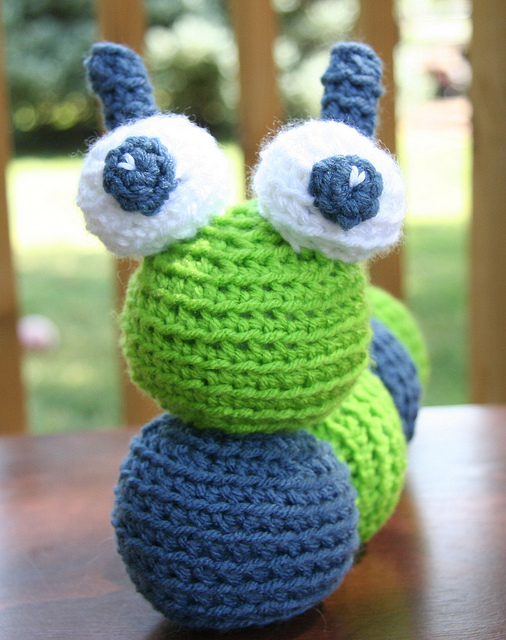
Well – you can add a little speck of light to those, too.

Adding specks of light to crocheted eyes

I first talked about adding a little yarn speck to your eyes in Cuddly Crochet, but I was reminded of the technique when I saw some fabulous projects by Stacey (a different Stacey!) on Ravelry:


Aren’t these fabulous? Stacey’s used the crochet baby-safe eyes, and embroidered the cutest little reflections on them!

Stacey’s done an adorable V-shape, but you can use a little knot or a simple line. To do this, you’ll want to embroider your detail on when you’re assembling the features on the head.

You can use this trick to add a unique flair to the eyes on any pattern! Give it a try!

Learning Bead Crochet

Goals for Bead Crochet

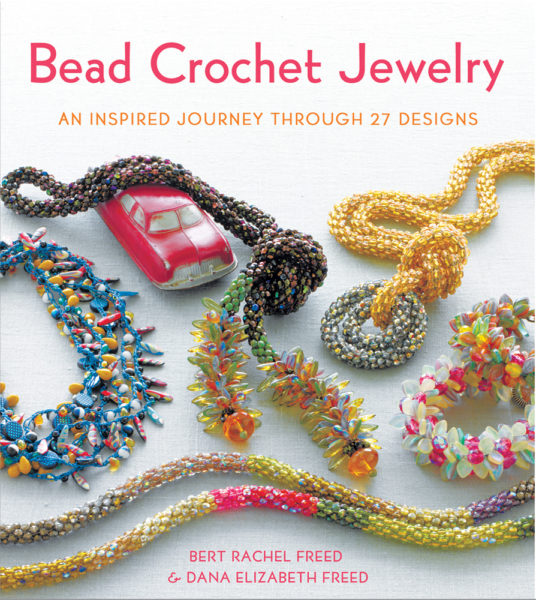
I got a copy of Bead Crochet Jewelry, and the jewelry looks amazing!


Bead crochet is a little different than regular crochet, and gives you a piece with a totally unique look. To bead crochet, you pre-string a lot of beads, and then (basically) slip stitch around a 4 stitch round (or more stitches, if you’d like). While slip stitching, there’s a certain technique for incorporating the bead appropriately into the stitch.

My long-term goal is to make myself a few fabulous necklaces! But, that’s a bit much for one Saturday! So, my goal this week was to:

  • select beads and thread appropriate for a starter project
  • string beads (you need to pre-string a LOT of beads!)… and see whether it would drive me bonkers
  • learn the basic technique for bead crochet
  • fasten off my work

My Resource

Now that I’ve completed my first (albeit, small) bead crochet project, I have to tell you: this book is fabulous! Bead Crochet Jewelry is written by a mother and daughter (who I had the good fortune of meeting at TNNA), and it’s completely obvious throughout the book that this duo has a passion for bead crochet and are skilled teachers!

The book is organized by difficulty level (really helpful for us newbies!), and choc-full of helpful tips and step-by-step photos. I’m not going to fib: bead crochet is pretty different from regular crochet, and I had some trouble manipulating such thin thread early on. But, I persevered because of the great instructions (and dreams of future projects), and I couldn’t be happier!

My Materials

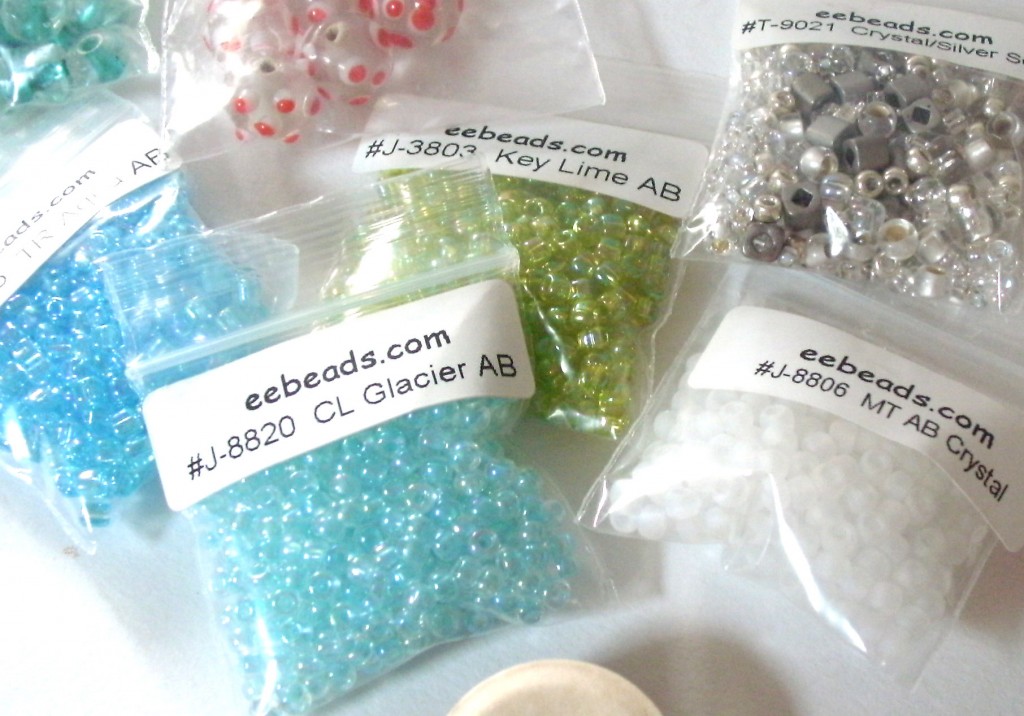
I checked out my local craft stores, and none of them carried the type beading thread that was recommended in the book. So, I ordered my thread (and some beads, while I was at it!) from eebeads.com.

What I Did

I’ll admit: since I’m a pretty proficient crocheter, I thought I could start straight away on one of the projects, and skip over the advised practice. I was wrong.

Bead crochet requires a new way of interacting with the beads and hook… and that’s really hard to do for the first time with bead thread.

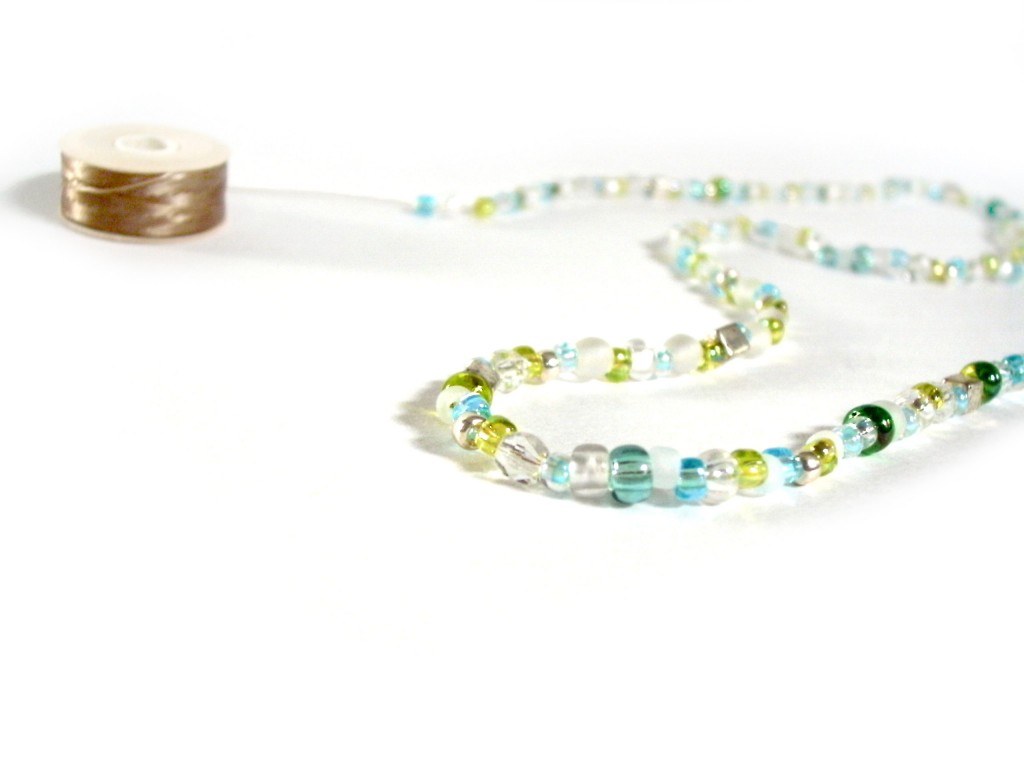
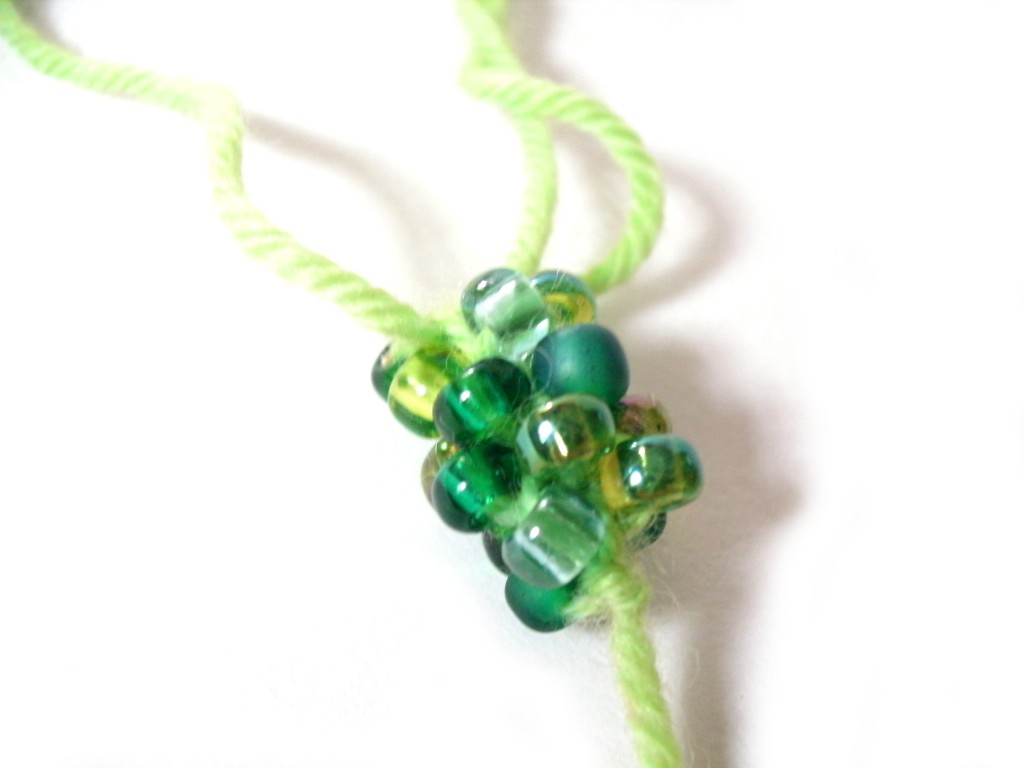
I began by stringing a pretty collection of beads. However, not only was the thread tiny (and I had no idea what I was doing!), the beads were slightly different sizes, making it a tough 1st project! So, after struggling a bit, I took the book’s advice and did a practice piece with yarn and jumbo beads:

I’m so happy that I did! Even though it doesn’t look fabulous, it allowed me to get the basic technique and get my fingers used to what they were supposed to do!

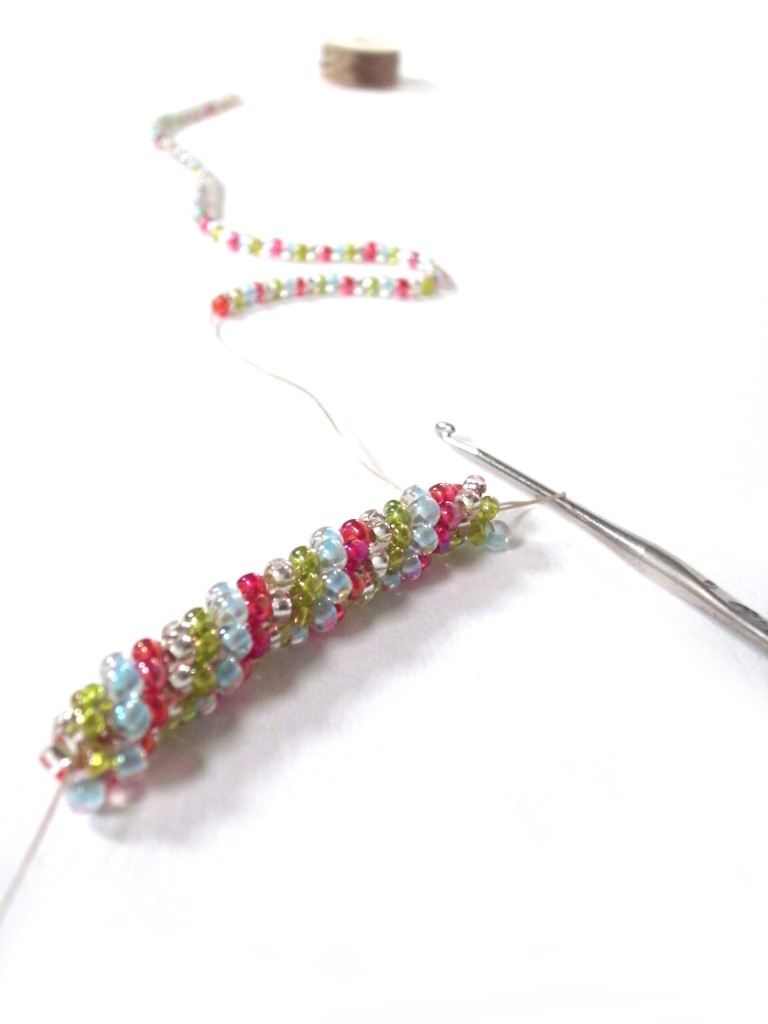
Next, I strung seed beads for my real project! I decided to use all identically-sized seed beads to make it easy on myself. I was delighted to discover that the crocheting was much easier now that I had some practice under my belt.

Isn’t it pretty? Look how nicely the colors are swirling! Yay!

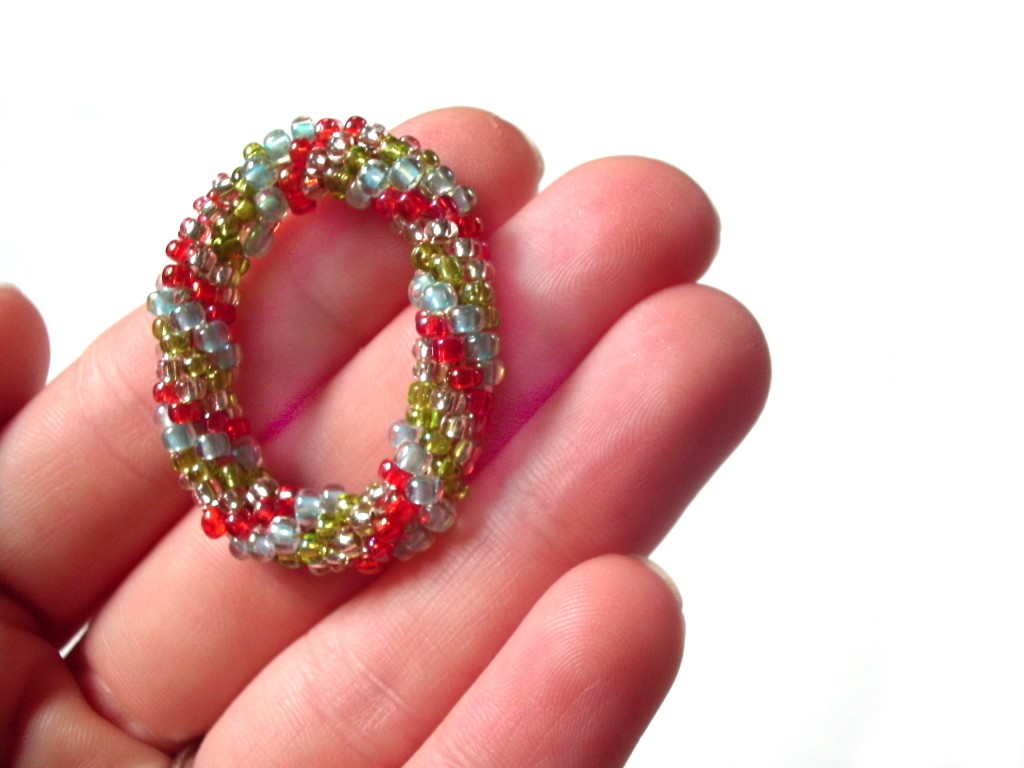
I even finished off my piece in a circle. I have no idea what I’ll use it for (turns out that I strung on too few beads for a bracelet), but I’m so proud!

What I Learned

Most importantly, I learned that I like bead crochet! I was very worried that I would find the pre-stringing and tiny thread size irritating… but I found the stringing relaxing and got used to the small gauge size. Hooray!

I also learned a few pieces of advice for starting. It’s incredibly important to practice with a larger hook/bead size to begin, and also use multi-colored beads. If you do that, you’ll get the hang of what you’re doing to move on!

Finally, I realized that I need reading glasses. I suspected this for a while, but this tiny project brought the need into focus! And trust me, it’s much easier to bead crochet when you can really see what you’re doing!

Future Goals

I love this! I’m going to keep going! Next up for me is a bracelet with some focal beads… so excited!

I totally recommend Bead Crochet Jewelry, it’ll really inspire you to learn!

Best,
Stacey

How to attach felt to your amigurumi

Adding a small piece of felt decoration can be a quick and easy way to add character to your amigurumi faces! In today’s blog post, I’ll show you how to do it!

The Glue

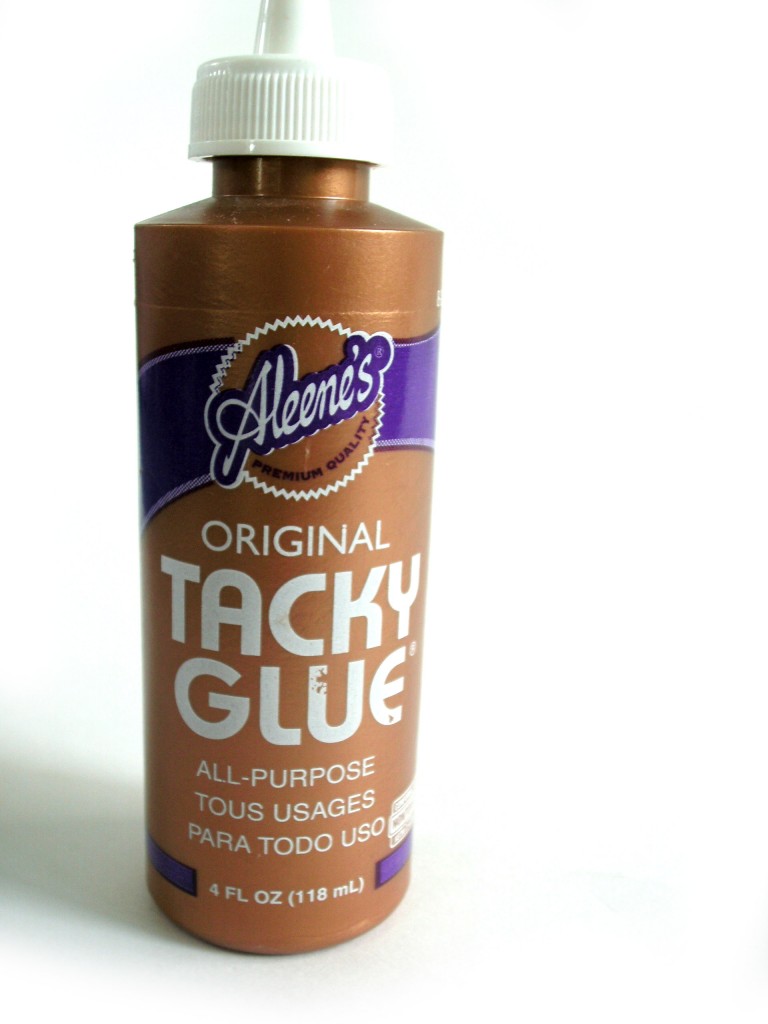
Basically, any glue that works on fabrics will work for yarn, as well. I use Aleene’s Original Tacky Glue.

The glue will hold up pretty well, but if you’re making the toy for a small baby, I would recommend sewing the felt on with a sewing needle and thread. Better safe than sorry!

The Process

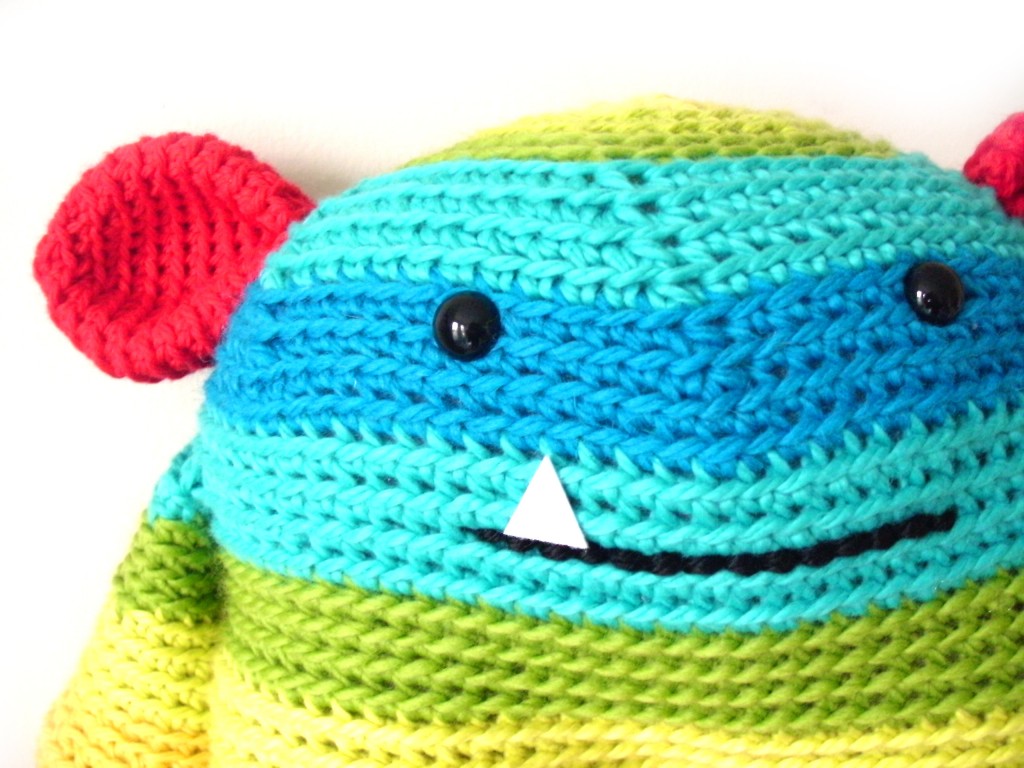
The thing I love most about felt is how versatile it is! Simply cut the shape you desire, and glue it onto your piece. I sometimes add my felt piece at the very end… so I can see what personality the amigurumi wants!

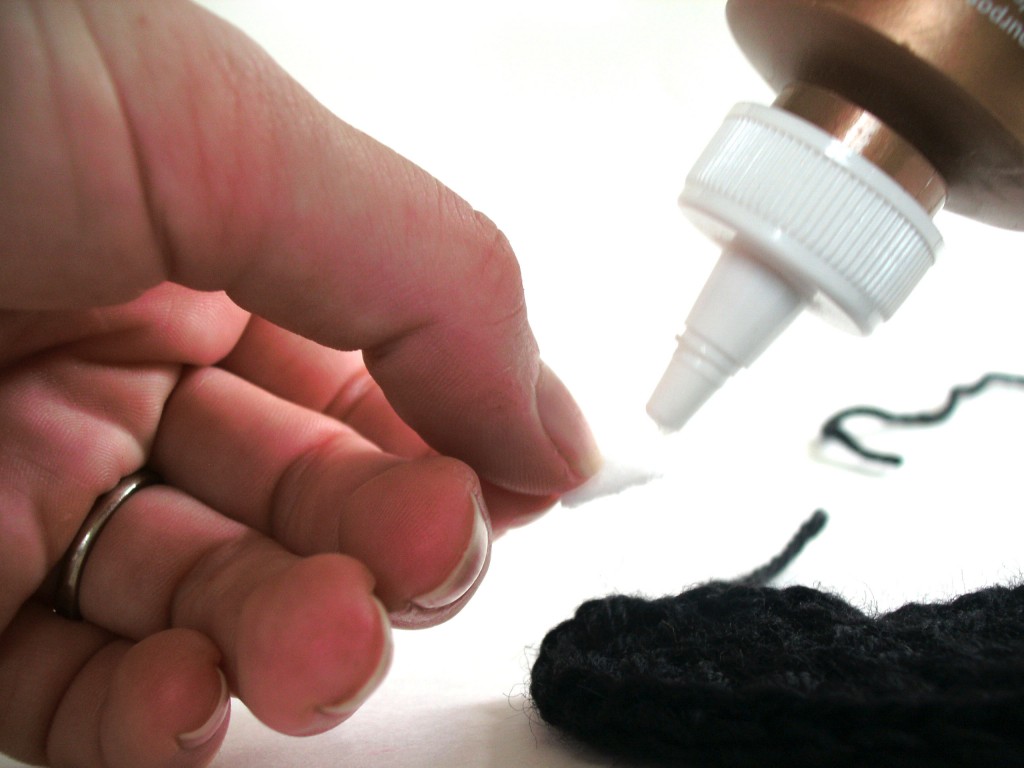
To glue a piece on, just add a dab of glue to the back of the felt:

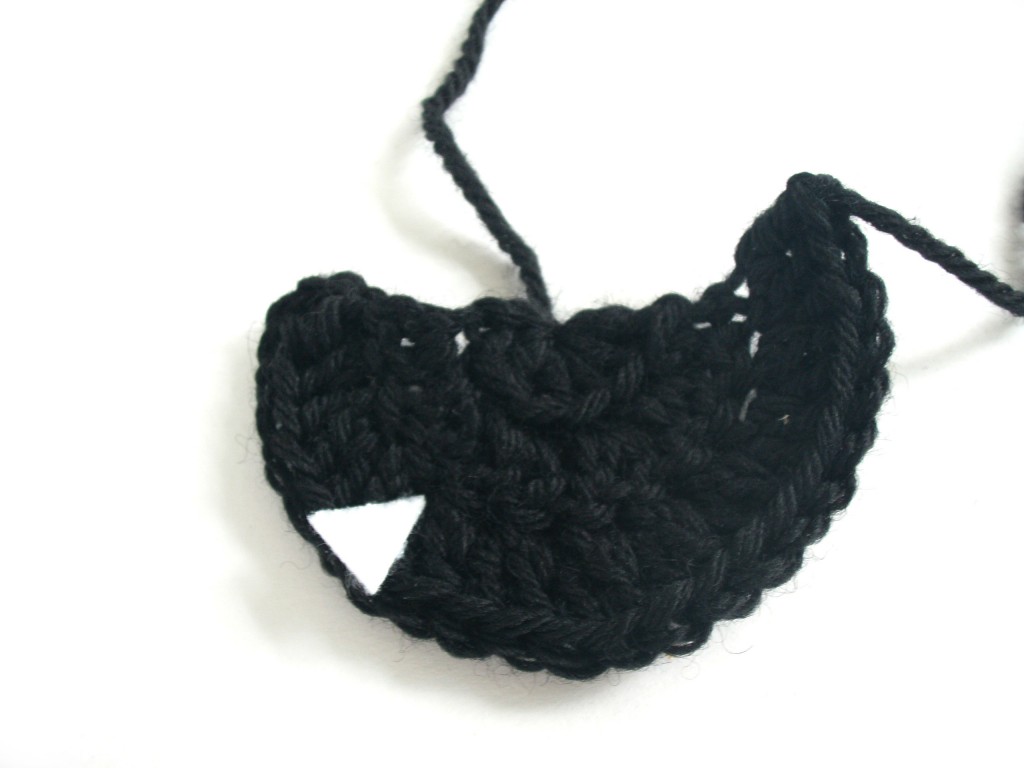
And press into place. Voila! Allow the glue to dry completely, and you’re ready to go!

Some tips

Here are a few helpful tips to keep in mind:

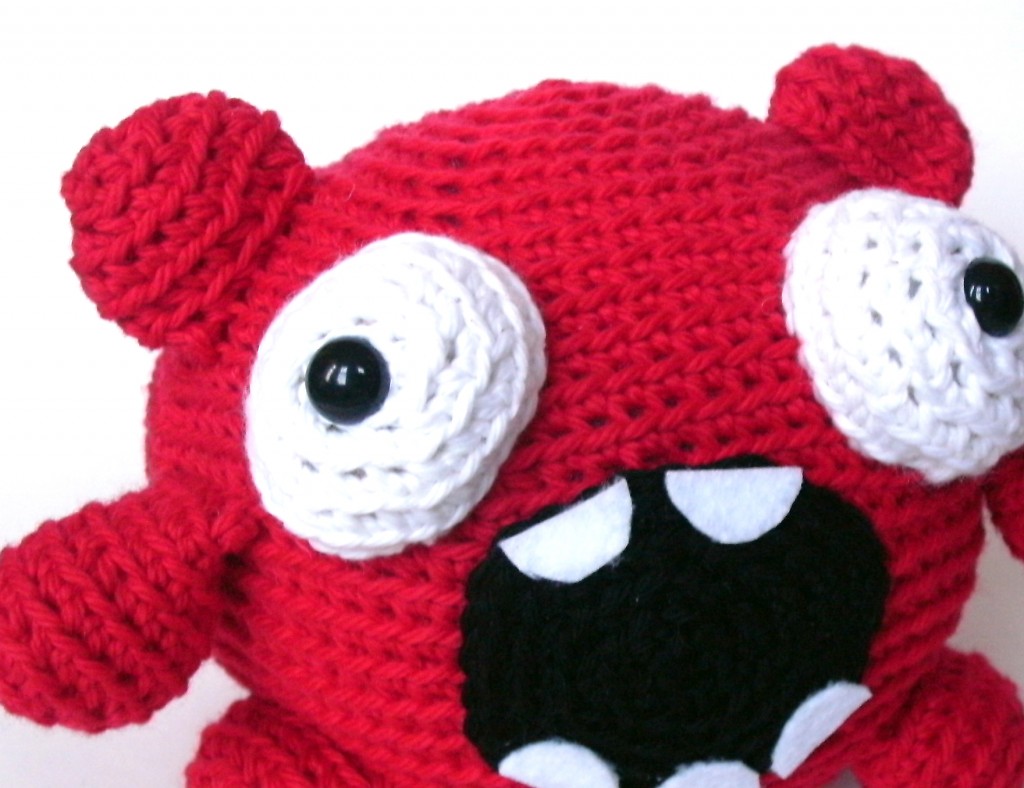
  • The shape of your felt piece adds expression, so feel free to experiment! For example, a rounded tooth gives a totally different expression than a pointed one!
  • Amigurumi are made from round balls… and in general, flat pieces don’t glue well to balls! To make sure your felt stays, attach to a relatively flat portion and keep your felt pieces small.
  • If you don’t like the look of your felt, just pull it off before the glue dries! You can gently wash the remaining glue off with a wet washcloth.

I hope you enjoy experimenting with adding some felt to your amigurumi!

And remember, you are the one crocheting! Even if a pattern doesn’t call for a felt facial feature… feel free to modify it and add one! It’s your piece!

Here are handy links to all the posts about faces and details. . .

Return to the main table of contents for Let’s Learn to Crochet Amigurumi.

Move on to the lessons about eyes.

Happy stitching!