How to Build a Quilt Design Wall (Flannel Board, Bulletin Board, etc.)

How to Build a Quilt Design Wall (or Flannel Board or Bulletin Board) - a tutorial from Shiny Happy World

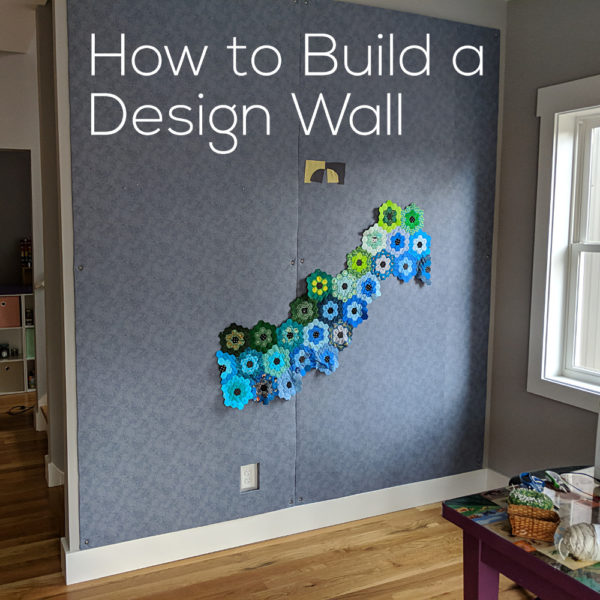
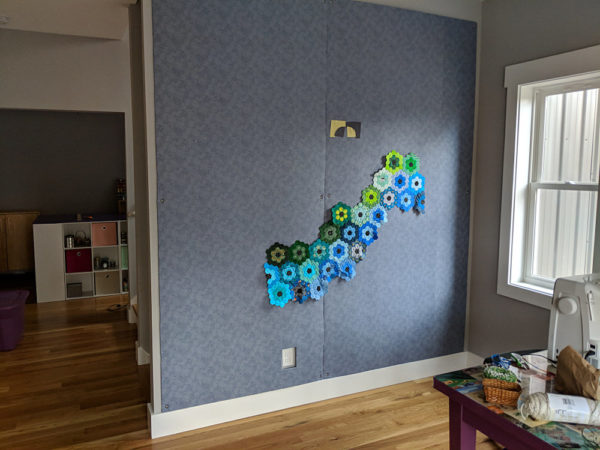
I finally have a quilt design wall in my new house and I’m so excited! There really is nothing like being able to step back and see an entire quilt like this!

And I’m going to show you (in excruciating detail) how I built mine – including the specific materials I used. I’ll also show you a bulletin board I made for my husband using the same method. I’ll even show you how to do that little cutout around the electrical outlet.

Ready?

Here we go!

To start with – I like to use foam insulation board. Styrofoam sheets are less expensive – but pinning into styrofoam gives me the willies. It’s a real nails-on-the-chalboard reaction so I don’t do it. Look for the 4 ft x 8 ft sheets of foam insulation board at your home improvement store. I like the ones that have a metallic foil material on one side.

I covered my board with flannel because I want to have both options – being able to pin into it but also being able to just smooth blocks up there and let them cling to the flannel.

Click through so you can see the flannel print close up. It’s a nice tone on tone print that looks interesting when there’s nothing on the board, but is subtle enough not to distract me from any design I’m working on up there. Later I’ll show you a different kind of option.

For my last quilt design wall I glued the fabric to the board – but that meant I couldn’t wash it, or easily change it if it got faded. This time I did the whole thing with pins.

Start out by piecing together enough fabric to completely cover your board, and wrap around each side with a couple of inches to spare. Press everything nice and smooth.

Lay your insulation board foil side up and cover it with the fabric – getting the fabric as centered as possible.

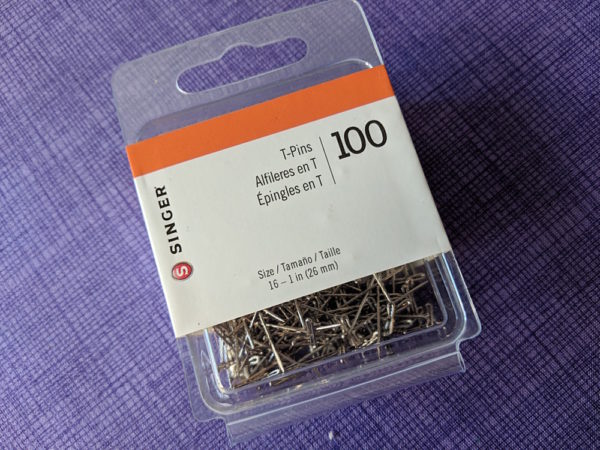
Start pinning your fabric into the sides of the insulation board. I used these 1-inch T-pins.

package of 100 T-Pins from Singer

Basically – I used the exact same method I use to prepare fabric for framing – just on a larger scale. You can watch that video here.

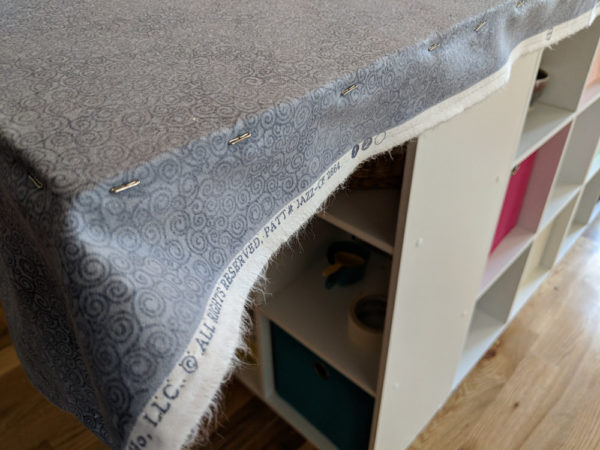
Keep adding pins, pulling the fabric smooth but not stretching it, until you have pins all the way around your board every 1-2 inches.

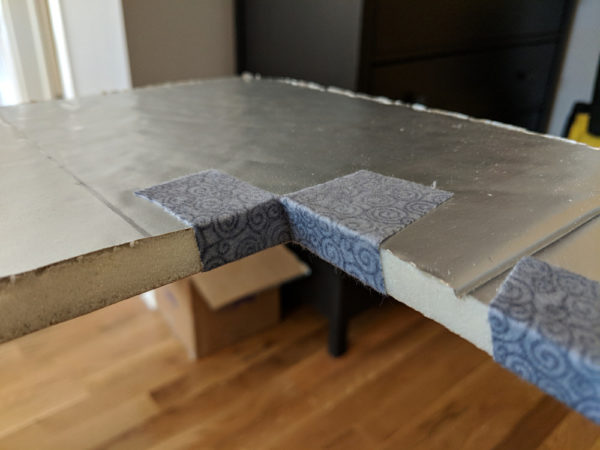
side view of a quilt design wall being made - showing T-pins holding the grey fabric in place

Flip your board over so you’re working from the back.

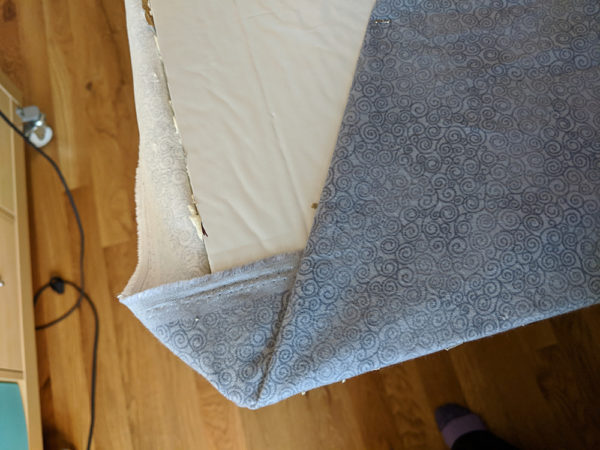
Smoothing the excess fabric on the back of the foam insulation board

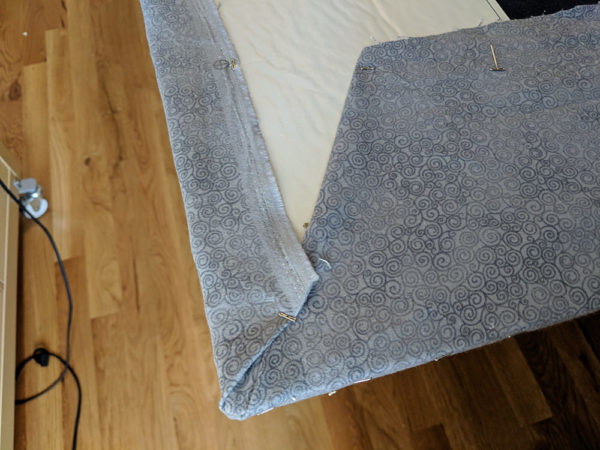
Fold in one corner, then fold in one side. Insert some of the T-pins at an angle so they hold the fabric flaps in place, but don’t poke through the front.

How to Build a Design Wall (or Flannel Board or Bulletin Board) - a tutorial from Shiny Happy World

Fold in the other side. Now your corner is nice and neat!

(See how pretty that tone-on-tone Jazz print is?)

Continue around the back of the board, securing the excess fabric with T-pins inserted at a slant. Remember – the side pins are the ones really holding the fabric in place on the front of the board. These are only holding the excess fabric in place, so you only need a pin every 8-12 inches or so.

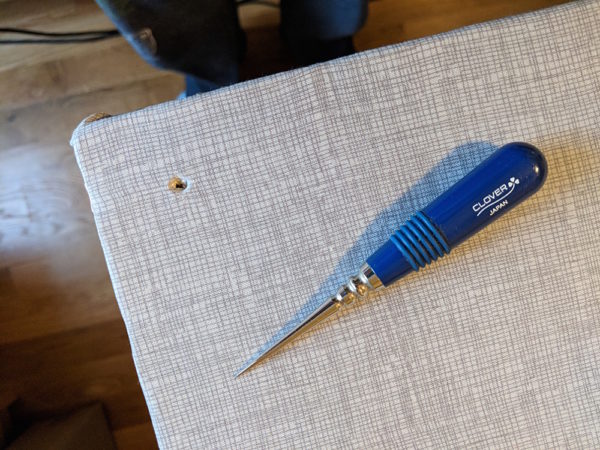
Using an awl to poke a hole in one corner of my new quilt design wall

Use an awl or other sharp tool to poke a hole in each corner of the board (mine is 1 inch in from each edge) and one more in the middle of the longest edge.

This step is important! Don’t think you can just screw right through the fabric. The bit or the screw will catch the fabric and yank it into an awful twist, ruining all that work you did getting everything nice and smooth.

Hold the board just where you want it on the wall and mark through each of those holes with a pencil. Take the board away and insert a wall anchor at each of those spots.

Now screw the board into those wall anchors!

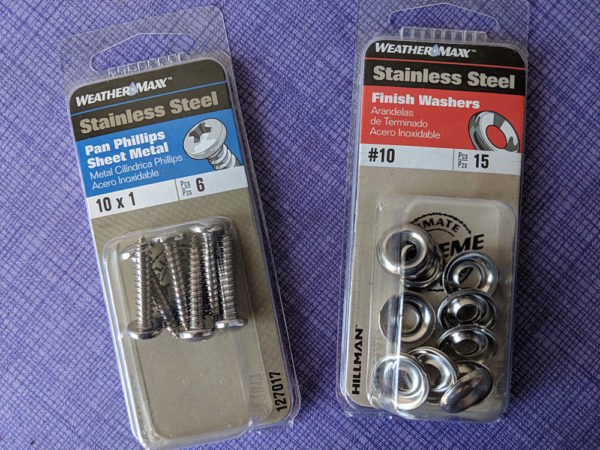
I used these nice stainless steel screws and washers.

stainless steel screws and washers

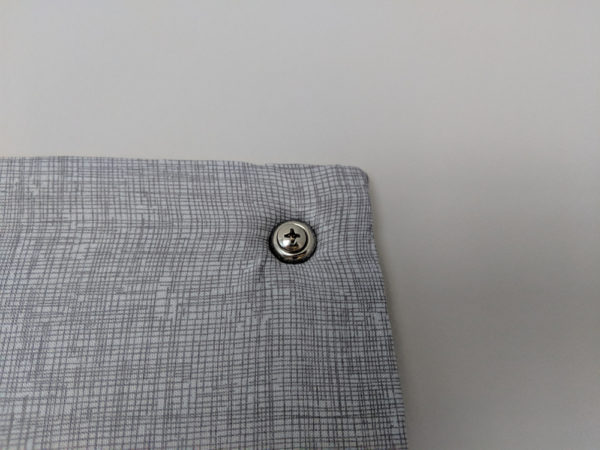
You definitely need to use some kind of washer so that over time the head of the screw doesn’t just pull through the soft foam. See how nice these look?

corner of my new quilt design wall, screwed into the wall using a stainless steel screw and washer

I like to screw it in tight enough that it kind of dimples into the surface of the foam. That way I can skim quilt blocks right over the screws if I want to.

What About Electrical Outlets?

So my first board of my quilt design wall was easy – but the second one was going to go right over an electrical outlet. I wanted to be able to continue to use that outlet, so I needed to cut a hole in the board and finish those edges.

Don’t worry – it’s not hard!

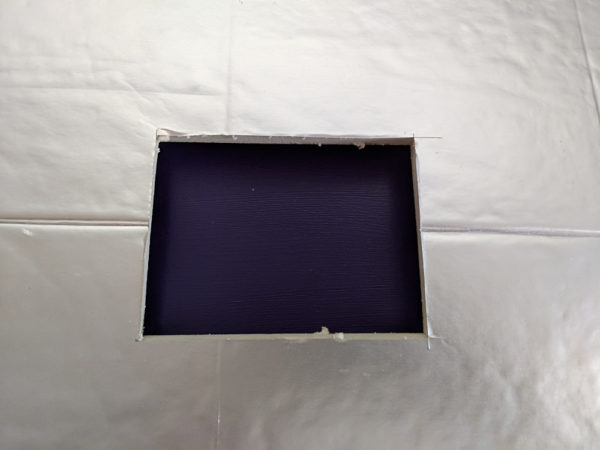
Measure your space and cut a hole in your board just a little bit bigger than your outlet cover.

rectangle cut in foam insulation board

This stuff is easy to cut with a simple X-acto blade.

Now cut four squares of fabric roughly 2-3 inches square. It doesn’t not have to be exact – or even especially neat, as you can see with mine.

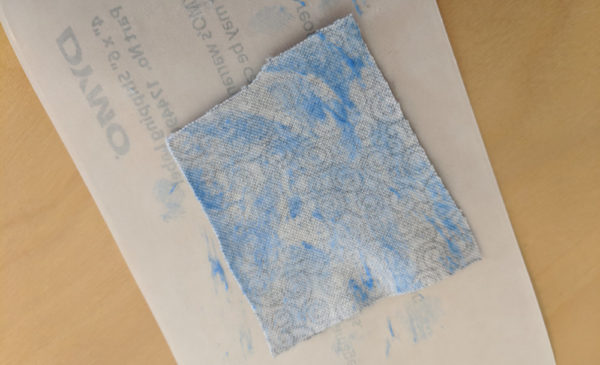
Cover the back of one square of fabric with glue.

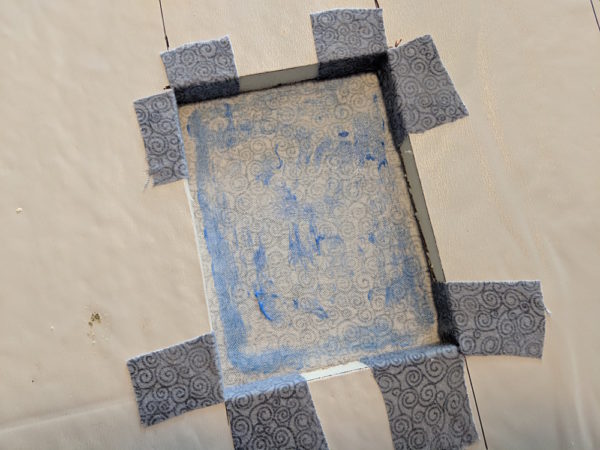
fabric smeared with blue glue

I used a Uhu glue stick – not my fabric glue stick. I wanted a permanent hold here.

Stick the square right into one corner of your cutout and press it in place, as shown.

covering one corner of the outlet hole in my quilt design wall with a scrap of fabric

Now use a sharp pair of scissors to snip down from the top and up from the bottom – right on the fold created.

covering the corners with a scrap of fabric

You want to cut very close to the surface of the board – with just a few threads to spare.

Now folds those flaps down and smooth them onto the front and back of the board.

covering the corners with a scrap of fabric

Repeat for the other three corners.

Now just cover your board like a showed in the first part of the tutorial. Pretend that hole isn’t even there.

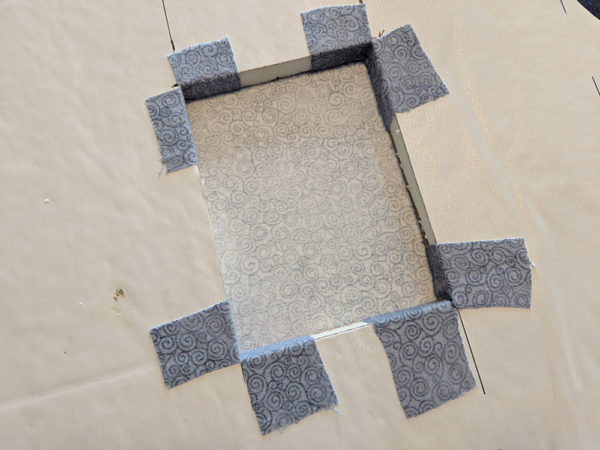
outlet hole with corners covered with grey fabric

When you flip your board over, you’ll see the back of that fabric through the hole.

Make sure the board is on a flat surface (so you have something to press against) and coat all the fabric inside the cutout with glue.

outlet hole with corners covered with grey fabric

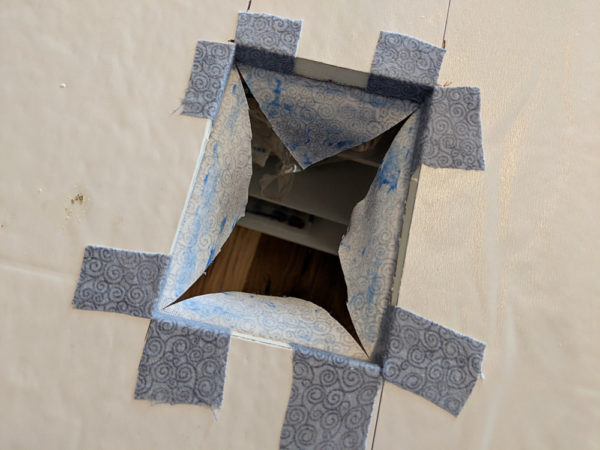
Now use a pair of sharp scissors to cut an X in that fabric from corner to corner.

outlet hole with corners covered with grey fabric

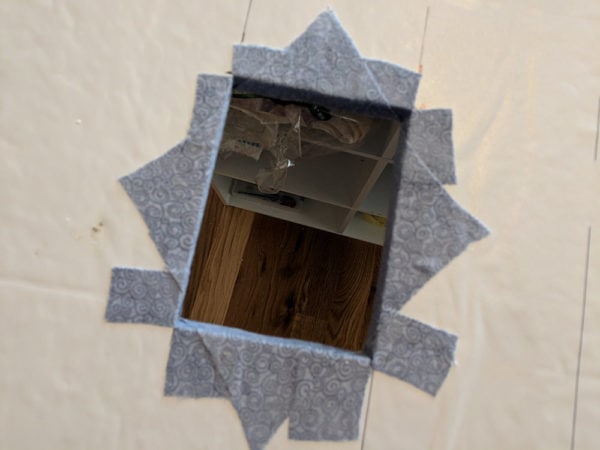
Pull those triangle flaps to the back side of the board and smooth them in place.

outlet hole with corners covered with grey fabric

Sorry – I was using my camera’s autofocus and it focused on what it could see through the hole, instead of the fabric treatment around the hole. But I think you can still see what I did, blurry as it is. 😛

That’s it! This board is ready to hang,  just like the first one.

How to Build a Design Wall (or Flannel Board or Bulletin Board) - a tutorial from Shiny Happy World

Ta da! I have a quilt design wall!

Pieced Bulletin Board

I needed my board to be pretty simple so it wouldn’t distract from whatever I’m designing on it.

But my husband wanted a similar board to outline his next book on – and he wanted it to have a bit of design. Nothing too fancy – but just a little extra pizzazz.

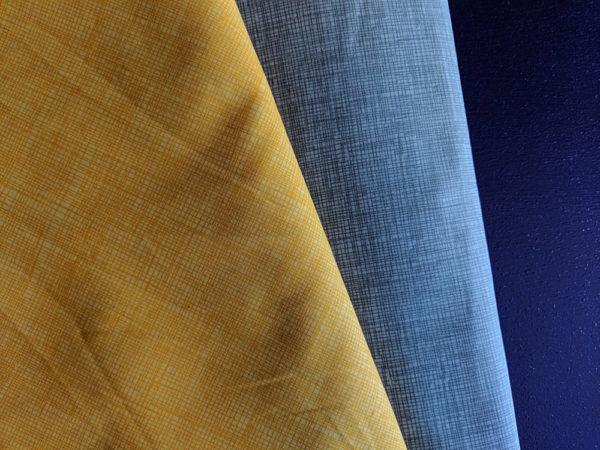
Here are the fabrics he chose.

How to Build a Design Wall (or Flannel Board or Bulletin Board) - a tutorial from Shiny Happy World

He doesn’t need fabric to cling to his board, so I just used regular quilting cotton instead of flannel.

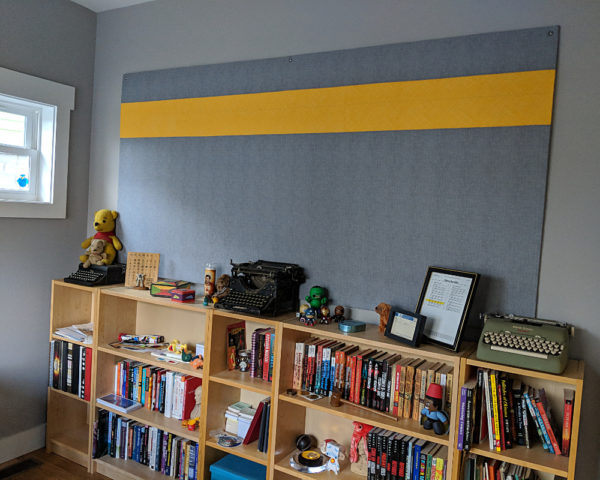
And here’s his finished bulletin board.

How to Build a Design Wall (or Flannel Board or Bulletin Board) - a tutorial from Shiny Happy World

It’s all ready for him to start hatching his next novel!

I love having a quilt design wall again! It makes it so much easier to really SEE the layout of a quilt in progress.

Here are handy links to all the posts about quilting tools and supplies.

Sewing Machine

Iron

Rotary Cutting Tools

Scissors

Other General Sewing Room Supplies

One More Hugely Popular Post that Seems to Fit Here Better than Anywhere Else

Return to the Let’s Make a Quilt main Table of Contents.

Move on to the posts about choosing your quilt pattern.

Happy stitching!
Make a Quilt Block with Soft 3D Parts – video tutorial

Make a Quilt Block with Soft 3D Parts - a video tutorial from Shiny Happy World

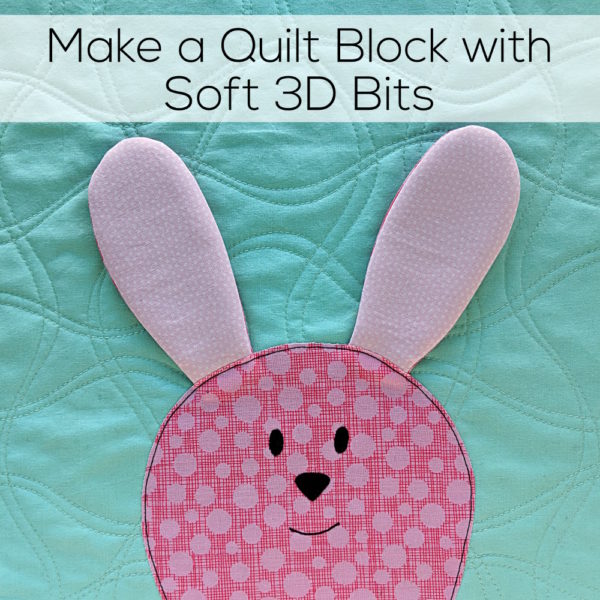
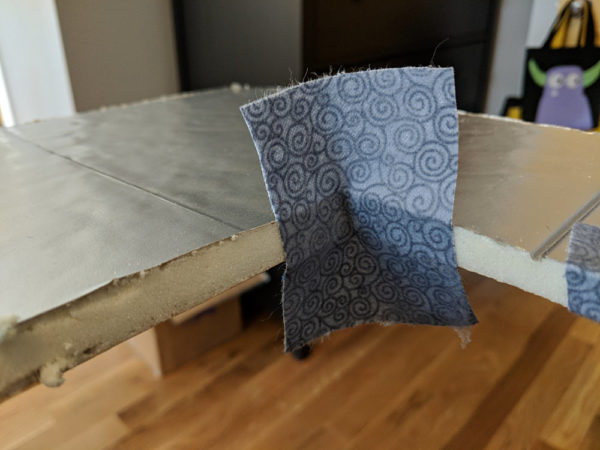
It’s so much fun to make a 3D quilt! You can add soft 3D embellishments to any applique pattern – like the bunny ears you see above.

There’s a post here showing how to add small 3D pieces to an applique quilt – teeth and small bear ears.

And I teach several 3D options in my Cute Quilt-As-You-Go Applique Monsters class on Craftsy. Here are a few examples showing flappy ears, a silly satin tongue, and springy elastic curls.

Applique quilt blocks with 3D pieces - tutorial from Shiny Happy World

You can see that these are mostly longer 3D pieces that you want to flap and dangle. But what if you want them to stand up – like bunny ears?

You can do that for quilts – just like you can do it for stuffed animals.  Here’s the tutorial showing how to make stuffed animals with stand-up ears.

The technique for 3D quilts is basically the same – but it’s a tiny bit more involved because applique template pieces have no seam allowances – and you need to account for that if you’re going to sew them into flappy ears.

Don’t worry – it’s easy. I show you how to do it in this video.

See? Not hard at all.

Get the free Mix & Match Bunnies pattern here. That’s the pattern I used for the bunny in the demonstration.

Here are links to all the posts showing how to applique with fusible adhesive – my favorite method. It’s fast and easy and (with the right materials) it holds up beautifully to rough use and repeated washing.

Here are links to special posts about eyes.

Here are links to some extra fun things you can do with your applique.

Other Applique Methods

Finished with this topic?

Return to the Let’s Make a Quilt main Table of Contents.

Move on to the lessons about outline stitching.

Happy stitching!
Joining Strips with a Diagonal Seam

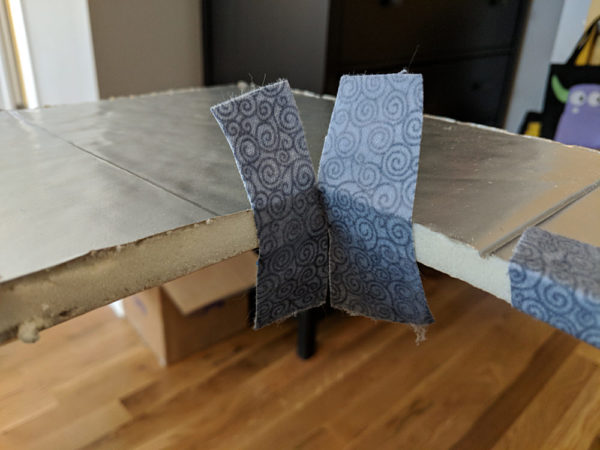
Joining Strips with a Diagonal Seam - a video tutorial from Shiny Happy World

I almost always use scrappy bindings in my quilts and I get a lot of questions about how I get those diagonal seams.

I show the diagonal seam in my video How to Bind a Quilt – but I never actually showed how to do it.

Until now.

See how easy that is?

I use this method any time I’m joining strips together. For me that’s usually binding a quilt, but it can also be for bias strips on bags, clothing, and any other application.

Happy stitching!
Best,
Wendi

Applique with Prints – Choosing Fabric for a Quilt

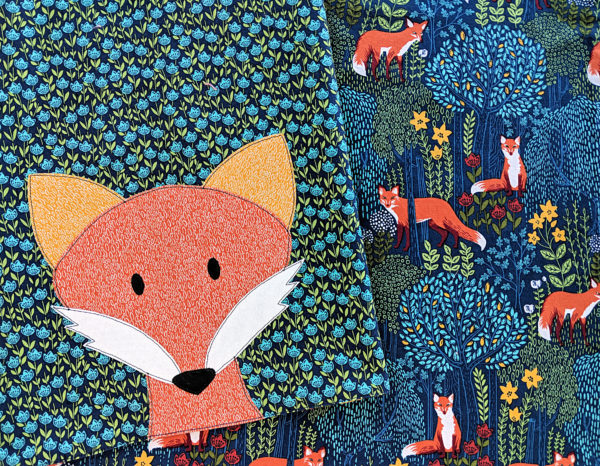
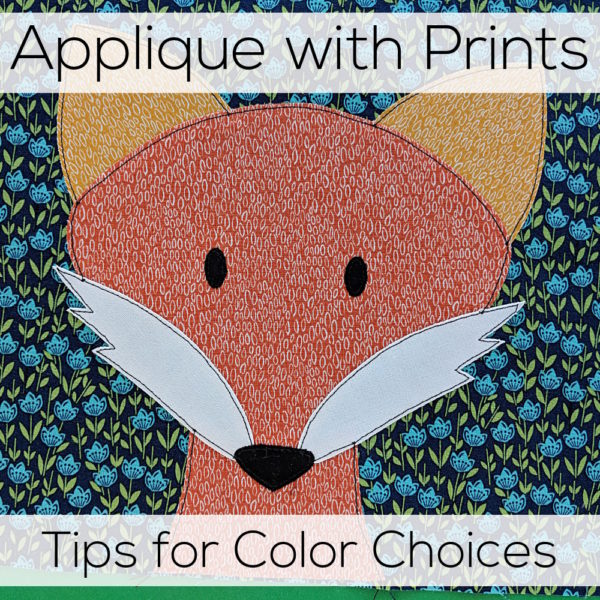
applique fox face demonstrating choosing fabric for a quilt

Choosing fabric for a quilt can be tricky – especially when you’re doing applique!

When I showed the lovely fabrics I was planning to use for this free receiving blanket pattern, a couple of people said they were eager to see how I used the prints, since I usually stick to solids and near-solids.

The reason I usually stick with solids and near-solids is because they’re so much easier to work with! Especially for applique where you don’t want the design to get lost in the background fabric. It’s soooo easy to end up with a block that you’re not happy with!

So – here’s the fabric.

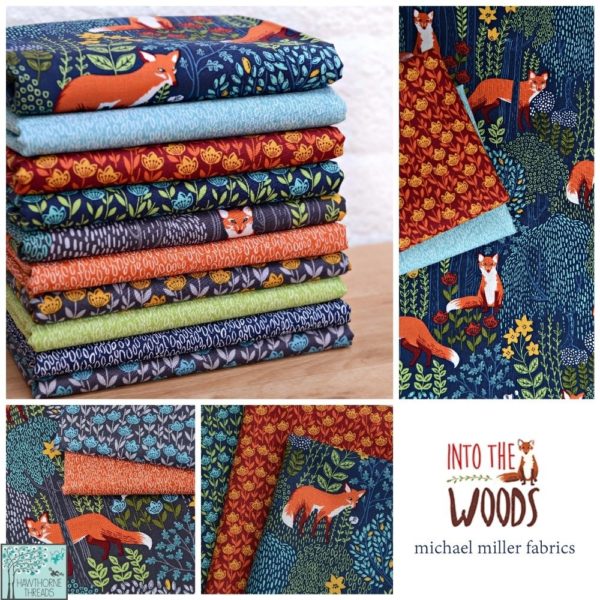
Into the Woods fabric collection from Michael Miller Fabrics

It’s the Into the Woods collection from Michael Miller Fabrics, sadly out of print now. But you’ll see a similar collection of fabric types in almost all quilt collections – some tone-on-tone small prints, some multicolored medium-scale prints, and some multicolored large-scale prints.

Gorgeous, right? Especially that larger scale print with the foxes and foliage.

But that’s exactly the print I didn’t want to use for my background. I used it for the back of the receiving blanket instead.

Why?

Because it contained all the colors I wanted to use in my applique fox face.

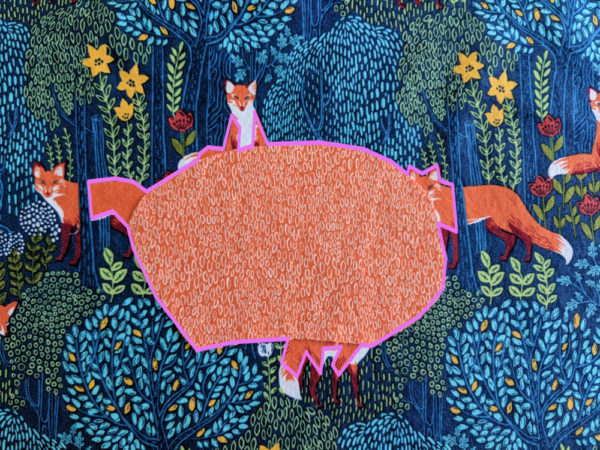
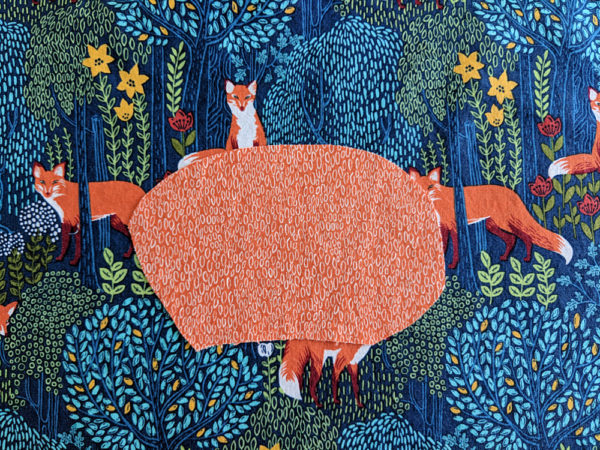
To show you why that would be a problem, I cut out a wonky little oval from the main fox color and laid it on that pretty fabric.

orange oval on multicolored fox print fabric - demonstrating how like colors blend into one shape when they touch

You can see the oval just fine, right?

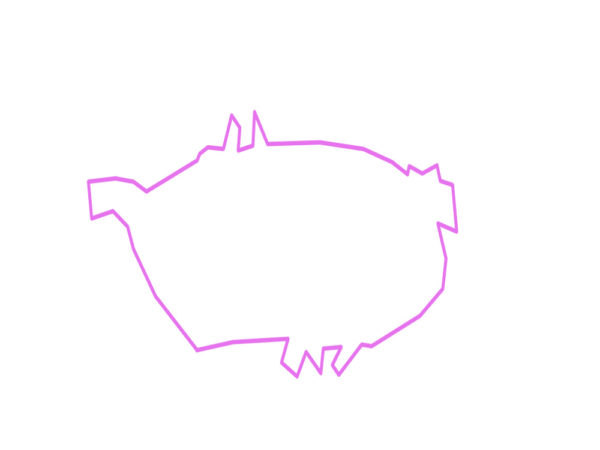
Yes, but your brain is actually kind of fighting to see the oval. Your brain wants to merge all the same colors into one shape, so it actually sees a shape like this.

outline of an irregular oval-ish shape

See?

orange oval on multicolored fox print fabric - demonstrating how like colors blend into one shape when they touch by outlining the new shape formed

(This tendency is what makes it so much fun to play with negative space in traditional quilt designs. Your brain wants to merge those spaces together into new shapes.)

Again – you can still see the oval. It’s just that you’re having to overcome your brain’s natural tendency to see something else, and that will make for a less successful design overall.

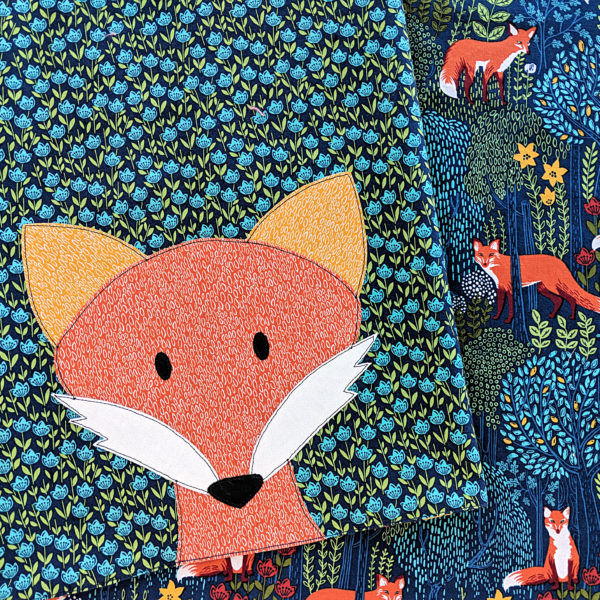
That doesn’t mean you can’t use fun prints. It just means that when you’re choosing fabric for a quilt, you have to pick your background very carefully. Here’s what I ended up choosing.

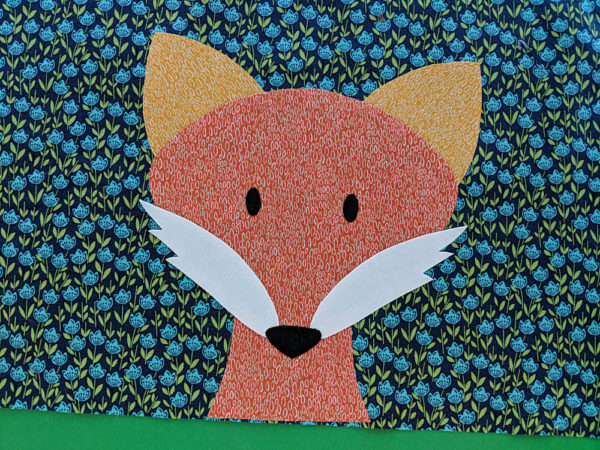
applique fox on blue floral background, with a large scale multicolored fox print behind that - demonstrating how to choose fabric for a quilt

That pretty floral fabric I used in the background has dark blue, light blue, and green. No orange or gold or white – the colors in the fox applique. The green and gold are awfully similar – but ultimately I decided they were different enough for the combination to work.

And I still got that pretty fox and foliage print in there – just on the back of the blanket where it wouldn’t muddle the applique. 🙂

These color lessons apply to more than applique. Think about embroidering on a printed fabric, or using a print for a softie, or even a variegated yarn for a crochet amigurumi – the same color “rules” apply.

And if you want to make your own fox receiving blanket, the fox applique pattern is here, and the free receiving blanket pattern is here.

Here are links to all the posts about choosing fabric.

And here are links to posts about using specialty fabrics.

Finished with this topic?

Return to the Let’s Make a Quilt main Table of Contents.

Happy stitching!
Free Receiving Blanket Pattern

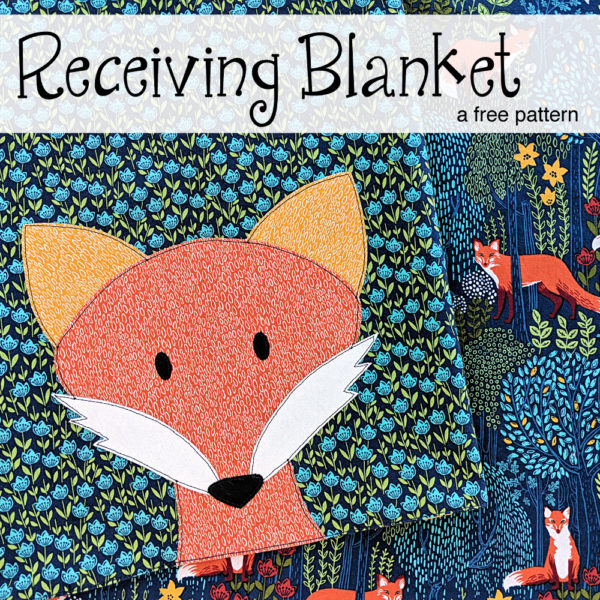
baby's receiving blanket with fox fabric and fox applique

Make an easy baby gift with this free receiving blanket pattern.

A receiving blanket is seriously the easiest baby gift you can make. Choose fabulous fabric and no embellishment and you can make one in 15 minutes. Even if you add an applique (like the fox shown) you can still make it in less than an hour.

Here’s how. . .

Step 1

Cut two squares of fabric about 36 inches square.

Any kind of fabric is fine. I’m using quilting cotton here (from the GORGEOUS Into the Woods collection from Michael Miller Fabrics) but I’ve also used flannel, terry cloth, baby corduroy, and more. Just about anything goes.

I like to use one fabric for the front and a different fabric for the back, but you don’t have to.

And when I say “about” 36 inches I really mean it. I bought one yard cuts of fabric, but by the time I washed them and squared off the cut ends they were more like 34 inches. So I cut two 34 inch squares. No problem.

Step 2

Put the two squares of fabric right sides together and pin all the way around the edge.

Take a little care here and make sure you get everything laid out and pinned neatly. If your squares aren’t really lined up, it will show in the finished blanket – and make the pressing in Step 5 hard.

Step 3

Sew almost all the way around the edge, leaving an opening big enough to fit your hand for turning right side out. I usually leave 4-5 inches. Use a quarter inch seam allowance – or something close. I use the edge of my favorite presser foot as a guide which makes a seam more like 3/8 inch and that’s just fine. 🙂

Step 4

Clip the corners right up close to the stitching.

clip corners to avoid bulk

This will eliminate bulk in those corners when you turn it right side out.

Step 5

Turn the blanket right side out – taking care to poke out the corners and smooth all the edges. Press the edges flat.

Step 6

Now you have a choice. You can leave the edges as they are and hand sew the opening. I like to use ladder stitch (that links to a video tutorial) for invisible stitching.

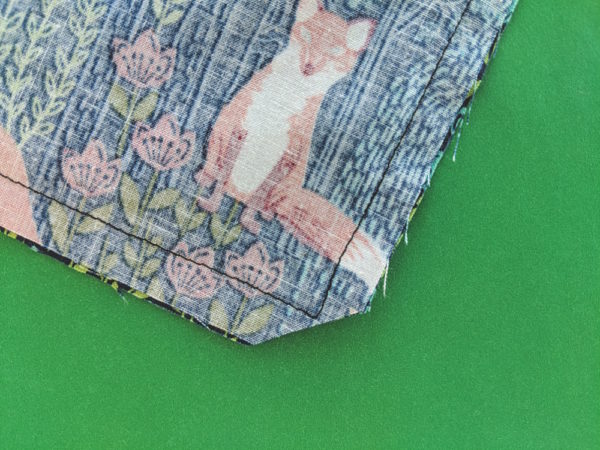
Or (if you want a no-hand-work project) you can topstitch your blanket all the way around the edge. That will make your seams extra secure and sew up that opening at the same time.

close-up of the topstitched edge of a receiving blanket made with a free pattern from Shiny Happy World

Here’s how close to the edge I typically stitch.

Finished!

But that’s not all. This receiving blanket pattern is basically a blank slate for you to play with.

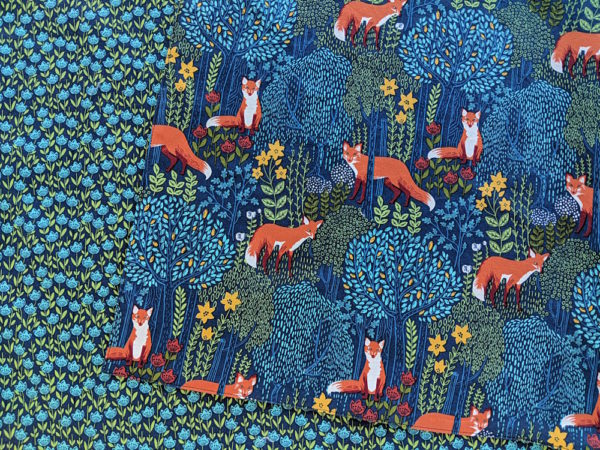
Sure – you can use fabulous fabrics and make it just this simple. How beautiful is this?

deep blue fabric with foxes - Into the Woods collection

Honestly – no further embellishment needed at all.

But if you want to add something fancy, you can.

You can add some embroidery. Maybe stitch baby’s name and date of birth in the corner? There’s a free alphabet pattern for hand embroidery here.

You can add some applique. On this sample I added the Fergal Fox applique pattern in the lower right corner of the blanket.

Finished receiving blanket made with a free pattern - plus an added fox applique face.

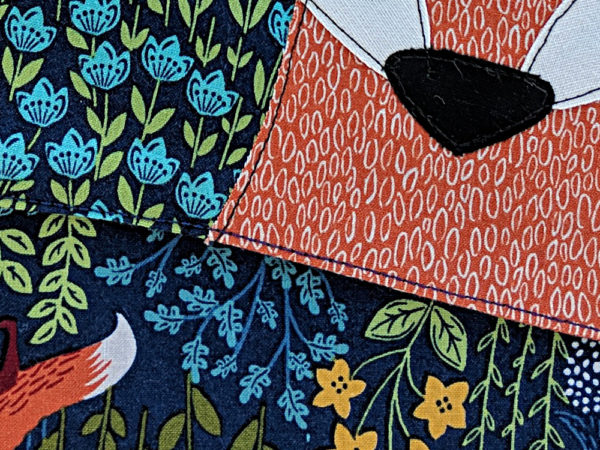
No resizing needed – and it’s a great way to get extra mileage out of patterns you already own. If you do this, make sure you place the bottom edge of the neck right up against the raw bottom edge of the blanket.

applique fox face added to the corner of a receiving blanket pattern

That way the raw edge will get sewn up in the stitching that sews the front and back of the blanket together and it will look like the fox is peeking into the frame rather than like a decapitated head floating in the corner. 🙂

There are lots more single block applique patterns available here – perfect for adding to this pattern. And there are a few free applique patterns here. Add a free applique pattern to the free receiving blanket pattern for a perfect low-cost gift!

Have fun with this pattern! Be sure to tag any photos of your finished work with #shinyhappyworld – or share it in the Shiny Happy People group on Facebook.

Here are several free patterns that work with my basic 10-inch applique squares – no resizing needed!

Here are several free patterns that work with just some simple resizing. This post about making coasters has info about resizing an applique pattern that can be applied to any of these projects.

Return to the main Let’s Make a Quilt Table of Contents.

Happy stitching!
Free Santa’s Village Signs to Make a North Pole Quilt

applique buildings from the North Pole/Santa's WorkshopI’ve been working on a super fun North Pole quilt by adding a bunch of cute Santa’s Village signs to houses and buildings made with the Shiny Happy Houses quilt pattern.

Free Santa's Village signs to make a North Pole quilt - from Shiny Happy World

It’s been so much fun!

Free Santa's Village signs to make a North Pole quilt - from Shiny Happy World

Now you can do the same thing!
Free Santa's Village signs to make a North Pole quilt - from Shiny Happy World

Get the Shiny Happy Houses quilt pattern here.

Click here to get the free pattern for all the signs  – there are 26 – plus a page of blank signs so you can come up with your own fun names. 🙂

The pattern for the signs includes instructions for how I do the lettering. It’s easy!

Free Santa's Village signs to make a North Pole quilt - from Shiny Happy World

I wanted everything in my quilt to look like it was made of candy so it’s a lot of bright colors on spun-sugar pastel backgrounds. 🙂 Free Santa's Village signs to make a North Pole quilt - from Shiny Happy World

Happy quilting!
Best,
Wendi
Wendi Gratz from Shiny Happy World

Mrs. Claus – free applique pattern

Mrs. Claus - free applique pattern from Shiny Happy World


There’s a new free applique pattern for you! Merry Christmas! 🙂

This Mrs. Claus pattern is the same size and style as the other free Christmas applique patterns (10 inch finished blocks). There are four now so you can make a square wallhanging!
Free Christmas applique patterns from Shiny Happy World

Here are links to the other three. . .

Download the Mrs. Claus pattern pieces here.

Here’s how to make her!

Step 1

If you’re using Quilt As You Go, quilt the background to the batting. I’m showing mine from the back so you can see the stitching more clearly.

Mrs. Claus free applique pattern from Shiny Happy World - step by step photos

Step 2

Print or trace the pattern pieces onto the paper side of fusible adhesive.

Mrs. Claus free applique pattern from Shiny Happy World - step by step photos

I love these printable sheets of Heat & Bond Lite because I’m lazypants and don’t like to trace.

The pieces have already been reversed, so no need to flip anything.

Step 3

Roughly cut out the pieces, leaving a little extra all the way around each piece. Leave a little extra extra wherever there’s a dotted line. That edge will tuck under other pieces for a clean finish.

Mrs. Claus free applique pattern from Shiny Happy World - step by step photos

Fuse the pieces to the back of your fabric, following the instructions on your fusible.

Step 4

Trace the features onto the front of the face fabric.

Mrs. Claus free applique pattern from Shiny Happy World - step by step photos

If you hold it up to a window, you’ll be able to see the lines very clearly through the fabric.

I trace just inside the lines marking the position of any applique pieces – like the eyes.

I trace directly on any lines to be stitched – the nose and mouth.

I just use a fine tip black Sharpie.

Here’s what it looks like without the light shining through.

Mrs. Claus free applique pattern from Shiny Happy World - step by step photos

Step 5

Cut out all the pieces neatly.

Mrs. Claus free applique pattern from Shiny Happy World - step by step photos

Cut directly on the solid lines. Leave a little extra seam allowance past the dotted lines.

Step 6

Peel off the paper backing and layer up all the pieces.

Mrs. Claus free applique pattern from Shiny Happy World - step by step photosRemember – those dotted line edges will tuck behind other pieces. For example – the bottom of the bun has a dotted line, showing it tucks behind the top of the head.

Line up the lower edge of her shoulders with the bottom edge of the block. You’ll trim away the excess when you trim your block down to size so you don’t see that cut edge.

Fuse the design in place, again following the instructions on your fusible package.

Step 7

Stitch around all the pieces to secure the edges. Stitch right over your traced lines for the nose and mouth. (This video has tips for stitching those tight curves.)

Mrs. Claus free applique pattern from Shiny Happy World - step by step photosI like to use a simple straight stitch in thick black thread. I think the cartoony outline suits my simple designs, but you can use matching thread and any stitches you like.

This post has more info if you’re trying to figure out in what order you should stitch the pieces.

Step 8

Trim it down to size and you’re finished! I recommend starting with an 11 inch square and trimming it down to 10 1/2 inches if you’re making a quilt or a wall hanging – but you can also use this design to make some placemats (free placemat pattern here) and that will need a different starting block size.

Mrs. Claus free applique pattern from Shiny Happy World - step by step photos

Happy quilting!
Best,
Wendi
Wendi Gratz from Shiny Happy World

Mrs. Claus - free applique pattern from Shiny Happy WorldFree Christmas applique patterns from Shiny Happy World

Think BIG! Fun and Easy Giant Applique Class
Fox applique fabric pieces (unassembled) and blue scissors

Think BIG is here!

It’s a brand new class covering everything you need to know to do GIANT applique.

  • How to enlarge any applique pattern to any size you like – including an easy formula
  • How to work with that giant pattern
  • What to do when the pattern pieces are bigger than the biggest fusible adhesive you can buy
  • What to do when your applique is way bigger than your ironing board

You’ll get general information that you can use for any applique of any size for any project – but you’ll also get all the pattern pieces and instructions to make four fun projects.

Make a BIG poster.

large blue applique cat on pink background with words Don't forget to have Fun!

You’ll get the giant cat pattern, the alphabet, and the instructions to make a big poster.

I made this reminder to hang in my new studio – but you can make anything you like! This would be a great project for a new baby. Make a baby quilt, then enlarge your favorite block from the quilt to make a matching poster with baby’s name and birth date!

Make a BIG pillow.

Giant applique Fox pillow from the Think BIG Giant Applique Class from Shiny Happy World

You’ll get the giant fox pattern plus all the instructions to make a big pillow. Mine is 26 inches square – but the class includes instructions to enlarge to any size you like. Make a big floor pillow to match one of the blocks in your favorite applique quilt!

Make a BIG bunny baby quilt.

Big Bunny applique Baby Quilt from the Think BIG Applique Class from Shiny Happy World

This bunny quilt is fast and easy. You can make it in a day! The corner bunnies are “normal” 10 inch blocks and the center medallion is a whopping 30 inches square. The class includes instructions for easy peasy Quilt As You Go construction. You could easily adapt the pattern to work with any applique design in your stash, to match any nursery theme – but you’ll get the bunny pattern in both sizes.

Make a BIG napping quilt.

Big Lap Quilt with giant yellow applique dog from the Think BIG Applique Class from Shiny Happy World

Whoa! Look at that giant version of my Augie Dog! It’s way WAY bigger than the original. 🙂

You’ll get the full-sized puppy pattern plus complete instructions to make a 50 x 60 inch napping-size quilt – my favorite size for curling up on the couch. Using Quilt As You Go doesn’t make much sense for a quilt made of one HUGE block, so I include a video with tips for quilting it.

Of course, the class includes instructions to enlarge any block to size for a quilt like this. I’ve already had one reader suggest a quilt with a single “doll” from the Paper Dolls quilt, enlarged to be the same size as your child or grandchild. What a brilliant idea!

By the end of the class you’ll be able to adapt ANY applique design to ANY size you like – and add huge fun to all your favorite patterns. 🙂

Sign up for the class here.

Happy quilting!

Best,
Wendi
Wendi Gratz from Shiny Happy World

Free Trick or Treat Bag Tutorial

Trick or Treat Bag - a free pattern from Shiny Happy World

Need to whip up a super easy trick or treat bag for Halloween this year?

Then I have the pattern for you!

It’s fully lined (which actually makes construction easier), requires no hand sewing, can be made with any of my square quilt block patterns with no resizing – and you can make it in an hour or less. 🙂

This project will work with any of my square applique patterns. If you’re using someone else’s pattern, you may need to resize it to fit a 10 inch square.

I’m using two monsters from the Scary Squares monster quilt pattern.

If you have a witch who needs a black cat, you could use the free Spooky Cat applique pattern.

If you have a farmer who needs a few farm animals, you could use any of the blocks in the Noisy Farm pattern.

If you just want to customize it with a name or Halloween greeting, use a fun Halloween print fabric and this free alphabet applique pattern.

The sky is the limit!

What You’ll Need

  • 1/2 yard medium weight fabric for the main bag (I used black cotton twill)
  • 1/2 yard light weight fabric for the lining (I used a Halloween novelty print)
  • fusible adhesive (I recommend Heat & Bond Lite)
  • fabric for your applique
  • black thread
  • applique pattern of your choice

Cutting Instructions

  • Cut two 11″ x 11″ squares from the main fabric.
  • Cut two 11″ x 11″ squares from the lining fabric.
  • Cut two 14″ x 4″ rectangle from the main fabric for the handles.

Put It All Together

Step 1

Applique the main fabric squares with the design of your choice. If it’s one of my portrait designs, make sure the cut edge of the body is lined up with the bottom edge of the square.

Trick or Treat Bag - a free pattern from Shiny Happy World

If you’ve never done applique with fusible adhesive, it’s super easy! You’ll find instructions with video links in any of my patterns, and there’s a general video tutorial here.

Step 2

Fold the rectangles for the handles into double-fold strips and press.

There’s a video here showing how to do that if it’s new for you.

Stitch through all the layers down each long edge.

Trick or Treat Bag - a free pattern from Shiny Happy World

Set the handles aside.

Step 3

Layer the two lining pieces right sides together. Sew down one side, across the bottom, and up the other side using 1/4″ seam allowance.

Trick or Treat Bag - a free pattern from Shiny Happy World

I clipped the corners here out of habit, but you don’t need to do that. They’re about to get chopped off in the next step.

Repeat for the two main trick or treat bag pieces.

Step 4

Box the corners  of the lining so the bag is 1 inch deep

Trick or Treat Bag - a free pattern from Shiny Happy World

If you’ve never sewn boxed corners before, this video will show you how.

Repeat for the main bag.

Step 5

Fold the bag in half to find the center of the top edge.

Pin the handles to the bag so that the inside edge of the handle is 2 inches from the center pin, and the raw edge of the handle is lined up with the raw edge of the bag.

https://wendigratz.wpengine.com/2014/07/video-sew-boxed-corners.html

Pin the handles in place on both sides of the main bag. You can baste them in place if you like, but I usually just hold them with pins for the next step.

Step 6

Leave the main bag right side out, and the lining inside out.

Slide the lining over the main bag, so that the right side of the lining is facing the right side of the applique, and the handles are sandwiched between the two layers. Match the side seams and centers and pin the two bags together around the top edge.

Sew around the top edge of the bag using 1/4″ seam allowance and leaving an opening on one side between the inside edges of one of the handles.

Trick or Treat Bag - a free pattern from Shiny Happy World

This is easiest if you start sewing right at the inside edge of one handle. Sew through that handle, around the side seam, through both handles on the other side, around the second side seam, and through the last handle. Stop as soon as you sew over the last handle (remember to backstitch!) and you’ll have an opening about 4 inches wide.

Step 7

Turn the bag right side out. This step is a little mind-bendy if you’ve never done it before, but it’s actually really simple.

First pull the main bag out of the lining so that both parts are inside out.

Trick or Treat Bag - a free pattern from Shiny Happy World

Now reach into the opening, grab the main bag and pull it through the opening so that it’s right side out. Keep pulling and the lining will follow – also right side out.

Trick or Treat Bag - a free pattern from Shiny Happy World

Now just tuck the lining down inside the bag. 🙂

Step 8

Smooth and press the top edge of the bag.

Fold under the seam allowance from the turning opening and press that as well.

Edgestitch all the way around that top edge. This will finish your bag, sew up the turning opening, and reinforce the handles – all in one step. 🙂

Trick or Treat Bag - a free pattern from Shiny Happy World

Finished!

Trick or Treat Bag - a free pattern from Shiny Happy World

Now go out and fill your trick or treat bag with lots of yummy candy. 🙂

For a slightly smaller tote bag, made with the same method, head over here.

Here are several free patterns that work with my basic 10-inch applique squares – no resizing needed!

Here are several free patterns that work with just some simple resizing. This post about making coasters has info about resizing an applique pattern that can be applied to any of these projects.

Return to the main Let’s Make a Quilt Table of Contents.

Happy Halloween!

Scary Squares vs. Mix & Match Monsters – What’s the Difference?

grid of monster appliques

As of today I have two different monster quilt patterns in the shop. Scary Squares and Mix & Match Monsters.

There are a lot of similarities between the monsters (because I drew them all) but these are not the same pattern!Scary Squares easy monster quilt pattern from Shiny Happy World

Scary Squares is the easier pattern. It includes full-sized applique patterns for twelve different monsters, plus all the instructions and links to videos you need to make your quilt. The pieces for each monster are exploded and labeled and ready for you to assemble in the usual way. This one is great for beginners.

Mix & Match Monsters - the pattern that comes with the Craftsy class Cute Quilt-As-You-Go Applique Monsters

Mix & Match Monsters includes 24 pages of mix and match monster parts. The pieces are all carefully sized and proportioned so you can combine them in a bunch of different ways to make a kajillion different monsters. 

How do you know which one is right for you?

If you’re new to Quilt As You Go and applique with fusible adhesive, or you just want a monster project that’s fast, easy, and fun – with all the design decisions already made – then the Scary Squares pattern is the one for you. Get it here.

If you look at the Scary Squares pattern and think, “I like the eyebrows on that one monster, but I want to add them to this other one, and maybe add the horns from that guy onto this guy, and use some faux fur while I’m at it. Oh – and I think this guy needs a contrasting belly and that guy could use some stripes and I wonder if I could add some springy, curly hair to this one, and wouldn’t it be fun to make it look like that one is busting out of his block. . .” then the Mix & Match Monsters pattern is the best choice for you. 🙂 Get it here.

Happy quilting!

Best,
Wendi
Wendi Gratz from Shiny Happy World