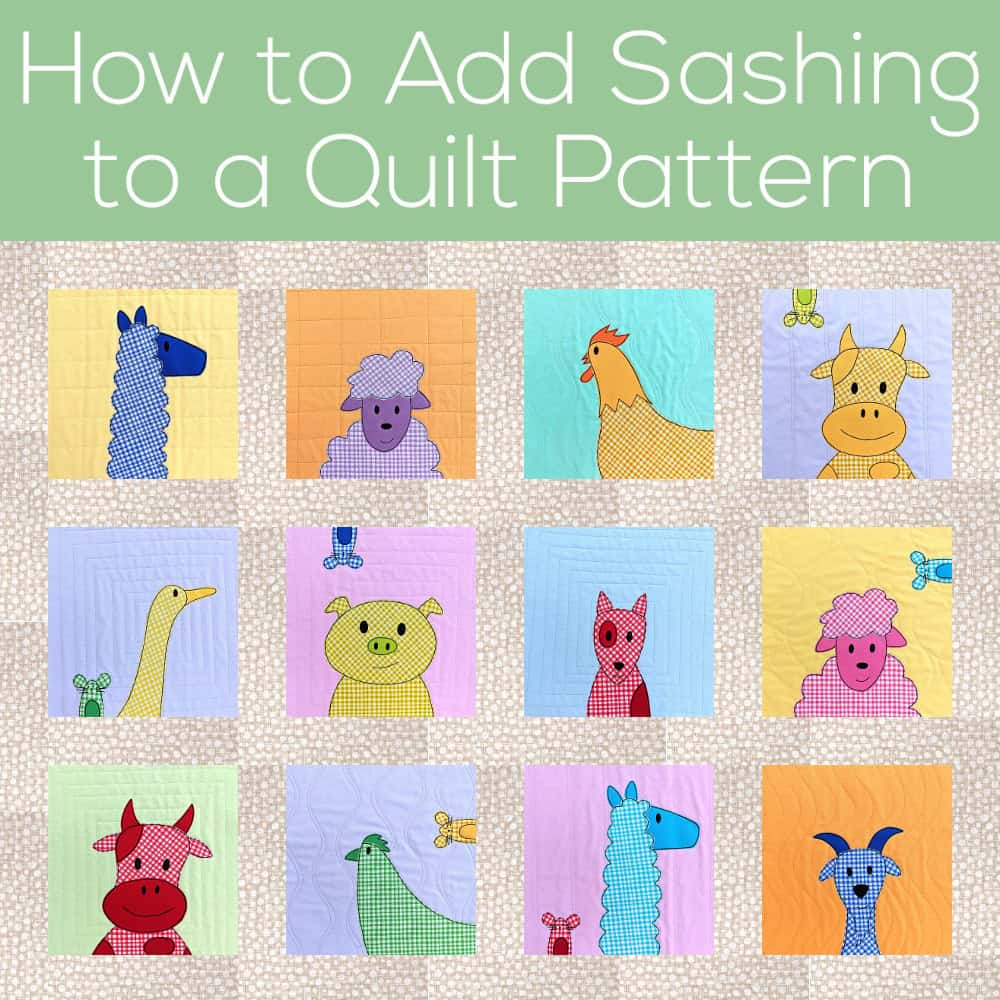
For years I’ve had people ask me about adding sashing to a quilt pattern from Shiny Happy World.
That’s an easy question.
Yes!
You can always modify any pattern to add (or take away) sashing.
Sometimes they have another question. How does adding sashing to a quilt change the yardage they need to buy?
Well – that’s a whole other question that requires a much longer answer. 🙂 So long that the best way to give it to you is as a printable download. It has fabric requirements, cutting guides, and assembly diagrams for six different quilt sizes with sashing and borders. Download it here.
First – let me clarify. I say almost any quilt pattern because these measurements will only work for square blocks. If you’re adding sashing to a quilt with double blocks or half blocks, you’ll need to do a little extra math for that. But the measurements in that PDF work for any of my quilt patterns that have 10 inch square blocks – and that’s almost all of them. 🙂
And one more reminder – all of these measurements only work if you have an accurate 1/4 inch seam. If you don’t have a quarter inch foot on your machine, I strongly recommend getting one. It will make your life sooooooo much easier. 🙂
Find links to all the posts about pattern size and layouts here.
I’m moving right along on my version of the Noisy Farm quilt with sashing added, and I realized this is the perfect time to share a little tip with you about pinning long seams.
I’m not very bossy about pinning most of the time. Some people pin, some don’t, and I’m mostly a live and let live kind of person. 🙂
But when it comes to long seams (like the ones attaching those looong sashing strips to rows) you’ll find that pinning – and actually pinning in a very particular way – will save you a lot of headaches.
Here’s the problem. If you just slap a long strip on your strip of blocks and just start sewing without pinning – there’s a really good chance that when you get to the end of the long seam, one of those pieces is going to be significantly longer than the other. This happens even if you use a walking foot and even if you’re really careful about keeping your tension even. It just happens.
You know what keeps it from happening?
Pins. 🙂
I’ve got a specific method I use to pin longs seams. I call it Divide and Conquer.
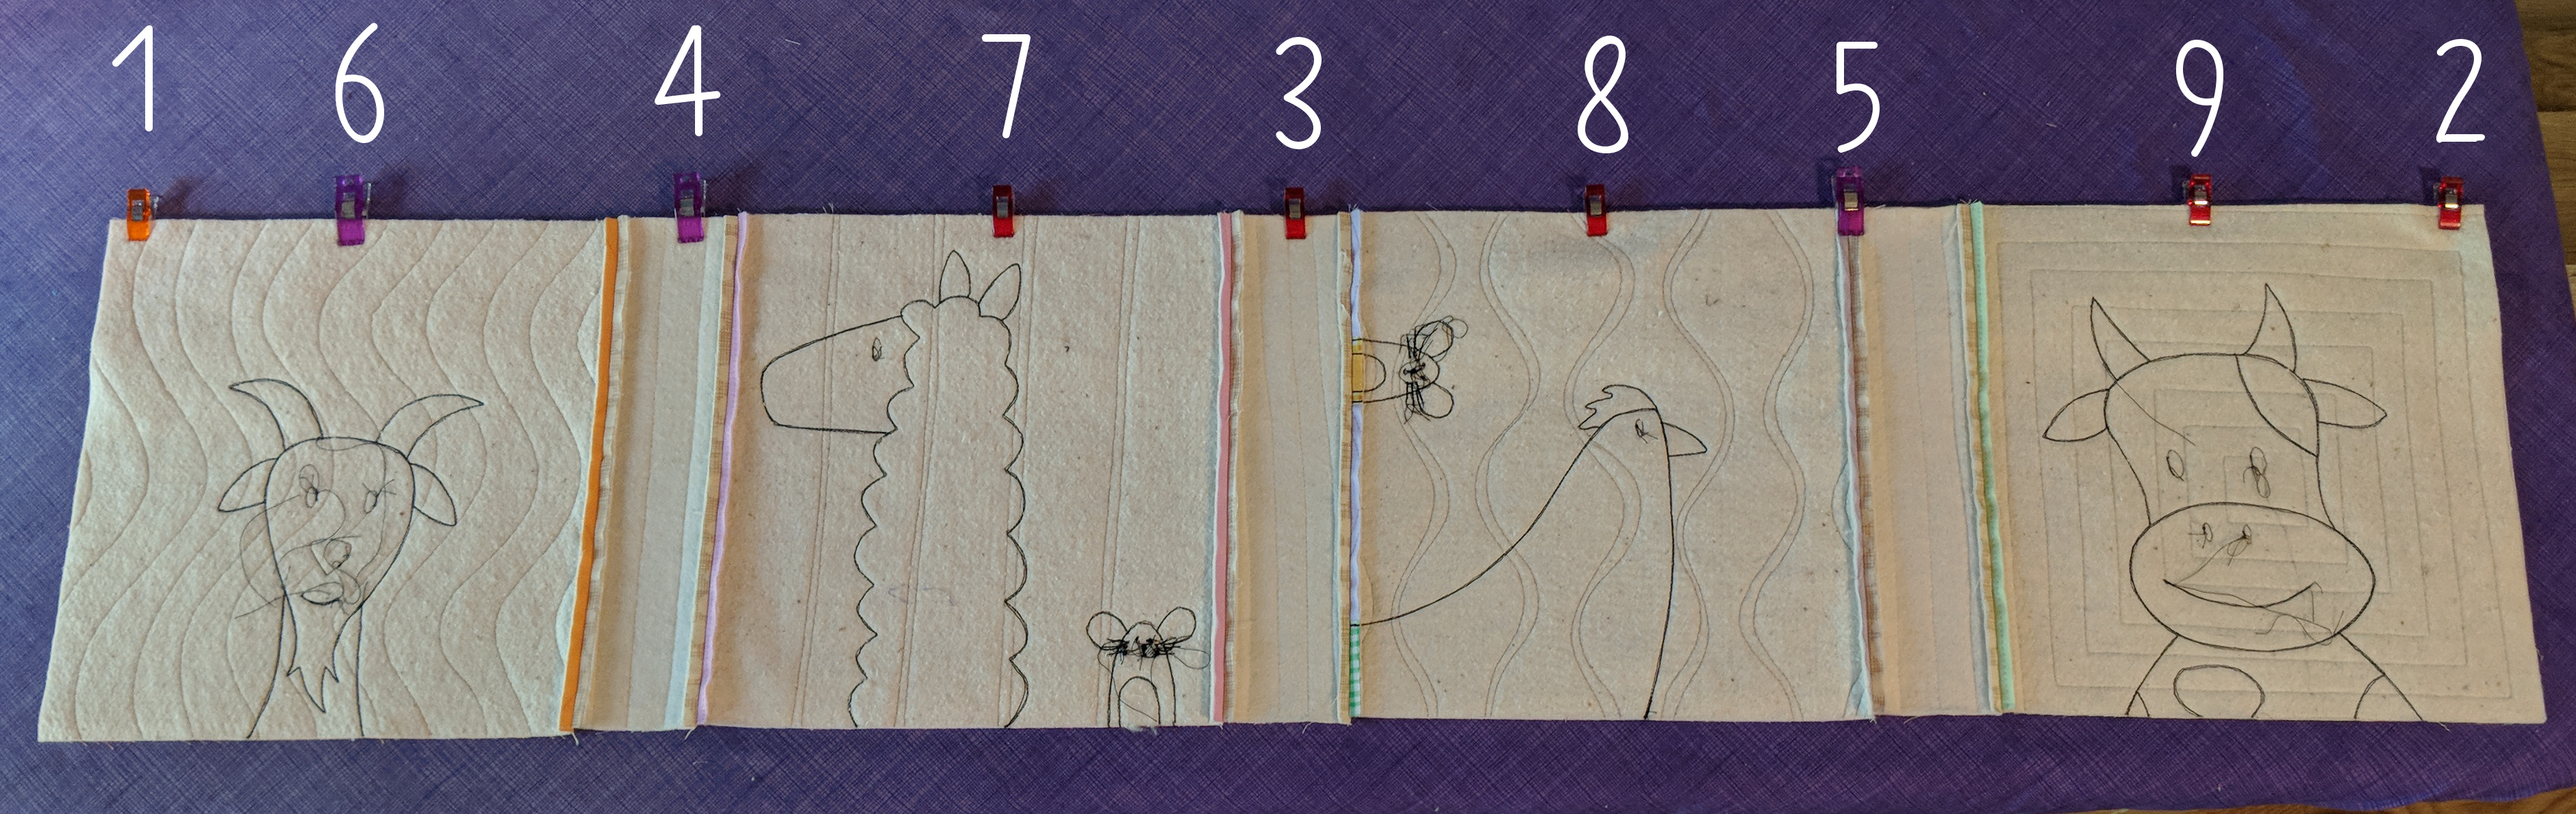
Here’s a seam I just pinned. (Actually clipped. When I pin already-quilted layers together I prefer to use sewing clips. They distort the fabric less.)
I loaded up a really large image size here so you can click on it to see it even bigger on your screen.
Those numbers show you the order in which I placed those clips.
First I start by clipping the ends – 1 and 2. That way I know that my ends are going to be perfectly lined up.
Next I want to divide that space in half (Divide and Conquer) and I place the clip right in the middle. That’s #3.
That leaves me with two large spaces – the one between 1 and 3 and the one between 3 and 2. I divide those spaces in half by adding clips 4 and 5.
Finally, I divide all the remaining spaces in half by placing clips 6, 7, 8 and 9.
It’s always the same – I start by securing the ends, then just keep dividing the remaining spaces in half over and over again until my clips are close enough together to take it to the machine.
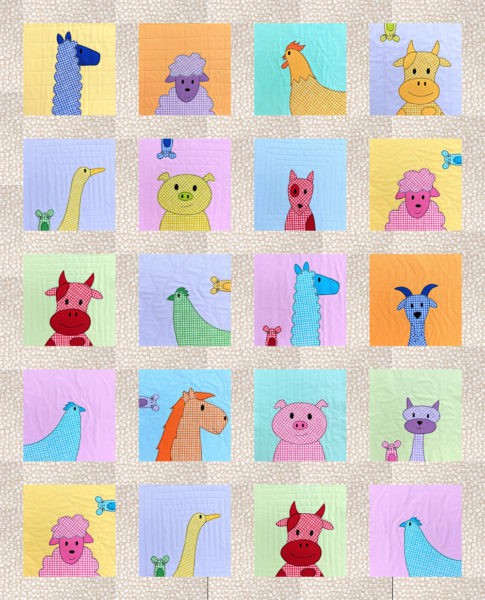
I’ve gotten a lot of questions lately asking for suggestions for the background colors of the Noisy Farm quilt pattern.
The cover sample you see above is from before I had fabric bundles in my shop, and most of the fabrics I used are no longer available.
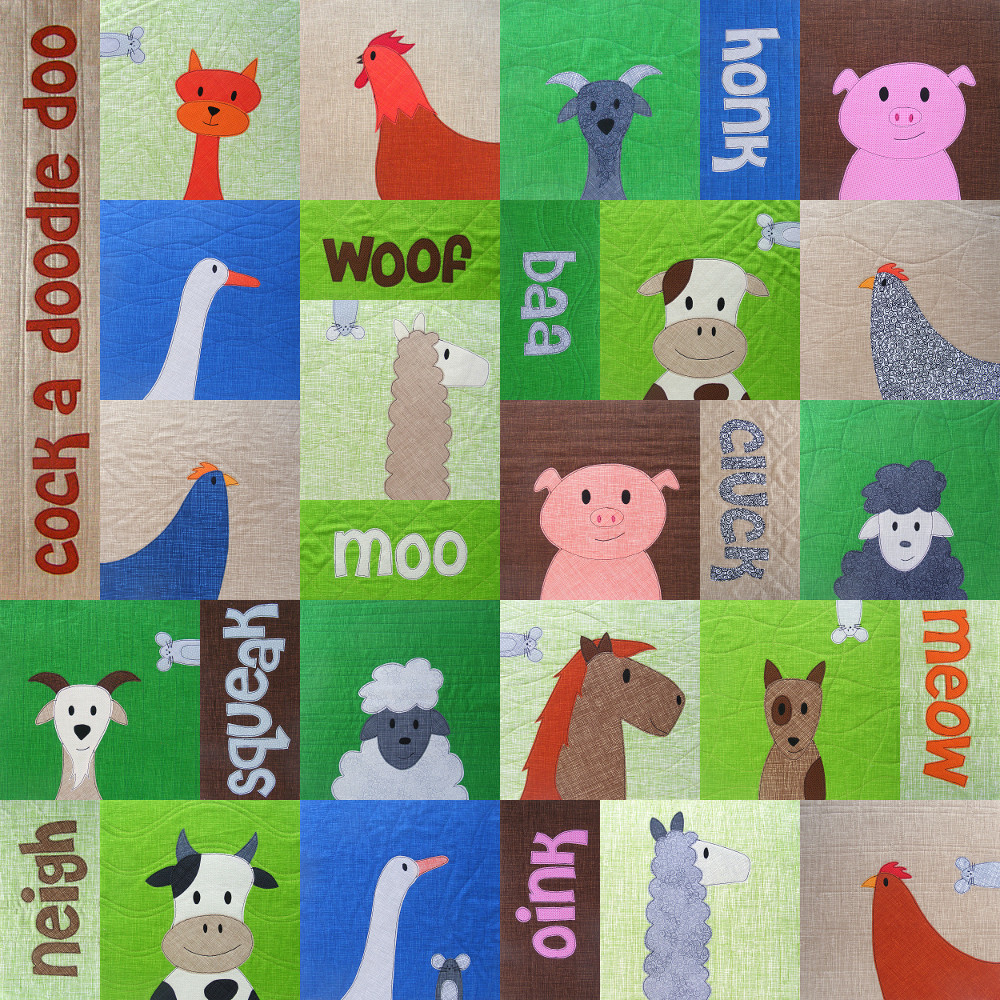
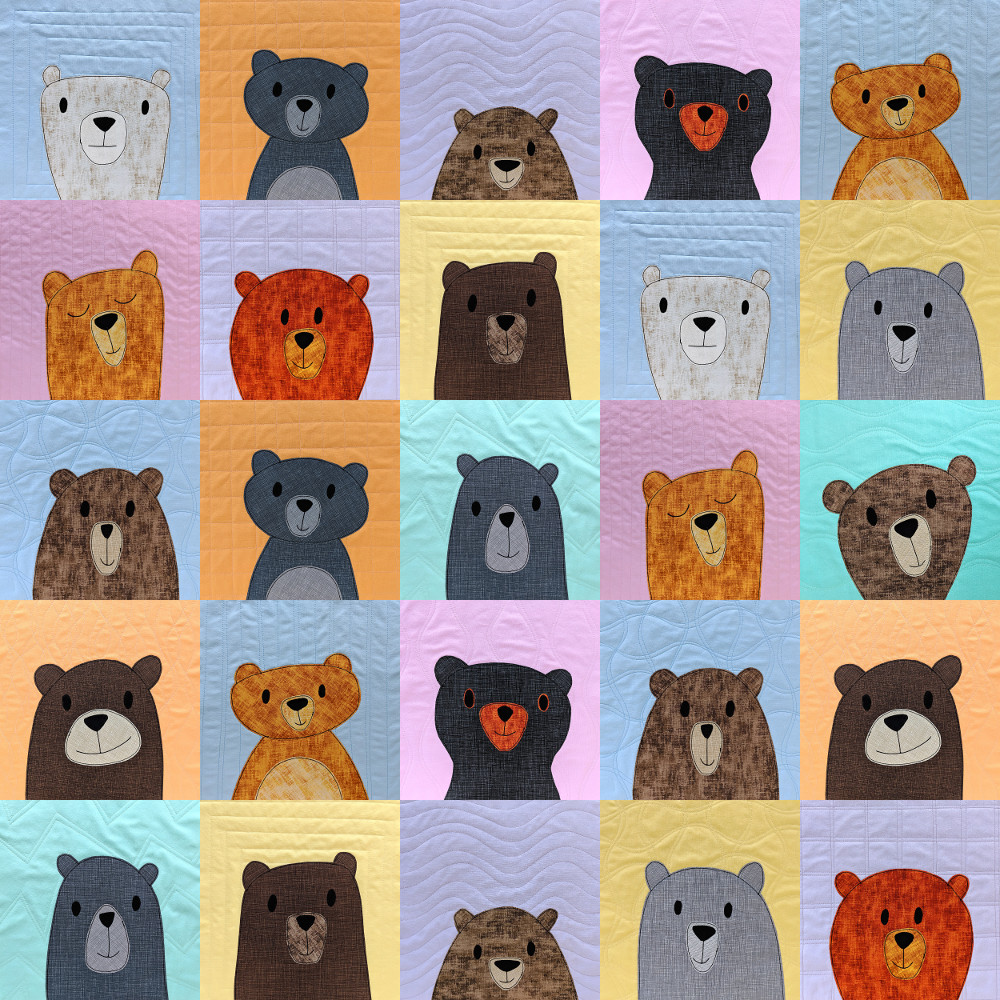
One of the things I love about the way I do fabric bundles now is that you can use any bundle for any quilt. Here’s an example of three quilts that all use the Warm Neutrals fat quarter bundle for the animals – but different bundles for the background colors.
Changing just the background colors really changes the whole feel of the quilt – and I love them all!
So when people ask for suggestions for background colors for the Noisy Farm pattern – I want to tell them they can use anything! Go totally bright with the Solid Rainbow! Go a little more subdued with Box of Crayons! Go baby sweet with Rainbow Sherbet! Go natural with Green Batiks! Want even more suggestions? Go to the Noisy Farm pattern listing and look at the additional photos. There are a bunch showing finished quilts that other people have made with different fabrics than my samples.
For my new version of the Noisy Farm quilt I used Rainbow Sherbet for the background blocks. I went totally wild with the animals and using the Gingham Play fat quarter bundle. Gingham always says “farm” to me and I can’t wait to make the animals in fantasy colors.
One more change – I made this one a silent farm. 🙂 I left off the half-blocks with animal sounds and added sashing. I get a lot of requests about adding sashing to a Quilt As You Go quilt. There’s a tutorial here showing how you can reset (almost) any of my quilt patterns with added sashing. I even did the math for you for all the sizes. 🙂
If you’ve made any of my quilt patterns using a different color scheme – please share! Seeing all the different versions of my patterns makes me Muppet-arms-flailing happy – and it’s a great resource for your fellow makers out there to see different options. 🙂
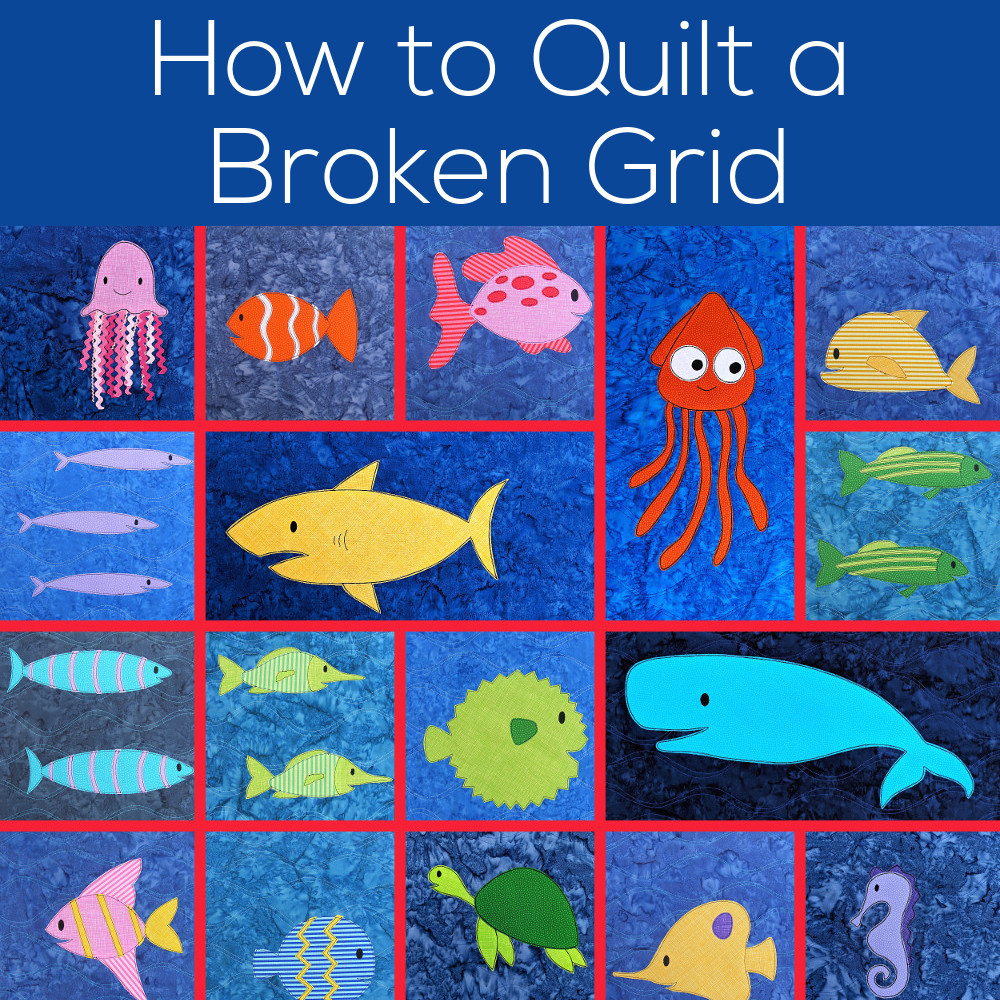
Some of my quilts have what I call a “broken grid” layout. You’ll also see it called an “alternate grid.”
Both of these terms refer to quilt layouts that aren’t the standard checkerboard-style grid, with all the seams running in straight, uninterrupted lines from edge to edge.
But I get a lot of questions about how, exactly, I quilt these quilts. Do I quilt around each square individually? Do I turn the corner to go around a block that’s interrupting my straight line?
Nope and nope. 🙂
At this point in the process I have my entire quilt sewn together and I want to do everything possible to avoid turning any corners while I’m quilting, because that means turning the entire mass of the quilt, and that is not fun.
So what do I do?
I hop over the block that’s blocking my way.
This video shows what I mean by that.
See?
Just hop right over those pesky blocks. 🙂
Do be sure to backstitch or knot – whatever technique you use to secure your threads – any time you have to stop or start quilting.
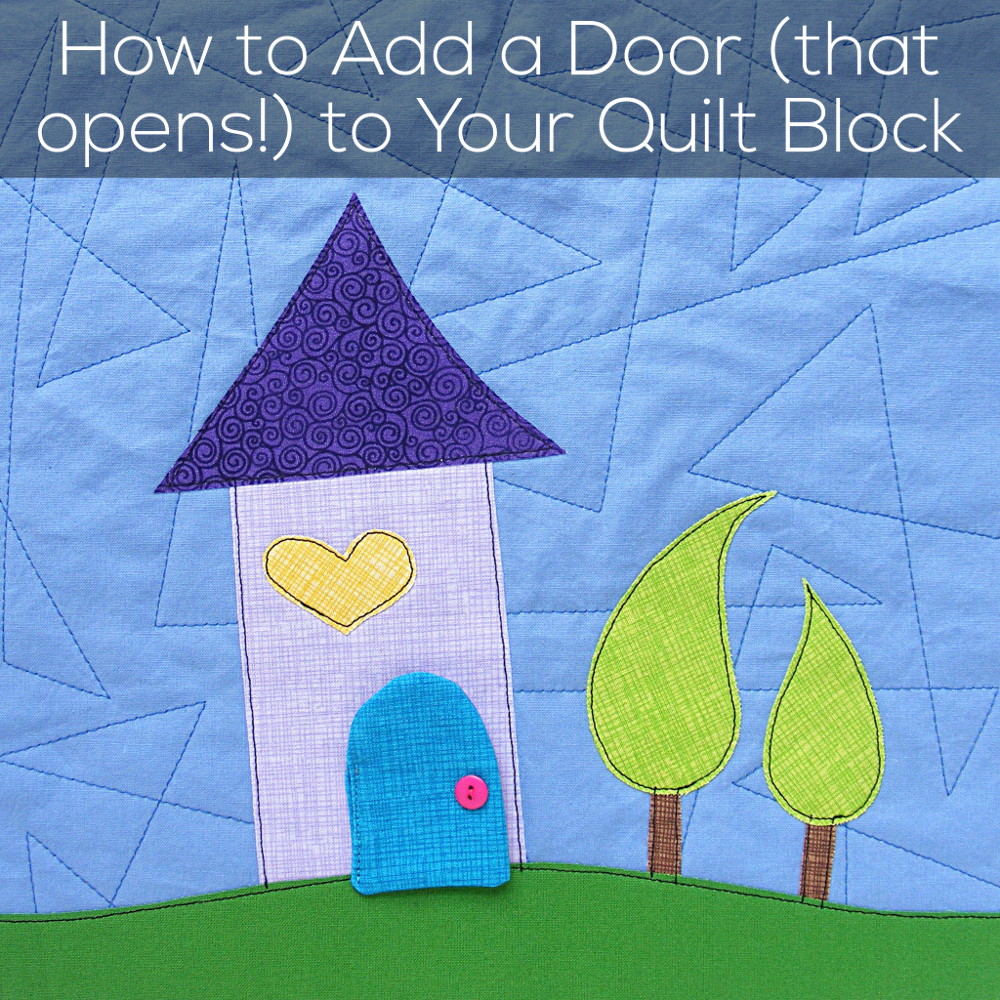
I’m using an example of one block from the Shiny Happy Houses quilt pattern, but you could adapt this idea in all kind of ways! I list a few possibilities at the end of the tutorial.
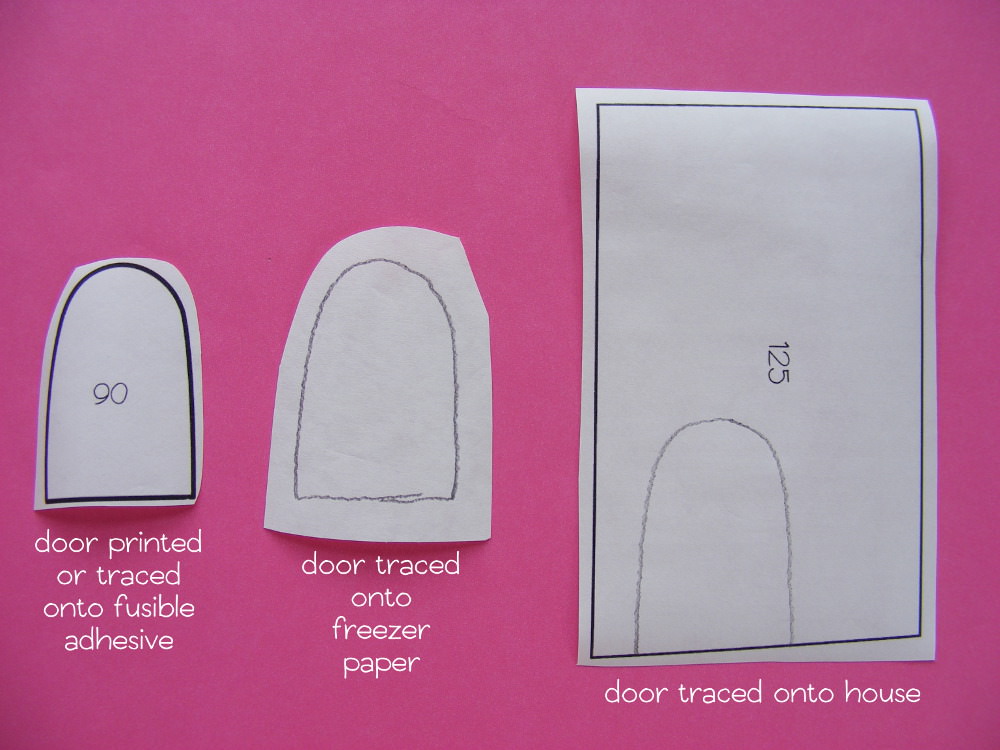
Step 1
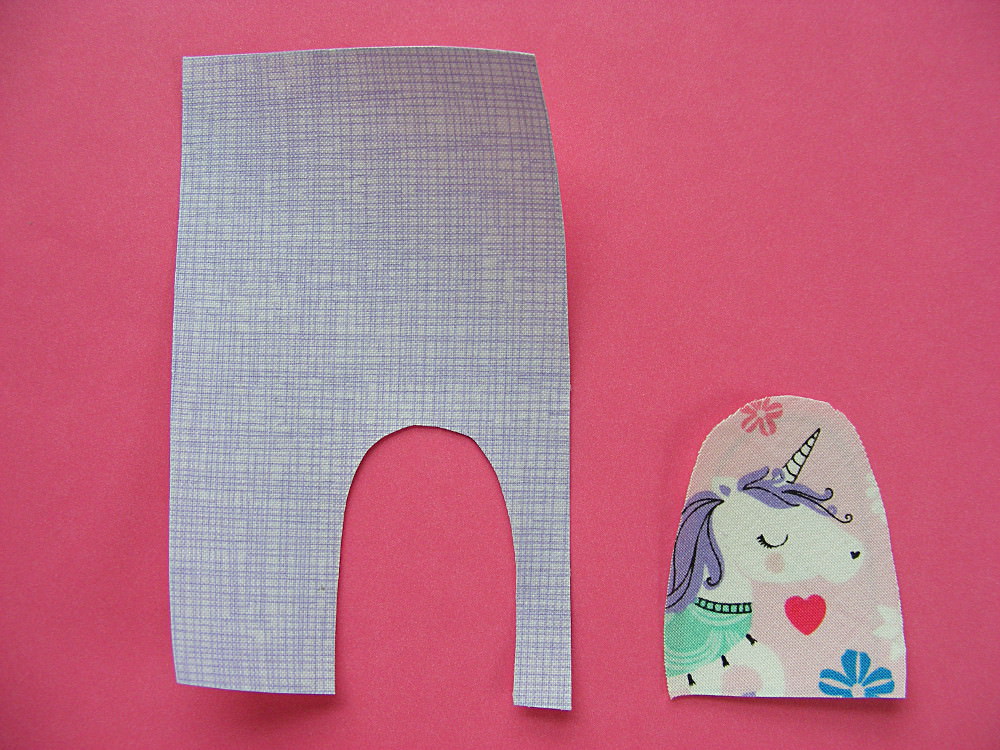
Trace or print all your pattern pieces as usual. You’re going to do three things with your door piece.
Print or trace your door onto the fusible adhesive – just like normal.
Also trace your door onto a piece of freezer paper.
Also trace your door onto the fusible adhesive house piece – right where you want it to go.
Step 2
We’ll start with making the door itself.
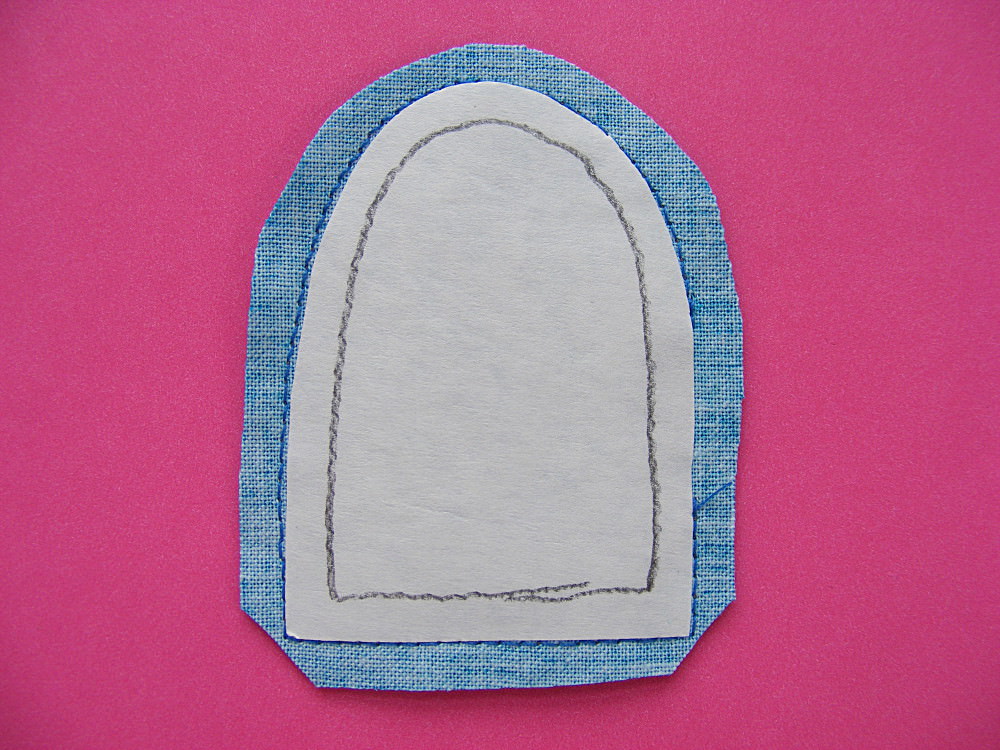
Cut the door piece out of the freezer paper a little bit bigger all the way around. Do this neatly – it’s just to make the door a smidge bigger than the door opening. Mine is a little bit more than an extra 1/8″ all the way around.
Layer two pieces of door fabric right sides together and fuse the freezer paper door piece to the wrong side of the top layer.
Use the edge of the freezer paper as a guide and stitch almost all the way around the door, leaving a little bit open for turning on the side where the “hinges” would be. Don’t forget to backstitch at the beginning and end of your stitching.
Step 3
Trim around the door, leaving a small seam allowance.
Clip away the excess completely at the corners.
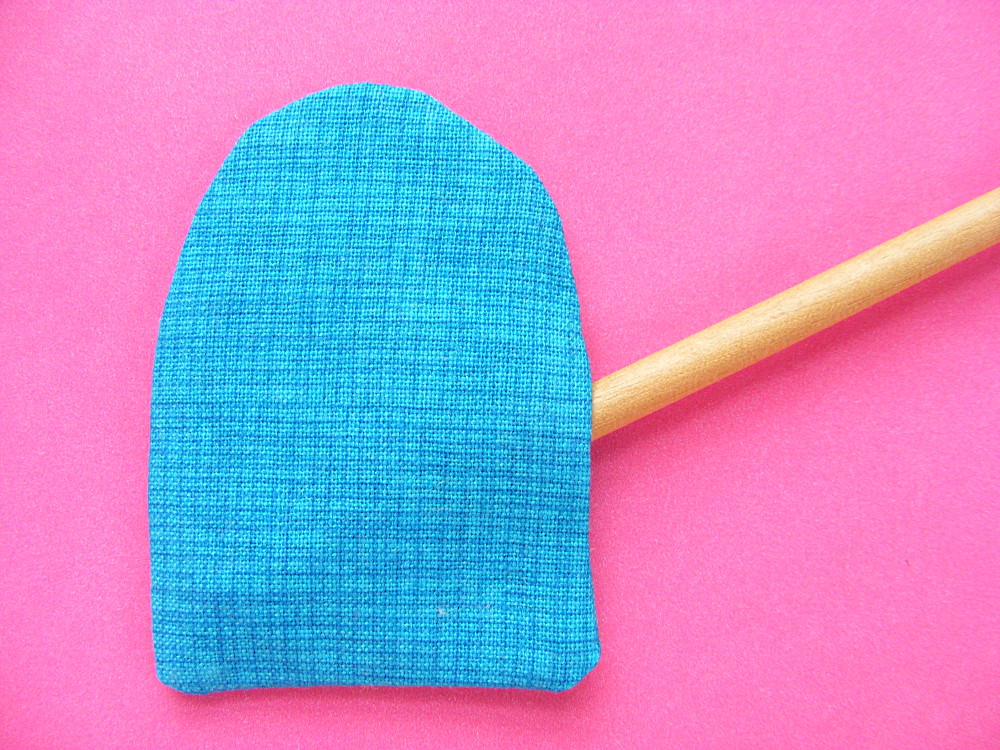
Step 4
Turn the door right side out through the opening. Smooth your curves, poke out your corners, and tuck the seam allowance at the opening inside and press the whole thing nice and flat.
I’ve got my turning stick going into the opening here so you can see where it is. 🙂
Now set the door aside for a bit.
Step 5
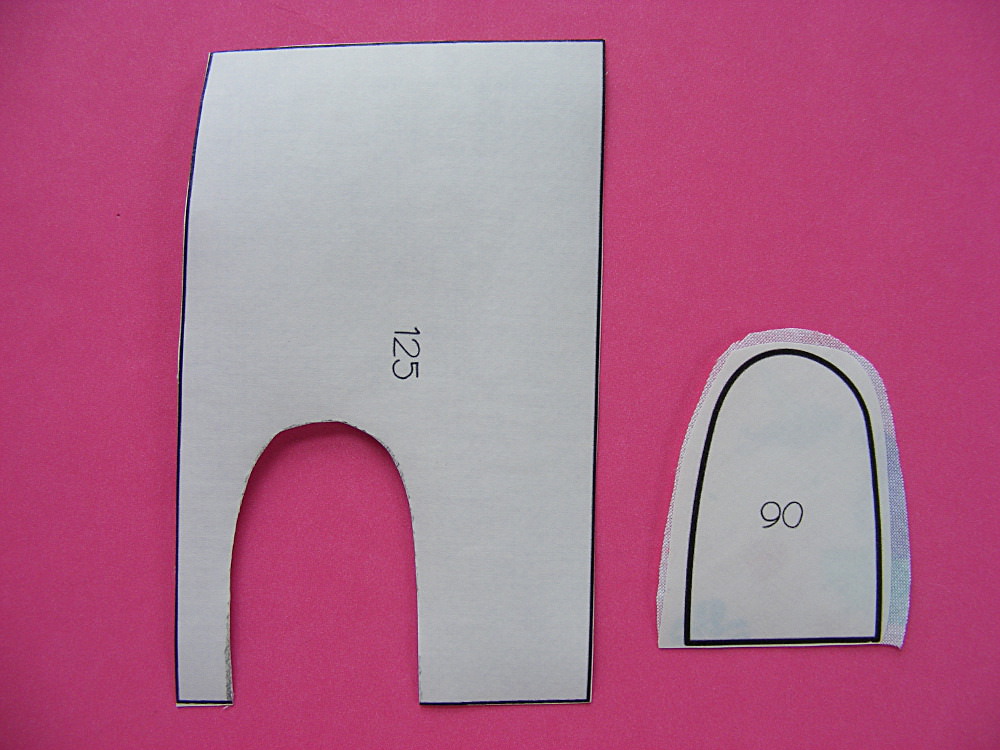
Fuse the house piece and the “behind the door” piece to the back of their fabrics.
Cut out the house piece right on the line – including cutting away the door that you traced.
Cut the “behind the door” piece right on the line at the bottom of the door. Leave a little extra fabric at the top and sides.
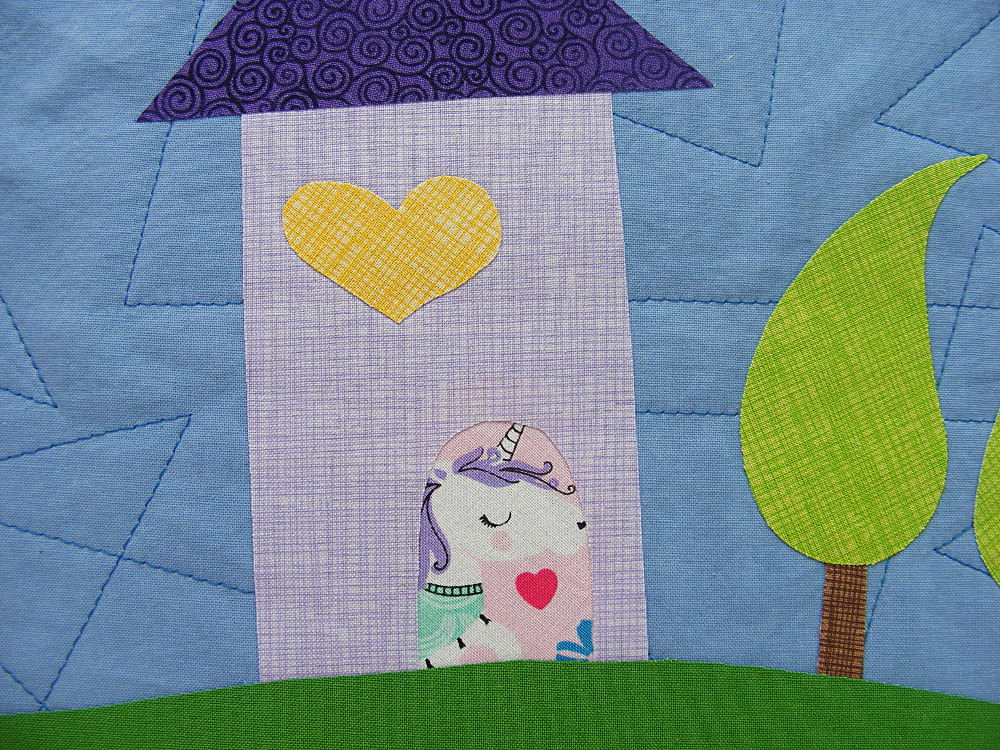
Here they are from the front after cutting them out. It’s fun to fussy cut something cute for the “behind the door” piece. 🙂
Step 6
Peel off the paper backings, layer all the pieces together, and fuse.
The “behind the door” piece should be tucked behind the door opening so that it peeks out.
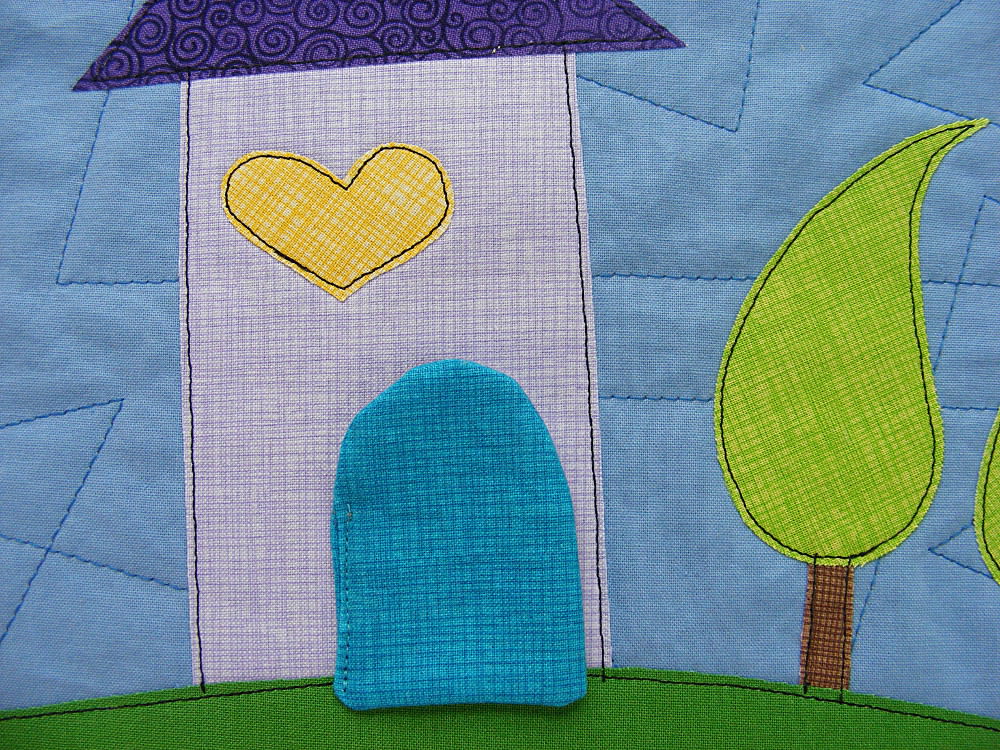
Step 7
Outline all the pieces as usual.
You’ll only need to stitch around the door opening on the house piece – that stitching also secures the unicorn piece behind it.
Step 8
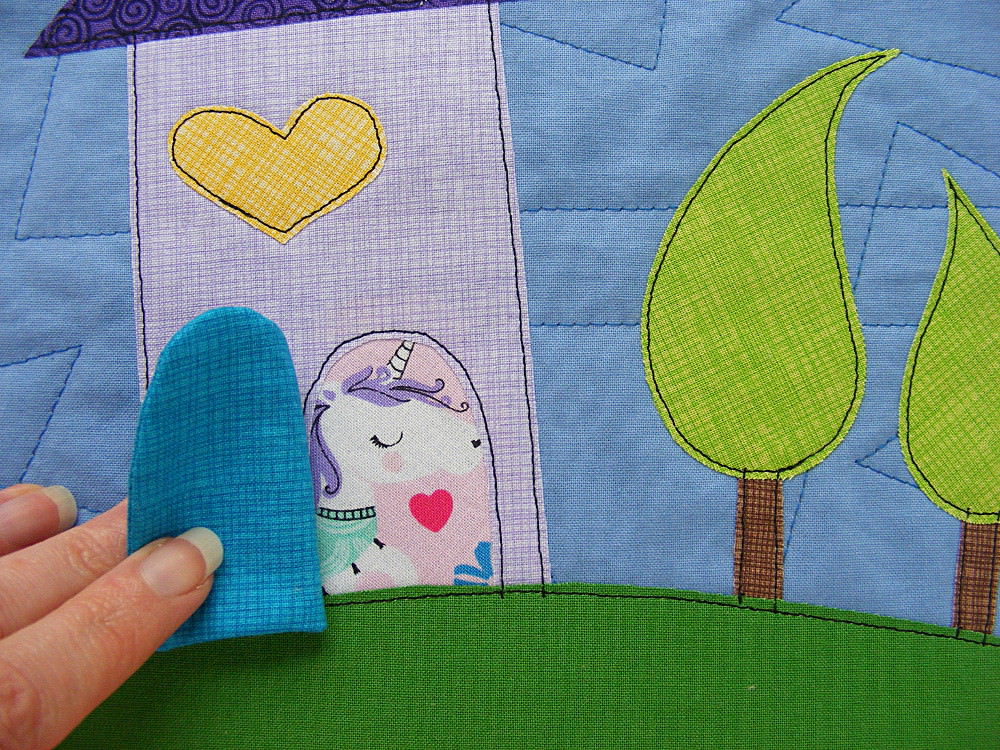
Sew the door in place by stitching down the side with the turning opening.
No hand sewing needed!
Finished!
Add a button doorknob if you like. 🙂
You can play with this idea in so many ways! Add shutters to the windows! Make a camouflaged “door” in a treetop (using the same fabric as the rest of the treetop) and hide a little bird or squirrel in there! I know someone out there has used the Shiny Happy Houses pattern to make a castle. Add a functioning drawbridge!
The possibilities are endless, and I can’t wait to see what you all make!
Here are links to all the posts showing how to applique with fusible adhesive – my favorite method. It’s fast and easy and (with the right materials) it holds up beautifully to rough use and repeated washing.
If you’re like most quilters – you have a LOT of patterns. 🙂
It’s always great to come up with another use for one of your favorites – especially if you can make an accessory to go WITH one of your best quilts.
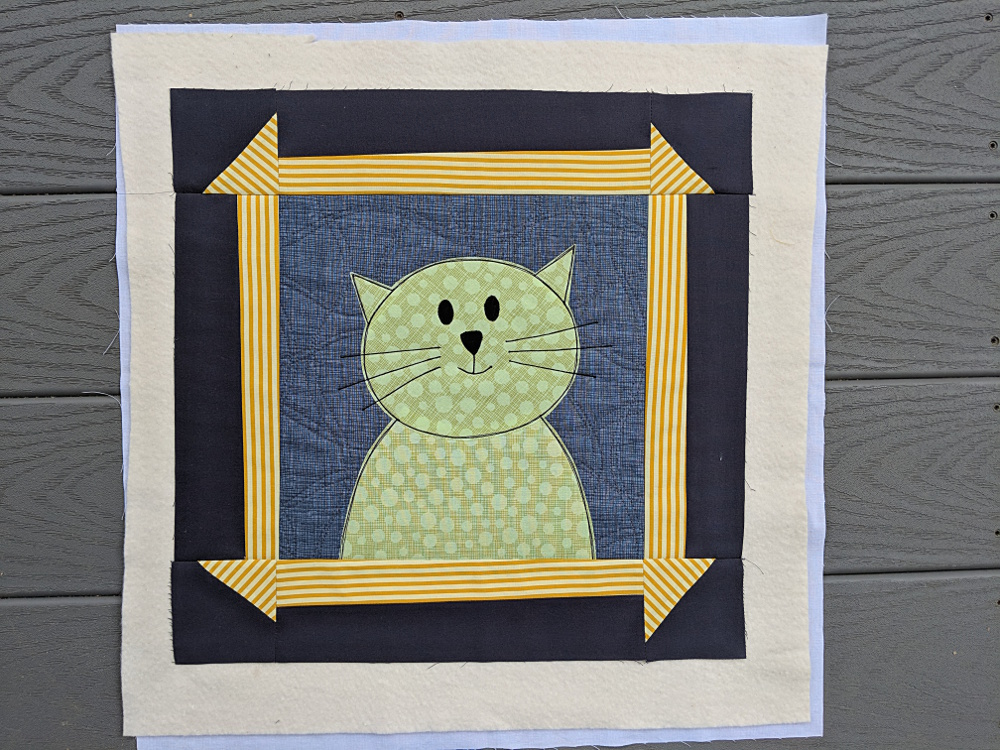
You can turn a single block into a wall hanging and hang it just as it is. But it’s extra fun to give that block a special frame to really set it off and make it into a piece of art. 🙂
And it’s even more fun if that frame uses a wonky version of a traditional quilt pattern.
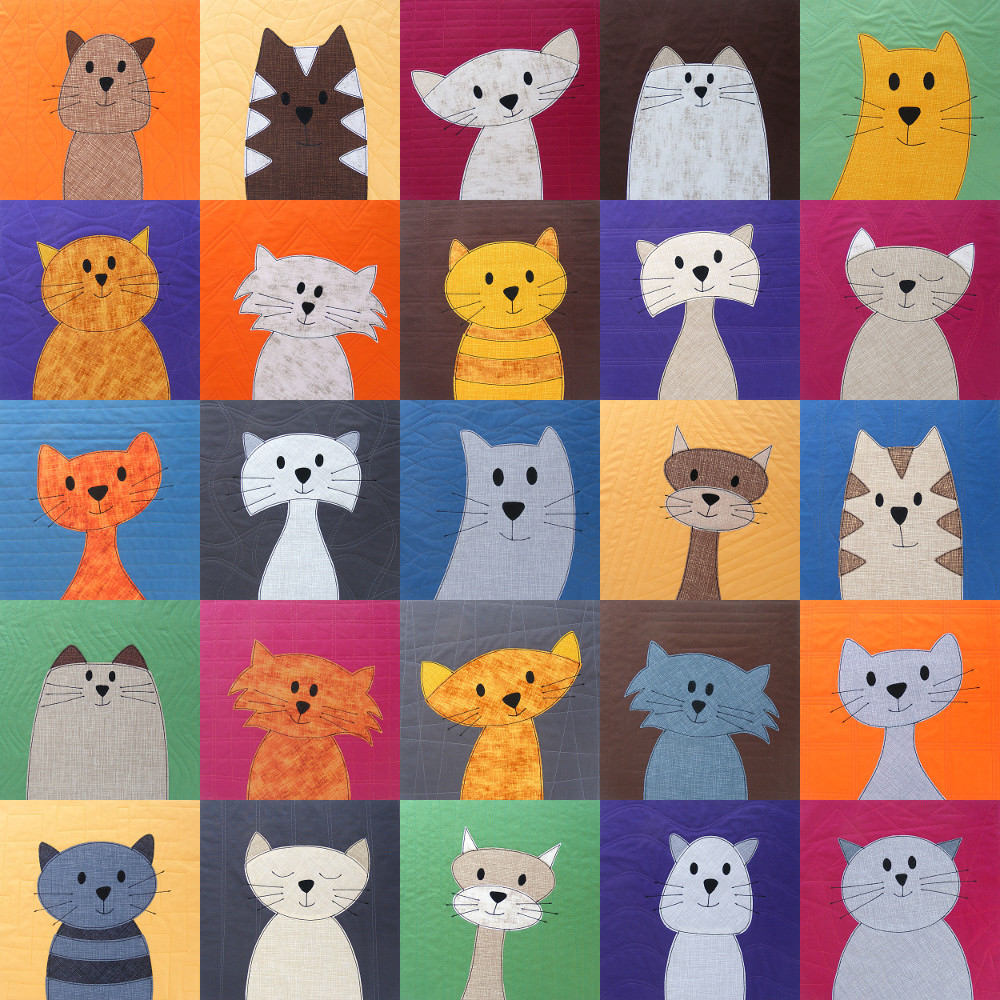
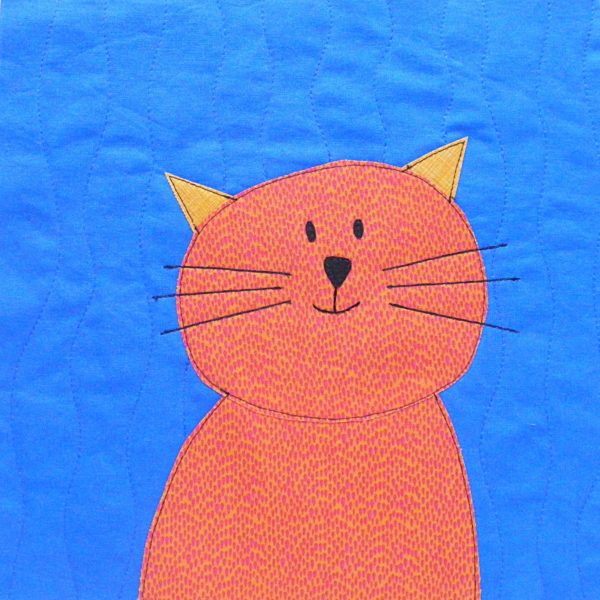
For this wall hanging I used one of my favorite blocks from the Cuddly Cats quilt pattern – no resizing. So it’s a 10 inch block in the center, with a wonky churn dash frame around it. The entire wall hanging is 16 inches square.
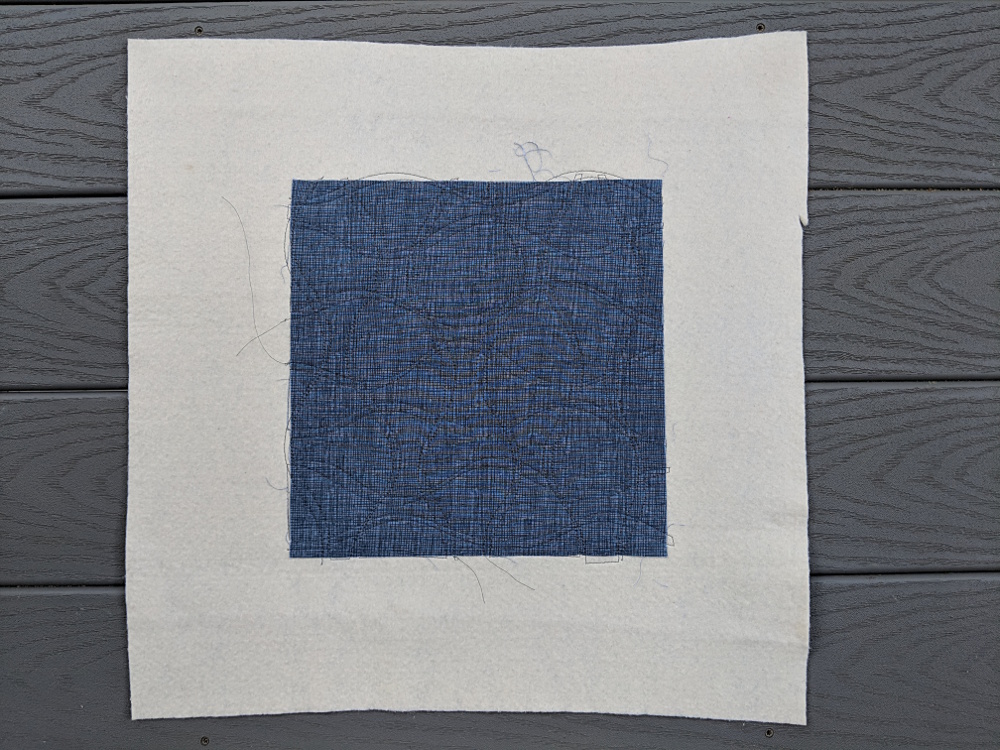
Press your batting square. Center your background block in the center of the batting.
Quilt the square to the batting.
I used double wavy stripes on mine. You can find a tutorial for that here.
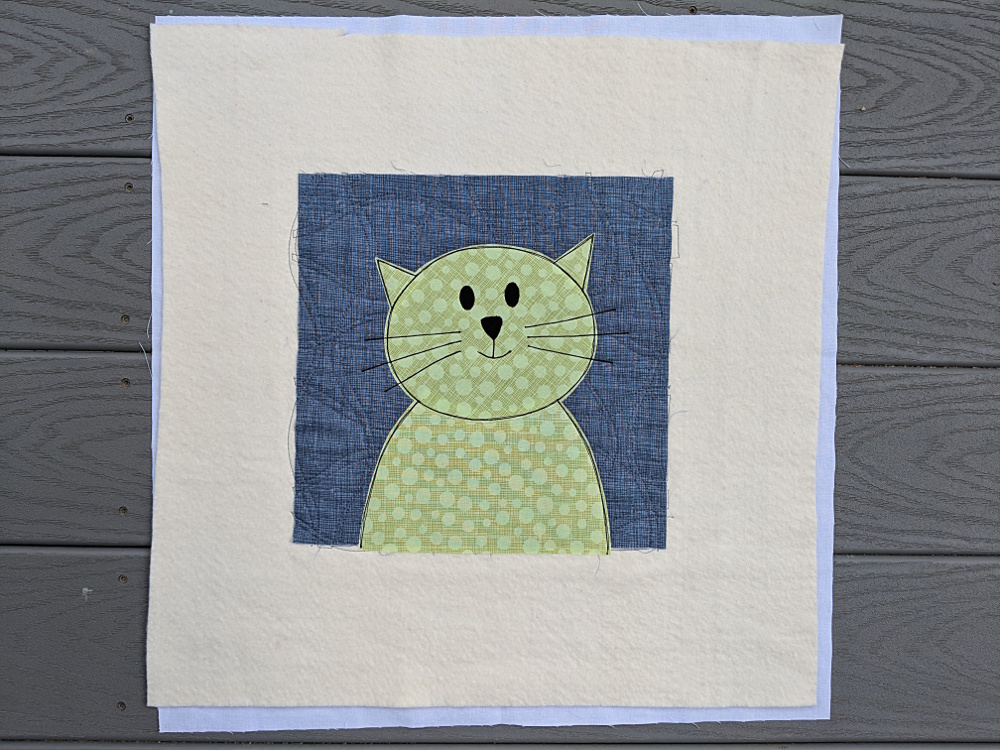
Step 2 – Applique the Face
Applique the design to the block – being sure to line the lower edge of the applique up with the lower edge of the background block.
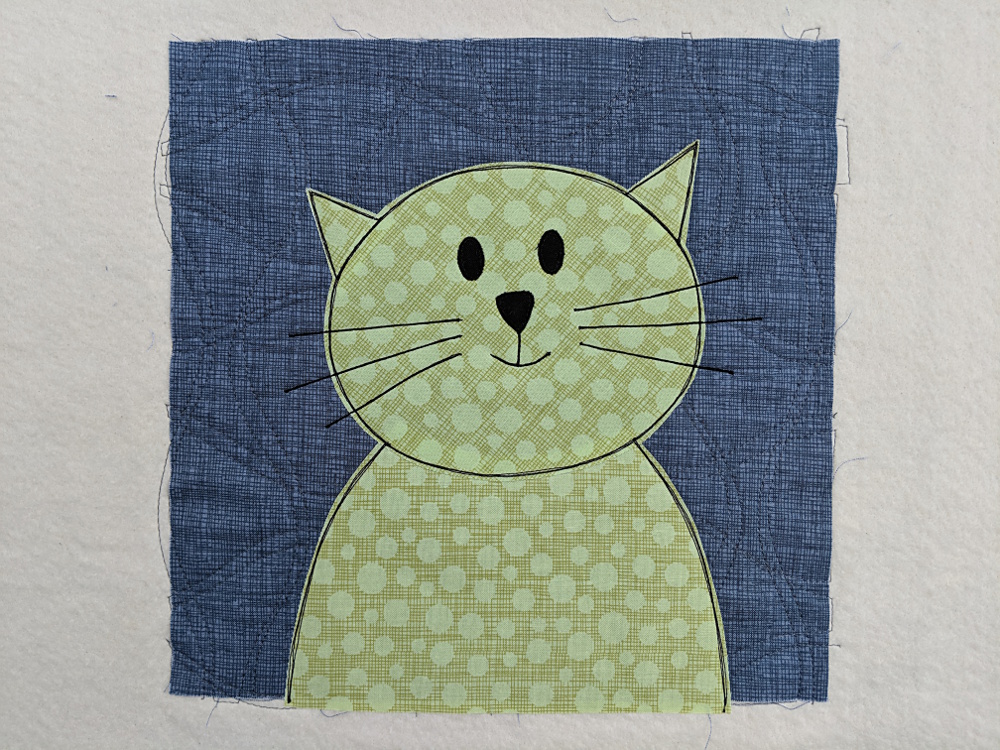
Add a backing to your wall hanging (I used spray adhesive to baste it to the batting) and outline your applique. Here’s a closer look at the placement and the outlining.
Cut four background corner pieces each 5 inches square. I used dark grey for mine.
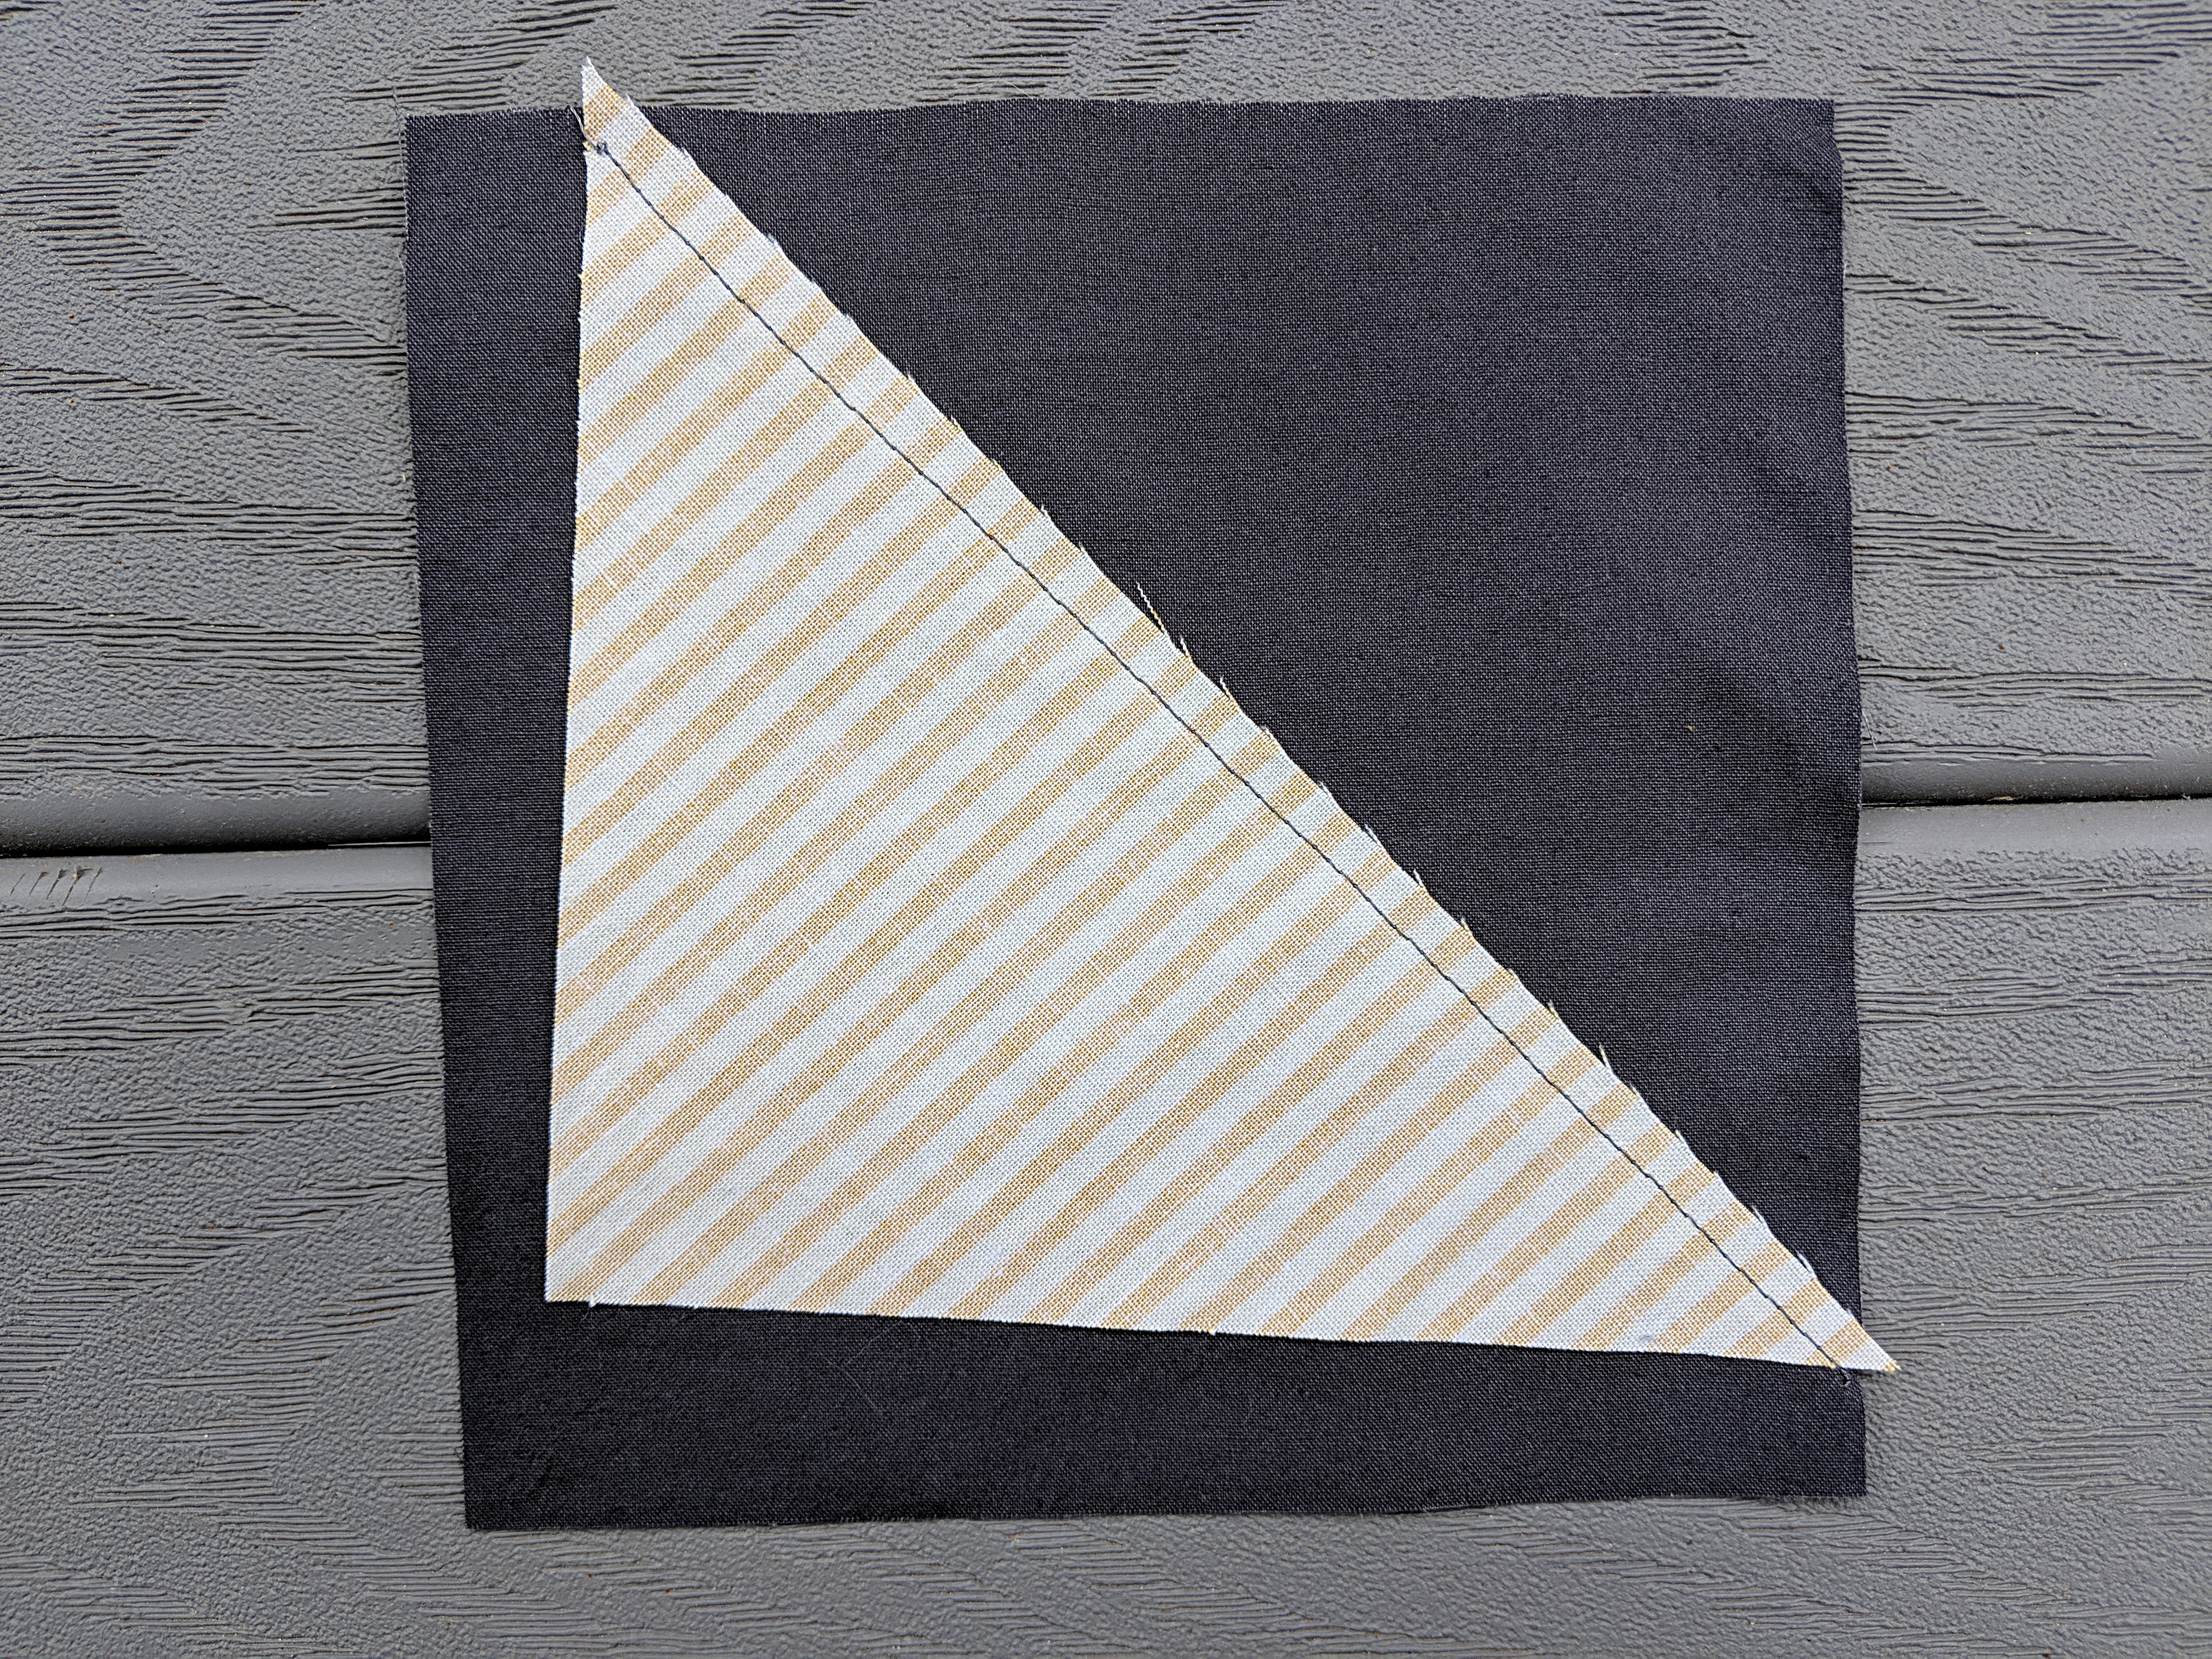
Cut four right triangles with the legs (not the hypotenuse) anywhere between 4 and 5 inches long. The triangles should all be a little different.
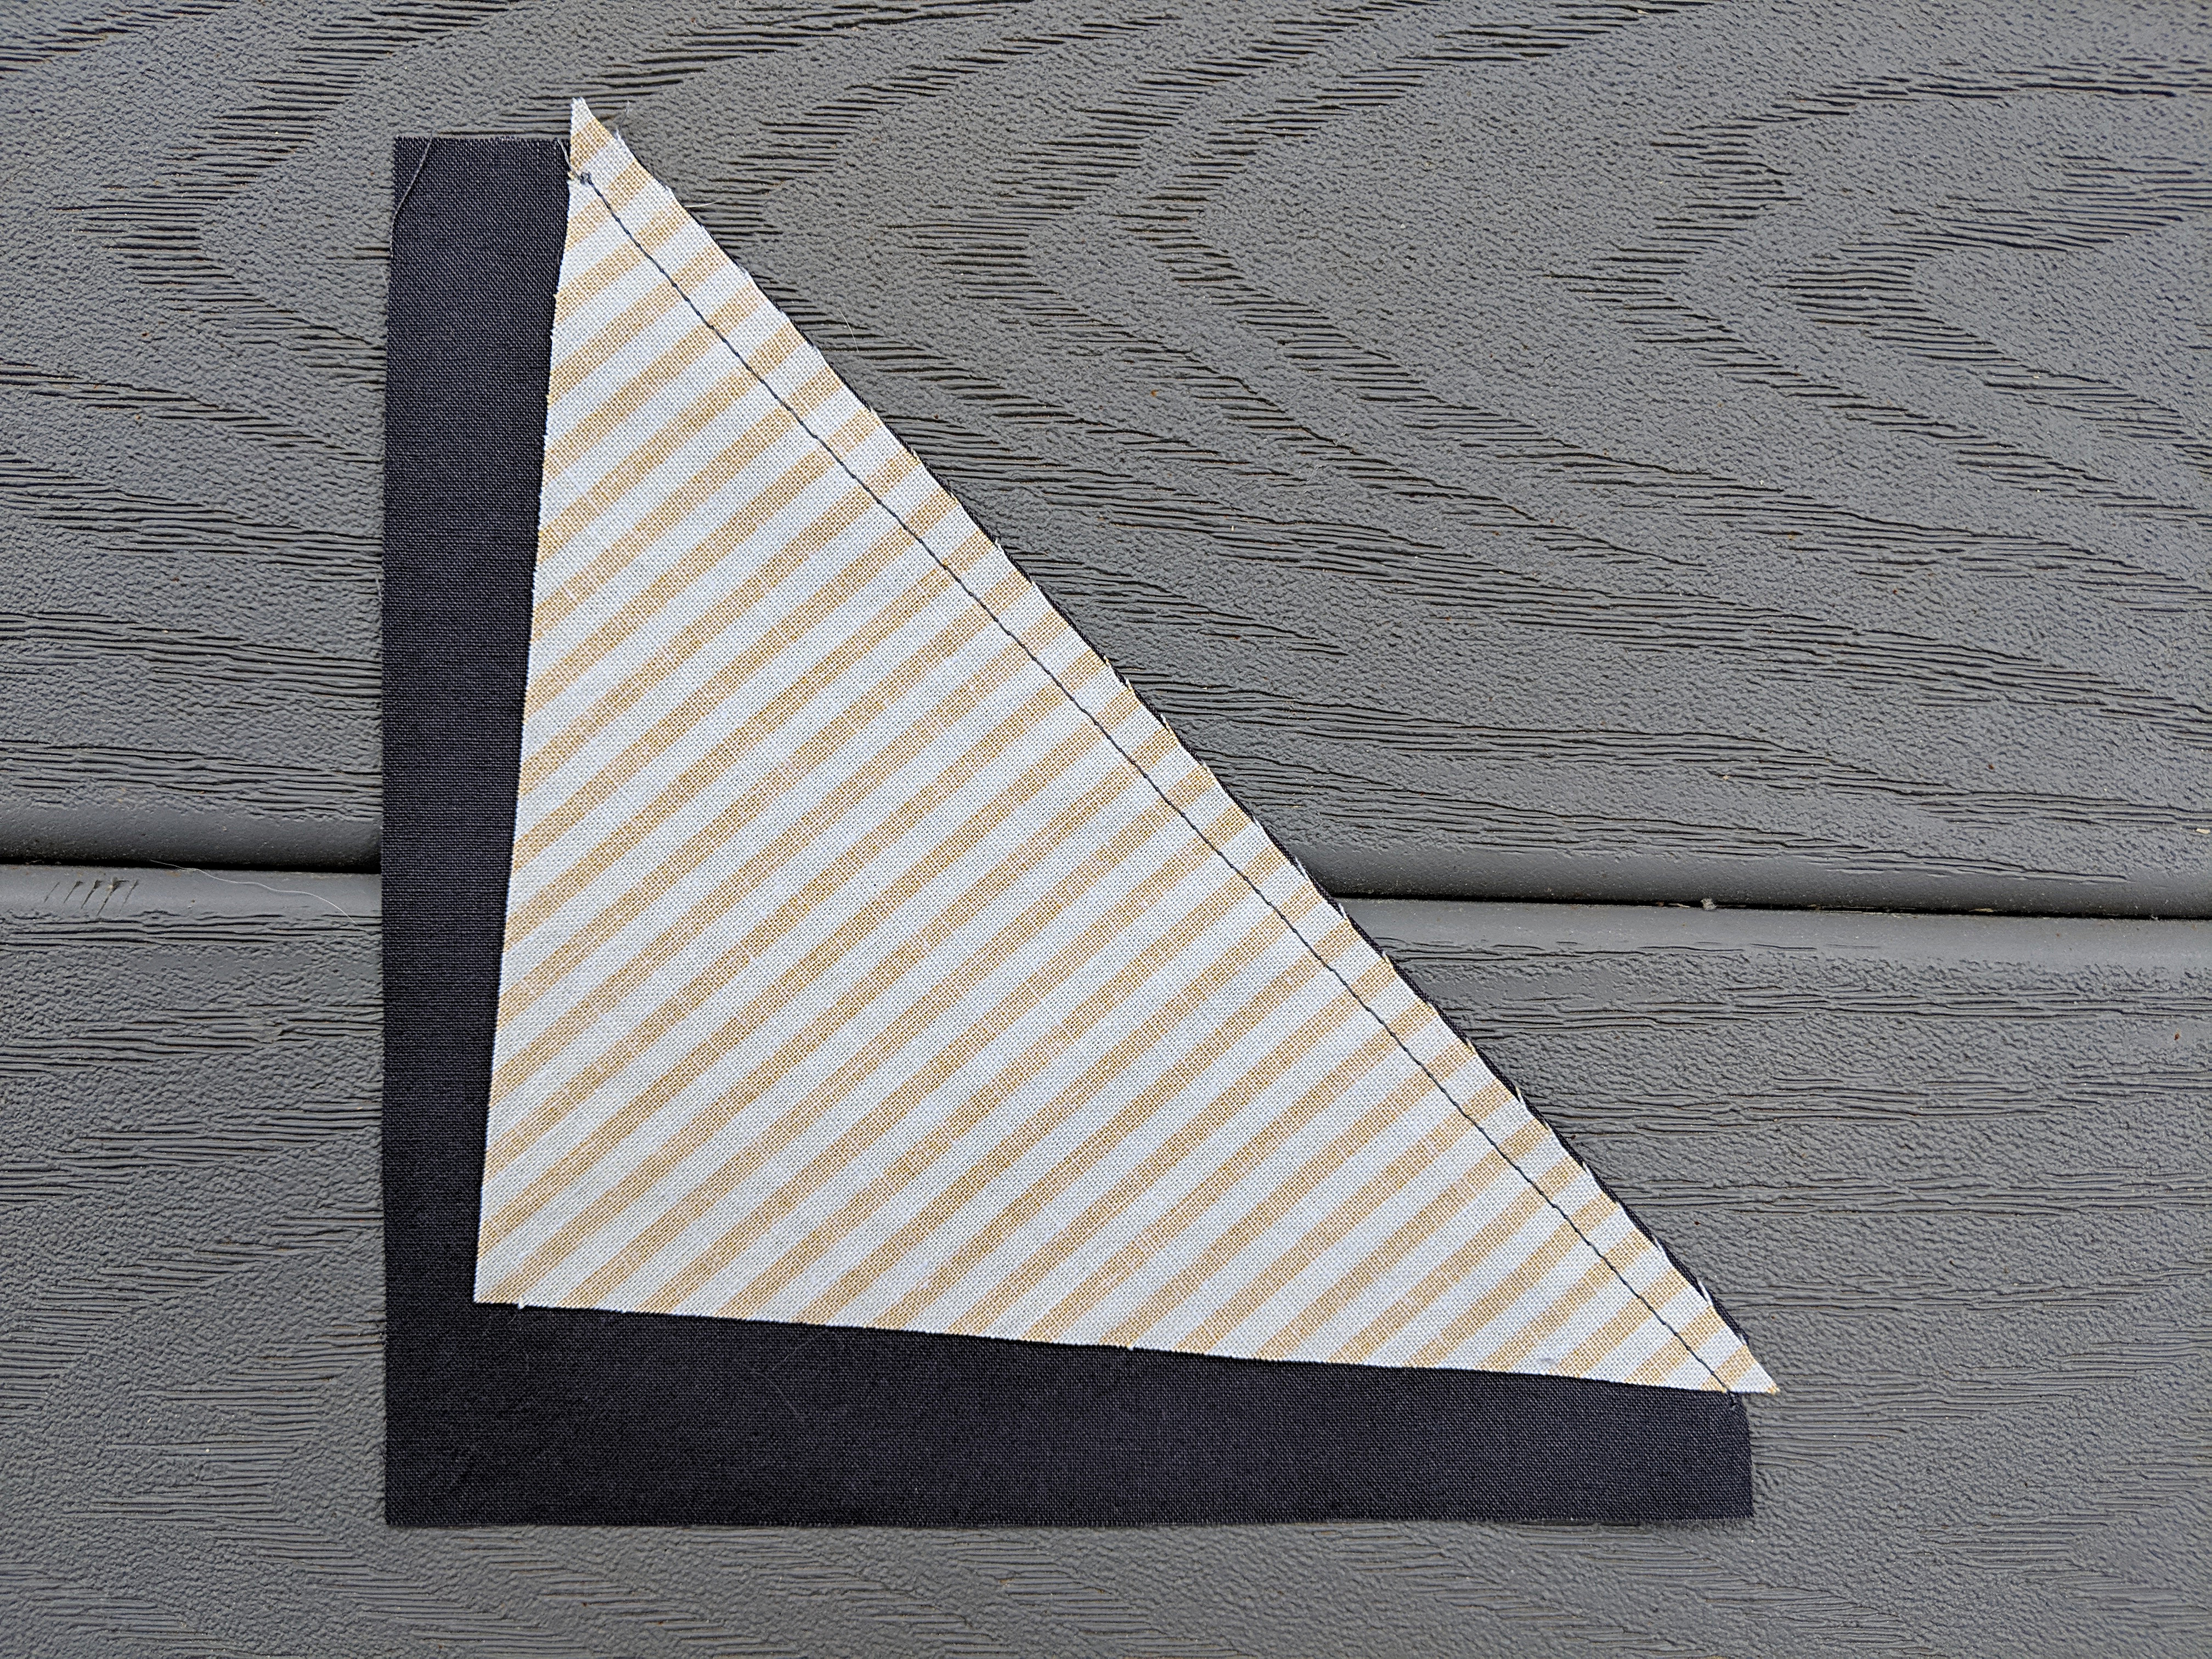
Lay one triangle face down over the corner of one square, so that the points of the triangle (at each end of the hypotenuse) just hang over the edges of the square, as shown.
Sew the triangle to the square. Your seam allowance doesn’t need to be exactly 1/4 inch.
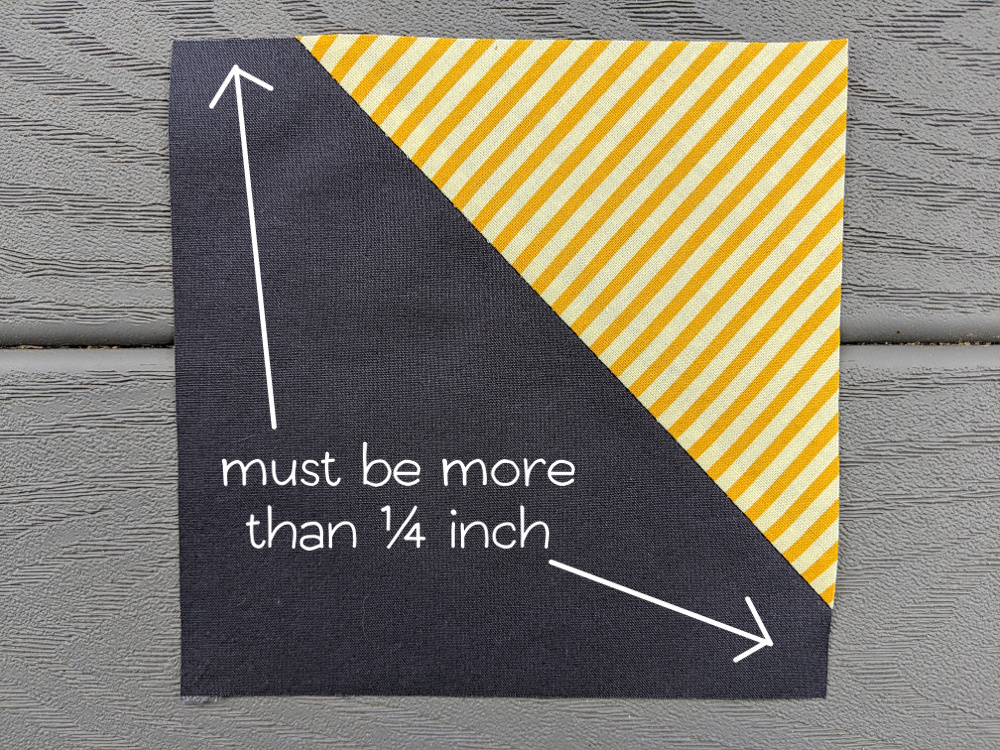
Make sure there is more than 1/4 inch between the points of the triangle and the edge of the background fabric square. That will make it impossible to accidentally chop off the points when you assemble the whole frame. 🙂 Yay for foolproof tricks!
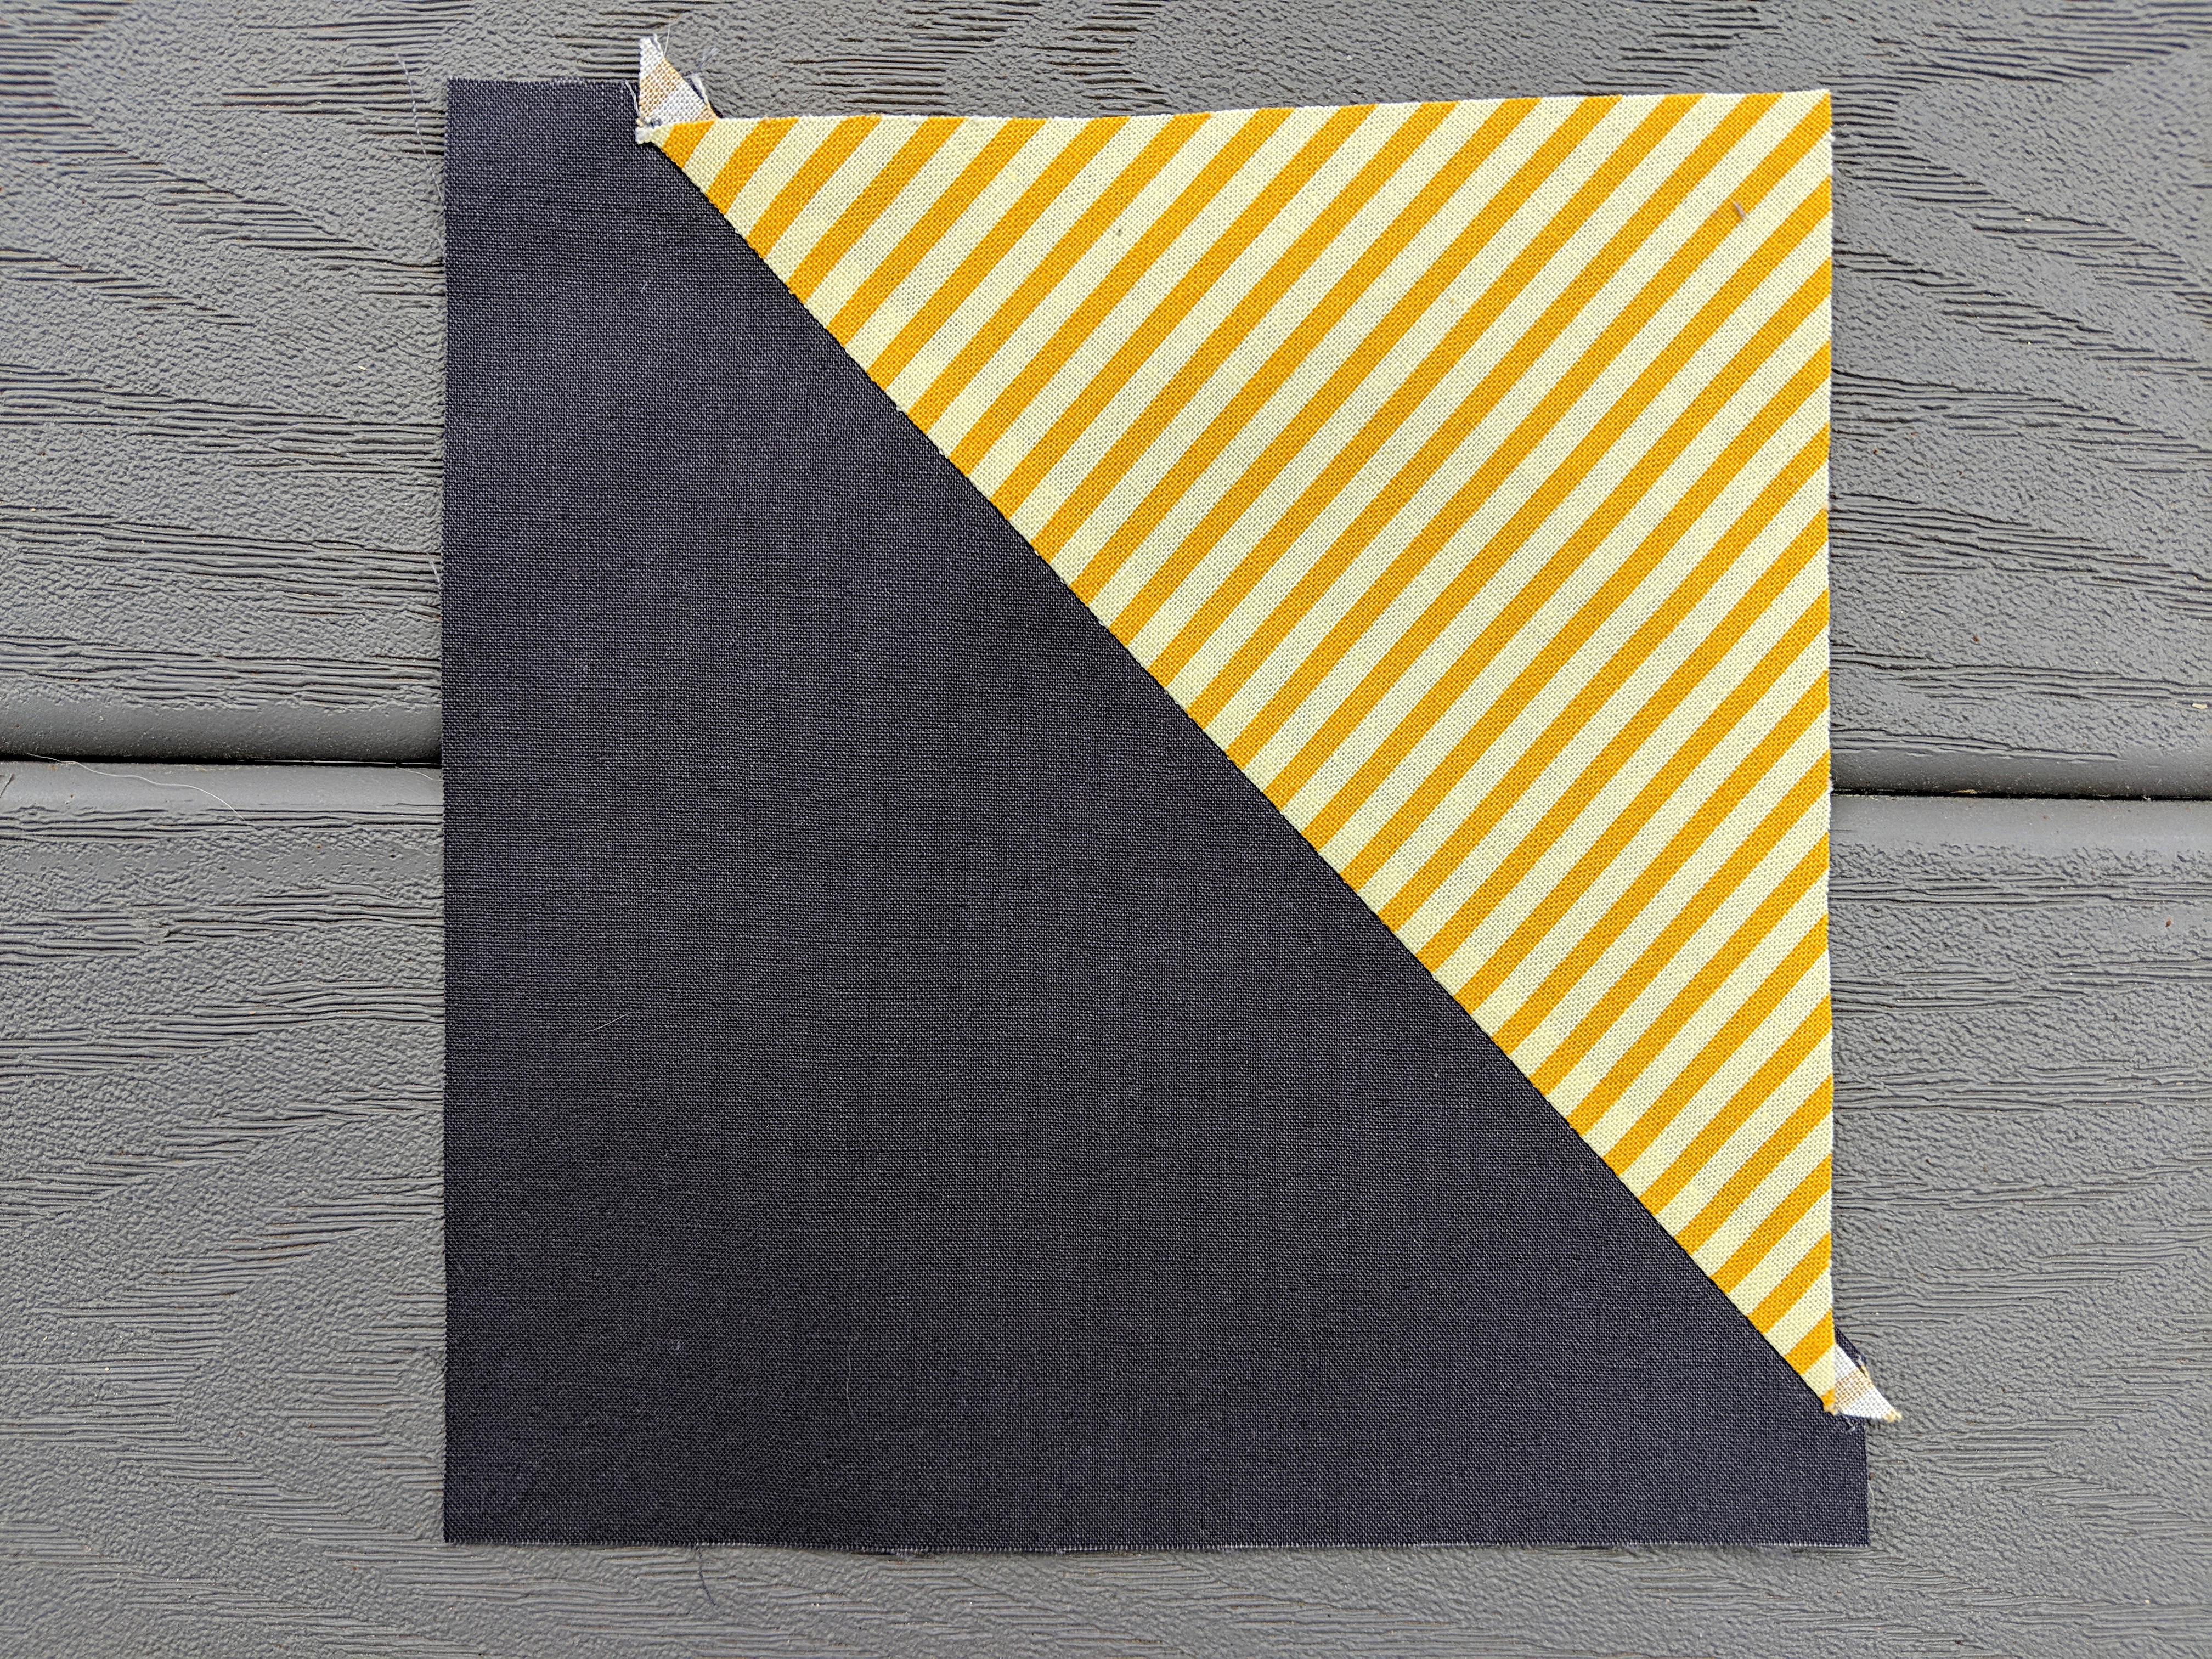
Repeat for the other three squares, so you have the four corners of your churn dash block. The sizes and angles of the triangles should all be a little different.
Set them aside.
Step 6 – Preparing Background Rectangles
Cut four background strips 12 inches x 3 inches.
Cut four frame strips 12 inches x 2 1/2 inches.
Sew the frame strips to the background strips and then trim those rectangles down to 10 1/2 inches x 3 inches. Make the seam between the two strips go at a slight angle – and make all the angles a little different to make your finished block more interesting.
You can see my finished rectangles in the next step. See how some are wider than others? And they all slant a bit?
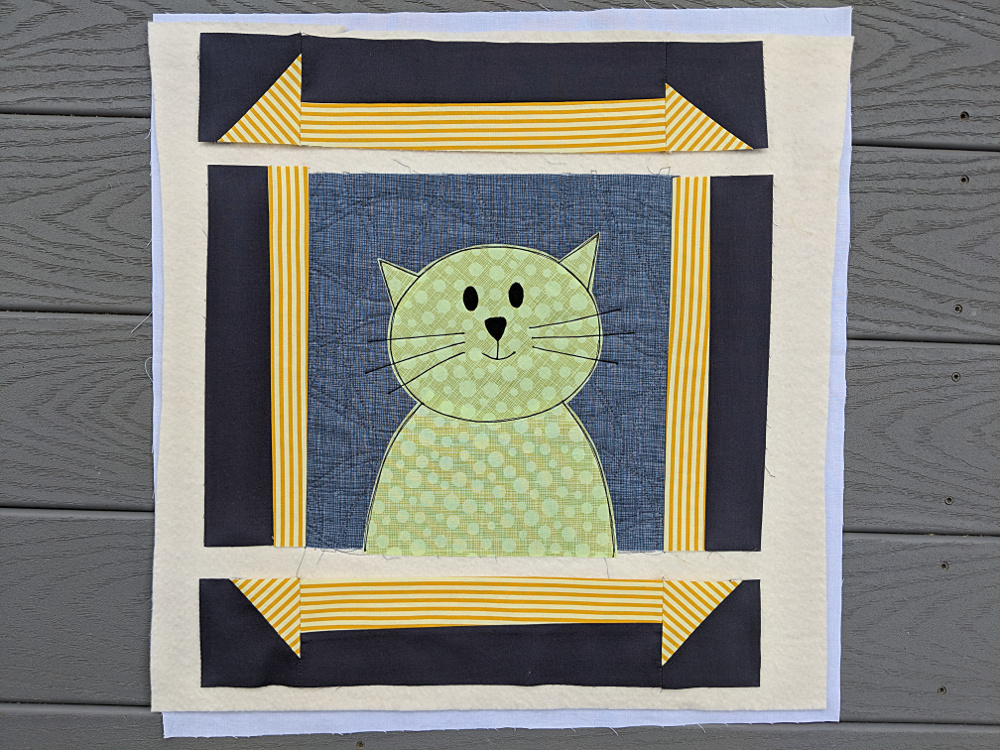
Step 7 – Laying Out the Churn Dash Block
Lay out all the churn dash components as shown.
Play around with the placement of the frame pieces until you’re happy with how things look.
Step 8 – Sew the Side Rectangles
Sew the side pieces of the frame to the sides of the block, sewing through the batting and backing too. For this and the rest of the project it’s important to use an accurate 1/4 inch seam allowance.
Press the side pieces open.
Step 9 – Sew the Top and Bottom Strips
Sew together the corners and strips for the top and bottom rows of the frame.
Press your seams in toward the strips – away from the corner triangles.
Step 10 – Finich Sewing the Churn Dash Block
Sew the top and bottom rows to the center of the block, being careful to line up the seams.
Press the whole block flat.
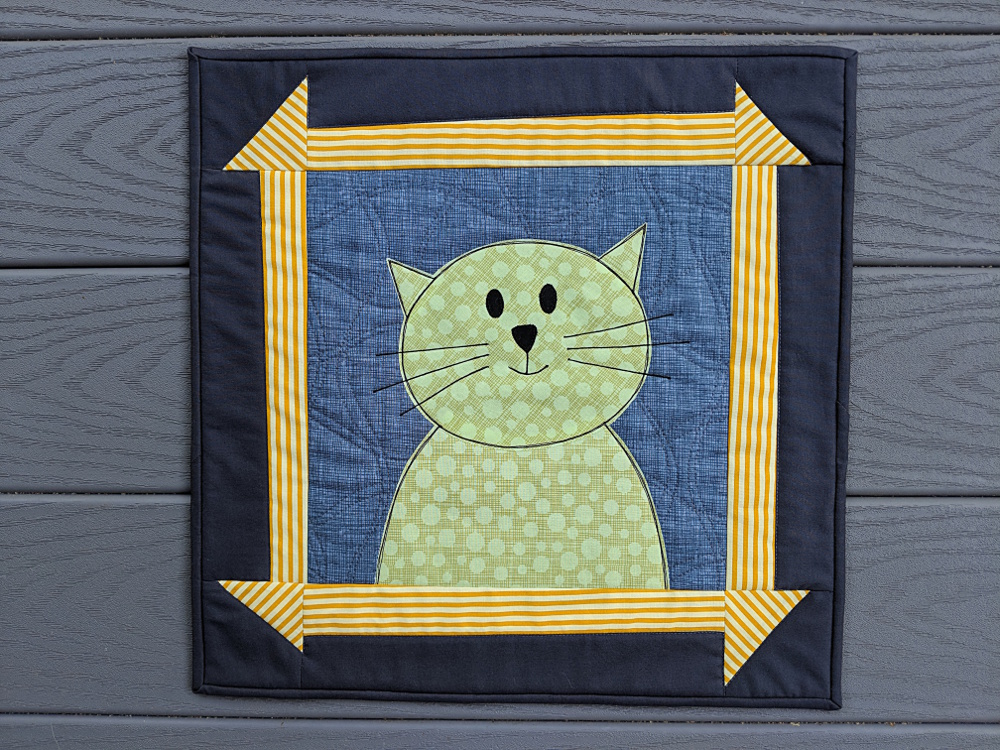
Step 11 – Quilt, Trim, and Bind
Quilt the frame if you want to. (It doesn’t need it structurally, so just do it for looks if you like.) I stitched in the ditch around the outside edge of the frame and that’s it.
Trim away the excess batting around the edges and bind your mini quilt.
Here are several free patterns that work with just some simple resizing. This post about making coasters has info about resizing an applique pattern that can be applied to any of these projects.
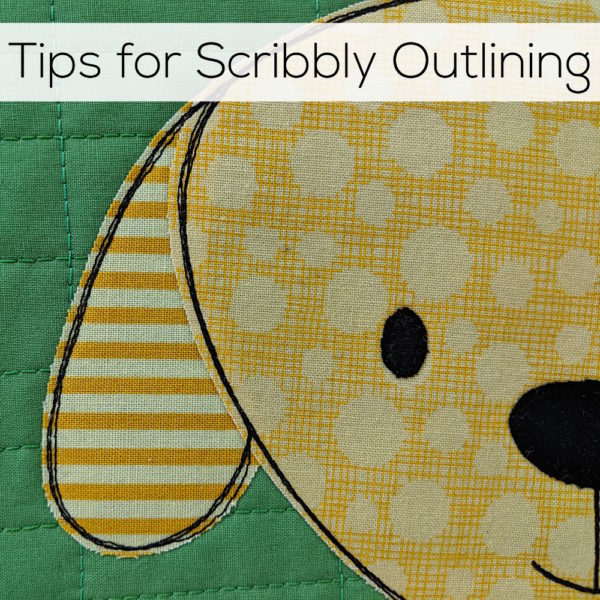
There are SO MANY different ways to outline applique pieces – and scribbly outlining is one of my favorites!
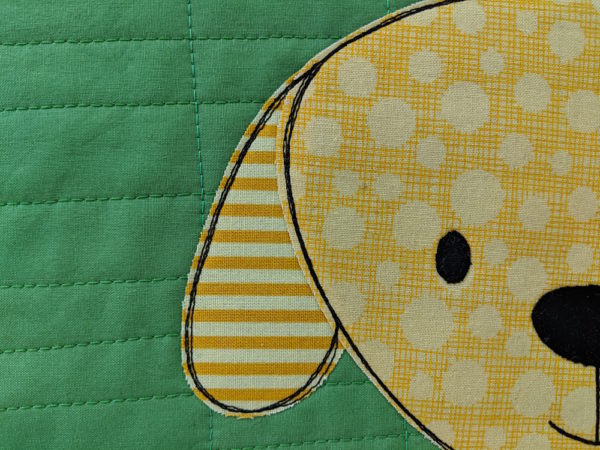
A lot of people applique with satin stitch or decorative stitching like blanket stitch. I demonstrate how to use decorative stitches in one of the lessons in my Fusible Applique Made Easy Class on Craftsy. Here’s an example of some of that stitching.
There’s blanket stitch around the bottom of the eyes, another stitch around the belly patch, and straight stitching everywhere else.
Fancy stitching can be fun, but I usually outline with a simple straight stitch and black thread. I love the cartoony look it gives and I think it really suits my applique designs. Plus it’s super easy!
(A lot of people worry that their fabric will fray if they just do a straight stitch outline. I posted a photo of one of my daughter’s quilts after over a year of constant use and many trips through the washer and dryer. Click here to see how it holds up.)
Sometimes, if I want a thicker line, I use a thicker thread. I like using 12 wt. thread from Sulky Petites and I’ve got a post here where I talk about what you need to do to work with thicker thread – what needle to use, what to use in the bobbin, etc.
Sometimes when I want a thicker line but I’m too lazy to change my needle (like maybe just on cat whiskers) I’ll use regular thread and go over the stitching two to three times, being careful to stitch right over the previous stitching so it looks like one solid, thicker line. You can see that in this cat.
I did most of the outlining with regular thread, but you can see the line is thicker on the whiskers and the mouth. That’s where I went over it a few times.
Lately I’ve been wanting to play around a bit with scribbly outlining, more like the lines in my sketchbook.
So I tried it! It took me a few blocks to get just the look I was trying for.
It took three rounds of stitching to get this look. Two just looked like a mistake – three looked intentional.
It’s kind of hard to deliberately go off the line! I’ve made hundreds of these blocks and by now it’s kind of automatic to follow the line as closely as possible. 🙂 I found it helped to deliberately ignore the line on pass two, to just pretend it wasn’t there and outline again as if it was a blank piece. Then on round three, if the first two lines were still too much on top of each other, I would deliberately veer off line. Make sure you cross over the line when you veer – you don’t want another line consistently inside or outside your original line. You want to cross over so sometimes it’s inside and sometimes it’s outside. That gives the best sketchy look.
Bonus! Four lines of scribbly outlining looks pretty much exactly like three. That means there’s no real benefit to doing four trips around the whole thing, but you can use that extra trip in some places to avoid having to start and stop to go around pieces like ears and muzzles and necks. For that snippet you see above, there are three rows of stitching around everything except the bit of the head that overlaps the ear. I went over that bit four times so I could stitch the ear without ever having to stop and tie a knot.
Here are links to all my posts about outline stitching.
If you’e using an electric cutting machine like a Cricut. . .
Upload the file to your machine.
Resize if needed. (To fit a block that finishes at 10 inches square, the image should be 7.5 inches wide.)
Ungroup the pieces and assign colors
Cut the belly and the face from the lightest color fabric
Cut the shoulders, ears, and eye patches from the darkest color fabric
Cut the eyes and nose from solid black
Cut.
Step 2
Trace or print the pattern onto the paper side of the fusible adhesive.
I use printable Heat & Bond Lite fusible adhesive so I just printed out the page. No tracing!
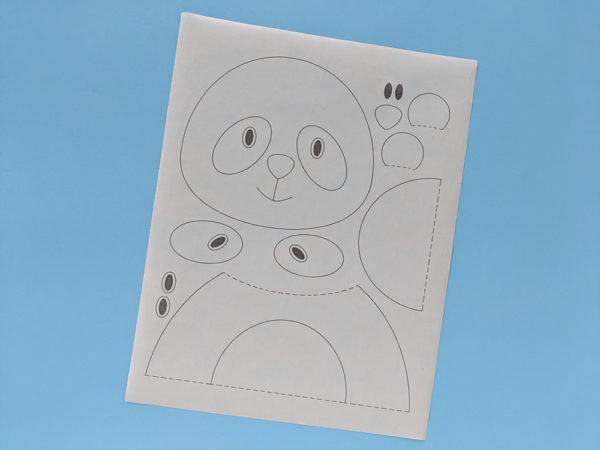
The image has already been reversed, so just trace or print. If you’re tracing, be sure to trace the facial features and placement guidelines too. You’ll need those for Step 5.
Step 3
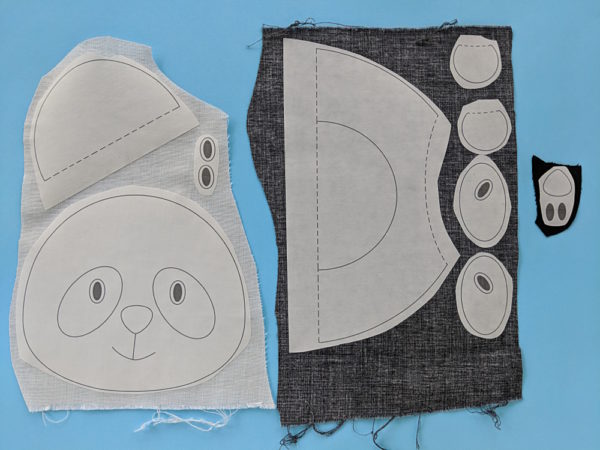
Rough cut around each shape and fuse it to the back of your fabric.
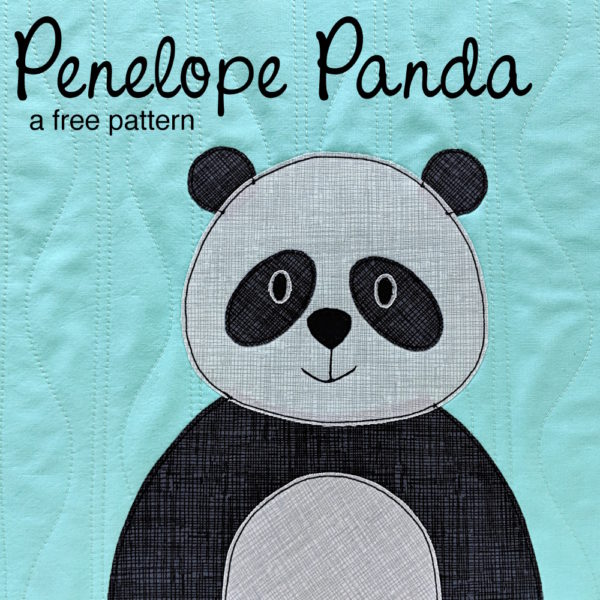
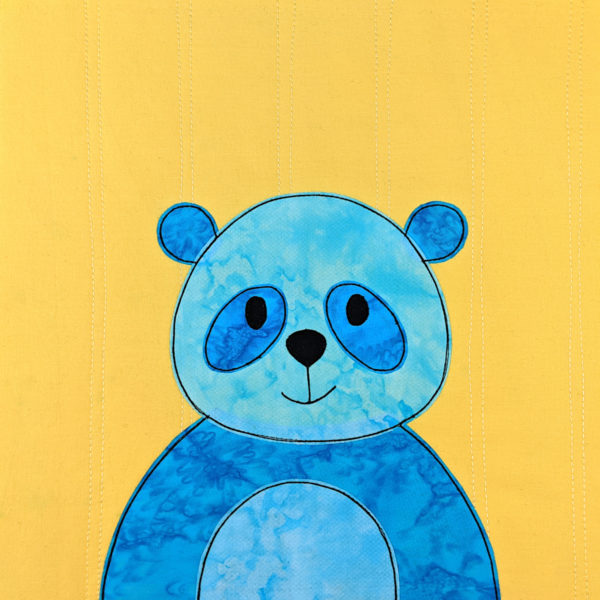
Note – if you’re making your panda in realistic colors, use the large eye template pieces to make light-colored eye backings do the dark eyes show up on the dark eye patches. Use the small eye templates for your solid black eyes.
If you’re making a panda in fantasy colors, use the large eye templates for your solid black eyes, and discard the small eye templates.
There’s a video here with more information about helping make sure dark eyes show up well on a dark background.
Step 4
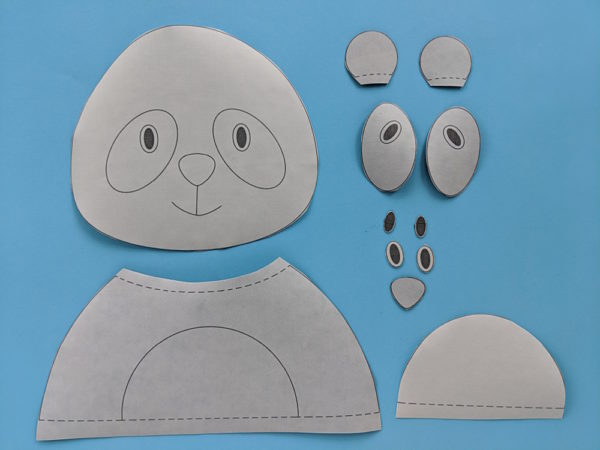
Cut around each piece neatly. Cut directly on the solid lines.
Step 5
Remember back in Step 2 when I told you to make sure you traced the facial features? Now you’re going to do that. Hold the face up to a window so the light shines through it. You’ll be able to see all the dotted placement lines, and the adhesive will stabilize the fabric so you can trace on it without it crinkling up.
Trace the lines to show where all the applique pieces are placed – the eye patches, eyes, nose and mouth are especially important. The belly piece is one you can probably place well without a guide.
Optional – trace the lines to show where pieces overlap, to help you position the ears on the head and the head on the shoulders. These placement lines are less important – you can play around a lot with the placement of these parts.
Step 6
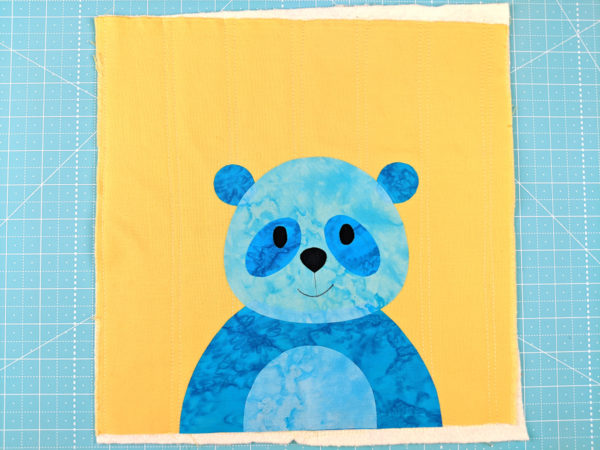
If you’re doing Quilt As You Go (I did) then you can quilt your block before adding the applique. So easy!
Cut your background fabric and a piece of 100% cotton batting 11 inches square.
Layer the block with a piece of 100% cotton batting. Quilt any pattern you like!
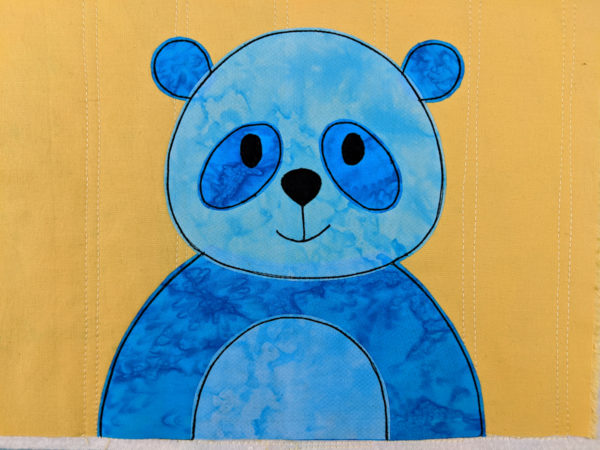
Have fun! And share a photo of what you make! You can share it in the Shiny Happy People group or tag it with #shinyhappyworld on Instagram.
If you like this free pattern, sign up for the Shiny Happy News! Subscribers get a weekly newsletter full of sewing tips and tricks, free patterns, special discounts, and other things to make you smile. 🙂
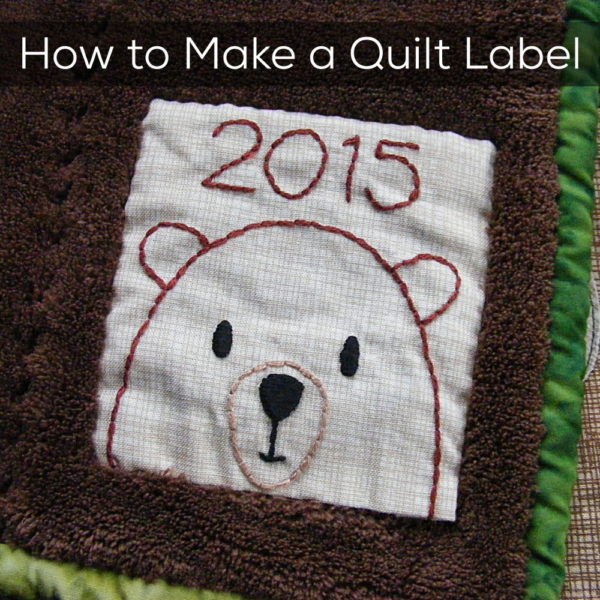
Cut a piece of fabric big enough for the full four inch square to fit flat in a hoop. A seven inch square of fabric should work just fine.
Stitch the design on your quilt label. I used 4 strands of thread and two simple stitches – backstitch for all the lines, and satin stitch for the solid eyes and nose.
If you want to add a date – or maybe a name – there’s a free alphabet embroidery pattern here – with letters that are relatively simple to stitch, with no serifs, curlicues, or extra-tight curves. 🙂
When you finish stitching, trim the fabric so there’s about an extra inch all the way around the part you want to show as the quilt label. Fold about 1/2 inch under on each side and press.
Position the label where you want it (I always put mine in the lower right corner) and pin or glue it in place to hold it secure while you stitch it.
Stitch the label to the quilt back all the way around the edge, being sure to only stitch through the quilt backing. Don’t let your stitches go through to the front of the quilt. I like to use ladder stitch.
That’s it!
It doesn’t take long and it’s a really nice finishing touch. 🙂
Here are all my posts about how to bind and finish your quilt.
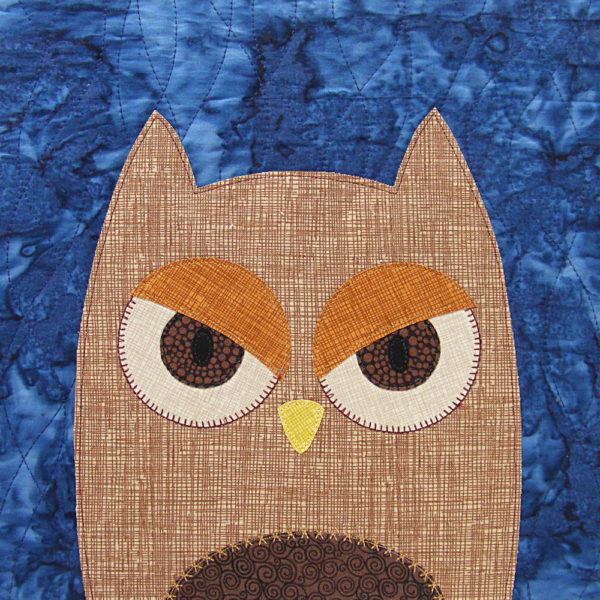
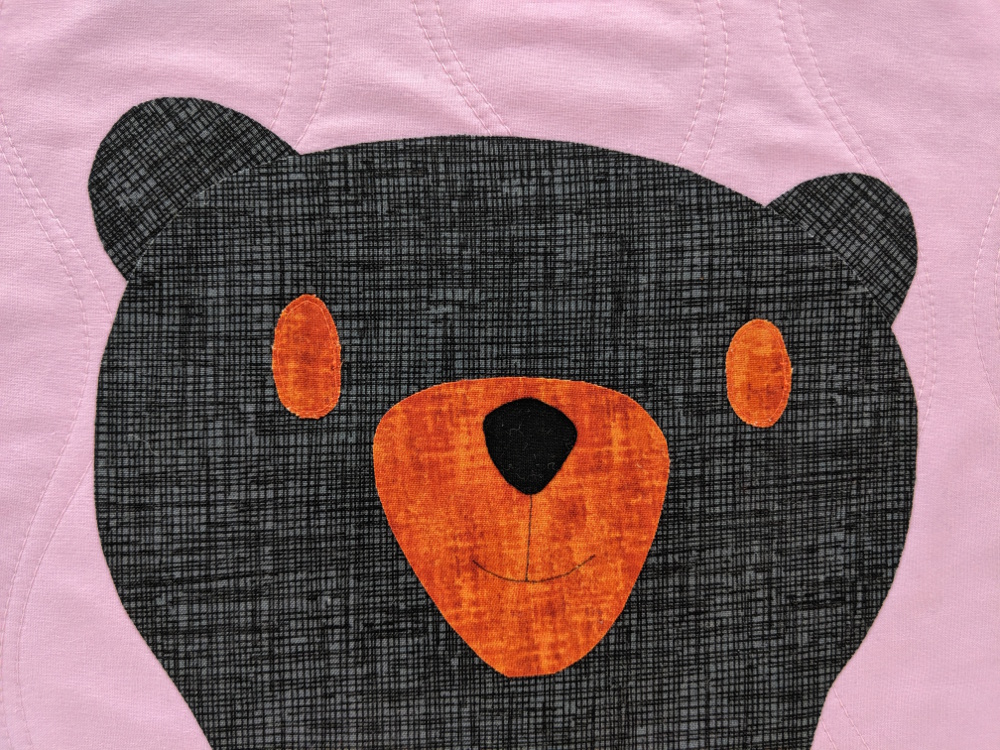
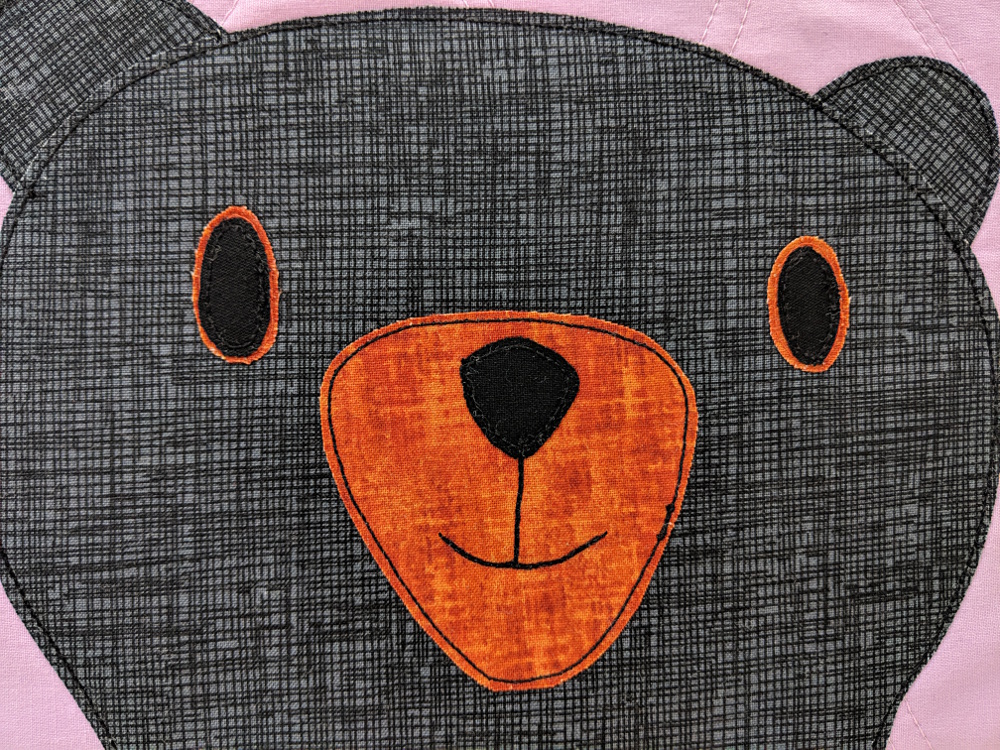
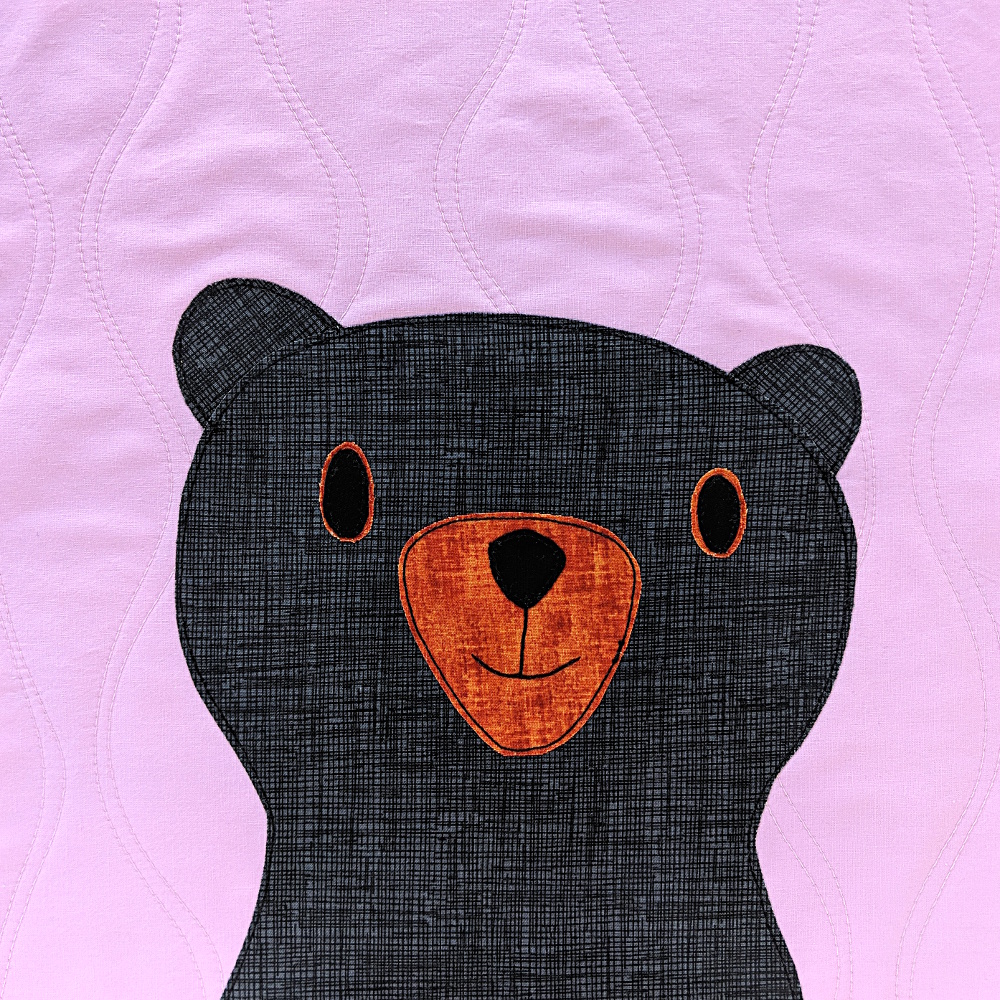
A lot of people have questions about how to applique dark eyes on a dark face. It’s really important for the eyes to show up well, and dark on dark fabric tends to hide them!
Of course – living in Appalachia – I had to make a black bear.
But black bears are tricky!
Black eyes didn’t show up every well on the almost-black fabric I chose for the bear face.
The solution is to make an extra layer in a lighter color to back the eye.
Black bears usually have a cinnamon-colored snout, so I chose the same fabric to go behind the eyes. If your applique pattern doesn’t have a contrasting snout color (maybe you want to make a black cat from this pattern?) then just choose a slightly lighter shade of the face color.
I don’t recommend white. It will usually make your finished face look frightened. 🙁
Here’s what to do.
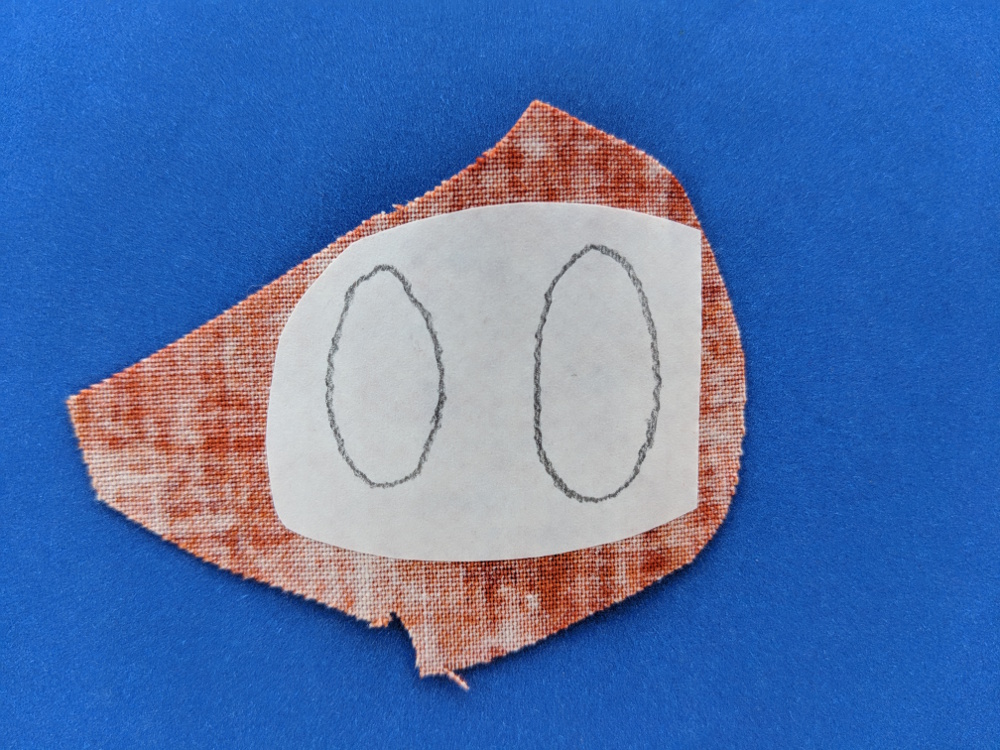
Using a scrap of your fusible adhesive, trace the eyes again. Fuse that to the back of the fabric you want to use to define the eyes.
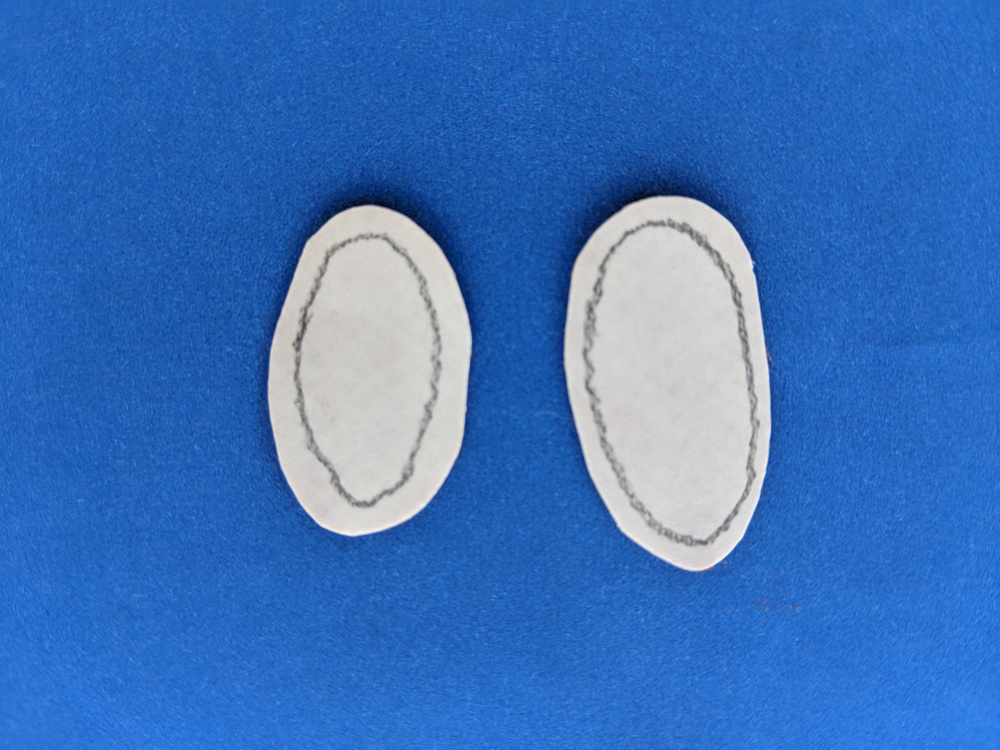
When you cut them out – cut them a little bit bigger than the eyes you’ve traced.
I’ve cut mine with a little less than an extra 1/8 inch all the way around. You don’t have to measure it – you really just want a sliver of that color showing.
Now – fuse those pieces in place – along with all the other pieces on the block except the black eyes.
DO NOT FUSE DOWN THE BLACK EYES YET.
I know. It looks a little creepy at this point.
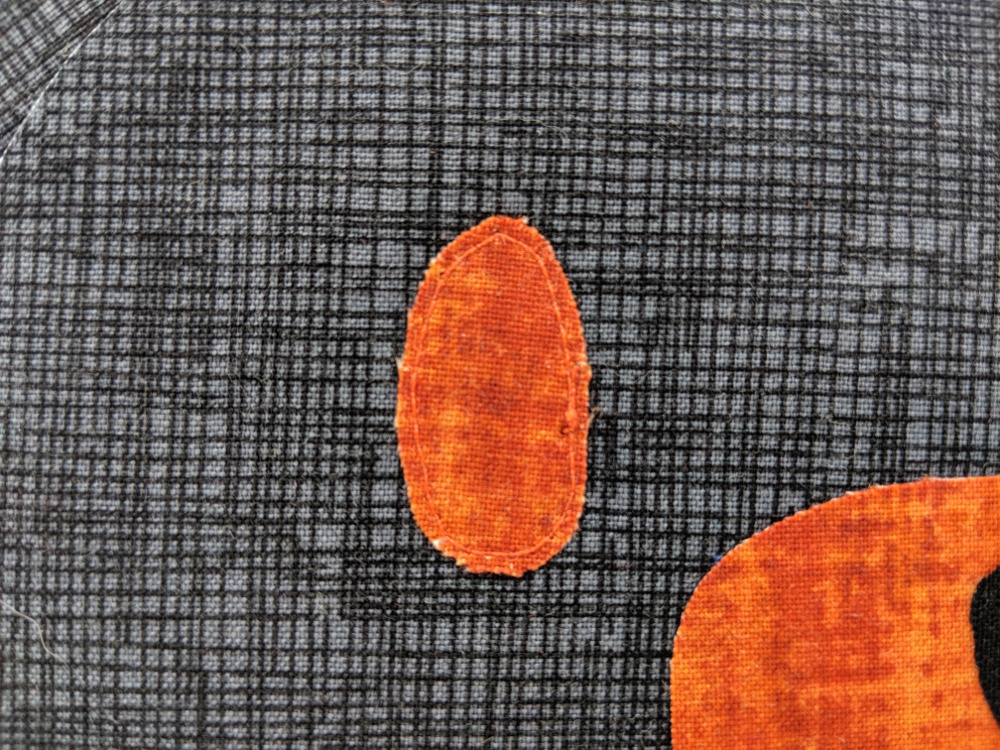
I usually outline all my applique pieces in black thread – but this is the exception. Stitch down the eye backings using matching thread.
If you do it now, you can be a little wobbly with your stitching. There’s no black eye for the wobbliness to show up against. If you fuse the black eye before you do the outlining you have to be very careful to keep your stitching right on that sliver of background color showing – and that would be hard.
Here’s a close up view where you can hopefully see my stitching. It’s just a simple straight stitch.
NOW you can applique the dark eyes and do all the rest of the outline stitching in black thread.
Whew! Much less creepy. 🙂 And look how nicely her eyes show up – without looking frightened.
Here are links to all the posts showing how to applique with fusible adhesive – my favorite method. It’s fast and easy and (with the right materials) it holds up beautifully to rough use and repeated washing.