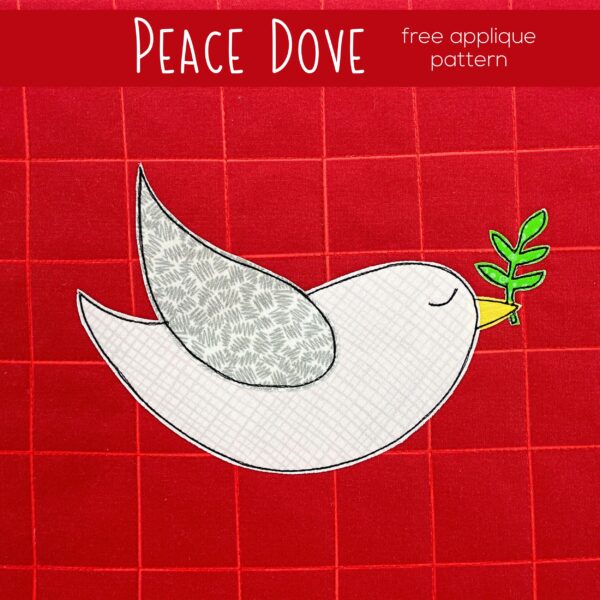
Free Dove Applique Pattern

Peace dove embroidery applique pattern for quilting, sewing, and craft projects.

Use this free dove applique pattern to make all kinds of things!

Get the free Peace Dove Applique Pattern here.

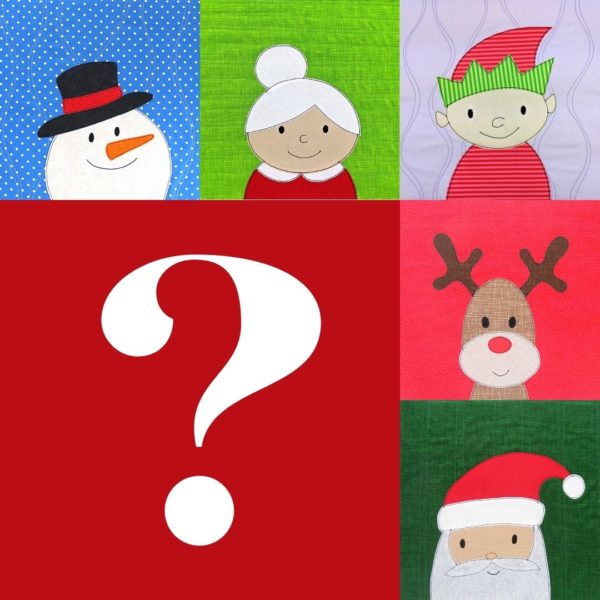
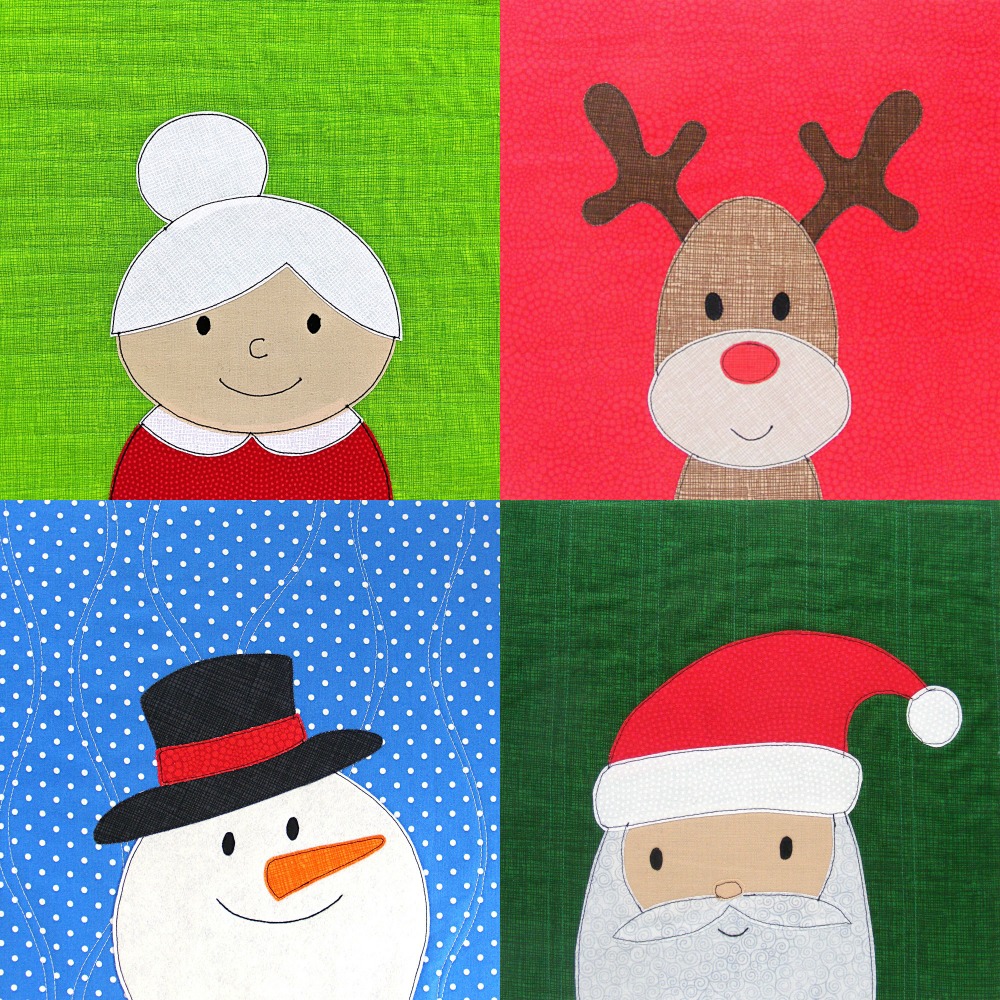
The dove combines with all the other free Christmas applique patterns so you can make a quilt, but there are so many other possibilities too! Here are just a few ideas (with links to free patterns) . . .

Here are links to the other free Christmas applique patterns. . .

The dove is designed to make an applique that fits in a 10-inch square block. That makes it really easy to resize as needed. Do you want to make a 4 inch coaster? Print the pieces at 40% size. Do you want to make a tote bag that’s 17 inches square? Print the pieces at 170% size.

You can also easily use this pattern to make half-blocks to break up a standard grid. Just adjust the angle of the wing so it’s not tipped up so high and you’re all set – no resizing needed.

You can find yardage requirements and cutting guides for multiple layout possibilities (including a grid with half-blocks) here.

A Little Extra Help

If you’ve never made a quilt before, I recommend starting here.

If you’ve never done any applique before (or are new to my method) I recommend starting here.

There’s also a single video here that takes you through all the basic steps of my method.

You can find loads of single-topic tutorial videos here, and also by using the search box at the top of the page.

Prep Your Block

Cut an 11” square of fabric for the background, and an 11 inch square of batting.

Press them both (with steam) and let them cool. Layer the background square over the batting square and quilt the two layers together. Do NOT add the backing yet. This video shows some of my favorite straight-line patterns, and this video shows some of my favorite wavy line patterns.

Press the quilted block again (with steam) and let it cool.

This video has a general intro to my Quilt As You Go method, along with complete instructions for how to assemble the block. It’s a long video, but there’s timestamp info to help you skip to the specific instructions you want.

Cut Your Pieces

Get the pattern instructions and templates here.

If you have an electric cutting machine, you can use it to cut your pieces. The pattern includes a link to download the SVG files.

The image in the SVG file is NOT reversed. If your cutting machine has you cut your pieces fabric side up, leave the orientation as it is. If your cutting machine has you cut your pieces fabric side down, you’ll need to flip the image horizontally.

Different cutting machine brands import the image at what seems to be totally random sizes. To fit the appliqué on a block that finishes at 10 inches square, check to make sure the small square in the image is one inch, and resize if necessary before ungrouping the pieces. Delete that square after resizing so your machine doesn’t try to cut it. 🙂

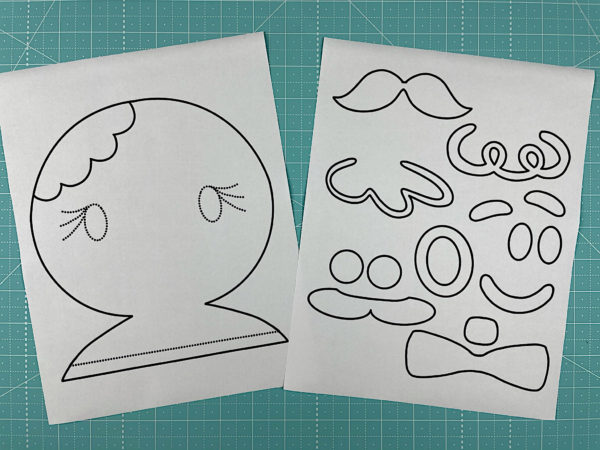
Print your templates.

If you’re cutting everything by hand you’ll need to print the reversed and exploded templates. If you’re using printable fusible adhesive you can print those pages directly onto the paper side of your fusible.

I hate to trace so I use printable Heat & Bond Lite for all my quilts – make sure whatever brand you choose is compatible with whatever type of printer you have.

If you’re using a light box you’ll also need to print the placement guide.

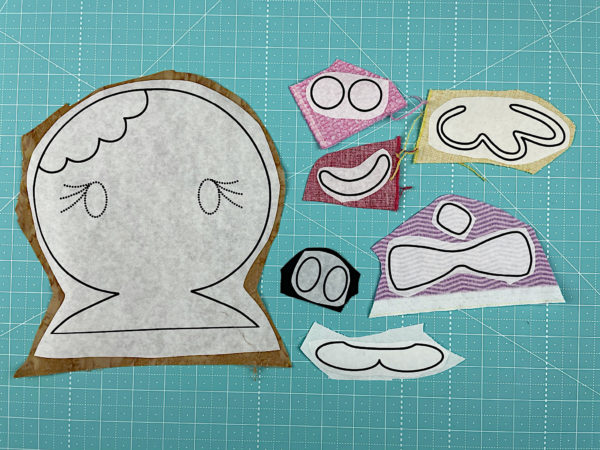
Roughly cut around each shape. Leave a little bit extra all the way around each piece.

Follow the package instructions and fuse each piece to the wrong side of the fabric.
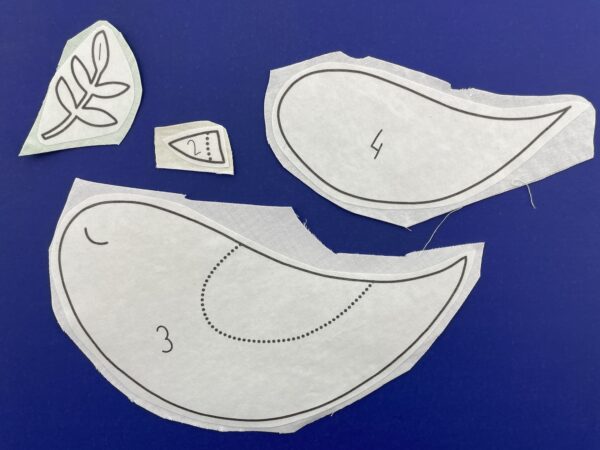
Organic cotton fabric cutouts with sewing pattern outlines for crafting and quilt-making.

Cut out each piece neatly, directly on the solid lines.
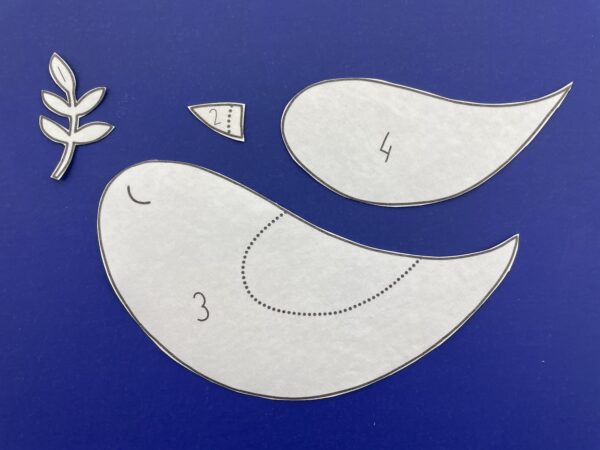
Colorful paper whale craft with numbered pieces for children’s activity.

Cutting after you fuse ensures that the adhesive goes right to the very edge of the fabric.

Trace the dotted lines onto the fabric. If you hold the pieces up to a window, the light will make the lines very visible – even on dark fabric.
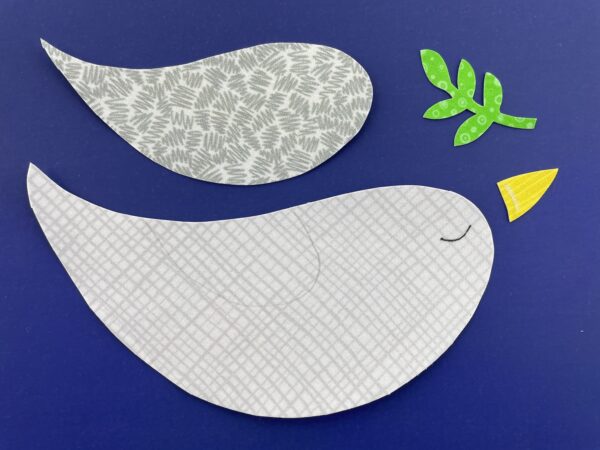
Colorful paper whale craft with fabric and felt materials for kids' DIY projects.

If you want to skip this step, this video shows how to use a light box. If you use a light box, you only need to transfer the eye.

Put It All Together – Video Tutorials

Peel off the paper backing and arrange the pieces on your background block. Fuse in place according to the adhesive package instructions.
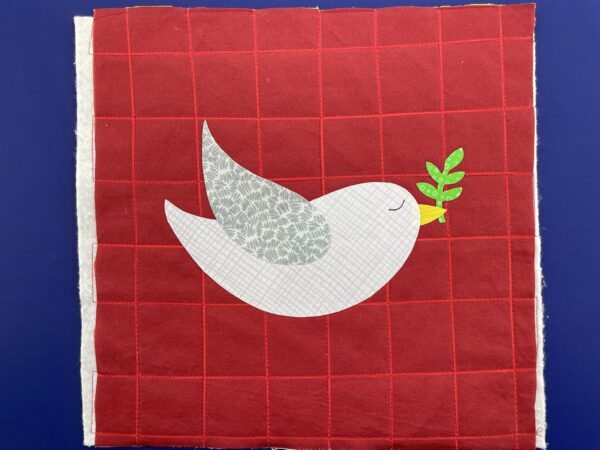
Bright fabric quilt block featuring a smiling white bird holding a green leaf, on a red background.

This video shows the assembly with me explaining how I’m layering the pieces.

This video shows the same thing – but using a light box to guide placement.

Stitch all the edges down. You can use any stitch you like, in matching or contrasting thread. I really love the look of a simple straight stitch with black thread.
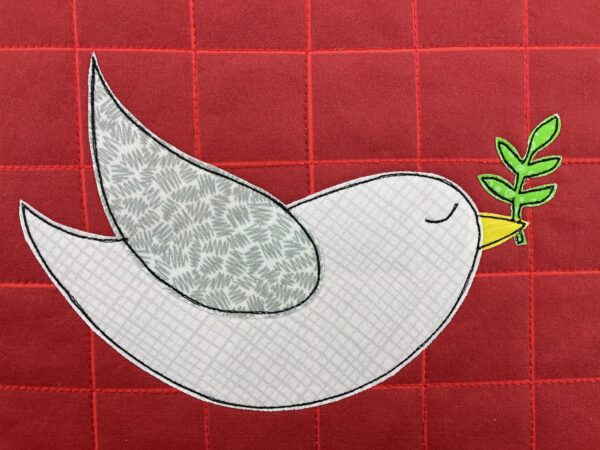
Soft embroidered dove holding an olive branch on red quilted fabric.

I demonstrate sewing with different thread weights here.

This post will help you with the order in which to stitch.

This post has tips for stitching tight curves – very helpful for that olive branch.

Finished!
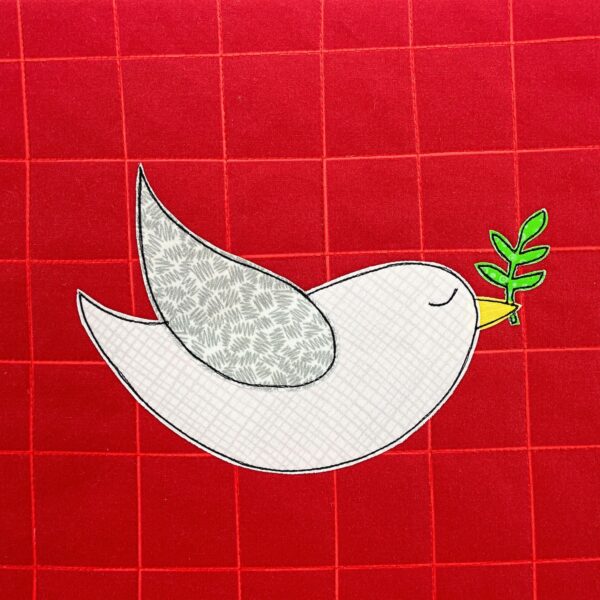
Whimsical embroidered bird holding greenery on red background.

For this bright, saturated color combo I used the Classic Rainbow blenders (plus Elephant Blenders for the white and gray).

The background block is one of these pre-printed quilt blocks in Classic Rainbow – Dark.

For a slightly subdued color palette I used colors from the Farmers Market collection.
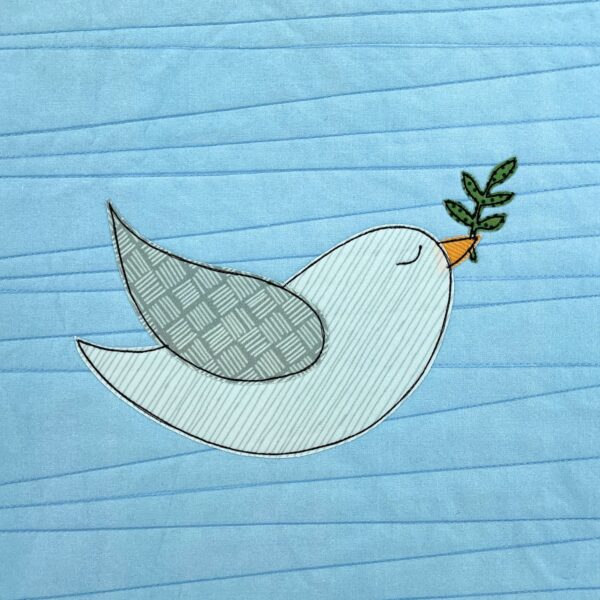
Soft blue fabric with a cute embroidered dove holding a leafy twig in its beak.

Finishing

If you’re making a quilt, trim your finished block to 10 1/2” square.

If you’re using your block to make something else, just follow the pattern instructions for whatever you’re making. You’ll find a bunch of project ideas (and free patterns) here.

More Christmas

Find all the Christmas patterns here.
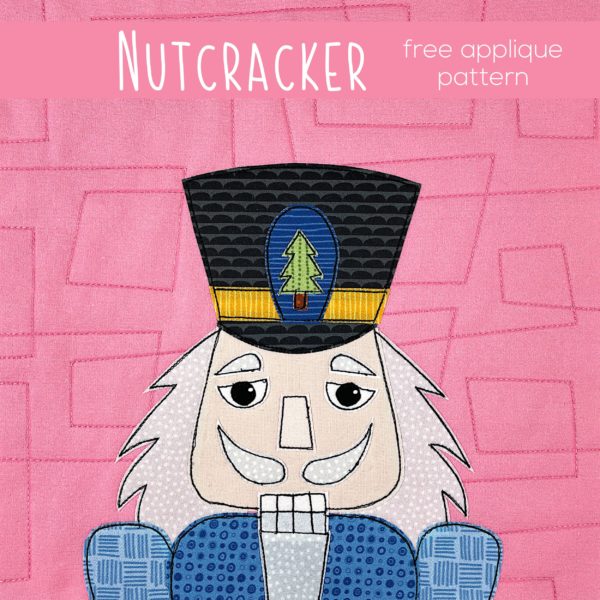
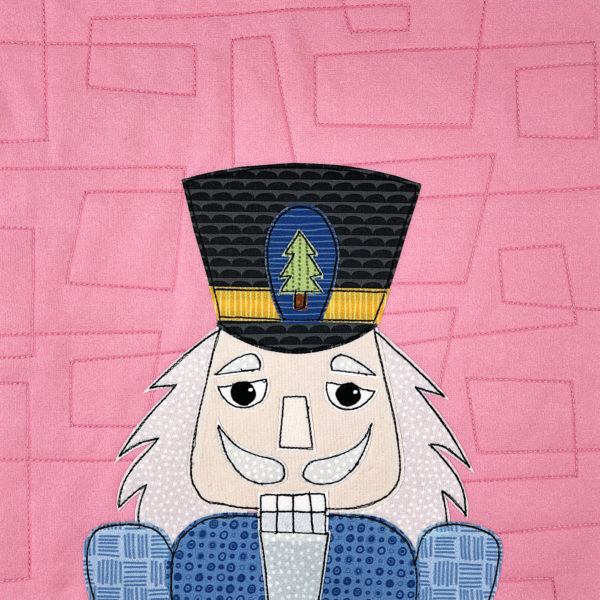
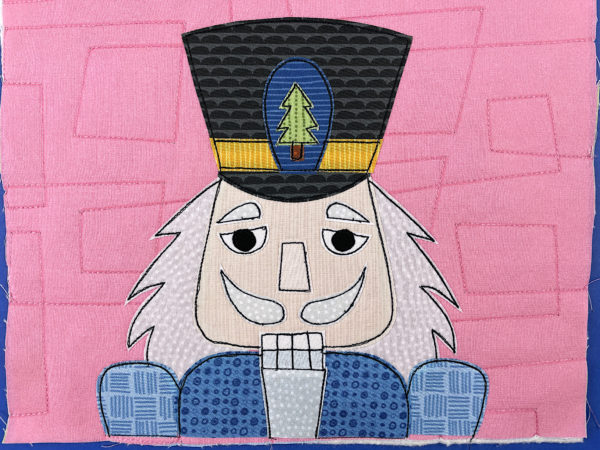
Free Nutcracker Applique Pattern

Get the free nutcracker applique pattern here.

Every year (almost) I release a free holiday applique pattern.

Here are the links to the patterns from previous years.

This year I’d like you to meet the Nutcracker!

You can use him to make quilts, pillows, gift bags, Christmas stockings, placemats, and more!

Want even more options? You can find all the Printable Christmas Art here – downloadable files you can use to make greeting cards, mugs, invitations, stickers, and other printed projects.

These instructions assume you’re already familiar with the applique method I use – Quilt As You Go and applique with fusible adhesive.

If you’re new to my patterns, there’s a detailed video workshop here that takes you step by step through the methods I use. It’s totally free, and you can work your way through the lessons using any pattern you like, including this nutcracker pattern!

Step 1

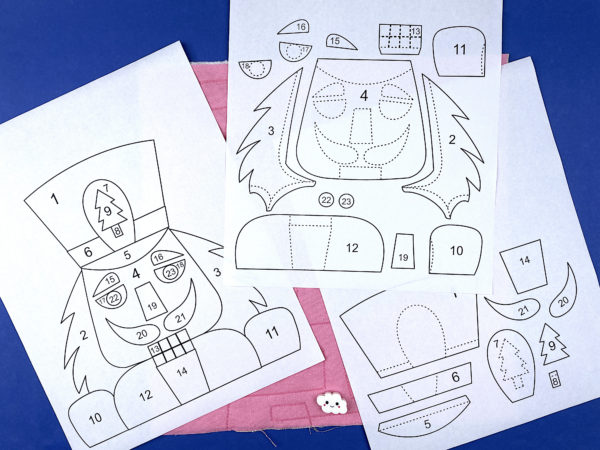
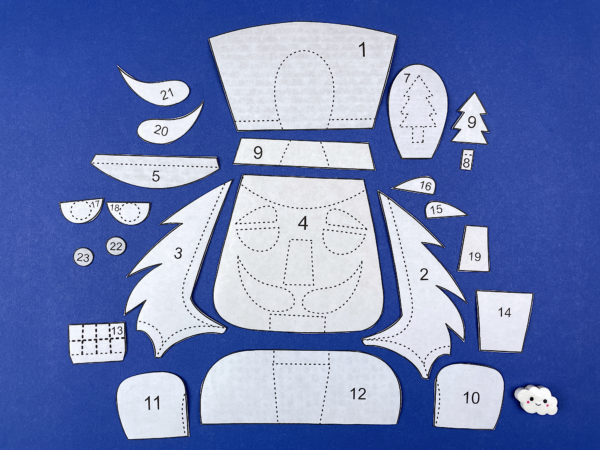
Get the free pattern here. It includes the reversed and exploded templates. If you’re using an electic cutting machine like a Cricut, the pattern has a link to the SVG files you’ll need.

Step 2

Trace or print the pattern onto the paper side of the fusible adhesive.

I use Heat & Bond Lite for all my quilts, and I love printable sheets because I’m lazy and hate to trace. 🙂

The image has already been reversed, so just trace or print. If you’re tracing, be sure to trace the lines separating the teeth too. You’ll need those for Step 5.

Step 3

Whoa! That’s a lot of pieces!

It’s ok – the numbers tell you what’s what and there’s a video showing how to layer them up. 🙂

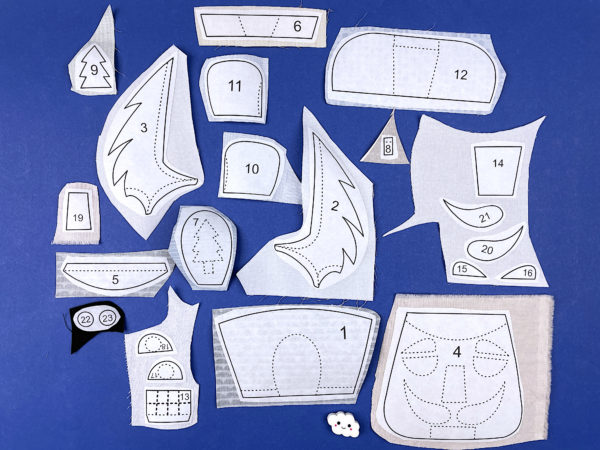
Roughly cut around each shape and fuse it to the back of your fabric.

Step 4

Cut around each piece neatly.

This time you’re cutting directly on the solid lines.

Step 5

Remember back in Step 2 when I told you to make sure you traced the lines for the teeth? Now you’re going to use that. Hold the teeth up to a window so the light shines through it. You’ll be able to see all the dotted lines, and the adhesive will stabilize the fabric so you can trace on it without it crinkling up.

If you’re not using a lightbox (I am in my video), trace all the other dotted lines too using chalk or a pencil. They’ll help you position the pieces.

Step 6

If you’re doing Quilt As You Go (I did) then you can quilt your block before adding the applique. So easy!

Cut your background fabric and a piece of 100% cotton batting 11 inches square.

Layer the block with a piece of 100% cotton batting. Quilt any pattern you like!

I prefer to quilt my blocks before I applique. These posts show how I do that, along with lots more info. Start with them.

Some people prefer to quilt after they applique. This post features a gallery of lots of quilt patterns with video instructions showing you how to work those patterns around applique you’ve already done. Of course, you can also stitch these designs before you applique.

If you’ll do the quilting later, simply skip this step.

Step 7

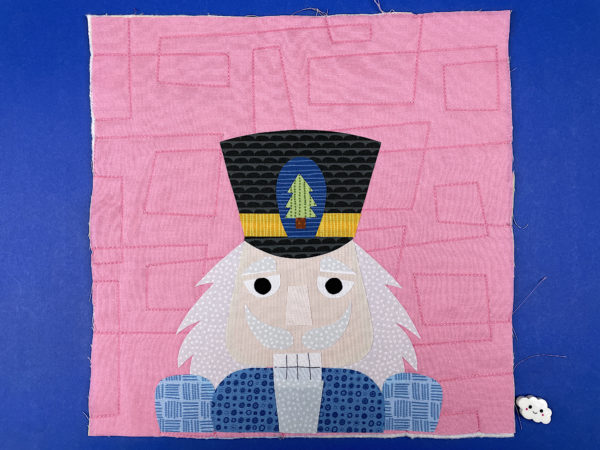
Peel off the paper backing and arrange the pieces on a background block.

Fuse the pieces in place, following the instructions for whatever brand of adhesive you used.

This video has detailed instructions for layering all those pieces and also shows the finished block.

Step 8

Outline all the pieces with black thread and a simple straight stitch – or choose your favorite decorative stitch.

This video has some tips for outlining those tight curves.

I like going around all the pieces three times for a sketchy, scribbly look. This post has some tips for that.

This post has tips for using decorative stitching.

This post has some information about outlining using thicker thread.

Done!

Do you like those little specks of light in his eyes? This post shows you three ways to add those catchlights.

If you’re making a one-block project, go ahead and finish it up!

If you’re making a bunch of nutcracker blocks to join into a quilt -­ maybe adding them to the other free Christmas blocks – have fun!

Browse all my free quilt layout guides here.

This video shows how to trim your finished quilt blocks.

This video shows how to sew your blocks together using the QAYG method I use.

This post has tips for quilting on a cuddle fleece back.

And this video shows how to bind your quilt.

What can you do with just one block pattern? Tons of things!

I have lots of free patterns that you can use with any applique patterns – stockings, tote bags, placemats and more! Find all the free patterns here.

Have fun! And share a photo of what you make! You can share it in the Shiny Happy People group or tag it with #shinyhappyworld on Instagram.

If you like this free pattern, sign up for the Shiny Happy News!

Want more Christmas? Browse all the Christmas patterns here.
Happy stitching!

Gingerbread Cookie – Free Applique Pattern

Every year (almost) I release a free holiday applique pattern.

What to do this year?

Here are the links to the patterns from previous years.

I’ve been having a lot of fun with Mix & Match patterns lately, so I decided to make a gingerbread cookie with lots of parts for you to play with!

Here’s a quick intro. . .

Now let’s jump right to the instructions!

These instructions assume you’re already familiar with the applique method I use – Quilt As You Go and applique with fusible adhesive.

Step 1

Download the template pieces. If you’re using paper-backed fusible adhesive and cutting by hand, use this link to download the PDF. If you’re using an electric cutting machine, use this link to download the SVG.

If you’e using an electric cutting machine like a Cricut. . .

  • Upload the file to your machine.
  • Resize if needed. (To fit a block that finishes at 10 inches square, the image should be 15 inches wide.)
  • Ungroup the pieces and assign colors
  • Cut.

Step 2

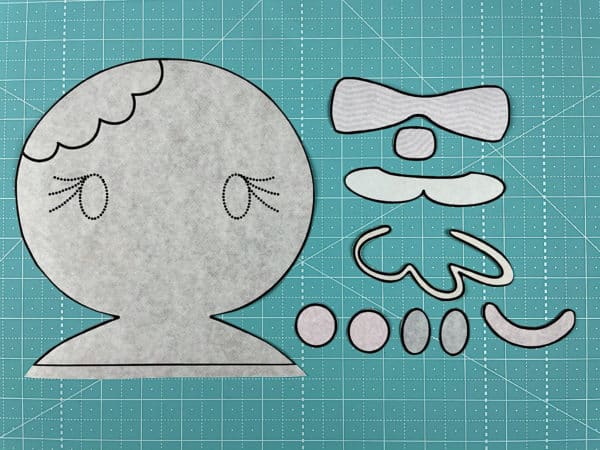
printed pattern pages for free gingerbread applique pattern

Trace or print the pattern onto the paper side of the fusible adhesive.

I use Heat & Bond Lite for all my quilts, and I love their printable sheets because I’m lazy and hate to trace. 🙂

The image has already been reversed, so just trace or print. If you’re tracing, be sure to trace the eyes and (optional) eyelashes too. You’ll need those for Step 5.

Step 3

printed gingerbread applique pieces fused to fabric

Roughly cut around each shape and fuse it to the back of your fabric.

Here’s a video showing those first two steps. . .

Step 4

Cut around each piece neatly.

Pre-cut felt face and hair pieces for DIY craft project, child-friendly sewing activity.

This time you’re cutting directly on the solid lines.

This video has more info about that step.

Step 5

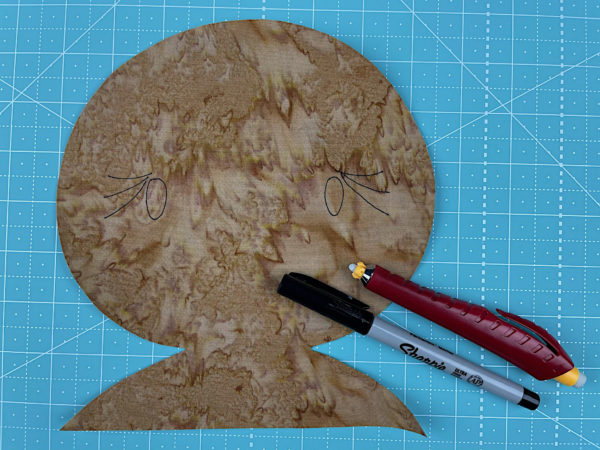
Remember back in Step 2 when I told you to make sure you traced the eyes and eyelashes? Now you’re going to use that. Hold the face up to a window so the light shines through it. You’ll be able to see all the dotted lines, and the adhesive will stabilize the fabric so you can trace on it without it crinkling up.

- Colorful abstract fabric circle with handwritten "70" on a blue cutting mat.

Trace the lines to show where the eyes go. If your cookie will have eyelashes, trace those too.

Here’s a video with more info about this step.

Step 6

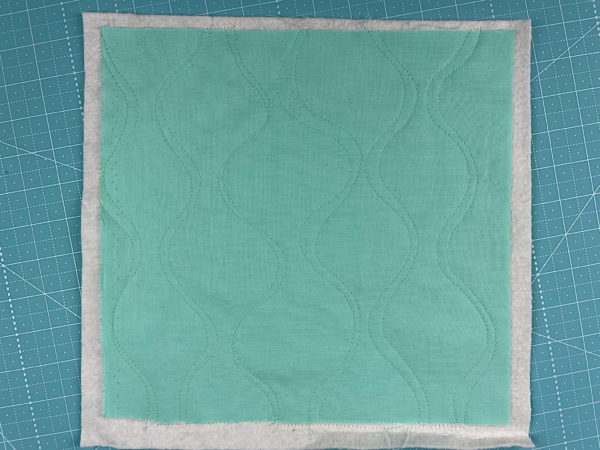
If you’re doing Quilt As You Go (I did) then you can quilt your block before adding the applique. So easy!

Cutting mat with quilted fabric for sewing projects.

Cut your background fabric and a piece of 100% cotton batting 11 inches square.

Layer the block with a piece of 100% cotton batting. Quilt any pattern you like!

Find all the Quilt As You Go tutorials here.

If you’ll do the quilting later, simply skip this step.

Step 7

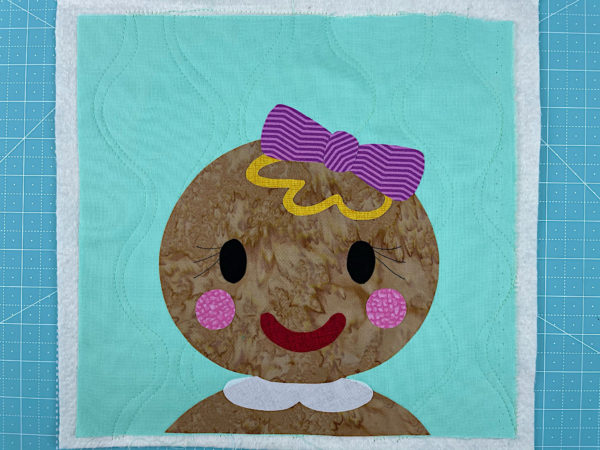
Peel off the paper backing and arrange the pieces on a background block. Have fun creating your own custom cookie!

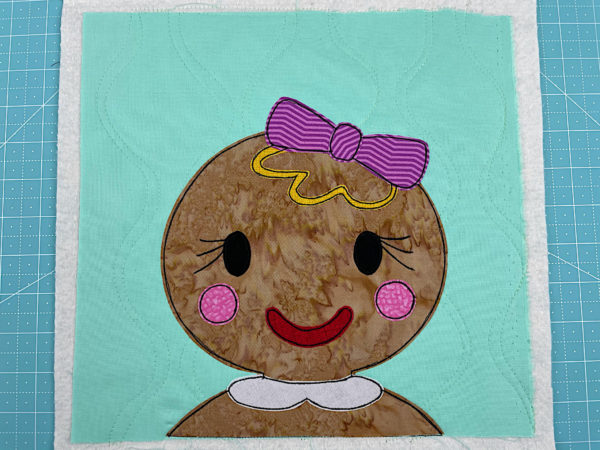
Colorful applique portrait of a smiling girl with a purple bow on her head, crafted with fabric pieces.

Fuse the pieces in place, following the instructions for whatever brand of adhesive you used.

This video has detailed instructions for layering the cookie decorations.

And this video is a shorter version with no explanation – just music – perfect for folks already familiar with my techniques.

Step 8

Outline all the pieces with black thread and a simple straight stitch – or choose your favorite decorative stitch.

Bright quilted fabric featuring a cute face of a cookie girl with a pink bow, perfect for baking or kitchen decor.

This video has some tips for outlining those tight curves.

I like going around all the pieces three times for a sketchy, scribbly look. This post has some tips for that.

This post has tips for using decorative stitching.

This post has some information about outlining using thicker thread.

And this video has me talking through the path I followed to outline my sample block – and also shows you the other two blocks I made.

Done!

If you’re making a one-block project, go ahead and finish it up!

If you’re making a bunch of gingerbread blocks to join into a quilt -­ maybe adding them to the other free Christmas blocks – have fun!

This video shows how to trim your finished quilt blocks.

This video shows how to sew your blocks together using the QAYG method I use.

This post has tips for quilting on a cuddle fleece back.

And this video shows how to bind your quilt.

What can you do with just one block pattern? Tons of things!

Check out this page I’ve been slowly building – 100 Things to Do with an Applique Pattern. 🙂

Have fun! And share a photo of what you make! You can share it in the Shiny Happy People group or tag it with #shinyhappyworld on Instagram.

If you like this free pattern, sign up for the Shiny Happy News! Subscribers get a weekly newsletter full of sewing tips and tricks, free patterns, special discounts, and other things to make you smile. 🙂

Happy sewing!

Christmas Pickle – a free crochet pattern

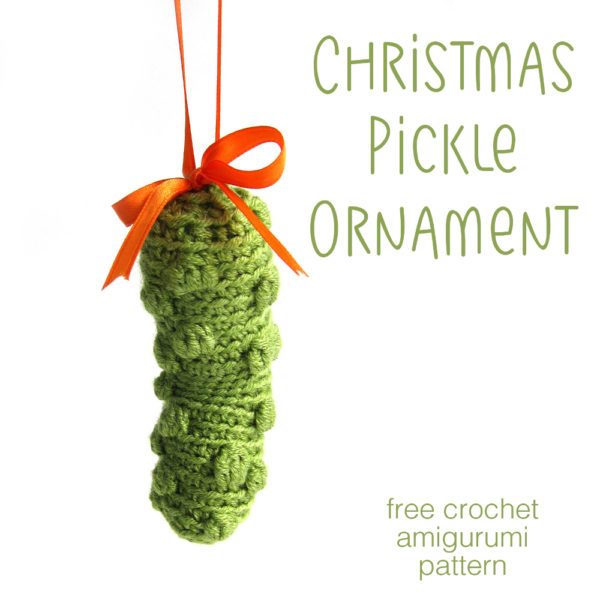
Green crochet Christmas pickle ornament handmade with yarn, tied with orange ribbon.

Stacey loves eating pickles, and is a Christmas Pickle Collector – so it’s no surprise that she designed a pattern for a crocheted Christmas Pickle! We’ve updated it here with some new tutorial links.

The skills you’ll need for just about any amigurumi are. . .

This project uses a couple of extra skills, but don’t worry. They’re easy, and we have video tutorials showing how!

You can go through all those posts now, or just hop to them as you get to those points in the pattern – whatever works best for you!

Yarn

This pattern can be used with any weight yarn. If you use worsted weight yarn, your pickle will be about 5 1/2 inches long.

Materials

  • Size H crochet hook (or size needed to get a tight fabric)
  • tapestry needle
  • yarn (less than a skein)
  • ribbon for hanging

Gauge Notes

This pattern doesn’t specify a gauge. It’s a stuffed pickle, and you don’t need to be too picky about exact sizing. The most important thing is that you use a hook size that creates a nice looking fabric for your yarn. If you use the recommended hook size, and your fabric looks very loose (so that stuffing would show through), then you will want to use a smaller hook. Other than that, no measuring required!

Stitch into the Back

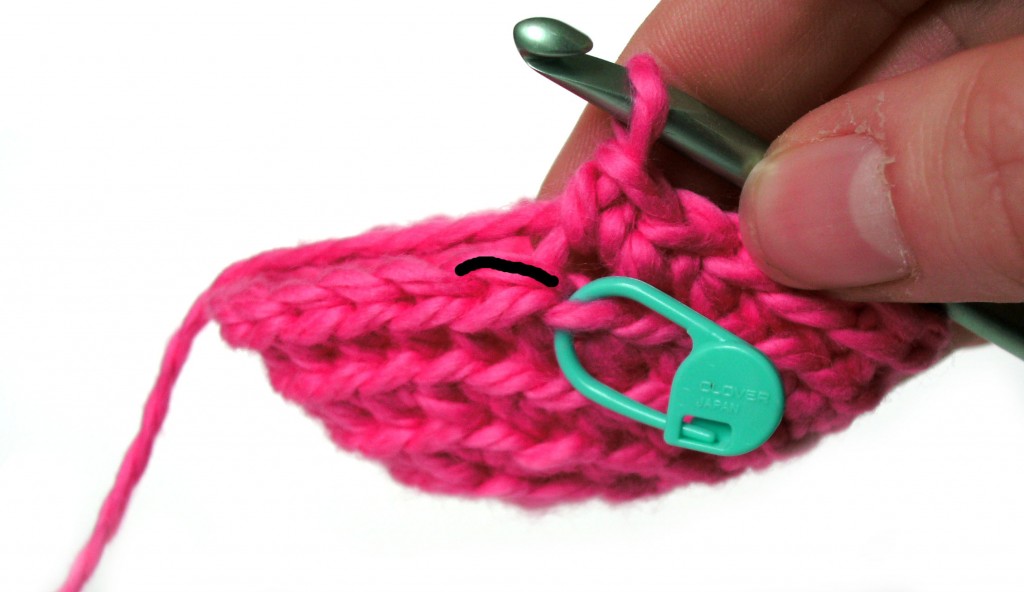
All stitches in this pattern (that are worked in the round) are worked through the back loop only, unless otherwise directed. Look at this picture.

Stitching in the Back Loop

See how one loop is highlighted in black? This is the back loop, and it’s what you’ll stitch into. Stitching into the back loop creates ridges on the right side of the piece.

Want to see crocheting through the back loop in action? Check out this blog post. It talks all about why Stacey crochets through the back loop and even has a handy dandy video showing how to find that loop. 

Abbreviations

  • ch: chain
  • sc: single crochet
  • hdc: half double crochet
  • bbl: bobble stitch
  • sc2tog: single crochet 2 stitches together
  • st(s): stitch(es)

Ready? Let’s jump in!

Ch 2 (I like to start with a sloppy slip knot. This video shows how. And this video shows how to chain.)

Round 1 sc 6 in 2nd ch from hook (6) This post will help you find that second chain from the hook.

Round 2 sc twice in next st (12) This video will help you if you find it tricky to start the second round.

Round 3 [sc twice in next st, sc in next st.] 6 times (18)

Round 4 sc in each st. (18)

Round 5 [bbl in next st, sc in next 5 sts.] 3 times (18)

Round 6 sc in each st. (18)

Round 7 [sc in next 4 sts, bbl in next st, sc in next st] 2 times (18)

Rounds 8-11 Repeat rounds 4-7.

Round 12 sl st in next 6 sts, sc in next 3 sts, hdc in next 6 sts, sc in next 3 sts. (18)

This video shows how to slip stitch – it’s what gives your pickle that classic bend in the middle. And this video shows how to half double crochet. These slightly taller stitches are what give your pickle room on the back to make that bend.

Round 13 sl st in next 6 sts, [bbl in next st, sc in next 5 sts] 2 times (18)

This video shows how to bobble stitch.

Round 14 sl st in next 6 sts, sc in next 3 sts, hdc in next 6 sts, sc in next 3 sts. (18)

Round 15 sl st in next 6 sts, [sc in next 4 sts, bbl in next st, sc in next st] 2 times (18)

Rounds 16-23 Repeat rounds 4-7, twice.

Lightly stuff your pickle.

Round 24 [sc2tog, sc in next st.] 6 times (12)

Round 25 [sc2tog] 6 times (6)

Add a bit more stuffing if needed and close up the top using your favorite method. I like the drawstring method – there’s a video here showing how. And here’s a video showing how to fasten off.

Bury the tail. Tie a ribbon to the top for hanging.

Congratulations! You have an adorable Christmas Pickle ornament!

Happy stitching!

Best,
Wendi

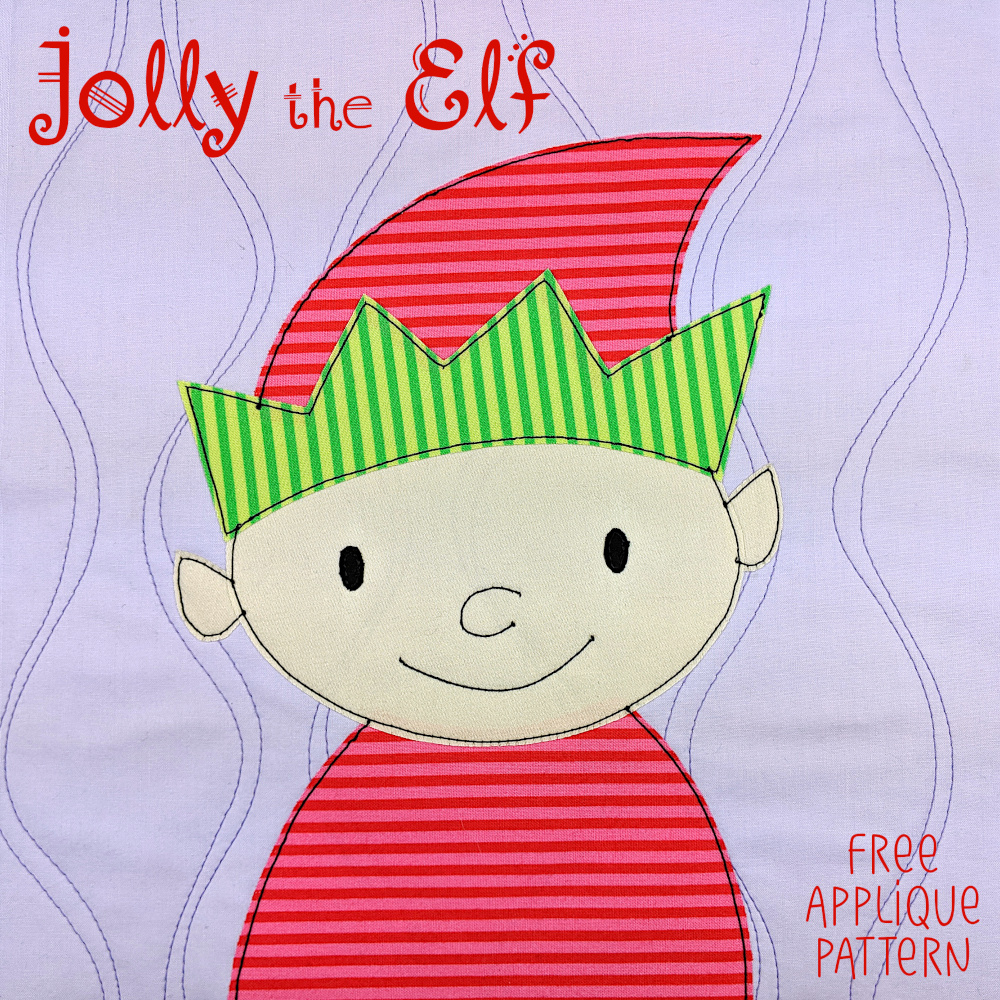
Jolly the Elf – a Free Christmas Applique Pattern

Jolly the Elf quilted fabric character from Shiny Happy World free applique pattern.

There’s a new free applique pattern for you! Merry Christmas! 🙂

Get the free Jolly the Elf applique pattern here.

This adorable elf pattern is the same size and style as the other free Christmas applique patterns – 10 inch finished blocks.

Find all the Christmas quilt patterns here.

The elf pattern includes all your templates, plus loads of step-by-step photos – but sometimes you’d really like to be in the room with me, watching over my shoulder as I talk through every step of the assembly.

That’s what these videos bring you!

This video shows how I put it all together without using a light box.

See how easy that is? Definitely easy enough to be your very first applique project.

And this video shows me putting that elf together with the help of a light box to guide placement. This version doesn’t include the pigtails or the eyelashes.

A light box isn’t nearly as bulky or as expensive as I thought it would be, and it’s an amazing tool! You can learn every detail about my set-up and see how it all works here.

What can you do with just one block pattern? Tons of things!

Combine the elf pattern with one of these free patterns. . .

Want to make a Christmas quilt with Santa, Mrs. Claus, a snowman, a reindeer, and these elves? Find all the free Christmas quilt patterns here.

If you’re looking for a different fun Christmas quilt pattern, check out this North Pole quilt pattern.

Happy stitching!

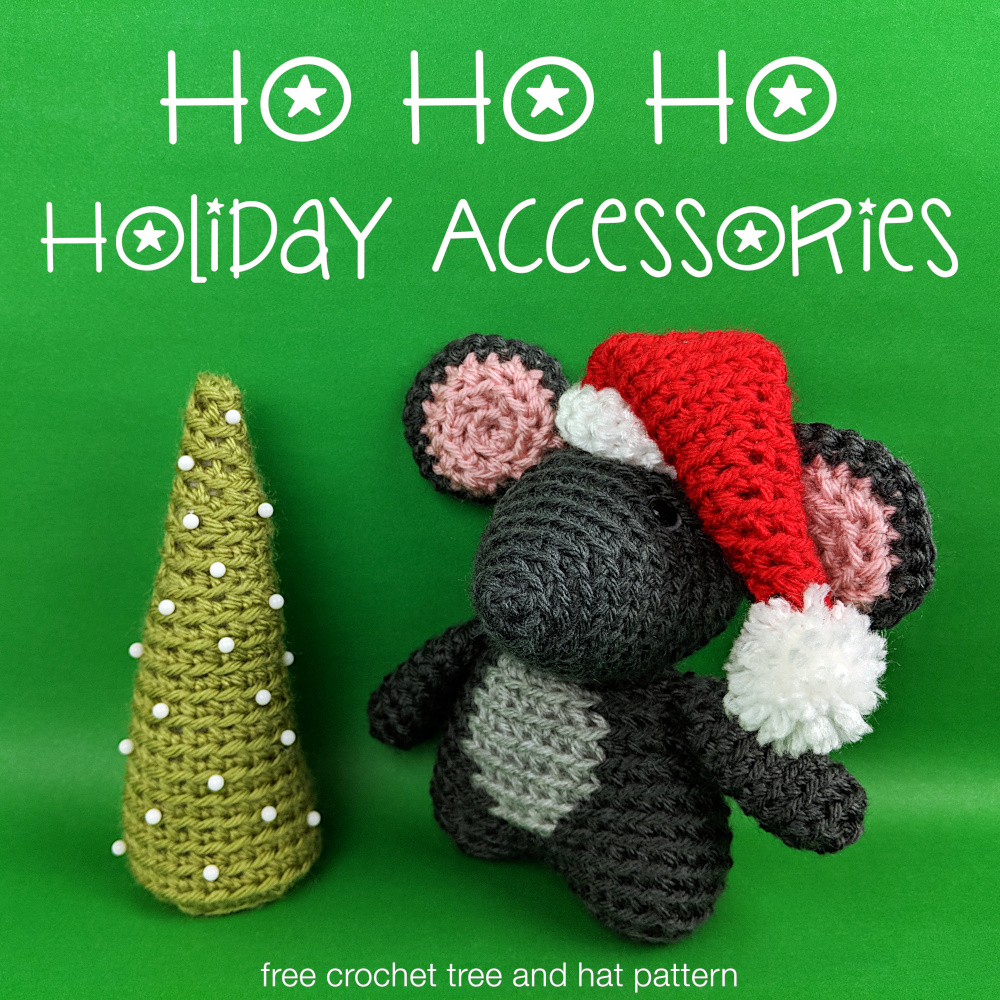
Ho Ho Ho Holiday Accessories – free crochet Christmas tree and Santa hat pattern

Crochet Christmas dog with Santa hat and Christmas tree ornament, holiday crochet accessories.

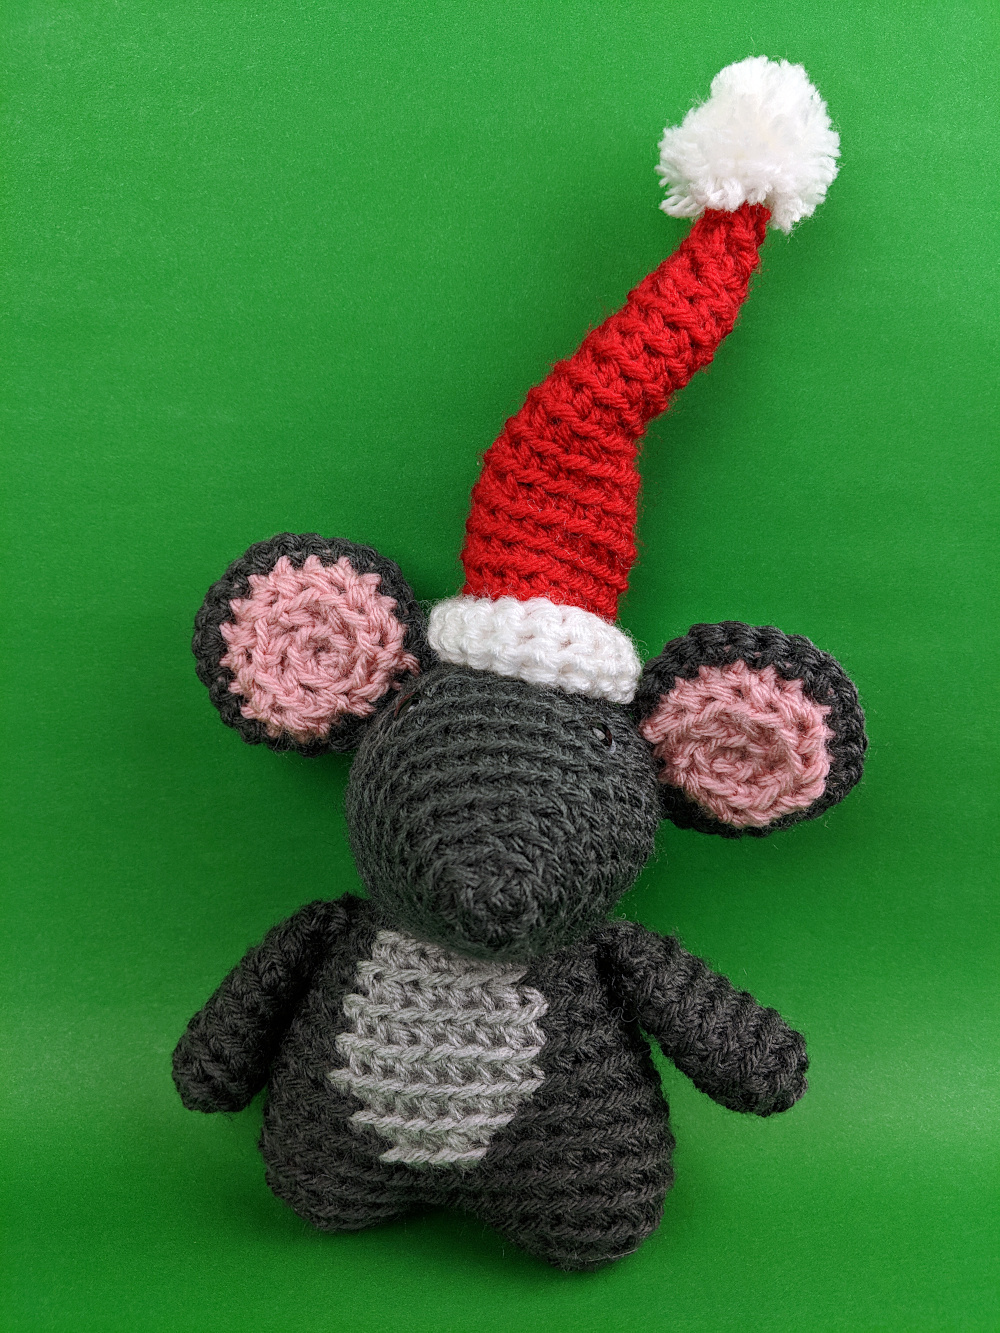
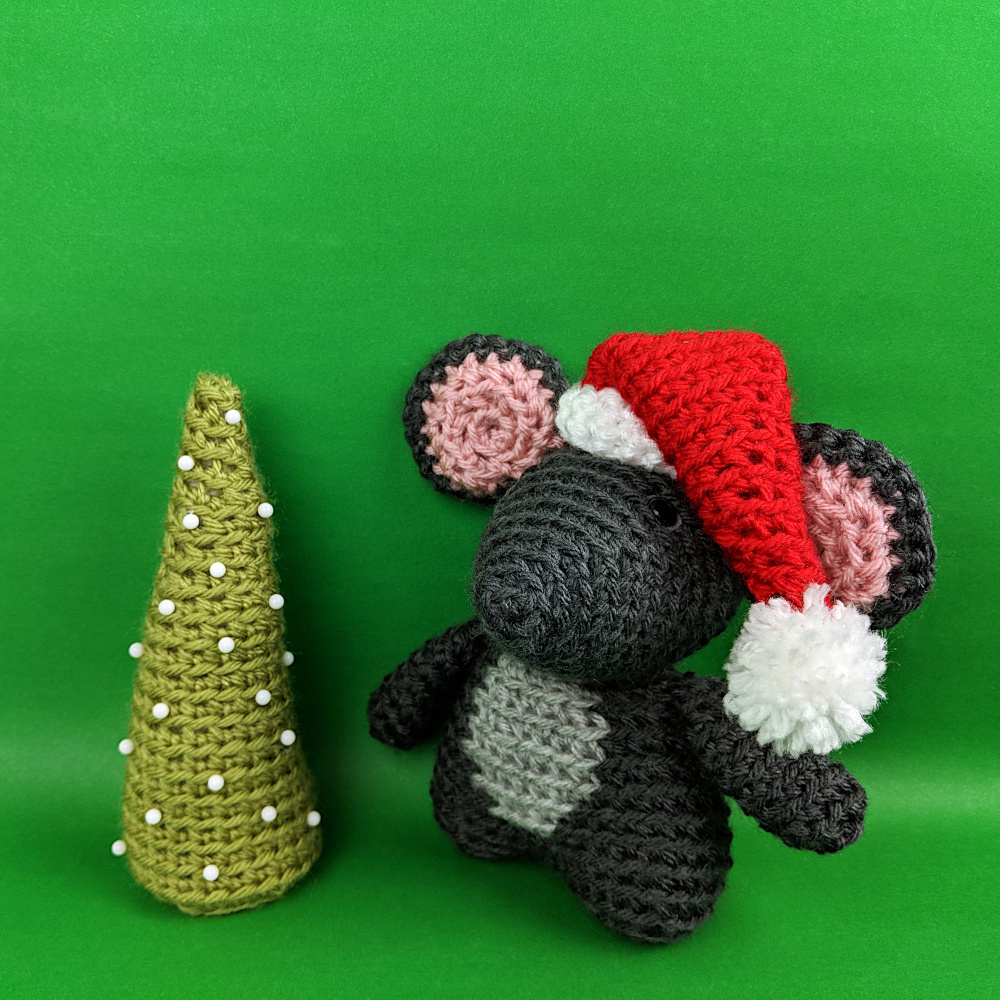
Milo Mouse is all decked out for Christmas!

I’ve got free patterns below for both the tree and the hat – plus some extra fancification ideas for both at the bottom of the post. Have fun with these!

You can use these patterns for any holiday decorations – the repeat pattern is easy to follow to make them larger if you need. Or just use thicker yarn!

Abbreviations

  • ch: chain
  • sc: single crochet
  • sc2tog: single crochet 2 stitches together
  • st(s): stitch(es)

The tree and the hat both start the same way. . .

Ch 2 (I like to start with a sloppy slip knot. This video shows how. And this video shows how to chain.)

Round 1 sc 4 in 2nd ch from hook (4) This post will help you find that second chain from the hook.

Round 2 sc twice in next st, sc in next 3 sts (5) This video will help you if you find it tricky to start the second round.

Round 3 sc twice in next st, sc in next 4 sts (6)

Round 4 sc twice in next st, sc in next 5 sts (7)

Round 5 sc twice in next st, sc in next 6 sts (8)

Round 6 sc twice in next st, sc in next 7 sts (9)

Round 7 sc twice in next st, sc in next 8 sts (10)

Round 8 sc twice in next st, sc in next 9 sts (11)

Round 9 sc twice in next st, sc in next 10 sts (12)

Round 10 sc twice in next st, sc in next 11 sts (13)

Round 11 sc twice in next st, sc in next 12 sts. (14)

Round 12 sc twice in next st, sc in next 13 sts. (15)

Round 13 sc twice in next st, sc in next 14 sts (16)

Round 14 sc twice in next st, sc in next 15 sts (17)

Round 15 sc twice in next st, sc in next 16 sts (18)

Round 16 sc twice in next st, sc in next 17 sts (19)

This is where the pattern changes, depending on whether you’re making the tree or the hat.

For the Santa Hat. . .

Round 17-20 Change to white yarn and sc in each stitch (19, 4 rounds) This video shows how to change colors cleanly.

Fasten off and weave in the tail.

Make a small white pompom and tie it to the end of the hat. There’s a video showing how to make a pompom here. I wrapped mine around the times of a fork for a nice small puffball. 🙂

Finished!

Crochet mouse plush wearing a Santa hat, holiday-themed handmade toy, Christmas crochet craft. If you’re making a hat for a larger softie, just follow this pattern of increasing one stitch per round until the hat is big enough to fit, then stitch at least four rounds of straight single crochet for the contrasting band. You may need to add more rounds of contrast to feel like it’s in the right proportion with the hat, depending on how much bigger you make it. Trust your judgement. 🙂

For the tree. . .

Picking up after round 16 above.

Round 17 sc twice in next st, sc in next 18 sts (20)

Round 18 sc twice in next st, sc in next 19 sts (21)

Round 19 sc twice in next st, sc in next 20 sts (22)

Round 20 sc twice in next st, sc in next 21 sts (23)

Round 21 sc twice in next st, sc in next 22 sts (24)

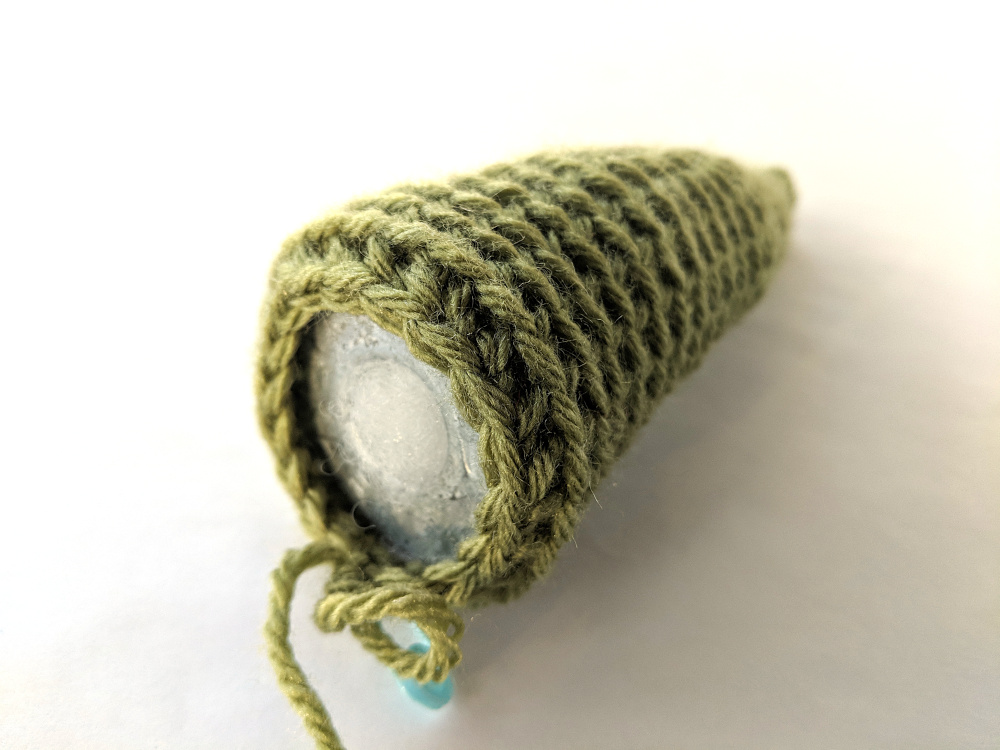
Stuff the tree and slip a large washer across the stuffing at the base of the tree. This will give your tree a nice flat base and the washer adds a nice weight.

Round 22 [sc2tog, sc in next 2 sts] 6 times (18)

Here’s what it looks like after that first decrease round wraps around the edge of the washer.

If you don’t have a metal washer, you can cut a circle of cardboard. It will give you the flatness without the weight.

Round 23 [sc2tog, sc in next st] 6 times (12)

Round 24 [sc2tog] 6 times (6)

Use the drawstring method to close up the last hole. 

Finished!

If you want to make your tree bigger, keep following the same increase pattern after round 21. To make your decrease rounds easier to calculate, make sure to make your last increase round one whose stitch count is evenly divided into 6.

I dressed up my tree with some simple white-headed pins – but there are tons of possibilities to dress up both the tree and the hat!

For the tree. . .

  • Use multicolored instead of white pins.
  • Wrap it in tiny fairy lights.
  • Sew (or pin) on buttons.
  • Add beads as you crochet! That link goes to a video showing how.
  • Use sparkly or glitter or eyelash yarn.
  • Pin on garland from the trim section of the fabric store – braid or cord or rickrack.

For the hat. . .

  • Sew on a bell or tassel instead of making a pompom.
  • Surface crochet the contrasting band on the hat with eyelash yarn. Yep – that’s another video link. 🙂
  • If your hat is kind of stiff and you want it to flop down like the one in the photo, you can drop a metal nut into the tip of the hat. The weight will keep it dipping down. I use a surprising amount of hardware store items in my softies. 🙂

If you decide to give a holiday Milo Mouse as a gift, I suggest pairing it with these books.

  • The Night Before Christmas – I had the line “Not a creature was stirring, not even a mouse” in my head as I designed Milo. There are so many beautiful editions of this story available – the link goes to one with very traditional illustrations.
  • Mr Willoughby’s Christmas Tree – I just love this story about the tippy top of a Christmas tree. 🙂

Have fun with these patterns!

Best,
Wendi


Free Santa’s Village Signs to Make a North Pole Quilt

applique buildings from the North Pole/Santa's Workshop

I’ve been working on a super fun North Pole quilt by adding a bunch of cute Santa’s Village signs to houses and buildings made with the Shiny Happy Houses quilt pattern.

Colorful candy shop embroidery design for kids’ clothing or decor.

It’s been so much fun!

Colorful fabric applique of Santa’s house with trees on a light blue quilt background.

Now you can do the same thing!

Bright colorful quilt depicting elf dorms and landscape with playful embroidered details.

Get the Shiny Happy Houses quilt pattern here.

Click here to get the free pattern for all the signs  – there are 26 – plus a page of blank signs so you can come up with your own fun names. 🙂

Get the North Pole Quilt Pattern bundle here. It includes the Shiny Happy Houses pattern, the pattern for the signs, and a layout guide (including materials lists for six different sizes) for a simple grid quilt.

The pattern for the signs includes instructions for how I do the lettering. It’s easy!

Colorful embroidered cheerful house and Christmas tree on quilted fabric background.

Free Santa's Village signs to make a North Pole quilt - from Shiny Happy World

I wanted everything in my quilt to look like it was made of candy so it’s a lot of bright colors on spun-sugar pastel backgrounds. 🙂

Browse all the Christmas quilt patterns here. (most of them are free)

Browse all the Christmas patterns here.
Happy stitching!

Make Easy Felt Gift Tags

Handmade felt gift tag with blue letter J attached to red fabric gift bag, perfect for custom gift wrapping.

Four years ago I posted a tutorial showing how I make reusable fabric gift bags. We don’t use any gift wrap anymore at the holidays – just these bags.

This was a really popular tutorial and people loved the bags – but I had a lot of people ask how we stuck tags to them.

I’m finally getting around to that post!

For a while we just used paper tags tucked into the ribbon – but that didn’t always stay in place, so a couple of years ago I made a bunch of felt tags and they’ve been AWESOME.

First – a note. Mine is a small family – just three of us – and we all have different initials. So for us it worked really well to just have tags with a first initial. You may need to adapt the idea a bit to work for YOUR family, but the basic technique can be used a lot of ways. 🙂

First cut a 3 inch square of felt.

Why 3 inches? It’s a number that allows me to get 12 squares out of a single sheet of felt with no waste. 🙂

Cut out the felt letter you need. I used this free alphabet pattern.

It’s easy to cut shapes like those letters if you use freezer paper.

  1. Trace the letter onto the paper side of the freezer paper
  2. Fuse the shiny side of the paper to the felt.
  3. Cut out the letter – cutting through the felt and the paper at the same time for super accuracy
  4. Peel off the paper and use it again.

Stick the letter to the felt square with a dab of glue stick. Sew around the letter using a simple straight stitch on your sewing machine. You could also hand sew the letter in place using fancier stitches, but I wanted to make a big stack of these in an afternoon. (Keep reading for a no-sew option.)

Cut a slit in the felt on each side of the letter.

Colorful felt alphabet letter 'a' applique sewn onto a green square background, ideal for kids' educational crafts.

I don’t measure these or worry too much about precision – most of the slits are about an inch tall, and roughly half an inch from the edge of the felt.

Done!

Now – here’s how I use them.

I make two kinds of bags. The main kind – the ones I use most often – have the ribbon sewn to the top edge of the bag. They’re designed for the ribbon to wrap all the way around the gift, like this. . .

Colorful patterned gift wrapped with green ribbon, suitable for gift giving or craft projects.

For those I just slide the tag onto the ribbon anywhere on the front of the package. It looks like this. . .

Felt square with embroidered letter J on purple ribbon, decorative craft accessory.

This is a gift for Jo. 🙂

The other kind of bag I make has the ribbon sewn into a side seam near the top of the bag. Those bags are meant to gather up at the top like a classic Santa sack, with the ribbon tied around the neck of the bag – not the gift itself.

For those I thread the tag onto one of the loops before I finish tying the bow. Here’s what it looks like.

Red holiday fabric gift bag with white snowflake and character print, tied with white ribbon.

Another gift for Jo! 🙂

Both ways are super easy, and post-gift-opening cleanup is a breeze. The ribbons are attached to the bags, so I just fold up the bags, and make a little stack of the tags. The bags and the tags all fit in one small plastic tub – maybe the size of two shoe-boxes. 🙂

Here are links to everything you need. . .

I like the way the stitching looks, but you could make a completely no-sew version using Heat & Bond Ultrahold fusible adhesive. Remember – this is the heaviest weight they make and you should NOT sew through it. (It will gunk up your needle.) If you use this option, you’ll need to fuse a little hotter/longer than the package directions say in order for the heat to fully penetrate the thick felt and melt the adhesive. Everyone’s iron is a little different, so just experiment with temperature and time until you get a solid fuse.

Happy crafting!

Best,
Wendi
Bright, cheerful woman smiling at a colorful fabric craft display at Shiny Happy World.

Mrs. Claus – free applique pattern

Shiny Happy World Mrs. Claus applique pattern with pink background and polkadot green dress.

There’s a new free applique pattern for you! Merry Christmas! 🙂

Get the free Mrs. Claus applique pattern here.

You can use this pattern to make LOTS of fun Christmas decorations – placemats, stockings, gift bags, and more.

Of course, the Mrs. Claus pattern is the same size and style as all the free Christmas applique patterns so you can make a Christmas quilt!

The pattern includes all your templates, plus loads of step-by-step photos – but sometimes you’d really like to be in the room with me, watching over my shoulder as I talk through every step of the assembly.

That’s what these videos bring you!

This video shows how I put it all together without using a light box.

See how easy that is? Definitely easy enough to be your very first applique project.

And this video shows me putting that block together with the help of a light box to guide placement.

A light box isn’t nearly as bulky or as expensive as I thought it would be, and it’s an amazing tool! You can learn every detail about my set-up and see how it all works here.

Get the free Mrs. Claus applique pattern here.

Want to make a Christmas quilt? Find all the free Christmas Quilt Patterns here.

Choose a quilt layout guide here. That will give you a materials list, cutting instructions, and more for whatever size quilt you want to make.

Want to try some easy handstitching? Find all the felt Christmas Ornament Patterns here.

Browse all the Christmas Patterns here.

Happy stitching!

Rudolph the Red-Nosed Reindeer – a free applique pattern

Reindeer applique pattern for free design, festive kids craft.

I know it’s not even Thanksgiving yet, but I wanted to share this free reindeer applique pattern early enough that you would have plenty of time to make it before Christmas. 🙂

Get the reindeer applique pattern here.

It’s designed as a 10″ finished block, just like all the other free Christmas applique patterns. Use them all together to make a fun quilt or wall hanging!

Browse all the Christmas quilt pattern (mostly free) here.

Or you can use Rudolph combined with one of these free patterns. . .

Ready to make him?

The reindeer pattern includes all your templates, plus loads of step-by-step photos – but sometimes you’d really like to be in the room with me, watching over my shoulder as I talk through every step of the assembly.

That’s what these videos bring you!

This video shows how I put it all together without using a light box.

See how easy that is? Definitely easy enough to be your very first applique project.

And this video shows me putting that reindeer together with the help of a light box to guide placement.

A light box isn’t nearly as bulky or as expensive as I thought it would be, and it’s an amazing tool! You can learn every detail about my set-up and see how it all works here.

Want to give Rudolph a truly shiny nose? Use this tutorial to make the nose out of satin, or this one to make it out of shiny tissue lamé.

Get the free reindeer applique pattern here.

Want to make a Christmas quilt? Find all the free Christmas Quilt Patterns here.

Choose a quilt layout guide here. That will give you a materials list, cutting instructions, and more for whatever size quilt you want to make.

Want to try some easy handstitching? Find all the felt Christmas Ornament Patterns here.

Browse all the Christmas Patterns here.

Happy stitching!