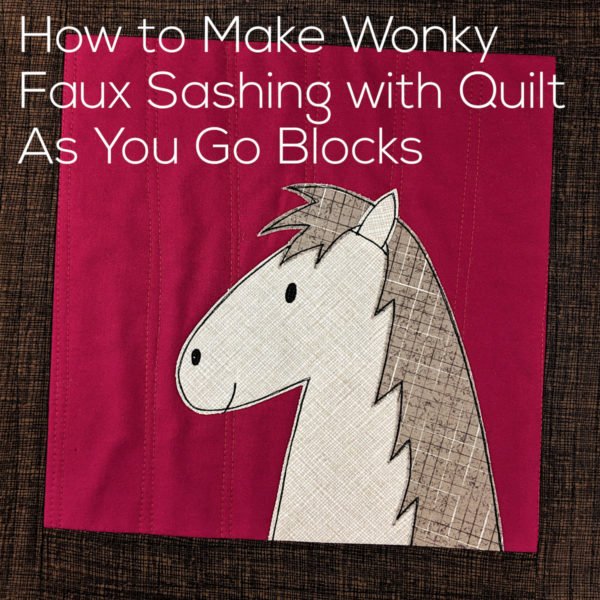
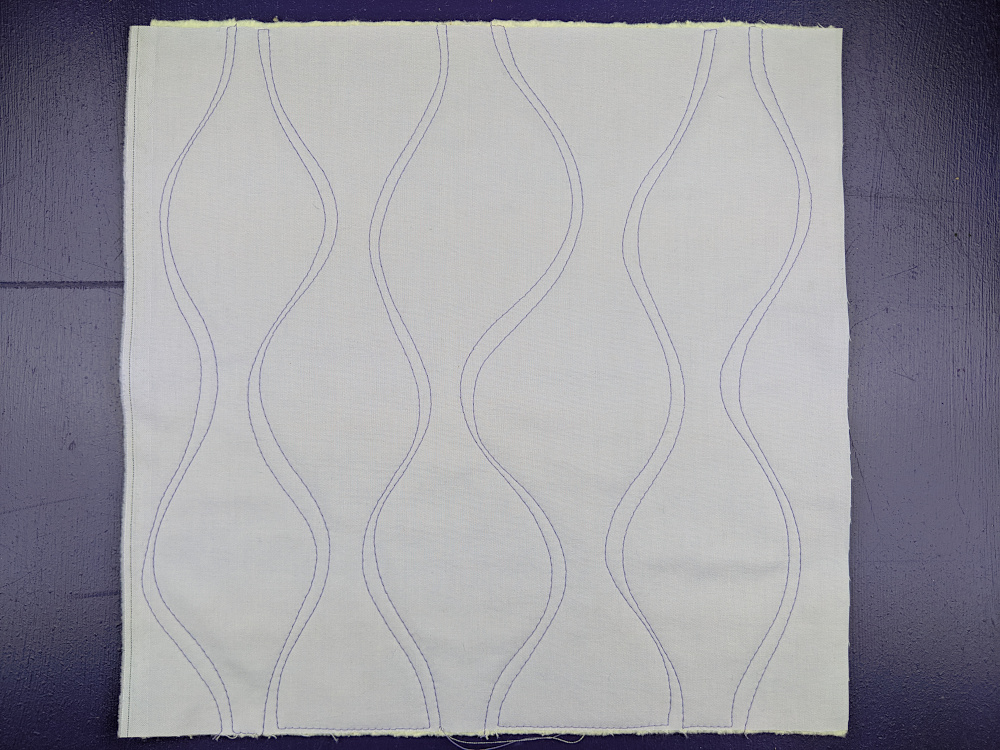
But my favorite method is actually to add fake WONKY sashing to my blocks. That makes blocks that dance around in your quilt, tipping slightly in different directions. It makes the appliques look like they’re peeking out of slightly Seussian windows. 🙂
It’s really easy to do! Here’s a video showing how. . .
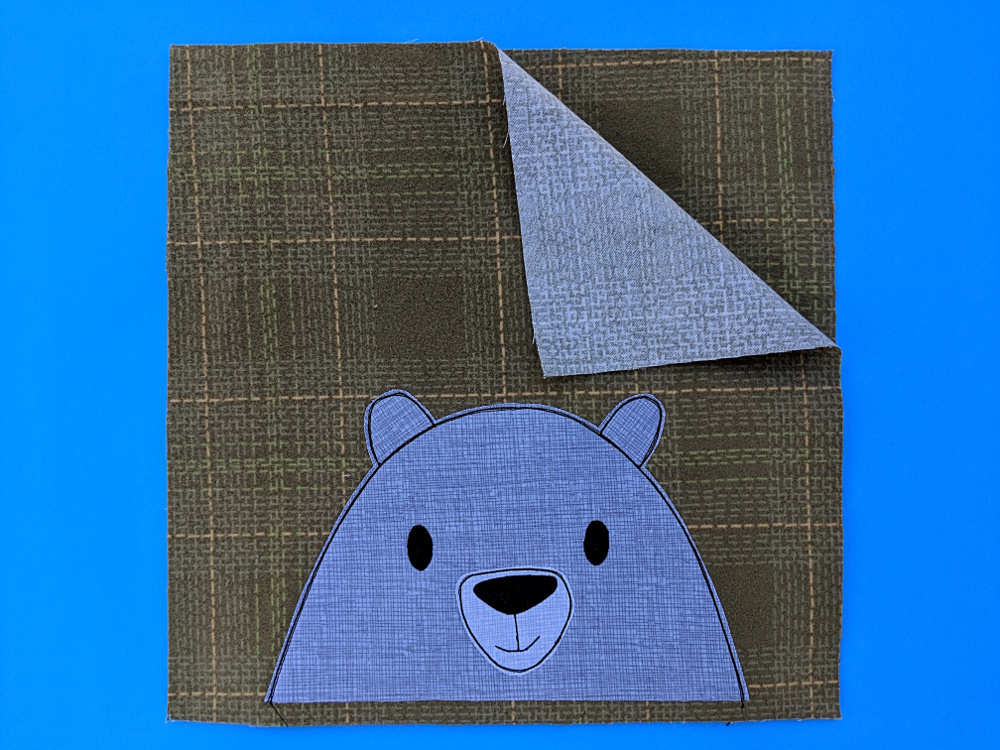
Here are those dimensions. . .
Cut your background blocks 10 1/2 inches square
Cut your batting 13 inches square (you’ll trim it later to 12 1/2 inches square)
Cut your strips for the sashing 2 1/2 inches wide
And here are the rest of the links I promised. . .
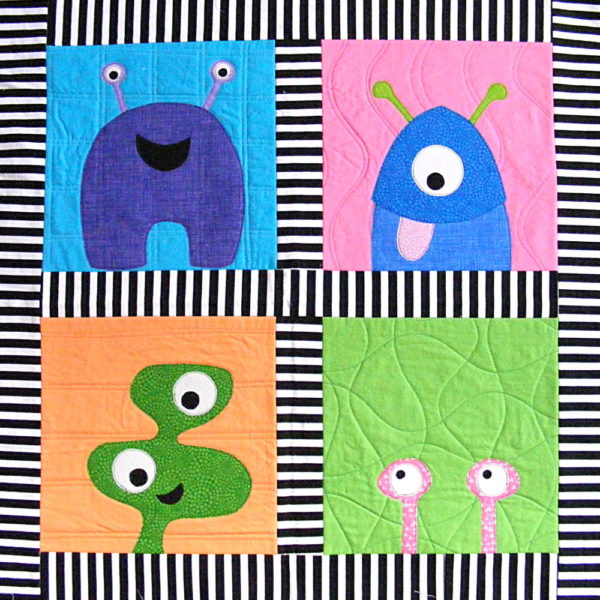
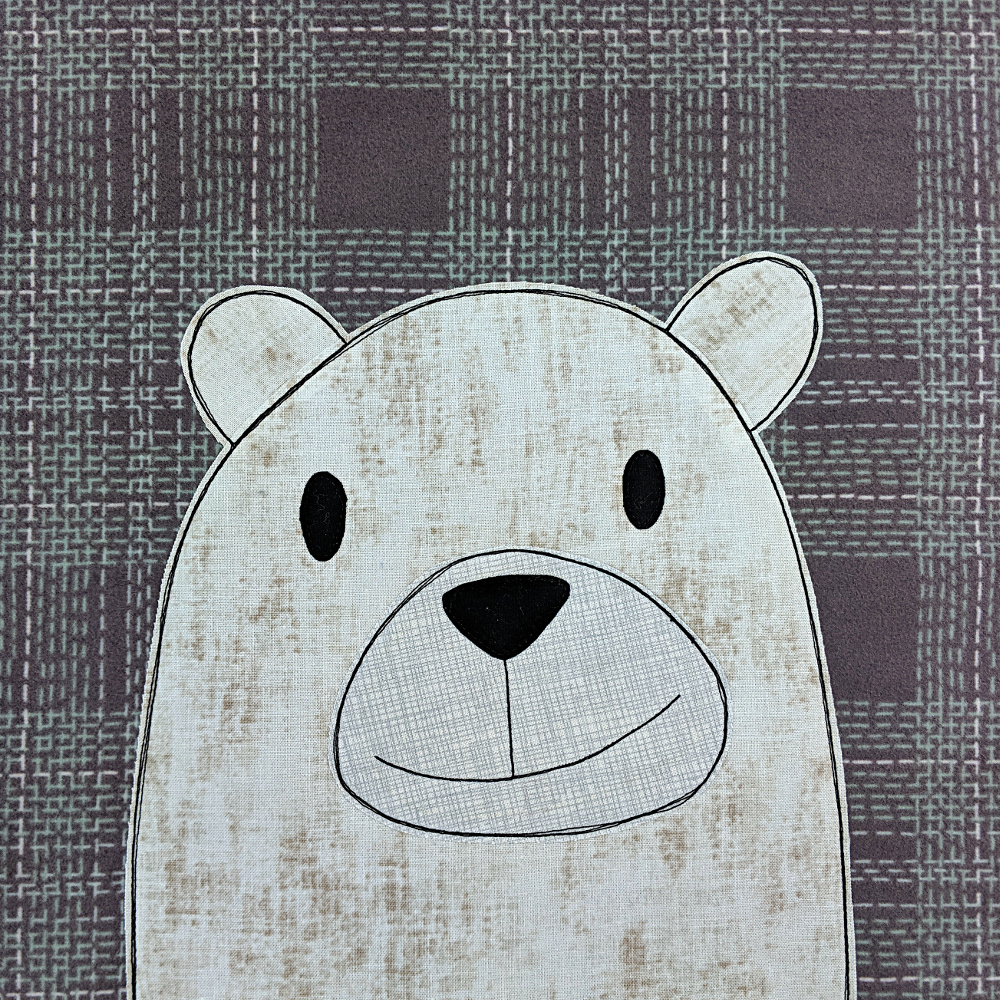
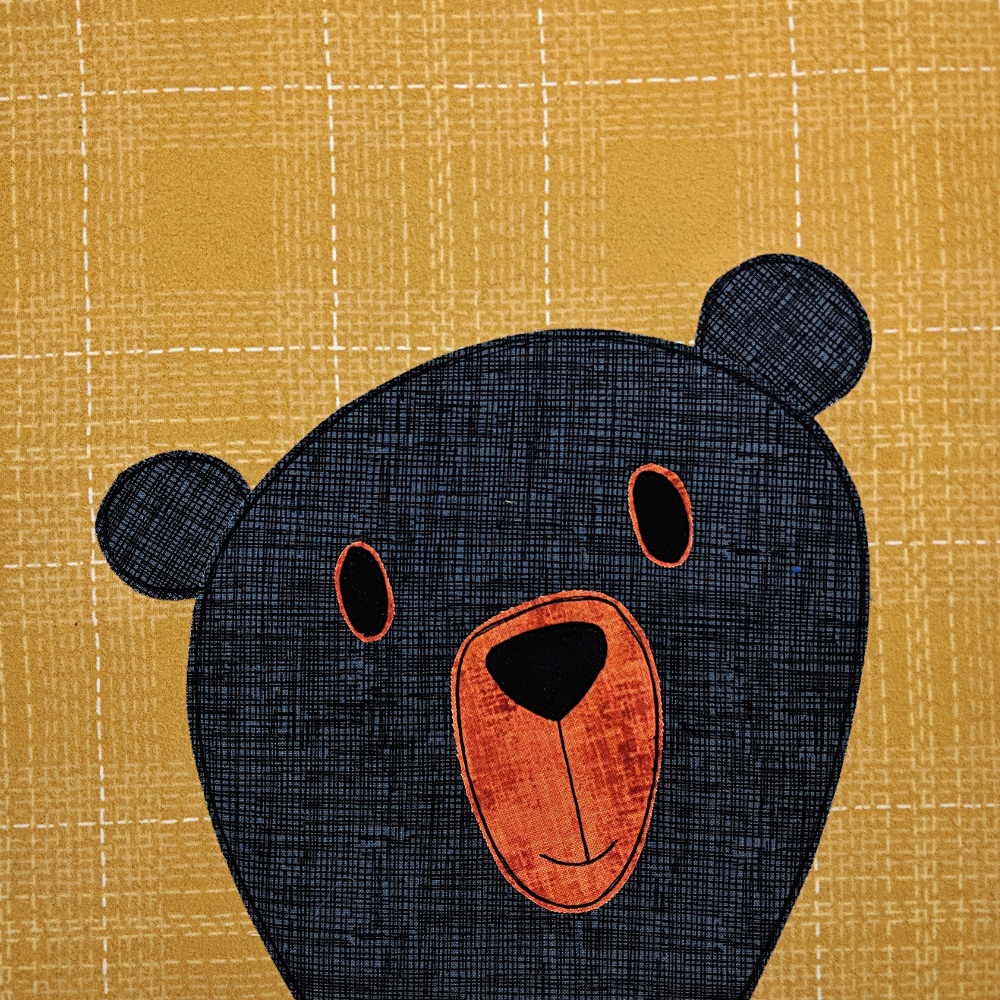
Of course – once you make some wonky sashing to frame your applique, your next step will be to sometimes make your applique bust out of its frame – like these silly monsters.
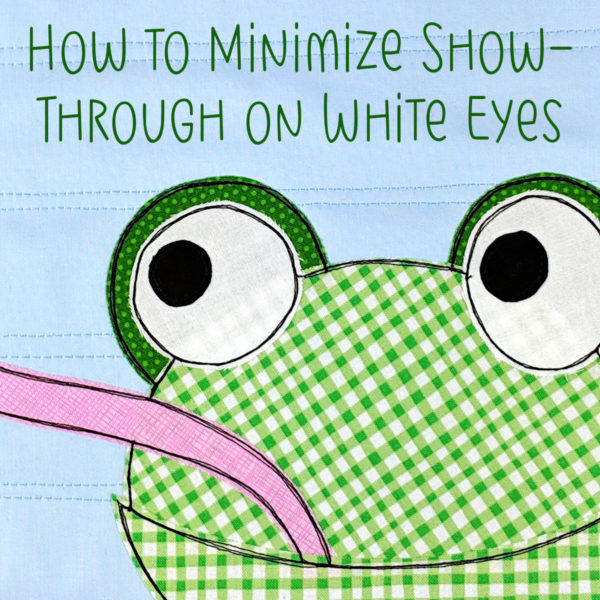
I get a lot of questions about how to stop seeing through fabric applique – especially on my frog and monster patterns that have big googly eyes.
When you use fusible adhesive and layer a light color (like white) over a boldly patterned fabric, the print below can show through.
In this video I show you how to minimize that show-through. It’s really easy!
I rarely use light-colored solids, so this isn’t often an issue for me – but it does come up when I want to make big googly eyes. 🙂
I actually don’t mind seeing through the fabric applique a little bit (it can be kind of cool to be able to see how something is made) so sometimes I’ll use a lighter-weight interfacing like you see me use in the video.
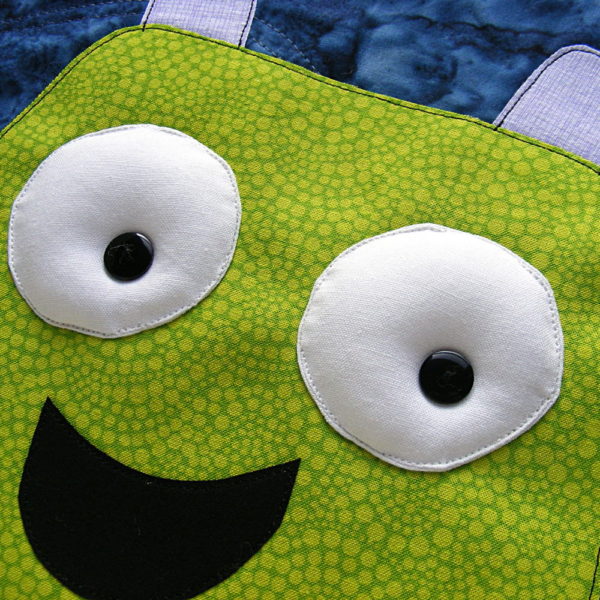
If you want more complete coverage, I recommend this Heat & Bond Medium Weight fusible interfacing. It’s one step thicker than the one I use in the video – still nice and flexible, but with better hiding properties. 🙂
Now that you know how to stop seeing through your fabric applique, want to practice?
You can get that pond frog pattern here, a tree frog here, and there are fun googly-eyed monster patterns here, here, and here.
Here are links to all the posts showing how to applique with fusible adhesive – my favorite method. It’s fast and easy and (with the right materials) it holds up beautifully to rough use and repeated washing.
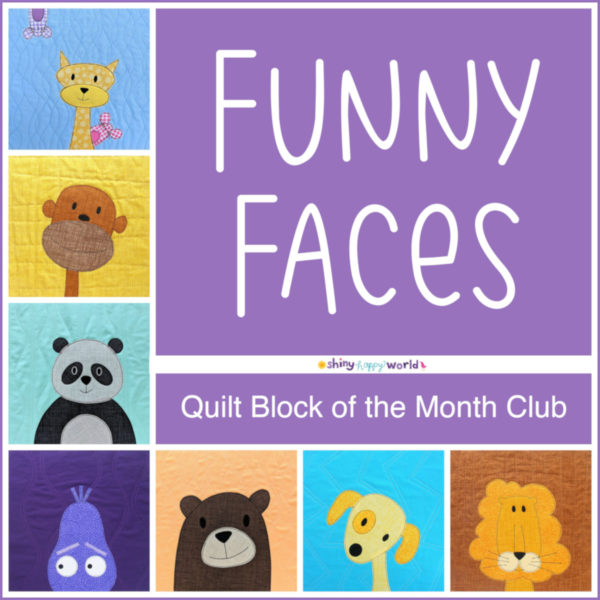
Every month (on the 15th) members get a new pattern for a fun applique quilt block.
The blocks are all sized to finish at 10 inches square – so you can join them together into a funny faces quilt, or mix and match them with my other quilt patterns. They’re so much fun to play with!
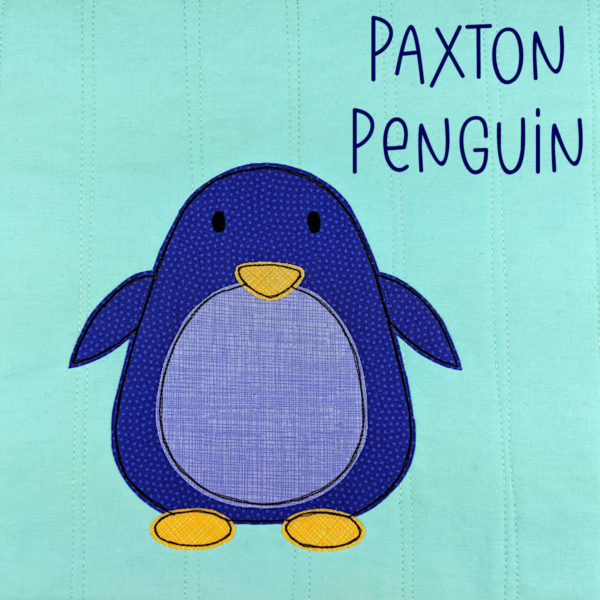
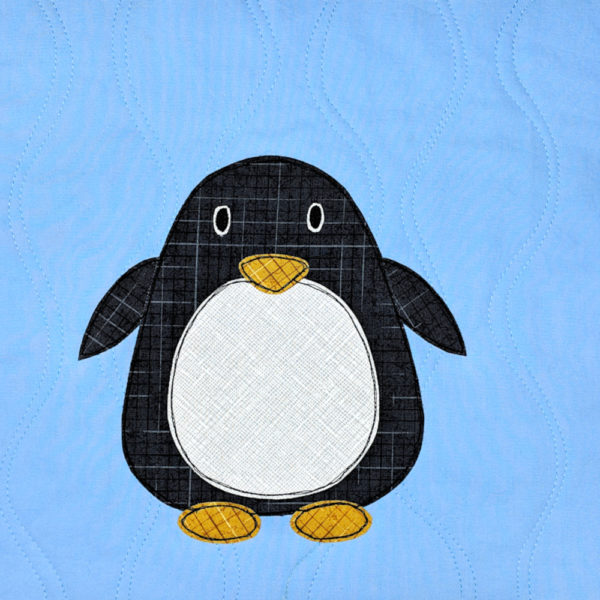
This is Paxton Penguin – he’s the first block in the club, available to members right now. Isn’t he a cutie?
Here’s another version – in classic black and white.
You don’t have to make a quilt. You’ll also get free patterns for lots of other projects you can make with a single quilt block – pillows, tote bags, receiving blankets. placemats, and more. 🙂
The club includes complete video instructions for Quilt as You Go and applique with fusible adhesive – my favorite way to make quilts.
As long as your membership is active, you’ll have access to the virtual clubhouse where you’ll download your new pattern every month, find all the video lessons, ask questions, and chat with other club members – and share photos of your finished funny faces!
It’s going to be so much fun!
The current club pattern is always the first pattern in this section of the shop. You can join any time EXCEPT the last day of the month. That’s my change-over day to switch from the old to the new pattern every month. 🙂
There are a LOT of free lessons here at Shiny Happy World.
Hundreds!
That’s awesome – but sometimes it can be a little overwhelming.
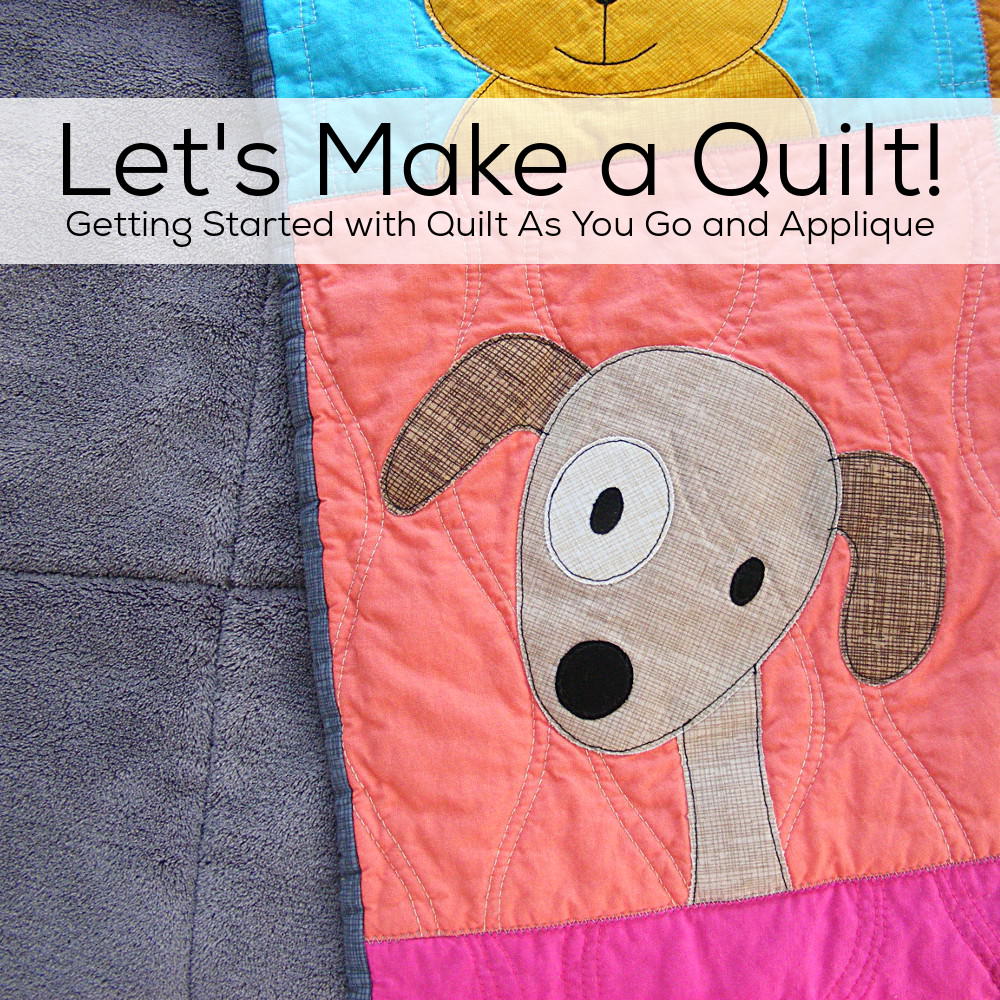
Do you want to learn to make a quilt using my super easy Quilt As You Go method, paired with painless applique with fusible adhesive?
Then I’ve got the perfect free workshop for you!
It pulls all of my QAYG and applique lessons together in one place, and arranges them in the best way for you to learn the whole process from start to finish. We cover everything from fabric and supplies, to picking a pattern, and all the steps of the process – including binding your quilt!
This class is for you if. . .
You’ve never made a quilt of any kind.
You’ve made pieced quilts but have never tried applique.
You’ve made applique quilts but want to try a new method.
You’ve made pieced and applique quilts but you’ve never tried Quilt As you Go.
You already know how to make all kinds of quilts and you want to make one with some new friends.
This class will take you step by step through everything you need to know to make a cute and cuddly quilt!
You work through the lessons at your own pace – using any pattern you like. There are even several free block patterns you can download to give it a try!
Last week in the newsletter I asked for reader suggestions for what to watch while I stitch embroidery samples for my new book. The response was AMAZING! And lots of you said you watch while working too so I thought I’d share all the suggestions in one awesome list. I’m adding a star to the ones I’ve watched and can also recommend. 🙂
Here are all the shows that got multiple mentions (in order of number of mentions) . . .
Doc Martin
*Father Brown
*Midsomer Murders
*Downton Abbey
Doctor Blake Mysteries
*The Marvelous Mrs. Maisel
Shetland
Anne with an “E”
Outlander
Vera
Lark Rise to Candleford
Scott & Bailey
*West Wing
A Place to Call Home
*Sherlock
*Great British Baking Show
*Death in Paradise
*Frasier
*Longmire
Broadchurch
McLeod’s Daughters
Murdoch Mysteries
Home Fires
Agatha Raisin
*Bletchley Circle
Line of Duty
The Incredible Dr. Pol
Bodyguard
*Inspector Morse
The Paradise
Endeavor
*Rosemary and Thyme
Hinterland
Grace and Frankie
Vikings
And here are the rest (in alphabetical order). . .
*Arrow
Artful Detective
Back Roads
Being Human
Blue Bloods
*Bones
*Cheers
The Closer
Darkest Hour
Denver Pet Show
Derek
Designated Survivor
Dirk Gently’s Holistic Detective Agency
Doctor Foster
Dr. Quinn Medicine Woman
Drop Dead Diva
*Elementary
Escape to the Country/Escape from the City/Escape to the Continent
*Flash
*Friends
Game of Thrones
Girlfriends
The Good Cop
Home Fires
Homecoming
Indian Summers
Inspector Lewis
Jack Irish
Jack Ryan
Jamestown
Keeping Faith
Kids’ Baking Championship
*Kingdom
Land Girls
The Last Kingdom
Last Tango in Halifax
Legends
Little Dorrit
Little Women
Love Child
*Madmen
Mercy Street
The Miniaturist
Misfits
Mr. Selfridge
*Monk
Mozart in the Jungle
The Mysteries of Laura
Mystery Road
The Nature of Things
NCIS
Offspring
Ozark
The Palace
*Poirot
Rake
Reign
Ripper Street
*Salt, Fat, Acid, Heat
Schitt’s Creek
The Science of Stupid
Secret Agent Selection WWII
Silent Witness
Striking Out
Sugar Rush
*Supergirl
The Supervet
This Is Us
Time Goes By
The Time of Our Lives
Timeless
The Tudors
The Unforgotten
The Waltons
Watership Down
We Will Meet Again
White Collar
Wolf Hall
Yukon Vet
Oh – and for those who don’t get the newsletter, here are the shows I mentioned that I’ve already watched and loved to stitch to. . .
The Crown
Call the Midwife
Victoria
Foyle’s War
Miss Fisher Mysteries
Poldark
Law & Order
Grey’s Anatomy
You guys – this is an amazing list! Please keep adding suggestions in the comments so we have a continuing resource. 🙂
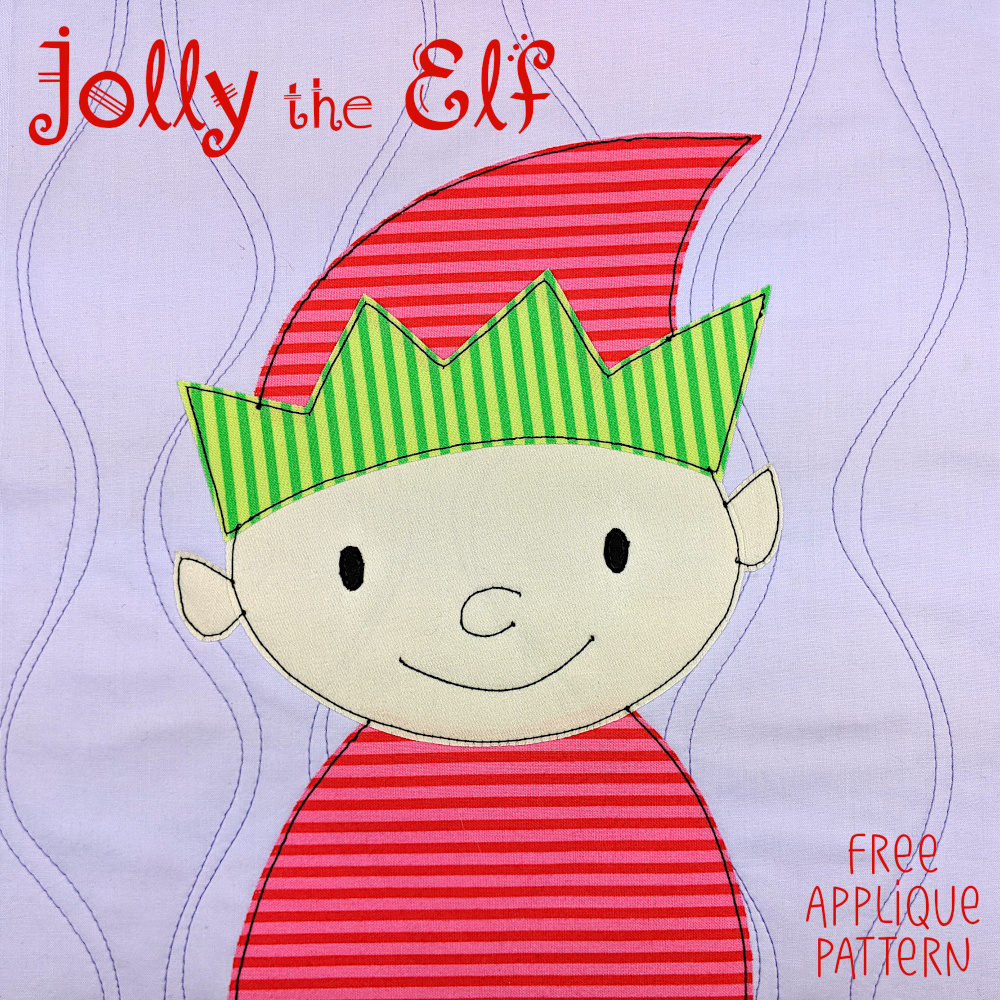
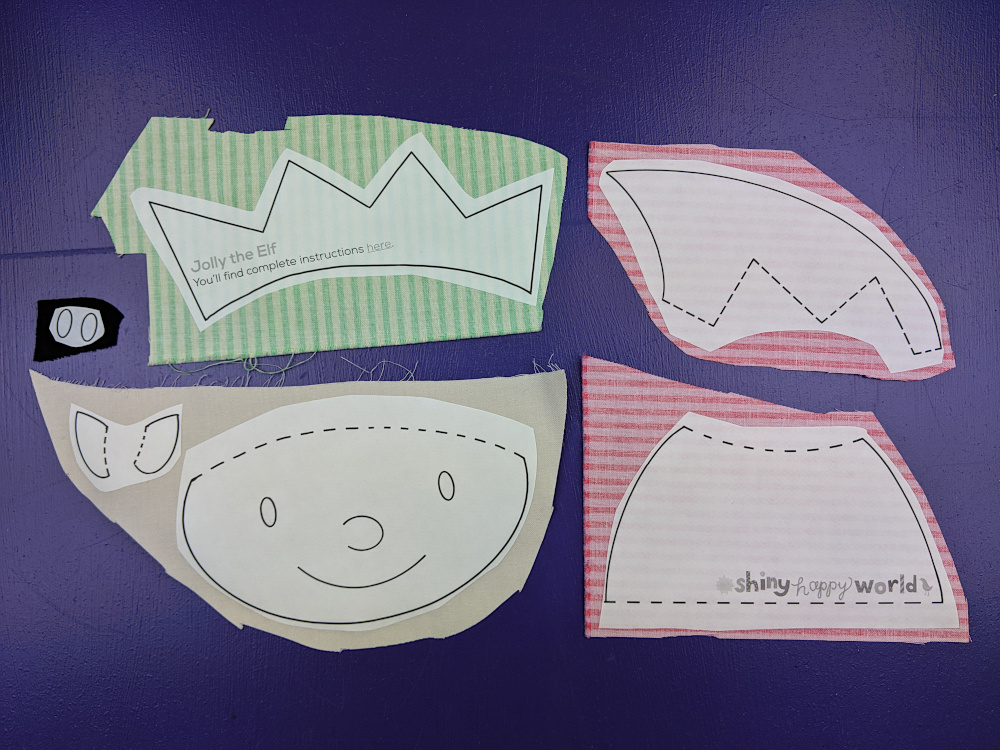
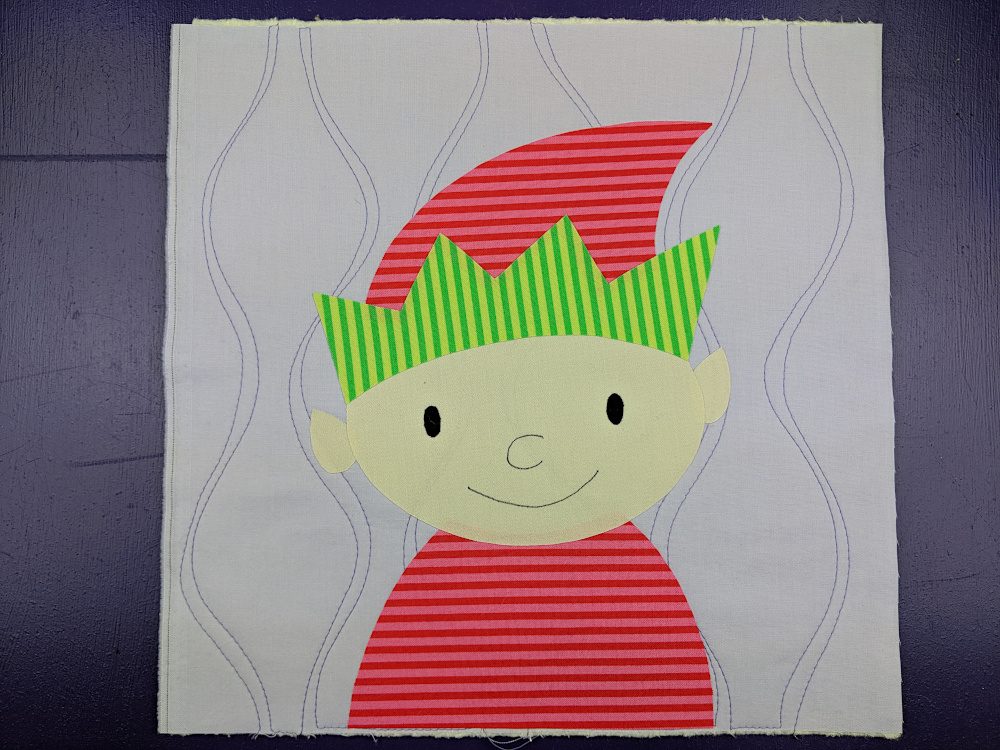
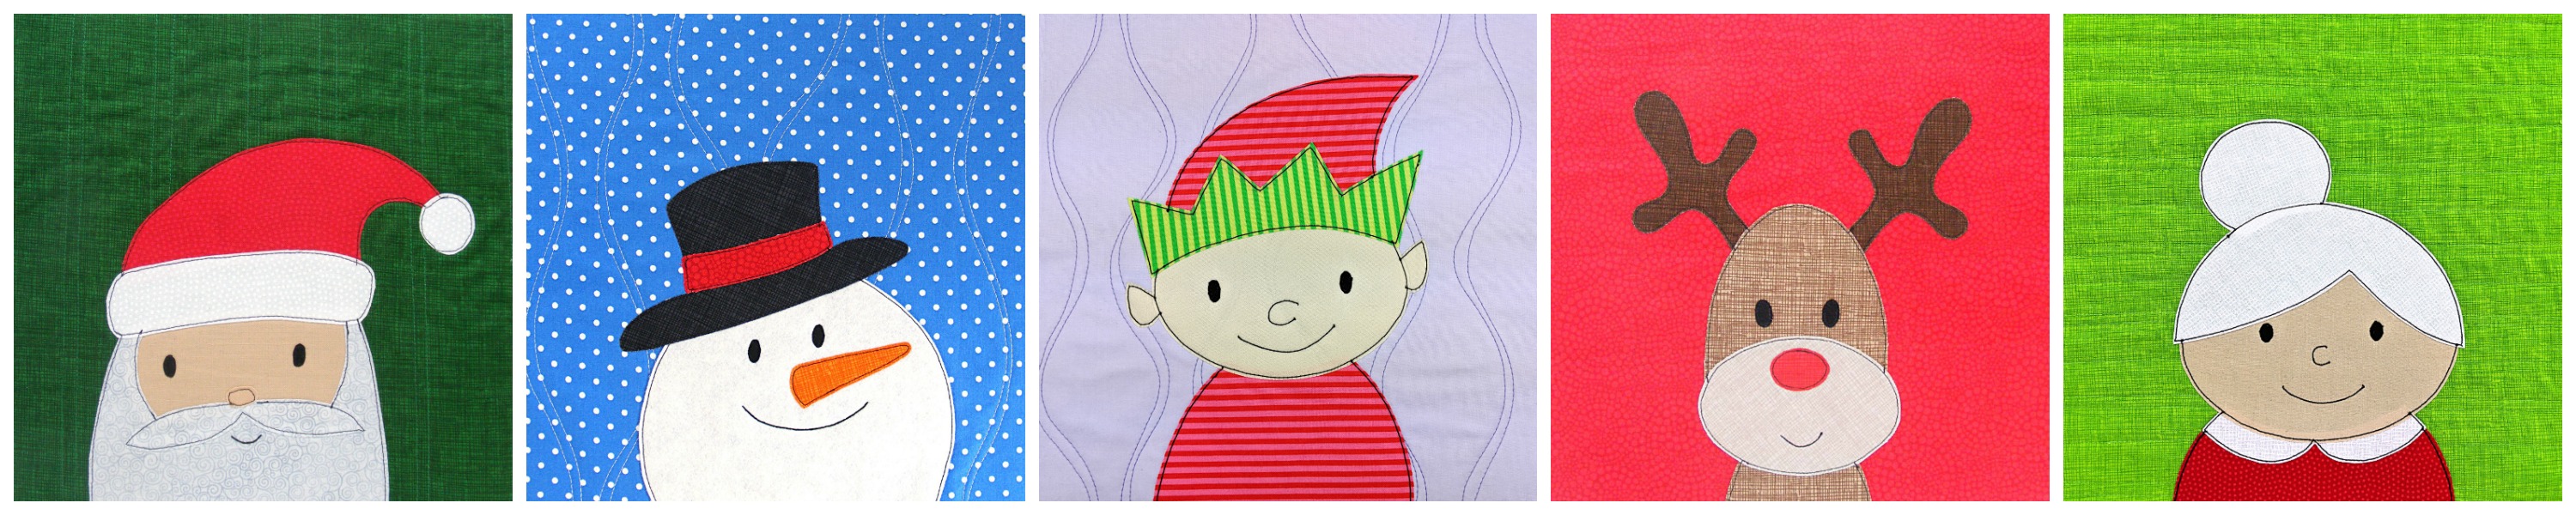
There’s a new free applique pattern for you! Merry Christmas!
This adorable elf pattern is the same size and style as the other free Christmas applique patterns (10 inch finished blocks). There are five now! (You’ll find links to all of them at the bottom of this post.)
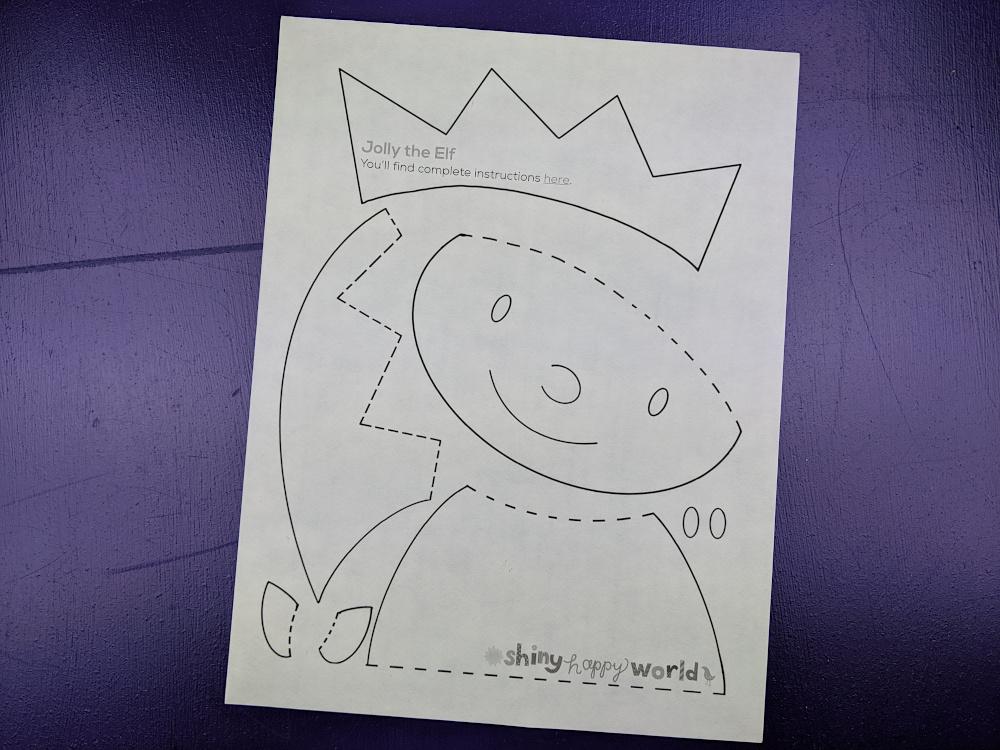
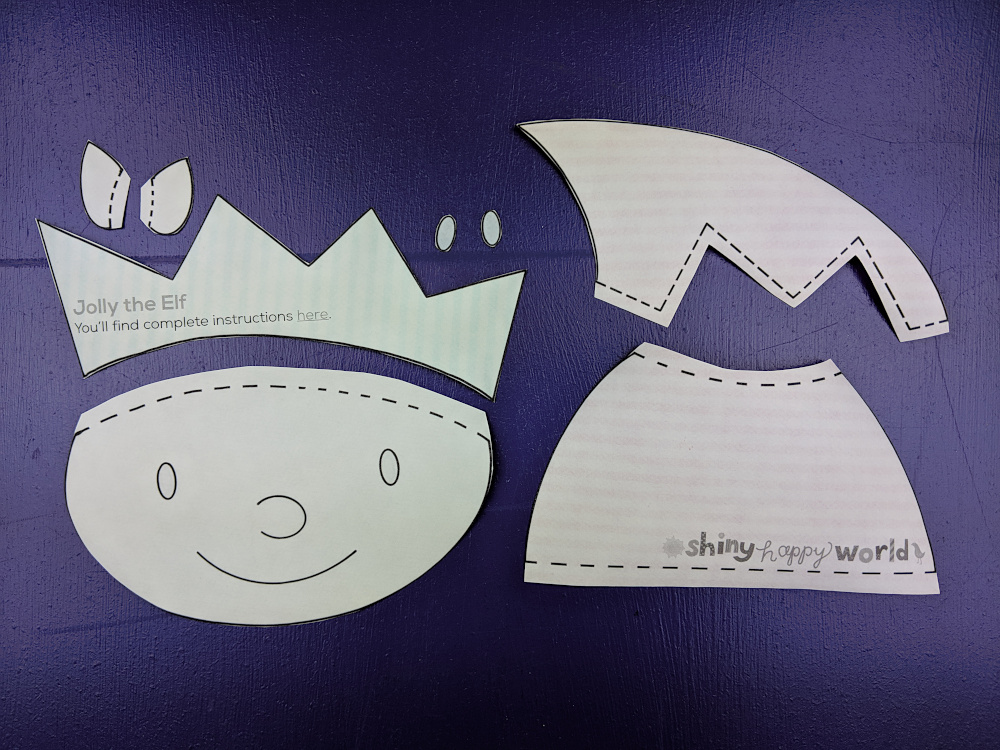
Trace or print the pattern onto the paper side of the fusible adhesive.
I use printable fusible adhesive so I just printed out the page. No tracing!
The image has already been reversed, so just trace or print. If you’re tracing, be sure to trace the facial features too. You’ll need those for Step 4.
Step 2
Rough cut around each shape and fuse it to the back of your fabric.
Leave a little bit extra all the way around - a little extra extra (at least 1/4 inch) where there’s a dotted line, like the top of the shoulders and the base of the ears.
Step 3
Cut around each piece neatly. Cut directly on the solid lines.
Leave a little seam allowance on the dotted lines - those are the seam allowances that will tuck behind other pieces.
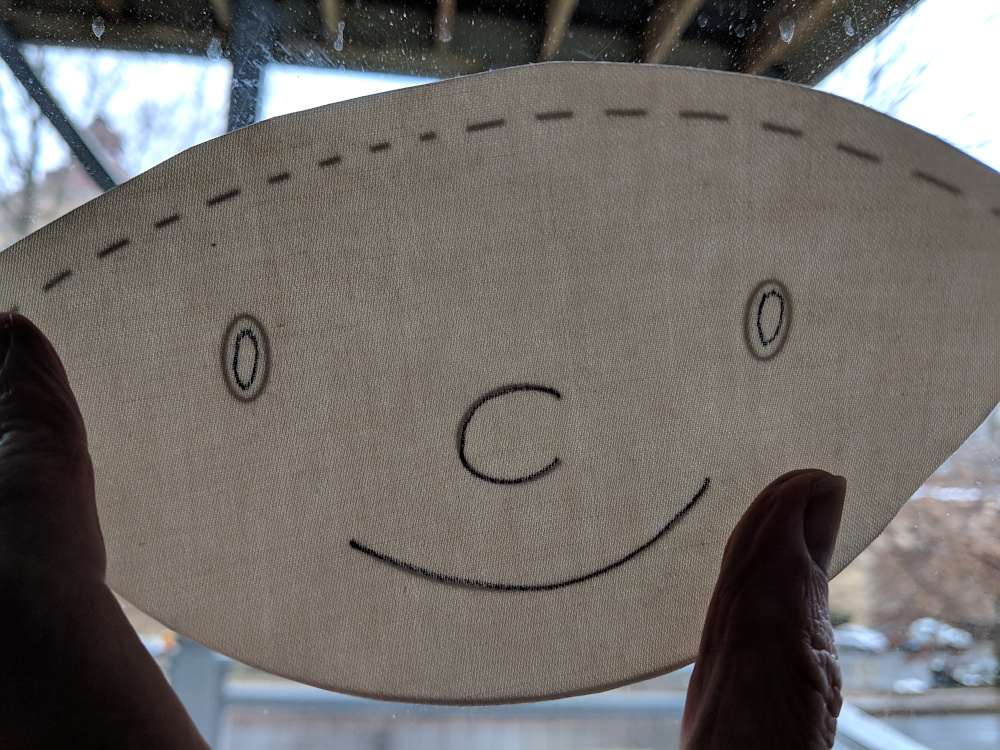
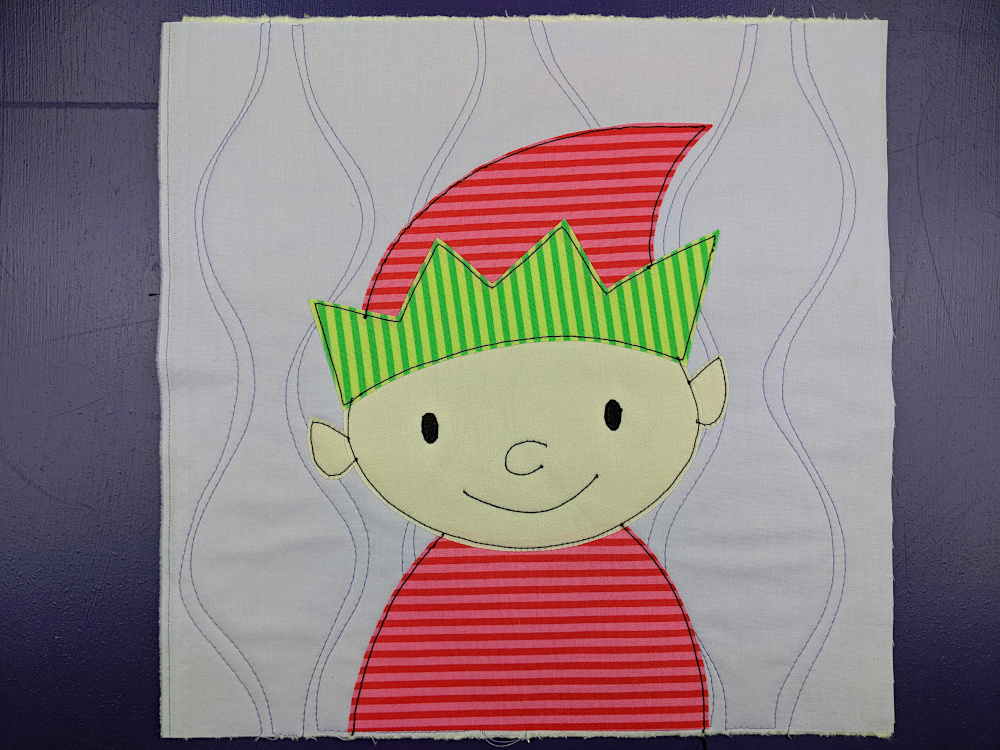
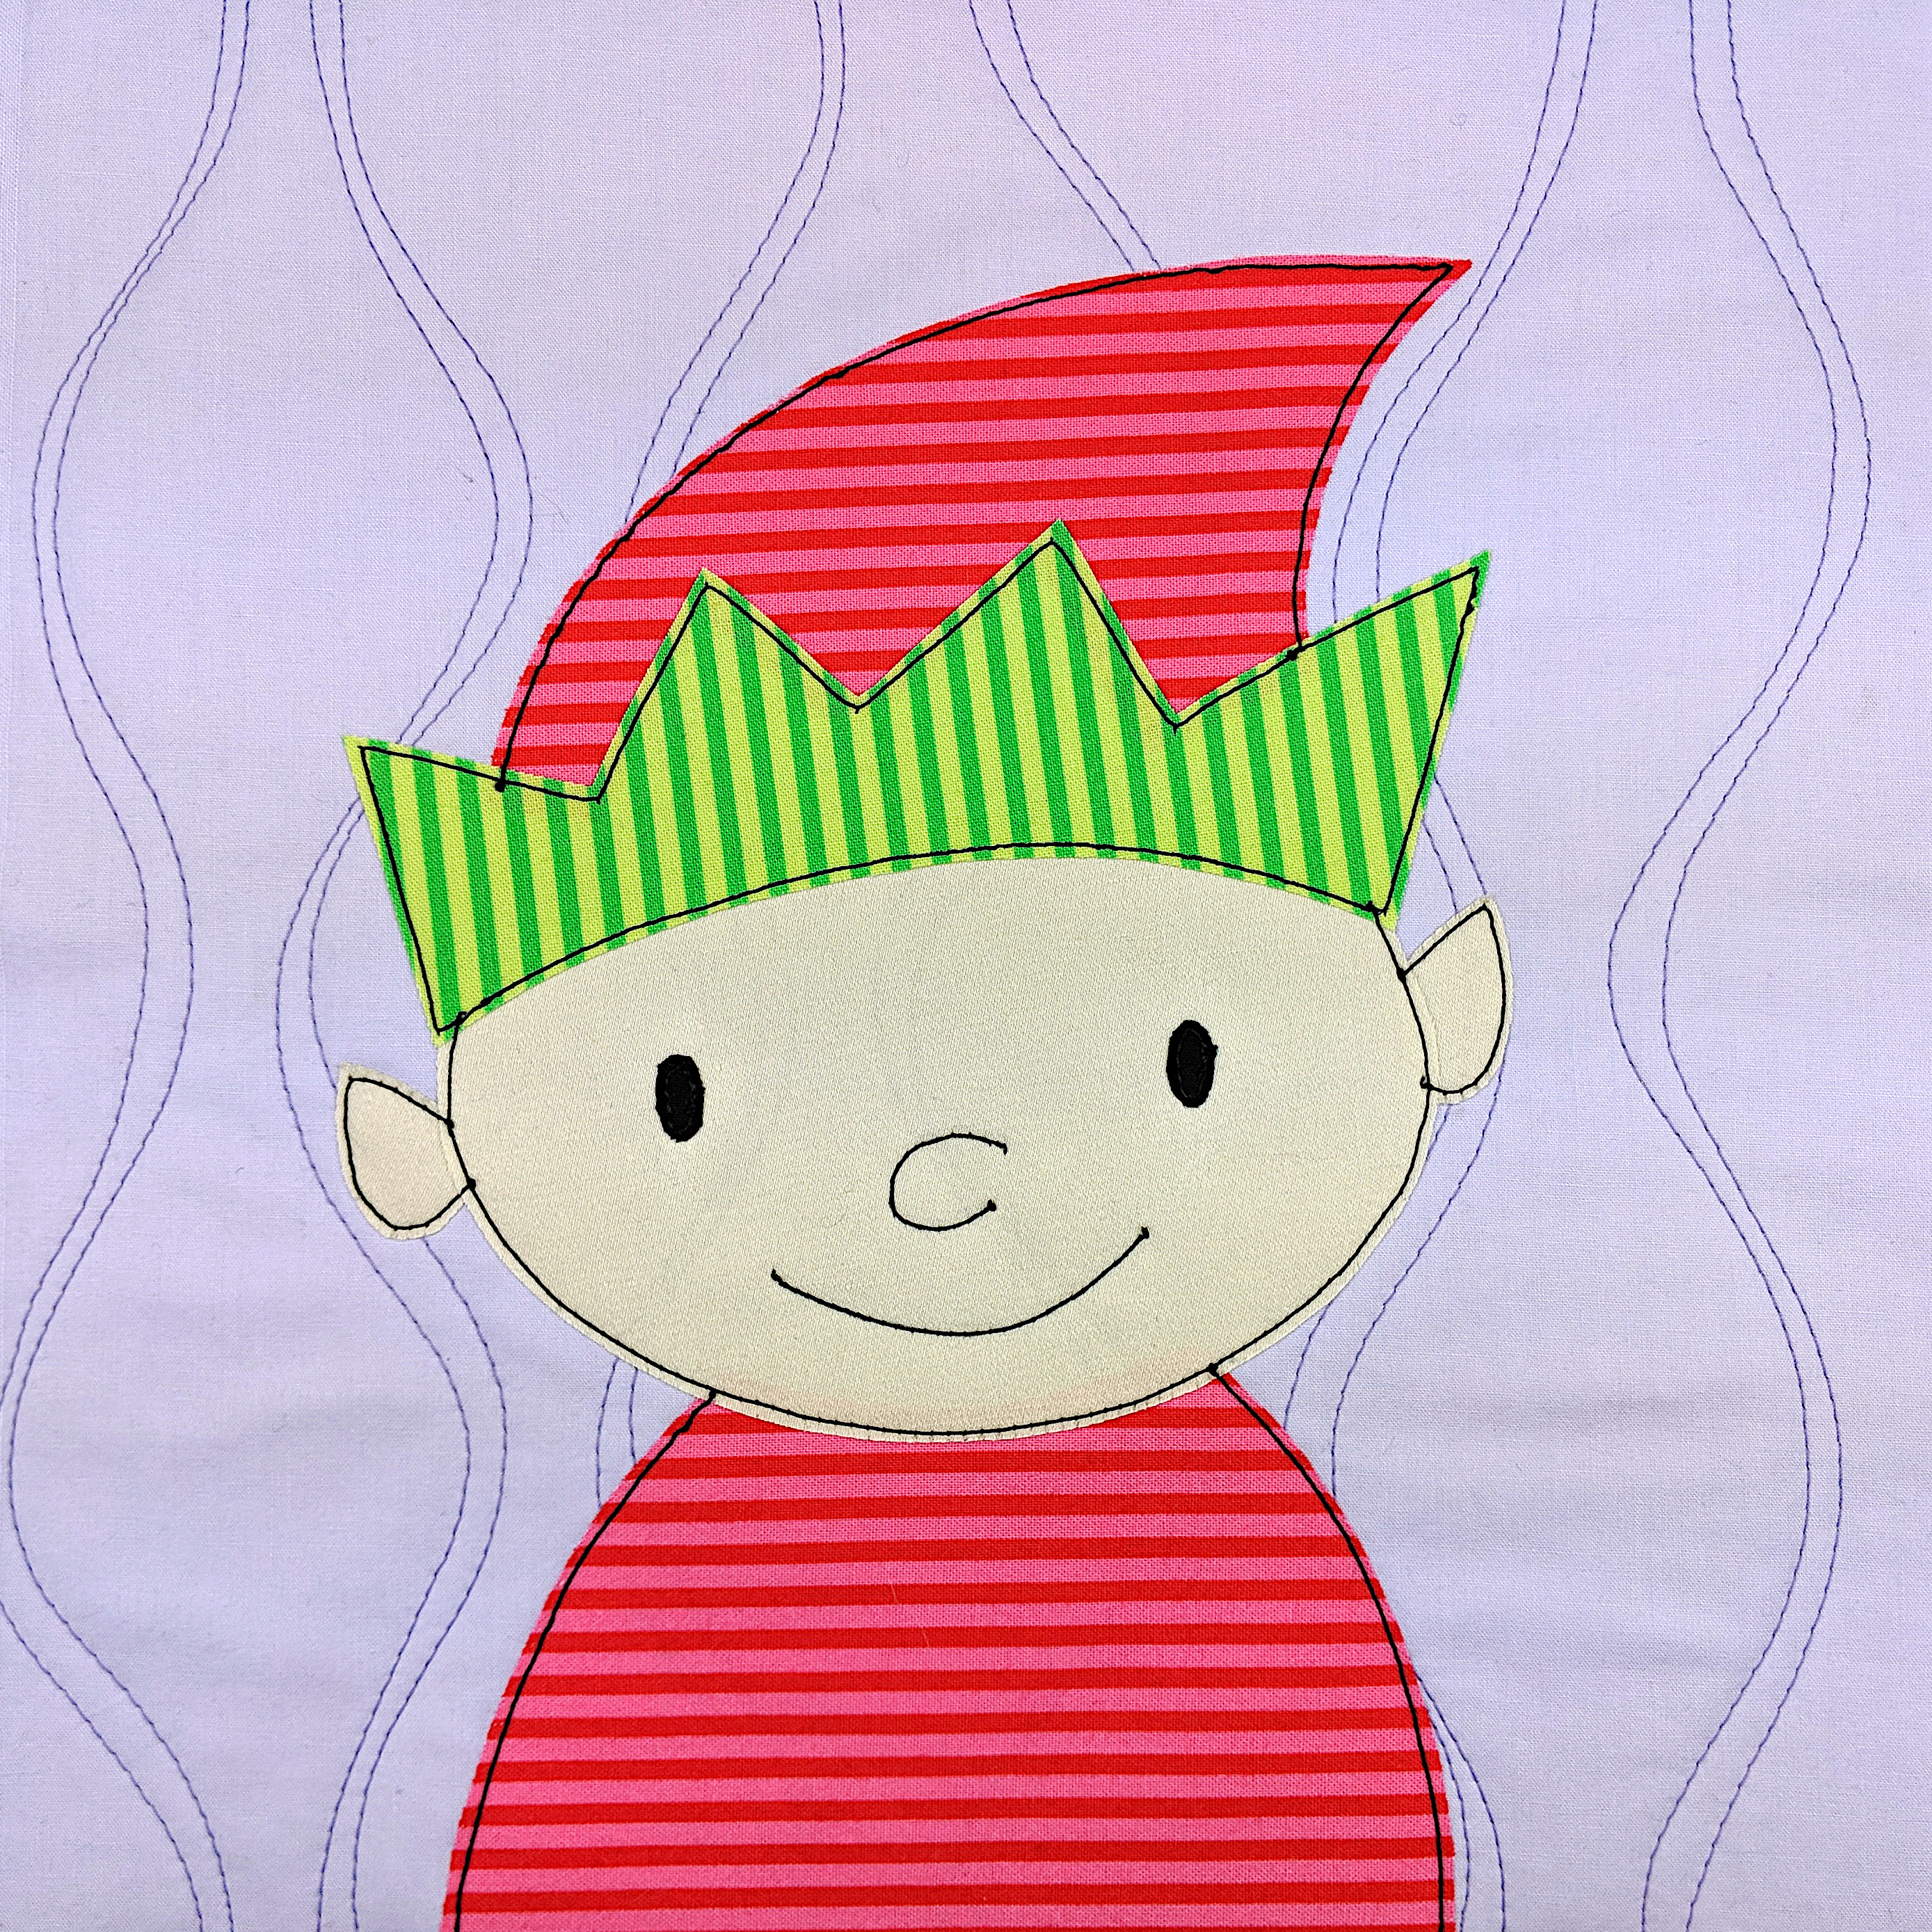
Step 4
Remember when I told you to make sure you traced the facial features in Step 1? Now you’re going to use that. Hold the face up to a window so the light shines through it. You’ll be able to see the eyes, nose and mouth, and the adhesive will stabilize the fabric so you can trace on it without it crinkling up.
I traced just inside the eyes, and directly on the nose and mouth.
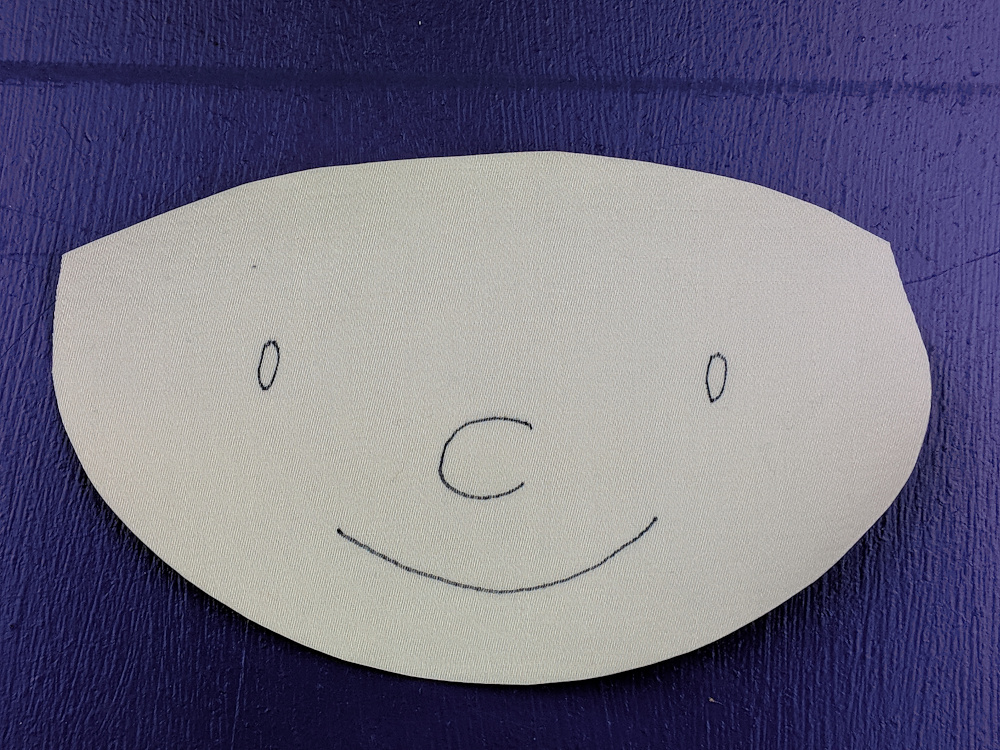
Here you can see all the tracing I did – without the light shining through.
Step 5
If you’re doing Quilt As You Go (I did) then you can quilt your block before adding the applique. So easy!
Cut your background fabric and a piece of 100% cotton batting 11 inches square.
Layer the block with a piece of 100% cotton batting. Quilt any pattern you like!
If you’re making a one-block project, go ahead and finish it up!
If you’re making a bunch of elf blocks to join into a quilt - have fun!
What can you do with just one block pattern? Tons of things!
Check out this page I’ve been slowly building – 100 Things to Do with an Applique Pattern. There are links to a bunch of free patterns you can use with your applique pattern to make bibs, pillow covers, tote bags, and more! 🙂
Here are all the free Christmas applique patterns so far.
If you’re looking for a different fun Christmas quilt pattern check out this post. It has a bunch of free patterns for little signs that you can add to a Shiny Happy Houses quilt to turn it into a North Pole quilt. 🙂
Have fun! And share a photo of what you make! You can share it in the Shiny Happy People group or tag it with #shinyhappyworld on Instagram.
If you like this free pattern, sign up for the Shiny Happy News! Subscribers get a weekly newsletter full of sewing tips and tricks, free patterns, special discounts, and other things to make you smile. 🙂
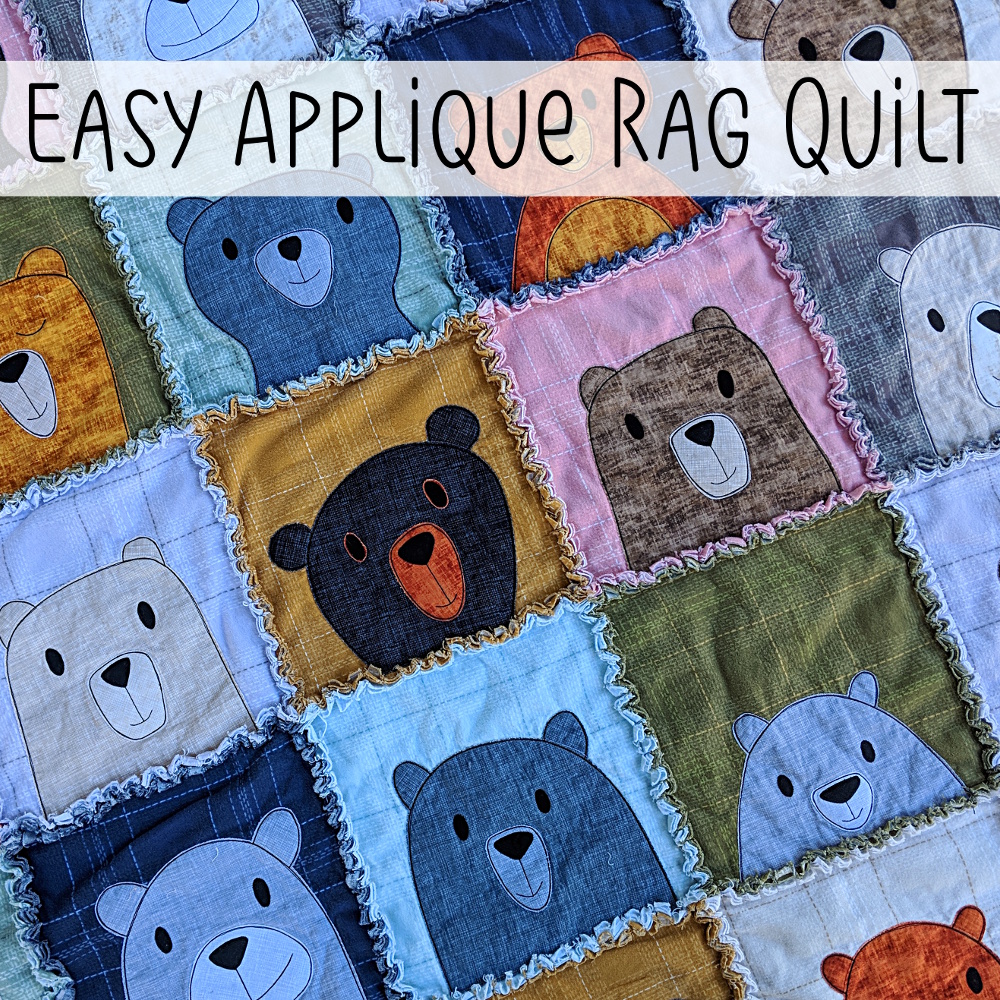
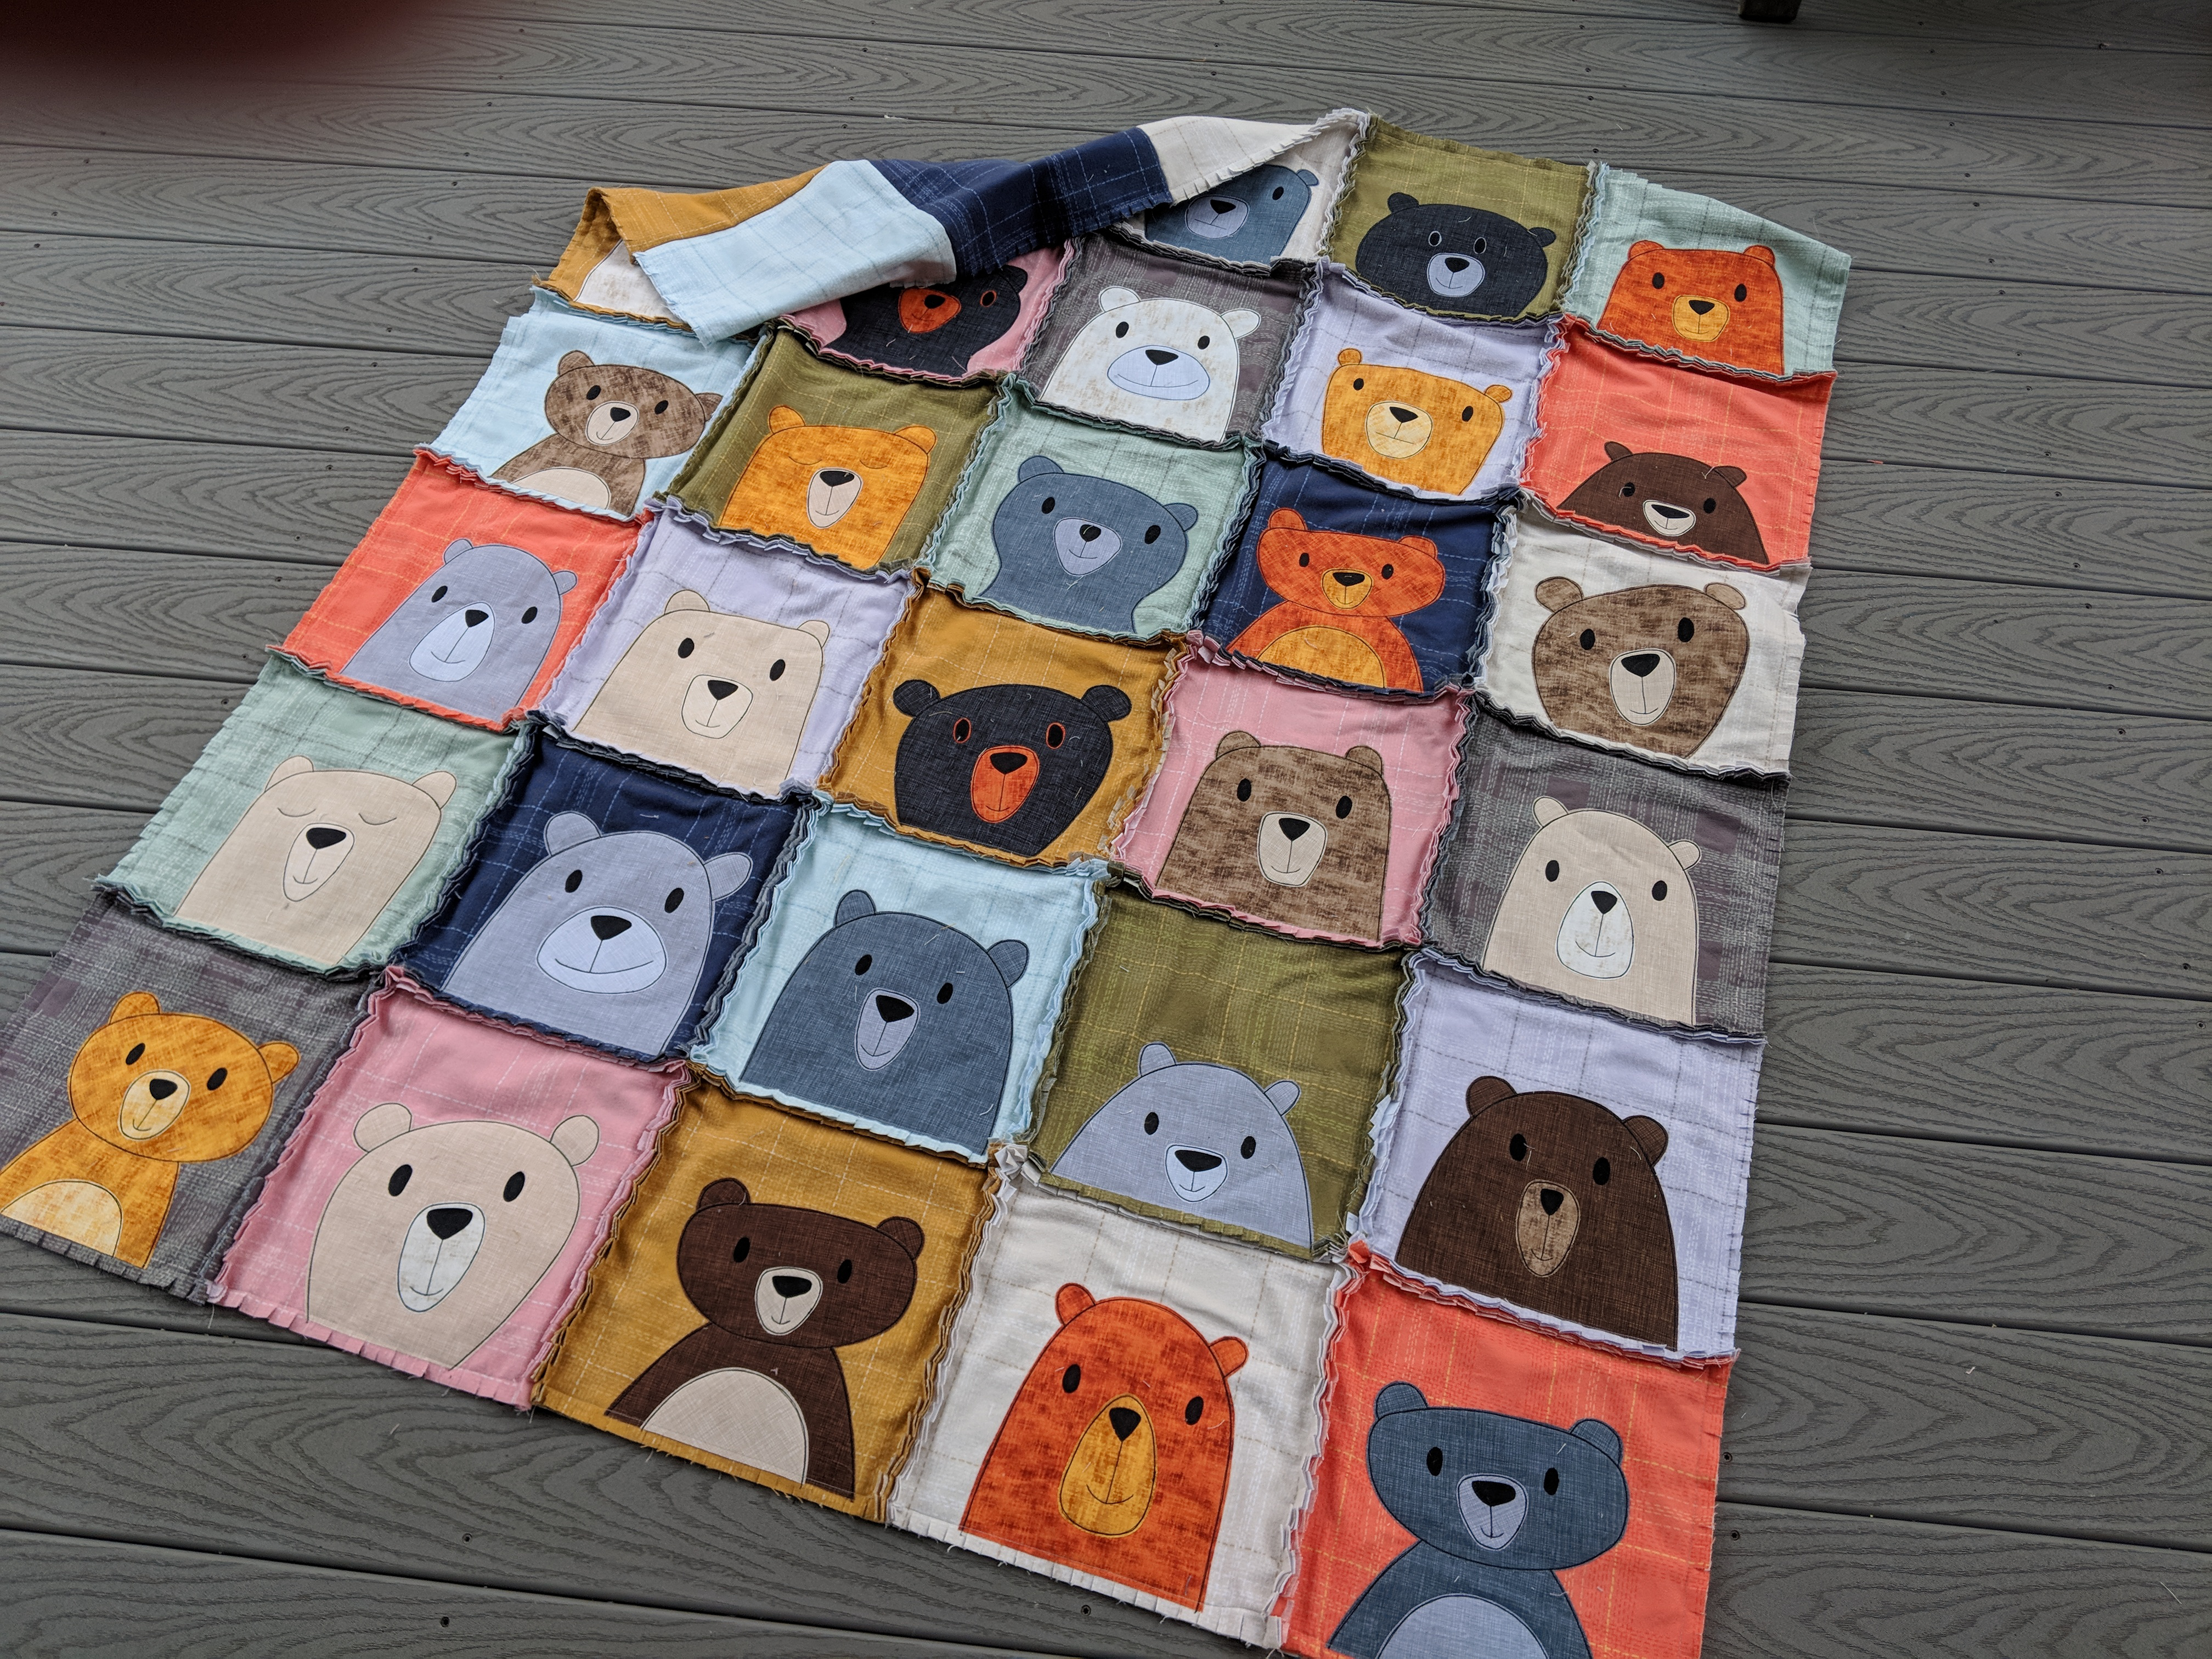
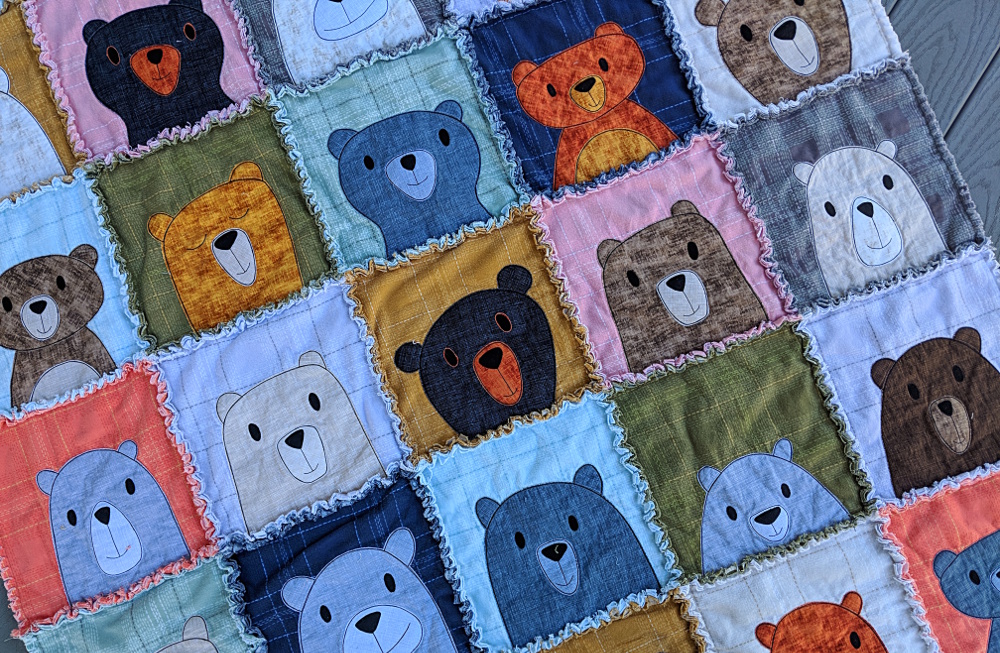
Several years ago my mother-in-law made us a fantastic flannel rag quilt. We use it all the time, and every time I look at it I think that it would be super easy to add applique to that style of quilt.
I finally did it!
And it was just as fun and easy as I thought. 🙂
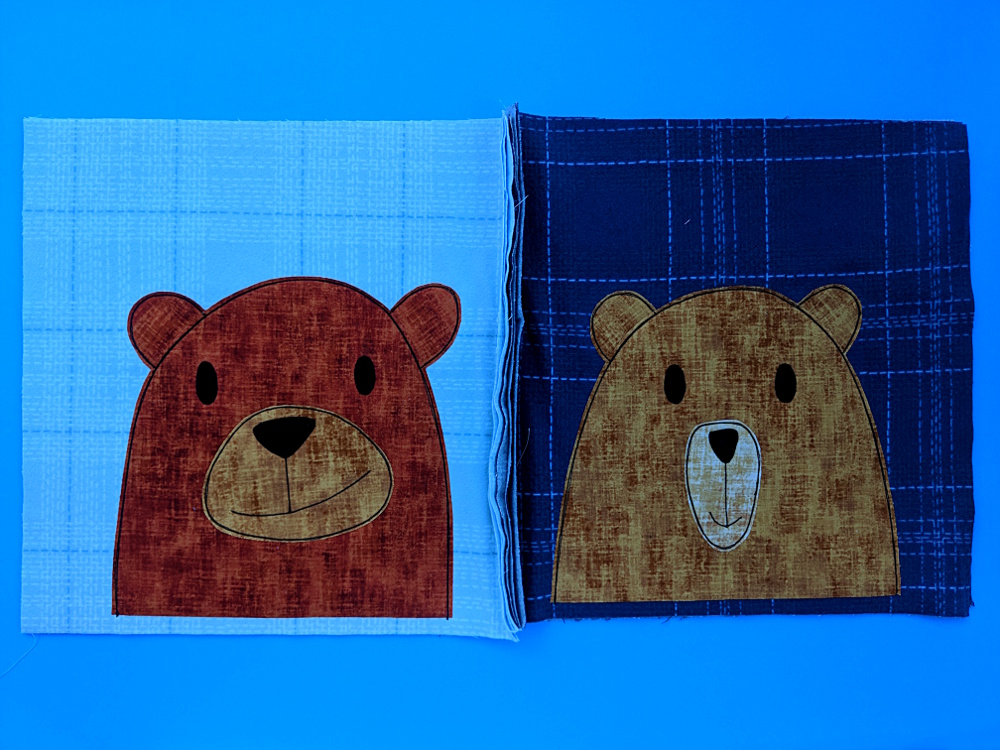
I made mine using the Bunches of Bears quilt pattern, but you could use any quilt pattern you like. All the square quilt blocks in my own patterns are already sized for 10 inch blocks. If you’re using someone else’s pattern you may need to enlarge or reduce the images.
So let’s go!
My quilt is nap sized – 50 x 60 inches – perfect for using on the couch. It’s 5 blocks wide and 6 blocks tall and the blocks all finish at 10 inches.
You can resize the pattern by changing the size of the blocks or by changing the number of blocks. 🙂
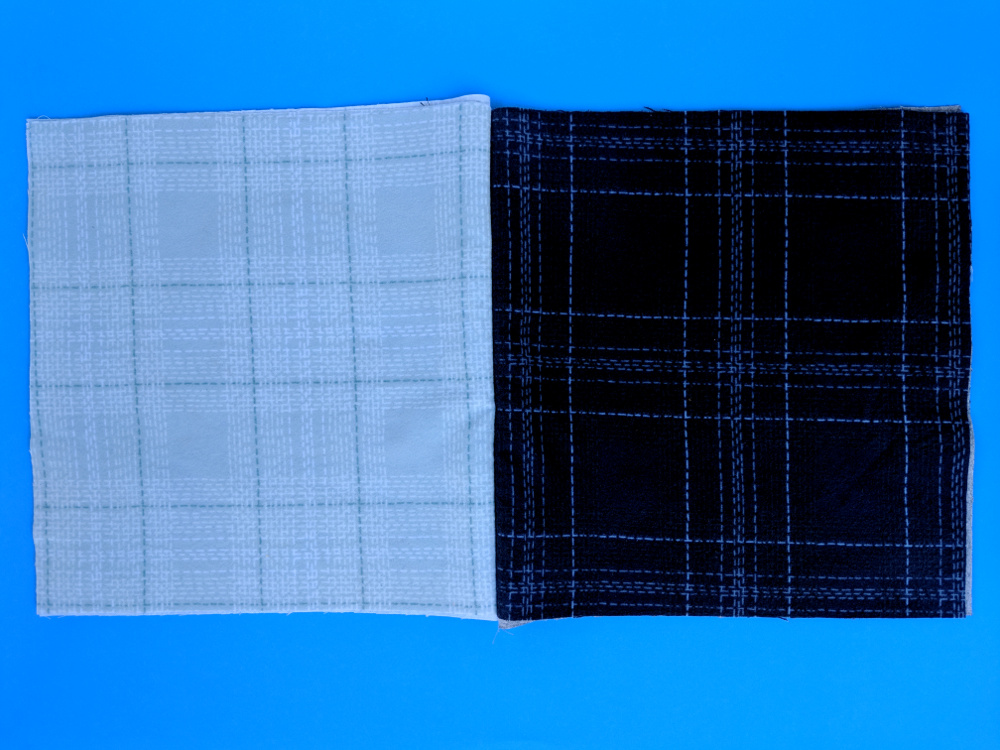
I used ten flannel colors (one of each color in the Dash Plaid collection from Dear Stella Fabrics) and bought one yard of each.
I prewashed my flannel. I think people don’t usually do that for rag quilts, but flannel is notorious for shrinking a lot and I didn’t want the shrinking to distort the applique. Don’t use fabric softener in the wash – it can resist the fusible adhesive. Dryer sheets are fine.
Each block is three layers of flannel, so you’ll need to cut 90 blocks, each 11 inches square. You can get nine from one yard of fabric.
Sneaky tip – if you have some ugly flannel that you can’t figure out how it got into your stash, cut 30 of the squares out of that and hide it in the middle of your layers. 🙂
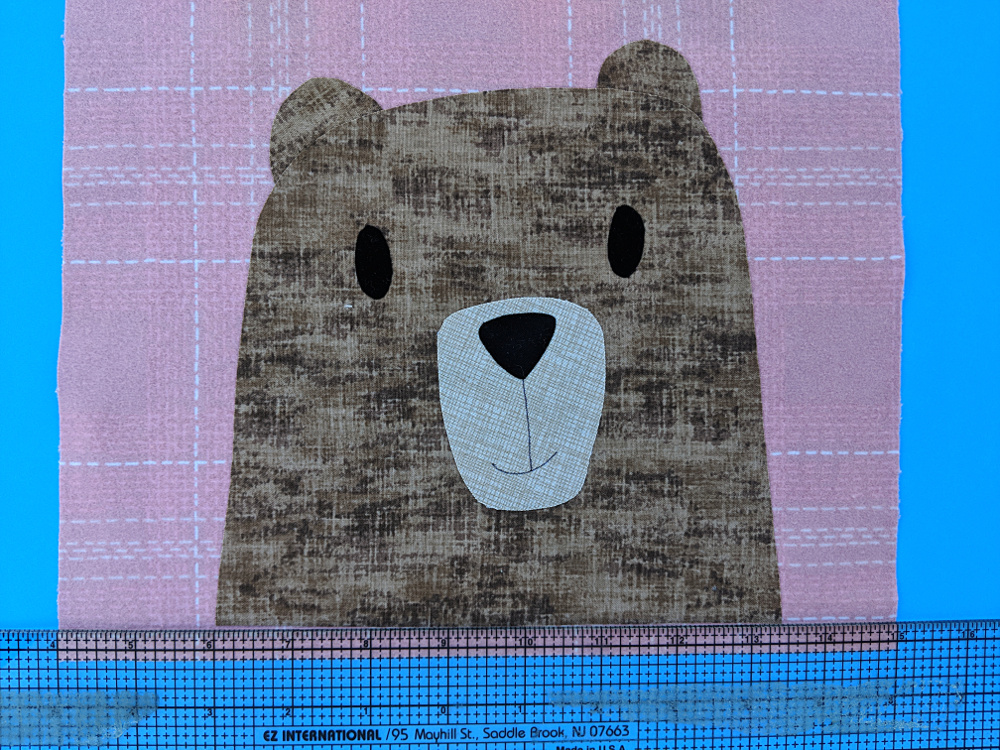
Applique 30 of the squares using any method you like. I used my favorite fusible adhesive method. There’s a video tutorial here. I used Heat & Bond Lite printable fusible adhesive sheets and regular cotton here. You could use flannel for the appliques too if you like, but I wanted to play with the contrasting textures. 🙂
When you position your faces, line up the bottom edge 3/8 inch up from the bottom edge of the block. That way, when you sew the blocks together using 1/2 inch seam allowance, you’ll catch the bottom edge of the applique in the stitching and it will be nice and secure.
Fuse the face into place.
Layer a second square of flannel behind the one with the applique (both facing right side up).
Stitch down all the edges on your applique. Outlining through both layers of flannel adds just a little bit of poof and dimension to your block – not as much as quilting with batting, but similar.
I used the “scribbly” method of going around each bit three times with regular weight black thread and a simple straight stitch. There’s a post here with more detail about that, and one here with more info about using a heavier weight thread if you prefer that.
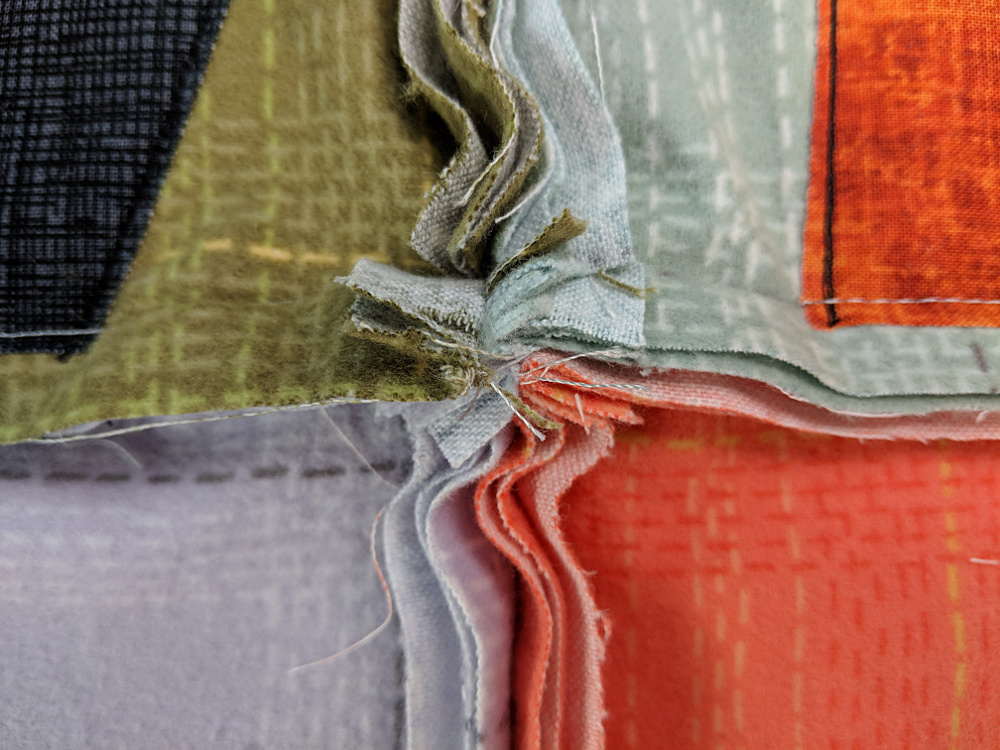
After you get all 30 blocks appliqued, it’s time to sew them together. This was actually the hardest part, because it’s backwards from any other kind of sewing you’ll do normally.
Add a third layer of flannel to each block, this time with the right side facing the back of the quilt. (It’s going to become your quilt back.)
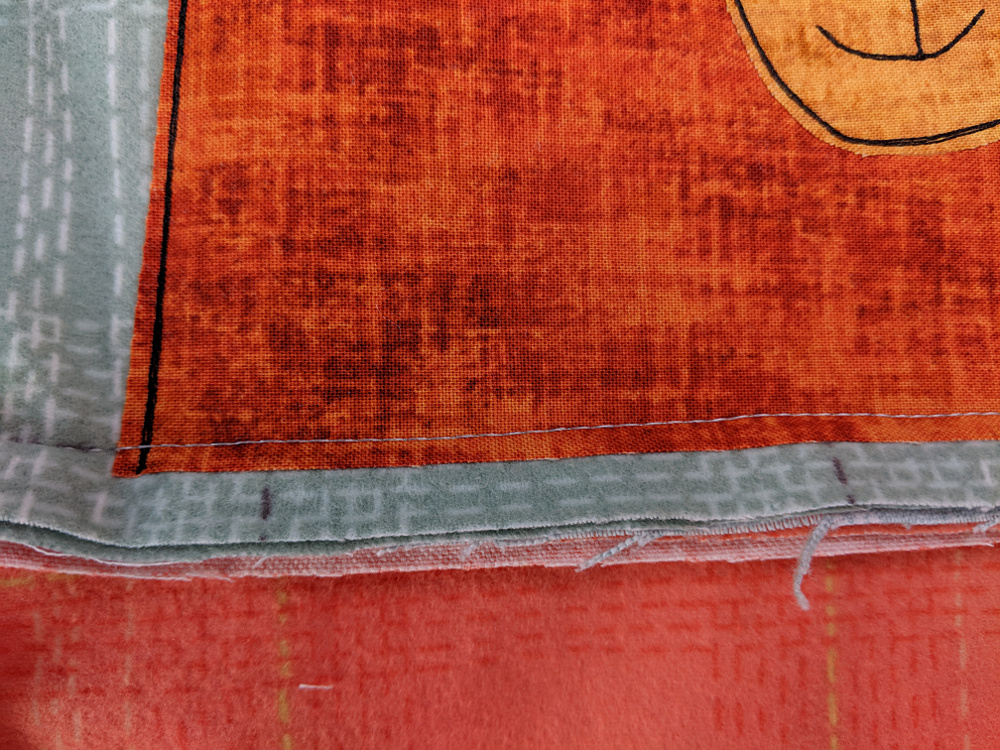
Using 1/2″ seam allowance, sew two blocks wrong sides together so that the seam allowance is on the right side of the quilt.
Here’s what it looks like from the back.
See? That last layer of flannel makes a nice quilt back, and you have a nice clean seam.
I joined all of my blocks into rows of five, then sewed those rows together for the finished quilt.
The intersections can get very bulky, so I snipped into the seam allowance 1/2″ from each edge and sewed my crossing seam through that slit so I wasn’t stitching the seam allowance down.
And look – my seam secures the bottom edge of each bear, just like I planned. 🙂
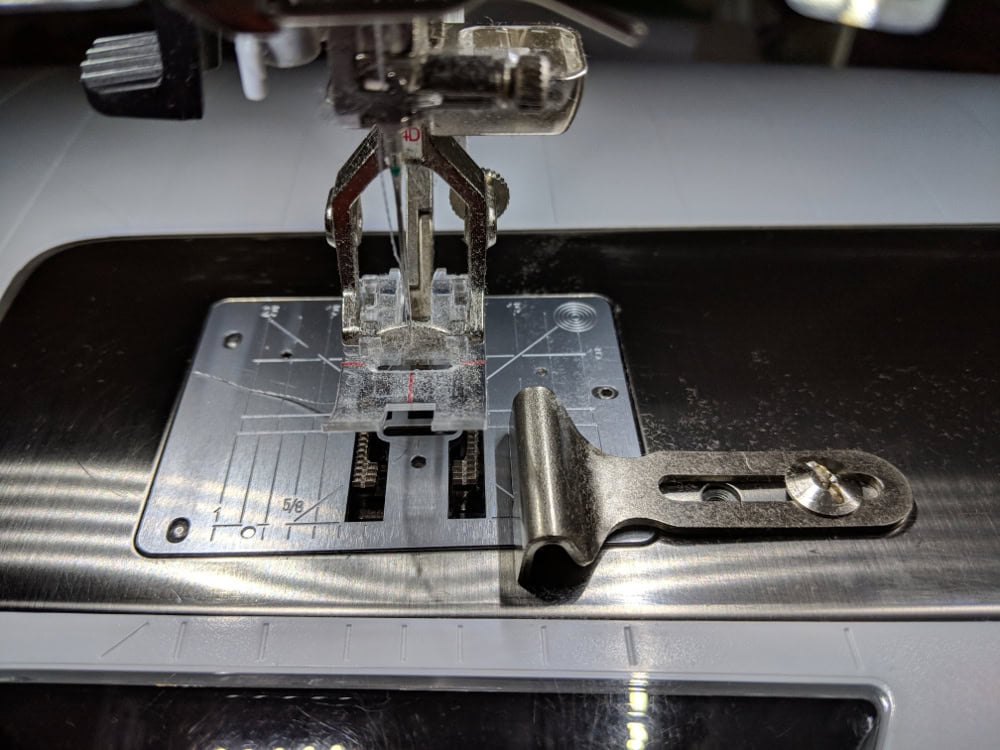
I found it helpful to use my quarter inch foot, but adjust it out to 1/2 inch for sewing all those layers together.
I also lengthened my stitch to 3.0 and reduced the pressure on my presser foot to keep the layers from creeping. If you can’t make that adjustment on your machine, just use a lot of pins or clips, as if you were sewing napped fabrics together.
Once all the blocks are sewn together, sew all the way around the outside edge of the quilt, one half inch in from the raw edge.
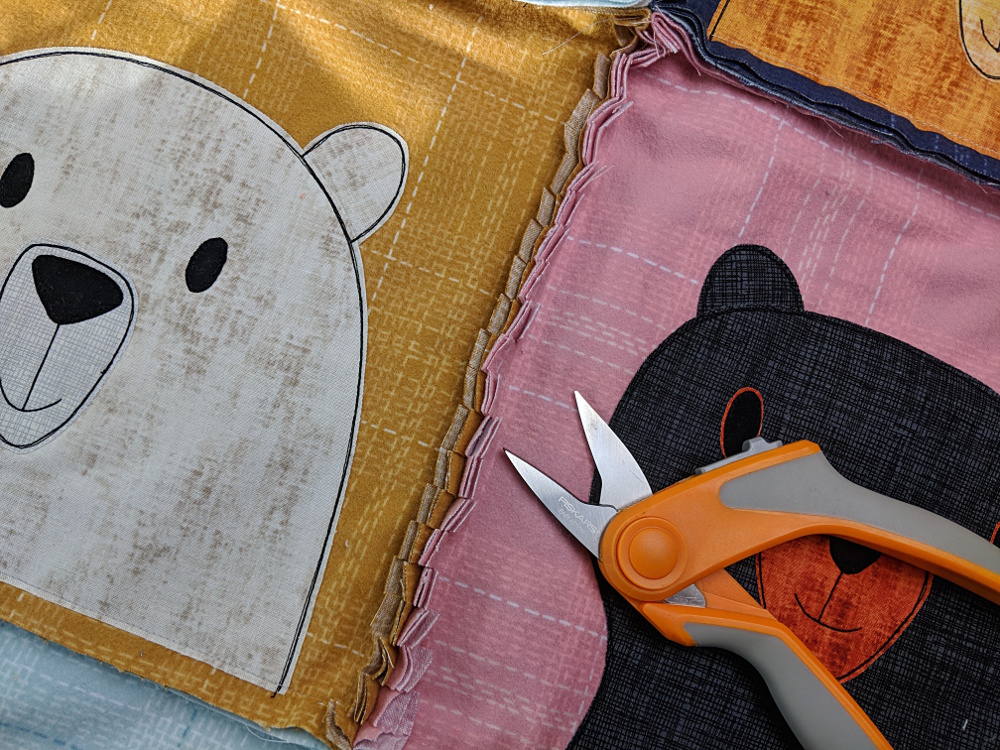
Now it’s time to snip all those seams.
Snip 1/2 inch apart all along all the seam allowances, almost up to the stitching line. Be very careful not to cut into your stitching. If you slip and snip it, repair it now by sewing over the snipped seam.
If you’re trying to snip with regular scissors, you’ll need to take a LOT of breaks. They’re really not designed for this kind of work.
If you can afford to buy a special set of snips just for this kind of work, it is absolutely worth it. I tried several brands and the Fiskars Easy Action Tabletop Rag Quilt Snips were by far my favorite. They have a spring action, so their default setting is open, which saves a surprising amount of strain on your wrist. They’re super sharp, and the blades are slightly serrated, so they really grip the fabric well, helping them cut right up to the tips of the blades without “pushing” the fabric out at all.
Even with the fancy snips I took a break between snipping the horizontal and vertical seams. It took about two hours total.
Don’t forget to snip around the outside edges too.
When you’re done snipping, throw it in the wash and tumble dry.
Ta daa!
All those snipped edges fray in the wash and you get a really soft, fluffy ridge between each block. This blanket is just begging for someone to snuggle under it.
If you make an applique flannel rag quilt, we’d love to see it! Post a photo in the Shiny Happy People group so we can all oooh and aaah. 🙂
Find links to all the posts about pattern size and layouts here.
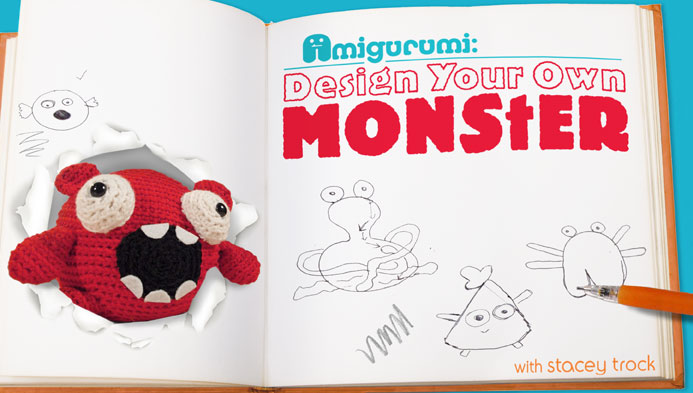
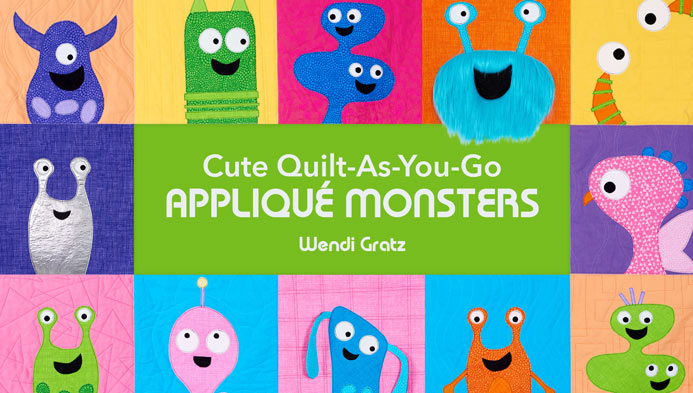
Stacey and I both have really terrific monster classes on Craftsy. The Shiny Happy World sale code doesn’t work on them, but Craftsy has sales all the time and if you use these links you’ll get the current sale price.
Stacey’s Design Your Own Monster class is fantastic – my favorite of all her classes. Get that class here.
My Cute Quilt-As-You-Go Applique Monsters class includes my Mix & Match Monsters pattern. It’s so much fun to make! Get that class here.
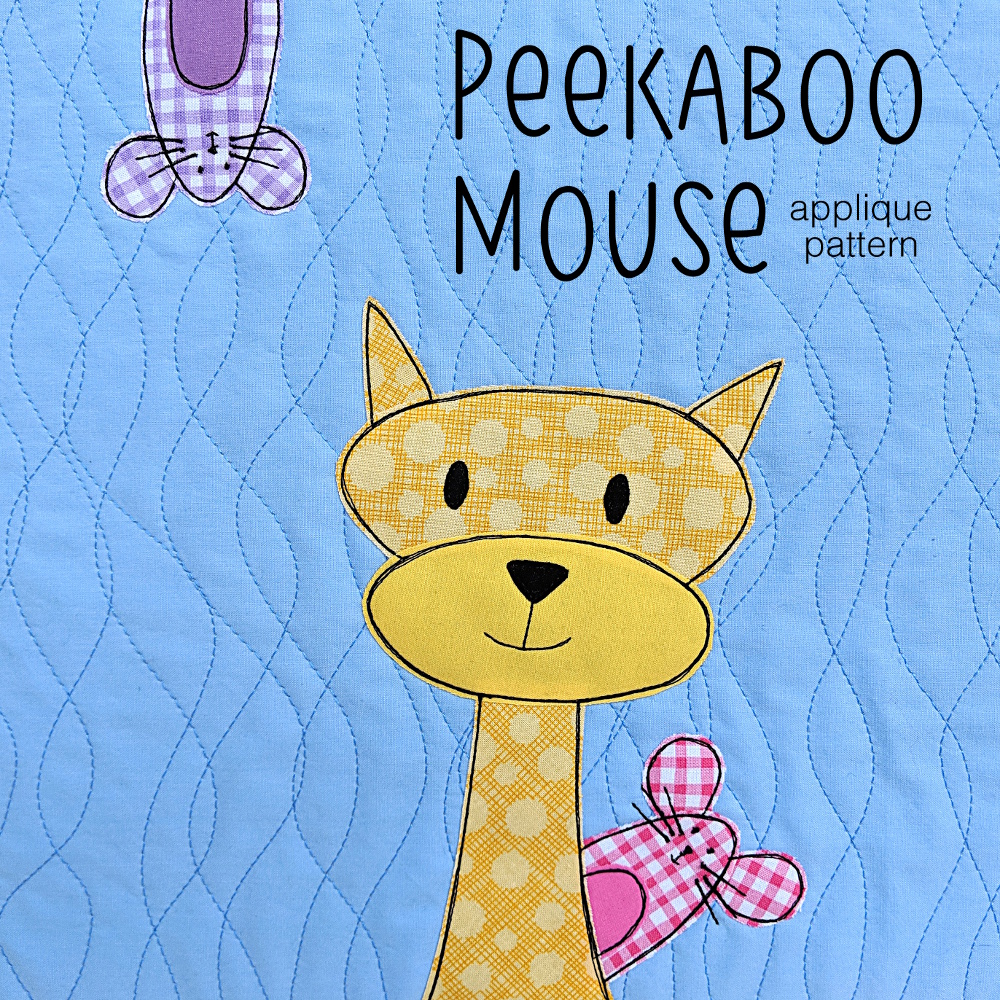
A lot of people have pulled the little mouse from the Noisy Farm quilt pattern to use in other quilts – but not everyone wants to buy a pattern with twelve different farm animals just for the little mouse!
I’ve been getting a lot of requests lately for the mouse as his own little pattern.
You can use it on its own – that mouse would be adorable peeking out of a pocket. Or you can use it combined with other quilt patterns, as shown in the image above.
Important note – the pattern only includes the mouse – not the cat. The cat is just there to show the two ways you can use the mouse pattern in your quilt blocks.
I didn’t just write up the pattern – I also recorded some new video tutorials especially for this little guy!
This is the first pattern I’ve ever done where I also include a link to download an SVG file of the pattern pieces – for those who have cutting machines like Cricut and Silhouette.
This video shows what to do with that file (for a Cricut Maker) once you’ve downloaded it. Heads up – it’s a long one.
If you don’t use a cutting machine, that’s fine. The pattern includes the regular pattern pieces for printing or tracing and cutting by hand.
Once you’ve got all your pieces cut, here’s how to assemble the little guy. I show how to put him on the edge of the block, and also how to make him peek out from behind another applique critter.
Finally – there’s the outlining. I know a lot of people will see that face and think NO WAY. I don’t like hand-stitching and that’s too small to do on the machine.
Not so!
Of course you can stitch the face by hand, but you can do every bit of it on the machine – no fancy embroidery features needed. Here’s how I do it on mine, just using regular straight stitch.
That’s it!
Get the pattern here and start adding adorable little mice to all your projects. 🙂
I get a lot of emails from people asking for advice choosing quilt colors. I always point them to the Shiny Happy People group where they can see many, many different quilts made with my patterns – usually using different colors than what I used in my samples. Really – seeing a finished quilt is the very best way to imagine it in different colors!
So I’ll be making more of an effort to show my quilt patterns in new color combinations – just to show as many options as possible. 🙂
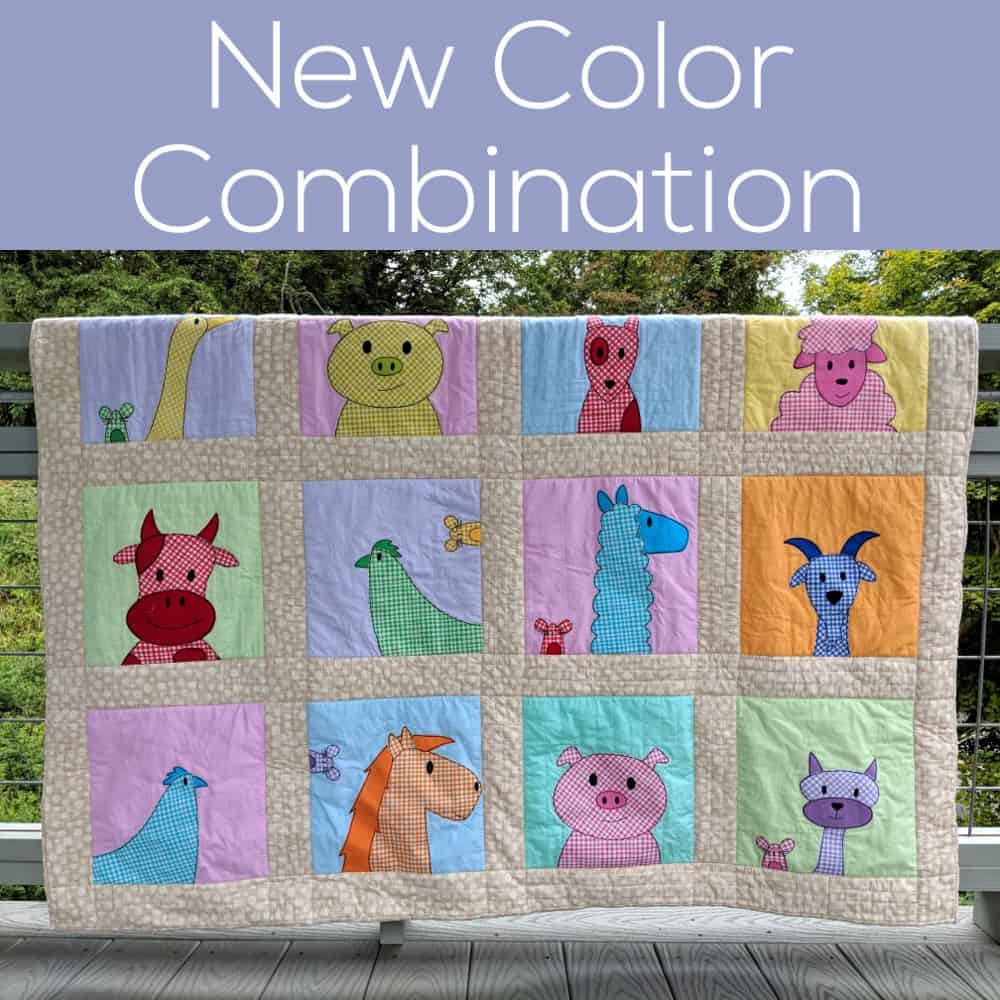
I recently remade the Noisy Farm quilt, using it as an example to how you can add sashing to any of my quilt patterns. While I was at it – I changed the colors too!
Here’s the original quilt in a crib size.
And here’s the new version.
In addition to adding the sashing – I used radically different colors!
I made the original sample before I had fabric bundles in my shop, so it’s not easy to say exactly what fabric packs they’d use now, but the Warm Neutrals would be the best choice for those natural-colored animals. The backgrounds are mostly greens and blues, so the closest match would be the Green Batiks and Blue Batiks.
The new version uses the Rainbow Sherbet bundle for the background blocks – pretty pale pastel solids. They really do look like soft sherbet colors. 🙂
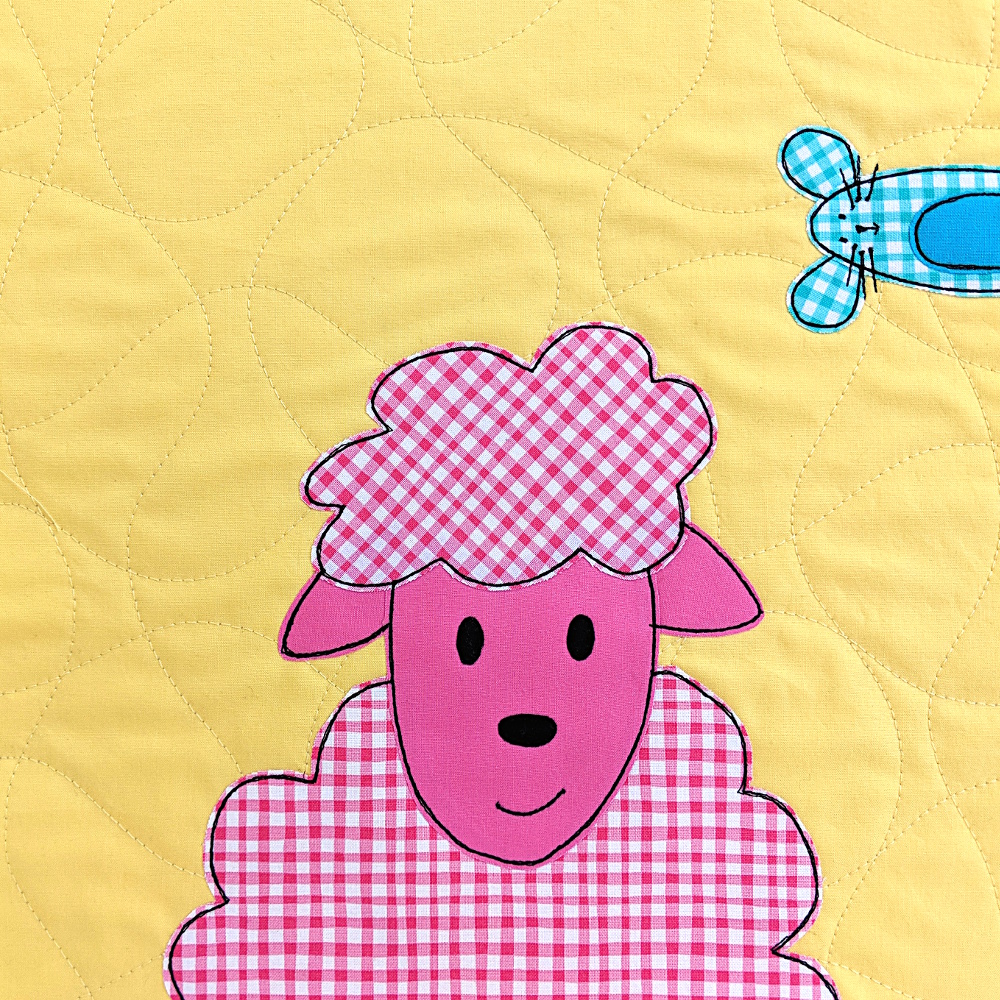
For the animals I went totally UNnatural with all kinds of fun colors and a wobbly, hand-painted gingham print. Here’s a close-up view of a silly pink sheep with a little turquoise mouse popping into the frame.
For the sashing I used Hash Dot in linen, also Michael Miller Fabrics. I liked how it has a slightly barn-ish feel while still balancing nicely with the soft pastel background fabrics. Sorry – I don’t sell that one in my shop, but you can search for Linen Hash Dot and lots of online sellers will pop up.
So there you go! New colors and a new layout for a totally new look for a favorite quilt pattern.
Want to know how to add that sashing? Here are the posts you’ll need for that.