As much as I love to cook, and as much as I love the flavor of gingerbread, and as much as I love candy and fussy details – I’ve never made a gingerbread house. Until now.
Maybe the problem is that I know a real gingerbread house is not really edible, even thought it’s made of edible goodies.
No such illusions with this little house made of felt and embroidery thread! You get all the pretty decorations and fanciness and it will last for years. Plus you can make it on your couch in front of the fire instead of in the kitchen. 🙂
Here’s what you’ll need. . .
You can find links to sources for all my favorite tools and supplies here.
scraps of wool felt (I used Tahitian sunset for the gingerbread and lavender, grass skirt, blue bayou and fuchsia for the decorations)
matching embroidery thread (I used DMC floss in white, 3858, 3746, 550, 907, 699, 326, 601, 603, 3846)
1 sheet of Sulky Sticky Fabri-solvy (optional, but recommended – will make two ornaments)
small amount of polyester fiberfill stuffing (a few cotton balls will do if you don’t have it)
scrap of string or yarn for the hanging loop
Throughout the pattern, the links go to video tutorials teaching that skill. If it’s a new stitch or technique for you, just click through to see how to do it!
Here’s how to make it. . .
1. Print the pattern.You can download it here. It’s formatted to give you the pieces for two houses – make one for yourself and one for a friend. Print the pattern at 100% size onto a sheet of Sulky Sticky Fabri-solvy (aka The Magical Embroidery Stuff).
2. Peel the backing off and stick the stabilizer/pattern transfer onto the felt. I used Tahitian sunset for the gingerbread, fuchsia for the pink lollipops on the sides of the door, grass skirt for the green stick candy sills, blue bayou for the door, and lavender for the purple candy.
Cut the pieces out on the lines.
Embroider the designs right through the stabilizer.
I used the following stitches and colors. . .
For the snow along the roof I used U-stitch and 4 strands of DMC #white.
For the snowflakes I used 2 strands of DMC #white.
For the center window I used backstitch in 2 strands of DMC #white, with French knots in the same color below it.
For the candycane stripes on the windows and door I used whipped backstitch. Backstitch the lines first with 4 strands of DMC #white, then whip with 2 strands of DMC #326.
For the lollipop sticks on the sides of the door I also used whipped backstitch. Backstitch the lines with 4 strands of DMC #699, then whip with 2 strands of DMC #907.
For the swirls on the purple candy I used chain stitch and 2 strands of DMC #550.
3. Soak off the Sulky Sticky Fabri-solvy. I soak mine in cold water for at least an hour, then rinse off the mushy stabilizer under cold running water. Don’t rub it to remove any stubborn bits – just hit them with a kitchen sprayer if needed.
Lay the pieces flat on a towel to dry. Do not wring, twist or even smoosh them. Just set them sopping wet on a towel and let them be. I promise they’ll dry. 🙂
4. Layer the small applique pieces onto the house. The stitching makes such a nice guide to help position everything!
I usually just hold them in place while I stitch them down, but this time I experimented with using a fabric glue stick. I used Prym brand and it stuck really well, but there was also a noticeable hardness to the glued bits. It wasn’t so hard that it was difficult to sew through – especially since I was mostly just sewing around the edges and I put a dab of glue in the middle of each piece – but I’d be careful not to use too much.
5. Use whipstitch and matching thread to applique each piece in place.
Add a tiny bit more detail stitching because there wasn’t enough already. Really – if you can’t go overboard on a gingerbread house then when can you? It’s supposed to be slightly insane. 🙂
I added little diagonal stripes on the green stick candy with 2 strands of DMC #699. I also added little starbursts in the centers of the pink lollipops using 2 strands of DMC #603.
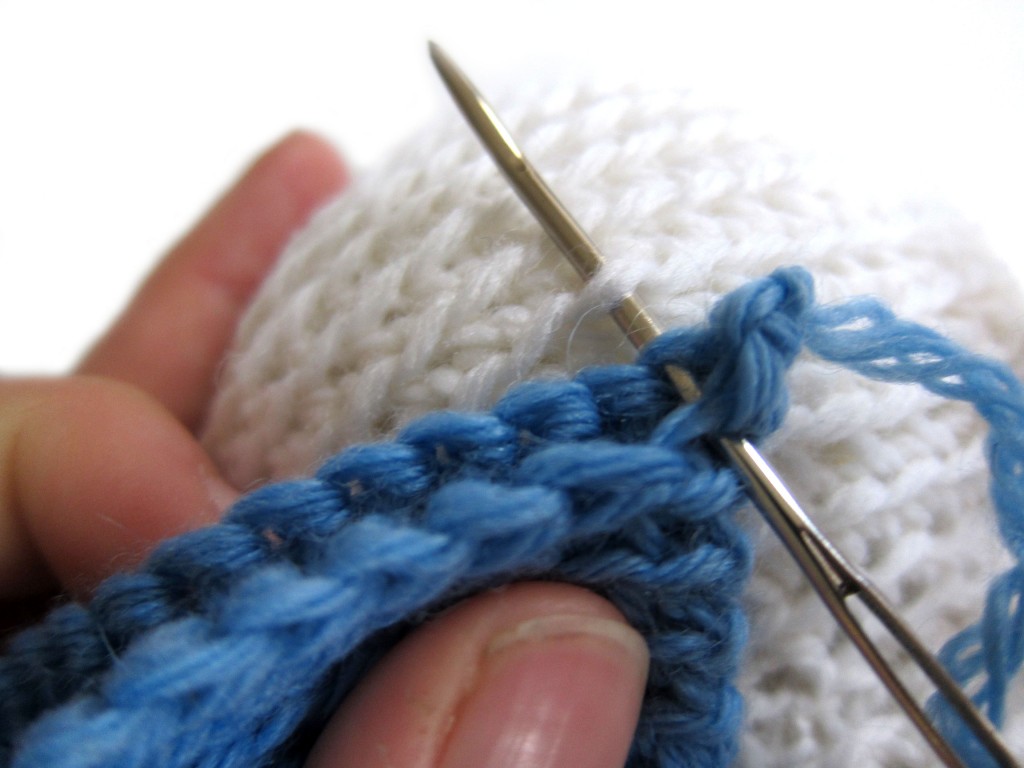
6. Layer the ornament front and back together and whipstitch all around the edges.
Whipstitching the edges of the felt is a little different that whipstitch applique, so it has its own video. You can watch it here.
Leave the bit under the door open for stuffing.
7. Add a few pinches of stuffing through the hole, then switch to matching blue thread and sew up the opening.
Thread a 10″ piece of string through the peak of the roof and tie a knot to form a hanging loop.
Finished!
Like all Shiny Happy World designs – you’re welcome to sell items you make with my patterns, but please don’t sell or distribute the patterns themselves.
If you like this free pattern, sign up for the Shiny Happy News! Subscribers get a weekly newsletter with updates, special offers and links to happy things. Sign up here.
This ornament is the same style and size (and difficulty level) as all my other holiday ornament patterns. Here are the first ten ornaments in this year’s Christmas Club collection.
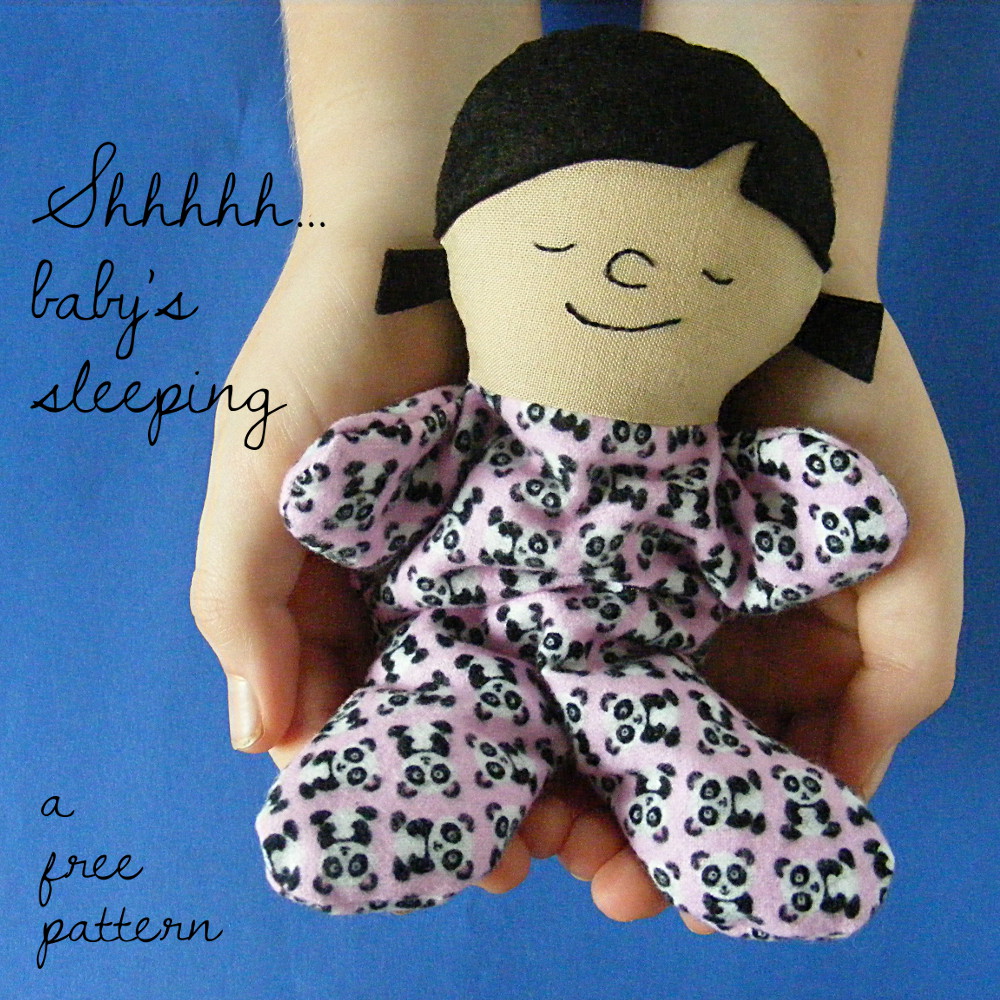
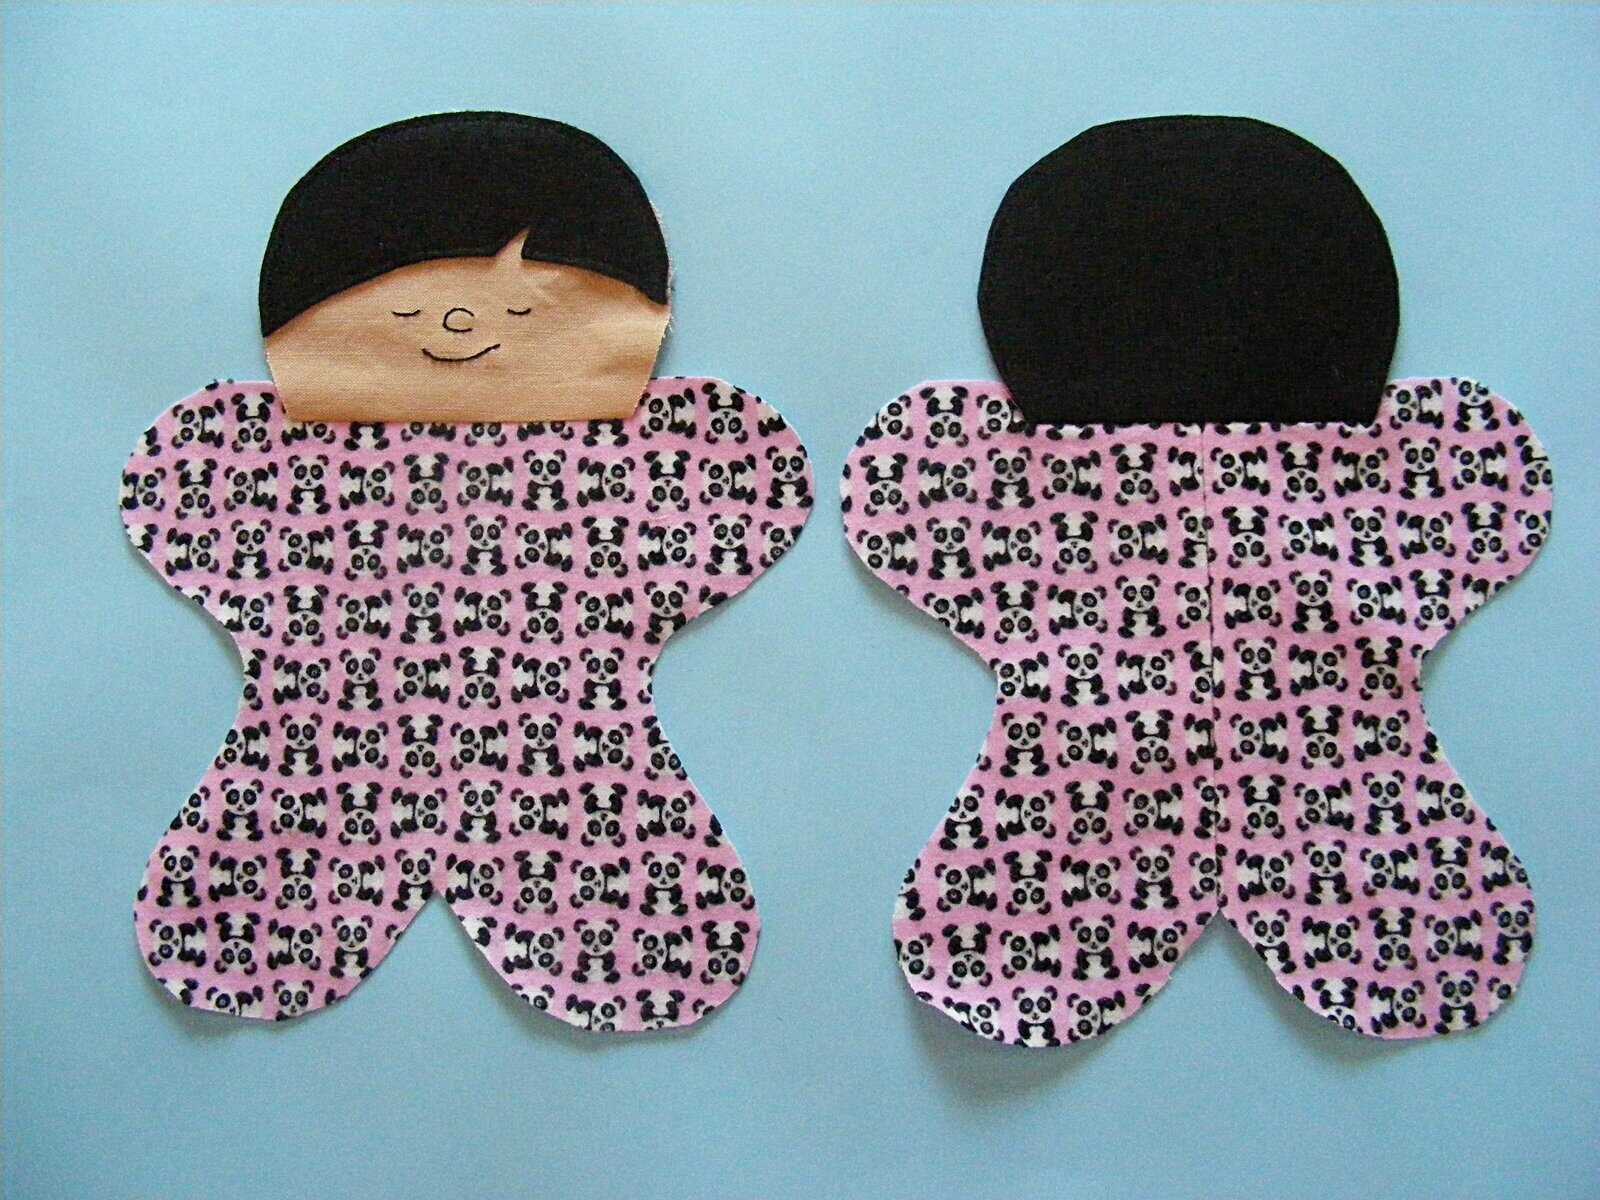
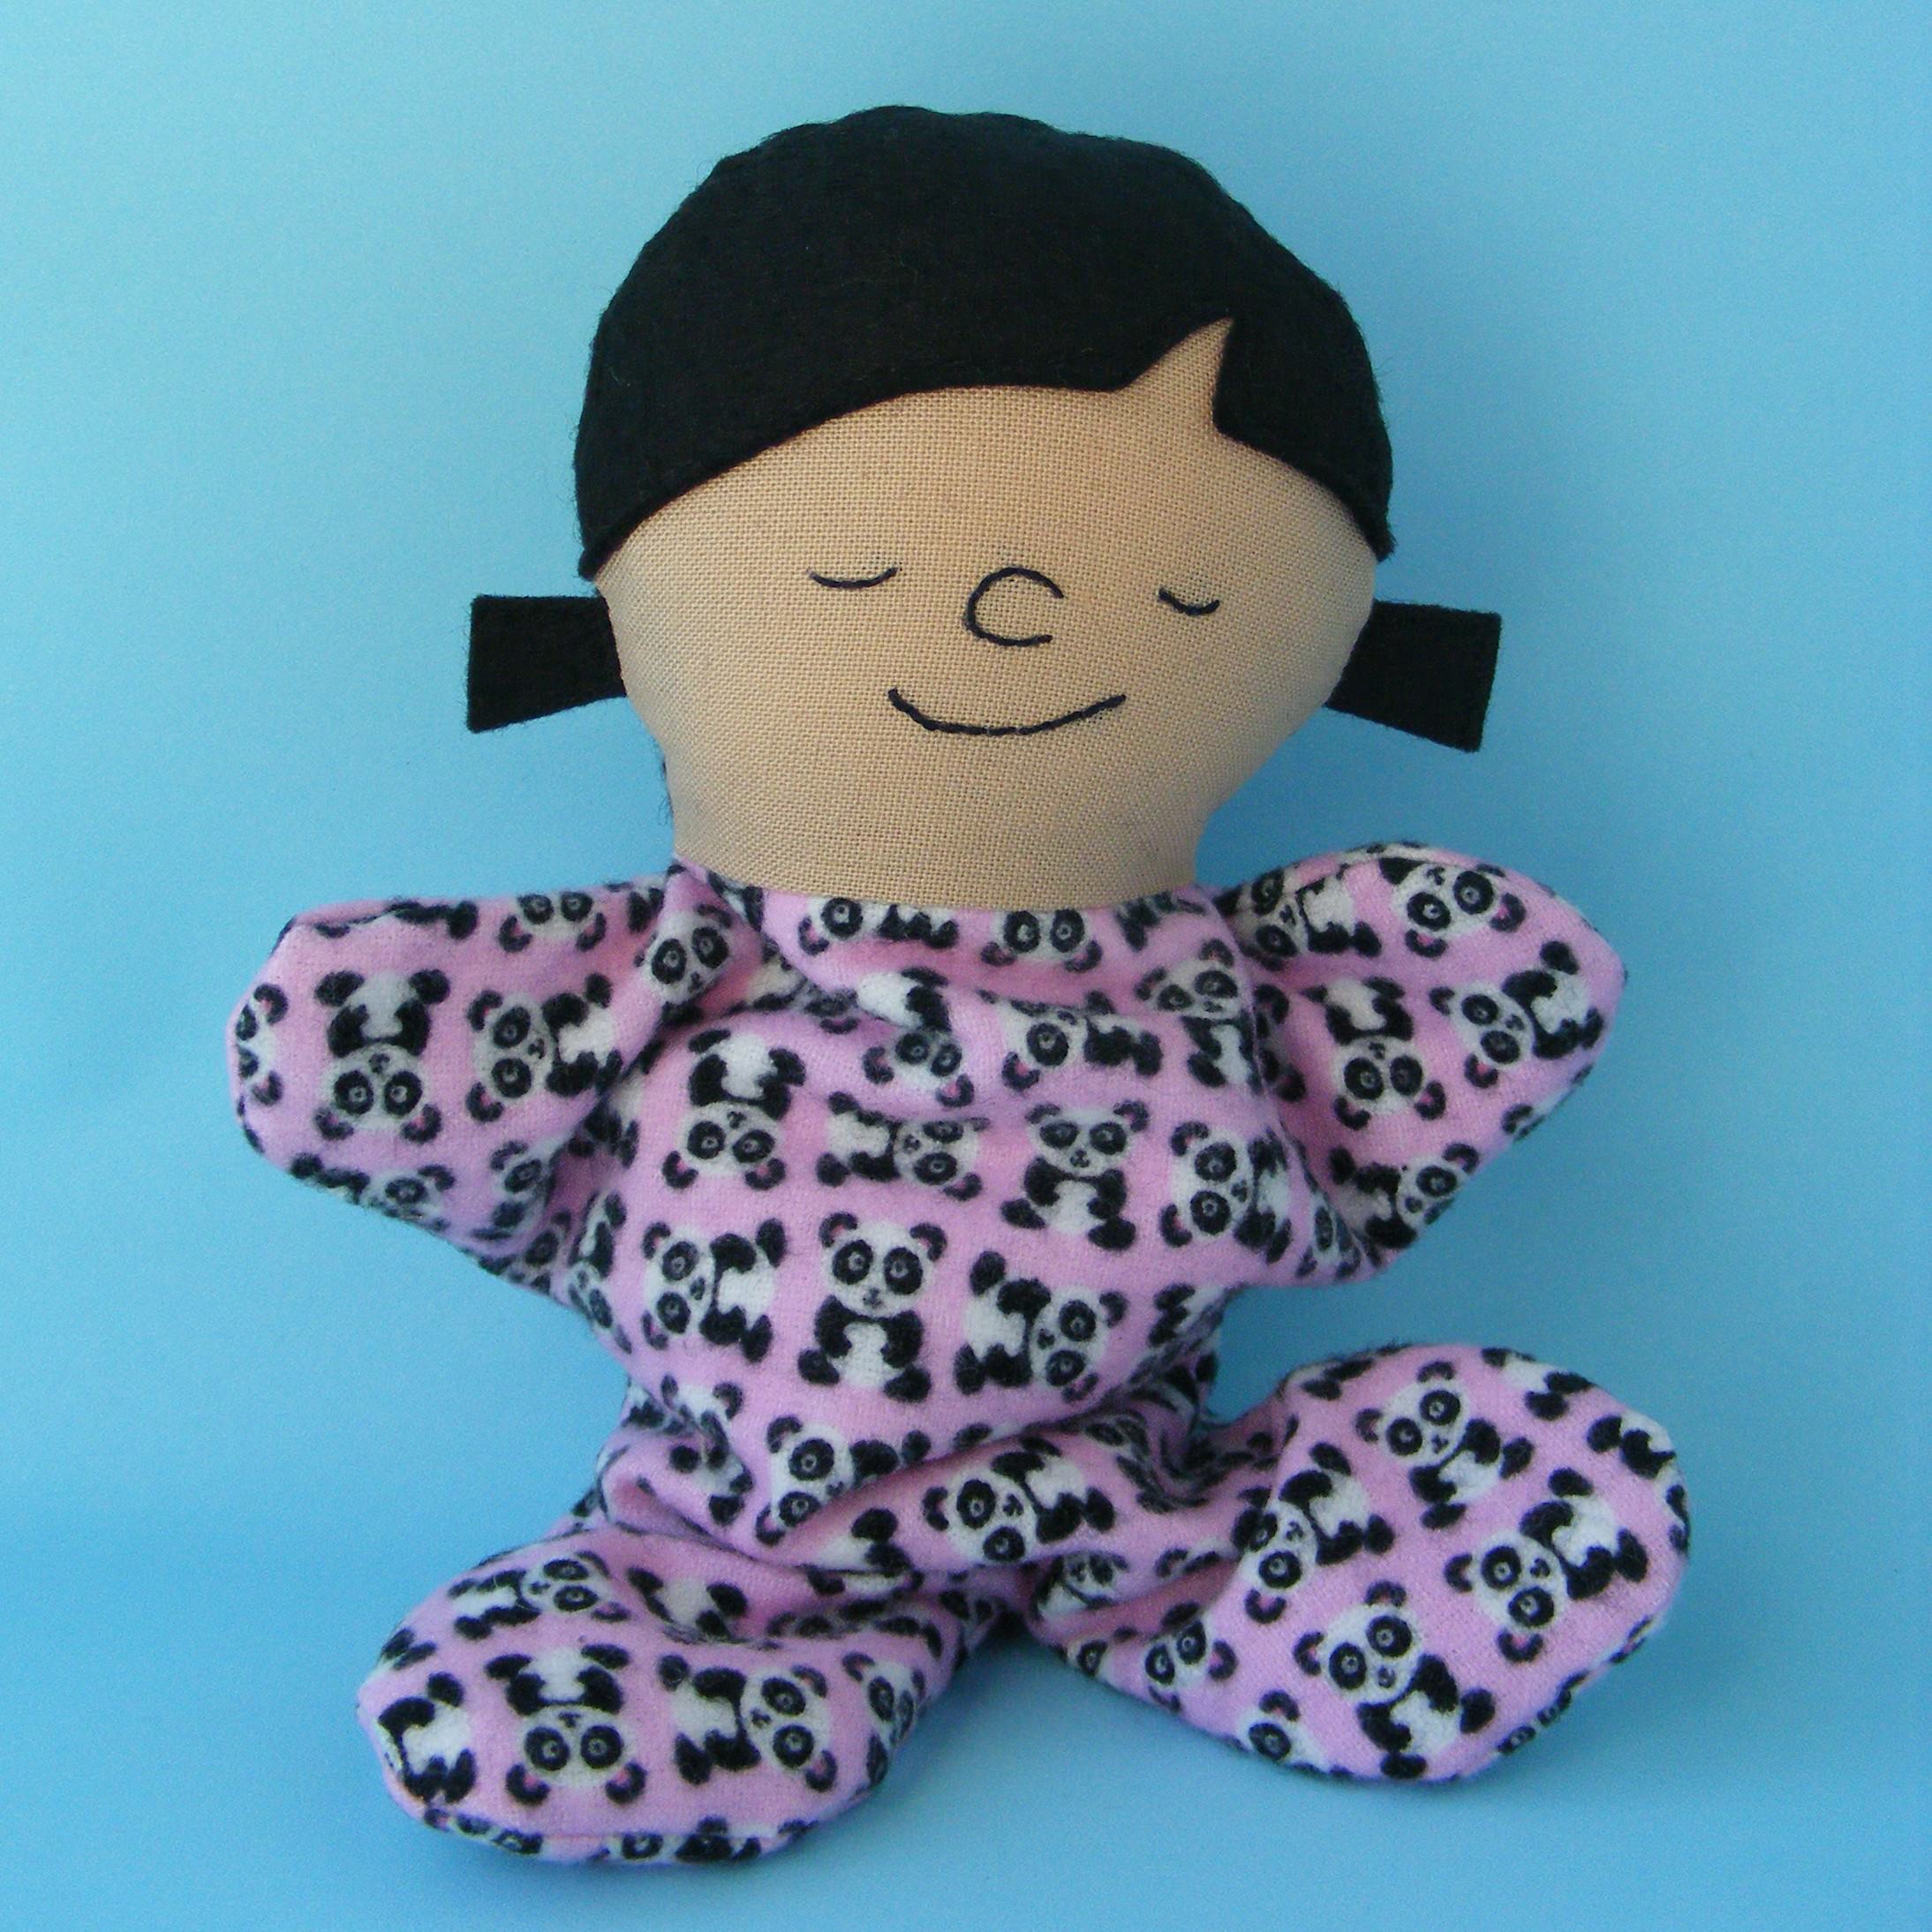
Here’s a free doll pattern to make a sweet Itty Bitty Sleepy Baby – a cuddly beanbag doll.
She’s a sleepy little girl who wants to curl up and take a nap in a special someone’s pocket. :)
She’s super easy to make - great for beginners. And she’s just the right size to be a mini doll for the dolls in The Dress Up Bunch. Fun!
Want to make her?
Here’s how!
Throughout the pattern, the links go to online video tutorials demonstrating the techniques used, or to sources for the materials. All seams are 1/4 inch seam allowance.
Happy sewing!
Materials
• scrap of people colored fabric • scrap of wool felt for the hair (I used black) • less than a fat quarter of pajama fabric • embroidery thread for the face (I used Sulky 12wt. cotton thread in black) • plastic pellets (I like PolyPellets Weighted Stuffing Beads) • polyfill stuffing (I like Soft Touch Polyfil Supreme Fiberfill)
Cut out all materials as directed on the pattern pieces. You should have:
1 body front piece
2 body back pieces
1 head cut from people-colored fabric
1 head cut from felt
1 front hair cut from felt
2 pigtails cut from felt
Step 2
Trace the face onto the people-colored head piece.
Embroider the eyes, nose and mouth using backstitch and a single strand of Sulky 12 wt. embroidery thread (the equivalent of two strands of regular embroidery thread).
Step 3
Sew the hair to the face piece.
Stitch very close to the edge and use matching thread.
Step 4
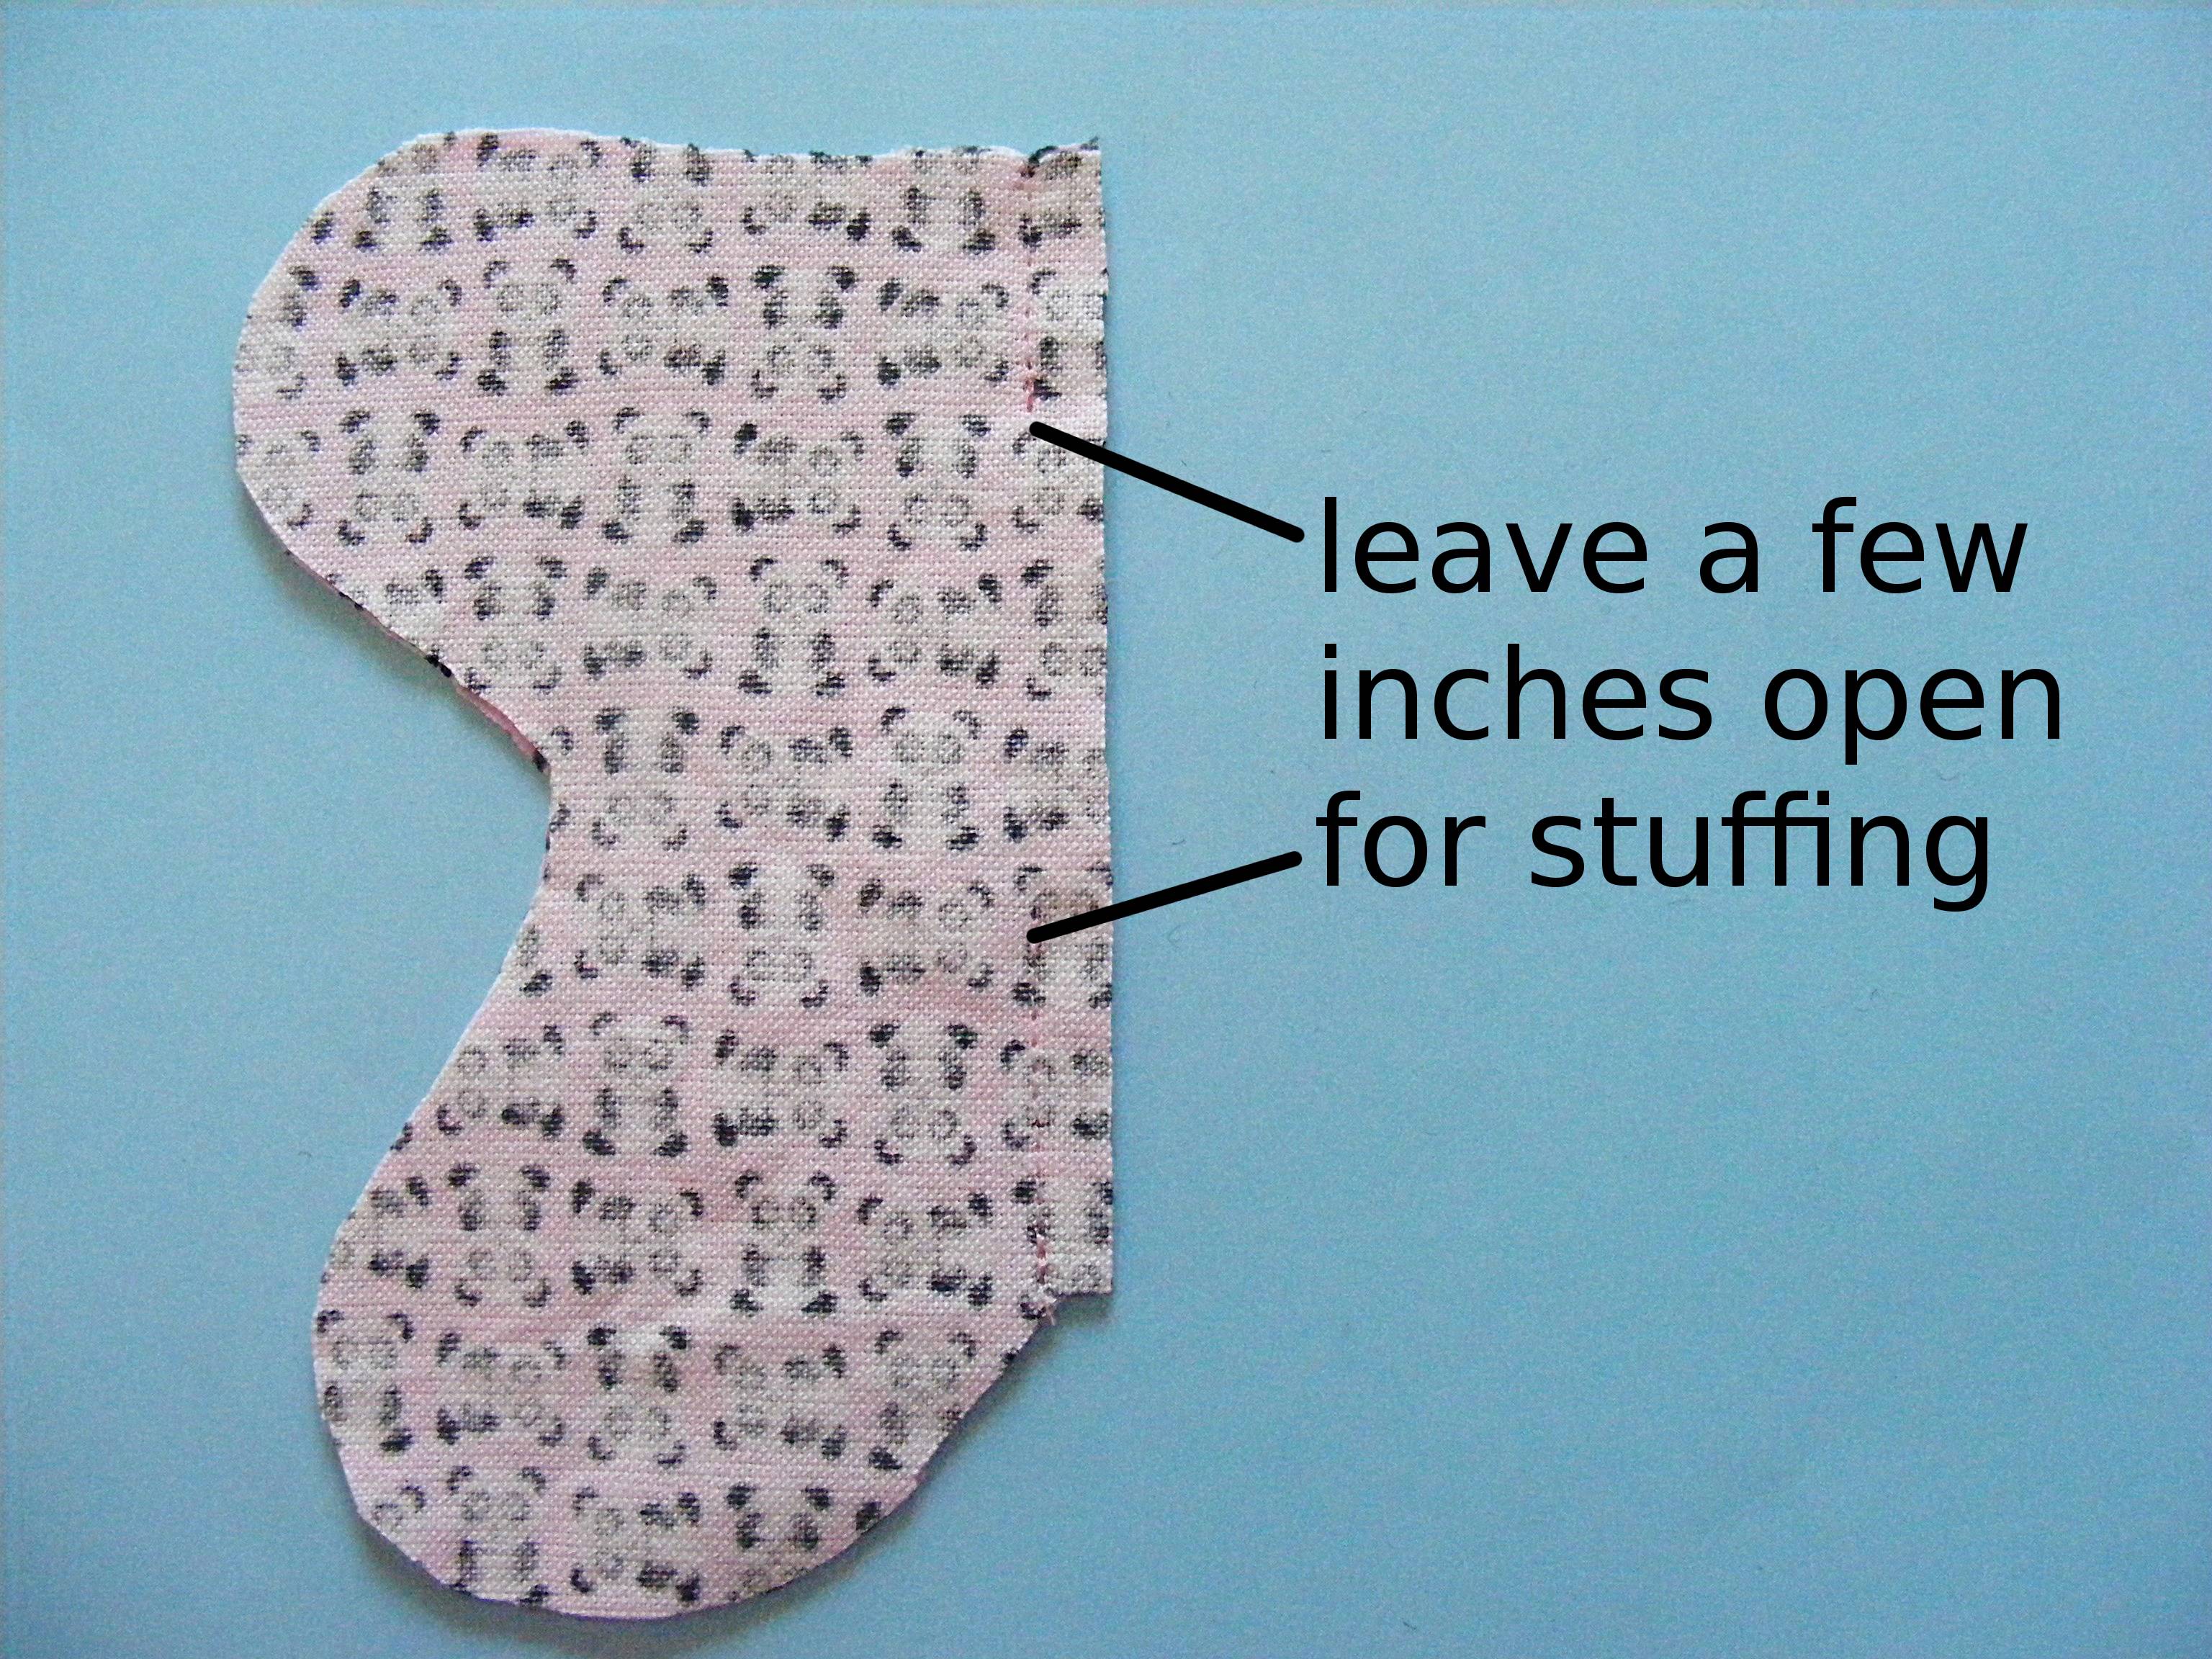
Sew the two body back pieces together along the center back line, making sure to leave a few inches open for stuffing.
Don’t forget to backstitch at the beginning and end of your stuffing opening.
Step 5
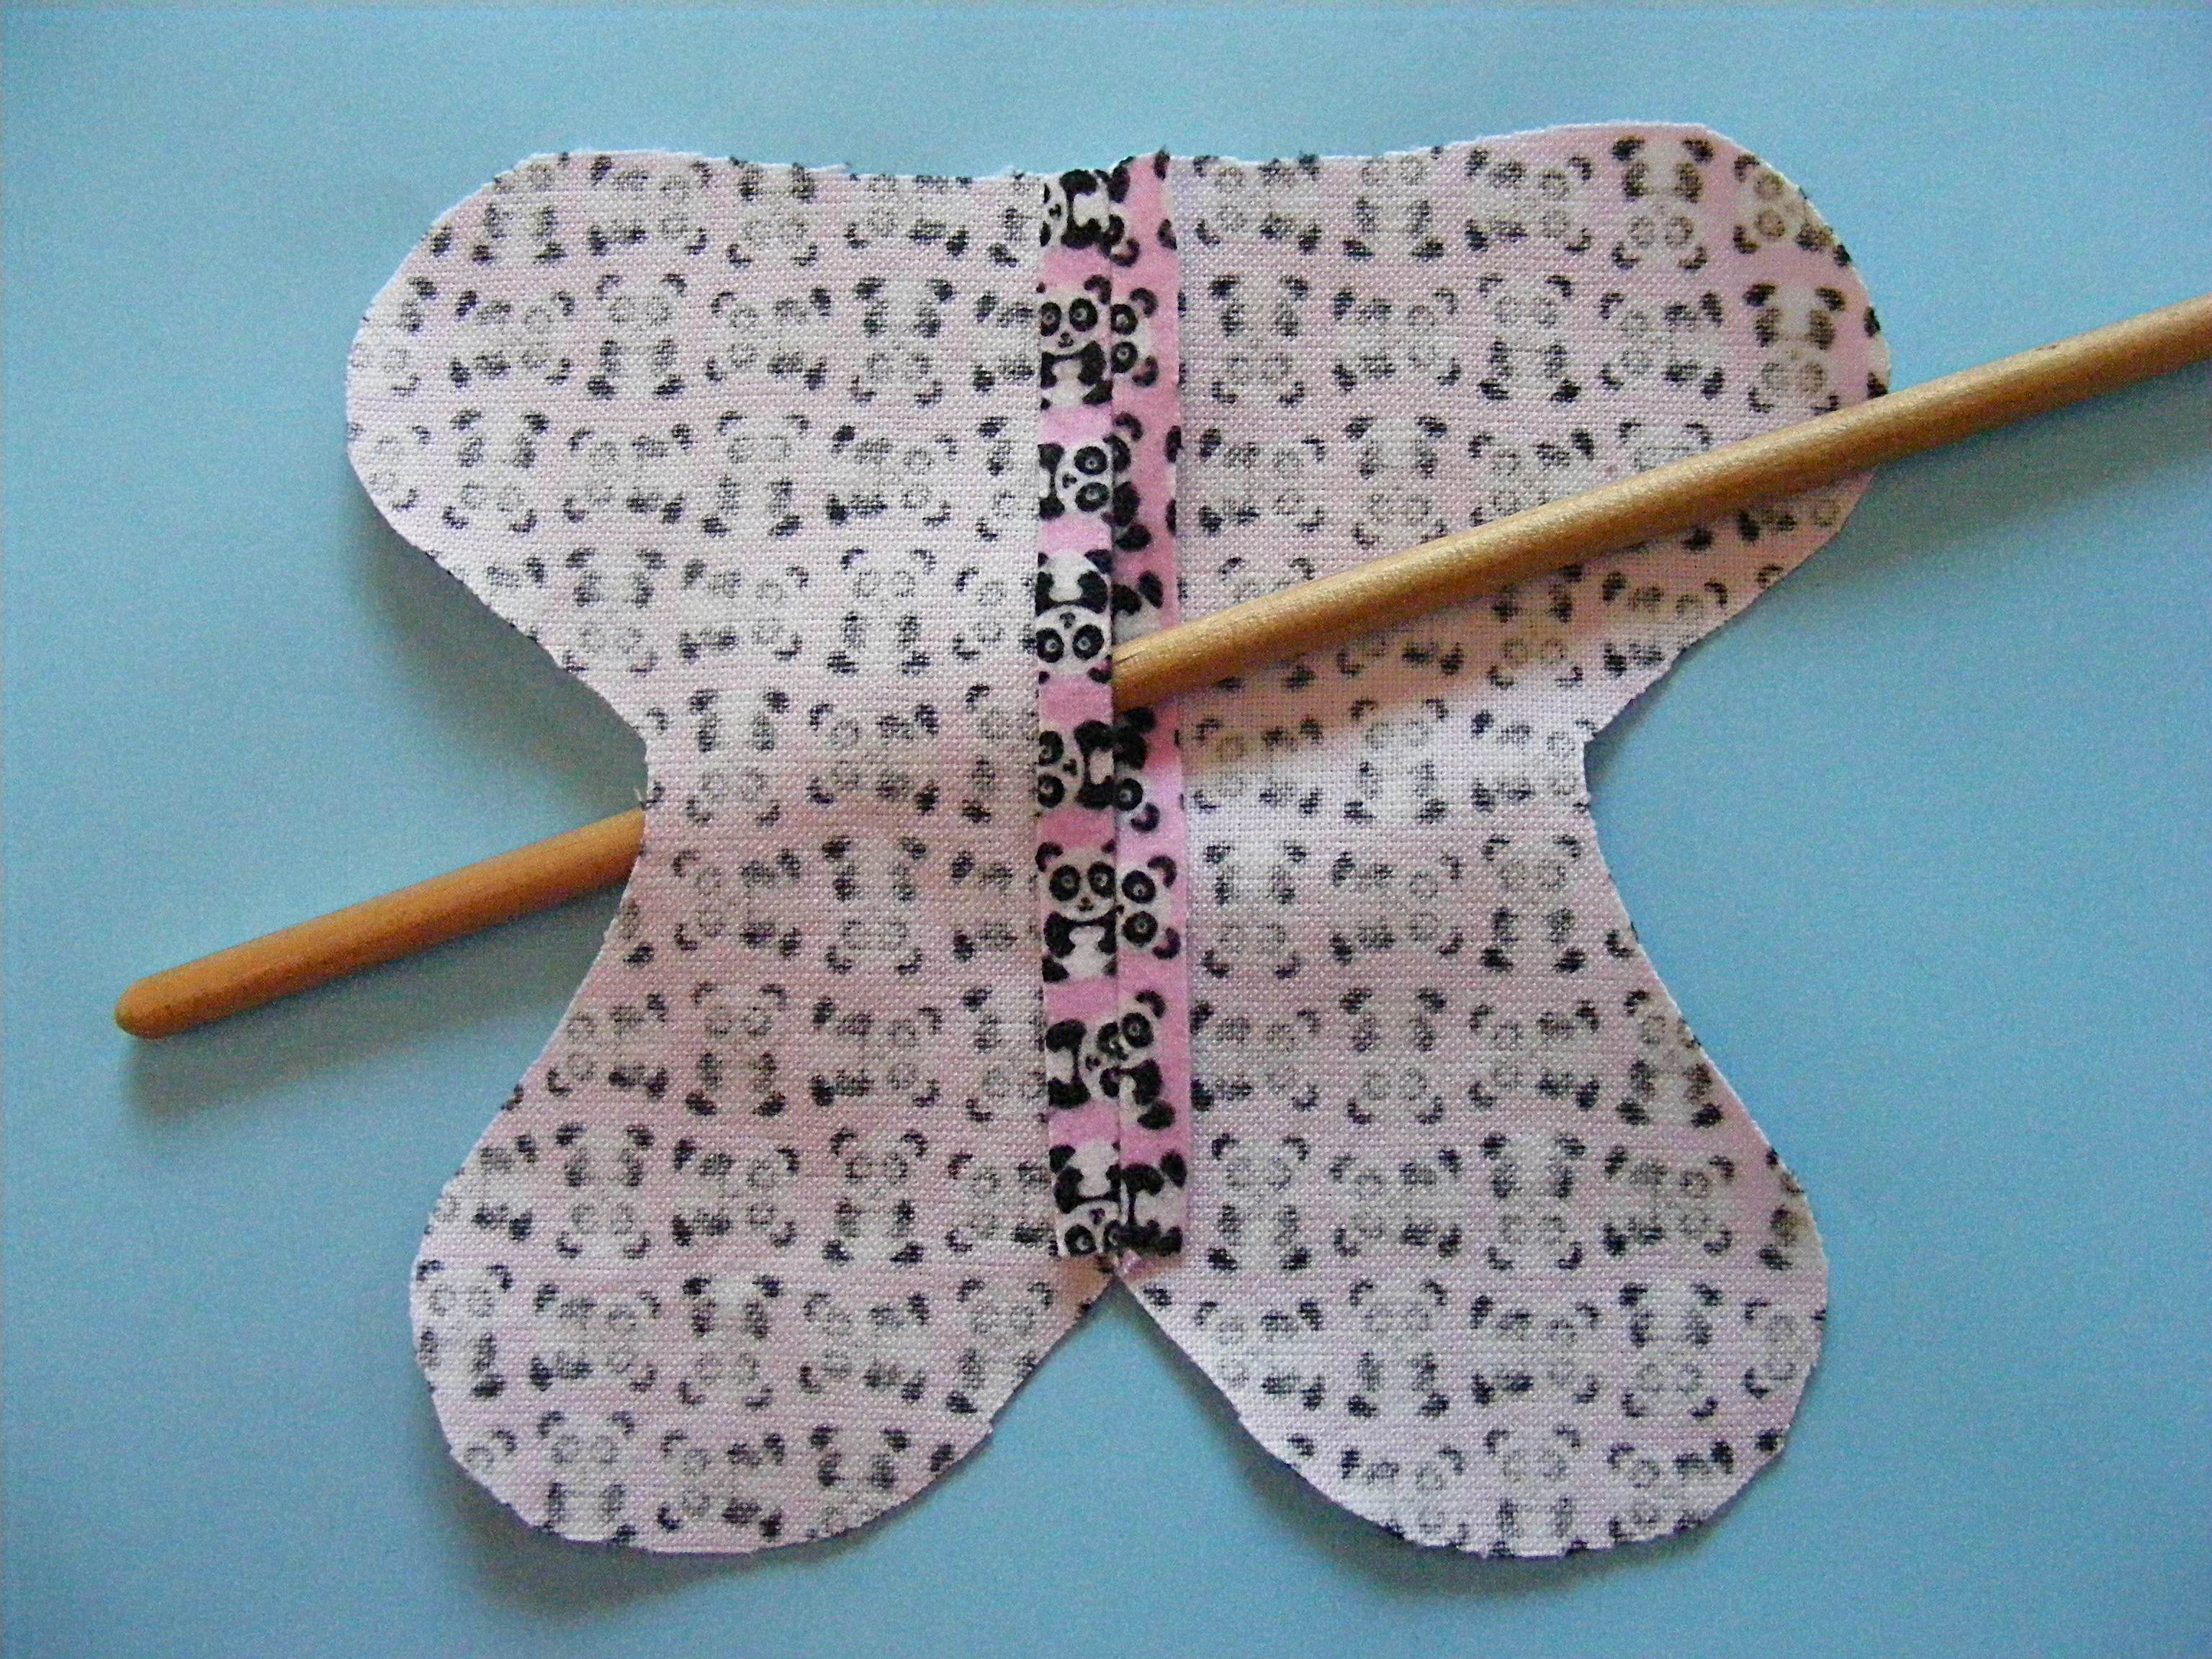
Open up the center back pieces and press the seam nice and flat, including the edges of the stuffing opening. That will give you a nice clean edge to sew when you’re closing up that opening by hand.
The stick shows where the stuffing opening is.
Step 6
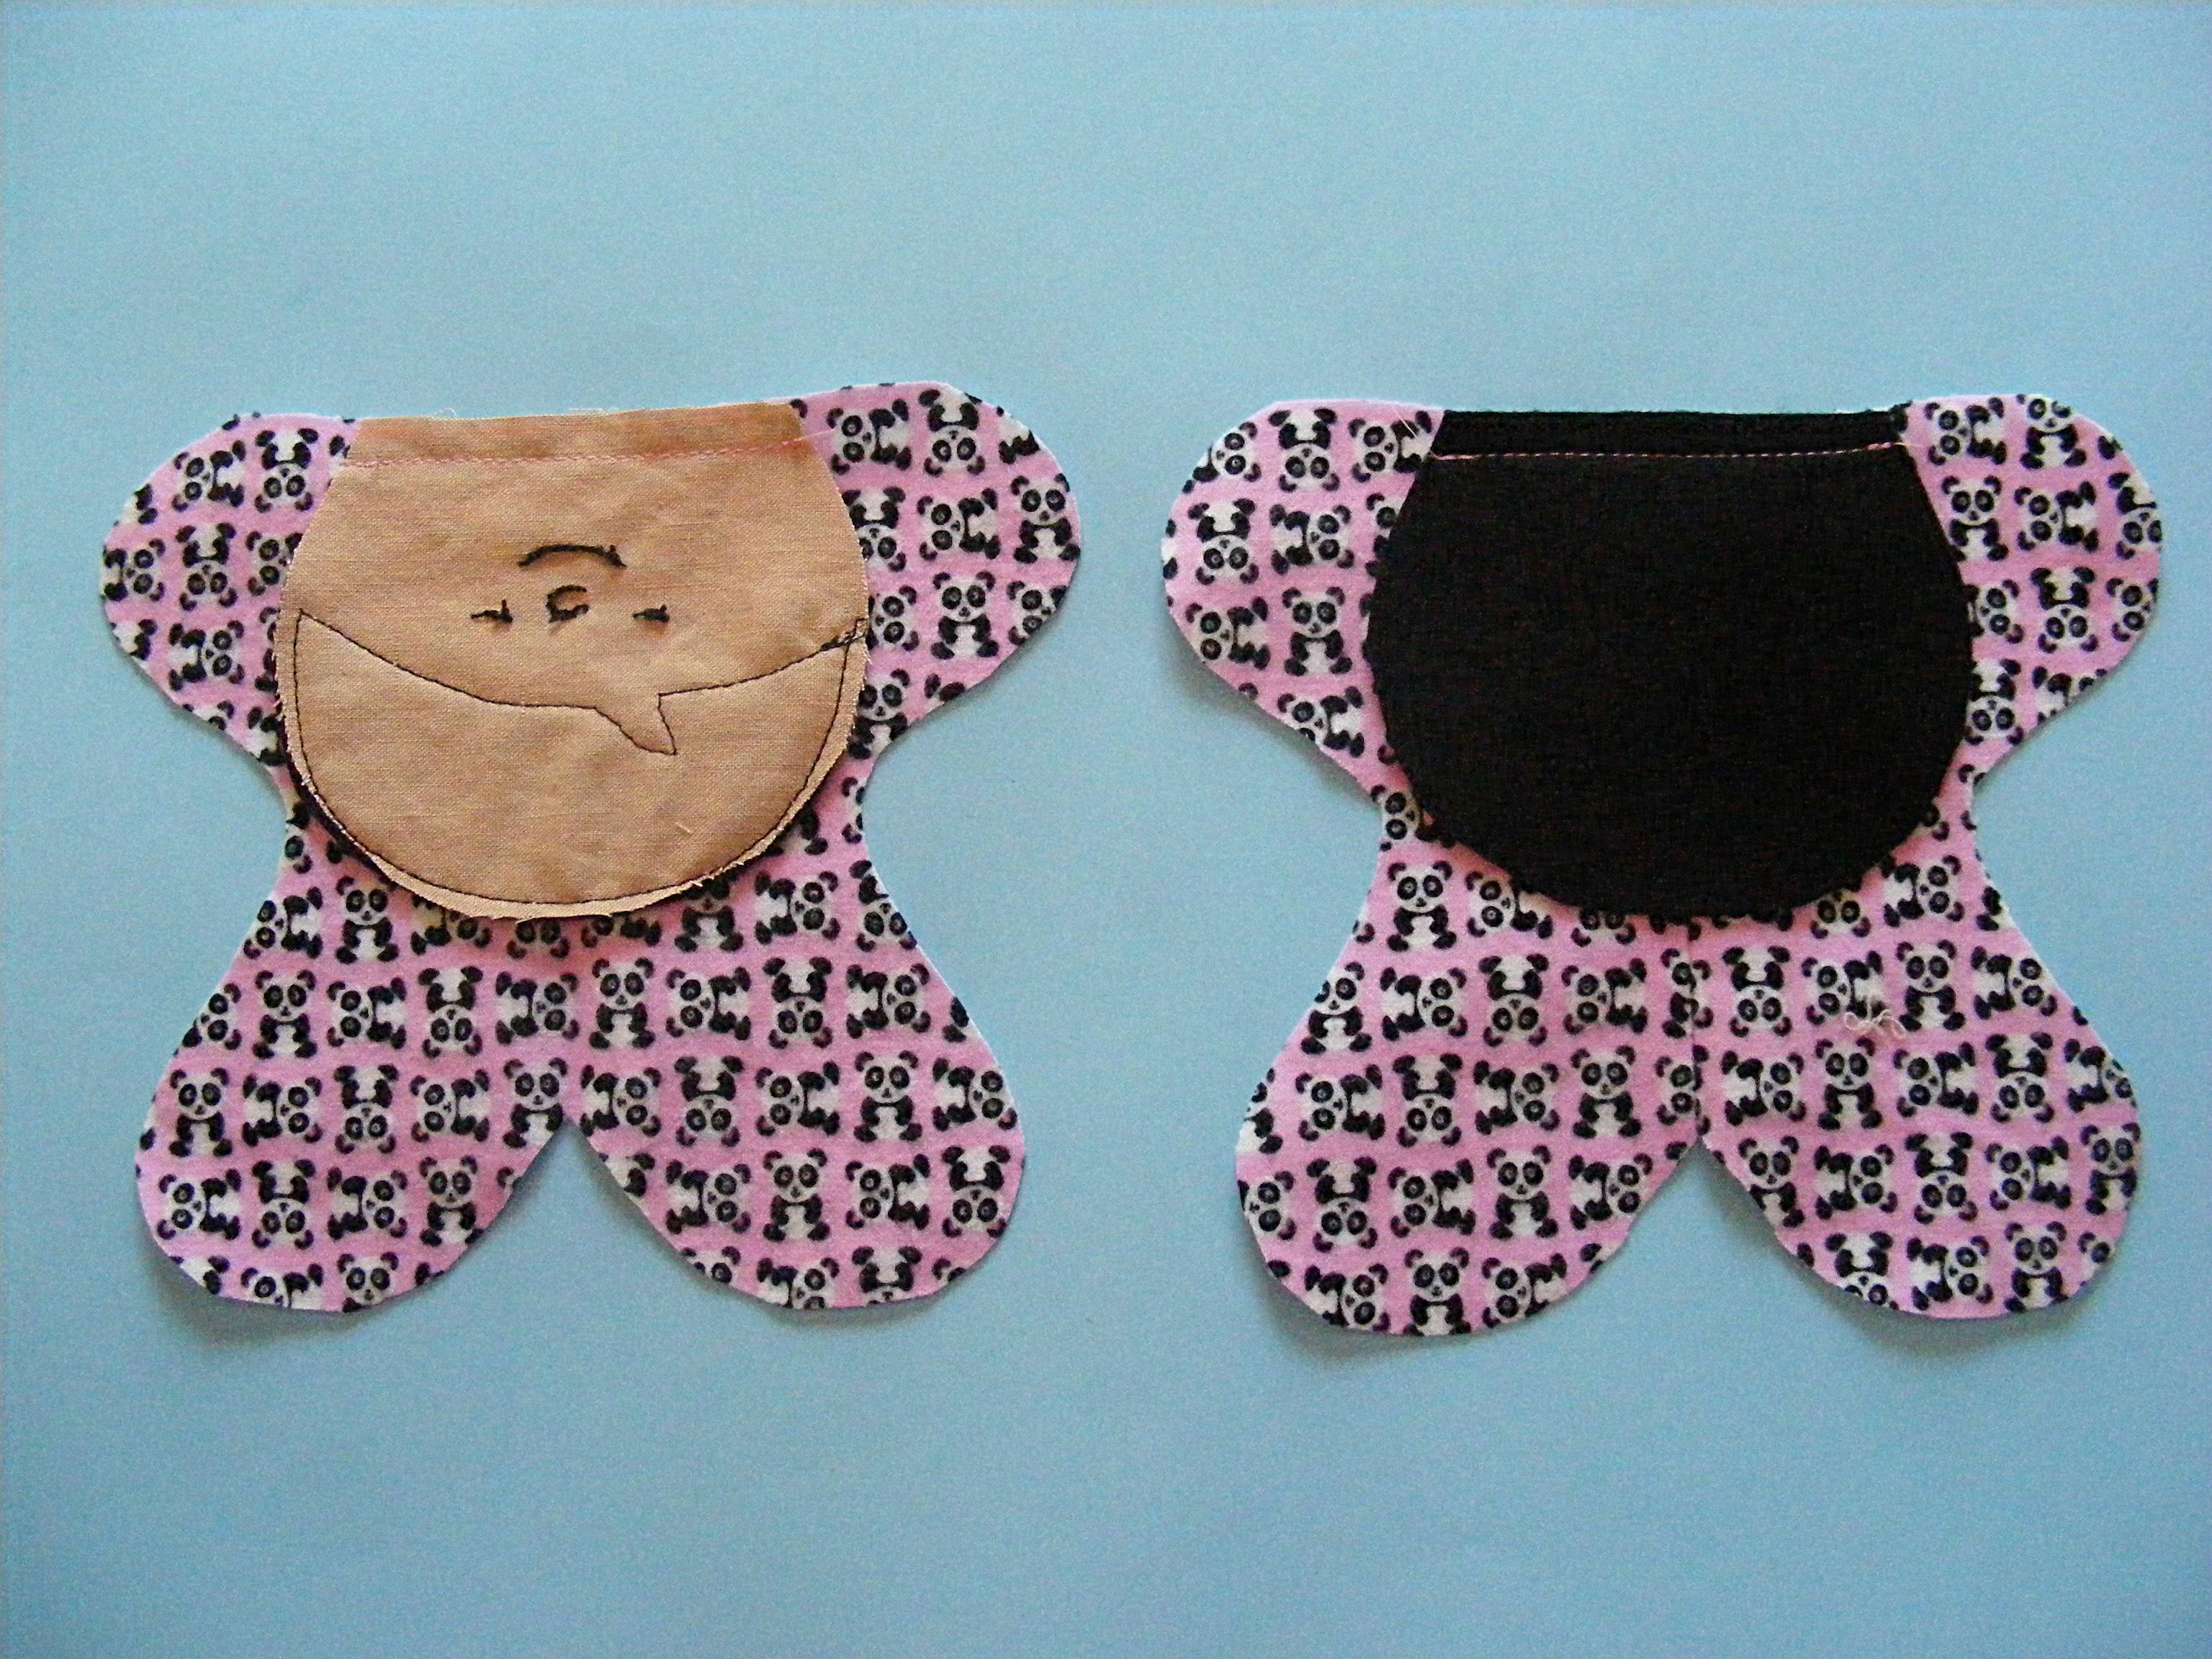
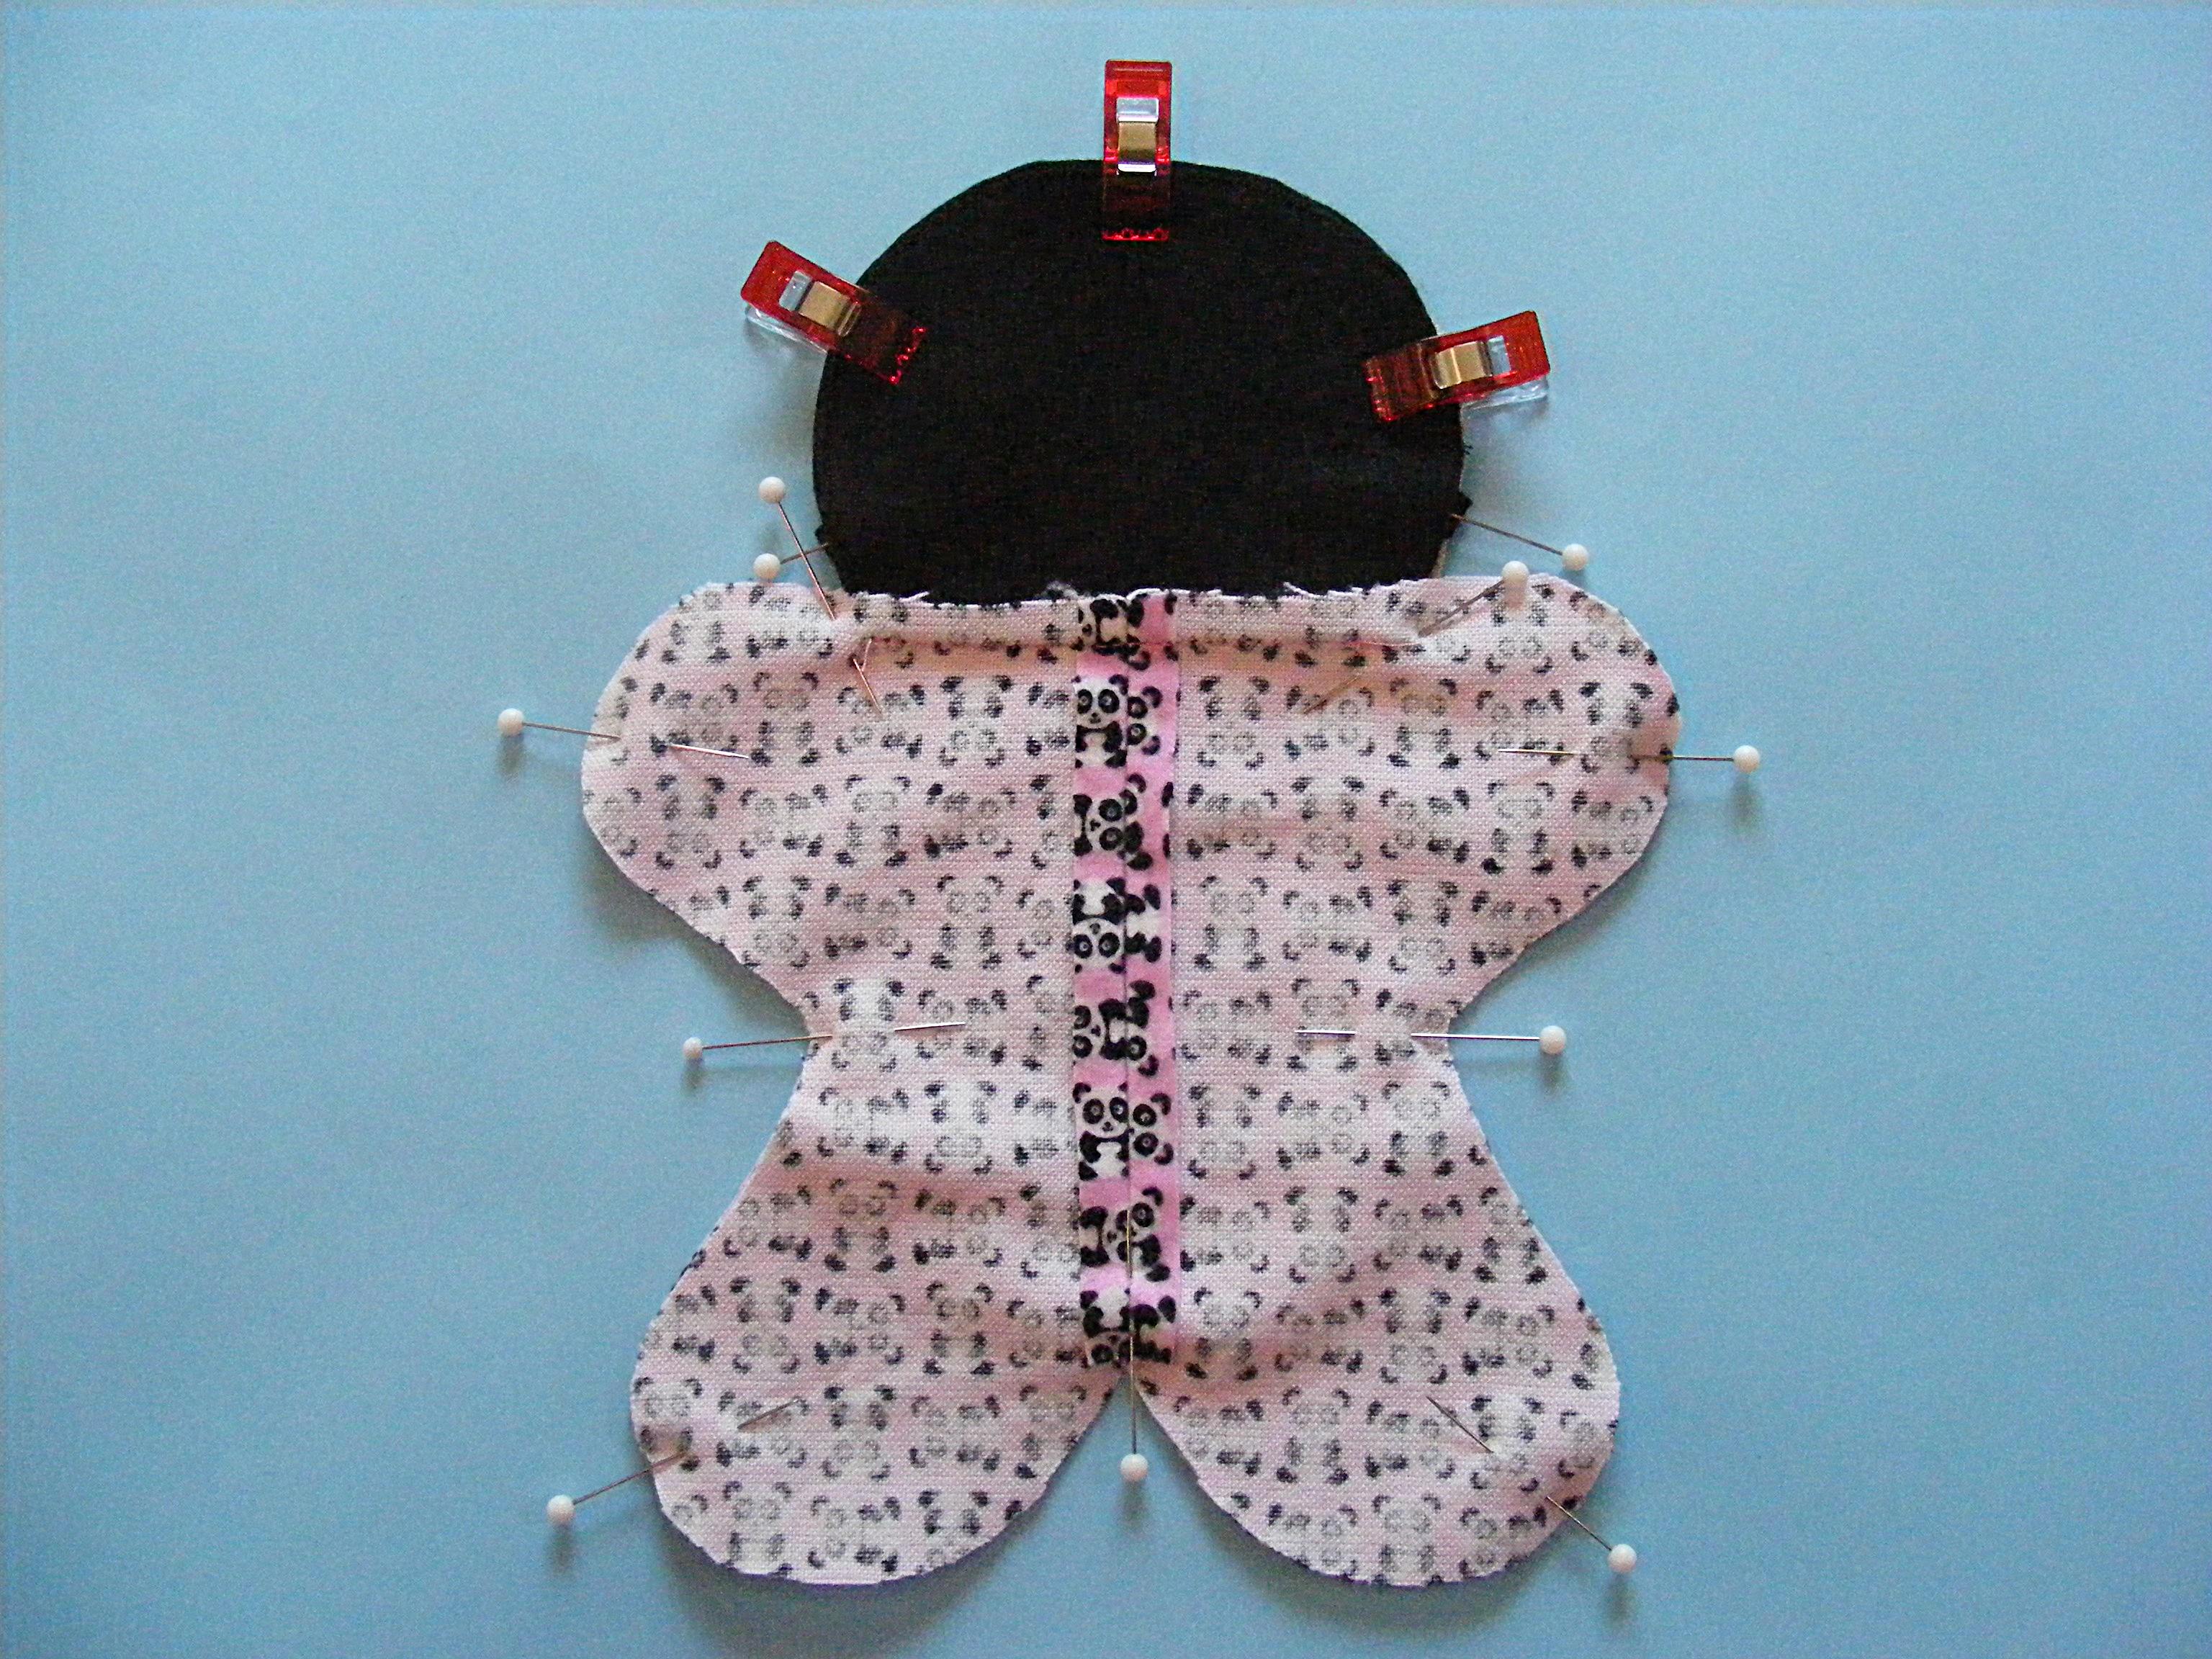
Fold the bottom of the head and the top of the body in half to find the centers. Line those centers up so the head is exactly centered on the body.
Sew the face to the body front and the felt head piece to the body back.
Step 7
Fold the heads up and press.
The seam allowance should be pressed toward the head so the body remains flat.
Step 8
Lay the body front face up on a flat surface.
Lay the pigtails over the face as shown in the photo. Don’t worry about making them perfectly even - crooked is cute. :-)
Pin or clip in place.
Step 9
Place the body back face down over the front, sandwiching the pigtails between the layers. Pin or clip the layers together carefully.
I match the neck seams first, then the center bottoms, then the dips at the sides and then the tips of the arms and legs and the head.
Step 10
Sew all the way around the body using 1/4 inch seam allowance. Make sure you’re catching the pigtails.
I changed the thread color when I got to the hair. I didn’t want specks of pink colored thread to show at the seam.
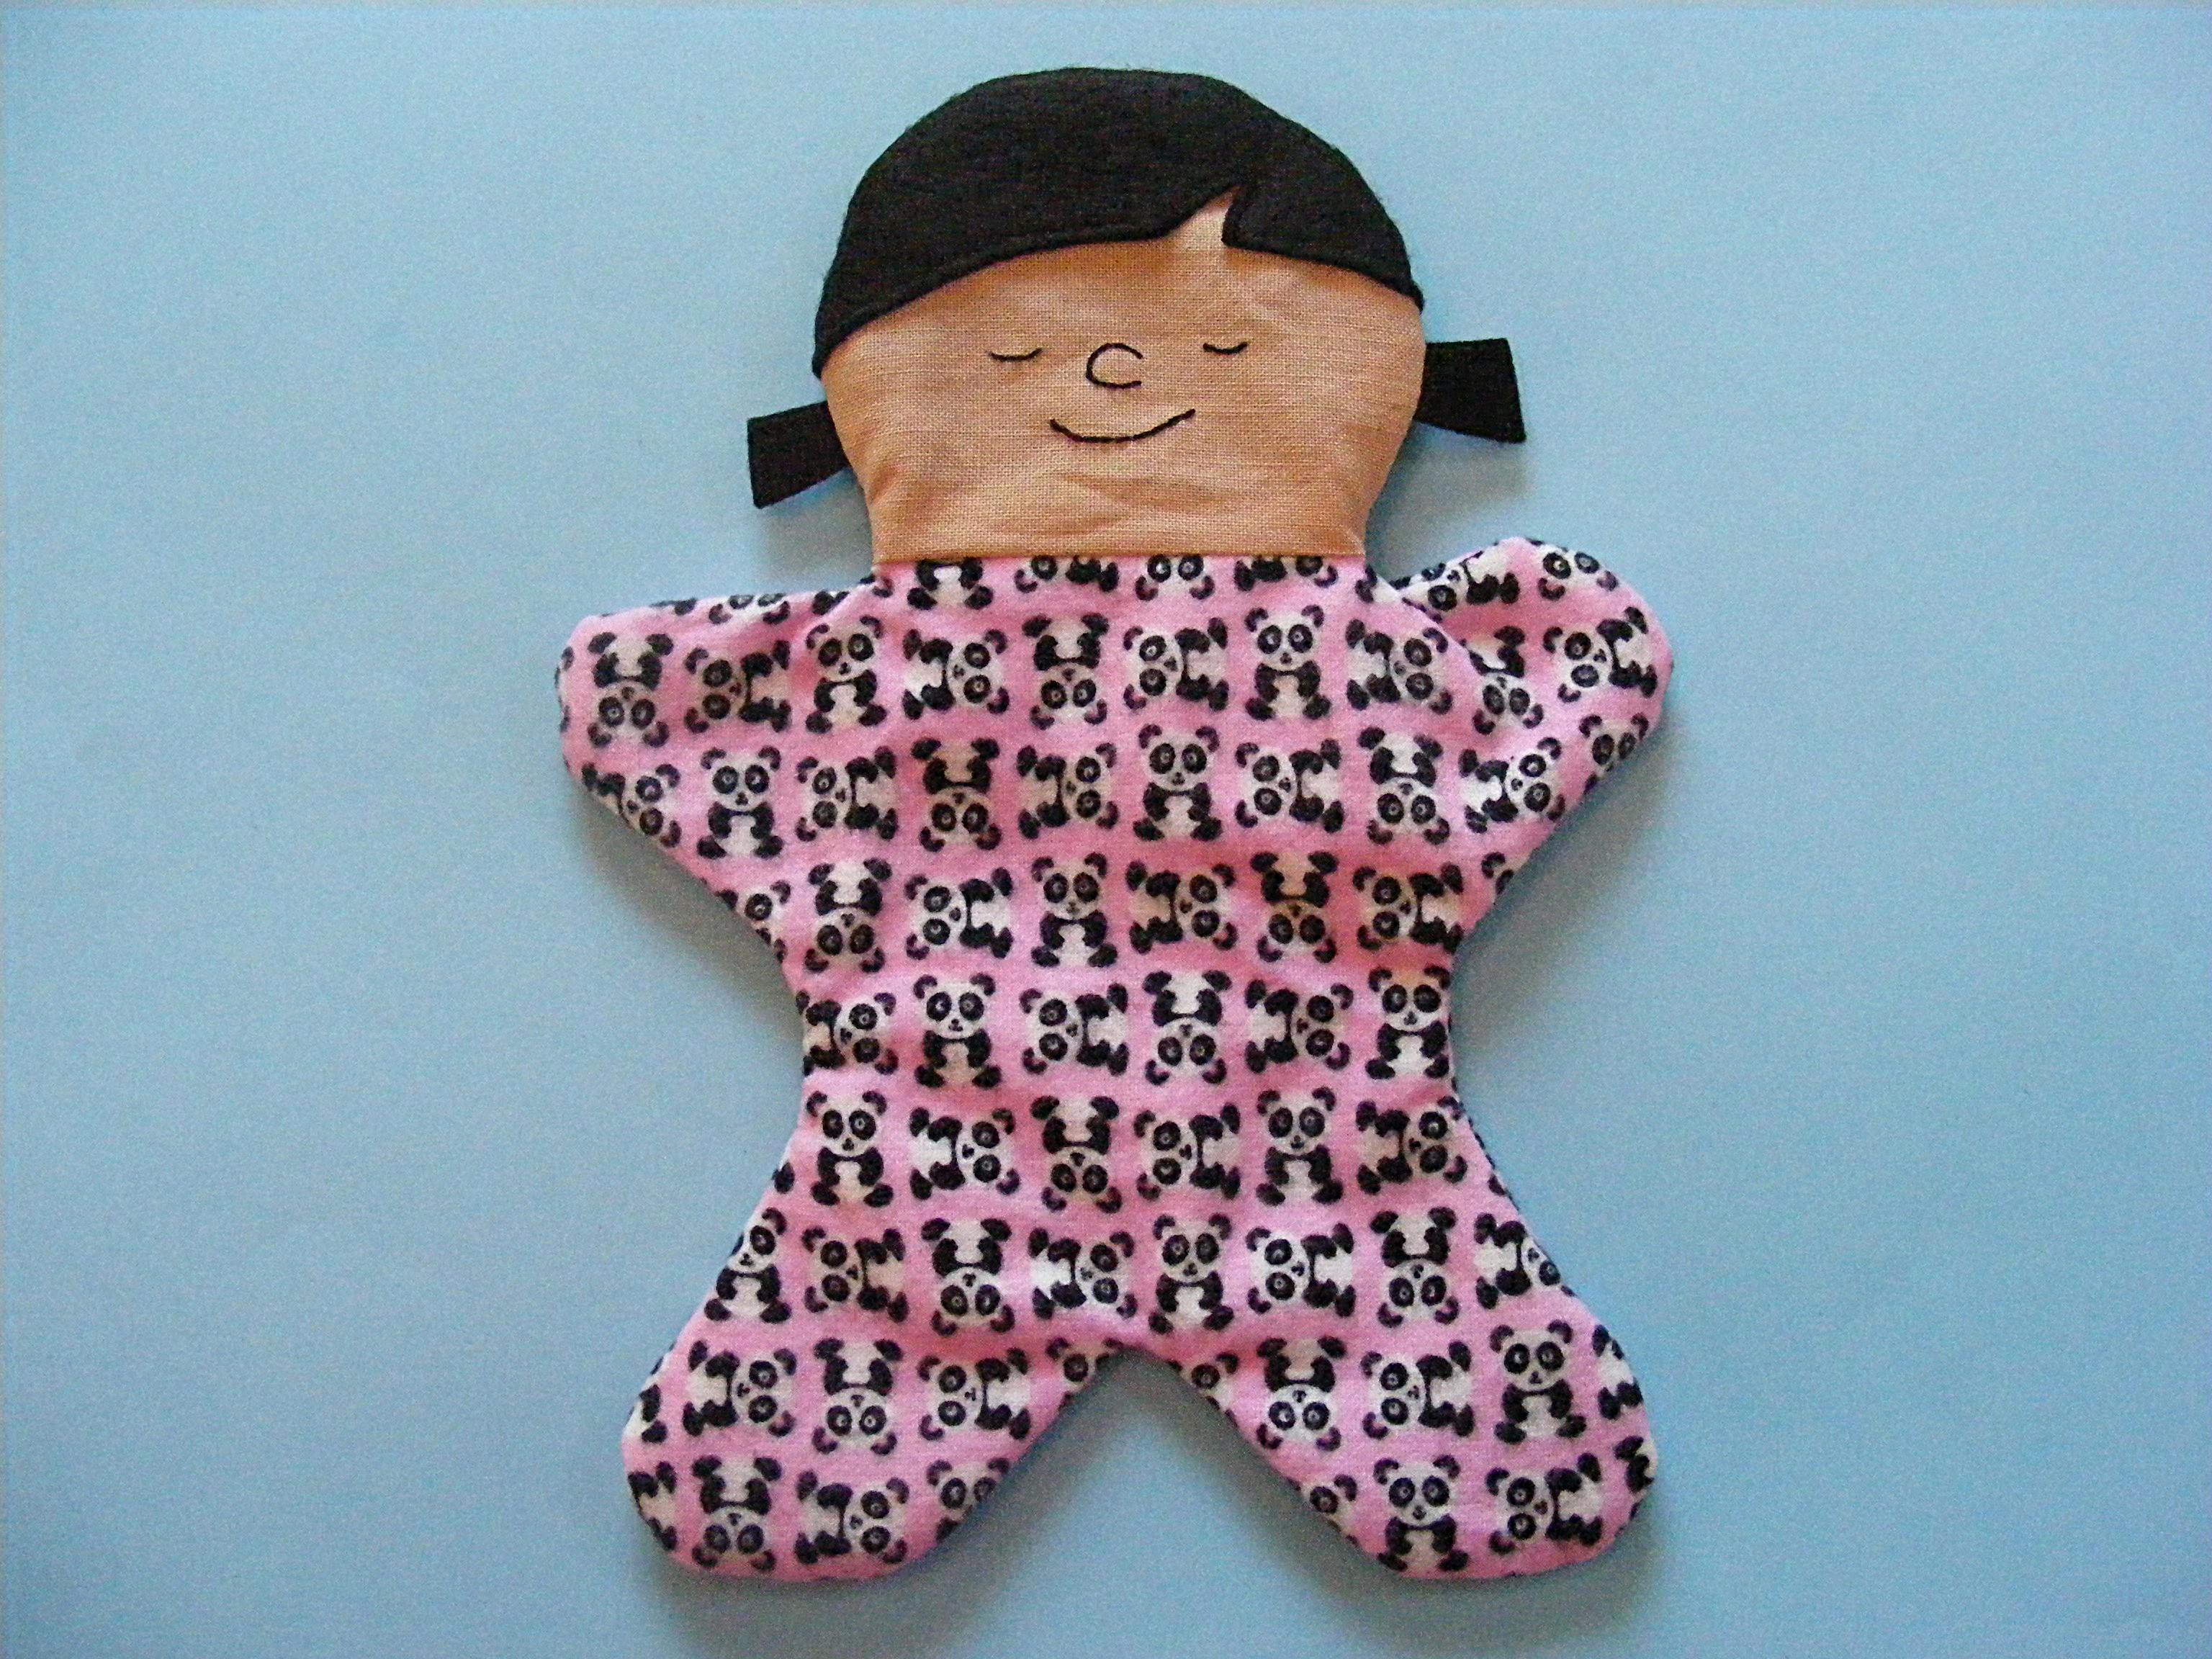
Awwww! Isn’t she a cutie? Take a moment to admire your work so far. She’s almost done!
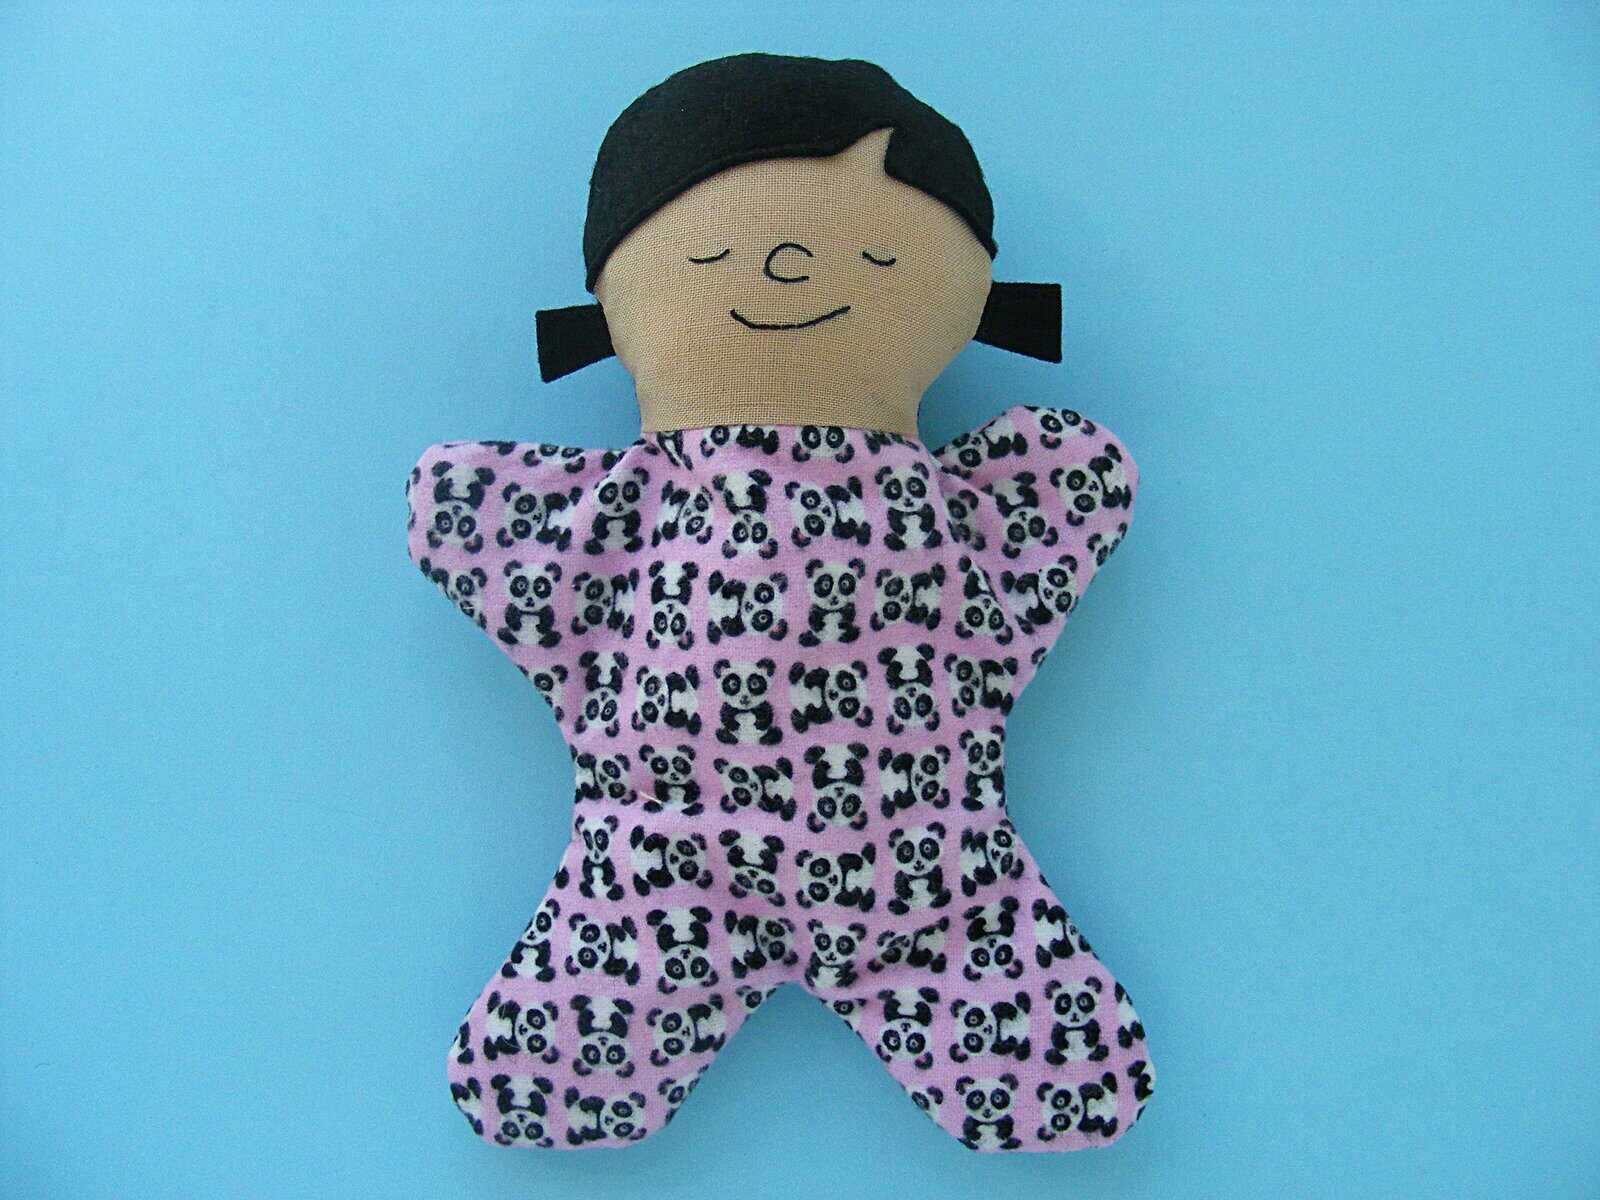
Step 12
Stuff the head pretty firmly with fiberfill.
Pour 1/2 cup of plastic pellets into the body and sew up the opening in the back using ladder stitch.
Finished!
Give her a big hug and then slip her into a special someone’s pocket. :-)
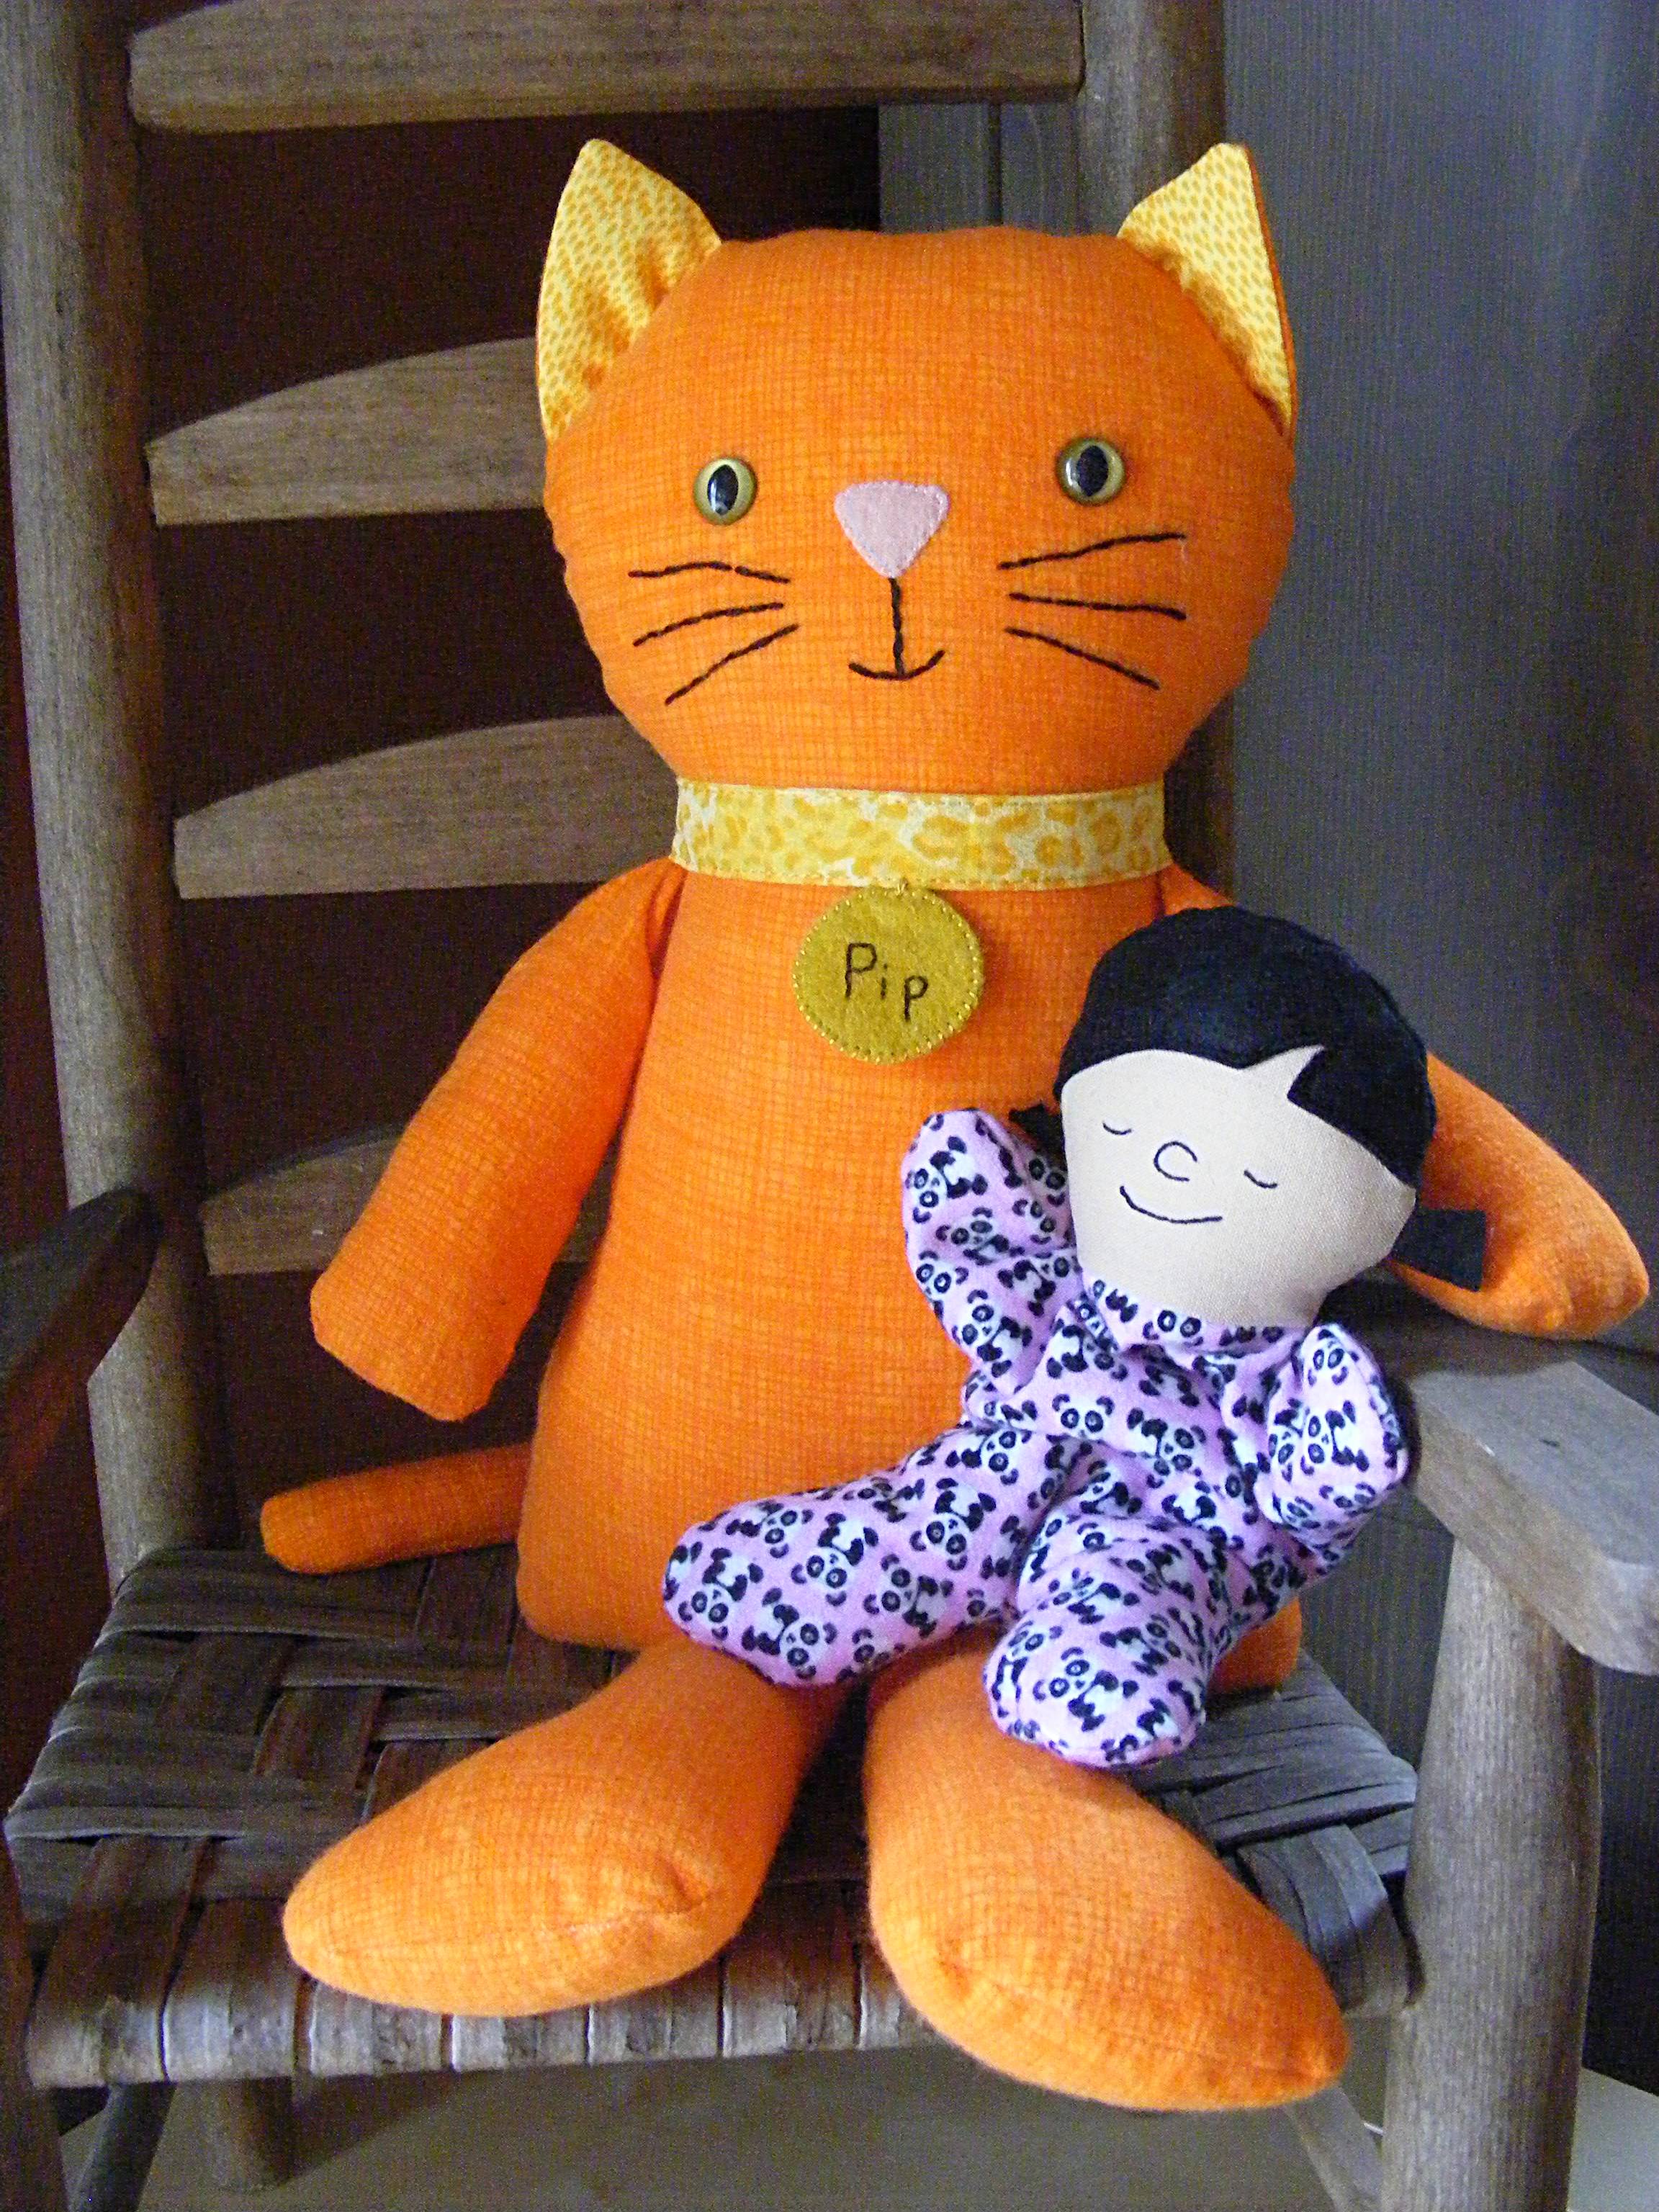
I designed her to be just the right size to work as a sweet baby doll for everyone in The Dress Up Bunch. Because dolls need dolls to play with, of course. :-)
Like all Shiny Happy World designs – you’re welcome to sell items you make with my patterns, but please don’t sell or distribute the patterns themselves. 🙂
If you like this free doll pattern, sign up for the Shiny Happy News! Subscribers get a weekly newsletter with updates, special offers and links to happy things. Sign up here.
Have a great weekend, everyone!
The Dress Up Bunch is a collection of cute and cuddly rag dolls. Get patterns for the dolls, plus all their fun outfits and accessories!
The easy charity quilt I made for Craft Hope is finished and on its way. I love how it turned out!
Craft Hope is an organization that partners with different organizations to collect handmade items for donation. I know lots of crafters like making items to donate and there’s always a demand for patterns for easy charity quilts, so when I made my Craft Hope Quilt I decided to share the how-to so you could make one too, if you’re so inclined.
It’s an easy and fun technique – great for beginners of all ages. I’ve been posting lots of in-progress photos as I go and I’ve been getting a ton of questions, so I’m going to answer them here all in one place. . .
How are you piecing and quilting the blocks all at once?
That is the magic of Quilt As You Go. It really is the perfect no-stress way to make a scrap quilt of this kind.
Yep. I have (had) a lot of scraps and I store them in baskets sorted by color – which made it really easy to make this kind of quilt without making a HUGE mess in my studio. It was more of a manageable mess. 🙂
If you did all the quilting while you pieced, how are you backing it? Do you have to quilt it again?
Here’s what the back of the quilt looks like.
I backed it in Cuddle Fleece – delightfully soft, cuddly, and easy to work with. I used it as the back of a quilt for my daughter a little over a year ago and she loves it so much that she basically told me I should never use anything else. 🙂
You can see that the front is nice and crinkly after washing – every seam is also quilted so it crinkles up nicely.
The back has a lot less quilting. I sewed all the finished, quilted blocks together, pressed the seams open, backed it with the fleece, basted it (I use safety pins) and then quilted 1/4″ from each block-joining seam. I like the kind of frame-ish effect around each block and I like the big grid on the back.
Each block is a 10″ square, finished, so the full quilt is 60″ wide and 90″ tall. You could very easily make it bigger or smaller just by adding or removing blocks. You could also change the size of the blocks, but I don’t think I’d make them much bigger – a 10″ grid on the back of the quilt works very well but there might be some bagging or sagging if you went a lot bigger. I’ve done some quilts with 12″ blocks and that works fine too.
Why don’t you spray baste?
I tried it once (many years ago) and it was a disaster. The fumes are pretty intense and you’re supposed to do it outside – but there’s no clean place in my yard to do it and I don’t have a clothesline to use for that method. So I tried it inside where the fumes almost killed me. I got overspray in my carpet (which was very hard to wash out) and then the adhesive gummed up my needle the whole time I was sewing. The product has probably improved a lot since then (I don’t even remember what brand I tried) but it will be a while before I’m ready to try it again. 😛
How do you pick your binding on a quilt with so many colors?
I really love to use black and white or dark grey bindings with a rainbow quilt like this. I actually would have preferred a nice crisp black and white stripe for this, but I didn’t have enough of that and I needed to ship the quilt out to make the deadline so I went with the black and white gingham-ish print you see in the photo above. I love black and white with bright colors!
That’s it!
With winter and the holidays coming, a lot of organizations are calling for quilts – especially twin quilts and crib quilts for kids in need and lap quilts for seniors. This is a fun technique for an easy charity quilt that even beginning quilters can make successfully. Kids can do it too! Give it a try!
All the detail stitching and bits of applique in this matroyshka doll were So Much Fun! I love a rich little project like this one – lots of detail for fun stitching, but it’s small so I can finish it in a couple of nights. 🙂
This is the ninth ornament in the Christmas Club collection. Here they all are so far. . .
You can still join at any time! The Welcome PDF that you get with your order has a link to access all the patterns that have gone out so far.
The club is closed now, but you can still get all the patterns!
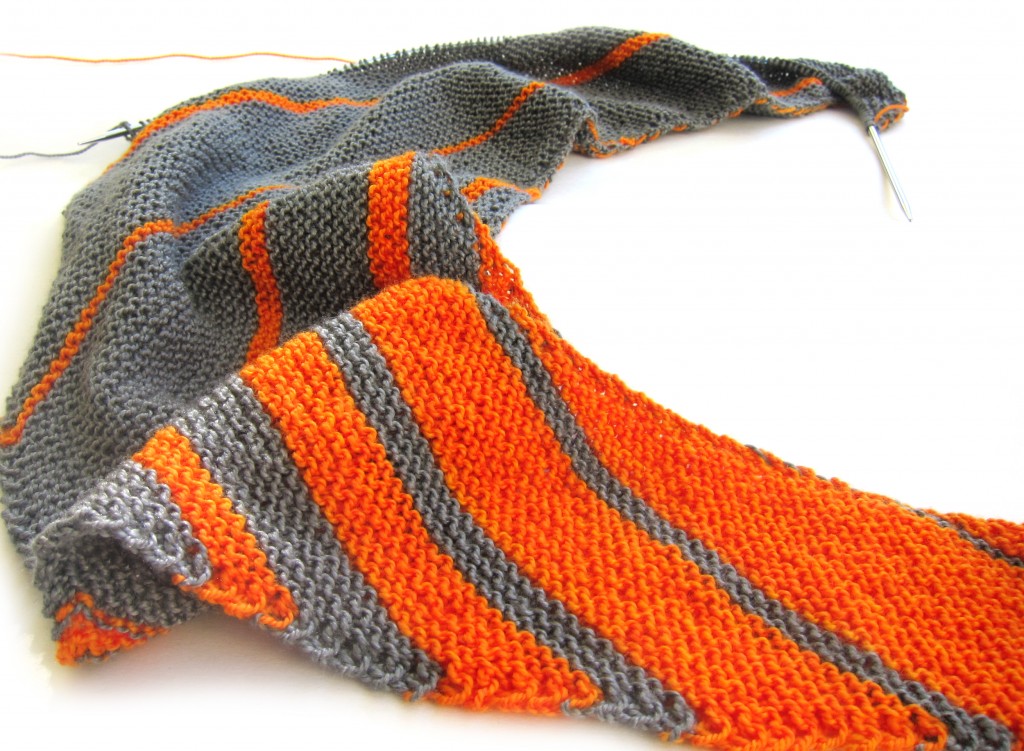
I’m knitting Phi, a fabulously fun garter stitch shawl.
The shawl has stripes that can be quite thick, so you need to carry the unused yarn up the side of the thick stripes. I came up with a little technique for how to do this in a way that’s nearly invisible on the right side (a modification of the technique suggested by the designer), and I thought you might be interested!
Here’s the video!
That’s what I’ve been up to this week… how about you? I hope you have an awesome Wednesday, and get some great knitting/crocheting done this week!
If you want to check out more Work-In-Progress posts, please check out Tami’s Ami’s Blog, who’s been organizing a great WIP Wednesday blog theme! And, don’t forget to come back for FO (Finished Object) Friday!
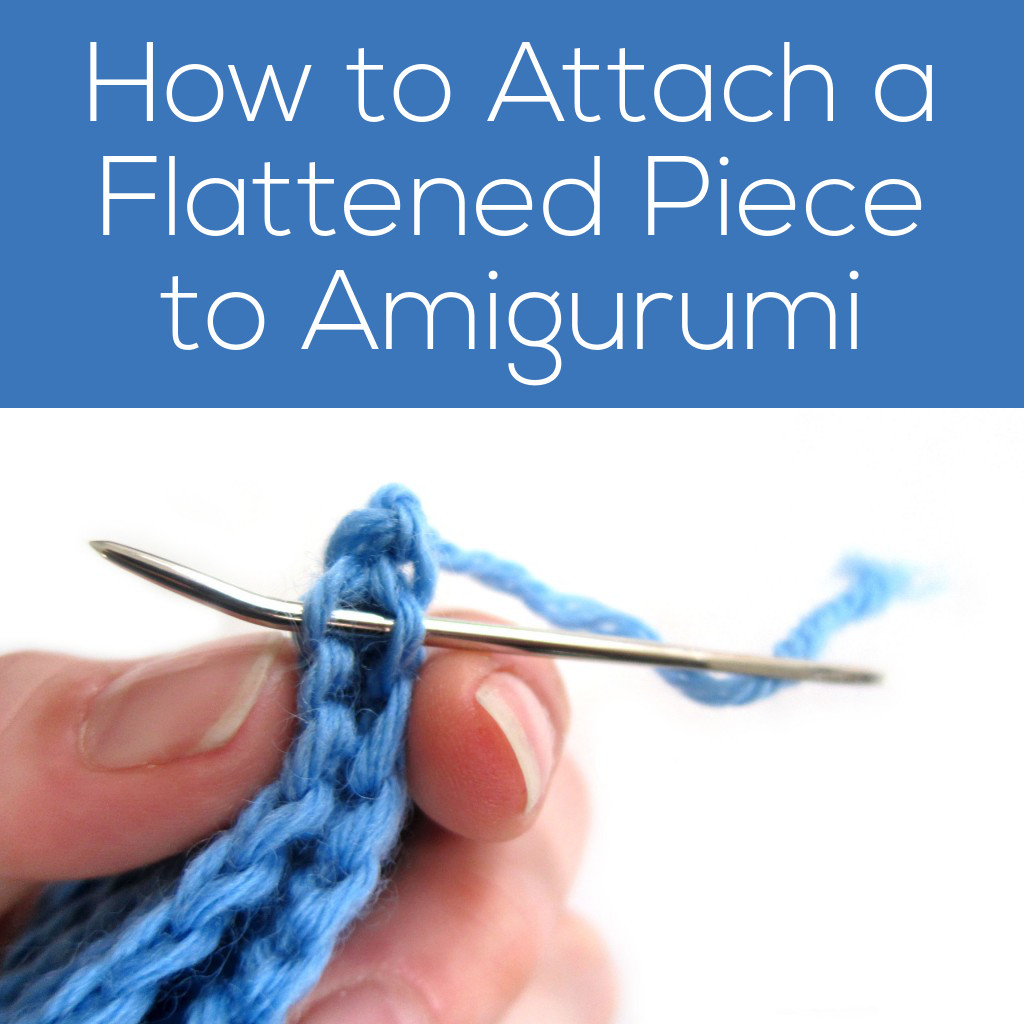
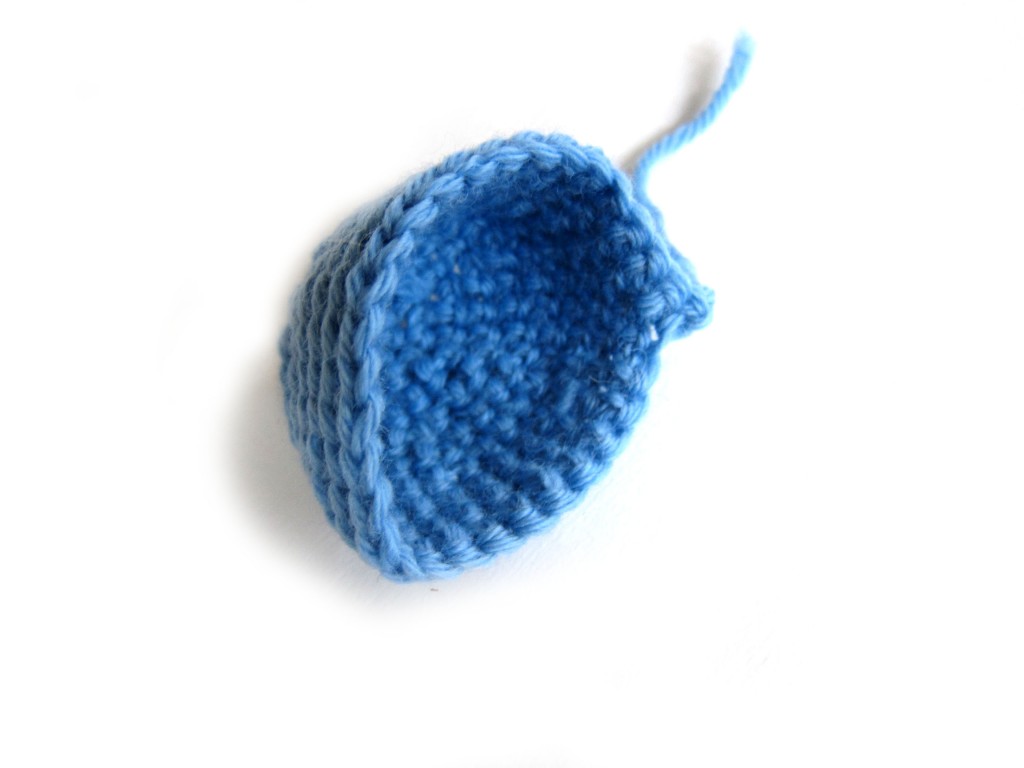
Every once in a while, you’ll come across instructions that tell you to ‘flatten piece, and attach’. But, what does that mean? Today, I’ll show you step-by-step!
Let’s assume we’ve followed the crochet instructions, and we have a piece (that’s been worked in the round), and we’ve fastened off. The piece will look something like this one:
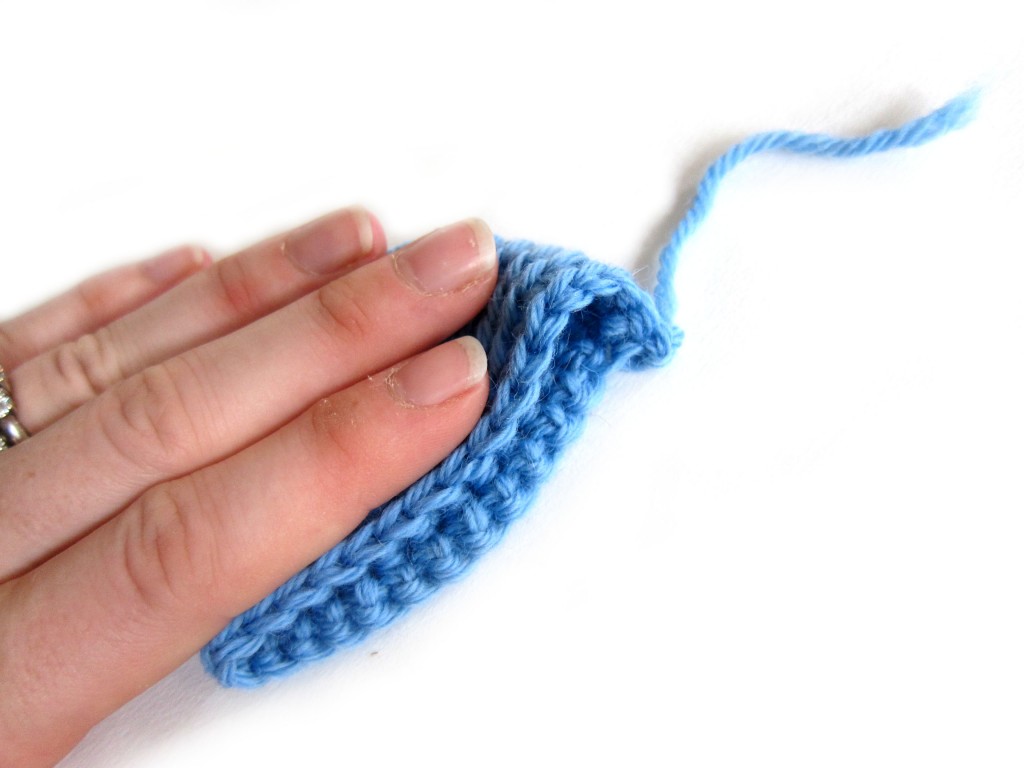
Now, we need to carry out the instruction ‘flatten piece’. It’s easy! Simply squish the piece closed, leaving your long tail on one side.
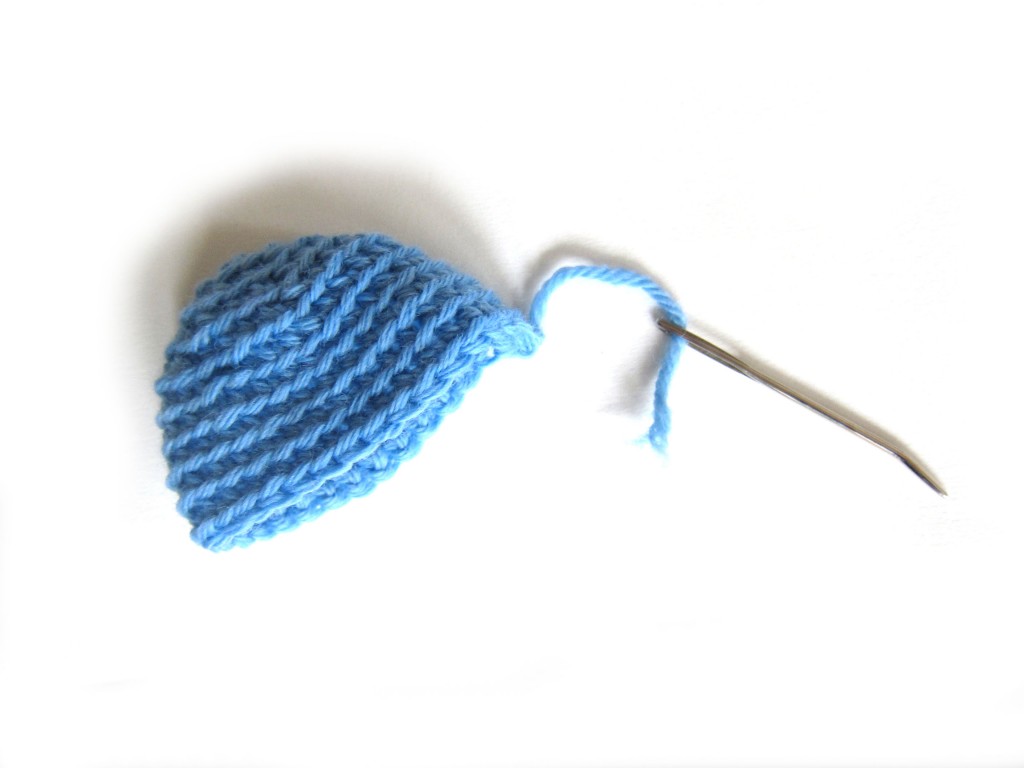
Thread the long tail of your piece onto a tapestry needle (mine is shorter than usual for photo purposes!).
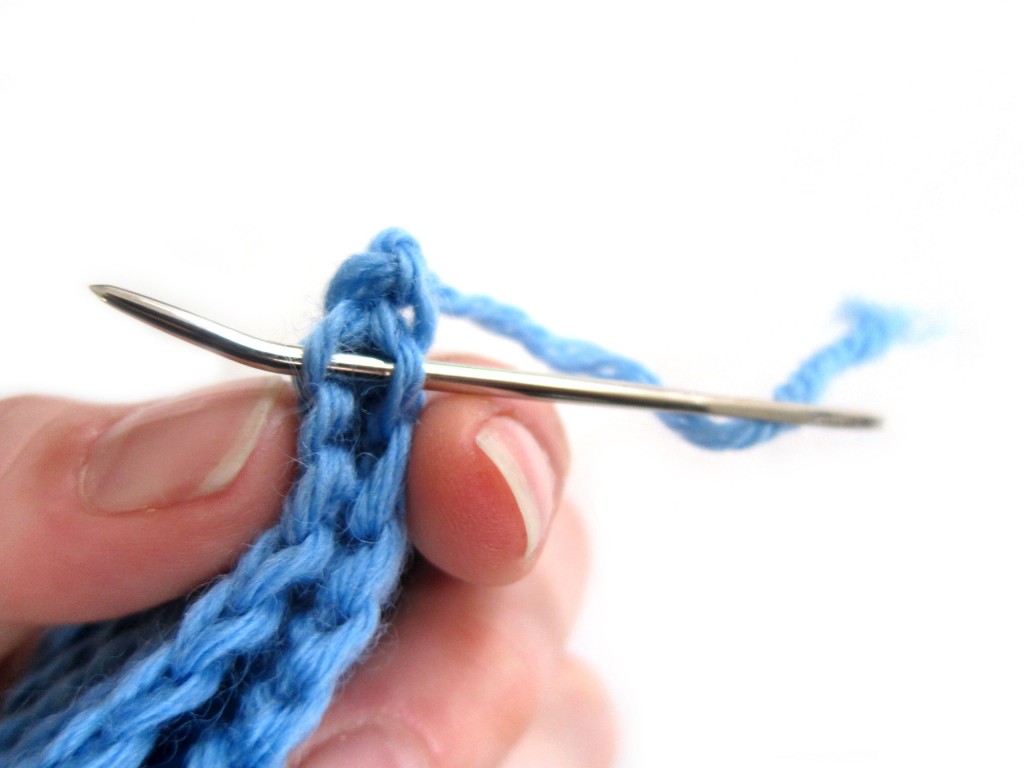
Now, we need to do the ‘attach piece’ part. To attach a flattened piece, the key is that you want to go through both layers of your flattened piece.
Run your tapestry needle through both layers of your piece, then through one stitch on your background work (just like you usually attach):
Now, just repeat this last step, until you’ve attached your entire piece! Yay!
Here are handy links to all the posts about attaching parts. . .
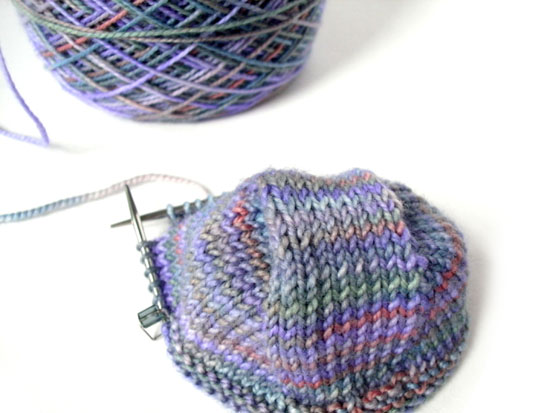
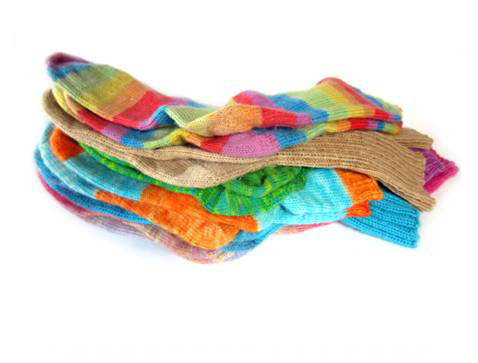
I love knitting socks. And I get a lot of questions about which resources I’d recommend for learning.
So, in today’s blog post, I’m going to give you a list of my favorite sources!
Your First Pair of Socks
Do you feel comfortable increasing and decreasing? Have you used double point needles? Great! Then you’re ready to knit your first pair of socks!
My Easy Peasy Sock Pattern is designed for the first-timer. It’s a pattern that’s easy to follow and gives you a nice (although thick) sock.
Socks knit by mmeglet on Ravelry
If it’s your first time, then there are a few things you should know. First, ssk is a decrease, not simply slipping two stitches and knitting the next. If you’re not familiar with the stitch, then watch this video. Second, turning the heel requires working short rows. They aren’t scary, but they’re weird. If you follow my instructions to the letter, your heel will come out perfectly. Don’t overthink it.
If learning from a written pattern isn’t for you, then I highly recommend Donna Drachunas’s Knit Sock Workshop on Craftsy. It’s a video course, so you’ll learn everything you need to know!
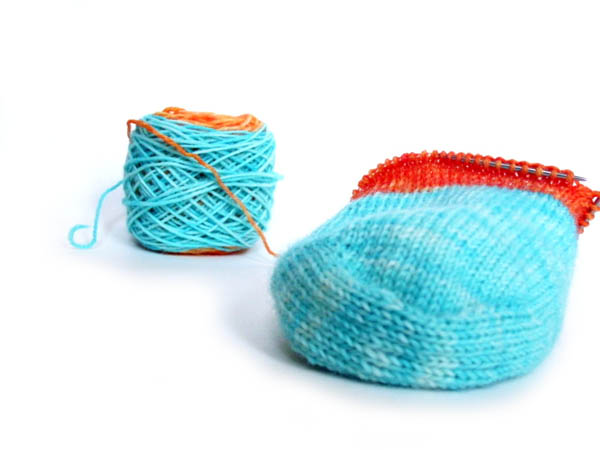
I designed my sock pattern to be the easiest to do… but it’s not the best-fitting sock. For your second sock, you’ll probably want to use fingering weight yarn and choose a different pattern. I adore the Basic Sock Pattern by Churchmouse.
I’ve knit 7 pairs of socks from this pattern. It’s easy to understand and contains lots of variations.
I also adore The Simple Collection by Tin Can Knits. I haven’t knit them yet, but I have no doubt that Rye is a fabulous sock to knit as one of your first.
You also might be prepared to ditch your double point needles. My favorite way to knit socks is with a 9″ Circular Needle. Read this post to see why I love them!
And more…
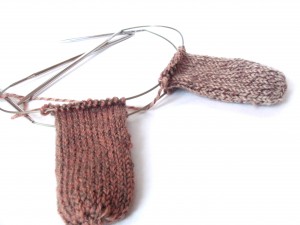
My second favorite technique is to use two circular needles. You can even knit two socks at a time! I highly recommend Antje Gillingham’s book for learning the technique.
Socks can become a lifelong addiction… they’re portable and fun to make. As you make more socks, you might get interested in more complicated patterns and designs. I have the book Sock Knitting Master Class: Innovative Techniques + Patterns From Top Designers, and it really gets your sock juices flowing. Check out this really interesting toe shaping I learned to do:
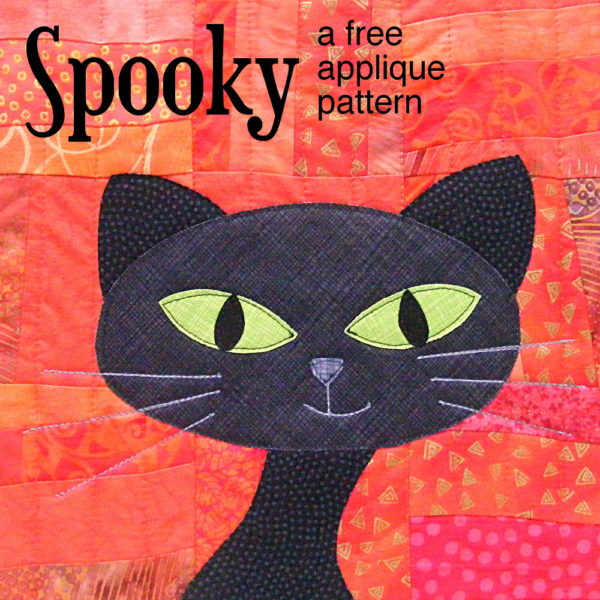
You can add this free cat applique pattern to your Cuddly Cats quilt pattern if you like. I designed it especially to have really terrific eyes for a black cat – but you can make it any color you like.
I love black cats! I grew up with two of them – Nasty and Gandalf. But it can be tricky to applique the eyes on a black cat. Almost all of my animals in all of my applique patterns have simple black oval eyes. That helps give all my designs a cohesive look – and they’re also simple to applique. But what if the animal you’re making is black? Black bears, black panda eyes, black raccoon eyes, black penguin eyes, and, of course, black cat eyes.
Especially for Halloween, I created this spooky black cat applique – a single block applique pattern – with huge luminous green eyes. I love her! And the pattern is the same size as the blocks in the Cuddly Cats quilt so you can mix and match if you like. 🙂
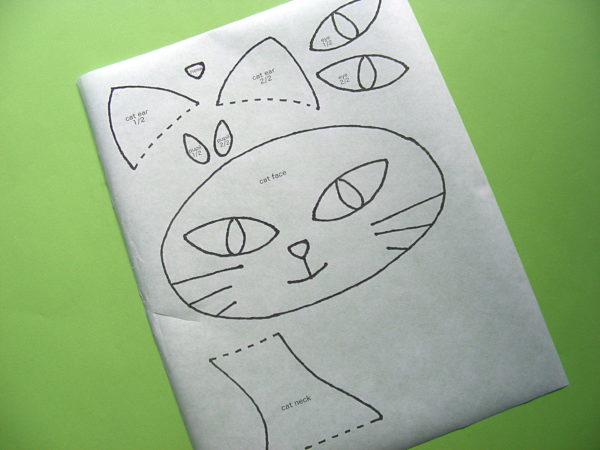
Trace or print the pattern onto the paper side of the fusible adhesive.
I use Heat & Bond Lite printable fusible adhesive sheets so I just printed out the page. No tracing!
The image has already been reversed, so just trace or print. If you’re tracing, be sure to trace the facial features too. You’ll need those for Step 5.
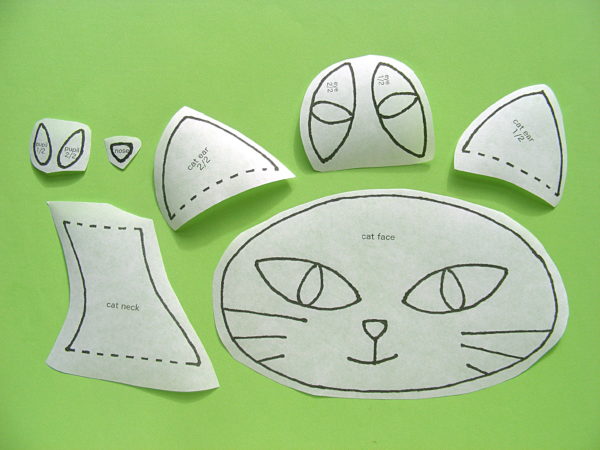
Step 3
Rough cut around each shape and fuse it to the back of your fabric.
Leave a little bit extra all the way around - a little extra extra (at least 1/4 inch) where there’s a dotted line, like the top of neck shoulders and the base of the ears.
Step 4
Cut around each piece neatly. Cut directly on the solid lines.
Leave a little seam allowance on the dotted lines - the top of the neck and the base of the ears will tuck behind the head.
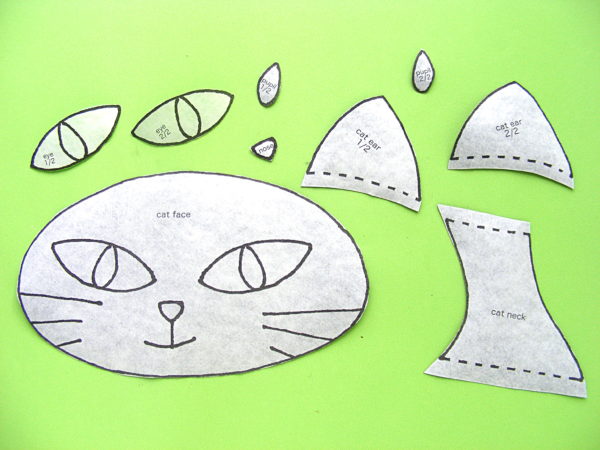
Step 5
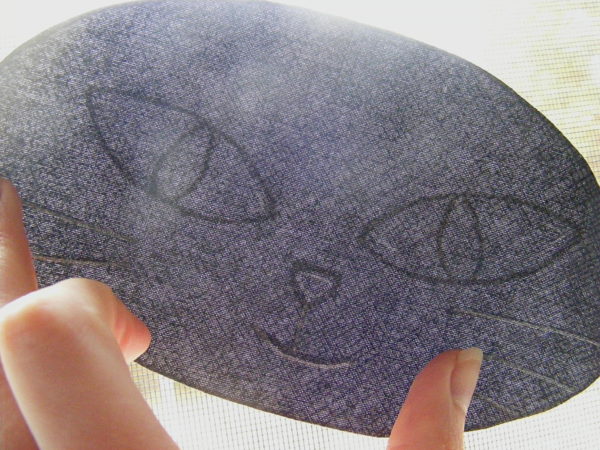
Remember when I told you to make sure you traced the facial features in Step 1? Now you’re going to use that. Hold the face up to a window so the light shines through it. You’ll be able to see the lines, and the adhesive will stabilize the fabric so you can trace on it without it crinkling up.
Since this is a dark fabric, I traced with a white chalk pencil.
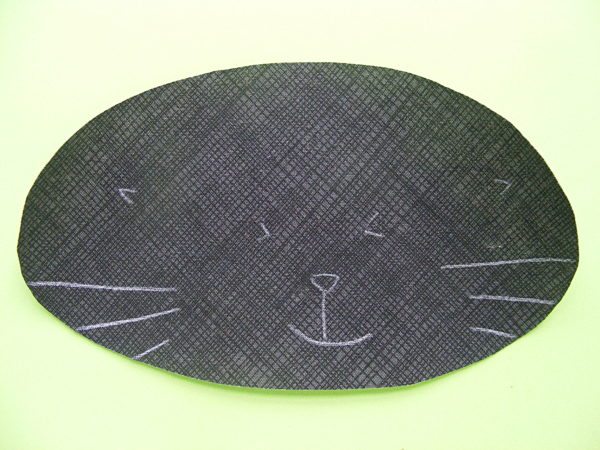
Here you can see all the tracing I did – without the light shining through.
I traced the whiskers and mouth exactly, since I’ll be stitching over those lines. I traced the nose a little smaller, and just marked the corners of the eyes to help me position the applique pieces later.
Step 6
If you’re doing Quilt As You Go (I did) then you can quilt your block before adding the applique. So easy!
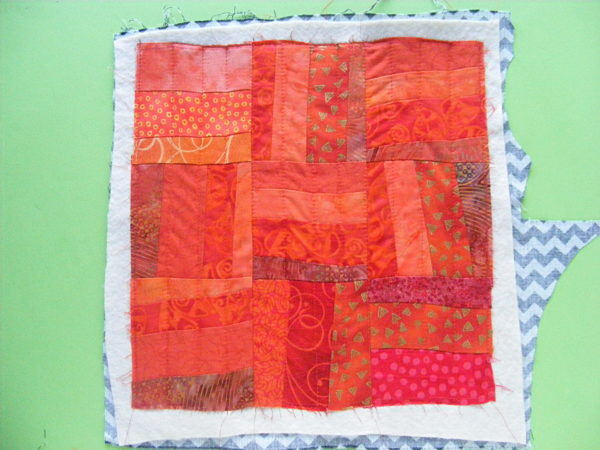
I used a bunch of orange scrappy strips all sewn together for a super textured background, but you can use just one solid square.
Cut your background fabric and a piece of 100% cotton batting 11 inches square.
Layer the block with a piece of 100% cotton batting. Quilt any pattern you like!