Adorable Easter Eggs – a free crochet pattern

Bowl of colorful crocheted Easter eggs made with a free pattern from Shiny Happy World.

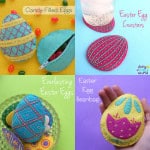
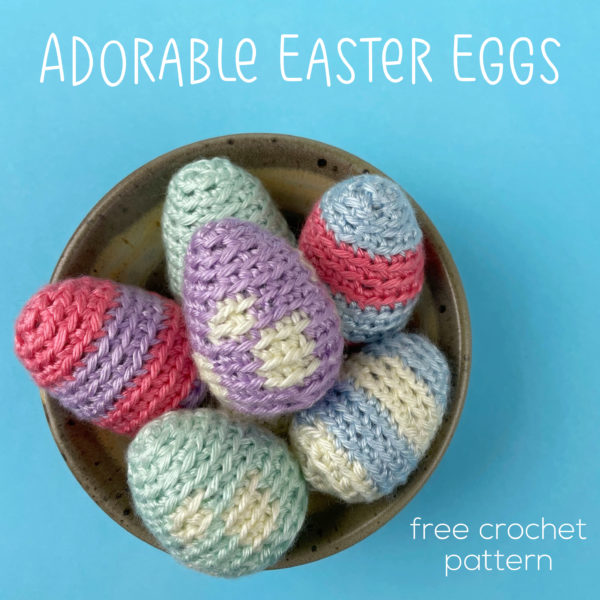
Stitch up some easy crocheted Easter eggs with this free pattern.

These little eggs are super fun to stitch up – and a great way to use up your smallest yarn scraps.

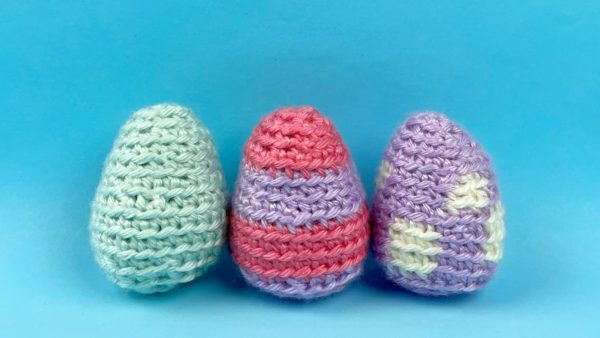
The pattern includes instructions for a plain egg, a striped egg, and a spotted egg.

Row of three colorful crocheted Easter eggs - one solid, one striped, and one polkadot

Are you new to crochet and you don’t think you have the skills? Not to worry! These crocheted Easter eggs are a really easy pattern – just increasing and decreasing – nothing to attach. Plus – the links within the pattern go to tutorials showing how to do each step.

If you’re just getting started, start with the plain egg. It’s a great way to learn the basic stitches – single crochet, increase, and decrease.

After you have one under your belt you can try some simple color changes.

Have fun!

You can use any size yarn for this pattern – but if you’re doing stripes or spots, make sure both yarns are as close to the same thickness as possible. Use the hook size recommended on the yarn band – or one size smaller if needed to get a nice tight stitch.

Plain Crocheted Egg

Start out with a sloppy slip knot.

Ch 2. This video shows how to chain stitch.

Round 1 Sc 6 times in 2nd ch from hook (6) This video shows how to single crochet, and this video will help you find the second chain from the hook.

Round 2 Sc twice in each stitch (12) This video will help you with that increase round, if you need it.

Round 3 Sc in each st (12)

Round 4 [Sc twice in next st, sc in next st] 6 times (18) If you’re confused by those brackets and parentheses, take a look at this post about How to Read a Crochet Pattern.

Round 5-6 Sc in each st (18)

Round 7 [Sc twice in next st, sc in each of next 2 sts] 6 times (24)

Rounds 8-10 Sc in each st (24)

Round 11 [Sc2tog, sc in each of next 2 sts] 6 times (18) This video will help you with this first decrease round.

Stuff the egg.

Round 12 [Sc2tog, sc in next st] 6 times (12)

Round 13 [Sc2tog] 6 times (6)

Round 14 Use the drawstring method to close up those last six stitches, leaving a perfectly smooth top. This video shows the drawstring method of closing up amigurumi.

Fasten off, pulling the knot towards the center. This video shows how to fasten off.

Done!

Striped Crocheted Easter Egg

For the striped egg you’ll be changing yarn colors. This video shows the basics of how to change colors when you’re doing single crochet, and this video has some tips for making those colors changes a little smoother.

MC is your main color. SC is your second color.

Start out with a sloppy slip knot.

With MC, ch 2.

Round 1 Sc 6 times in 2nd ch from hook (6)

Round 2 Sc twice in each stitch (12)

Round 3 Sc in each st (12)

Round 4 [Sc twice in next st, sc in next st] 6 times (18)

Round 5-6 With SC, sc in each st (18)

Round 7 [Sc twice in next st, sc in each of next 2 sts] 6 times (24)

Rounds 8-10 With MC, sc in each st (24)

Round 11 With SC, [sc2tog, sc in each of next 2 sts] 6 times (18)

Stuff the egg.

Round 12 [Sc2tog, sc in next st] 6 times (12)

Round 13 [Sc2tog] 6 times (6)

Round 14 Use the drawstring method to close up those last six stitches.

Fasten off, pulling the knot towards the center.

Done!

Polkadot Crocheted Easter Egg

For the spotted egg you’ll be changing colors for just a few stitches at a time. You do that just like the color change in the striped egg, EXCEPT you don’t need to cut and knot your yarn between those changes. Just drop one color and pick up the new color without cutting the yarn. The color you’re not using will just carry on the back of the work. This is called “stranding” and there’s a video showing how to do it here.

MC is your main color. SC is your second color.

Start out with a sloppy slip knot.

With MC, ch 2.

Round 1 Sc 6 times in 2nd ch from hook (6)

Round 2 Sc twice in each stitch (12)

Round 3 Sc in each st (12)

Round 4 [Sc twice in next st, sc in next st] 6 times (18)

Round 5-6 [With MC, sc in next 4 sts. With SC, sc in next 2 sts] 3 times (18)

Round 7 With MC [sc twice in next st, sc in each of next 2 sts] 6 times (24)

Rounds 8-10 [With SC, sc in next 3 sts. With MC, sc in next 3 sts] 4 times (24)

Round 11 [Sc2tog, sc in each of next 2 sts] 6 times (18)

Stuff the egg.

Round 12 [Sc2tog, sc in next st] 6 times (12)

Round 13 [Sc2tog] 6 times (6)

Round 14 Use the drawstring method to close up those last six stitches.

Fasten off, pulling the knot towards the center.

Done!

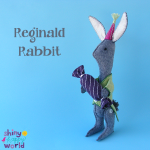
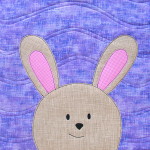
And here’s a sweet little lavender version of Blair Bunny. She’s traded her Halloween ghost costume for a pile of cute crocheted Easter eggs!
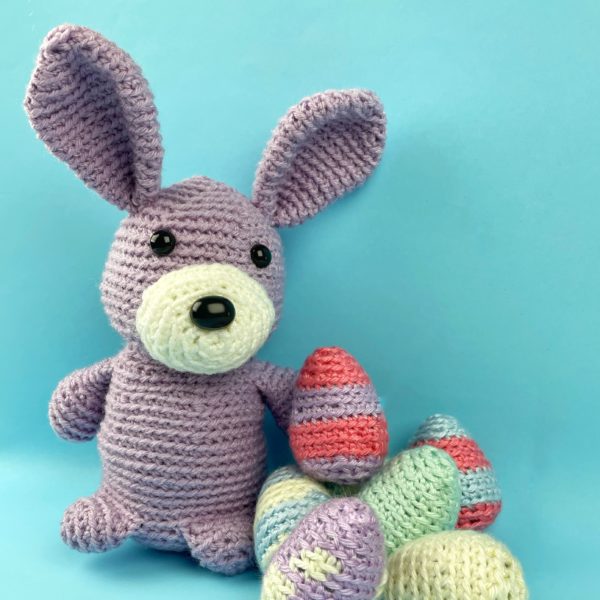
Lavender crocheted bunny with a pile of colorful crocheted Easter eggs made with a free pattern from Shiny Happy World.

Happy stitching!

Make a Quilt Block with Soft 3D Parts – video tutorial

Make a Quilt Block with Soft 3D Parts - a video tutorial from Shiny Happy World

It’s so much fun to make a 3D quilt! You can add soft 3D embellishments to any applique pattern – like the bunny ears you see above.

There’s a post here showing how to add small 3D pieces to an applique quilt – teeth and small bear ears.

And I teach several 3D options in my Cute Quilt-As-You-Go Applique Monsters class on Craftsy. Here are a few examples showing flappy ears, a silly satin tongue, and springy elastic curls.

Applique quilt blocks with 3D pieces - tutorial from Shiny Happy World

You can see that these are mostly longer 3D pieces that you want to flap and dangle. But what if you want them to stand up – like bunny ears?

You can do that for quilts – just like you can do it for stuffed animals.  Here’s the tutorial showing how to make stuffed animals with stand-up ears.

The technique for 3D quilts is basically the same – but it’s a tiny bit more involved because applique template pieces have no seam allowances – and you need to account for that if you’re going to sew them into flappy ears.

Don’t worry – it’s easy. I show you how to do it in this video.

See? Not hard at all.

Get the free Mix & Match Bunnies pattern here. That’s the pattern I used for the bunny in the demonstration.

Here are links to all the posts showing how to applique with fusible adhesive – my favorite method. It’s fast and easy and (with the right materials) it holds up beautifully to rough use and repeated washing.

Here are links to special posts about eyes.

Here are links to some extra fun things you can do with your applique.

Other Applique Methods

Finished with this topic?

Return to the Let’s Make a Quilt main Table of Contents.

Move on to the lessons about outline stitching.

Happy stitching!

Stuffed Animal Ears That Stand Up But Are Still Soft – Tutorial

Green stuffed bunny on a blue background. Text reads: How to Give Your Stuffed Animal Ears that Stand Up but Are Still Soft

It’s to give a stuffed animal ears that stand up!

I usually design my softies with floppy ears – often with a satin lining. I’ve known SO MANY kids who use softie ears like a blankie – clutching them or rubbing them as they fall asleep – that making blankie-like ears is kind of my default setting.

Bertie Bunny and Bartholomew Bunny both have floppy ears, and so does Elliott Elephant.

When I designed Benson Bunny (that spring green bunny you see in the top image) I wanted him to have ears that stood up straight.

I realized I had never made a stuffed animal with ears that stand up and I wasn’t sure how to do it!

Every stabilizer and interfacing I tried was either too floppy – or downright crunchy and hard. In desperation I turned to Betz White – bag-maker extraordinaire – and she suggested a product called Soft & Stable right away. She even sent me a sample to try and it was perfect!

Here’s what I love about it. . .

  • It’s easy to work with. You can sew right through it.
  • It’s stiffer than batting and really maintains its shape – but is still soft and cuddly. You can fold those ears over and they’ll spring right back up.
  • It’s very lightweight.
  • It’s machine washable and dryable.
  • It gives a really professional look to your finished softies.

I included instructions for using it in Benson’s pattern. But I realized I never posted general instructions for it here.

The thing is – you can use this with ANY pattern – even one that I designed with floppy ears!

So – here’s how to give any stuffed animal ears that stand up – but are still soft and cuddly.

First – there’s a link to a source for Soft & Stable on this page of my favorite tools and supplies.

Any pattern will have you cut an ear front and an ear back for each ear. They’ll always be cut from the same pattern piece so they go together. You need to cut an extra layer of Soft & Stable from that same ear pattern piece.

So for each ear you’ll have an ear front (I do love making that piece satin or other contrasting fabric), an ear back (usually out of the main fabric), and a third piece that will be hidden inside the ear cut from the Soft & Stable.

The sometimes mind-bendy part is assembling the layers. You want the front and back sewn together with the foam in between, but how do you stack the layers so when you turn it right side out it works?

Easy.

Stack the front and back ear pieces just like you normally would – right sides together. I like to start with the main fabric piece face up, then the lining fabric piece face down. Now just add the foam piece to the stack.

That’s it!

Sew around the edge of the ear just like the pattern says.

Here’s Benson’s sewn ear from the foam side of the stack.

Bunny stuffed animal ear shown after sewing and before turning it right side out.

And here it is from the main fabric side of the stack.

The same ear show from the other side

See the pink lining fabric peeking out between the green and the foam?

When you turn it right side out (I love to use turning tubes) make sure to reach in and turn between the main layer and the lining layer. That way you’ll end up with the foam between the two layers. 🙂

Done!

Now treat it just like an ear that doesn’t have the layer of foam in there.

If the pattern says to fold the sides in – that’s fine!

Bunny stuffed animal ear - folded in on the sides and ready to attach

You can fold and sew through the foam just like batting or almost any other stabilizer. It’s beautiful stuff!

You can use the same method to add 3D parts to quilt blocks! See that tutorial here.

Happy stitching!

How to Make a Pompom Tail – video tutorial

How to Make a Pompom Tail (and attach it to amigurumi) - a video tutorial from Shiny Happy World

We’re hopping into spring – which means it’s a useful time to know how to make a quick and easy pompom tail. 🙂

There are lots of great pompom tools out there (I especially love this adorable llama-themed one from Betz White) but sometimes you just have your hands and a pair of scissors on hand. That’s all you need for this method. 🙂

Be super careful not to cut those long tails! You saw how useful they are for attaching your bunny tail. 🙂

Want the pattern for that bunny? Get the Ringo Rabbit pattern here.

Here are handy links to all the posts about faces and details. . .

Return to the main table of contents for Let’s Learn to Crochet Amigurumi.

Move on to the lessons about eyes.

Happy stitching!

Easter Craft Ideas – Free Embroidered Felt Egg Pattern

Easter Craft Ideas - make a pretty embroidered felt egg with this free pattern

Looking for some easy and fun Easter craft ideas?

You (yes, you!) can stitch up a lovely felt egg just like this one. What do you need? Some felt. Preferably wool felt. It’s dreamy to stitch on and you can find it in hundreds of gorgeous colors.

You’ll need embroidery thread. Use any colors you like – either an assortment of colors like the sample above, or one color for a very simple, classic egg.

You’ll need a needle. I stitched my sample with three strands of thread – for that I recommend a #5 or a #8 embroidery needle.

You’ll need the pattern – of course. Download that here. It’s full-sized, so no enlarging needed.

You’ll need a bit of stuffing. A handful of cotton balls will do the trick.

Finally, there are a couple of optional items that I strongly recommend to make your stitchy life better. Sulky Sticky Fabri-solvy is fantastic for transferring patterns to felt (as you’ll see below) and Thread Heaven just makes your thread behave really nicely.

You can find a list of my favorite tools and supplies (with links to sources) here.

Do you have questions about working with felt? I answer a bunch of common questions here – including info about how to transfer an embroidery pattern to felt.

Here’s how to make it. . .

Step 1

Download the pattern here. Print or trace the pattern pieces onto Sulky Sticky Fabri-solvy. (Learn more about how to use this fabulous stuff here.)

Step 2

Rough cut around each piece and stick it to the felt.

Step 3

Embroider the design. You’ll be stitching right through both the stabilizer and the felt. I used a combination of the following stitches – the links below take you to videos teaching you how to do them if you’re new to embroidery.

Easter craft ideas - free tutorial to make a pretty embroidered felt egg

I used three strands of thread for all my stitching. It’s all white thread on Norwegian blue felt. The top sample used straw felt.

Repeat for all four wedge shapes.

Step 4

After you’re done with all the embroidery, cut the four pieces out neatly on the outline.

Easter craft ideas - make a pretty felt Easter egg

Step 5

Soak off the stabilizer. This is the magical part! Drop the pieces face down in a bowl of cold water and let them sit there for about an hour. The stabilizer will get all mushy and soft. Rinse it off under cold running water. If any bits are stubborn, just hit them with a kitchen sprayer and that should do the trick. Don’t rub the surface of the felt – just let the running water do its thing.

Easter craft ideas - pretty felt egg pieces waiting to be stitched together

Set them flat on a towel and let them dry. Don’t wring them out, twist them, or even smoosh them. Just lay them sopping wet on a towel and let them dry.

Step 6

Place two egg pieces wrong sides together and stitch them together along one edge. I used running stitch, which leaves a nice ridge that I like along the seams of the egg. If you want a smoother finish you can use whipstitch instead.

Easter craft ideas - two embroidered egg pieces stitched together

Repeat for the second pair of pieces.

It’s easy to mix up the ends – one is a little pointer than the other and has a bit more lattice. Make sure you put matching ends together.

Step 7

Put your pairs together (make sure the matching ends are together) and sew the last two seams. Leave a couple of inches of the last seam open for stuffing.

Easter craft ideas - embroidered egg is almost finished

It will be easiest to sew your egg together if you let it collapse into a deflated football kind of shape.

Step 8

Stuff your egg and finish sewing up the opening.

Easter craft ideas - free tutorial for a pretty embroidered felt egg

You can totally make this!

Looking for more Easter craft ideas? Click here for all kinds of Easter crafts – sewing, quilting, crochet and embroidery. 🙂

If you like this free pattern, sign up for the Shiny Happy News! Subscribers get a weekly newsletter full of sewing tips and tricks, free patterns, special discounts, and other things to make you smile. 🙂

Happy stitching!

Easter Crafts You Can Make – Sewing, Quilting and Embroidery Patterns

Easter crafts - easy (and sometimes free!) sewing, quilting and embroidery patterns from Shiny Happy World

Easter is early this year – March 27 – so it’s time to start thinking about your Easter Crafts. What do you want to make?

I could just link to the Easter section of my shop – but then you wouldn’t see all the fun free patterns that are available!

(And there are a lot of them.)

So I created this handy dandy round-up post with all the patterns for all my favorite Easter crafts. Just click on the image to go to that project!

Easter Stuffed Animals

Some are big and huggable. Some are small and pocketable. They’re all easy and fun to make.

Easter Felt Projects

Spend a lovely spring afternoon stitching one of these by hand.

Easter Quilt Blocks

Make a kajillion bunnies with a fun mix & match pattern.

Easter Embroidery patterns

Stitch them on tea towels, baby onesies and more.

Other Easter Sewing Patterns

Including Dress Up Bunch dolls and clothes!

Of course, there are lots of spring-themed patterns too – but I stuck to Easter crafts for this post. 🙂

So whether you like to sew, quilt or embroider – stitch by machine or by hand – I’ve got an Easter craft pattern for you. Have fun with them and be sure to share what you make in the Shiny Happy People group on Facebook!

Happy Easter! Happy spring! Happy stitching!

Best,
Wendi
That's me!

Easter crafts - easy (and sometimes free!) sewing, quilting and embroidery patterns from Shiny Happy World

Free Easter Embroidery Pattern – Little Chick with Big Feet

Little Chick with Big Feet - a super easy and cute Easter embroidery pattern free from Shiny Happy World

Here’s a super simple Easter embroidery pattern – easy enough for even the littlest kids to stitch.

I originally published this back in 2011 – but now it’s updated with new images and links to video tutorials. I can’t wait to see the new chicks you make!

Back when I released the chickens embroidery pattern, people said they especially liked the little egg-shaped chicks with big feet.

I told you they’d be back again and here one is – sized a bit bigger – as a free pattern. 🙂

Click here to get the free Easter embroidery pattern.

It’s lots of fun to decorate that egg-shaped body for Easter!

Of course, you can fill in the shape with all kinds of stitching in any design you like – but there are a couple of other options that are a lot faster.

You can add a little fusible applique to the project and then just stitch the outline. This video shows how easy it is to use applique as a sort of fill stitch. That’s how I made the sample you see up top.

For a really fun option, you can color the egg with colored pencils before you stitch. There’s a video here showing that technique in complete detail. In a nutshell, fuse some freezer paper to the back so the fabric behaves better, then color it in just like paper. If you’re going to hang the finished chicks on the wall you don’t need to worry about heat setting the pencils or anything like that. Stitch the outline after you’re done coloring and hoop it up for framing.

Look at the cute little Easter chicks my daughter made that way! (The other two chicks are from the chickens embroidery pattern.)

Little Chick with Big Feet - a super easy and cute Easter embroidery pattern free from Shiny Happy World

I love framing each tiny chick in its own hoop. They make a really cute Easter decoration hanging in a cluster.

Remember – it’s a cute Easter embroidery pattern – but chicks are cute all year long! You can stitch this to a baby onesie, applique it to a receiving blanket, stitch it on a tea towel or baby bib and more. Have fun with it!

Sign up for the weekly newsletter so you never miss out on free patterns like this one!

Happy stitching!

Free Bunny Softie Pattern

Itty Bitty Sleepy Bunny - a free beanie bunny softie pattern from Shiny Happy World

It’s a free bunny softie pattern! With a soft beanie body and small size, this Itty Bitty Bunny is just perfect for Easter baskets! And it’s super easy to make!

It can’t wait to hop into the pocket of someone special. 🙂

Here’s how to make it!

Materials

  • scrap bunny­-colored fabric
  • scrap of pink satin for the bunny ears
  • less than a fat quarter of pajama fabric
  • embroidery thread for the face (I DMC #3371 and #601)
  • plastic pellets (I like Poly­Pellets Weighted Stuffing Beads)
  • polyfill stuffing (I like Soft Touch Poly­fil Supreme Fiberfill)

Step 1

Download the pattern templates.

Cut out all materials as directed on the pattern pieces. You should have. . .

  • 1 body front piece
  • 2 body back pieces
  • 2 head pieces
  • 2 ears cut from bunny fabric
  • 2 ears cut from ear lining fabric

Step 2

Trace the face onto one head piece.

Embroider the eyes and mouth using backstitch and two strands of DMC #3371.

Satin stitch the nose with two strands of DMC #601.

Step 3

Place one ear lining and one ear piece right sides together and sew around the top (curved) edge.

Turn the ear right side out and press. Fold the bottom edges in to the center of the ear and stitch them in place.

Repeat for the second ear

Step 4

Sew the two body back pieces together along the center back line, making sure to leave a few inches open for stuffing.

Don’t forget to backstitch at the beginning and end of your stuffing opening.

Step 5

Open up the center back pieces and press the seam nice and flat, including the edges of the stuffing opening. That will give you a nice clean edge to sew when you’re closing up that opening by hand.

The stick shows where the stuffing opening is.

Step 6

Fold the bottom of the head and the top of the body in half to find the centers. Line those centers up so the head is exactly centered on the body.

Sew the face to the body front and the other head piece to the body back.

Step 7

Fold the heads up and press.

The seam allowance should be pressed toward the head so the body remains flat.

Step 8

Lay the body front face up on a flat surface.

Lay the ears face down over the face as shown in the photo. Don’t worry about making them perfectly even ­ crooked is cute. :-­)

Pin in place.

Step 9

Place the body back face down over the front, sandwiching the ears between the layers. Pin or clip the layers together carefully.

I match the neck seams first, then the center bottoms, then the dips at the sides and then the tips of the arms and legs and the head.

Step 10

Sew all the way around the body using 1/4 inch seam allowance. Make sure you’re catching the ears.

Clip into the seam allowance at all the concave curves and points as shown in the photo.

Step 11

Turn the body right side out.

Awwww! Isn’t that a cutie? Take a moment to admire your work so far. You’re almost done!

Step 12

Stuff the head pretty firmly with fiberfill ­ but not past the neck.

Pour 1/2 cup of plastic pellets into the body and sew up the opening in the back using ladder stitch.

Finished!

All done! Give it an itty bitty hug and then slip it into a special someone’s pocket. :­)

It’s a pocket-sized softie for your kids – and a snuggly bedtime softie for your kids’ dolls. Take a look at the Itty Bitty Bunny with one of the Dress Up Bunch dolls.

Emily with her Itty Bitty Bunny - patterns from Shiny Happy World.

Because dolls need softies to play with, of course. :­-)

Have a great weekend, everyone!

Best,
Wendi
That's me!

The Dress Up Bunch is a collection of cute and cuddly rag dolls. Get patterns for the dolls, plus all their fun outfits and accessories!

Free Bunny Applique Pattern with Fun Mix & Match Parts

three stacked bunny faces made with the free Mix & Match Bunny Blocks applique pattern


I’ve been thinking about designing a bunny applique block for a couple of years now, but Easter always seems to come and go before I have a chance to do it.

But not this year!

And I didn’t just design a bunny block – I designed a free bunny applique pattern with mix & match parts so you can play with it to make lots and lots and lots of unique bunnies. 🙂

Playing is good!

The pattern has three bunny head shapes, three bunny ear shapes, and three bunny faces. You can mix and match those for (I think) 27 possible bunnies. Throw in different color possibilities and you could make a king-sized quilt with no repeated blocks!

Download the pattern here.

If you’ve made any of my quilts, the construction will look familiar. The patterns have already been reversed and exploded so they can be printed right on my beloved printable fusible adhesive. No tracing! La la la la la.

I strongly recommend prewashing any fabric you use with fusible adhesive. The sizing on the unwashed fabric can resist the adhesive. And don’t use fabric softener in your wash – it can do the same thing. (Dryer sheets are fine.)

You can trace onto your favorite fusible if you want to, but I’m lazy and like to skip right to the fun part.

If you prefer the freezer paper applique technique you can print the pieces onto freezer paper, but the instructions I’m giving here are for applique with fusible adhesive. For a complete overview of that technique (my favorite) click here. Find general instructions for freezer paper applique here, and needle turn applique here.

I’m completely in love with the Quilt As You Go method, so I did all the outline stitching and quilting through the top fabric and the batting. I usually do the quilting before I do the applique so I don’t have to work around the pieces. Easy peasy.

Cut each background block 10 1/2″ square.

Step 1

Roughly cut out the pattern pieces and fuse them to the back of your fabric.

Mix & Match free bunny applique pattern from Shiny Happy World

Step 2

Cut out the pieces neatly. Cut right on the solid lines. Leave a little extra seam allowance where there’s a dotted line – that bit of the piece will tuck behind another bit for a clean finish.

Mix & Match free bunny applique pattern from Shiny Happy World

Step 3

Choose a face and trace it onto the face piece.

Mix & Match free bunny applique pattern from Shiny Happy World

If you tape the face in a window and then hold the face fabric up against it, the image will shine right through for easy tracing.

I usually trace just inside the eyes and nose (so I don’t have to be perfect with how I position those applique pieces) and right on the mouth because I’m not using an erasable pen. Don’t use a Frixion pen to mark the face! It will disappear when you fuse the pieces together and you will be sad. 🙁

After I’m done tracing the face, I fuse the eyes and nose to black fabric for their applique pieces.

Step 4

Play around with the placement of the ears.

Mix & Match free bunny applique pattern from Shiny Happy World

Do you want them standing straight up? Spread wide? Wonky and uneven? There is no right answer – they’re all cute. Do what you like!

Step 5

Layer all the pieces and fuse in place following the manufacturer’s instructions.

Mix & Match free bunny applique pattern from Shiny Happy World

Don’t forget to tuck the base of the ears and inner ears behind the head before you fuse.

Step 6

Stitch around all your pieces.

Mix & Match free bunny applique pattern from Shiny Happy World

I machine stitch with regular all-purpose black thread with basic straight stitching everywhere. I love the cartoony look it gives! I go over the mouth twice to give it extra weight.

For help with those tight curves, watch this video.

If you don’t want to applique the eyes and nose, you’ll find several other options here.

Done! With that block, at least. 🙂

There are instructions for finishing a Quilt As You Go quilt here.

See how to layer and baste any quilt here.

Learn how to bind a quilt here.

Here are the details on the three bunnies I made. . .

Mix & Match free bunny applique pattern from Shiny Happy World

This bunny uses Head #1, Face #3 and the fat ears.

Mix & Match free bunny applique pattern from Shiny Happy World

This bunny uses head #2, face #2, and the skinny ears.

Mix & Match free bunny applique pattern from Shiny Happy World

This bunny uses head #3, face #1 and the medium ears.

Mix & Match free bunny applique pattern from Shiny Happy WorldI made my three blocks into a pretty springtime wall-hanging.

There are instructions for adding a hanging sleeve here.

Combine multiple blocks in any configuration to make a baby quilt, a wall hanging, or a bed quilt.

Like almost all of my applique quilt patterns this finishes to a 10″ block. That means you can easily pop a bunny into any of my other quilt designs. A cute bunny would be a great addition to the Wild Flowers quilt or the Noisy Farm quilt. 🙂

Remember – you can adjust the size of any digital pattern to make it work for all kinds of projects!

Add a single bunny to a T-shirt or a baby onesie.

Add a single applique to this free receiving blanket pattern.

Add a different bunny to each side of this free tablet cover pattern.

Applique a bunny to any tote bag pattern – like this free mini tote bag.

Make a pillow using this free tutorial.

Use the pattern pieces with pretty paper to make collage greeting cards, like these I make for my daughter.

You can even shrink them down extra small and use them for embroidery patterns!

Have fun playing with these bunnies!

If you like them – sign up for the Shiny Happy News so you never miss a free pattern, a new tutorial, or the little bits of happiness I like to share!

Happy sewing!

Best,
Wendi
That's me!