Stuffed Animals: the must-have sewing book of the year!

Oh, I know. It’s only April. How can I make such a bold claim?

Because this book is that good.

I’ve been waiting for this one…

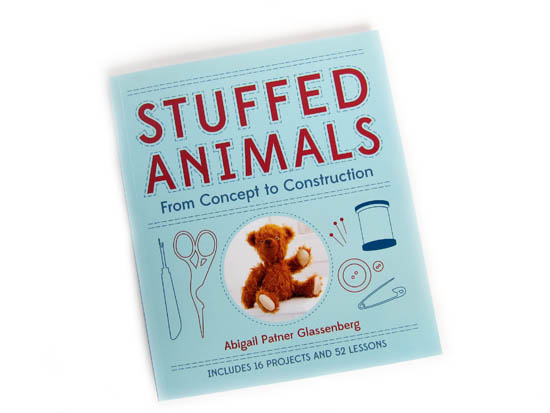
Stuffed Animals: From Concept to Construction is a fabulous new book by stuffed animal designer (and buddy of mine), Abby Glassenberg.

Stuffed Animals design book by Abby Glassenberg

As she was writing the book, I could tell that Abby was really excited about it. She’s an incredibly passionate designer, and pours her heart into not only designing adorable stuff, but also teaching others how to make things. So, I knew this book would be good.

But now that the book is out, and I have my hands on a copy… I can tell you that this book is fabulous! Whether you’re new to sewing stuffed animals, or you’re a sewing pro who wants to get deep into designing, there’s oodles of information in this book that you’ll love!

Stuffed Animals: From Concept to Construction

Have a peek at this trailer for the book:

Stuffed Animals Book Trailer from Abby Glassenberg on Vimeo.

Squee! Doesn’t it look like so much fun?

What’s inside

Stuffed Animals contains 16 projects (complete patterns for sewn stuffed animals) and 52 lessons (designed not only to give you tips to complete the projects, but also to help you design your own pieces).

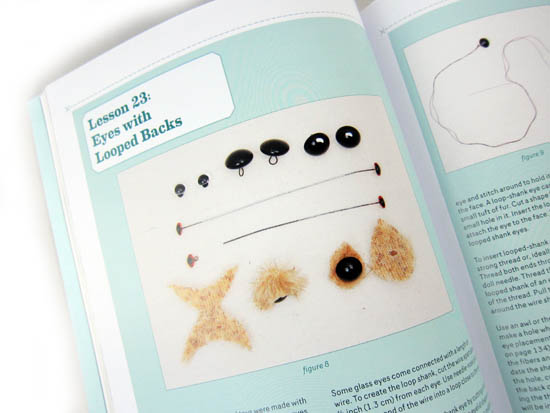
inside stuffed animals by Abby Glassenberg

The book also contains a hefty introduction, so that even if you’re a newbie to sewing, you’ll be set to start on the easier projects in the book! Some of the topics covered in the introduction are:

  • Basic materials needed (including a big secret… using hemostats!)
  • Using freezer paper for making sewing patterns
  • How to draw/mark/edit a pattern
  • Tips for using your fabric, including considering the grainline
  • Notes about seam allowance in patterns
  • How to adjust/correct your sewing machine tension
  • Various techniques for sewing stitches, by machine and hand
  • Step-by-step details on clipping curves, basting, turning & stuffing
  • Info about the proper finishing of your animal

And that’s just some of the topics covered in the intro!

The book continues… and features adorable patterns and oodles of great tips.

sewing camel pattern

And… (this book is almost 200 pages!) the pattern pieces are included in their actual size! That means that you can trace the pattern pieces without running to a copy shop to do fussy enlargements (as you need to do with some books).

pattern pieces in sewing

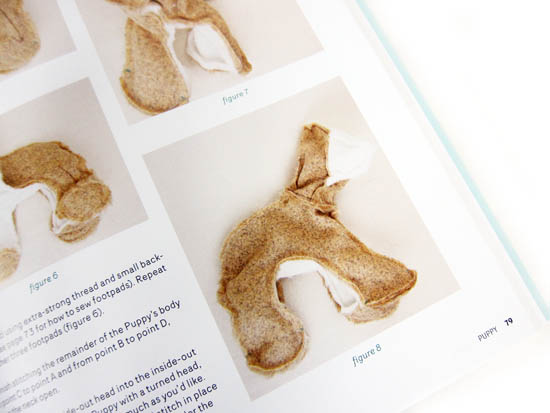
Each pattern and lesson contains step-by-step photos, so even if you’re not too confident about your sewing skills, you’ll be able to follow along! Love that!

inside1

What am I going to do?

Well… the first thing I’m going to do is re-read the entire book, cover to cover, because it’s just chock-full of so much inspiration!

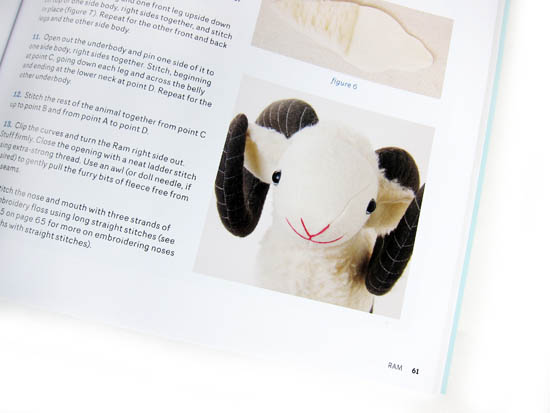
Then… this sheep is pretty darn irresistible:

ram stuffed animal pattern

(and get it? I knit and crochet… so he’d be sorta like a mascot!)

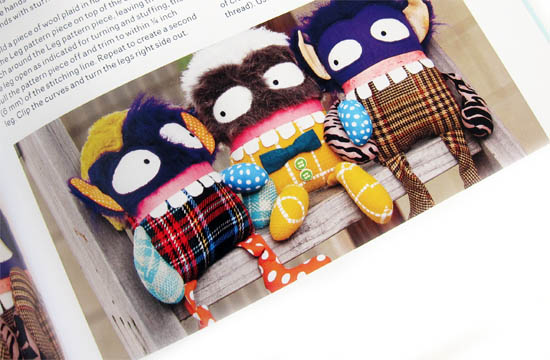
Or… I’m pretty drawn to these monsters that can be made up with scraps:

monster pattern abby glassenberg

(you know I love using leftovers!)

Can you tell I’m inspired?

Ready to get sewing?

If you’ve been looking to sew some adorable stuffed animals, then grab yourself a copy… you’ll love it!

I think this is the sort of book that’ll last your whole sewing life: from starting out as a newbie to designing your own adorable animals. What better value is there than that?

And if you’ve already snagged a copy… let me know what you think!

(To read Wendi’s review of the same awesome book, click here.)

Best,
Stacey

disclaimer

How to Use Pendant Frames for Embroidery – video

Make a Pretty Pendant with these Easy to Use Frames - a video tutorial

Want to learn the basics of hand embroidery with an easy online workshop – totally free?

Sign up for Embroidery 101 here. You’ll learn how to get started, the tools and supplies you’ll need, the four most basic stitches, how to transfer your pattern and how to display your work.

If you already know the basics – sign up for Embroidery 201. It’s also free! You’ll learn how to stitch on specialty fabrics like felt and stretchy T-shirts. Plus you’ll learn lots and lots and LOTS more stitches – all my favorites!

The Kiddie Cameo pattern was made for the pendant frames in the shop. I decided to also record this video showing just how to assemble the pendants – and it also gives a sense of the size because you see them in my hands.

You can shop for pendant frames here.

That flower image in the video is from a new pattern called Bitty Blooms – 30 tiny little flower patterns sized especially to fit in the pendants as well.

I’ll be adding more patterns especially for these frames – all will show the images in the frames on the pattern cover so they’ll be easy to spot among all the embroidery patterns. 🙂

Are any of you stitching these up for Mother’s Day? I’d love to see them!

Happy stitching!

Best,
Wendi
applique wendi

How do you know if a design is original? Follow your gut!

Especially after last week’s Wingspan debacle, there have been a lot of questions about originality and copyright. How can you tell if your new design is ‘different enough’ from someone else’s?

This is a really tricky question, and frankly, I’m not going to talk about the legal side at all, because I’m not qualified to do so. But, today I’m going to talk about some questions to ask yourself when you’re wondering if your new design is original and suited to publish.

What’s the source of your inspiration?

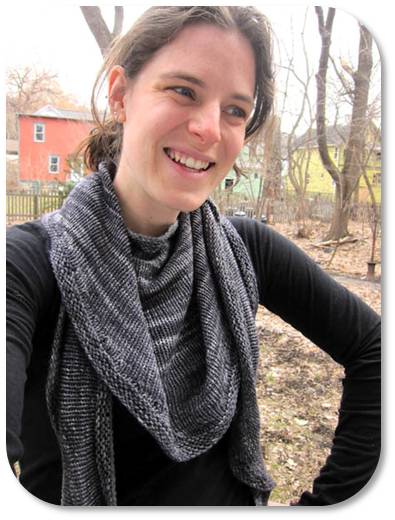
I’m going to use the shawl that I knit last week as an example.

SpaceCadet shawl

I originally began knitting Mrs. Tumnus by Eskimimi, but the lace pattern on the edging was too thought-intensive for my current knitting brain, so I decided to simplify the pattern.

In the end, I used the short-row shaping from Mrs. Tumnus, but enlarged the entire shawl and added a garter stitch border (with its own short-row shaping).

Would I consider publishing this shawl as a new pattern? No. Because I clearly used the Mrs. Tumnus shawl as an inspiration and made modifications.

But now, let’s look at the interesting case. What if I had designed the shawl completely from scratch… would seeing Mrs. Tumnus prevent me from publishing my new pattern? Probably not.

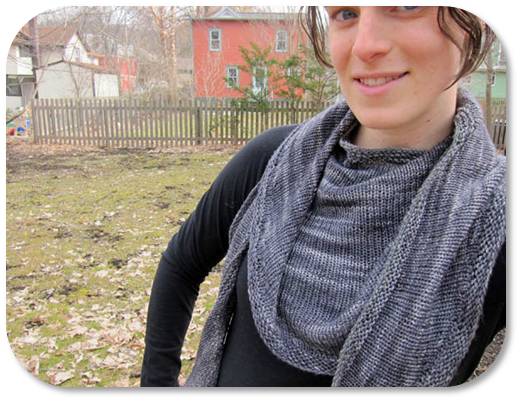
shawl knit from spacecadet creations

Mrs. Tumnus isn’t the first shawl to use short rows, and if I had come up with the ‘Stacey Shawl’ completely on my own, I wouldn’t look at Mrs. Tumnus and say, ‘geesh, that’s mine in a different size with a different edging’. I would probably publish the pattern, and it would be a case of two designers having similar ideas.

Do you see the difference? If you just ‘tweak’ an existing design, that’s not as original as coming up with the concept yourself.

Is the design your own style?

Creating an original design is tricky because we’re all using the same components. I didn’t invent crocheting in the round, increasing or crocheting through the back loop. But I use these components to create my own style of patterns.

You want to make sure that a design you publish is in your own style, as well.

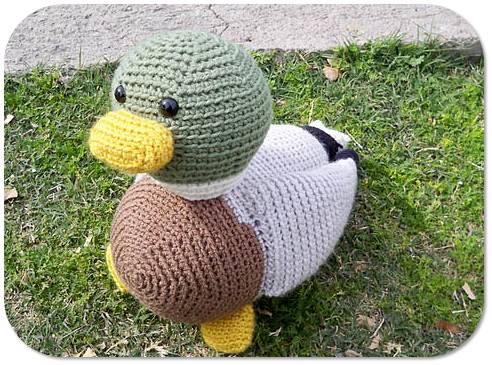
Some students of my Design Your Own Monster class have done an amazing job of creating patterns in their own style. Take a look at this Mallard designed by Hollie:

Mallard duck designed by Hollie

It’s crocheted through the back loop, in the round… but whoa! It doesn’t look like a FreshStitches pattern… this little duck has some fabulous shaping and color changes that represent Hollie’s own style. That’s fabulous!

What if you took my cow pattern and changed the ears so it looked like a pig? You see… that would look like another FreshStitches pattern, and isn’t really developing a different style.

A note about working from ‘inspiration photos’

It’s very tempting to look around online for cute photos… and with a little bit of skill, it’s possible to ‘reverse engineer’ a cute design: that is, crochet it without a pattern.

Is this your own design? Not really. If you’re crocheting an item that was designed by someone else (whether or not it’s an existing pattern), then you also aren’t creating your own design.

Follow your gut…

In the end, it’s up to you. While there are copyright laws in place, in practice, there isn’t much of a ‘copyright police’ going around that are going to investigate your pattern.

It’s up to you to only publish patterns that are original and uniquely your own.

This blog post isn’t an ‘answer’ to how to decide that for yourself, but I hope I’ve at least given you a starting point of some questions to ask yourself!

Meet an adorable Teddy Bear!

I’m happy to announce that Teddy, the Bear from my Woodland Animals class is now available as an individual pattern!

amigurumi crochet teddy bear

So, if you didn’t sign up for the class, but still want to make an adorable bear… now you can!

Don’t you want to crochet a cuddly bear, today? Grab your copy of the pattern!

Best,
Stacey

How to Turn a Quilt Block into a Pillow

How to Turn Any Quilt Block into a PIllow

So. Let’s say you really like one of my quilt patterns, but you’ve never made a quilt before and you’re kind of freaked out about making the whole thing.

Start with one block. You can make one single block, right? Of course you can! And you can turn that fun quilt block into a pillow. Here’s how.

Make a quilt block.

Any block from any pattern.

How to Make a Pillow Out of Any Quilt Block - a free tutorial from Shiny Happy World

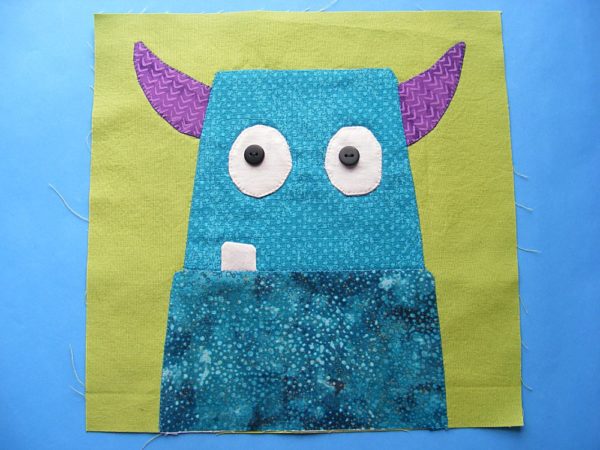
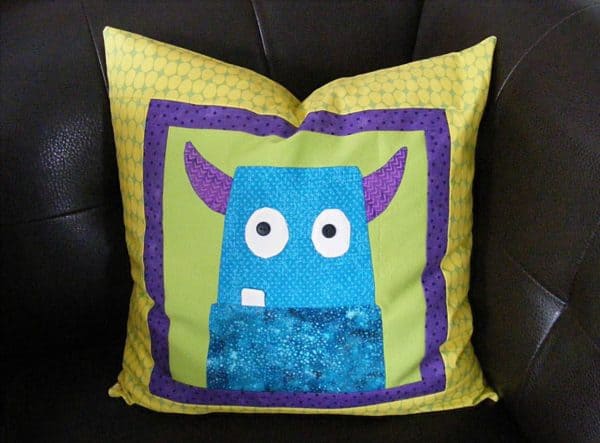
I made this monster block exactly as the pattern specified. It’s a 10 1/2 inch square. Almost all of my applique quilt patterns are 10 1/2″ squares.You could always enlarge the pattern so it fits on the pillow form you want to cover – but depending on the size you’re enlarging it to, that could make things a little tricky. I’ve got a class (Think BIG!) showing how to do giant applique. For now let’s keep things simple and just add some framing to enlarge the block.

Add Frames

My pillow form is 18″ square. That means I need the front of the pillow cover to be 18″ square. (I like my pillow covers to be just a little bit smaller than the pillows so they have a nice snug fit.)
My block is 10 1/2″ square. That means it will finish at 10″ square when I take up the seam allowances. I want it to end up 18 inches square, so I need to add 4 inches on each side of the block.
I could add 4″ frames all the way around, but I want a narrow frame inside a slightly wider frame. So I’m going to add a 1″ frame all the way around, and then a 3″ frame all the way around that. That will add up to the 4″ frame all around.

Start with the sides.

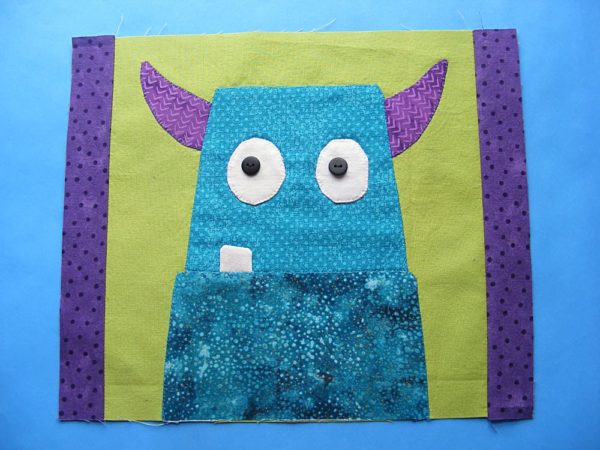
How to Make a Pillow Out of Any Quilt Block - a free tutorial from Shiny Happy World

Cut strips 1 1/2″ wide. (Remember – if you want a 1″ frame you need to cut your strips 1 1/2″ so seam allowance is included.) Sew a strip to each side of your block using 1/4″ seam allowances. Press them flat.

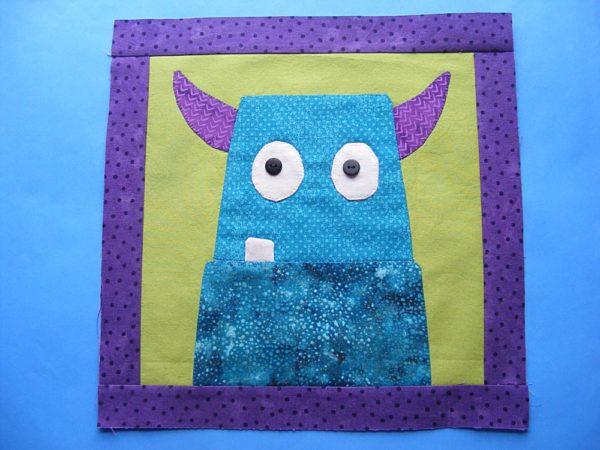
Sew strips to the top and bottom. Press them flat.

How to Make a Pillow Out of Any Quilt Block - a free tutorial from Shiny Happy World

The inner frame is done. Now your block is 12 1/2″ square.

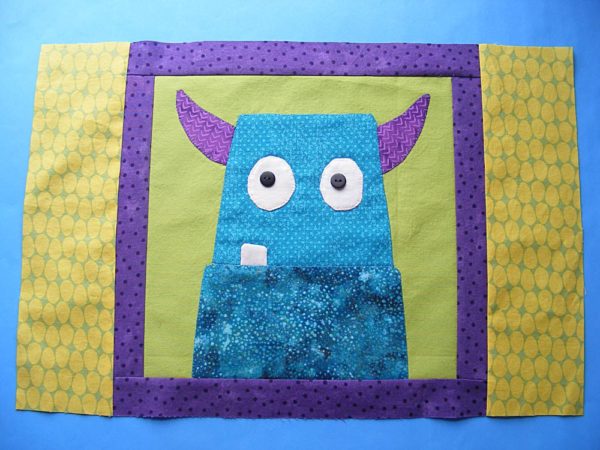
Do the same thing for the outer frame, but use 3 1/4″ strips for a 3″ frame.

How to Make a Pillow Out of Any Quilt Block - a free tutorial from Shiny Happy World

Once the outer frame is sewn on, your pillow cover front should be an 18″ square. Remember – that will finish at 17″ for a nice, snug fit for an 18″ pillow.

Make the Pillow Back

I like using zippers on my pillow covers so I can take them off for washing. You can add the zipper to the side seam where the front is sewn to the back, but I think that sometimes distorts the look of the pillow. I prefer to add it to the middle of the pillow back.

How to Add a Zipper to a Pillow Back - a video tutorial from Shiny Happy World


This video tutorial shows how to sew a zippered pillow back.

For this monster pillow you need to make a back that is 18 inches square.

Finish Your Pillow Cover

Unzip the zipper at least part way. Don’t forget to do this or you’ll be very sad!

Sew the pillow front to the pillow back, right sides together, all the way around the pillow, using 1/2″ seam allowance.

Turn it right side out through the zipper opening. (See why you left it unzipped a bit?) Slip your pillow form into the cover. Zip it up and toss it onto a chair.

Finished!

How to Make a Pillow Out of Any Quilt Block - a free tutorial from Shiny Happy World

One silly monster quilt block made into a pillow. 🙂

Here are several free patterns that work with my basic 10-inch applique squares – no resizing needed!

Here are several free patterns that work with just some simple resizing. This post about making coasters has info about resizing an applique pattern that can be applied to any of these projects.

Return to the main Let’s Make a Quilt Table of Contents.

Happy sewing!

Joining Quilt Blocks and Nesting the Seams – video

How to Join Blocks with Nested Seams - video

Want to learn how to make a quilt with an easy online workshop – totally free?

Sign up for Let’s Make a Quilt here. You’ll learn how to get started, the tools and supplies you’ll need, and how to make a quilt from start to finish using Quilt As You Go and applique with fusible adhesive.

It’s the easiest, most fun way to make an applique quilt. You can do it!

When you’re joining rows of quilt blocks together, the seam allowances at the corners can get pretty bulky. You can’t eliminate that bulk altogether, but you can minimize it – spread it out a bit – and that’s what I show you how to do in this video.

See all the quilt lessons here.

Happy quilting!

Best,
Wendi

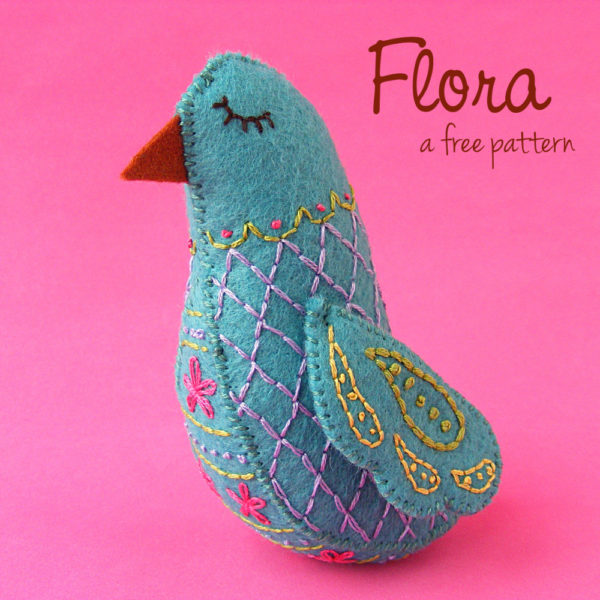
Free Pattern – Flora the felt bird

Flora the Felt Bird - a free pattern from Shiny Happy World

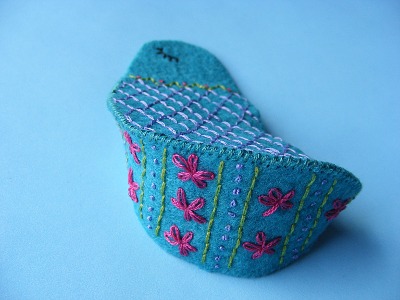
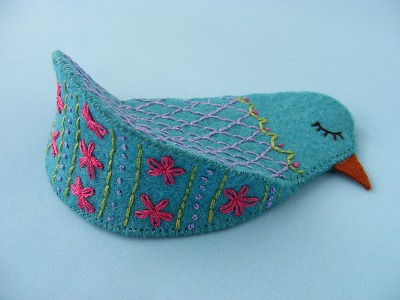
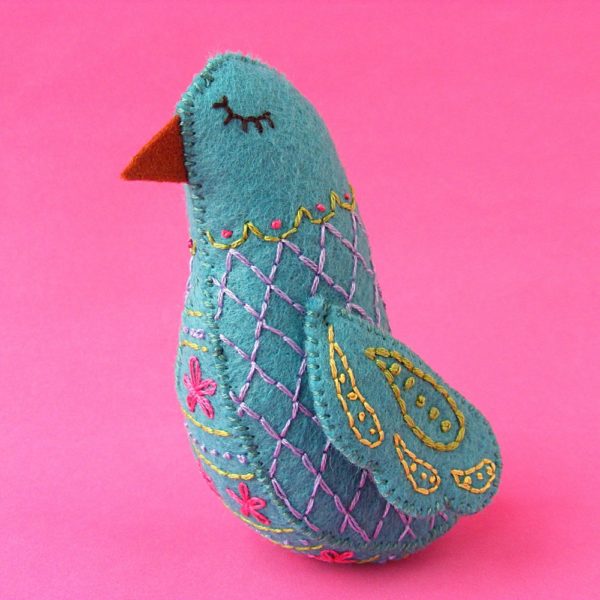
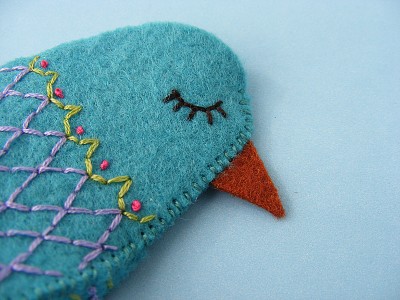
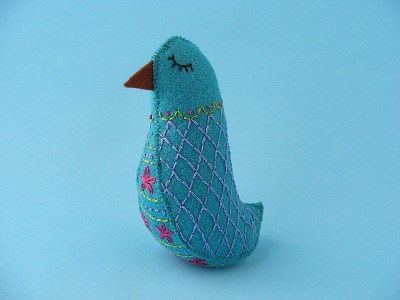
This little felt bird was such a delight to make! Seriously – I loved every minute of it. I want to make a whole flock of them in rainbow colors! And now you can make her too.

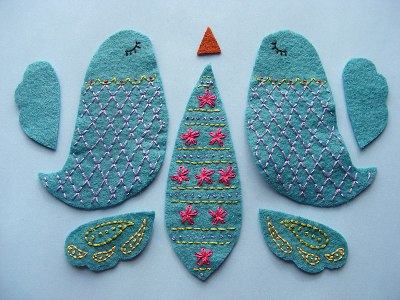
The embroidery is all easy – just three of the most basic stitches – backstitch, lazy daisy, and French knot.

Flora is all hand sewn from wool blend felt and colorful embroidery thread, making her an easy, portable project, perfect for carrying around in your purse.

Here’s what you’ll need:

Step 1
Download the pattern here.

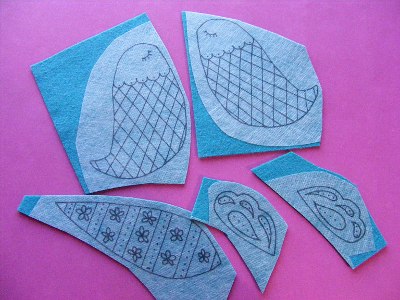
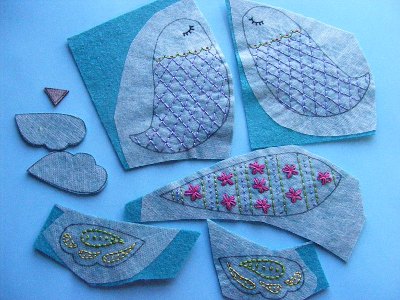
Transfer the pattern to the felt. When I discovered Sulky Sticky Fabri-solvy it changed my life. I made a video showing how awesome it is here. I call it The Magical Embroidery Stuff and I use it for everything. Here I’ve printed the pattern directly onto the Sulky Sticky Fabric-solvy, roughly cut around each piece, and stuck it to my felt.

Step 2
Stitch the design. I used two strands of embroidery thread and the following stitches: backstitch for all lines, French knots for all dots, lazy daisy stitch for the flowers. (Those links all go to video tutorials for each stitch.)

Stitch right through the stabilizer and the felt.

Step 3
Cut out the shapes.

Step 4
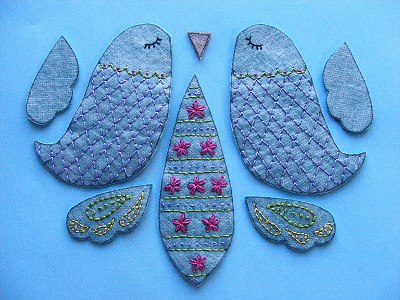
Soak off the stabilizer and let the pieces dry.

I lay the pieces face down in a bowl of cold water and just let them sit there for about an hour. Longer is fine – I’ve forgotten mine and let them soak overnight with no problem. The soaking will make the stabilizer all mushy and soft. Rinse it off under cold water. Use a kitchen sprayer if needed to get off any stubborn bits, but try not to rub the surface of the felt. Lay them out on a towel to dry. Don’t wring them, twist them or even smoosh them – just lay them dripping wet on the towel and leave them alone.

Step 5
Time to start putting it all together! Use 2 strands of matching embroidery thread to whipstitch all the pieces together. (This video shows how to whipstitch pieces together.)

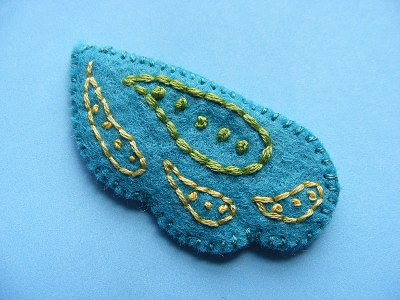
Sew one embroidered wing to one “naked” wing, all the way around the edge. Repeat for the second wing.

Step 6
Sew the belly to one side of the bird.

Start sewing at the tail of the bird, matching it to the wider end of the belly piece, and sew all the way to the top of the belly piece.

Step 7
Sew the other side of the belly to the other bird piece.

Start again down at the tail and sew all the way up to the top, but this time keep going past the belly, sewing the two sides of the face together.

Slip the beak between the layers of the face and keep stitching. Instead of whipstitching up and over the edges of the felt, stitch through the beak. (This video has help for catching the beak in that stitching.)

Step 8
Sew up the back, starting at the tip of the tail. Stop sewing about halfway up the back and stuff the tail. Mix a few large nuts (from the hardware store) into the stuffing to weight her bottom, otherwise she’ll tend to tip forward. Sew up a bit higher on her back and stuff in more stuffing. Finish sewing and stuffing until she’s nice and plump, and all sewn up.

Step 9
Pin the wings in place, one on each side of the body.

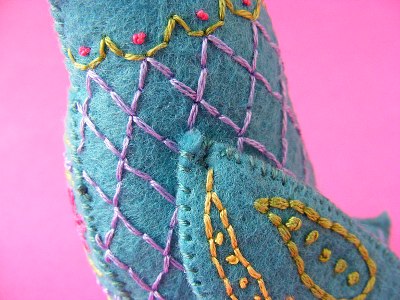
Use the grid pattern you embroidered to line them up exactly. Thread a long needle and knot the end. Starting sewing underneath one wing, near the top. Sew through the body and out the other side, through the opposing wing. Take a small stitch back into the wing, through the body and out through the first wing. Stitch back and forth like this a few times to secure the wings. Don’t pull the thread too tight or you’ll distort the shape of her body. Knot your thread underneath one wing and bury the tail.

She’s finished! don’t you want to sew a whole flock of these beauties?

Read more about working with felt in these posts.

Happy stitching!

How to Attach Limbs to a Felt Softie – video

How to Attach Arms to a Felt Softie - video

Howdy everyone! This is the last video in the little felt mini-series I’ve been running. In this one I show you how to attach limbs to your felt softie.

I demonstrate it with an arm, but you could use the same technique to attach a beak, antennae, tentacles – anything that might be growing out of your softie.

You can also use ladder stitch to attach things like this, but I like the look of the whipstitch here.

Here are links to other posts about working with felt.

And, of course, you can buy my favorite felt here.

Oddballs Felt Softie Sewing Pattern

The little guy I’ve been working on in this series is an Oddball. You can find his pattern here.

Best,
Wendi

How to join yarns, while crocheting, with no knot!

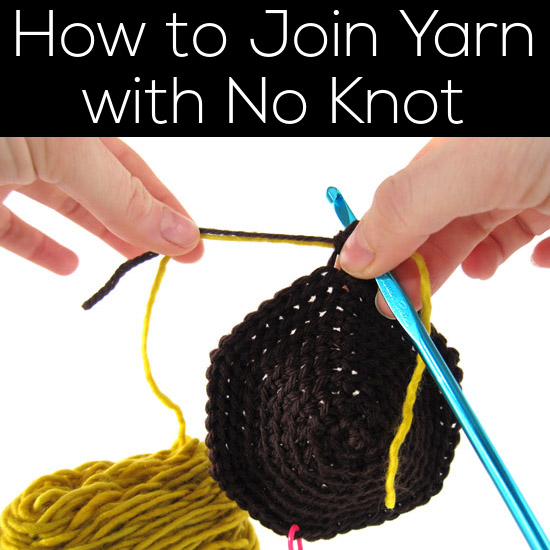
How to Join Yarn While Crocheting - with No Knot - a tutorial from FreshStitches and Shiny Happy World

In a previous post I showed you how to use the Russian join to make a Magic Ball with your yarn scraps.

But maybe you don’t want to join your scraps in advance! What if you want to start crocheting right away, and join your yarns as you go? No problem! Today, I’ll show you how!

I’ll show you a technique for joining yarns as you crochet with no knots. First, I’ll show you in photos… then I have a video for you!

How to crochet yarns together

First, crochet until you have about 3″ remaining in your current yarn (shown here in brown):

how to join yarns while crocheting

Then, hold up your new yarn (shown in yellow) so that the new yarn extends beyond the tail of your current yarn:

Joining yarns together while crocheting

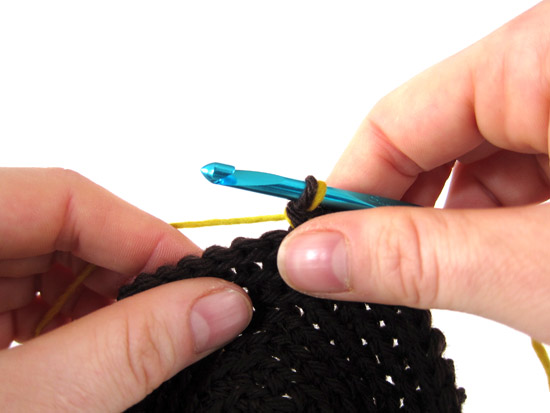
Holding the two yarns together, crochet a stitch:

joining yarns while crocheting

Now, drop the old (brown) tail of yarn…

joining yarns in crochet

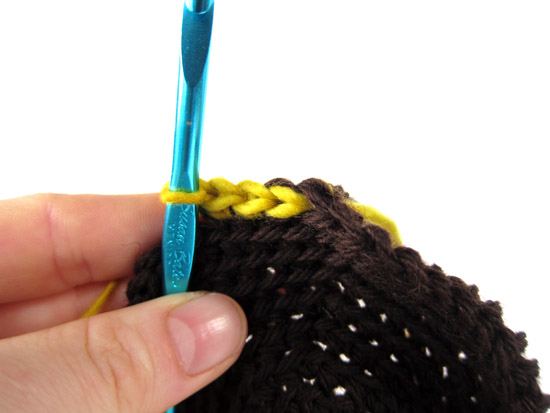
… and continue to crochet with your new yarn!

joining yarns in crochet

Ta da!

The yarns are secure… you don’t need to do anything else. Just let the tails hang on the inside of your piece!

And for the video…

Just in case you want to see it in action:

To view larger, click ‘play’, then the rectangle in the lower right-hand corner.

So handy!

In this post, I’ve used this technique to change colors of yarn, but it’s also a great way to change yarns… even if you’re just finishing one skein and starting another (of the same color).

I also use this technique while crocheting with two strands together. Just add one new yarn when one is about to end… easy!

And I do this when knitting, too!

One possible drawback to this technique is that you do get one stitch using both yarn colors. If your design calls for a “clean” color change – where you don’t have that blending of colors in one stitch – then take a look at this post on changing colors with single crochet. It’s also easy!

Here are handy links to all the posts about yarn. . .

Return to the main table of contents for Let’s Learn to Crochet Amigurumi.

Move on to the lessons for the basic crochet stitches.

Happy stitching!

Why the Right Stabilizer is Like a Good Bra :-)

Why the right embroidery stabilizer is like a good bra - plus help choosing the right thing for your needs

When it comes to embroidery, the thread is like the gorgeous silk blouse hanging in your closet. It’s pretty. It’s colorful. It’s touchable. It’s lovely.

But try wearing that silk blouse without the right undergarment and – unless you’re a very lucky woman – the results will be. . . not so lovely. 🙂

Stabilizers are the undergarments of the embroidery world.

Different outfits require different undergarments. Sometimes a little chemise or a slip are all you want. Sometimes you need a supportive bra. Some outfits call for head-to-toe Spanx. 🙂 It all depends on what you’re wearing and the look you’re trying to achieve.

Same with stabilizers, so here’s a little overview of which stabilizers serve what purpose.

Let’s start with my favorite, shall we?

sulky sticky

It’s Sulky Sticky Fabri-Solvy – which is quite an unwieldy mouthful. Sulky also offers it as Stick & Stitch, so you’ll find both names in shops.

It’s my everyday bra – good for just about any situation. 🙂

It’s a pattern transfer and stabilizer all in one – and you can print directly on it, which is awesome for all of us who use a lot of digital patterns. I recorded a whole video showing it in action and what’s so great about it, but here’s how I use it. . .

  • To transfer a pattern to any fabric. That includes fleece, felt, and dark colors – all the tricky little buggers.
  • To stabilize stretchy fabric for stitching. That’s mostly T-shirts, but could be any stretchy fabric.

It’s my go-to stabilizer. I’ll tell you right now – I rarely use anything else. But I admit it’s a little pricey. It costs a little bit more than $1 a sheet. I’m totally ok with spending that – just like I’m happy to spend $40 on a bra that’s well made, won’t fall apart in the wash, fits right, doesn’t pinch, doesn’t itch, and will work under almost everything I wear. Heck – I’d happily pay $100 if I could find all that.

But maybe you want some less expensive (though also less all-purpose) alternatives?

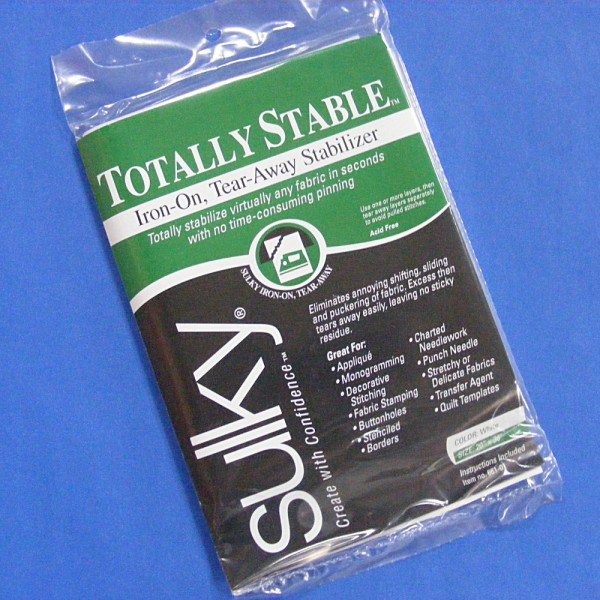
Sulky Totally Stable

Sulky Totally Stable is great for stabilizing stretchy knits and only costs $5 for a pack. You can see it in use in this video.

This is the girdle of the bunch – all about control and not really meant to be seen.

You’ll need to transfer the pattern separately – this is a stabilizer only. It goes on the inside of the shirt. You stitch right through it and then tear away the excess after you’re done stitching. It works very well and I used it on lots of T-shirts before I fell hard for The Magical Embroidery Stuff.

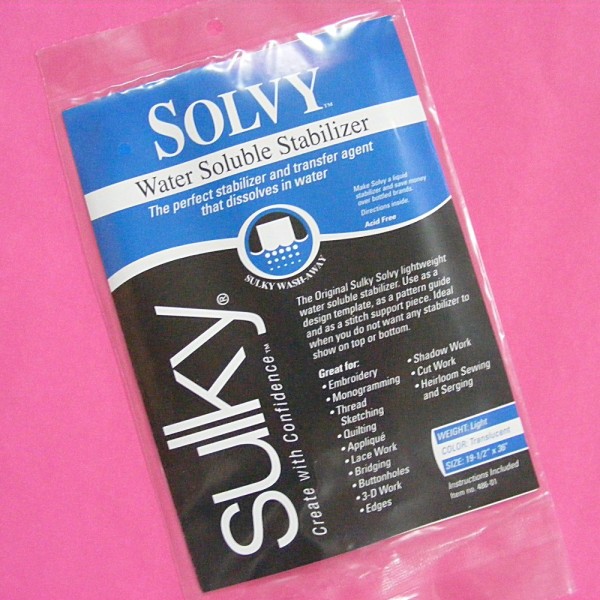
Sulky Solvy

Sulky Solvy is technically a stabilizer, but I’ve always used it for pattern transfers. (It’s also a great deal at $5 a pack.) Like a slip under a sheer skirt, this can help you with tricky fabrics.

It’s a clear film – not sticky.

You can easily trace your design onto it, then hoop it right over the surface of your fabric.

You stitch through it, then rinse it away. I used it on all dark-colored T-shirts (in combination with the Sulky Totally Stable) and also on fleece and felt if I didn’t want to use iron-on transfer pens. You can see it in use in this video.

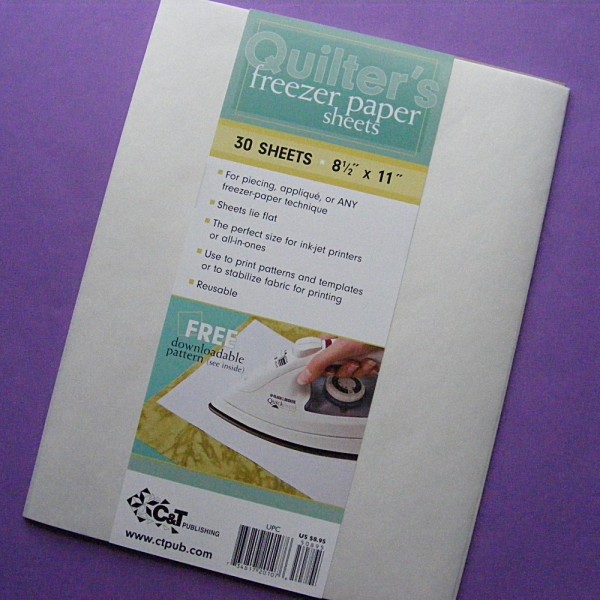
Printable Freezer Paper Sheets

Printable Freezer Paper does replace my Magical Embroidery Stuff sometimes.

It’s like a chemise or tank that you can wear under your most casual clothes instead of a bra. You’re not asking it for much – it just makes your day a little more comfortable. 🙂

I use this occasionally for freezer paper applique and all the time for cutting out felt pieces that don’t require any embroidery.

Easy. Fast. Accurate.

And no tracing! You can see it in a video here.

I’m also throwing hoops into the list.

I don’t think they’re what most people think of when they talk about stabilizers, but they certainly stabilize your work and improve the look of your stitching.

I can’t imagine stitching without them – does that make them the underpants of the embroidery world? 🙂

So there you have it! A rundown of all my favorite stabilizers – and probably too much information about my underwear. 🙂

Here are links to all my posts about embroidery tools and supplies.

For Beginners

Specialty Fabrics

Threads

Stabilizers and Pattern Transfer Tools

Return to the Learn to Embroider main Table of Contents.

Move on to the posts about working with patterns.

How to make a Magic Ball!

How to Make a Magic Ball Using a Russian Join - a tutorial from FreshStitches and Shiny Happy World

Have you heard of a Magic Ball?

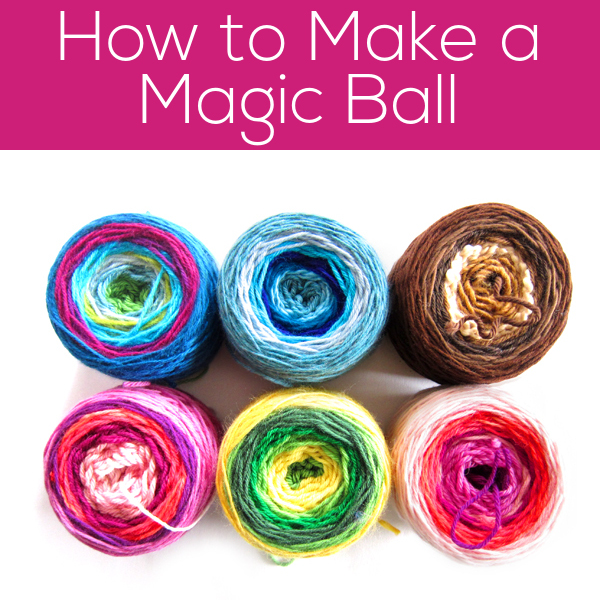
It’s a ball of yarn that changes colors and textures as you work. It’s something offered by a number of artisan yarn makers… but it’s also something you can make yourself with your leftover yarn!

Magic Ball how-to

Besides ending up with an awesomely fun end-product… you’ll finally get to use up all of those weird leftover pieces of yarn that are too small (you thought!) to do anything with! How great is that?

Perfect for the scrap-a-long!

Scrap-a-long

Magic Balls are fun to make… but they’re even more fun if you have a project in mind!

How about joining in on our scrap-a-long?

Ready to get started?

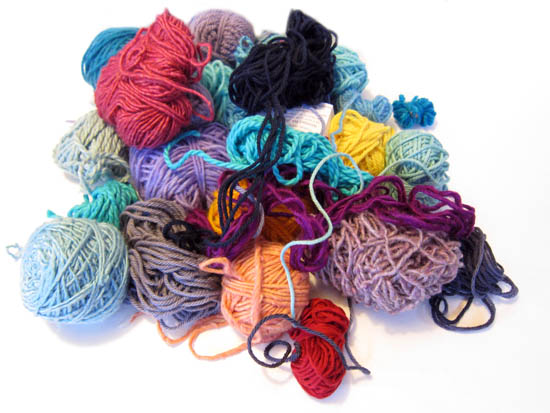
You’ll need two things. One, gather all of the leftover yarn bits that are lurking in your stash. You know what I mean. They’re too small for their own projects, but too big to toss out. You keep thinking you’ll do something with them…

pile of scraps

And a tapestry needle.

bent-tip tapestry needle

(mine is a bent-tip needle, but that’s by no means necessary for this. All you need is a needle that’s big enough to fit your yarn through the eye.)

Okay, now we’re ready to start!

We’re going to make our magic ball by joining all of these leftover yarns together using a technique called the ‘Russian Join’. The Russian join allows you to fasten yarns together without a knot, and it has the advantage of working with any type of yarn (unlike the ‘spit splice’, which relies on 100% wool yarn.)

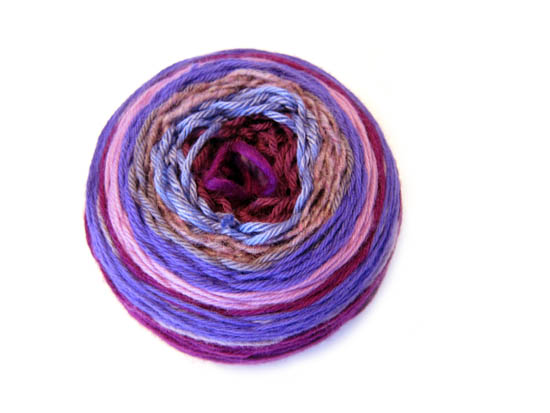
In terms of grouping your yarns together, you’ll want to group yarns in a way that is pleasing to you. Some folks prefer the random approach, but I like creating a color theme (check out How to organize your scraps for help!). For my magic ball, I’m attaching only various shades of purple. I also recommend using yarns of the same weight. My magic ball is composed entirely of worsted weight yarns.

How to do the Russian Join

Step 1: Thread your tapestry needle with yarn A (to start, yarn A will be an arbitrary choice. As you continue, yarn A will be the yarn that is attached to your ball).

How to do the russian join

Step 2: About 2 inches from the end of the yarn, insert your tapestry needle through the yarn. Split the plies, and work the needle through the yarn for about an inch, then pull the needle through, bringing the yarn tail through this bit of yarn.

How to do a russian Join

Notice that you have a loop!

Making a russian join

Step 3: Okay, now, thread yarn B (the other yarn) through the tapestry needle, and stick the tapestry needle through the loop in yarn A.

making a russian join

Step 4: About 2 inches from the end of yarn B’s tail, insert the tapestry needle through the yarn… just like you did before.

doing the russian join

Now you’ve made a second loop, joined onto yarn A!

russian join

When you pull the ends, you’ll notice the two yarns are fully joined! Hooray!

completed russian join


To make a magic ball, keep attaching yarns, one after another. You’ll probably find it helpful to wind the ball up as you go, particularly if you’re using long leftover lengths of yarn.

Once you’ve run out of leftovers (or have a ball that’s big enough), you can use your magic ball for any project! When knitted or crocheted, it’ll create an awesome striping-effect! And, you don’t need to do anything special at the joins, just keep working!

Isn’t that fun?

And doesn’t it make you want to gather up (and use) your leftovers?

Here are handy links to all the posts about yarn. . .

Return to the main table of contents for Let’s Learn to Crochet Amigurumi.

Move on to the lessons for the basic crochet stitches.

Happy stitching!