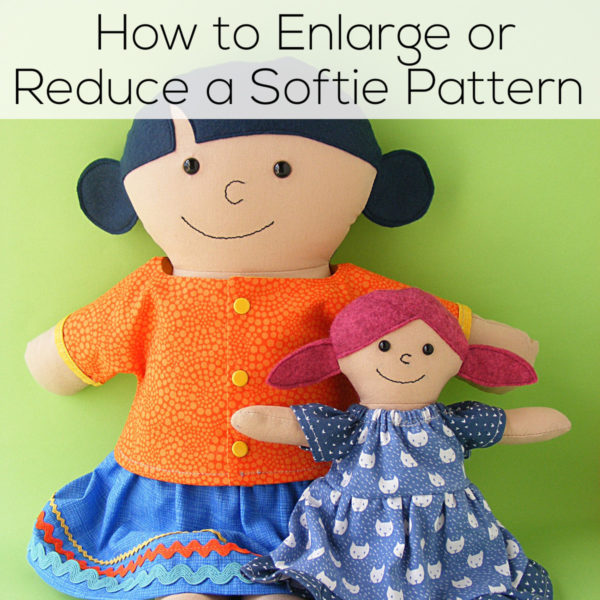
L.A.C.E over at My Glass House had a great question that I wanted to answer here for everyone. She’s making a bunch of Bartholomew Bunnies and she’s thinking of making a really big version of the bunny next. She asked if I had ever made one.
No, I haven’t. But I have enlarged and reduced other patterns and there IS a trick to it.
The first thing you need to do is mark off the seam allowance. When you enlarge the rest of the pattern you do not want to also enlarge the seam allowance. So – on almost all of my pattern the seam allowance is 1/4 inch. Use a ruler or a seam gauge and measure in 1/4 inch all the way around all the pattern pieces. Draw in all those seam allowance lines. Basically, what you’re doing is drawing the stitching lines in. (On many of my patterns those stitching lines are already drawn. It’s the dashed line.)
Now you can enlarge or reduce to your heart’s content. Make a ginormous bunny or a teeny tiny bear. You can either scan your marked-up pieces into your computer and enlarge and reduce in your favorite photo editing software, or you can take it to a copy shop and do it on a photocopy machine. Enlarge or reduce all the pieces by the same percent.
Next you need to add the seam allowance back on to your pattern pieces. Go all the way around the edge of each piece with a ruler or hem gauge making little marks at 1/4 inch, then connect all those little dots. Cut out your pattern pieces and sew!
One thing to be aware of – you may need to tweak the pattern a bit after enlarging or reducing. Proportions that seem just fine in the original model can look weirdly off – especially after enlarging. And those weird proportions can look even weirder after stuffing. For really simple blobby shapes like my bunny and bear you should be fine. But you might run into problems with something like a rag doll where the skinniness of the neck, or example, might be thrown off when you scale up or down. So if you’re working with a more complicated pattern – especially one with skinny parts and wide parts – you might want to make a sample up in a muslin (or other cheap fabric) first so you can check for problems. Draw on any details instead of stitching them, and be sure to stuff it too! Stuffing changes all the proportions.
You don’t want to do what I did here. I know better, but I did it anyway. I designed a pirate doll. I did all the time-consuming applique and hand stitching on his face and his outfit. It was looking good the whole way – until I stuffed him. Suddenly his head looked really tall and skinny (it looked even worse in person) and he was just. . . weird. Grrr!!! When in doubt, always make a muslin.
I use it to make straps, to bind the edges of pockets, pot holders and placemats, to make drawstrings, and more.
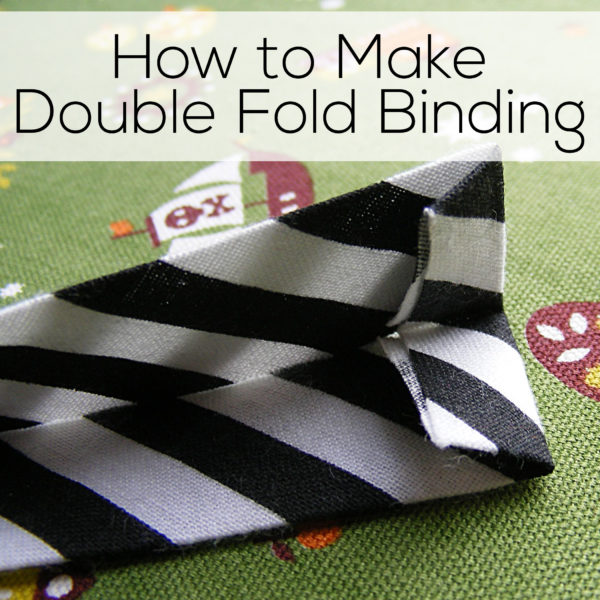
One quick note – you’ll also hear me use the term bias tape or double fold bias tape. Technically, I should only call it bias tape when the starting strips are cut on the bias instead of on the straight grain. I rarely use actual bias tape (you only need the bias when your binding tape needs to shape around curves) but all the packaged binding tape you buy ready-made at the store is bias tape – so I tend to slip and use that as a general term when I really shouldn’t. So – know going into this that the technique is exactly the same for both. The only difference is how you cut your initial strips.
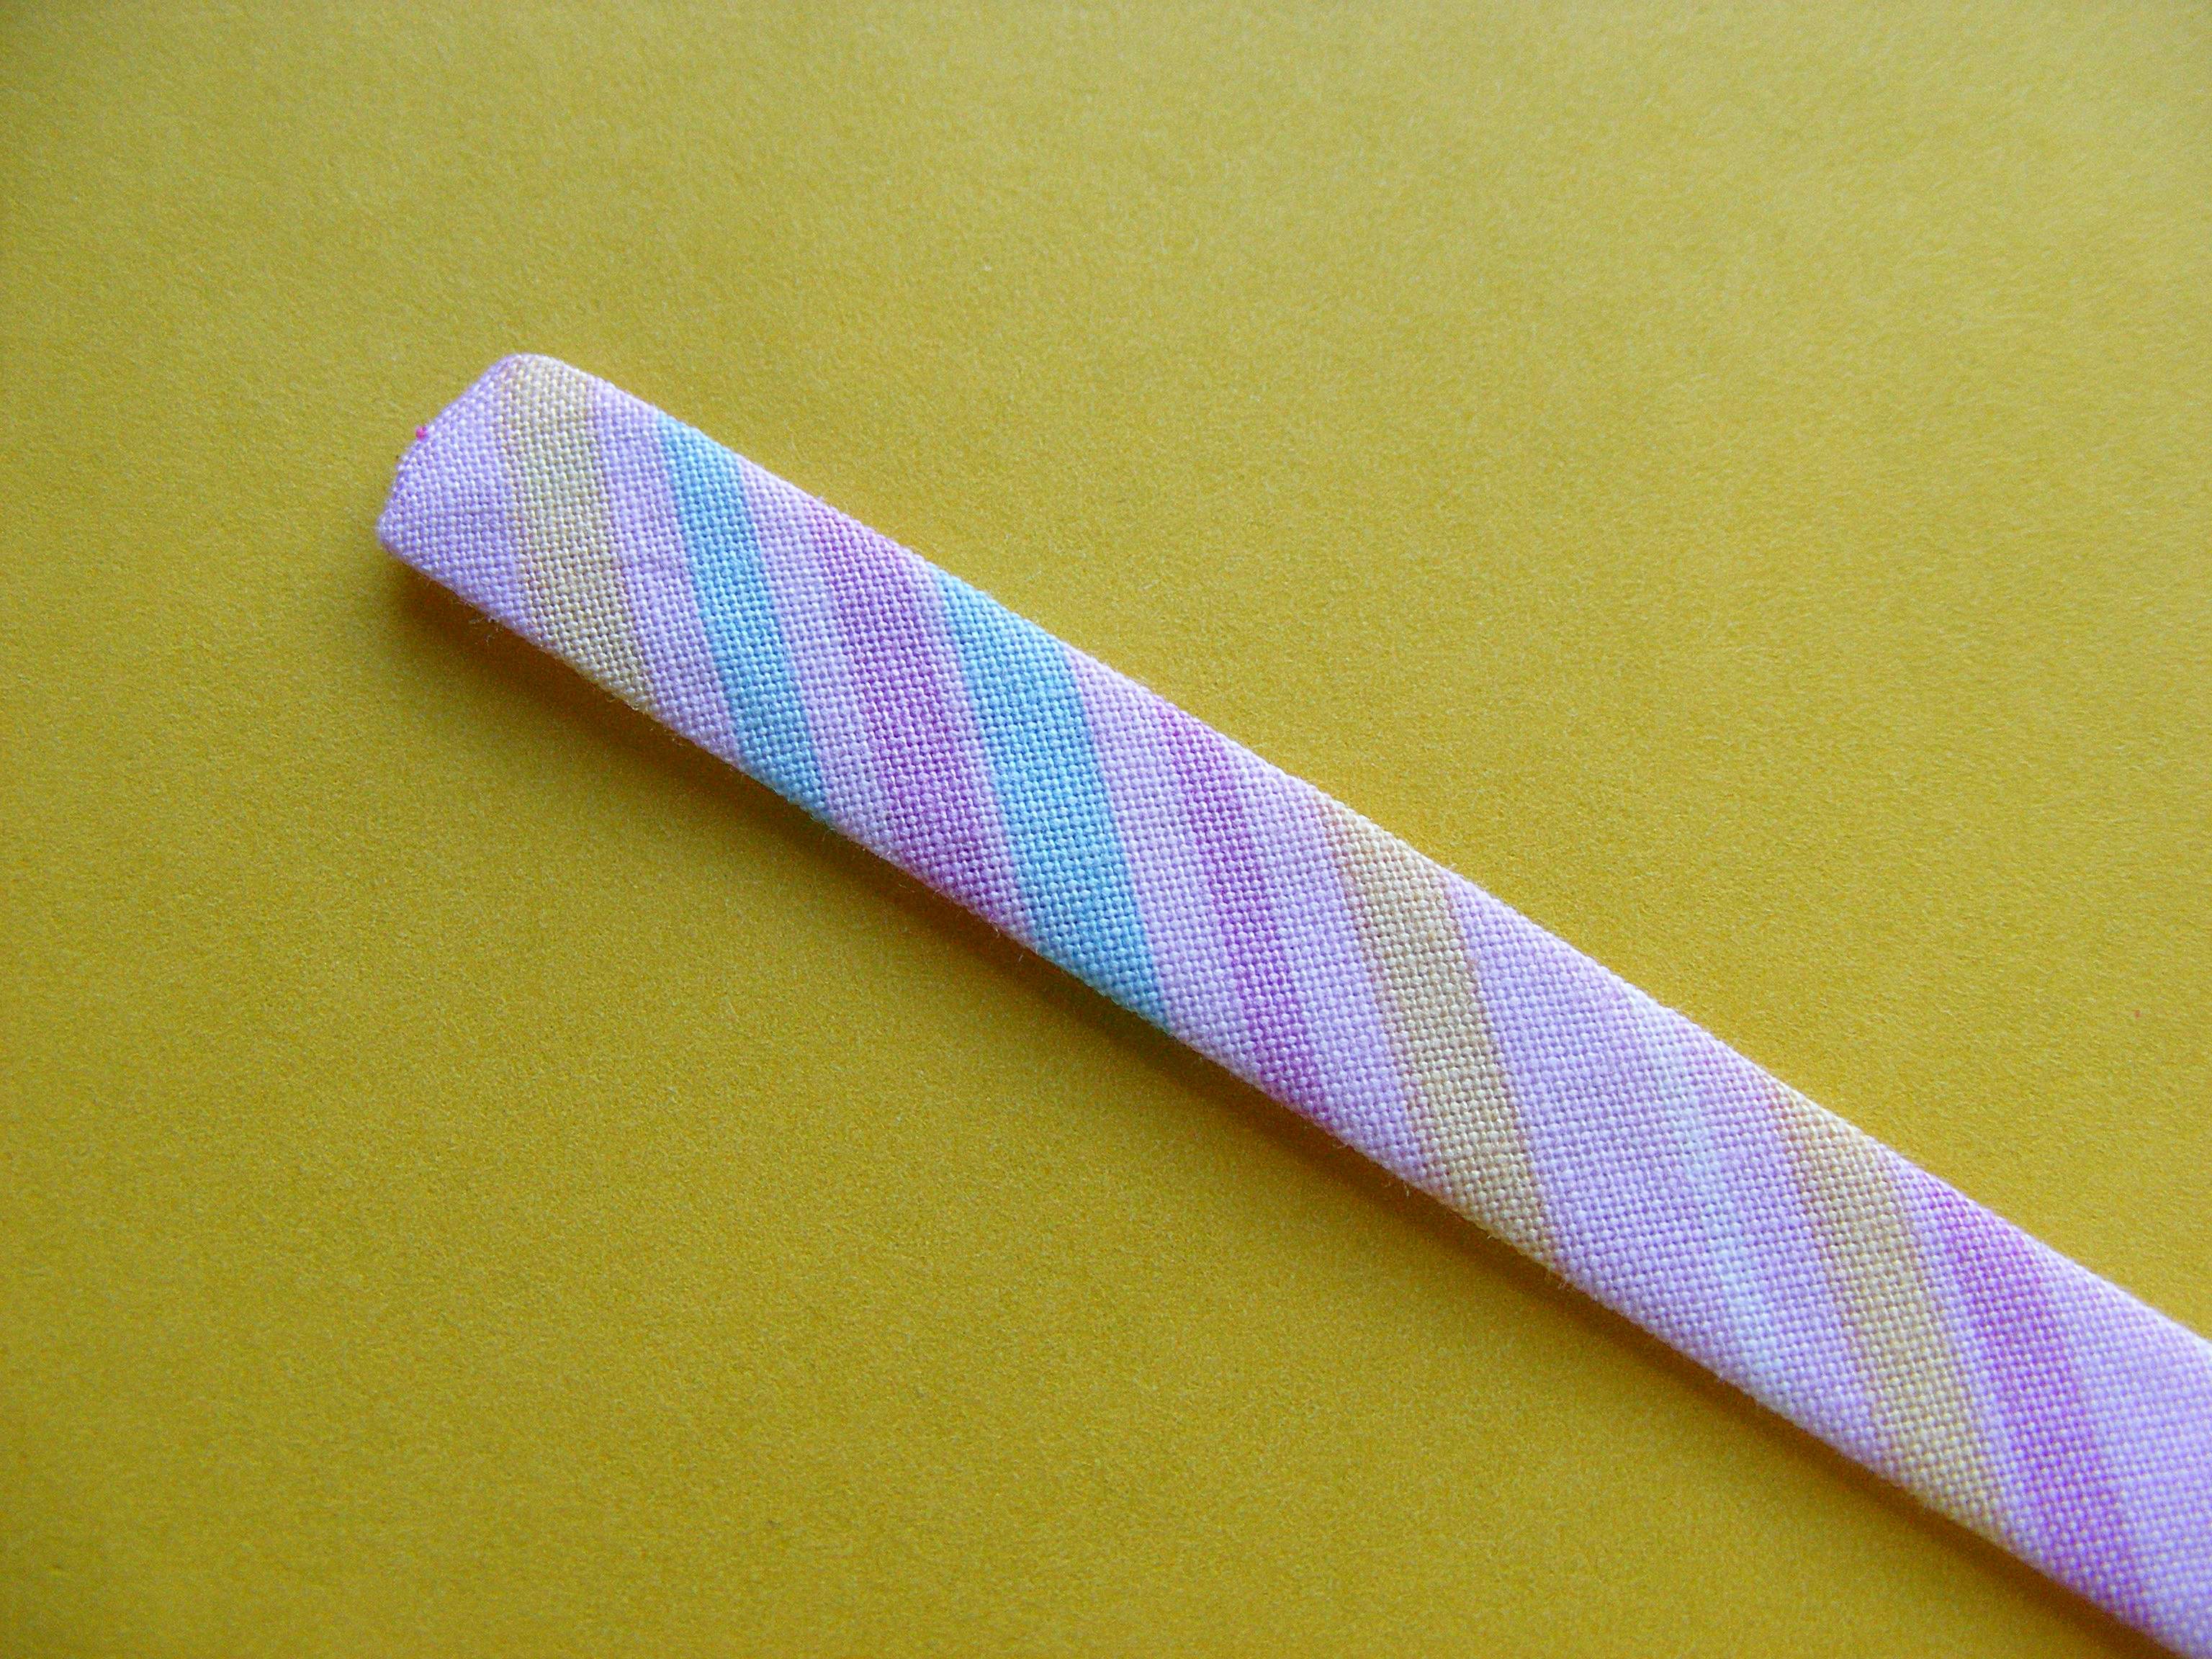
Speaking of cutting your strips – I’ve shown you how to cut strips using basic rotary cutting tools in this video. In today’s video I’ll show you how to join those strips together and how to use an inexpensive tool to make your own double fold binding tape.
There are a few different brands of bias tape makers out there – you should be able to find them in any big box fabric store.
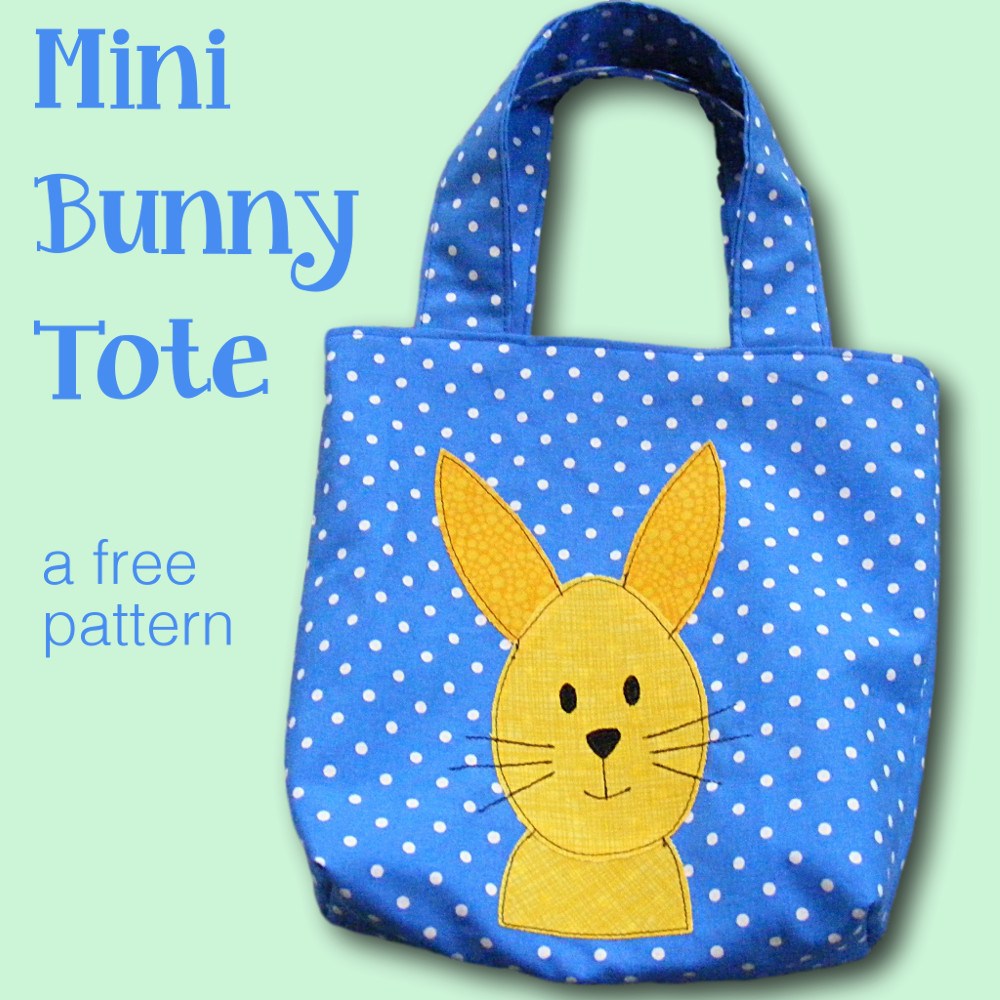
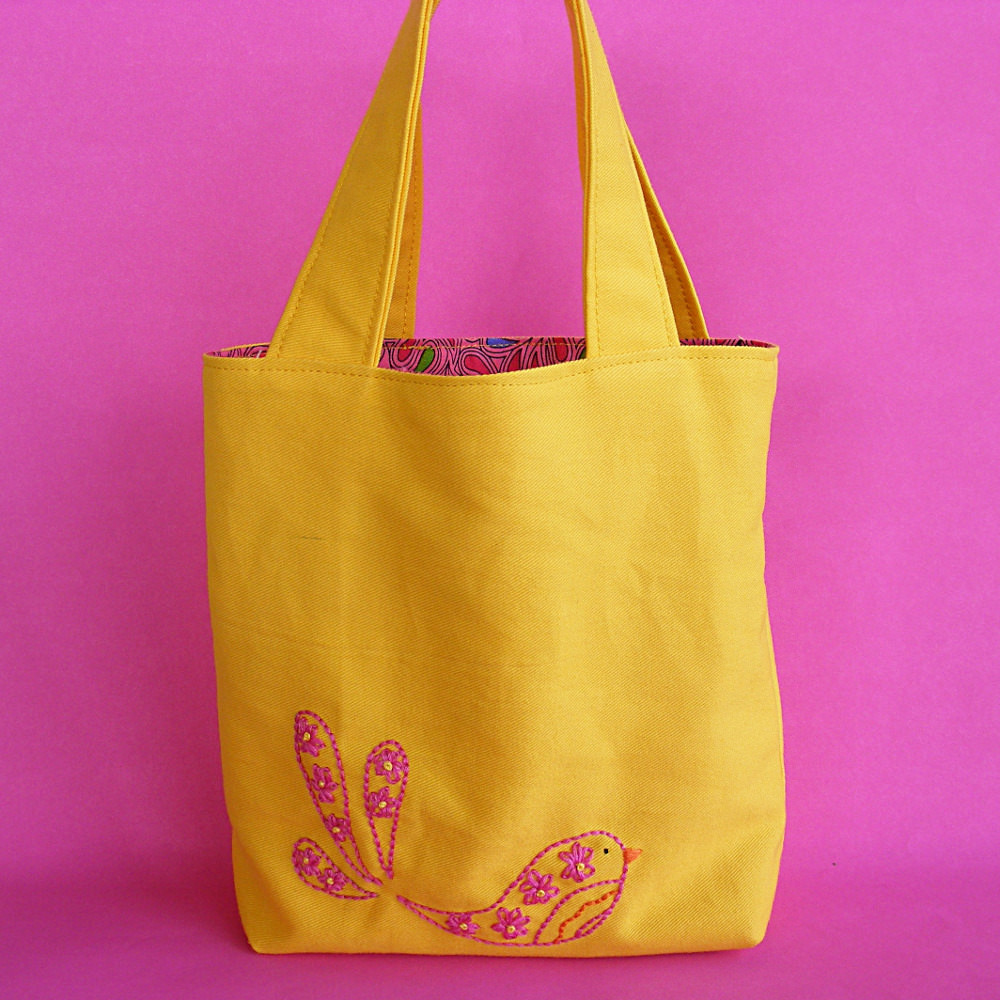
This mini tote bag measures 6 inches wide x 7 inches tall x 2 inches deep.
It’s the perfect size for packing your lunch, carrying a few books, or toting some toys.
And it’s easy to make!
You can decorate your bag any way you like. For that adorable bunny bag (perfect for Easter egg hunting) I used one of the blocks from this Woodland Critters quilt pattern, with the size reduced.
If you’re looking for free bunnies, I’ve got those too. Click here for the free Mix & Match Bunny applique pattern with several super cute bunny appliques. For all of these you’ll need to print the pattern pages at 60% to get the right size for the bag.
If you’re using a different pattern or your own design (or maybe a child’s drawing for an extra special bag) just make sure that the image is no more than 5 inches wide and 6 inches tall.
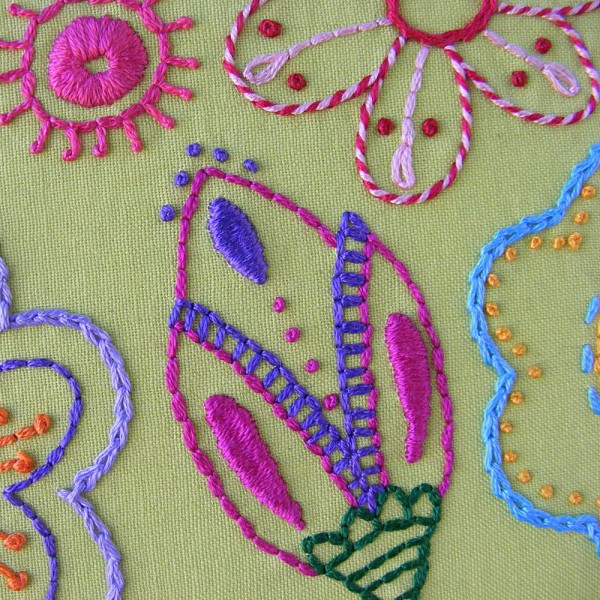
On the sample bag I used for the step-by-step photos below, I embroidered one of my favorite birds from this Bird Sampler pattern onto a solid fabric before sewing it up in Step 3. You’ll see the pretty bird in the final step. 🙂
You could also use a fabulous print that needs no extra fancification.
Choose a fun coordinating color for the lining and you’re ready to sew!
It’s a totally versatile tote bag pattern that you can use in so many different ways. Have fun with it!
What You’ll Need
one fat quarter of the main fabric
one fat quarter (or less) for the lining fabric
any additional materials you want for optional embellishing
Step 1
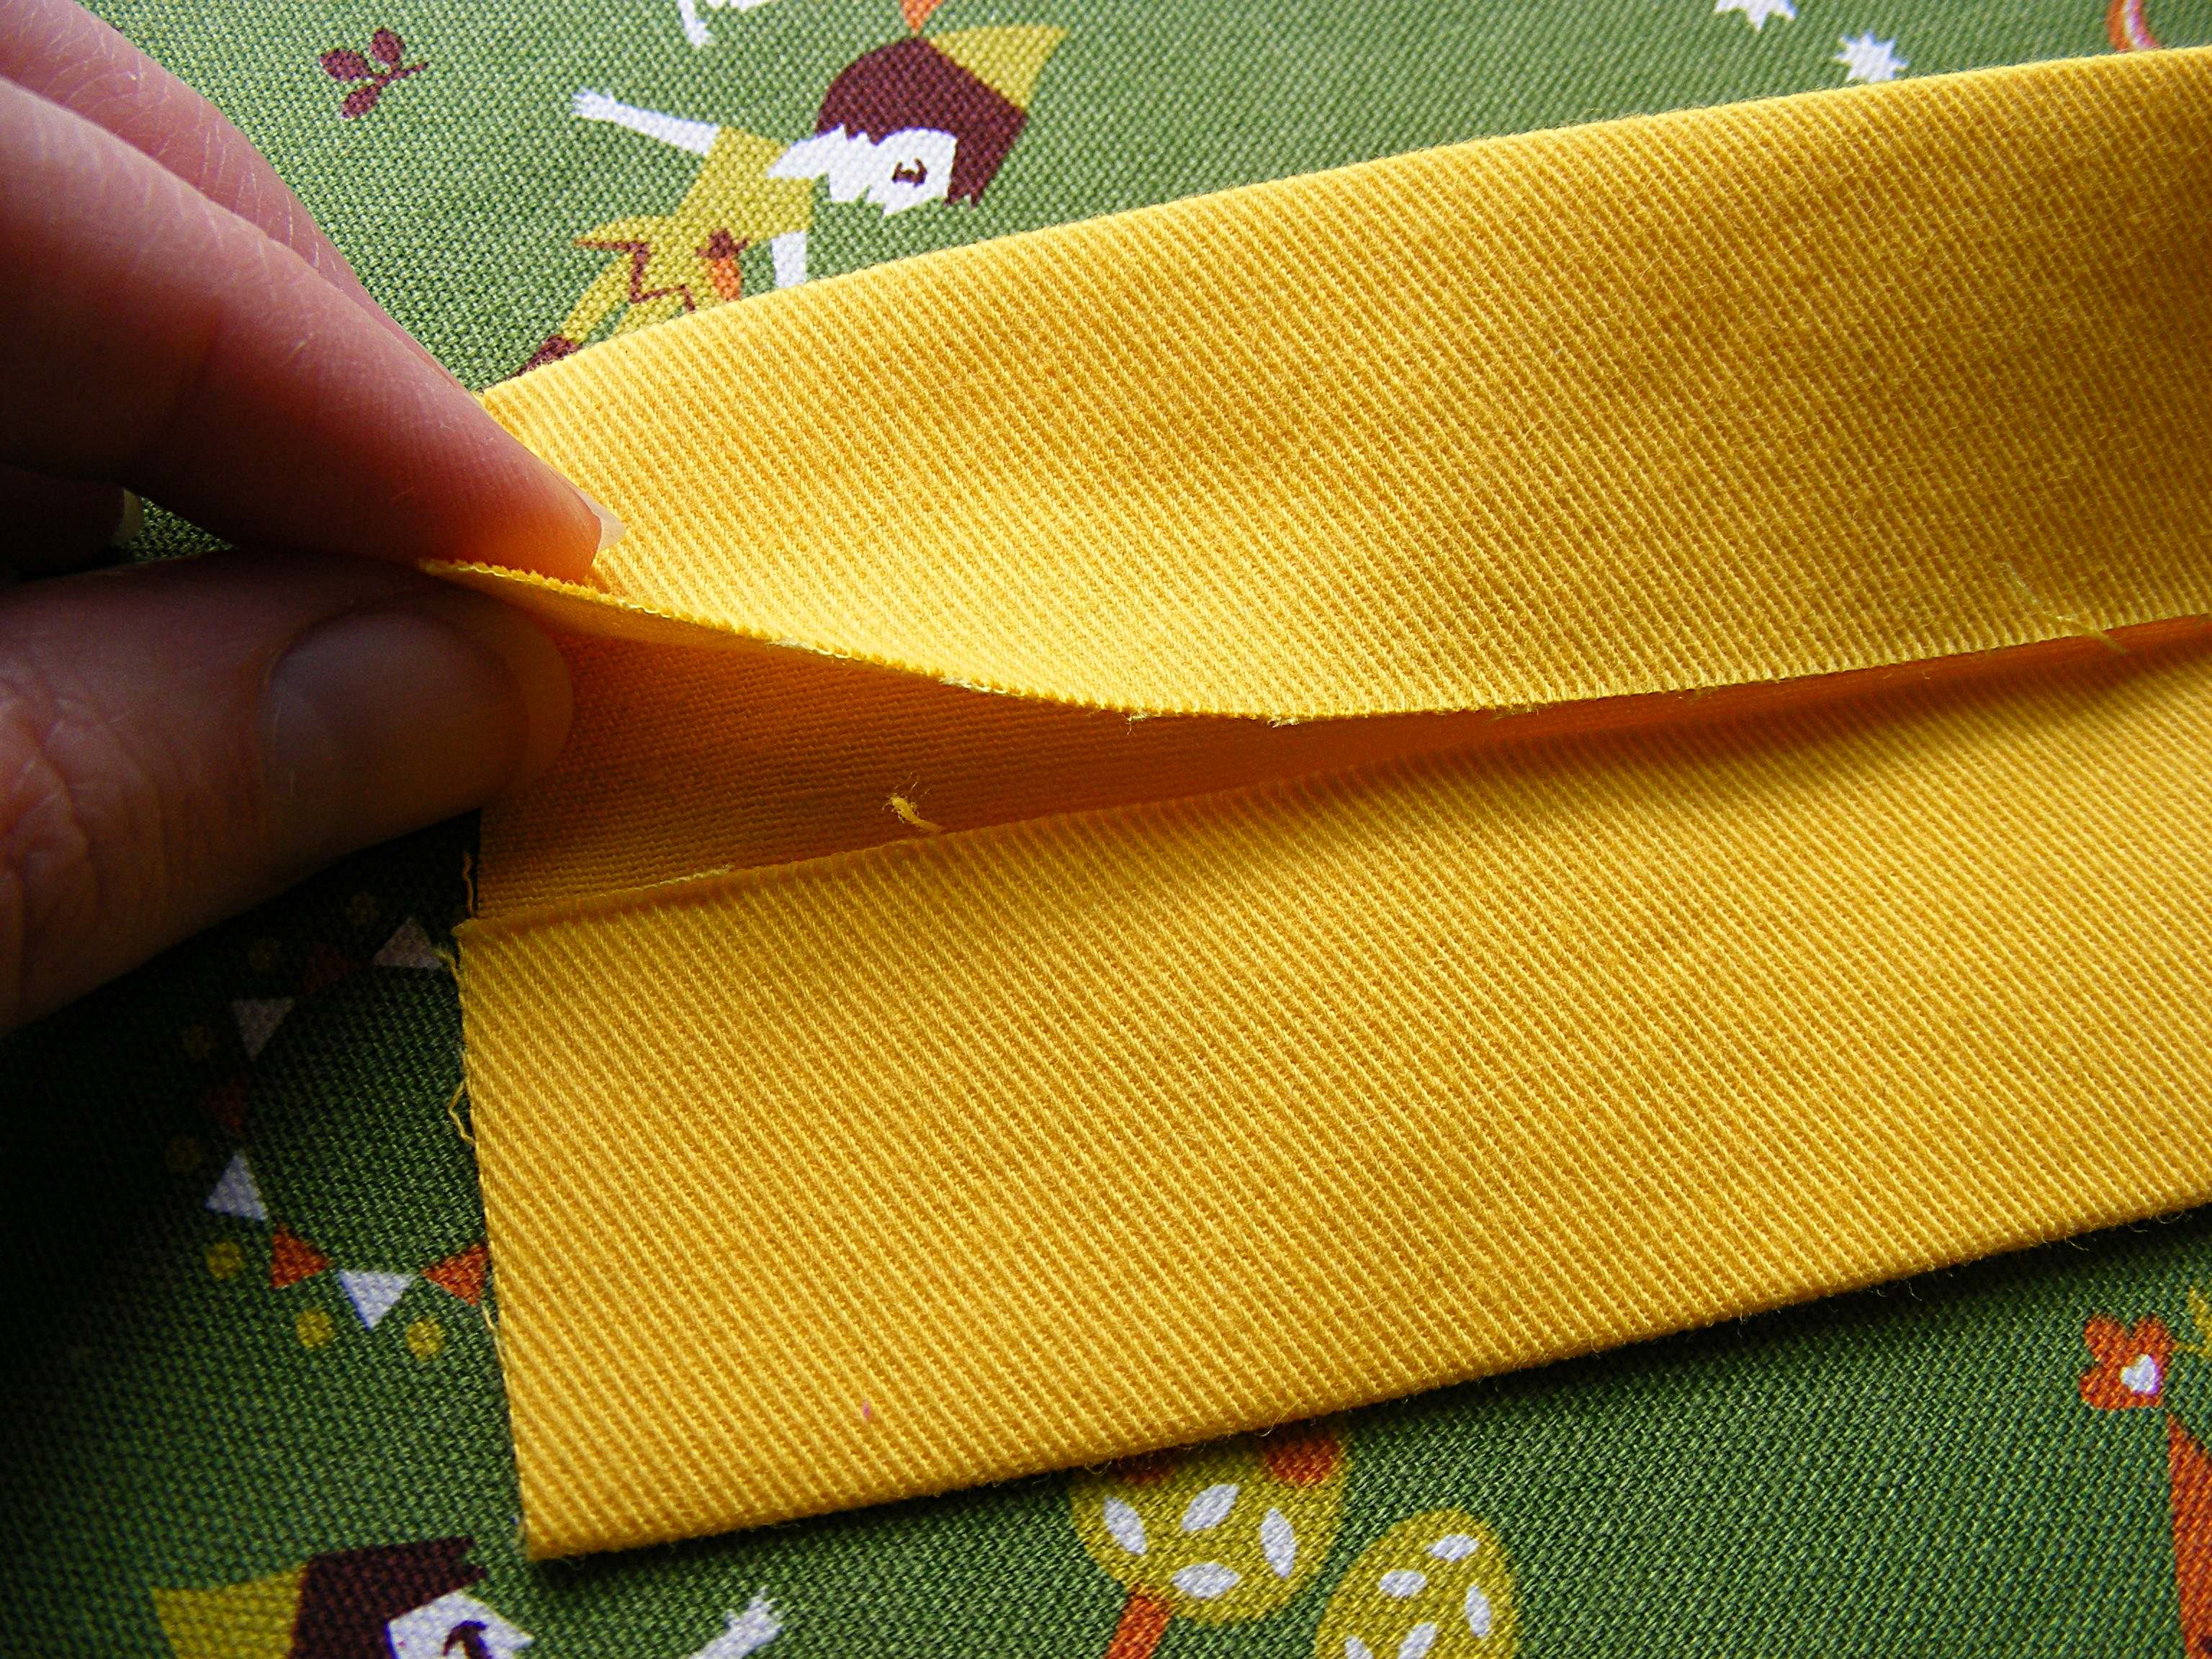
We’ll start with the handles. Cut two strips of the main fabric, each 5 x 12 inches. Fold one of the fabric strips in half the long way, right sides facing out. Press. Open the strip back up and fold each long edge in toward the center fold. Press.
Fold in half again along the center fold so that you have one long strip, four layers of fabric thick. This makes a nice, sturdy strap. Press.
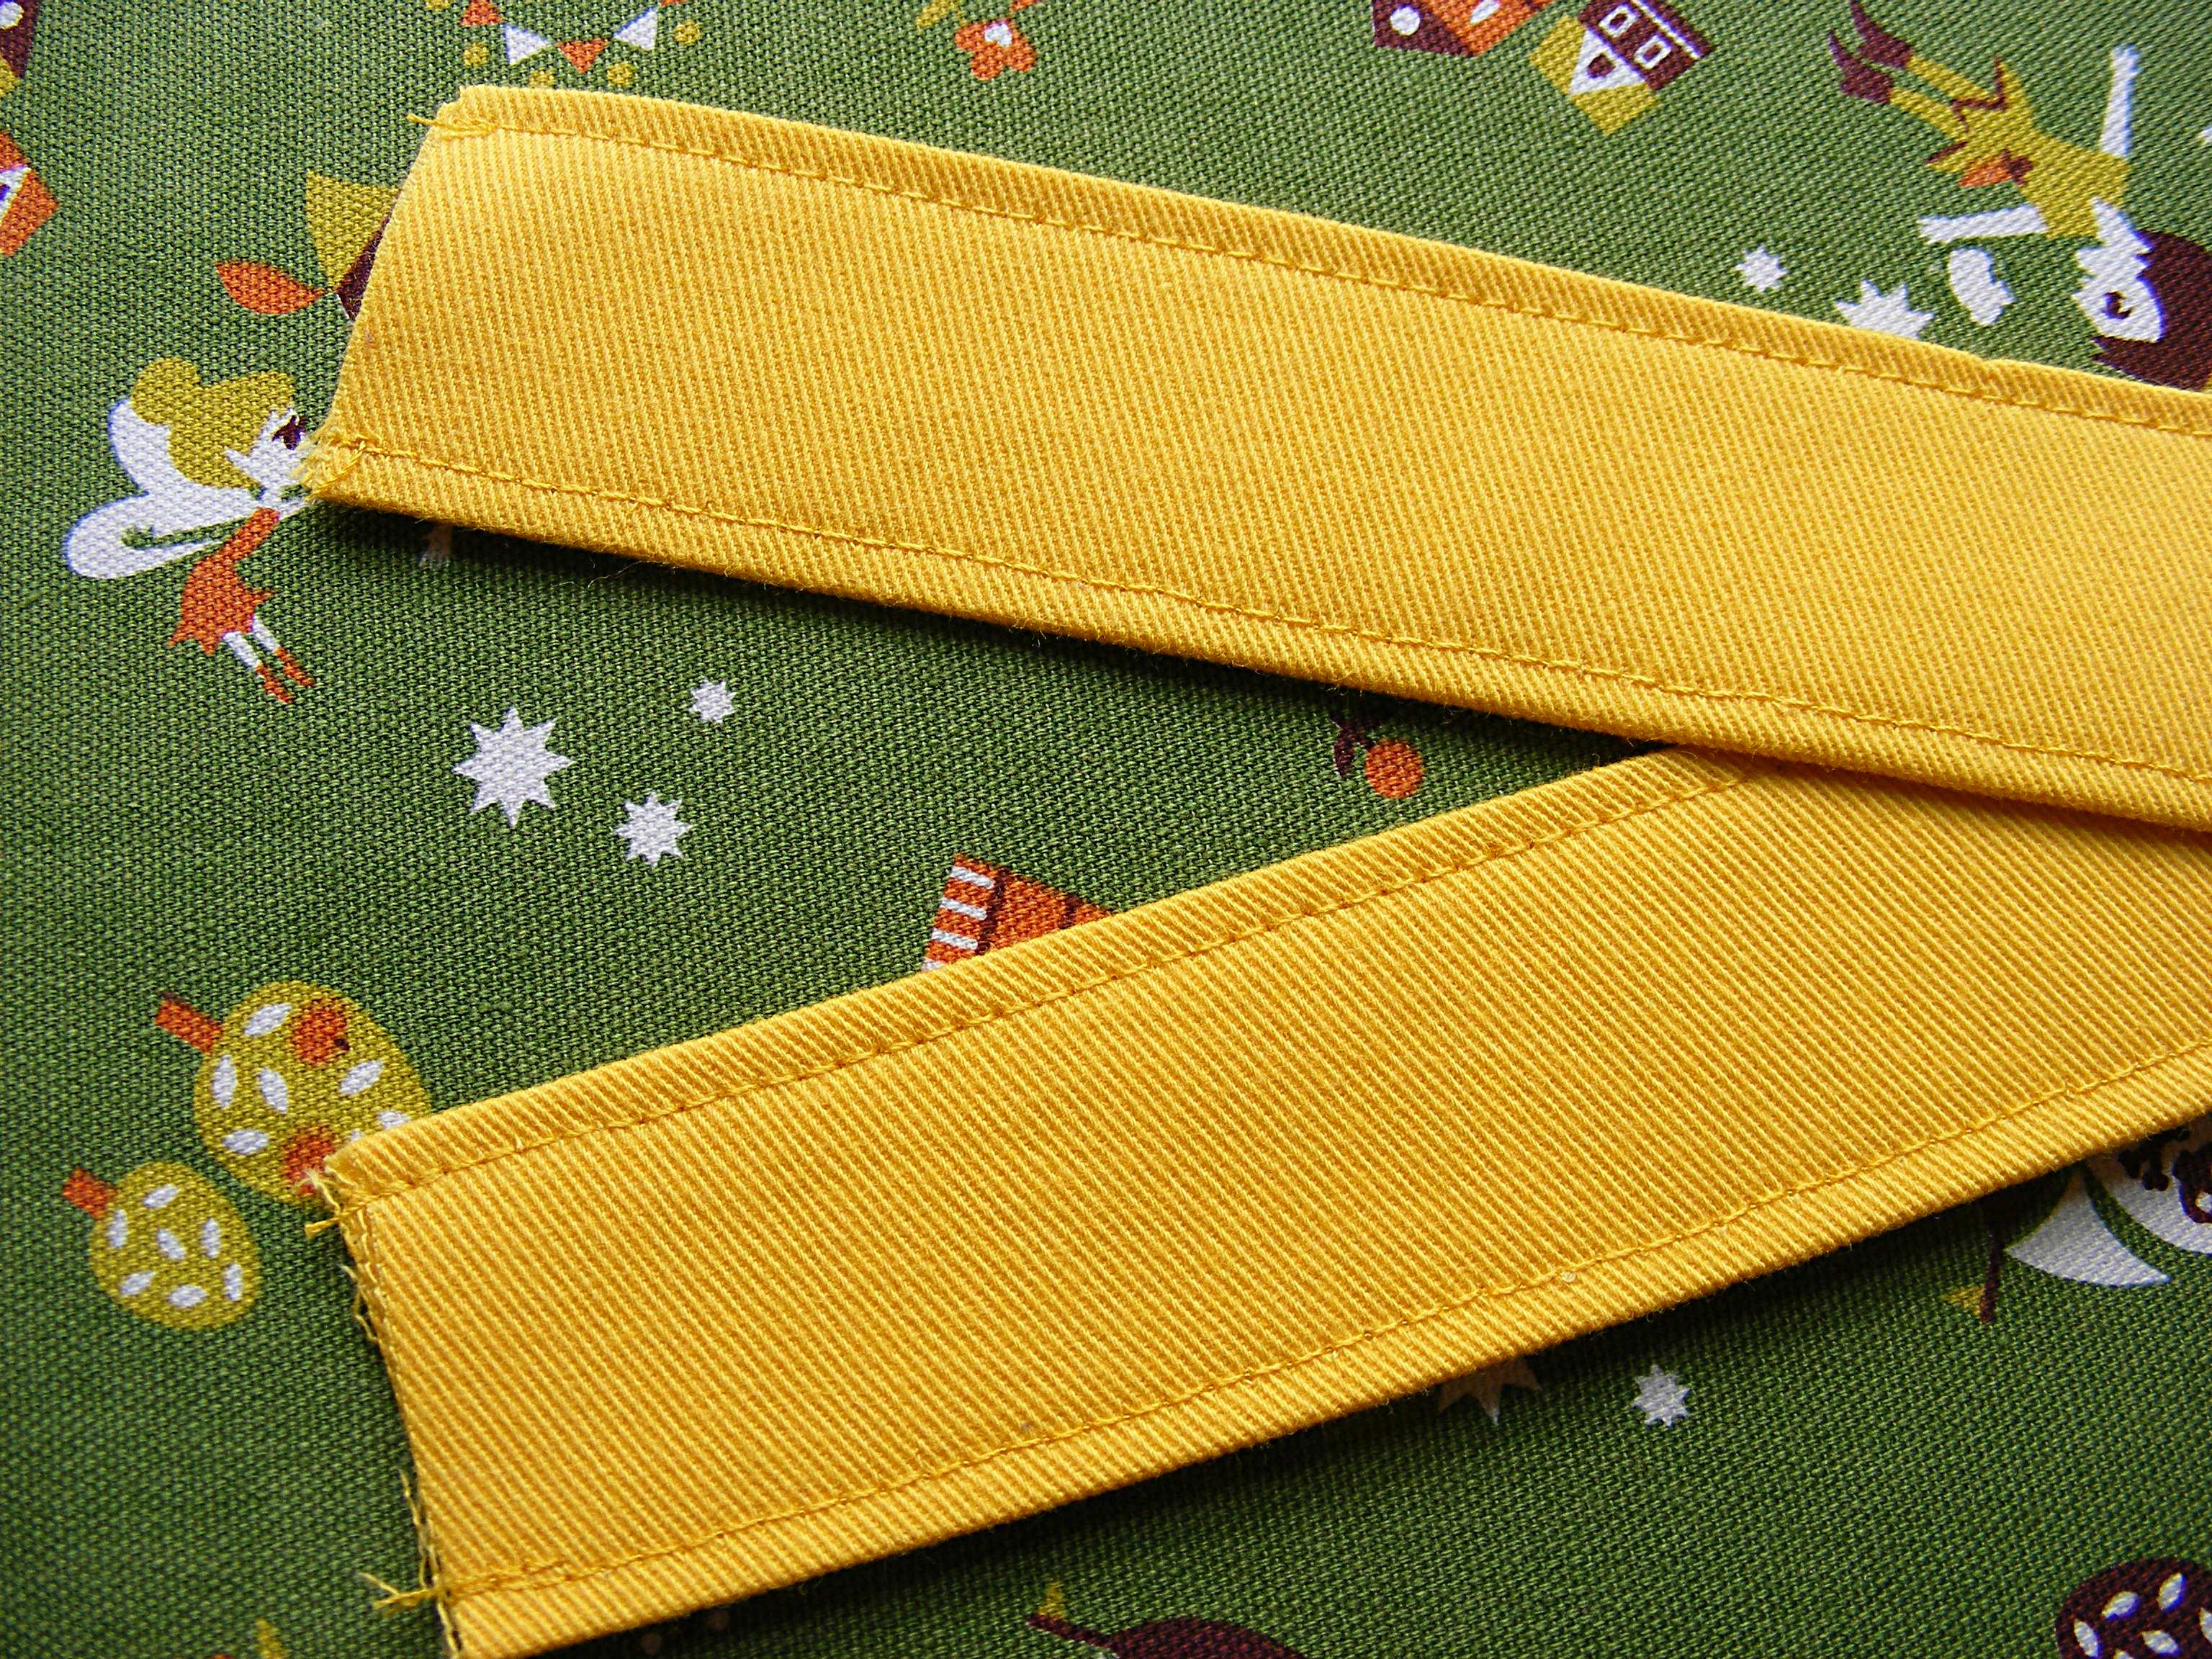
Topstitch along both long edges, about 1/8 inch from the edge.
Repeat for the second handle.
Step 3
Now for the bag. Cut two 9 inch squares from the main fabric, and two from the lining fabric. If you’re going to embroider your bag (or embellish it in any other way) do this now before you sew the pieces together.
Pin the two main fabric squares right sides together. Using 1/4 inch seam allowance, stitch around both sides and the bottom of the bag.
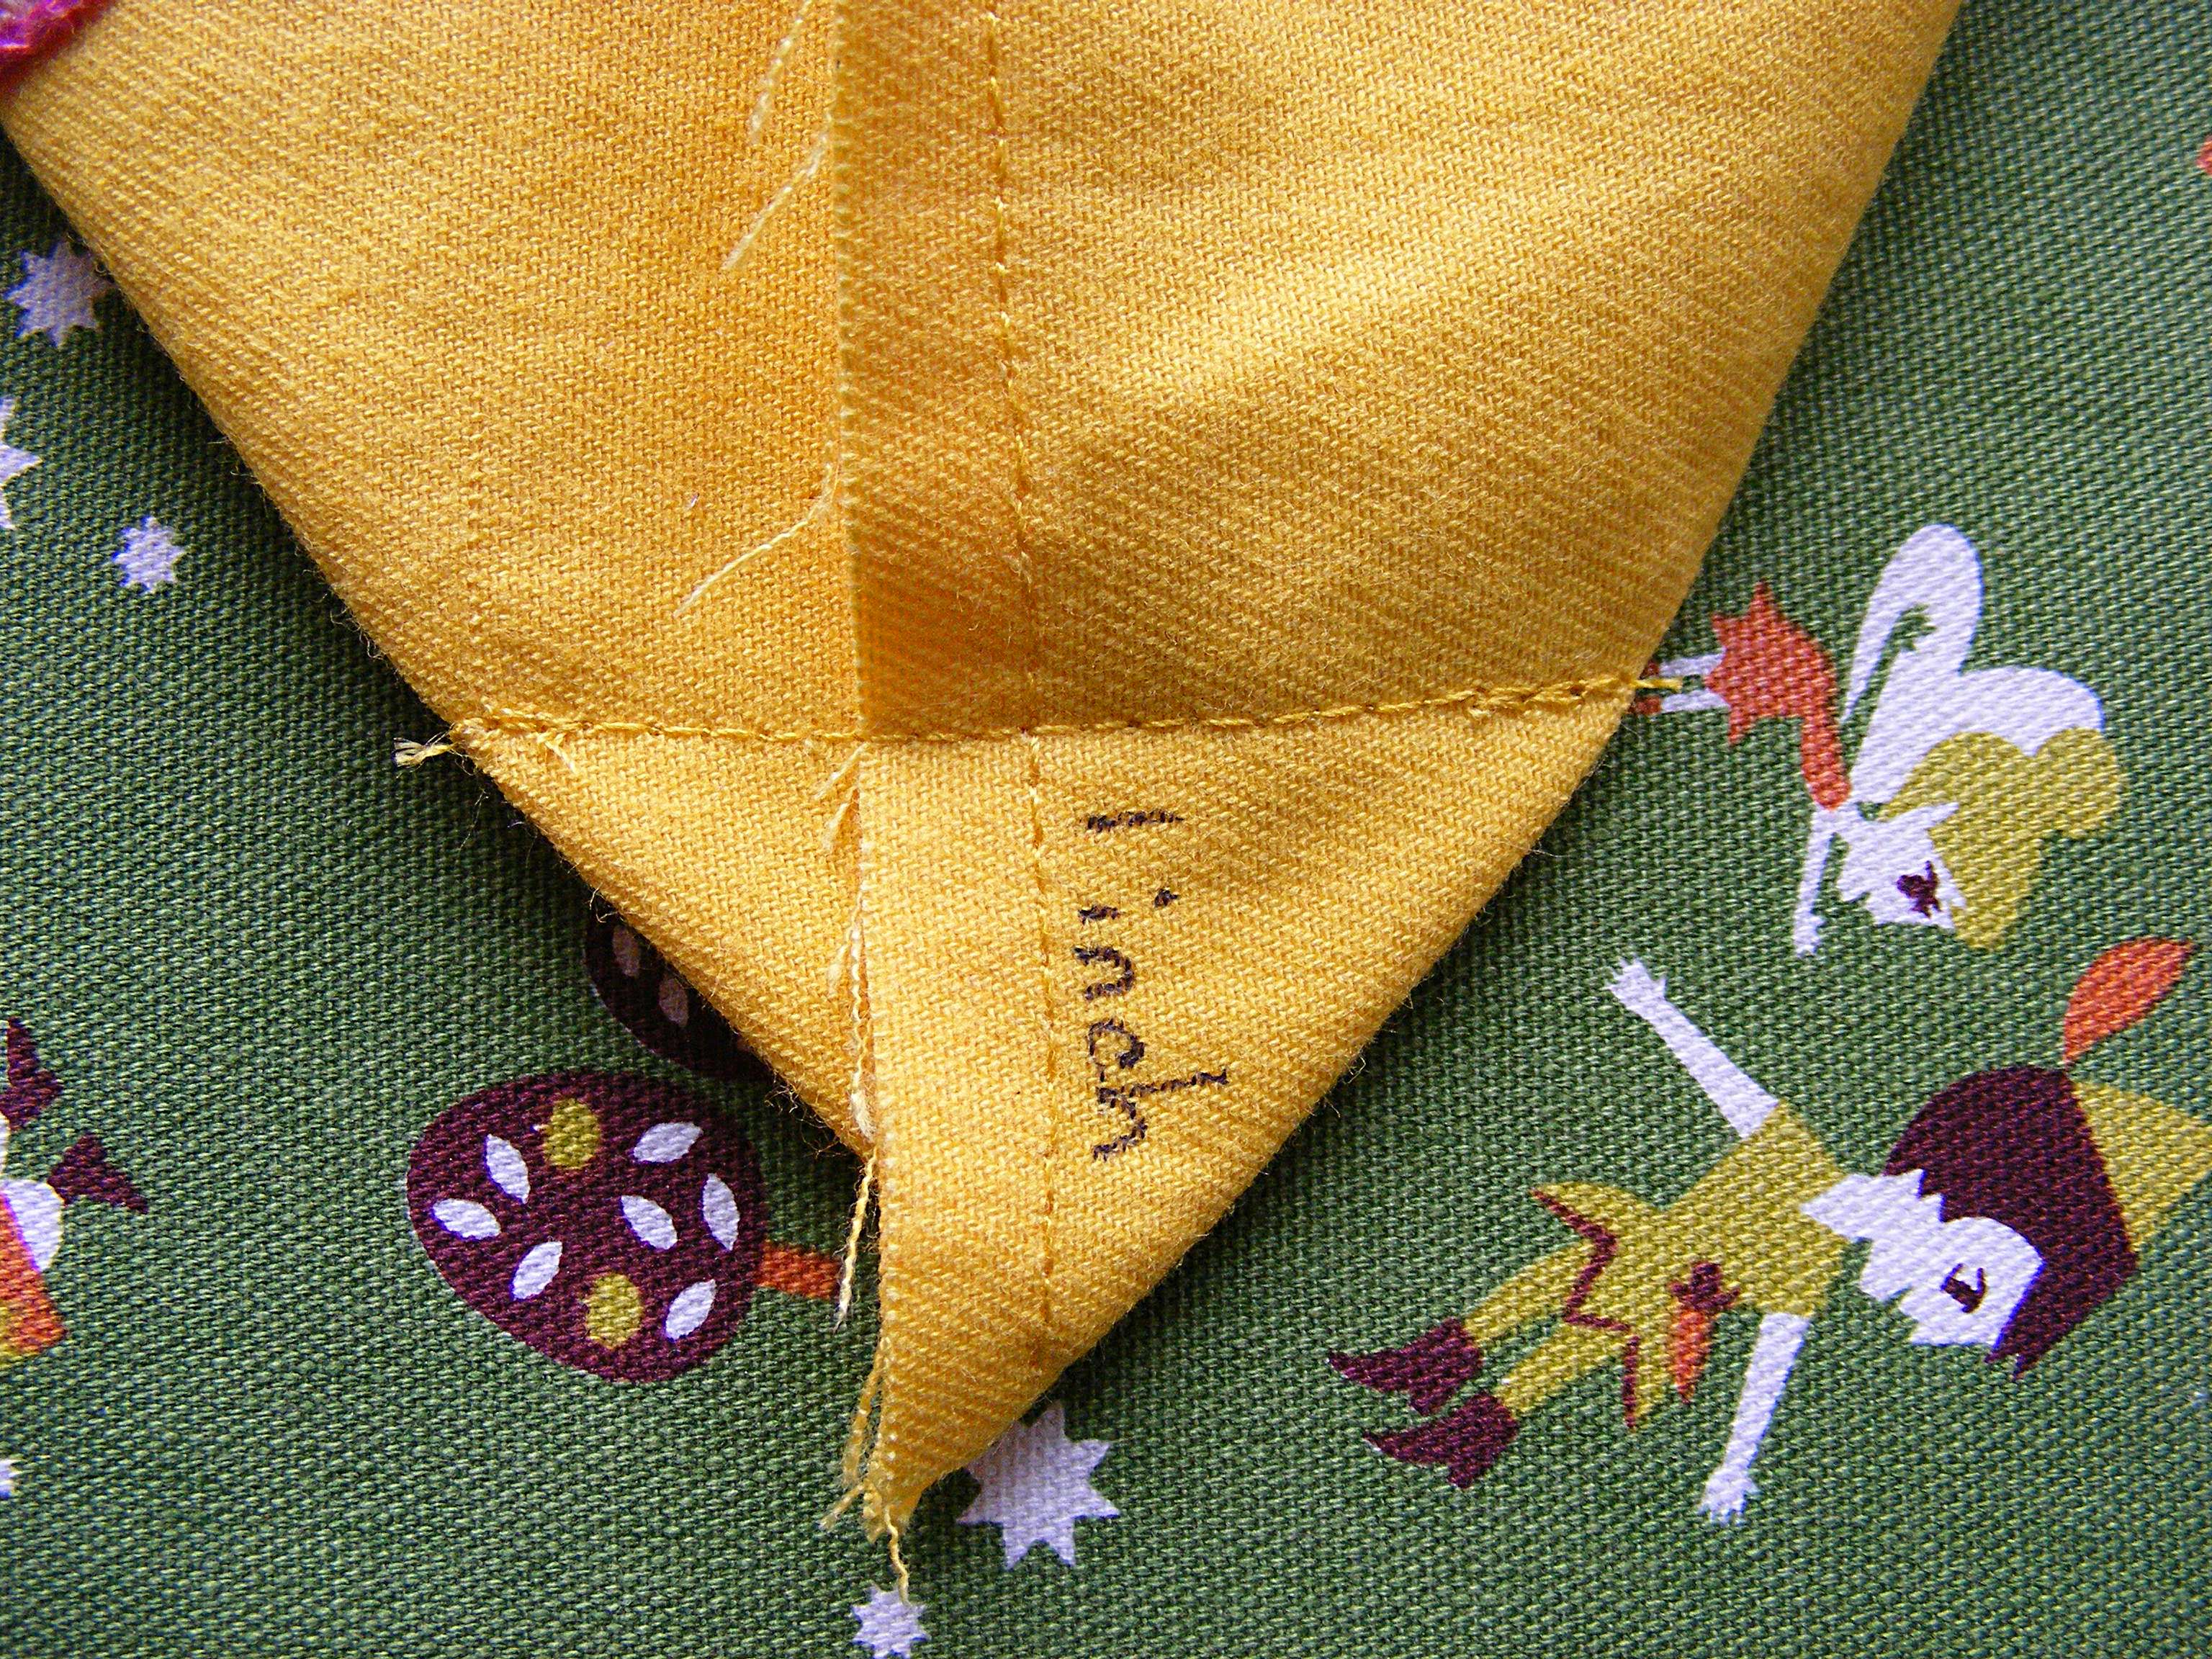
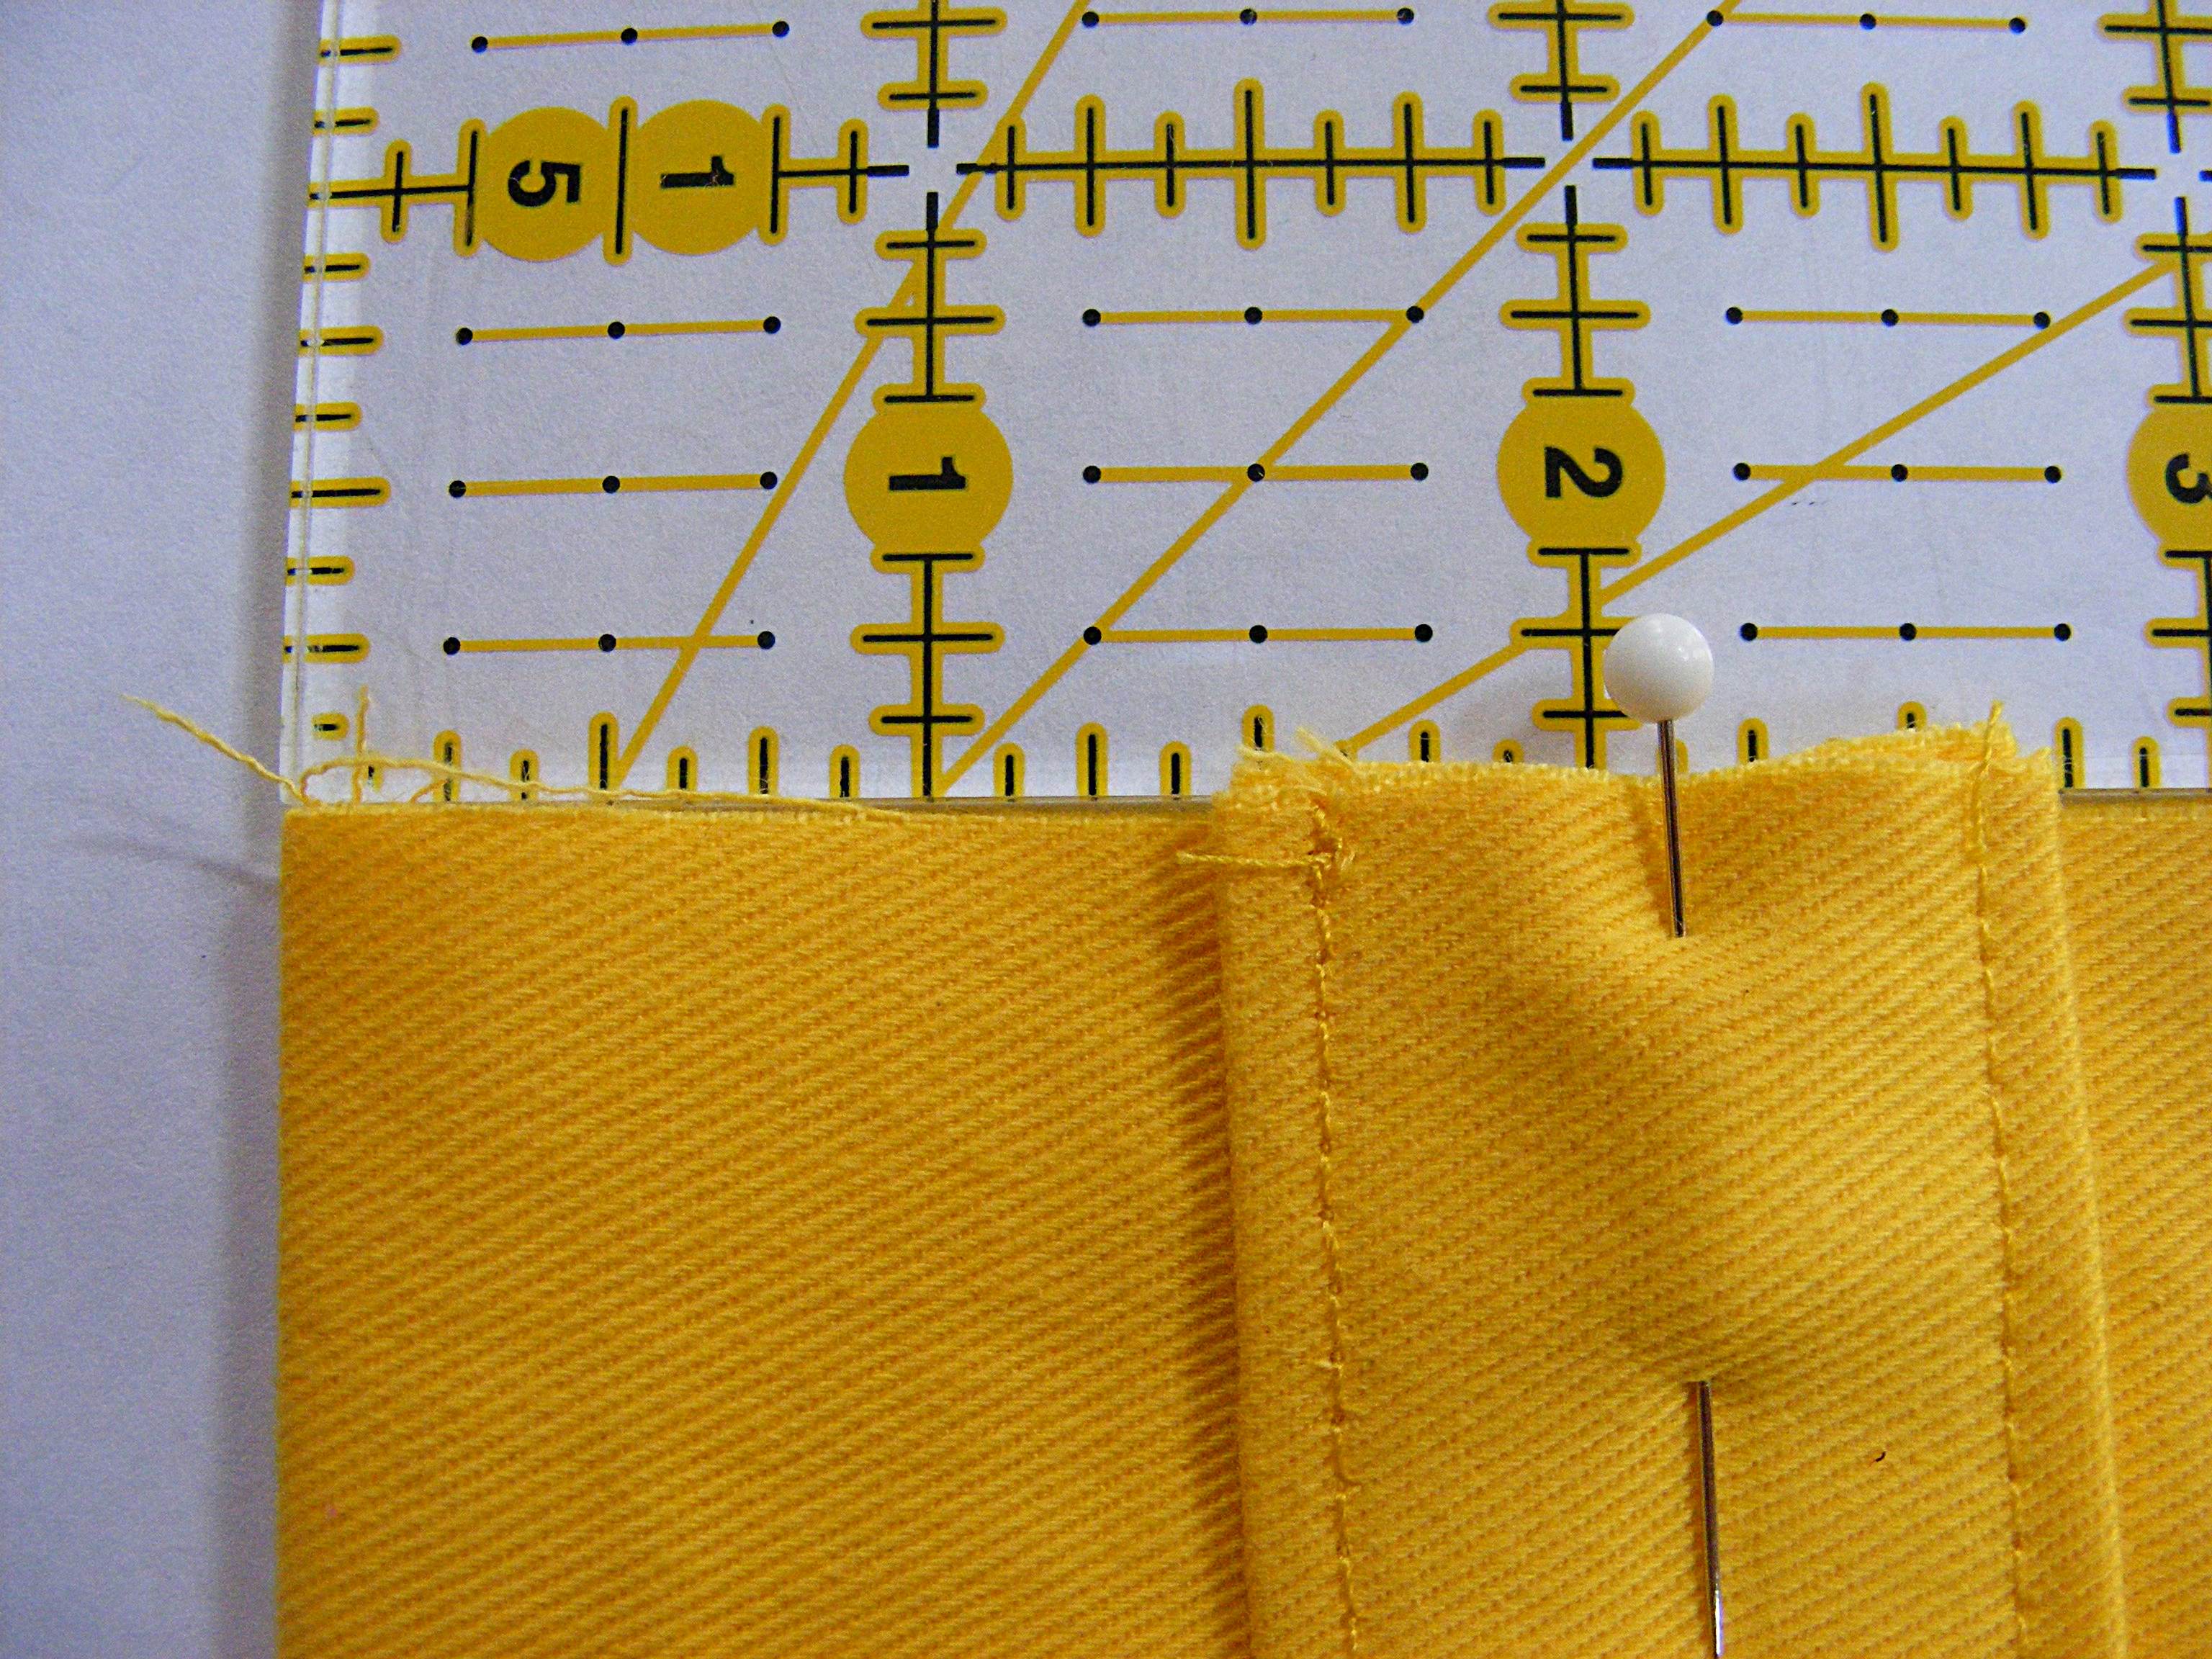
Open out one bottom corner of the bag so that the side seam and center bottom seam line up, and the corner of the bag makes a point. Measure up one inch from the tip of the stitching (NOT the tip of the fabric triangle) and stitch a line perpendicular to the side seam.
Turn the main bag right side out. Leave the lining inside out.
Pin the edge of one strap to the top edge of the bag, 1 1/2 inches in from the side seam.
Repeat for the other end of the strap.
Repeat with the second strap on the other side of the bag.
Step 6
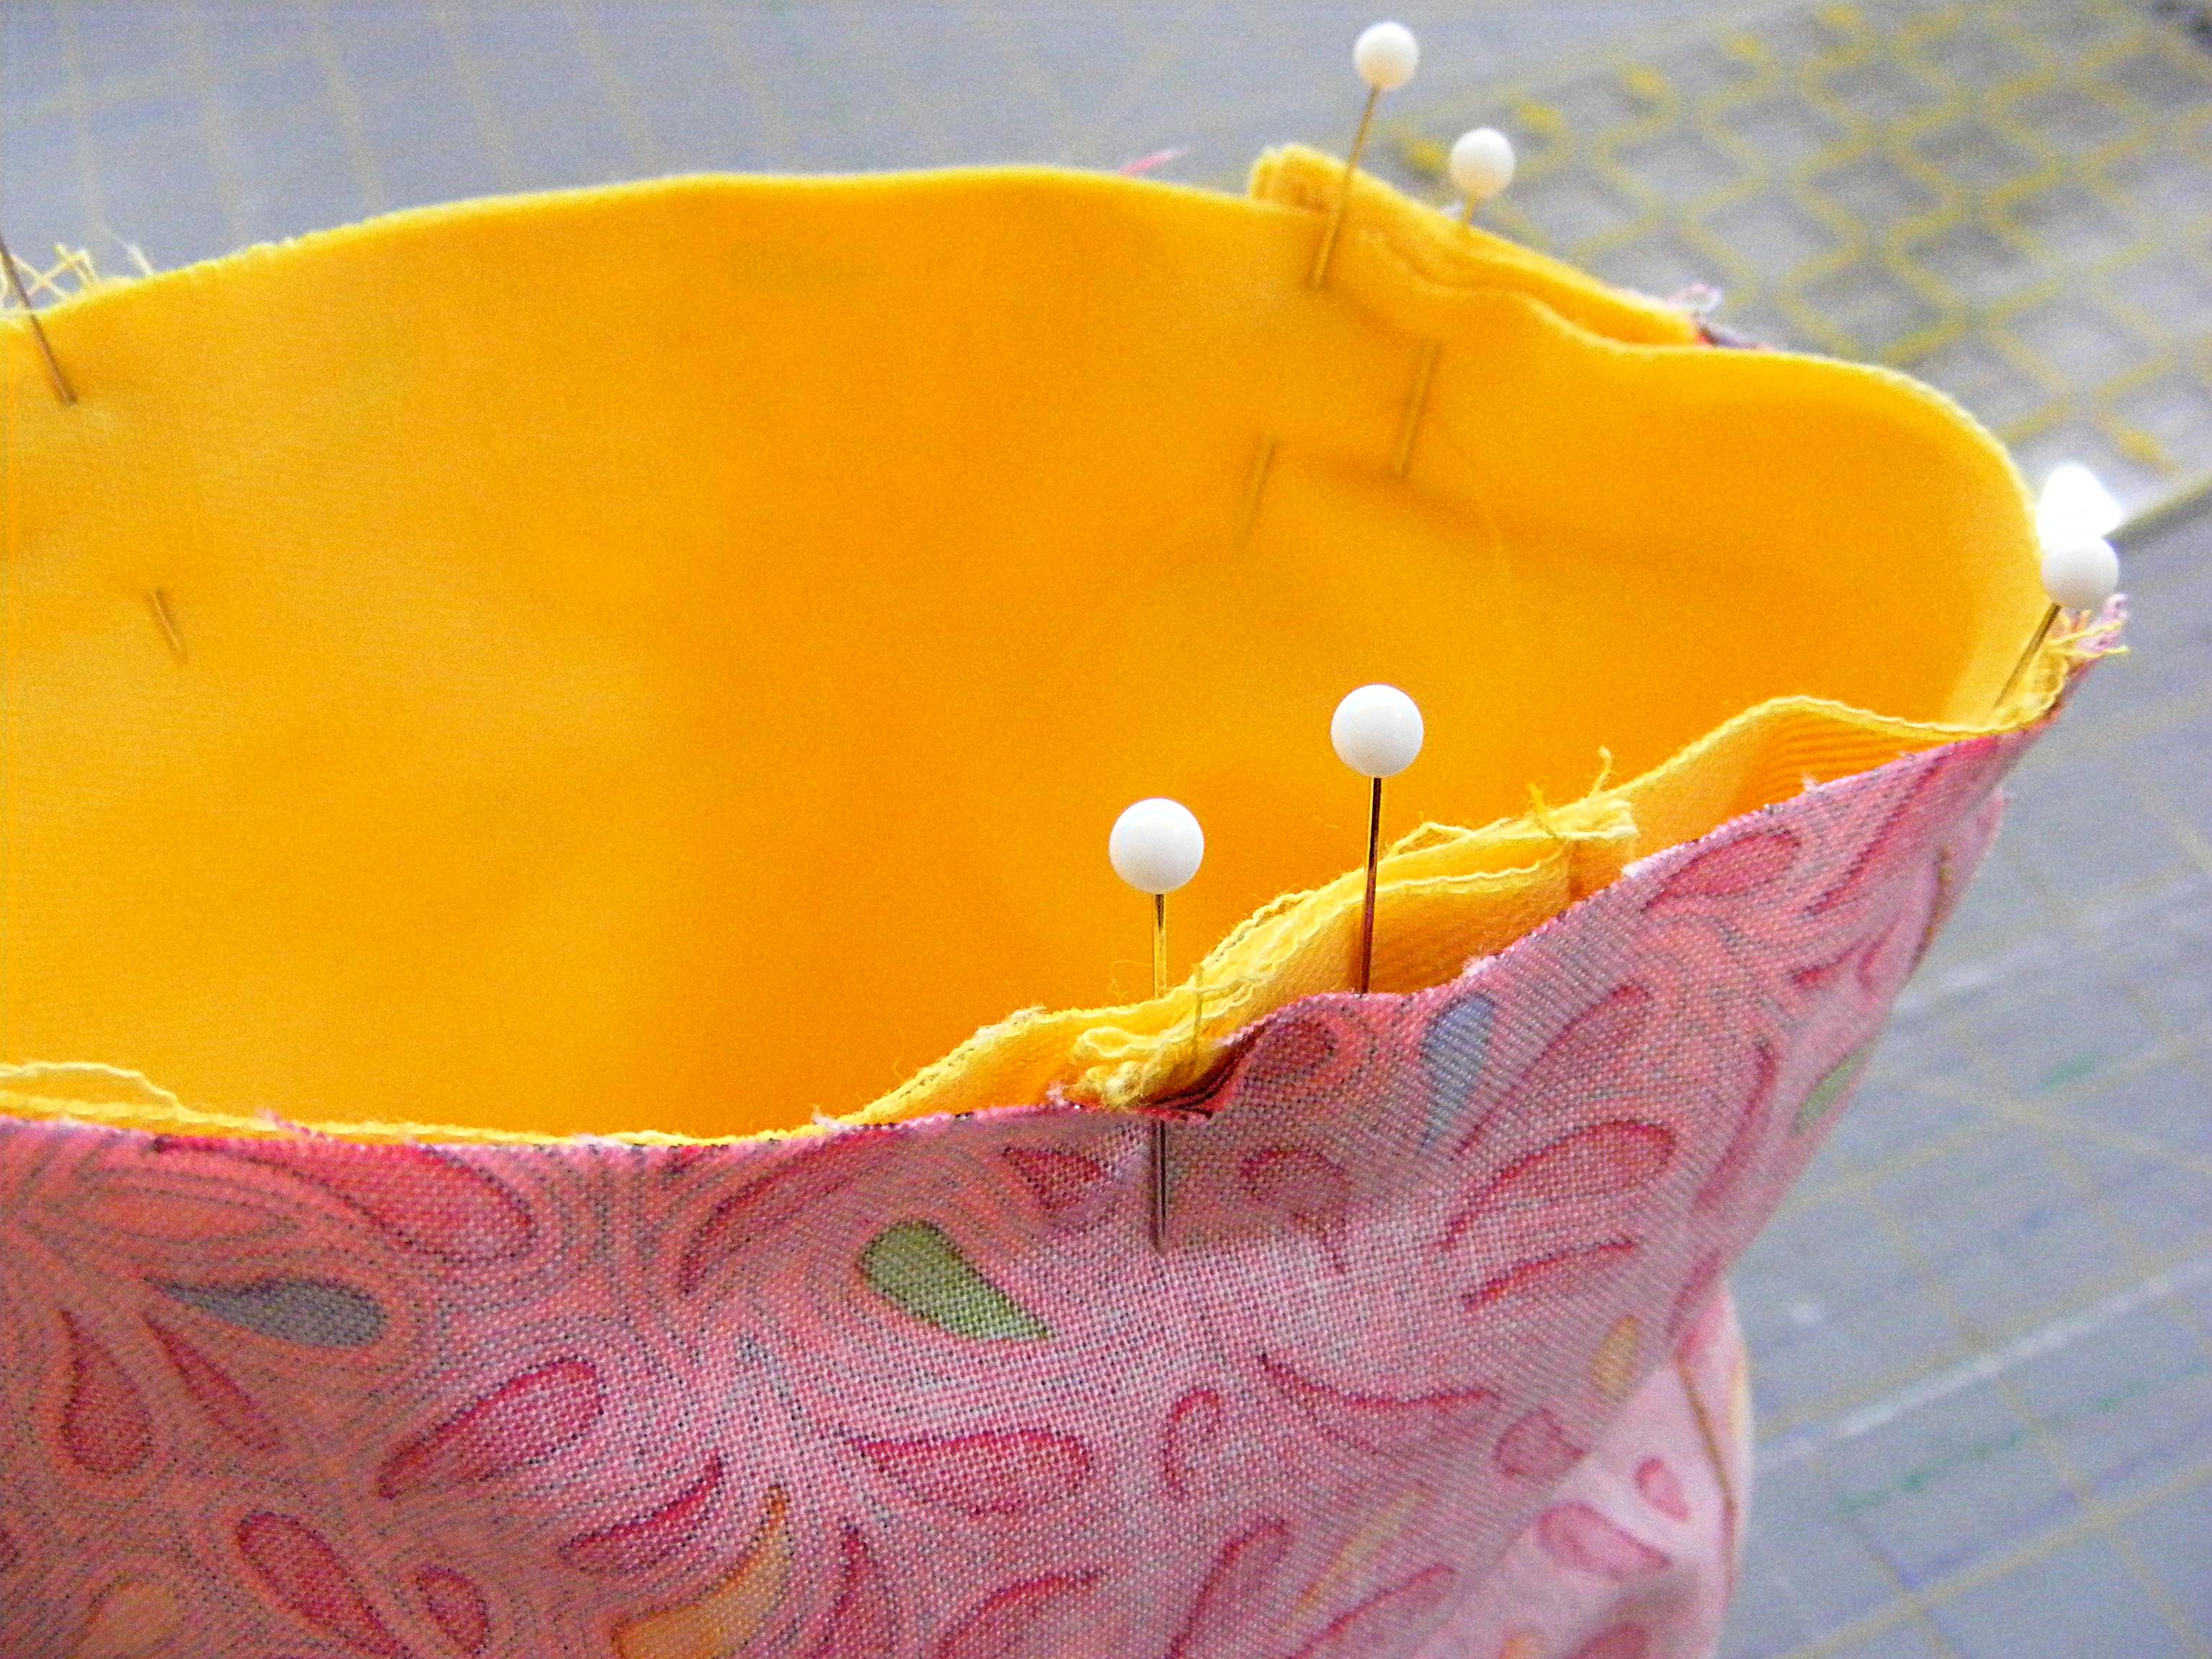
Put the main bag (right side out) inside the lining (wrong side out), with the straps sandwiched between the two layers.
The bag and lining should be right sides together.
Line up the side seams and pin the layers together around the top edge of the bag.
Step 7
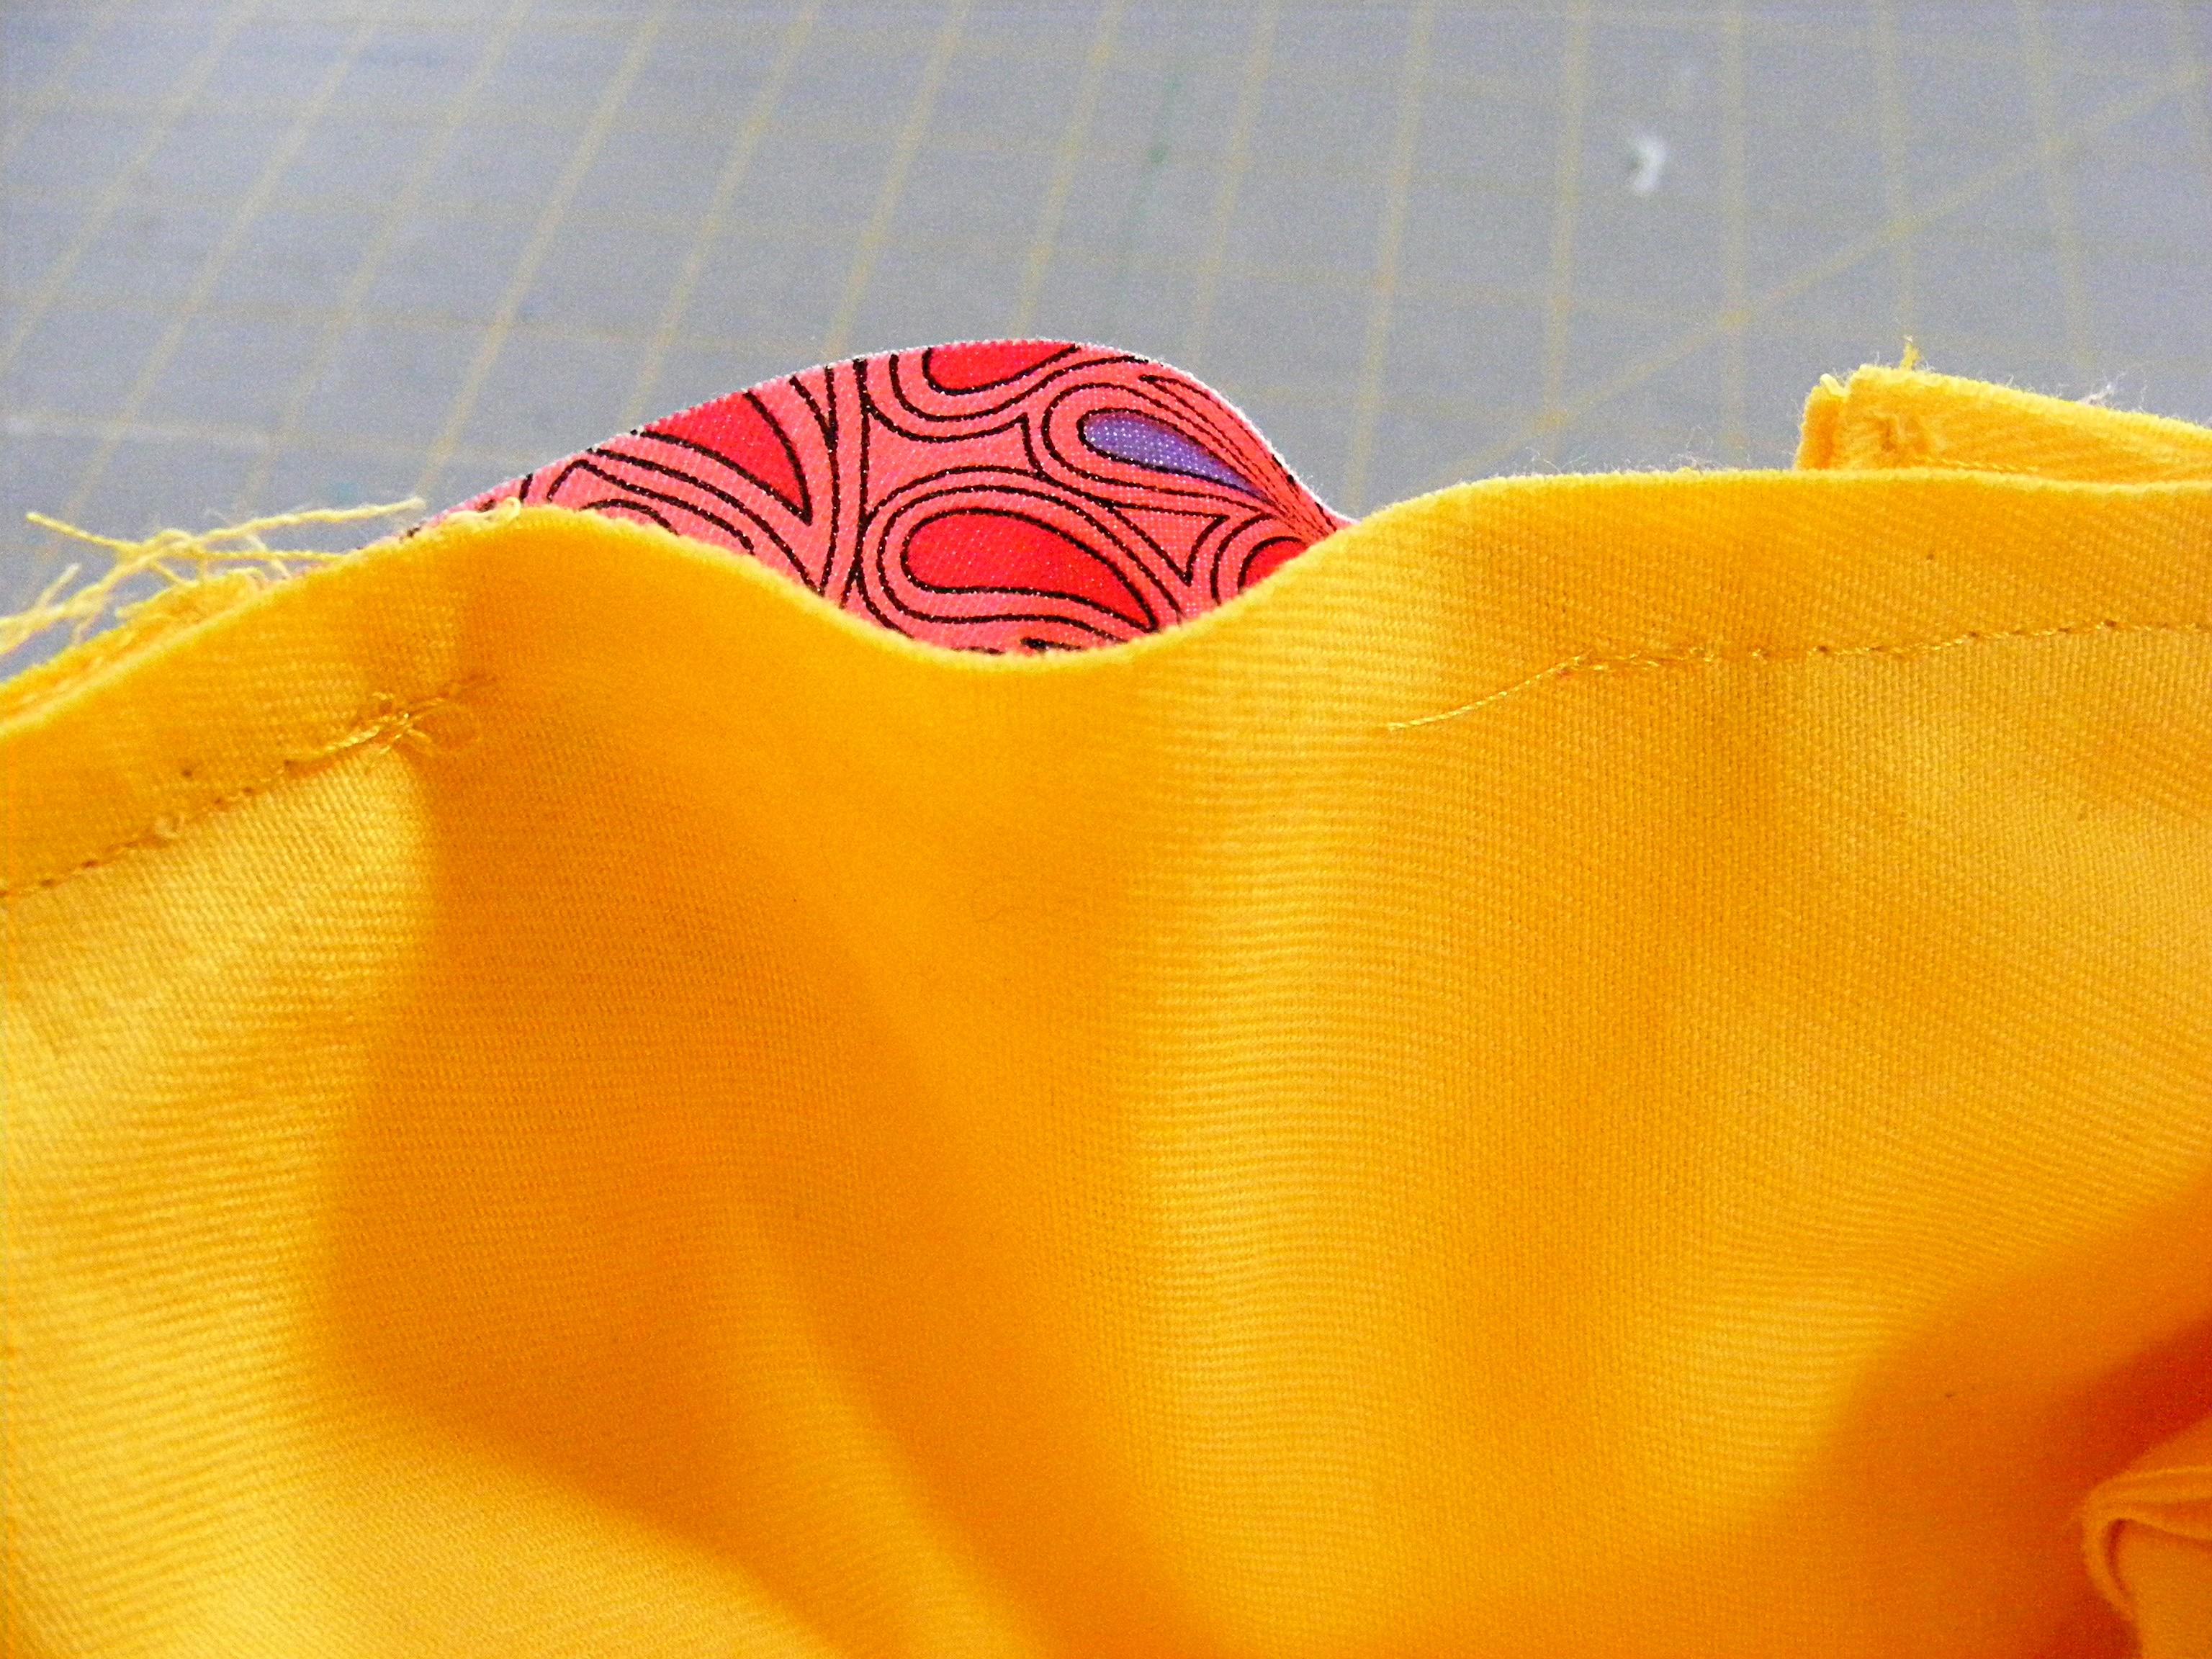
Using 1/4 inch seam allowance, stitch almost all the way around the top edge of the bag. Leave the space between the two ends of one handle unstitched, so you can pull the bag through the opening.
The easiest way to do this is to start sewing right at the inside edge of one handle. Sew through that handle, around the side seam, through both handles on the other side, around the second side seam, and through the last handle. Stop as soon as you sew over the last handle.
Be sure to backstitch at the beginning and end of your stitching. This is a pretty small opening and there will be some pressure on the edges as you pull the bag through.
Step 8
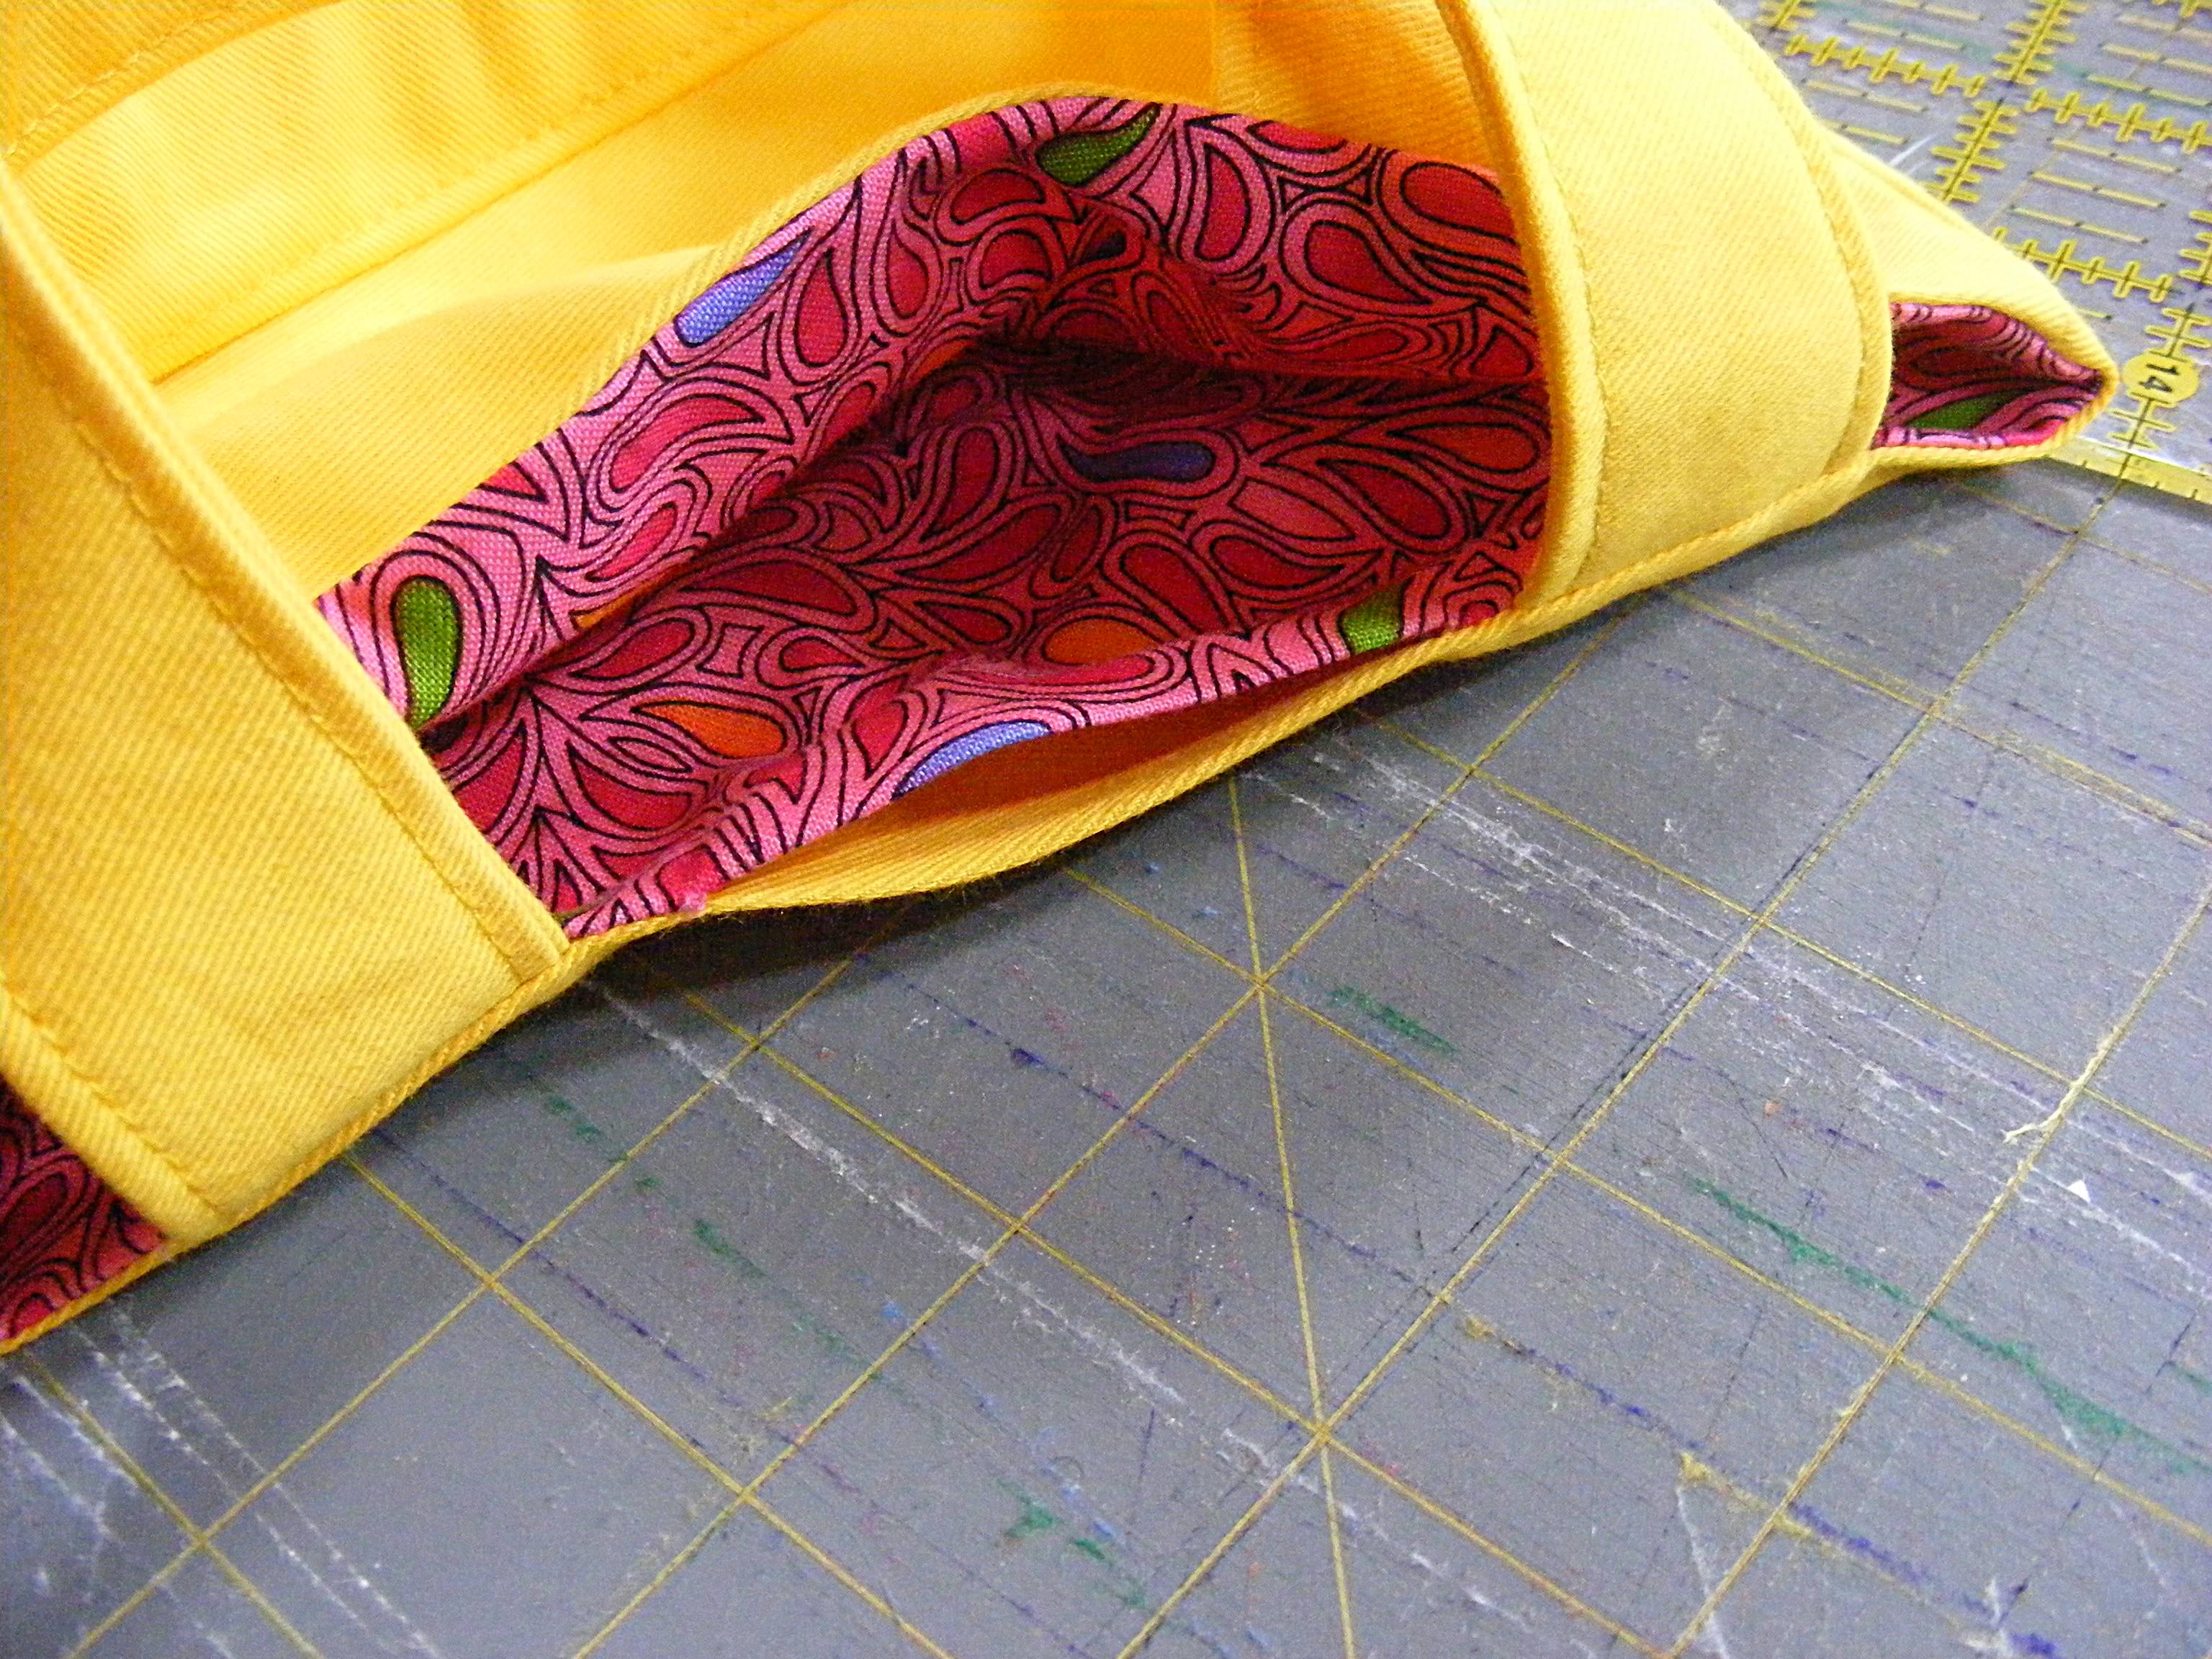
Reach into the opening and pull the main bag through. Pull through the handles, then pull the lining right side out and tuck it into the bag.
Press around the top edge, being especially careful to press the open edges evenly.
Step 9
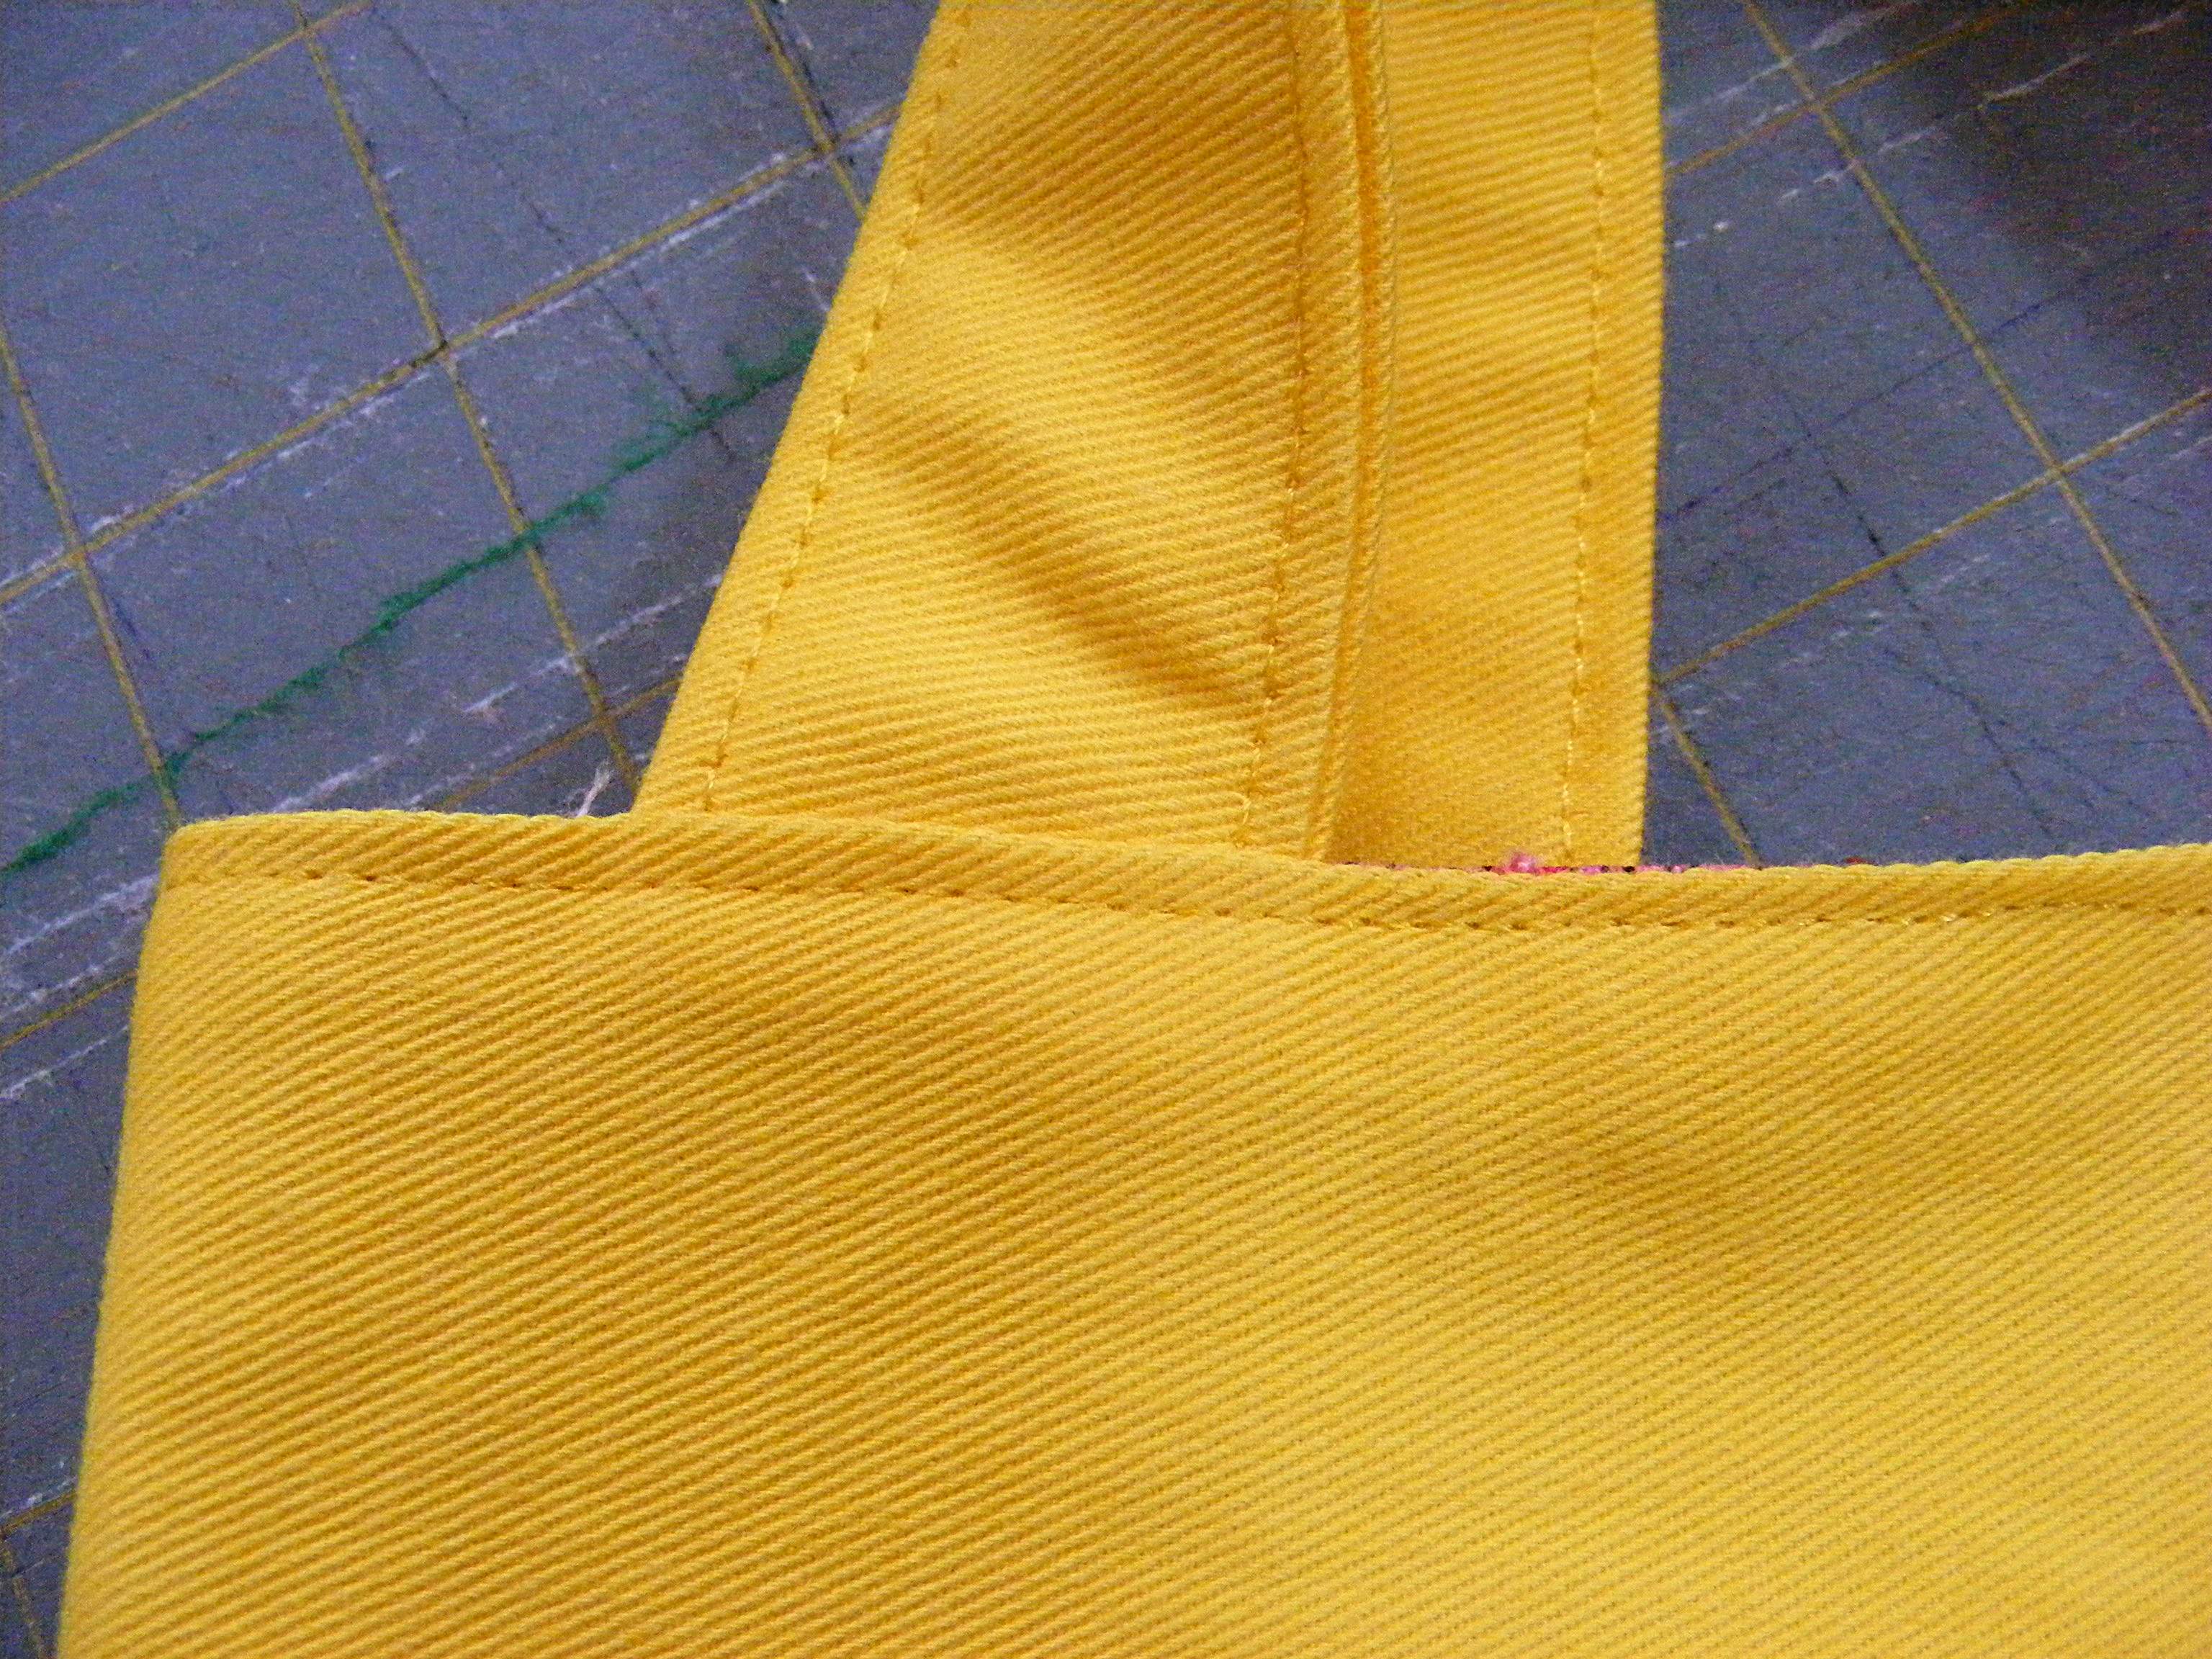
Topstitch around the bag, about 1/8 inch from the top edge.
Be sure that the folded edges of the opening you used for turning are lined up and that you catch both layers in the topstitching to hold them together. No hand stitching needed. 🙂
Finished!
Here are several free patterns that work with my basic 10-inch applique squares – no resizing needed!
Here are several free patterns that work with just some simple resizing. This post about making coasters has info about resizing an applique pattern that can be applied to any of these projects.
It’s Tip Tuesday! Hooray! I just got an email from Pam, asking:
I’m having trouble with making the heads of any animals round, it’s always pointy on the top. Do you know how I can fix that? Thanks!
Happy to help! When there is a too-pointy top, a couple of things could be the problem.
How’s your slip knot? If you’re using a standard slip knot, you could be getting a hole that makes the center puff up. I recommend using the sloppy slip knot (or magic ring, if you prefer) to get a nice center. If you’re using one of those techniques and still getting a point, make sure to pull really tightly! That solves a large number of the too-pointy problems!
Is your gauge consistent? If you are a new crocheter, your gauge is probably changing as you get more experienced. If you begin your piece by crocheting loosely, and tighten up a few rounds later, then the first rounds will puff out- making a pointy top. Try starting again, and try out your new, tighter gauge at the start!
Maybe there is no problem! The heads of animals don’t have to be perfectly flat… they’ll even out a lot after stuffing. Below is a photo of an amigurumi that I just crocheted:
It may look a little pointy, but it rounded out perfectly after stuffing!
In this video I show you how to square up your fabric and how to use basic rotary cutting tools to cut strips – on the straight grain and on the bias.
You use straight grain strips to attach to straight edges – like the edges of a quilt.
If you need your strips to curve (like around a curved hem, or to enclose the raw edges of armholes) then you use bias-cut strips.
Remember – that rotary cutter is razor sharp. Keep your fingers away from the blade at all times, and always remember to close the blade (or engage the safety) before you set it down. No blood on the fabric – that’s my motto. 🙂
Want to put those new rotary cutting skills into action?
This quilt is super easy to make.
I designed this quilt especially for beginners and it’s really easy to make. As in – I don’t care if you just took your first sewing machine out of the box and haven’t even threaded it yet – you can make this quilt. 🙂 Get the Buttonholes quilt pattern here.
If you want to learn some more advanced rotary cutting skills, here are some posts that show you how to use additional rulers. . .
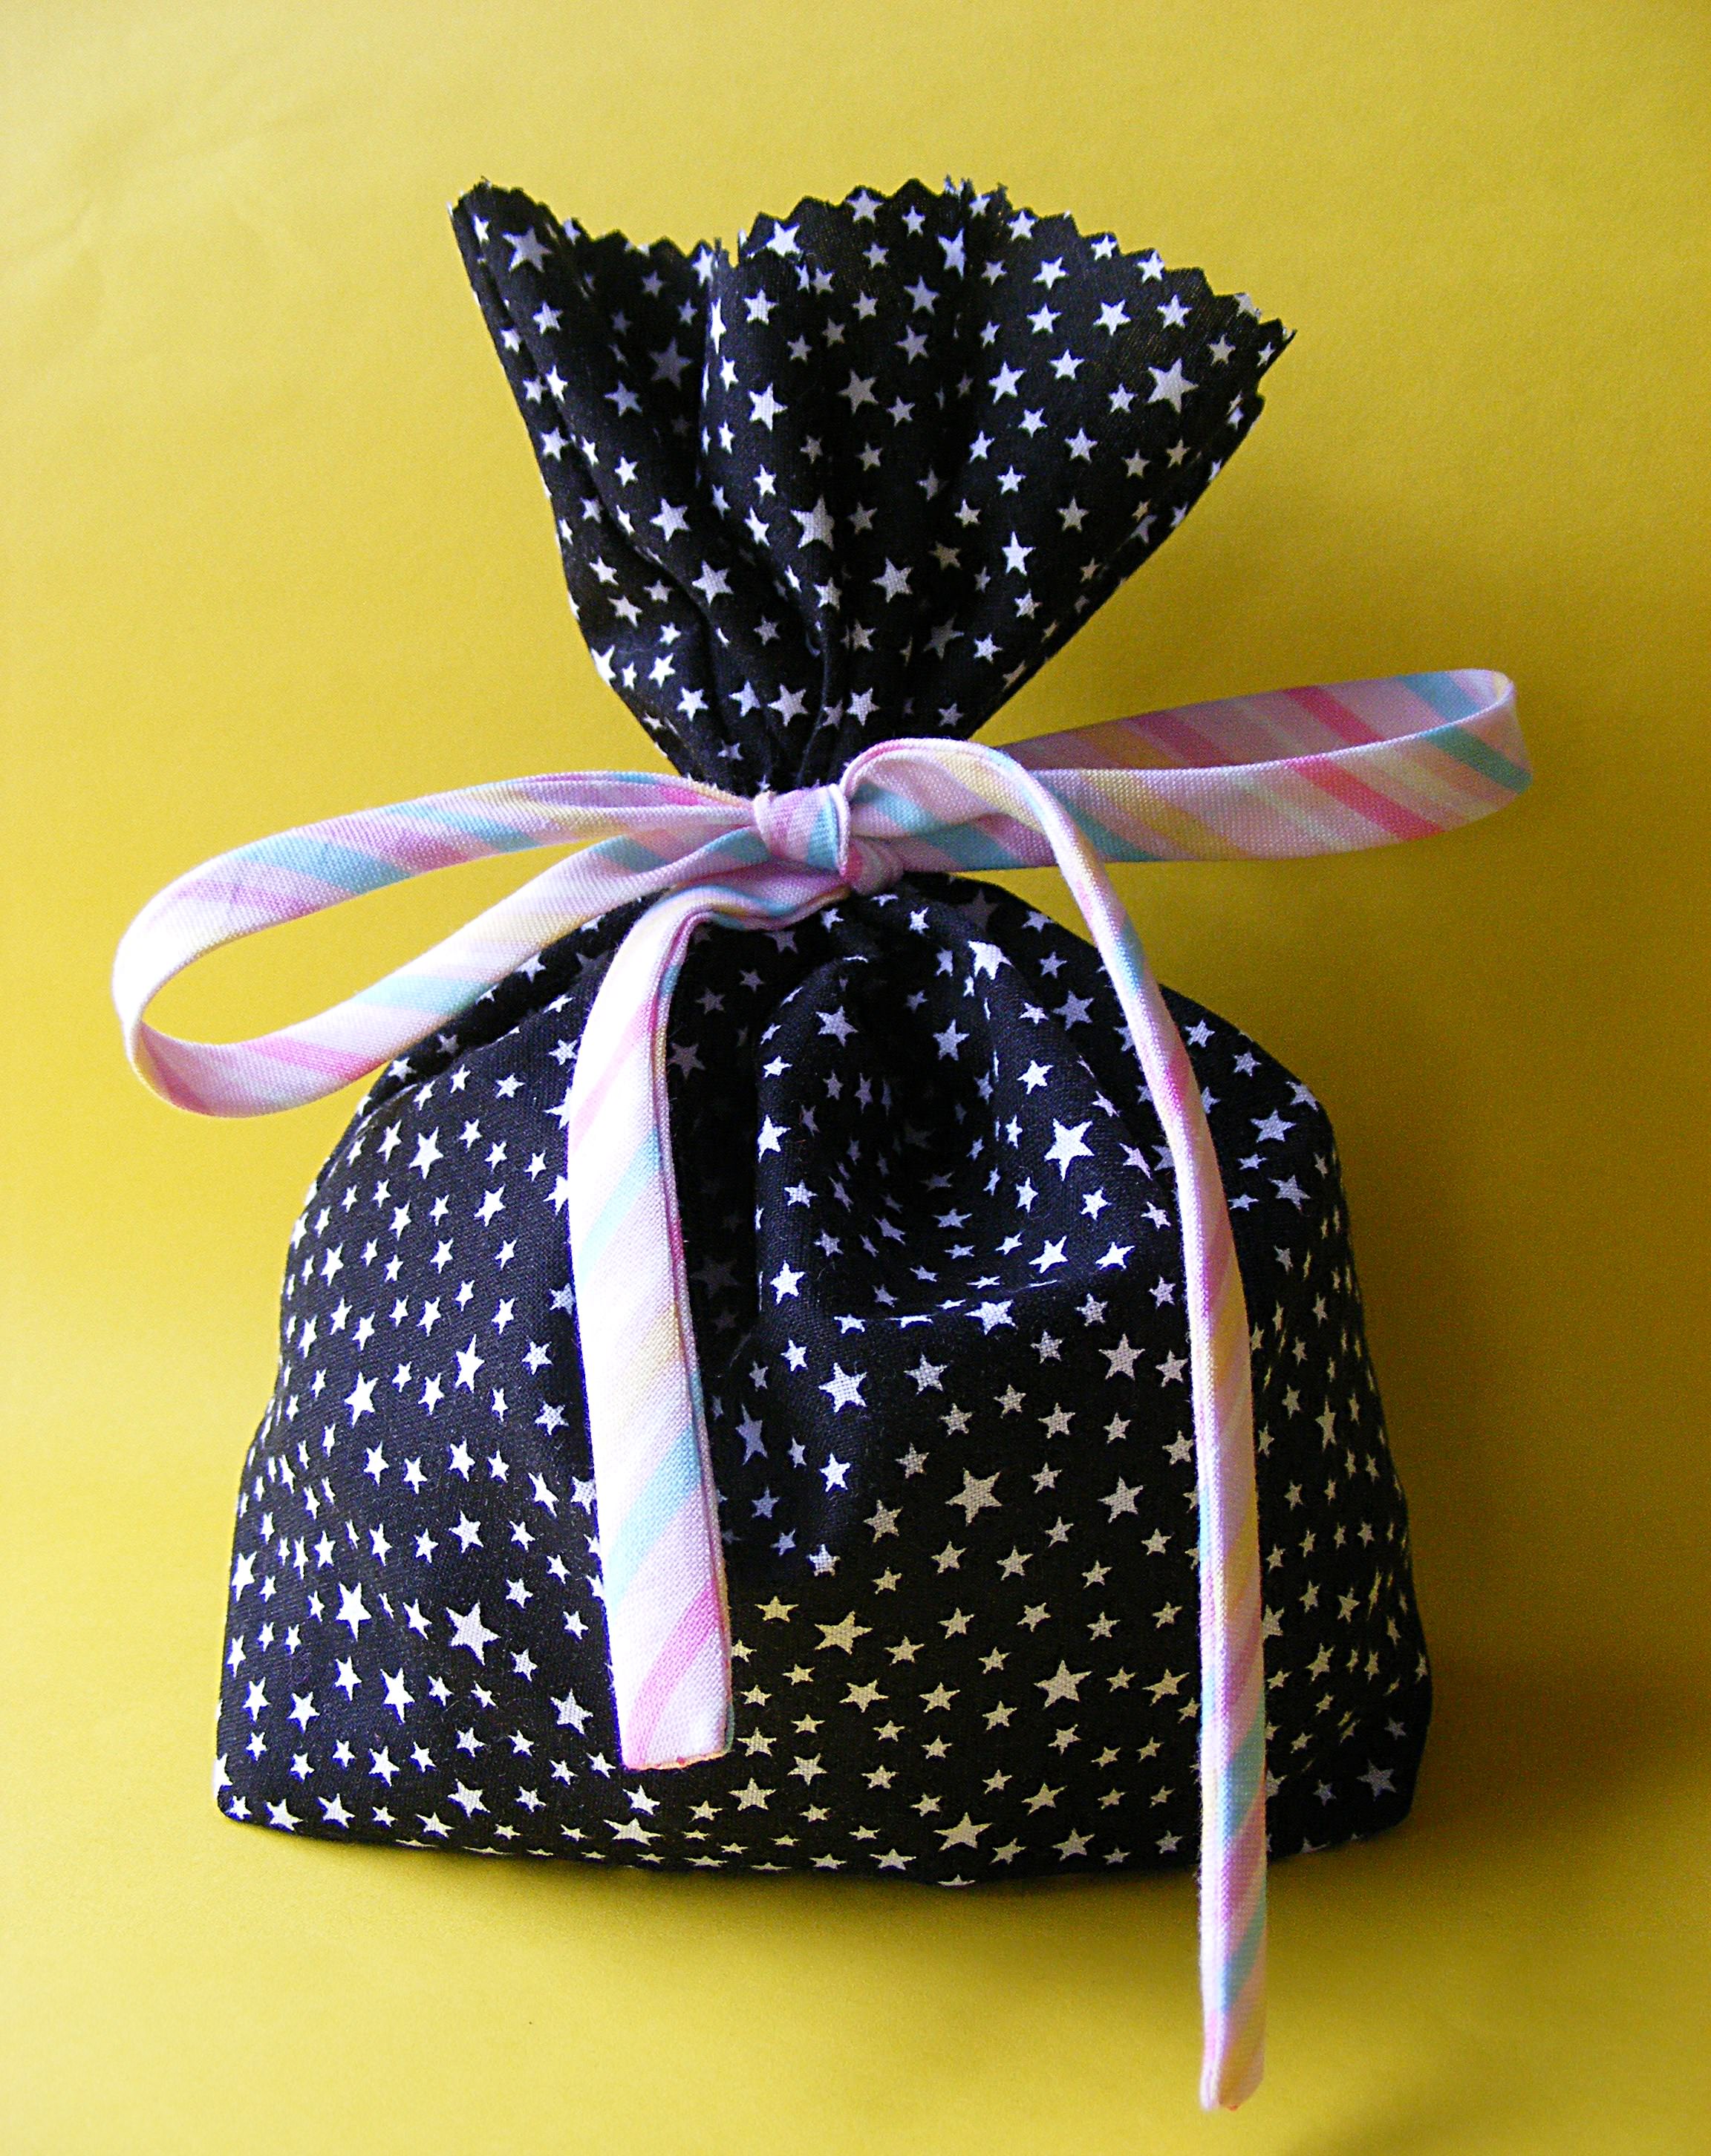
A couple of years ago I started building up a stash of reusable fabric gift bags – and working down my stash of gift wrap.
This little bag is one of my favorite sizes – roughly 4 inches wide x 7 inches tall x 2 inches deep.
It’s perfect for small gifts – and it goes together quickly and easily enough to make up a big batch and use them as party favor bags.
This batch is kind of girly looking, but a simple change of fabric will completely change the look. Try making some up in a favorite team’s colors!
Once you get the hang of making them, it’s really easy to adjust the pattern to be any size you want.
Have fun with them!
What you’ll need
two 7 x 9 inch rectangles for the bag
two 1 1/2 x 12 inch strips for the ties (or use 1/2 inch ribbon)
sewing machine, thread, etc.
less than an hour
Difficulty
Very easy – this is all straight line sewing. It’s a great first sewing project.
Step 1
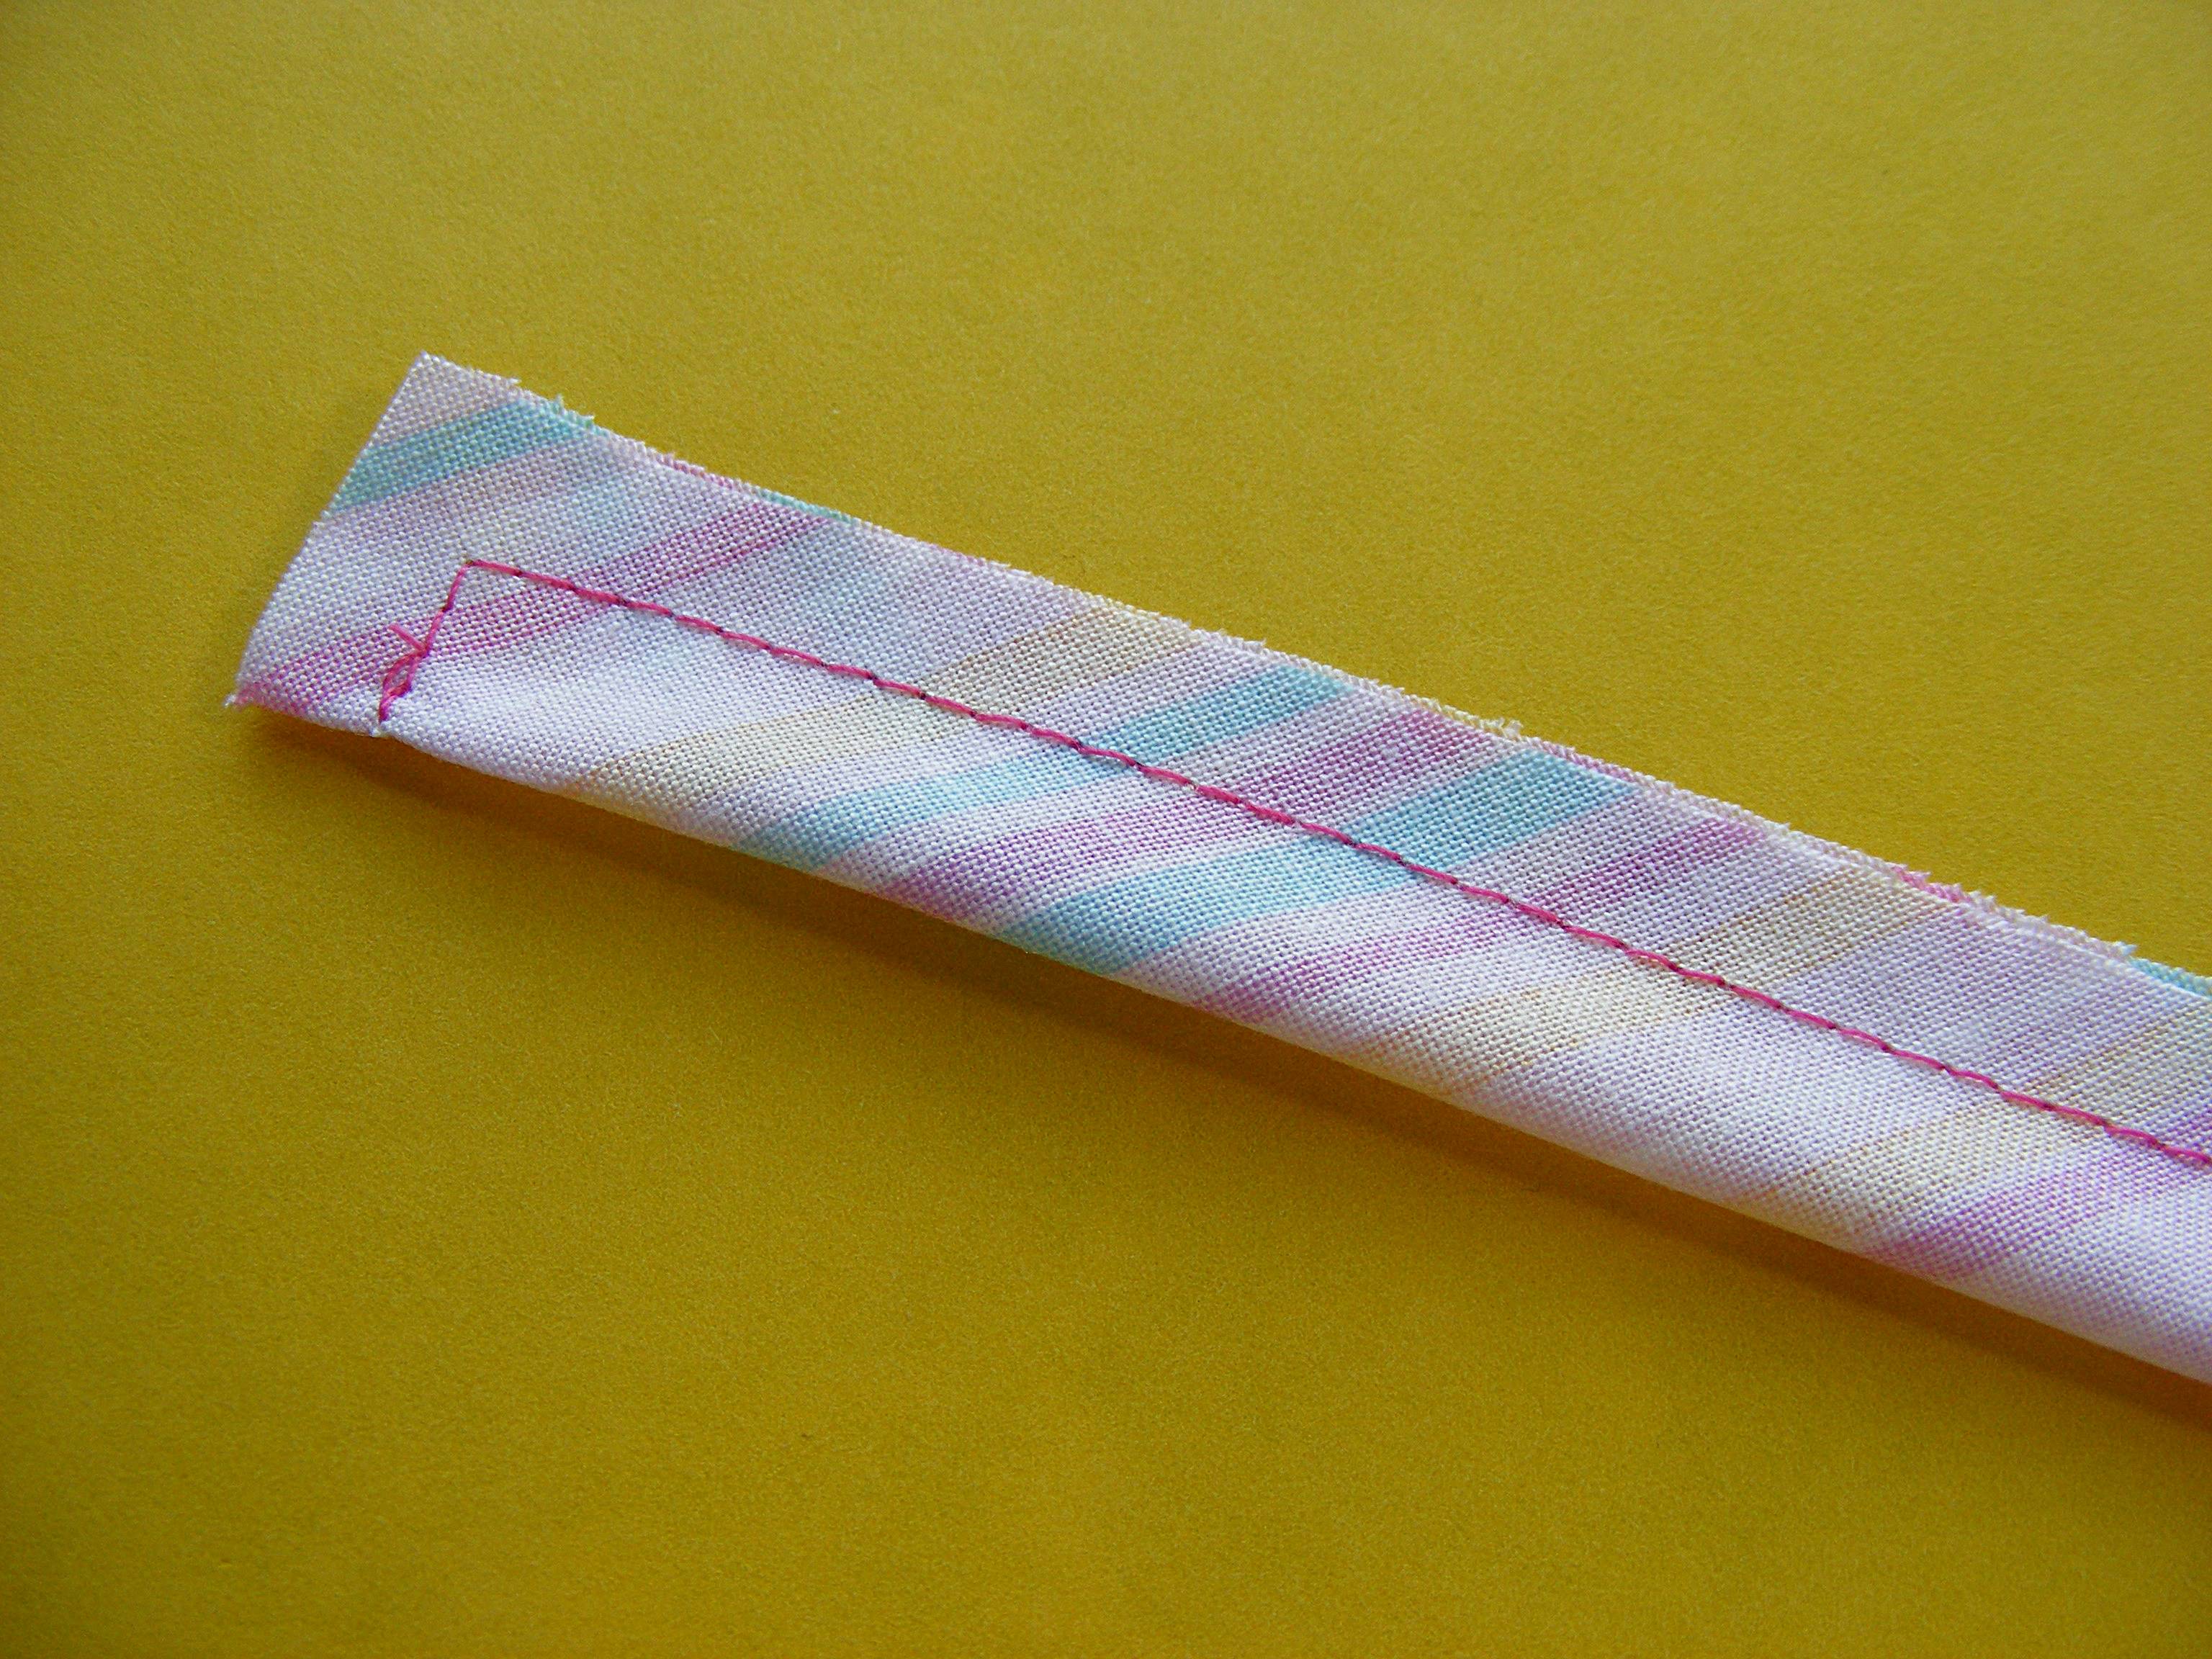
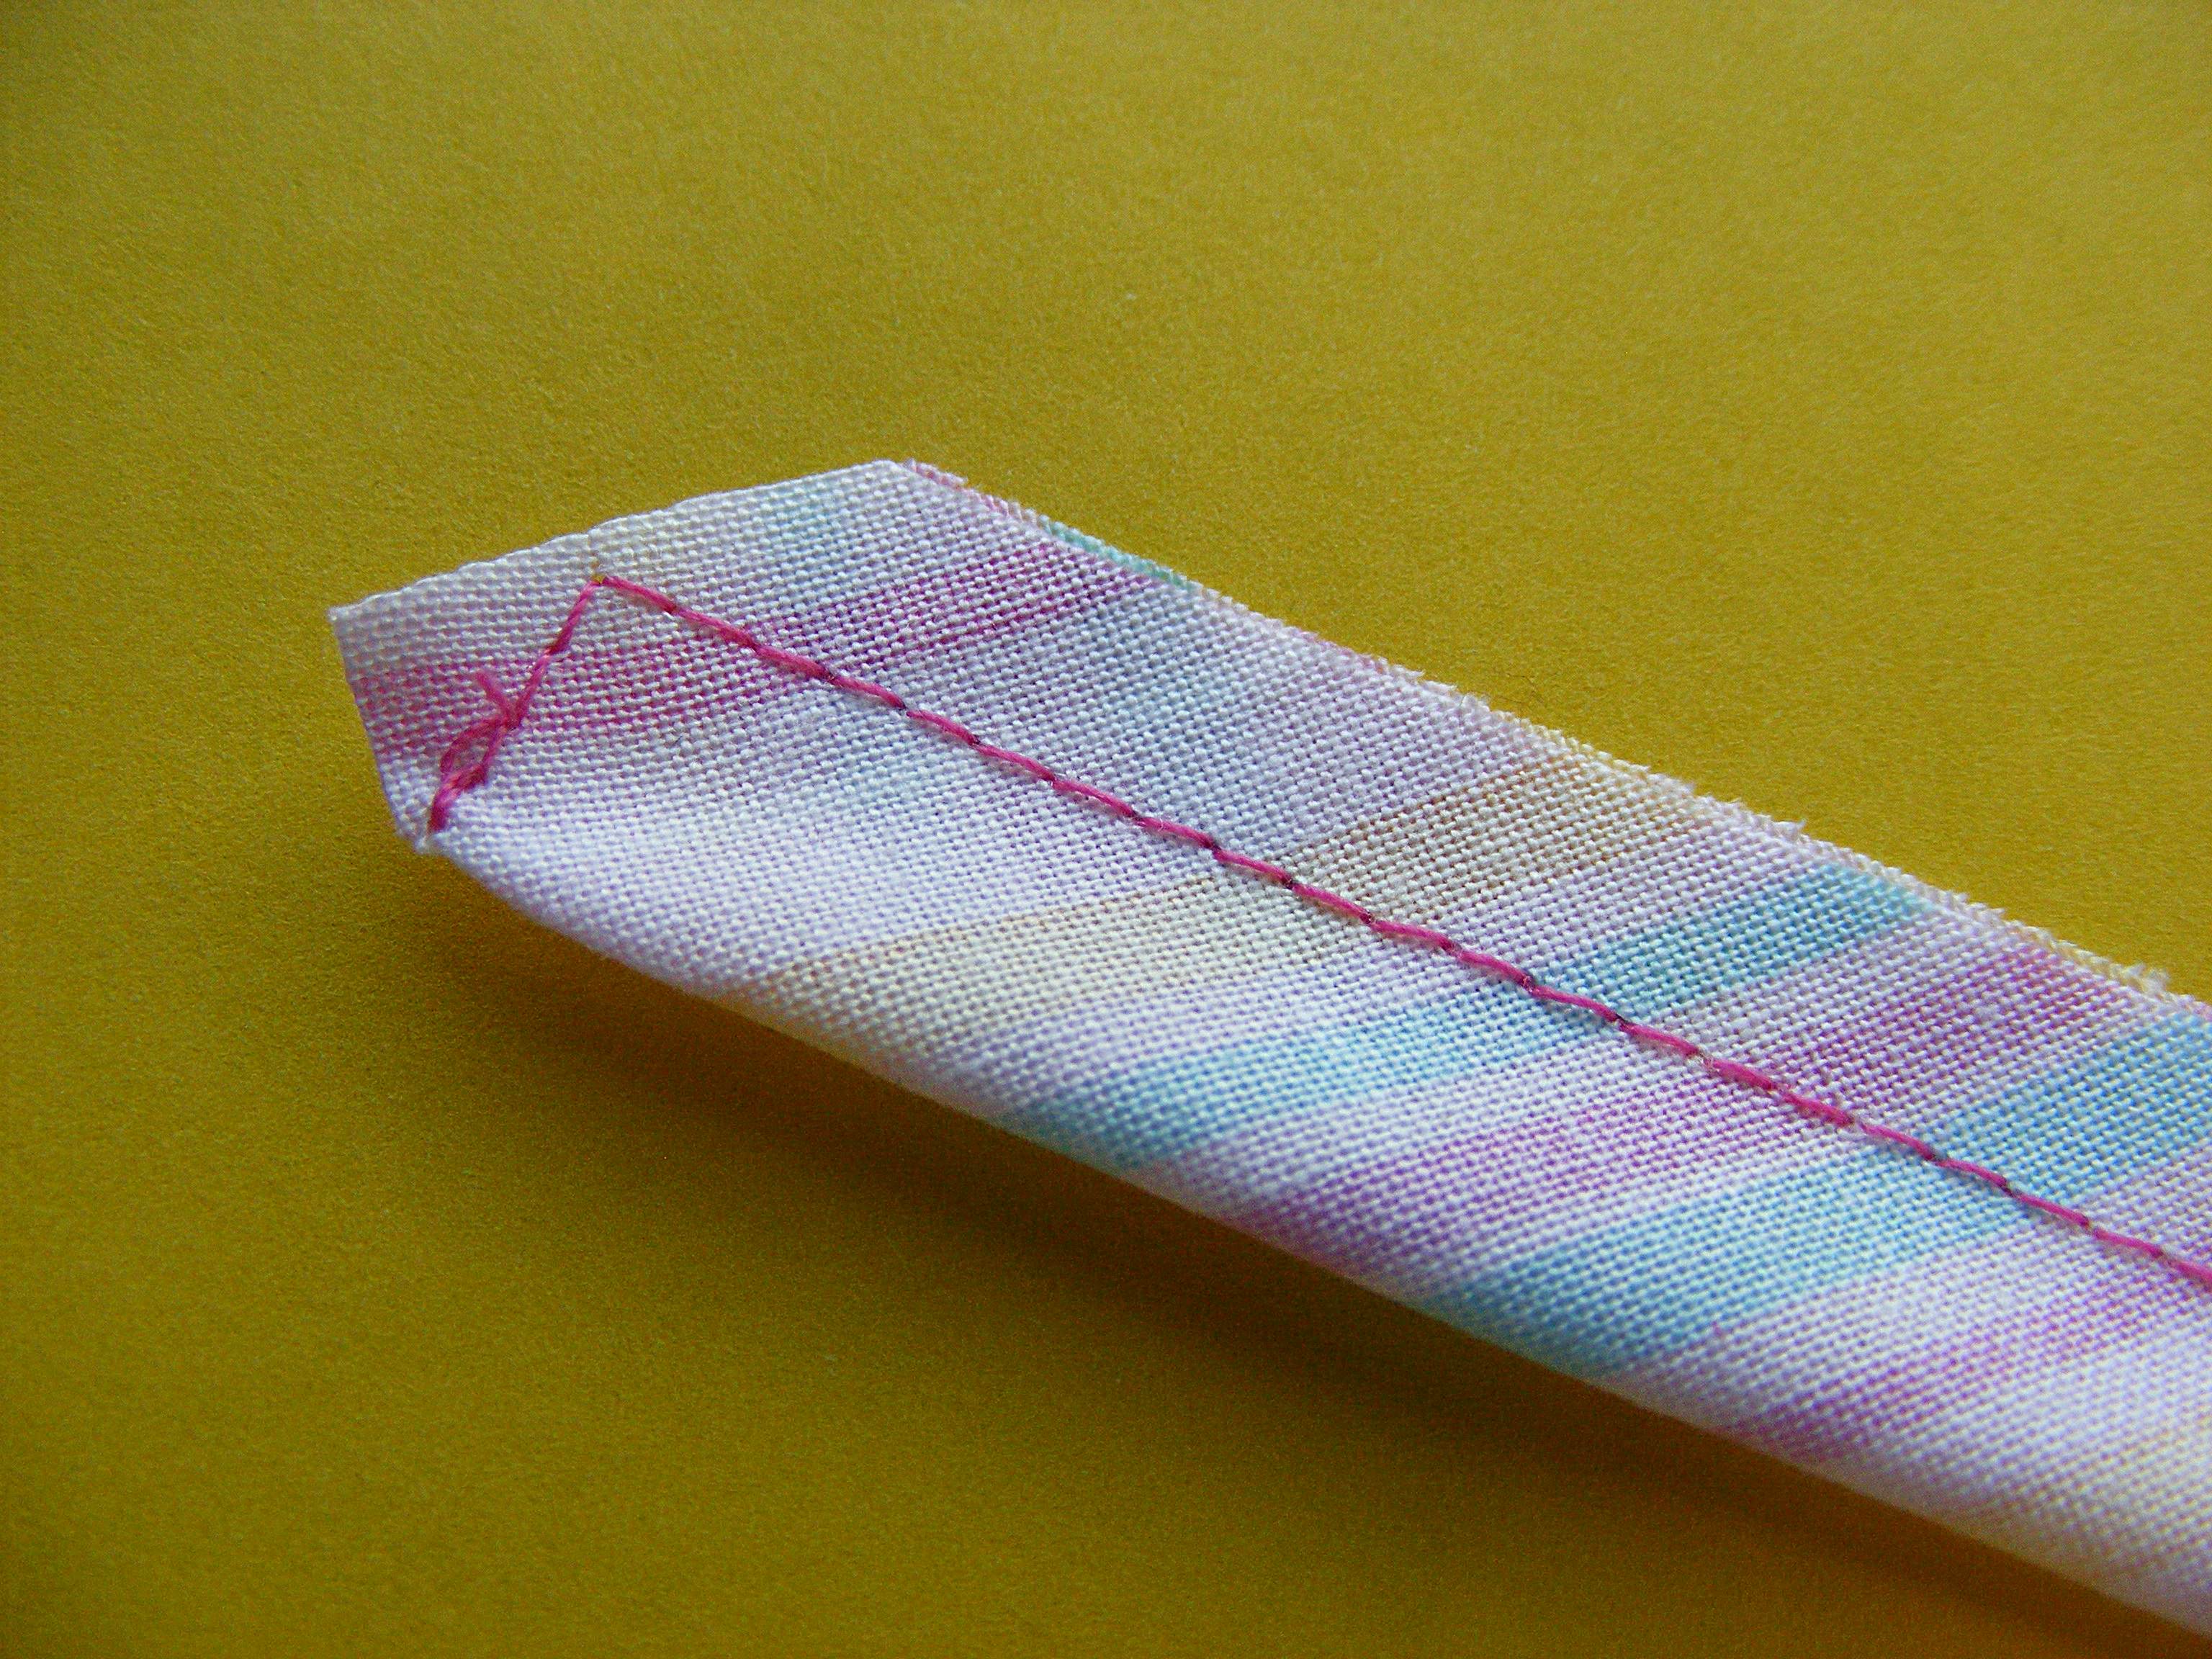
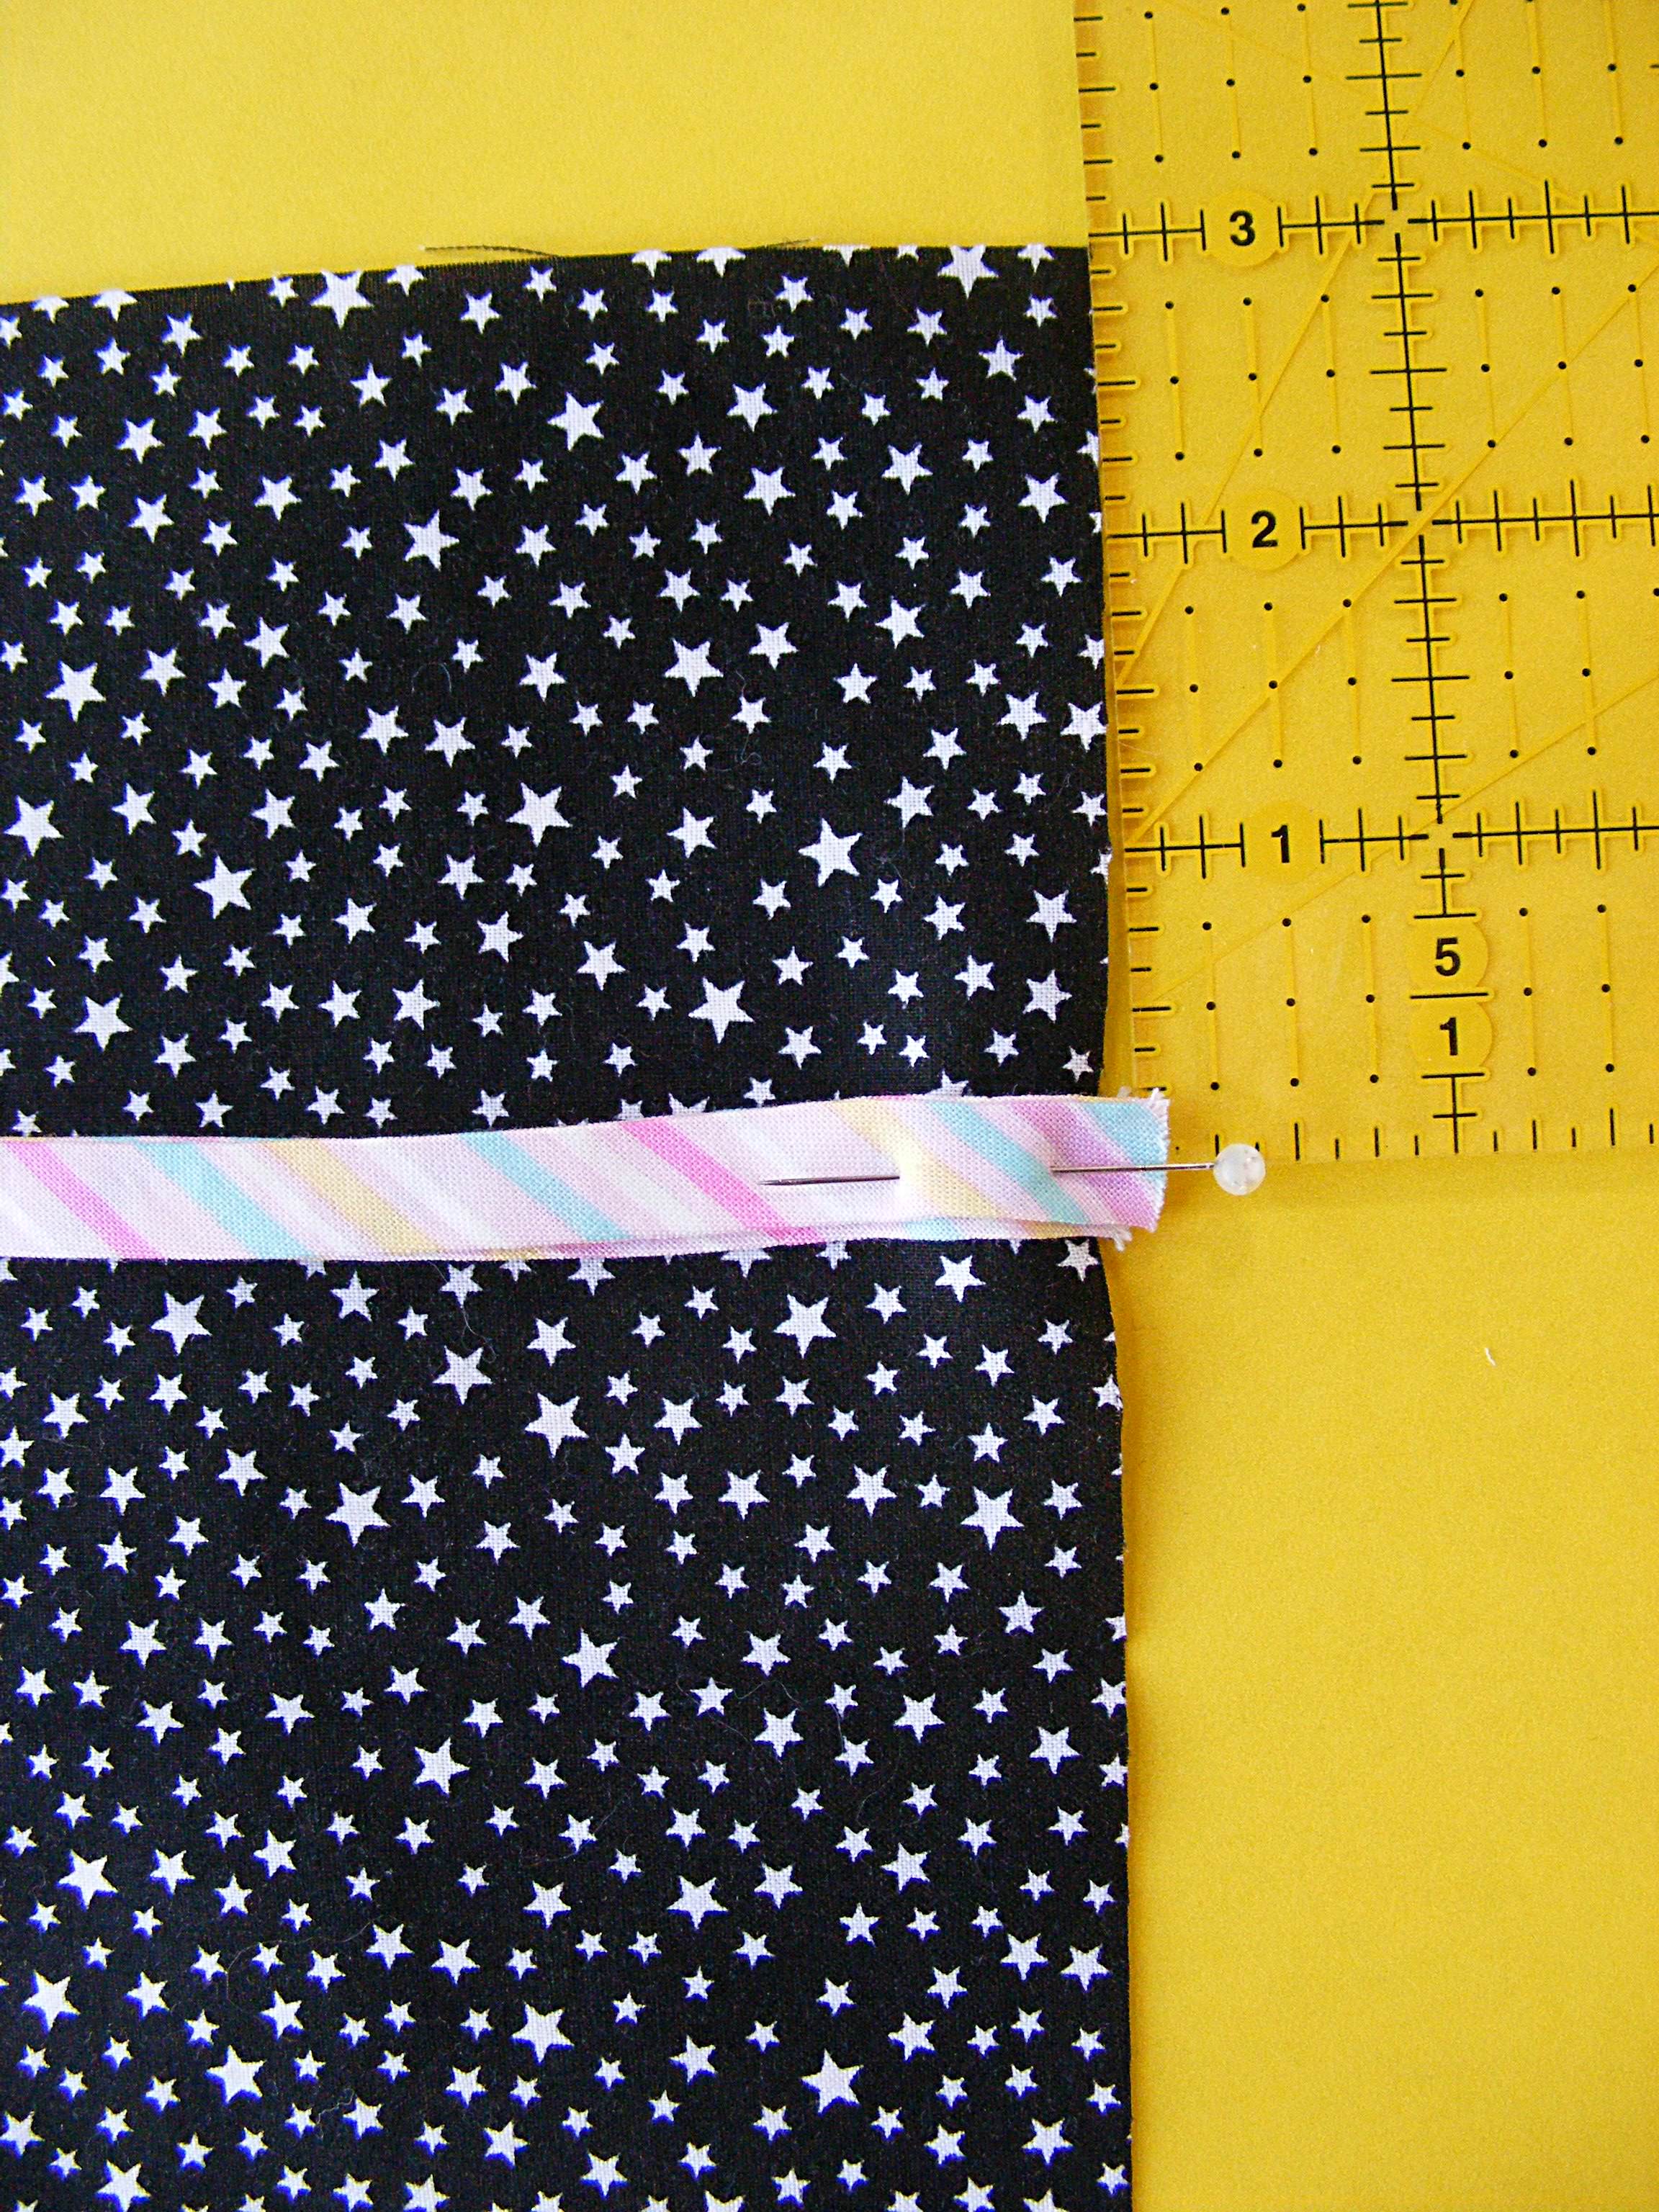
We’ll start with the ties. Fold one of the fabric strips in half the long way, right sides together. Using 1/4 inch seam allowance, sew along one short side and down the long open side, leaving the other short end open.
Remember to backstitch at the beginning and end of your stitching.
Using 1/4 inch seam allowance, sew together both sides and the bottom of the bag, catching the ties in the stitching where they’re pinned. Don’t forget the backstitch at the beginning and end of your stitching.
Step 7
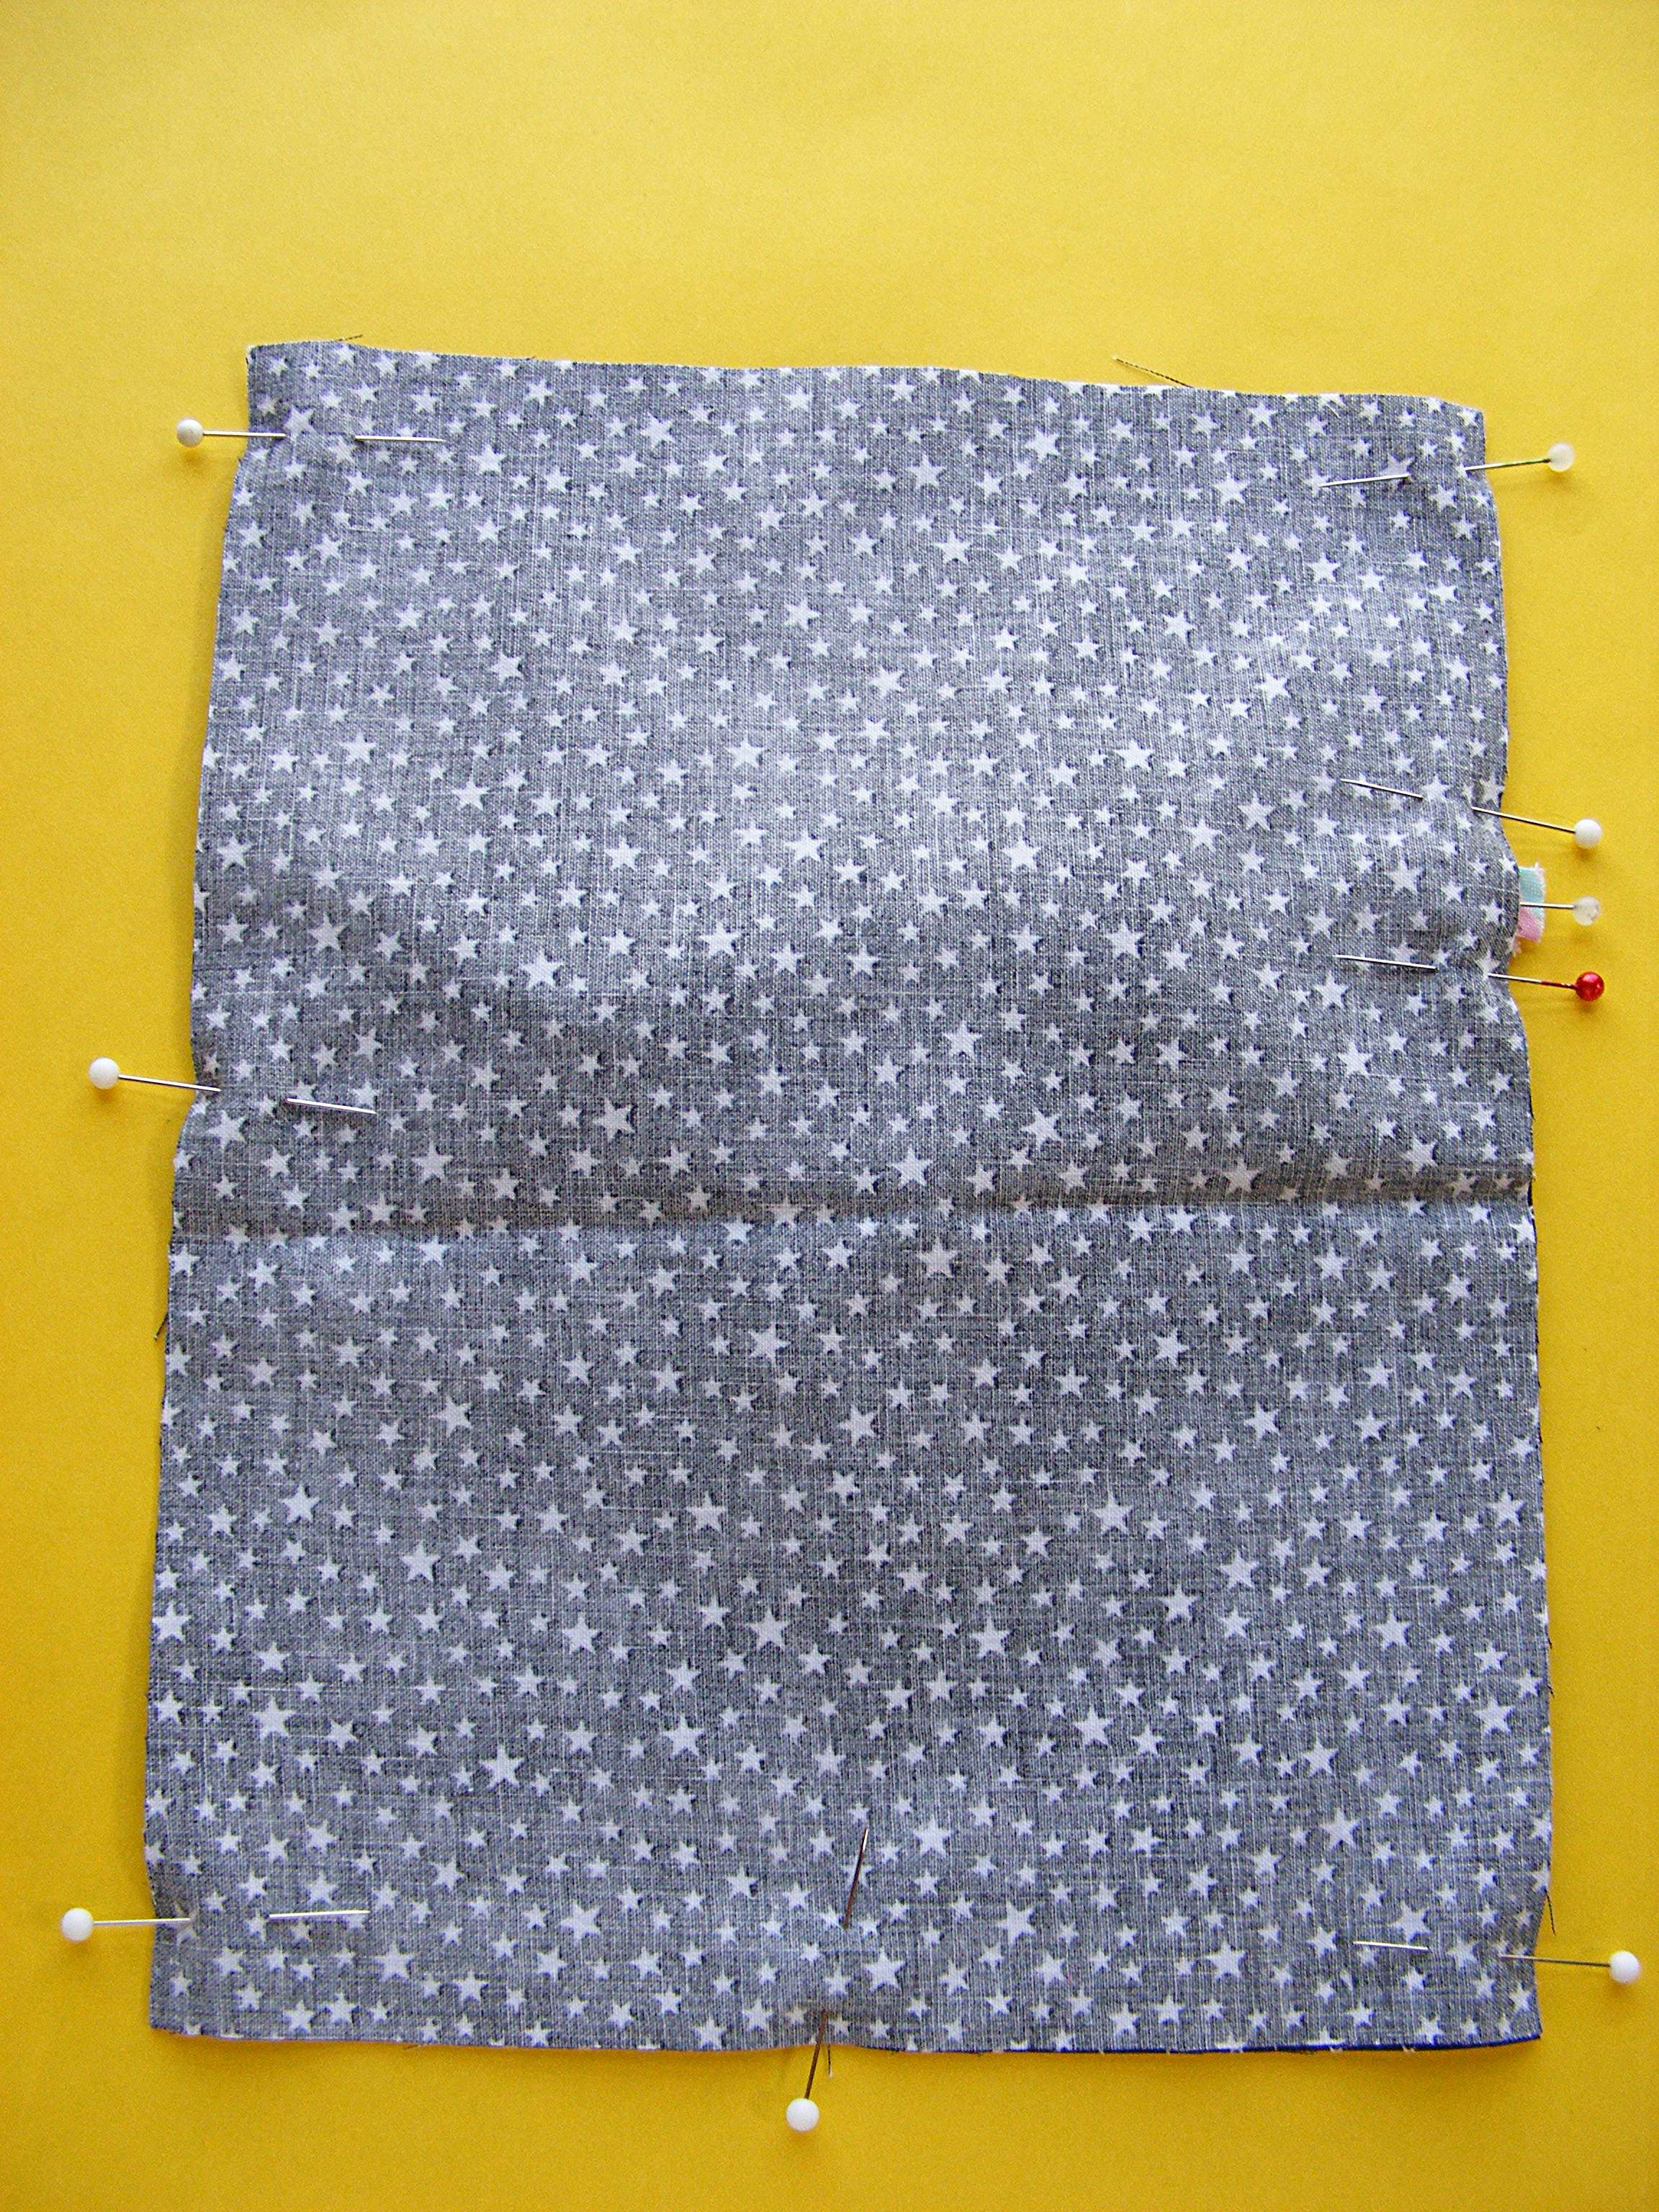
Now we’re going to box in the corners of your bag so it has some depth.
Flatten and fold one corner of your bag so that the side seam is lined up with the bottom seam. It should come to a point at the bottom.
Measure up one inch from the tip of the stitching line (not the point of the fabric) and mark a line perpendicular to the stitching line. Stitch on that line from edge to edge, backstitching when you start and stop.
Repeat for the other corner.
Step 8
Turn the bag right side out. Finish the top edge however you like. I like to just trim the edge with pinking shears, but you could hem it if you prefer.
This is a great size for small gifts or party favors, but you can easily make the bag bigger for larger gifts. Have fun with it!
Nothing cuts strips of fabric better than rotary cutting. It’s so much easier on your hands, wrists and shoulders than using scissors! Plus, you get more accurate cuts.
In this post I’m going to take you through the basic tools, tell you what you’ll use them for and give you some recommendations on purchasing.
All of these tools are readily available at pretty much any fabric store. I also linked to Amazon for each product – those links are affiliate links.
My #1 favorite tool – and one I recommend for everyone, whether you’re going to rotary cut or mark and cut with scissors – is a clear acrylic ruler. Mine is 6″ x 24″ and that’s the size I recommend. It should have an all-over 1-inch grid, with markings down to 1/8 inch. Also look for diagonal lines that say 30, 45, and 60. Those seem mysterious at first, but they are terrific for cutting angled shapes.
I also have a 2″ x 18″ ruler, but I hardly ever use it now that I have the big one. Just buy a big one.
The only other tools you really need for rotary cutting are a rotary cutter and a cutting mat.
This my my rotary cutter and I love it. It takes a 45mm blade and it’s very easy to find replacement blades. Some people also have smaller cutters for going around curves, and larger cutters for going through more layers of fabric, but this is all I need. The blade is (and needs to remain) razor sharp – so keep it out of reach of kids until they are ready to use it safely – with instruction and supervision.
I have two different cutting mats. This is the one I use for most of my cutting. It’s big – 24″ x 36″ and I do recommend getting the biggest one you can afford and/or have room for. Most fabric is 44″ wide and it’s very nice to be able to fold it in half just once for cutting – so look for one that’s at least 24″ on one side.
I also have a 12″ x 18″ mat like this one that’s very handy for cutting quilt blocks when I want to spin them around to cut from more than one side. With this small mat I can spin the mat and not disturb the block. I’ve tried cutting mats with a lazy Susan-style base for spinning around, but for me that spins too easily. I’m happiest just using a smaller mat.
There are lots of other specialty rulers out there, with markings designed particularly for a certain kind of quilt block. Only get these if you make a lot of that kind of block. These are the only specialty rulers I have. . .
This 15 inch square ruler is my go-to ruler for trimming finished quilt blocks to size. I use this ruler with every single quilt I make. There’s a tutorial showing how I use it here – How to Trim Quilt Blocks.