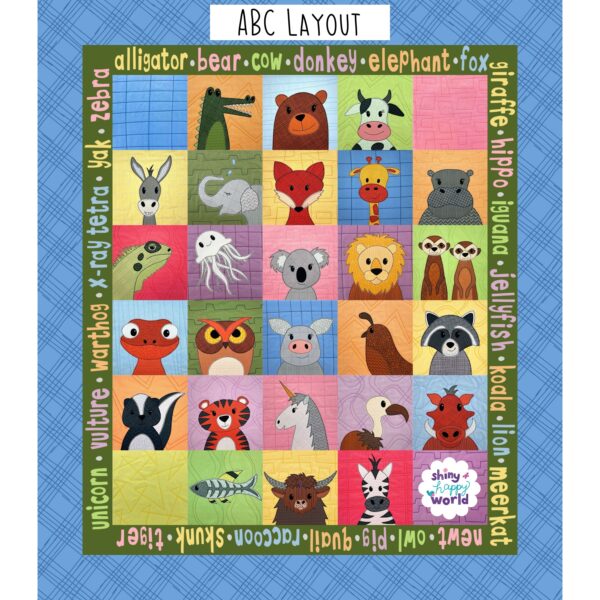
I’ve been getting requests for an ABC quilt pattern for years – but I coulnd’t do it until I had at least one pattern for every letter of the alphabet.
I finally have that!
You can pull your blocks from any of my patterns that use square blocks. (That’s almost all of them.) Pull what you can from Shiny Happy World patterns you already have, and then you can fill in the gaps here.
Remember, individual block patterns are always Buy 4 Get the 5th Free – no discount code needed.
Now you just need a materials list and cutting instructions for the complete quilt – plus ABC templates sized to fit that 4-inch border.
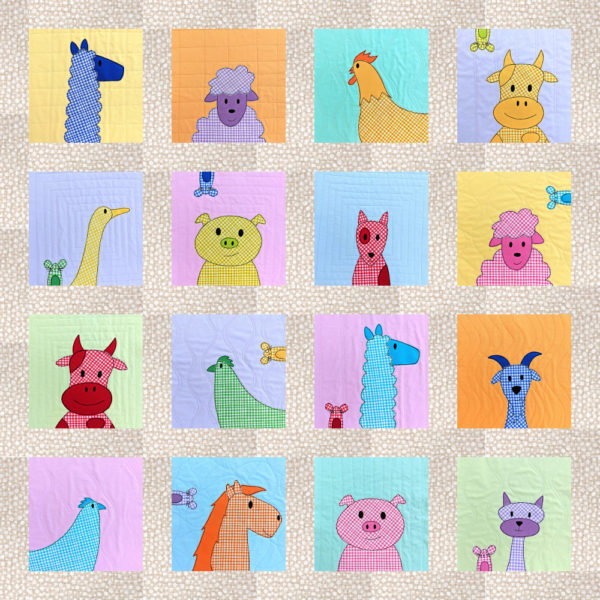
Unlike the rest of my layout guides, this one only has information for one size. That’s because it’s constrained by the number of letters in the alphabet. My sample quilt is 70 inches wide x 80 inches tall. That’s just a little shorter than a standard twin size.
Of course, this isn’t the only way you can lay out an ABC quilt!
Want to make a smaller quilt? Without the borders, this is the same size as my basic Napping Quilt – my favorite size for the couch. Use the Simple Grid Layout Guide instead of this one. Applique the names on the back of the quilt, or maybe embroider them into the background of each animal’s block. There’s a free ABC hand embroidery pattern here.
Maybe you like the size but don’t want to bother with double borders? Combine them into a single 10-inch wide border and scatter the animal names all higgledy-piggledy on it.
Want to make a standard twin-size quilt? Increase the width of the top and bottom outer borders from 6 inches to 11 inches.
I’m working on similar guides for other layouts too! That way no matter what layout your pattern shows, you can easily use the blocks in a different design. Here’s what I have so far and what’s coming. . .
I’m working on similar guides for other layouts too! That way no matter what layout your pattern shows, you can easily use the blocks in a different design. Here’s what I have so far and what’s coming. . .
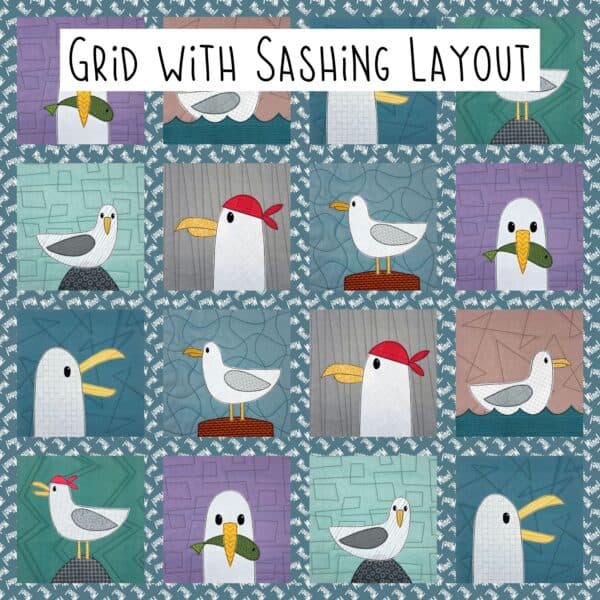
I almost never include sashing and borders in my quilt patterns. It’s just not my favorite. ¯\_(ツ)_/¯
But maybe it IS your favorite! That doesn’t mean you can’t use my patterns. It’s easy to add sashing and/or borders to any quilt made from the same size blocks.
It’s easy to add sashing and borders – but the math is. . . annoying.
That’s where my handy-dandy layout guides come in.
Each guide contains a materials list and cutting instructions for six different quilt sizes – from Itty Bitty Baby to King Size.
Download the Grid with Sashing and Borders Layout Guide here.
I’m working on similar guides for other layouts too! That way no matter what layout your pattern shows, you can easily use the blocks in a different design. Here’s what I have so far and what’s coming. . .
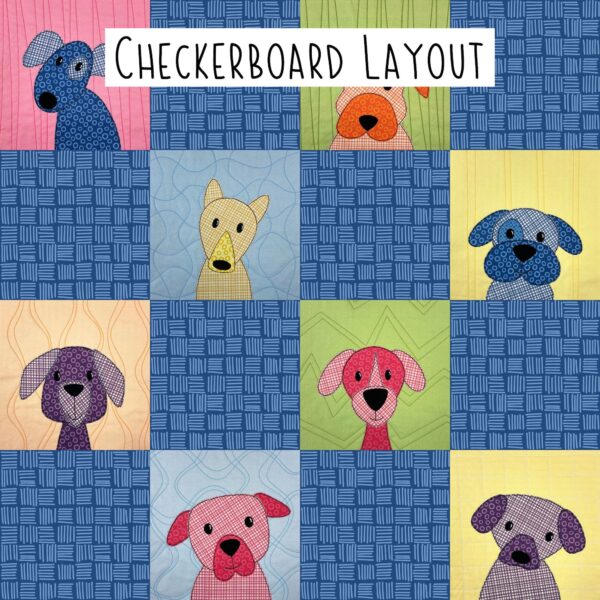
None of my multi-block patterns includes a materials list and cutting instructions for this layout – but that doesn’t mean you can’t do it. You just need additional instructions!
That’s where my handy-dandy layout guides come in.
Each guide contains a materials list and cutting instructions for six different quilt sizes – from Itty Bitty Baby to King Size.
I’m working on similar guides for other layouts too! That way no matter what layout your pattern shows, you can easily use the blocks in a different design. Here’s what I have so far and what’s coming. . .
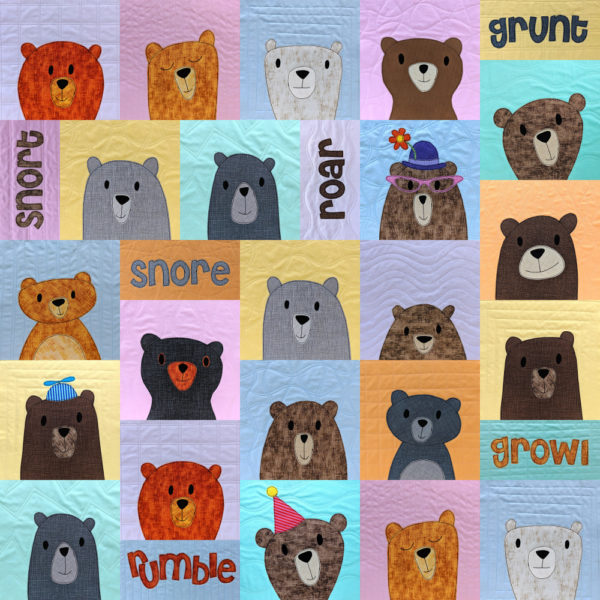
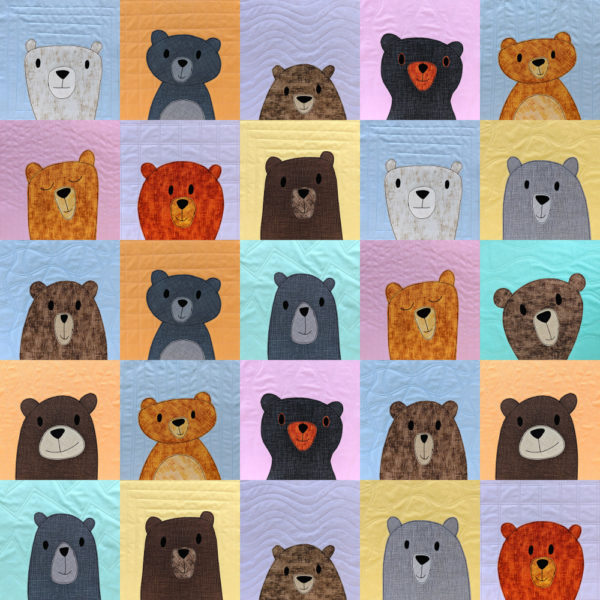
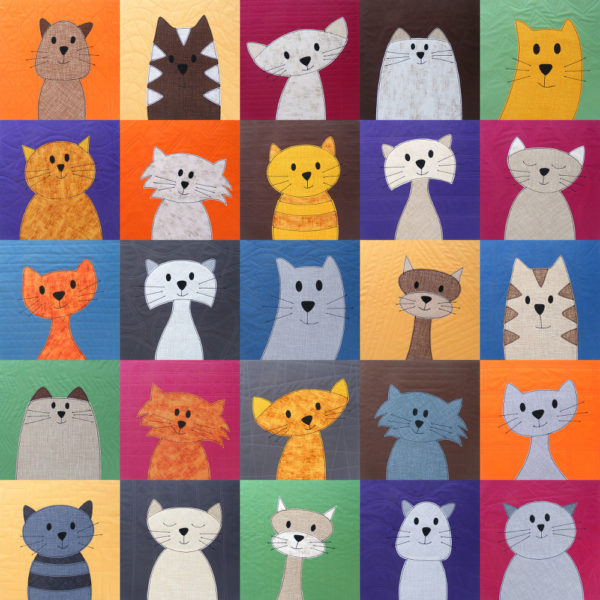
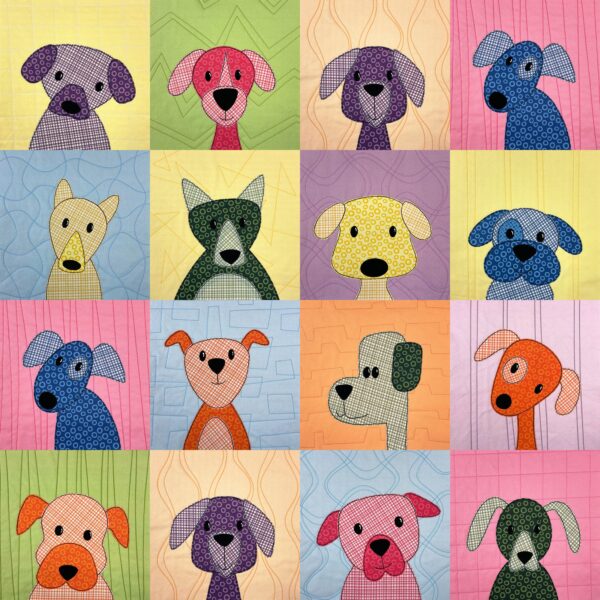
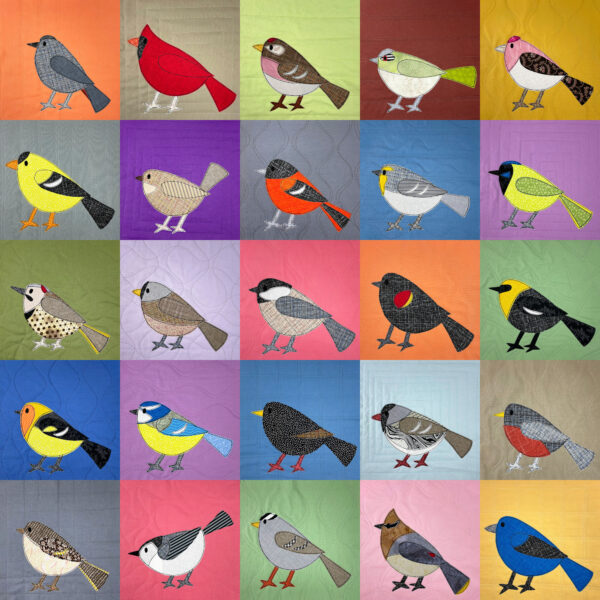
A simple grid is one of my favorite quilt layouts. It’s a classic for a reason! And it’s what you see on most of my multi-block quilt pattern covers.
Here are just a few examples. (Click on the image to go to that pattern.)
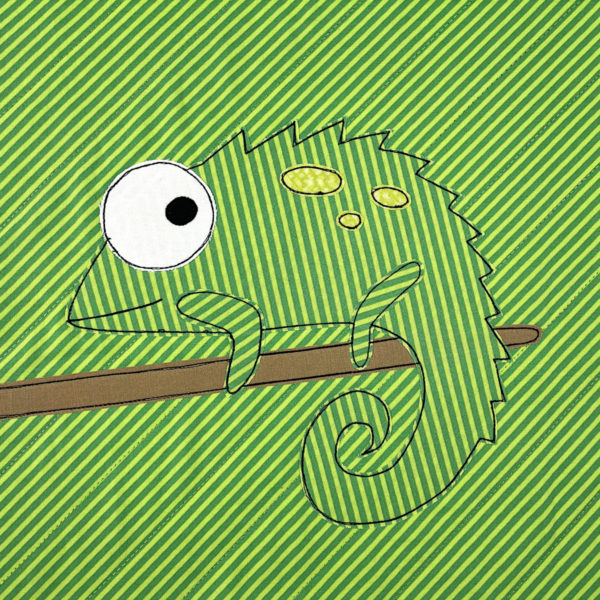
Those multi-block patterns only include materials lists and cutting instructions for three different sizes. And maybe you want to make a full quilt from a single block pattern? Like making this chameleon over and over again in every color of the rainbow!
The individual block patterns only include materials and instructions for one block.
That’s where my layout guides come in!
Each guide contains a materials list and cutting instructions for six different quilt sizes – from Itty Bitty Baby to King Size.
I’m working on similar guides for other layouts too! That way no matter what layout your pattern shows, you can easily use the blocks in a different design. Here’s what I have so far and what’s coming. . .
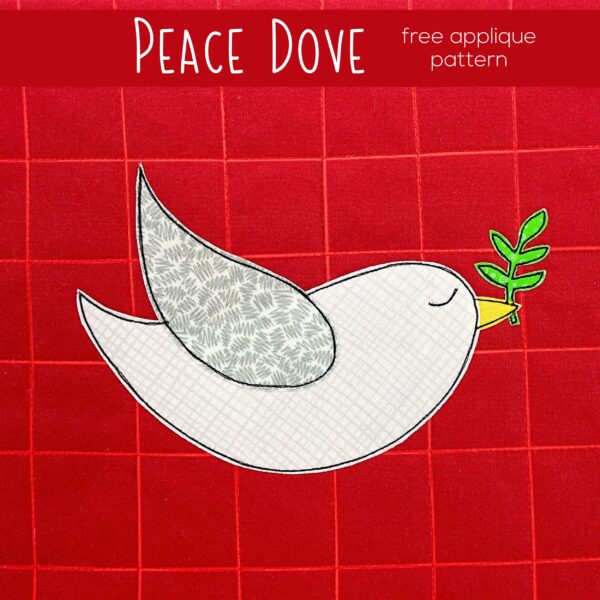
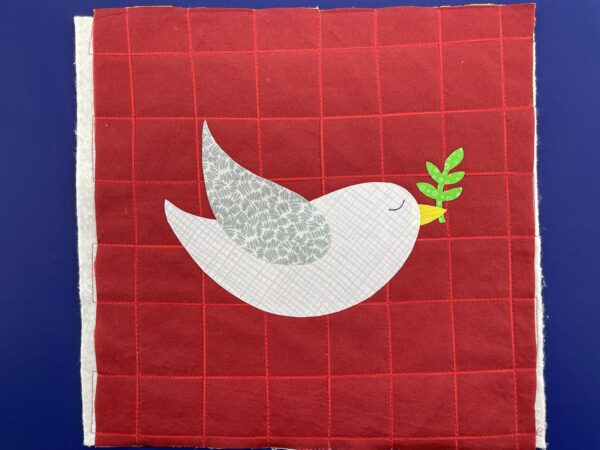
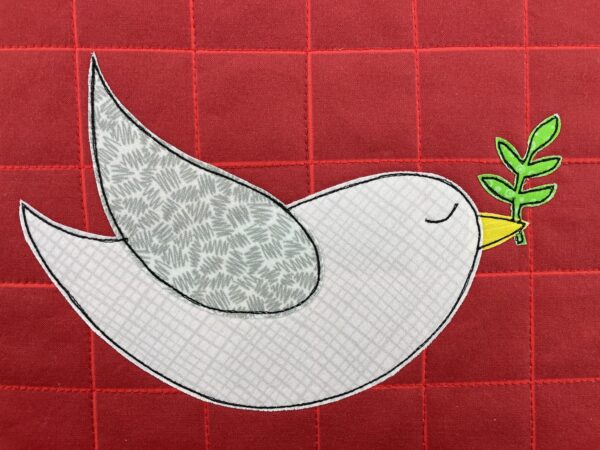
Use this free dove applique pattern to make all kinds of things!
Download the template pieces and placement guide here.
If you have an electric cutting machine, you can use it to cut your pieces. Download the SVG file here.
The dove combines with all the other free Christmas applique patterns so you can make a quilt, but there are so many other possibilities too! Here are just a few ideas (with links to free patterns) . . .
The dove is designed to make an applique that fits in a 10-inch square block. That makes it really easy to resize as needed. Do you want to make a 4 inch coaster? Print the pieces at 40% size. Do you want to make a tote bag that’s 17 inches square? Print the pieces at 170% size.
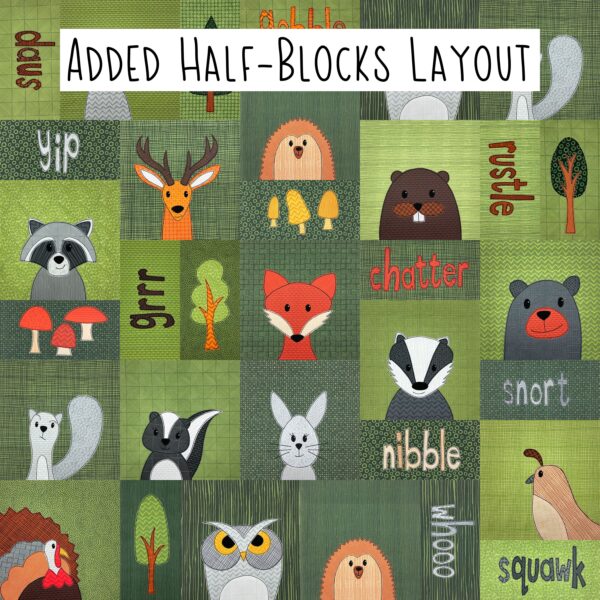
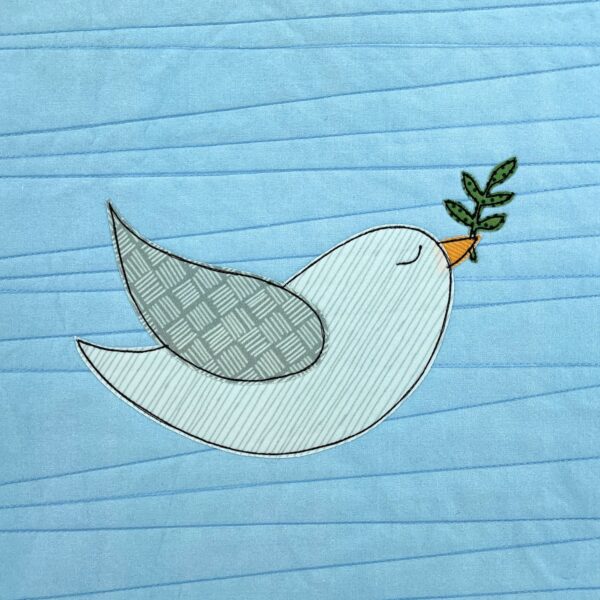
You can also easily use this pattern to make half-blocks to break up a standard grid. Just adjust the angle of the wing so it’s not tipped up so high and you’re all set – no resizing needed.
You can find yardage requirements and cutting guides for multiple layout possibilities (including a grid with half-blocks) here.
A Little Extra Help
If you’ve never made a quilt before, I recommend starting here.
If you’ve never done any applique before (or are new to my method) I recommend starting here.
There’s also a single video here that takes you through all the basic steps of my method.
You can find loads of single-topic tutorial videos here, and also by using the search box at the top of the page.
Prep Your Block
Cut an 11” square of fabric for the background, and an 11 inch square of batting.
Press the quilted block again (with steam) and let it cool.
This video has a general intro to my Quilt As You Go method, along with complete instructions for how to assemble the block. It’s a long video, but there’s timestamp info to help you skip to the specific instructions you want.
Cut Your Pieces
Download the template pieces and placement guide here.
If you have an electric cutting machine, you can use it to cut your pieces. Download the SVG file here.
The image in the SVG file is NOT reversed. If your cutting machine has you cut your pieces fabric side up, leave the orientation as it is. If your cutting machine has you cut your pieces fabric side down, you’ll need to flip the image horizontally.
Different cutting machine brands import the image at what seems to be totally random sizes. To fit the appliqué on a block that finishes at 10 inches square, check to make sure the small square in the image is one inch, and resize if necessary before ungrouping the pieces. Delete that square after resizing so your machine doesn’t try to cut it. 🙂
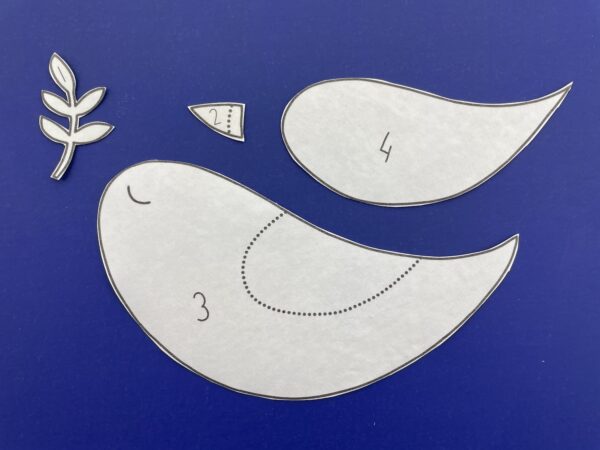
Print your templates.
If you’re cutting everything by hand you’ll need to print the reversed and exploded templates. If you’re using printable fusible adhesive you can print those pages directly onto the paper side of your fusible.
I hate to trace so I use printable Heat & Bond Lite for all my quilts – make sure whatever brand you choose is compatible with whatever type of printer you have.
If you’re using a light box you’ll also need to print the placement guide.
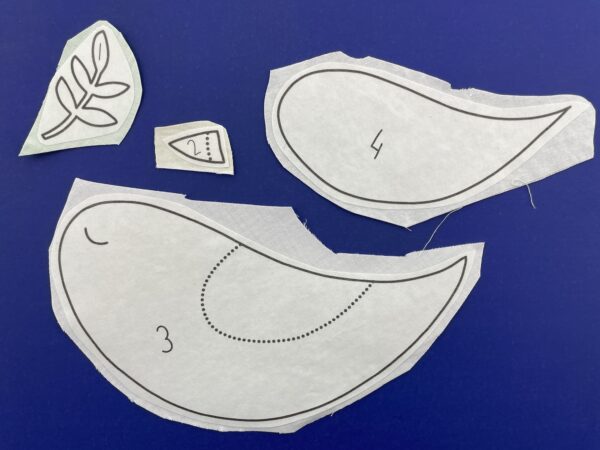
Roughly cut around each shape. Leave a little bit extra all the way around each piece.
Follow the package instructions and fuse each piece to the wrong side of the fabric.
Cut out each piece neatly, directly on the solid lines.
Cutting after you fuse ensures that the adhesive goes right to the very edge of the fabric.
Trace the dotted lines onto the fabric. If you hold the pieces up to a window, the light will make the lines very visible – even on dark fabric.
If you want to skip this step, this video shows how to use a light box. If you use a light box, you only need to transfer the eye.
Put It All Together
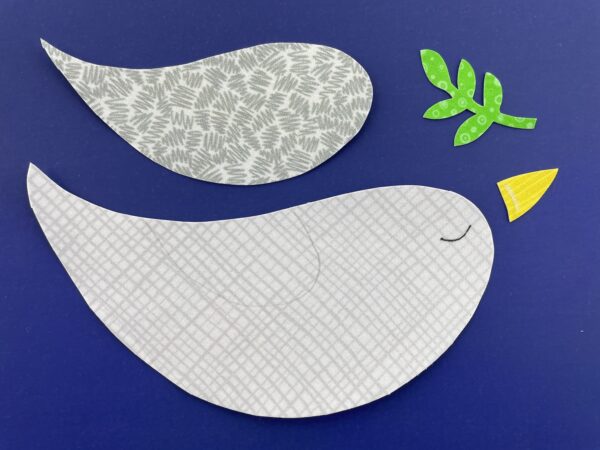
Peel off the paper backing and arrange the pieces on your background block. Fuse in place according to the adhesive package instructions.
This video shows the assembly with me explaining how I’m layering the pieces.
This video shows the same thing – but using a light box to guide placement.
Stitch all the edges down. You can use any stitch you like, in matching or contrasting thread. I really love the look of a simple straight stitch with black thread.
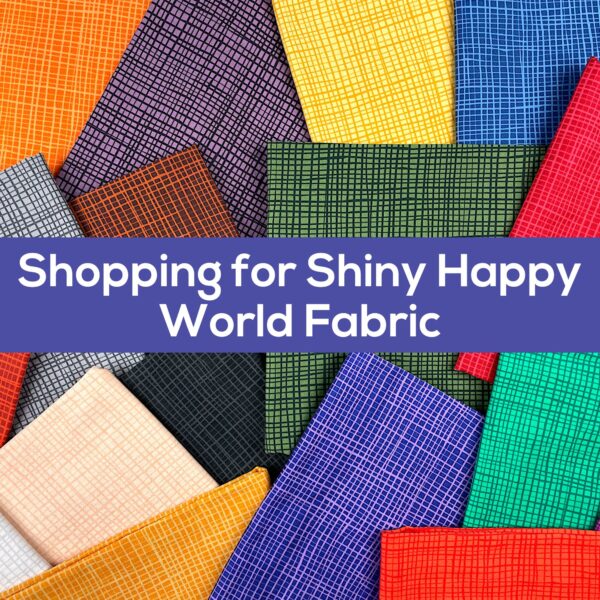
Back when I sold fabric bundles, I created several color palettes that I used over and over again. When particular fabrics went out of print (which they did with annoying frequency) I found new fabrics in those same palettes, so that even when the specific fabrics changed, you (and I) could still get a pretty consistent palette of colors.
Now all the fabrics I use come from Spoonflower (and they’re my designs, so they don’t go out of print!) but I still use the same approach to creating color palettes. I create a palette that really works well, and then use it in lots of different projects.
The only problem is that Spoonflower’s search engine is abysmal at shopping for blenders. If you’re looking for fabric with raccoons (or rockets, or popsicles, or any other easily identifiable motifs), Spoonflower’s search engine has you covered. But if you’re searching for wiggly stripes in a very specific color, their search engine just isn’t designed for that. 🙁
So I’ve created the links that you need here in my Shiny Happy World!
If you go to the fabric section of my shop (the pink menu in the banner) you’ll find the following options:
In this post I’m going to break down each of those categories and tell you how best to use them. But first a quick note! When you find something you like in my shop, the button takes you to the fabric or that collection in Spoonflower. You will actually make your purchase through Spoonflower – not through me – so you’ll need to use Spoonflower coupons or sales. They’re almost always having a sale of some kind!
Also – you can always use my palettes as a guide to shop at your own local fabric store! Just go to the Fabric by Color Palette section and pick the palette you like, then print out the main image (the one that shows all the colors lined up) and use it as a guide to pick your own tone on tone blenders.
Fabric by Color
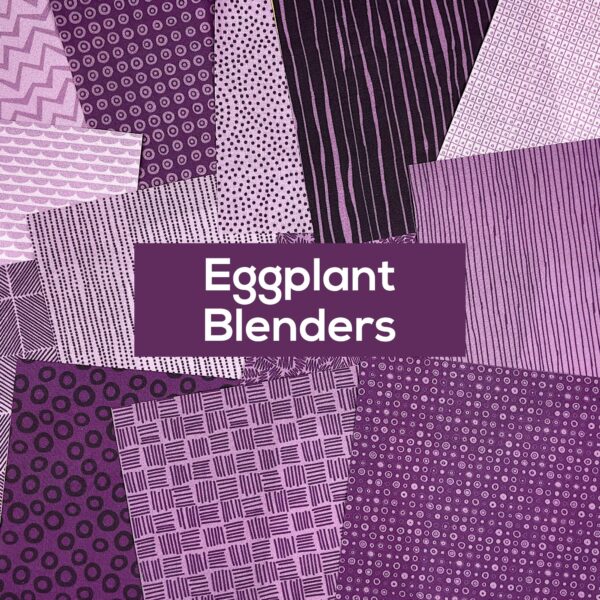
Fabric by Color is the most straightforward. It’s where you’ll find all my blenders, sorted by color. Here’s one of my favorites.
The link takes you to a collection on Spoonflower of every blender I have using all the shades from light to dark of that particular hue of eggplant purple, so if you shop within that collection you know you’re getting colors that work perfectly together.
The colors on the Fabric by Color page are not alphabetical. Instead they’re grouped by color collection, so all the Farmers Market blenders are together, all the Animal Kingdom blenders are together, etc. Which brings me to. . .
Fabric by Color Palette
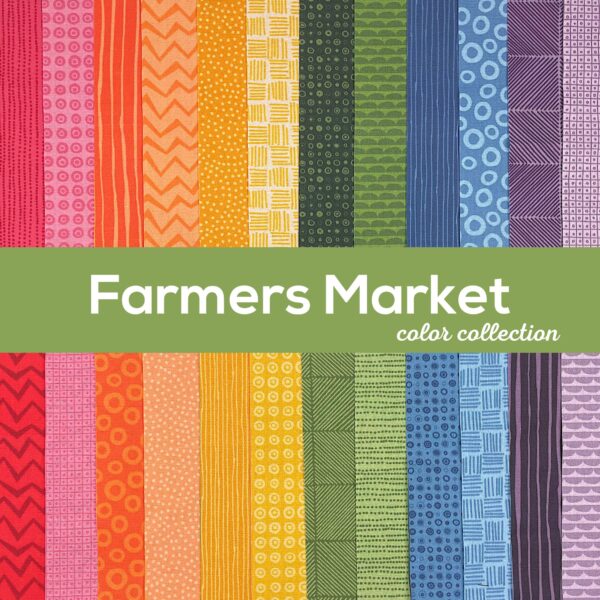
Fabric by Color Palette where you can find links to take you to collections for each color palette. Here’s the Farmers Market collection where you’ll find those eggplant blenders.
All of the colors in that collection are named for things that make sense for the collection. These are the color collections I have so far:
Farmers Market (colors inspired by and named for fruits and vegetables)
Animal Kingdom (colors inspired by and named for animals)
Classic Rainbow (bright, saturated primary and secondary colors, named for those colors)
Gemstones (bright, saturated tertiary colors named for gemstones)
Sea Breeze (soft, weathered colors inspired by and named for the beach)
I’ll be doing additional posts with more information about each color collection – including lots and lots of photos showing how I’ve used it in various quilts, because nothing is more helpful than seeing it in actual use. For now just know that these are very large collections because they have every single blender in every single color of that palette. It adds up to a lot, and can easily be overwhelming, which is why I also have Fabric by Color and Fabric by Design options.
Fabric by Design
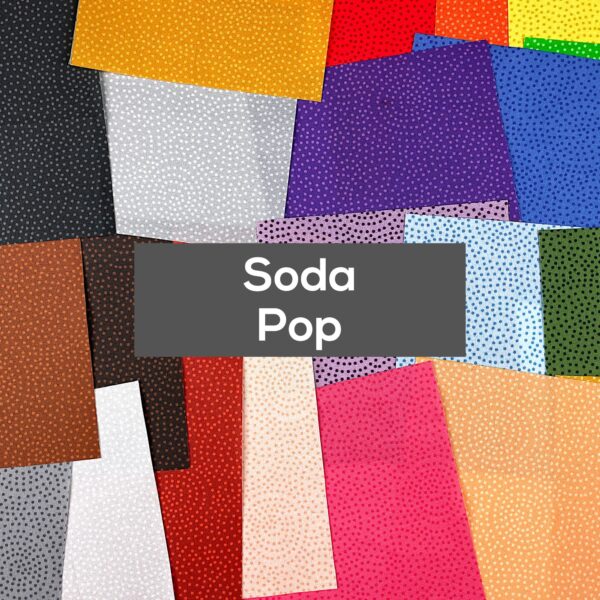
Fabric by Design is where you go if you know exactly what kind of pattern you’re looking for. For example, you know you want those swirly small polka dots I use in so many of my samples. I call that print Soda Pop.
If you click on that link, you’ll go to a collection on Spoonflower of every version of the Soda Pop print I have, from every color collection. How do you know which ones coordinate? That’s when you look at the color names. So if you know you’re using the Famers Market color palette for all your appliques, and you want those tiny dots, go to that collection and pick the ones named Strawberry, Cantaloupe, Corn, Avocado, Blueberry and Eggplant. They will all coordinate beautifully together.
So that’s the blenders – what I use most often. But I also have a few other ways to shop for fabric.
These collections usually include blenders, but they also include other fabrics.
Cheater Quilts
Cheater Quilts is where you’ll find large-scale designs that work great for cheater quilts, pillows, duvet covers, and more. My favorite thing to do with these prints is buy a few yards and then hand-quilt with big stitches around each motif, like I did here.
I don’t have much in the Cut & Sew section yet, but there will be more. Right now it’s just a few holiday projects.
More Shopping Details
I LOVE Spoonflower, but I’l be the first to admit that the all the fabric choices can be a little overwhelming. I’m going to give you a little bit of info here, but know that in every single fabric listing on my site, there are tabs with tons of additional info about how to order, and how much fabric you’ll need.
In a nutshell, my favorite fabric for quilts is the Organic Cotton Sateen. No contest. The colors are very bright and crisp – and stay bright and crisp through multiple washings. It’s a lightweight, very tight weave so there’s almost no fraying on raw-edge applique. And it gets softer with every wash! My bedsheets are this fabric from Spoonflower and I adore them.
For backing and binding I get full yards, but for applique I almost always get two yards of the Fill-a-Yard layout that can get you 48 different designs. I purchase two blocks of each color so I only get 24, but I’m getting very close to a fat eighth of each, and I love getting a wide variety prints in one go. I also love being able to pre-wash it as one piece of fabric (so no fraying) and then easily cut the pieces apart after washing.
Hope that helps with your fabric selection! More info (and loads of sample photos!) soon for each color collection.
Here are links to all the posts about choosing fabric.
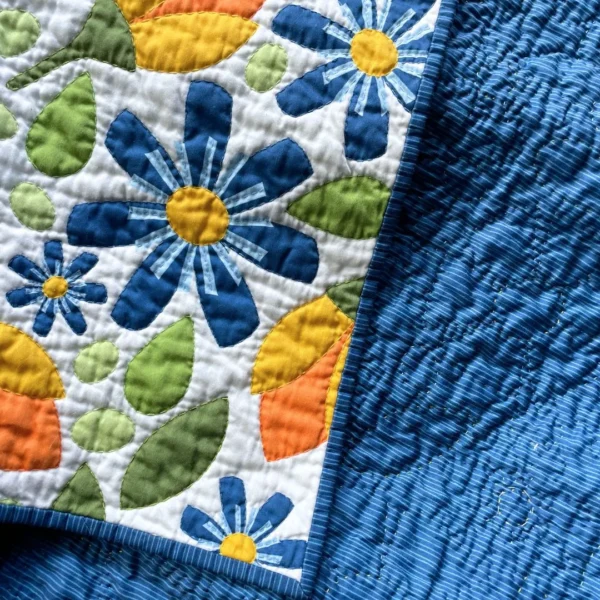
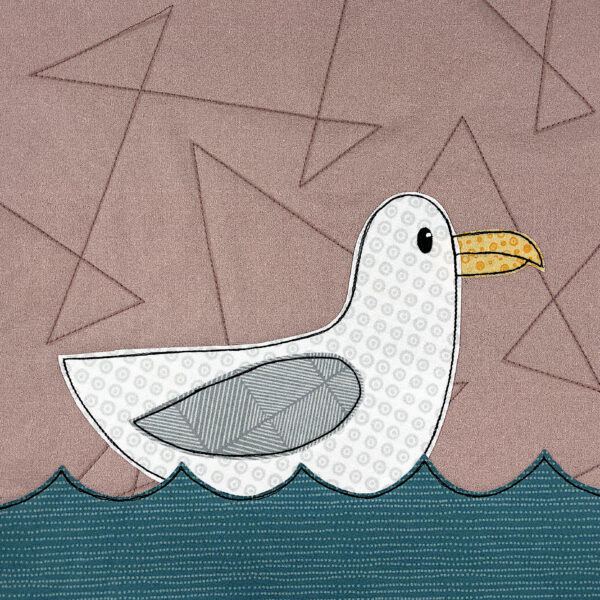
Add some waves to your quilts with this free applique pattern!
In addition to the wavy stripes you see in the top image, the free pattern also includes a template designed to use at the bottom of a block, in combination with an animal applique.
Here’s an example.
These waves will work particularly well with the following patterns:
People call them cloth books, quiet books, soft books – whatever you call them they’re easy and fun to make and a great way to get extra use out of your patterns.
The instructions below are for a 12-page book, 8 inches square, with flannel “batting” to make the pages extra soft and snuggly.
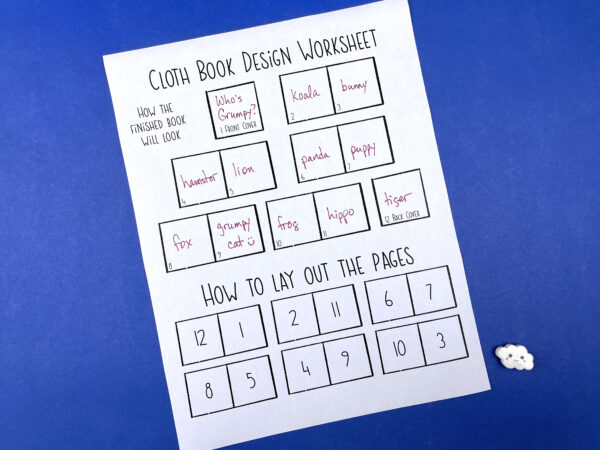
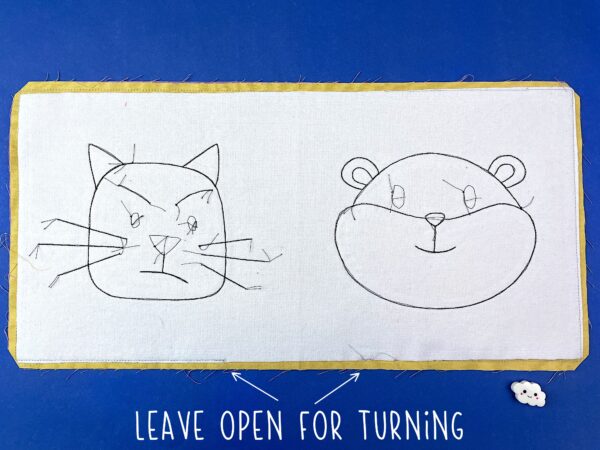
Here’s what mine looked like after filling it out.
The top of the worksheet is your planning guide. It lays out what the pages will look like when you’re reading them.
I decided to call my book Who’s Grumpy? I put one face on each page, including mostly smiling faces but one very grumpy cat. I deliberately placed the cat on an odd-numbered page so when someone is flipping the pages, that’s the immediate “reveal.” I’m imagining a kid pointing and calling out,”He’s grumpy!” as soon as you turn that page. 🙂
My book is a random collection of animals, but you can do anything!
Make a collection of a child’s favorite animals.
Make a souvenir of a visit to the zoo and the animals you saw there.
Make a collection of the animals native to your area.
Use this free ABC pattern to put an animal face on the even pages, and the sound that animal makes on the odd pages.
Make a Christmas book with the free patterns here.
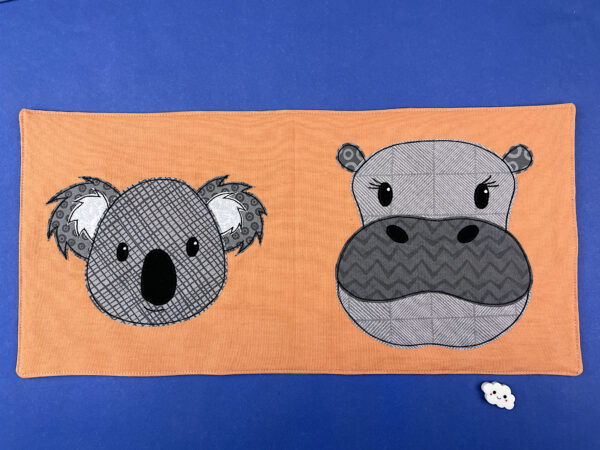
The bottom of the worksheet is your construction guide. It shows how you need to make the pages so that when you put them all together it reads like you planned in the top of the worksheet. So, for example, the animal for page two (the koala) needs to be on the same rectangle of fabric as the animal for page 11 (the hippo).
Materials
You’ll need 3/4 yard of fabric for your book, and 3/4 yard of flannel.
I recommend pre-washing both the fabric and the flannel, and I actually recommend washing and drying the flannel one extra time because that stuff has a tendency to shrink a lot.
You’ll also need fusible adhesive. I use Heat & Bond Lite for all my quilts.
Cutting Instructions and Applique Preparation
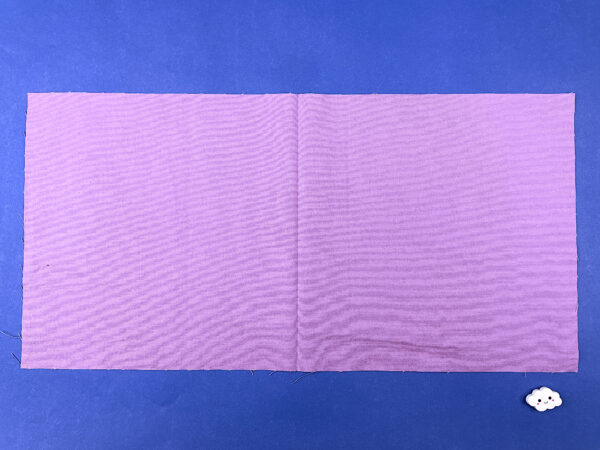
From the fabric, cut 6 rectangles each 8 1/2 inches x 17 inches.
From the flannel cut 6 rectangles each 8 inches x 16 1/2 inches.
Print or trace your applique templates. Since my book is 8 inches square and my patterns are all designed to fit in 10 inch squares, I printed all the template pages at 80% size. There’s more info about resizing patterns here.
Instructions
Fold your fabric rectangles in half and press the fold to mark what will be the spine of the book.
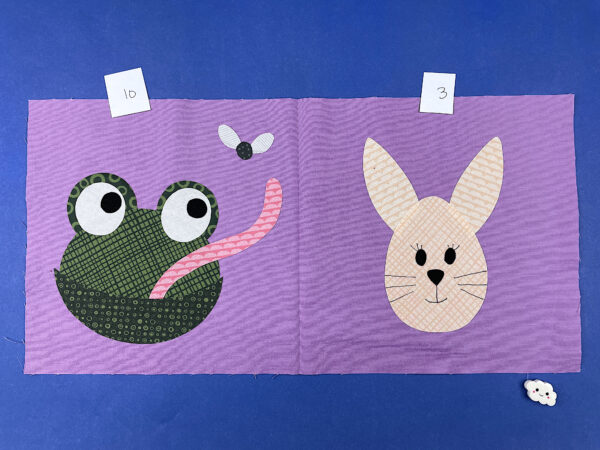
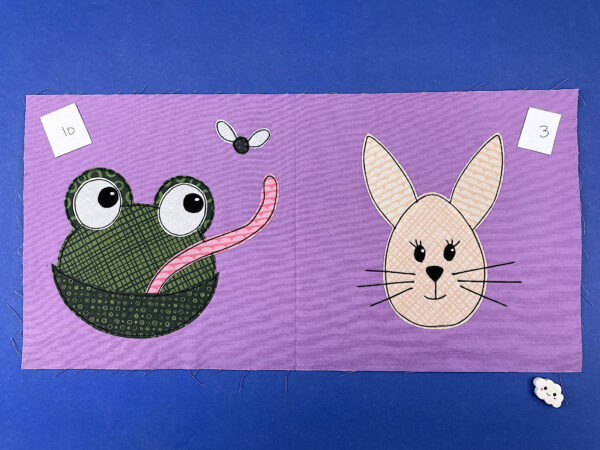
Fuse your appliques. (Those little cards with the numbers are my page numbers, just helping me to keep everything organized while I worked.)
I usually make my quilt blocks “snapshot style.” By that I mean I imagine that I’ve snapped a photo of the animal, zoomed way in on its face. Here’s an example.
I’m trying to make it look like she has a lower body – it’s just cropped out of the photo – and I achieve that effect by lining the cut edge of the bottom of the applique like up with the raw edge at the bottom of my block. You can do this in your soft book exactly the same way. Just line up the straight edge at the bottom of the applique piece with the bottom edge of the page so both raw edges get included in the stitching when you finish the page edges.
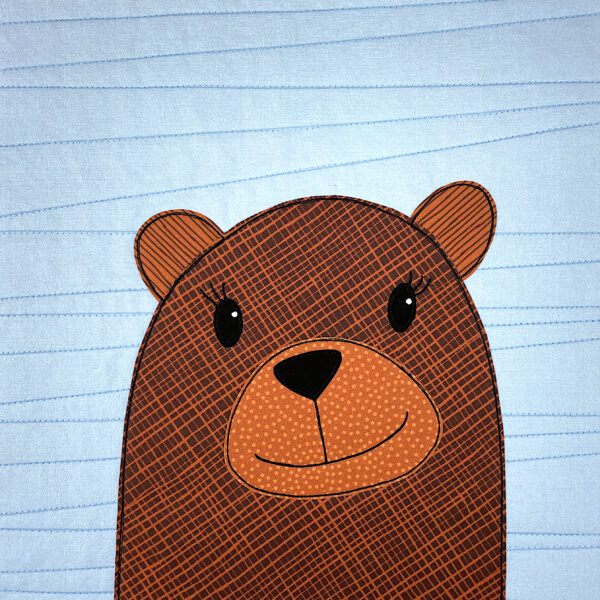
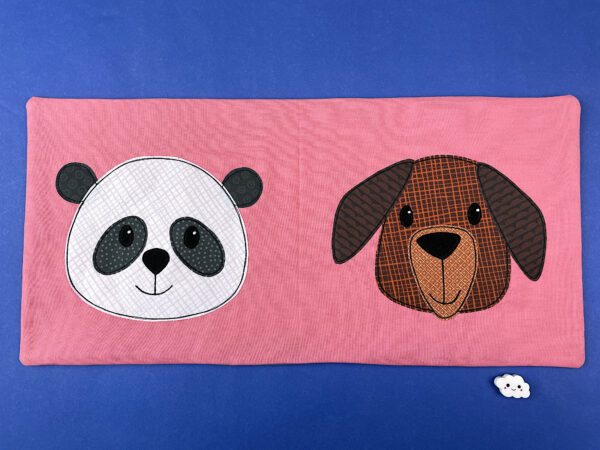
For my book I decided to float the heads in the middle of the block – what I call “emoji style.” When I do that, I just don’t use the shoulder or body pieces. That means I had to choose animals where the head and body are separate pieces, so I didn’t include anything like this bear.
See? No way to separate the head from the body.
That was a little design digression. Now, back to the instructions. 🙂
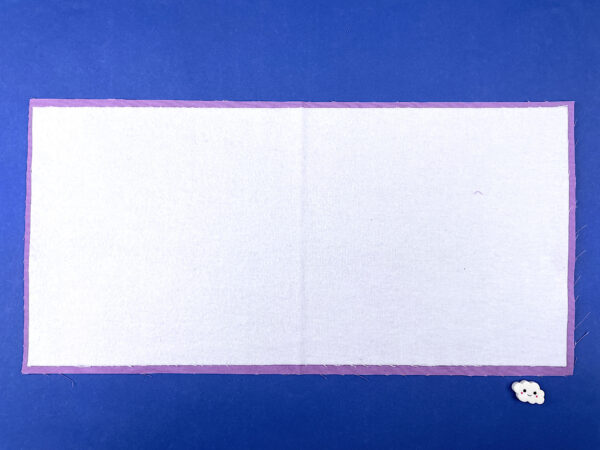
Center a flannel rectangle on the back of each page rectangle. I cut the flannel smaller than the fabric in order to de-bulk the edges of the pages.
I used spray adhesive because every few years I forget how much I hate it and I give it another try before swearing off it for another few years. It would have been a lot easier (and less messy) to just dab a little fabric glue stick in each corner and a swipe down the center. 😛
Outline the applique. I just use a simple straight stitch with black thread.
It all worked out fine, but since I used fabric paint for mine catchlights, it means for the rest of the process I had to be very careful not to iron over the eyes. It would have been easier to add the catchlights at the very end.
Now comes the fun part – finishing the pages.
Sew pages 12/1 to pages 2/11, right sides facing, using 1/4-inch seam allowance all around. Leave a 4-5 inch opening for turning.
Repeat with pages 6/7 and 8/5.
Repeat with pages 4/9 and 10/3.
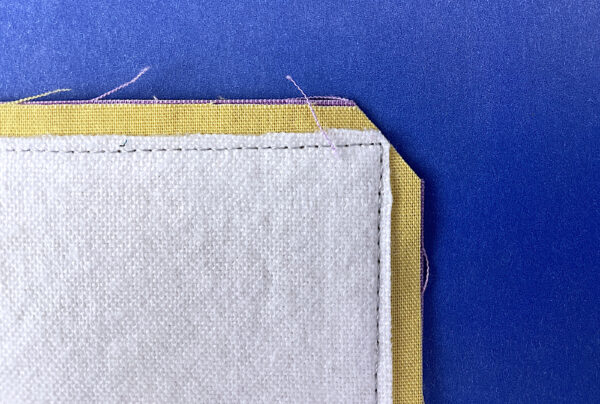
Clip the corners of each page and turn them right side out.
Here’s a close-up of the clipping. You want to get right up to the stitching without actually cutting the stitches.
Smooth all the edges, tuck the seam allowance in at the turning opening, and give it a good press.
You can close up that opening two ways.
Hand sew the opening closed using ladder stitch. This is slower, but completely invisible and results in the softest pages.
Topstitch the edges of the page all the way around, closing up the opening as you topstitch. This is faster, but results in a slightly stiffer page edge.
I chose option 2 – topstitching. I’m pretty sure the page edge will soften up over time, and even if it doesn’t it’s really not unpleasantly stiff. 🙂
Finally, stack the pages as follows.
Lay page 12/1 face down so that its back (page 2/11) is face up.
Over that lay page 10/3 face down so that its back (page 4/9) is facing up.
Over that lay page 8/5 face down so that its back (page 6/7) is facing up.
Sew the three layers together right down the spine of the book, using that pressed fold line as a guide. I stitched my spine twice for extra durability.
Close your book. You’re finished! Here’s my finished book. . .
Here are a bunch of additional ideas and links to further customize your book.
You can change the size of your book – just be sure to adjust the print size for your templates accordingly. I use 10-inches as the base for all my quilt blocks because it makes the math so dang easy. If you want a 9-inch book, print your templates at 90% size. If you want it to be 7.5 inches, print your templates at 75%. Easy peasy.
If you want to add or subtract pages, that will throw off the entire planning worksheet so you’d need to make your own. It also affects what batting you use in the pages. In my tests, even thin cotton batting was too puffy for a 12-page book, but it would probably work for an 8-page book. If you want to make yours longer than 12 pages, I’d recommend stabilizing the pages with interfacing instead of using the flannel.
Go crazy with fun special effects!
Maybe you want to use smooth shiny satin for your frog! Or fluffy fleece for your puppy. Or a little bit of white fur for the inner ears of the koala! This post will take you to the tutorial showing how to applique with satin, and at the bottom of that post there are links to tutorials for lots of other specialty fabrics.
Want to use an easy faux trapunto technique to give the koala a puffy nose?
Here are several free patterns that work with just some simple resizing. This post about making coasters has info about resizing an applique pattern that can be applied to any of these projects.
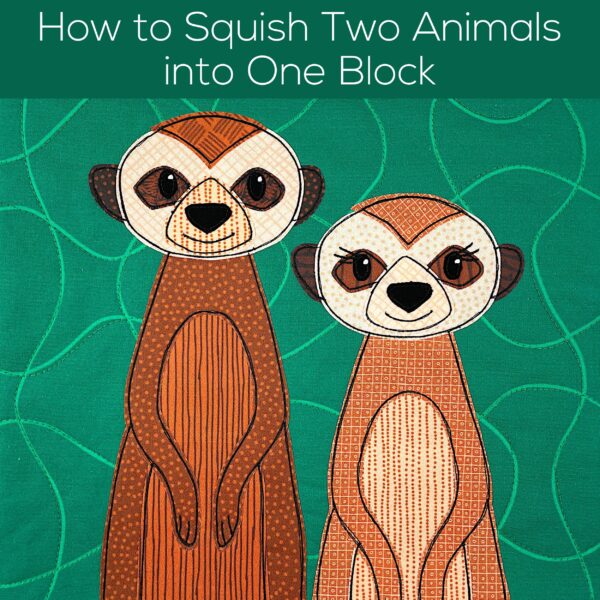
All of my applique quilt patterns (except the Paper Dolls) are built on a 10-inch grid, and I almost always design one animal for each block. But sometimes you may want to squish two animals into one block!
Maybe it’s a social animal like those meerkats in the first photo.
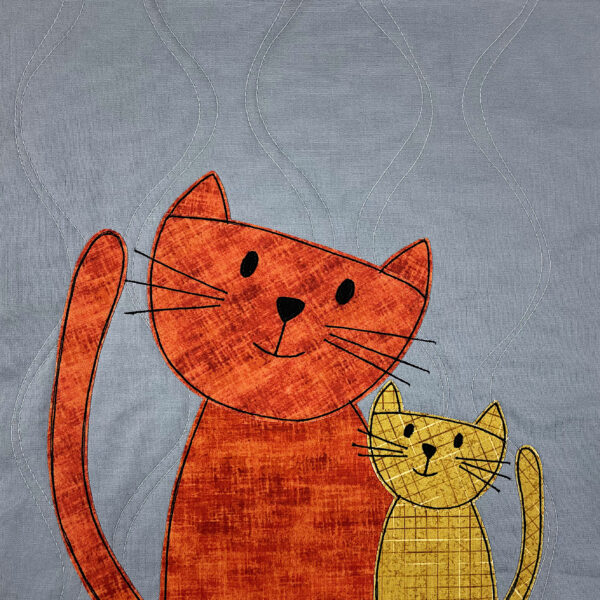
Maybe you want to add a baby animal, like these cats.
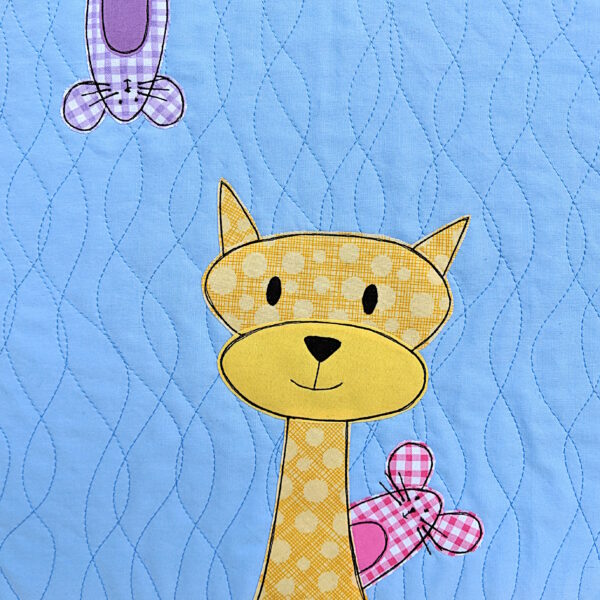
Or maybe you want to use the Peekaboo Mouse pattern to have a little mouse photobomb one of your other blocks.
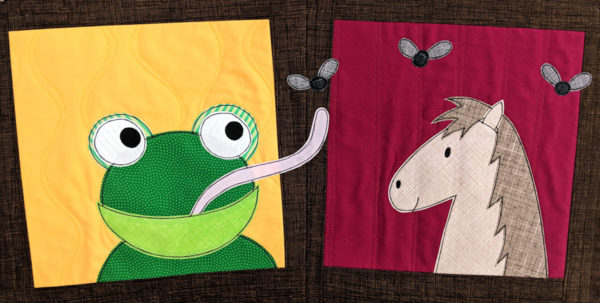
Or maybe you want to add something that will deliberately bust out of its 10 inch frame, like this frog flicking his tongue into a neighboring block.
It’s easy to play with your blocks like this – but you want to make sure it still fits in a 10-inch square, and since I advise you to start with an 11-inch block and then trim it down to 10 1/2 inches and sew it together so it finishes as 10 inch – you need to know where those 10-inch edges are.
I used to just use one of my square rulers to measure. I’d lay out the block, then check to make sure it all fits properly, then make adjustments (if needed) and measure again. It worked, but I wanted a way that let me see the edges AND move things around to adjust them at the same time.
So here’s what I do. I made a little tool that’s quick, easy, and free.
So there you go. How to squish two animals into one block – and know that they’re going to fit beautifully!
Have fun with this!
Here are links to all the posts showing how to applique with fusible adhesive – my favorite method. It’s fast and easy and (with the right materials) it holds up beautifully to rough use and repeated washing.