


All of my applique quilt patterns (except the Paper Dolls) are built on a 10-inch grid, and I almost always design one animal for each block. But sometimes you may want to squish two animals into one block!
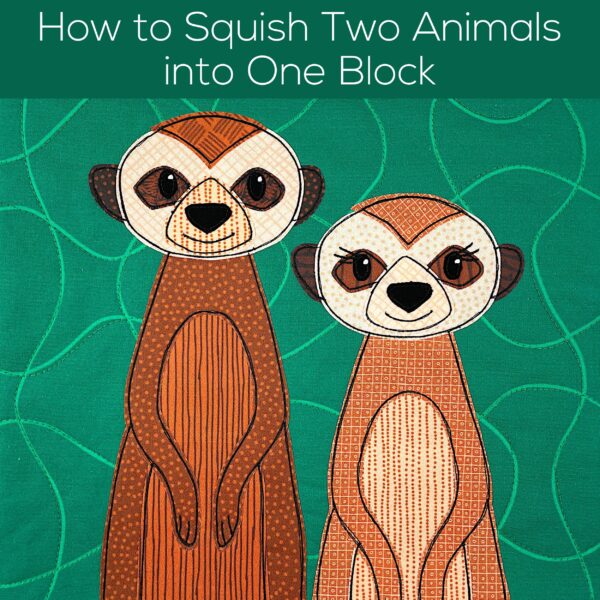
Maybe it’s a social animal like those meerkats in the first photo.
Maybe you want to add a baby animal, like these cats.
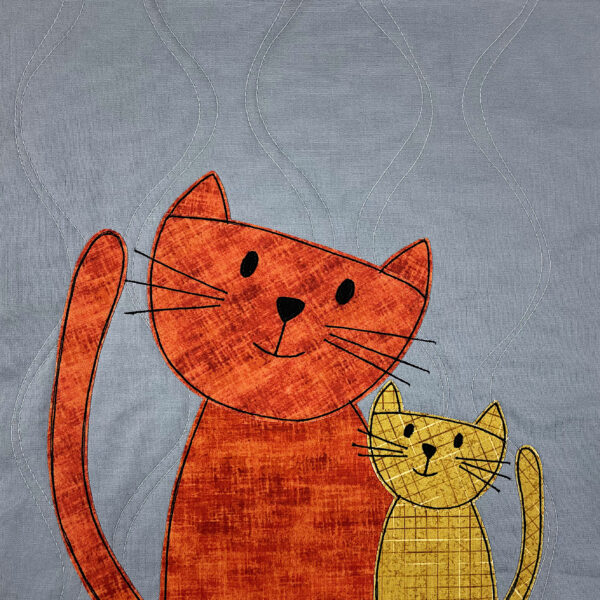
There’s a post here with more info about resizing any applique pattern to make a baby version.
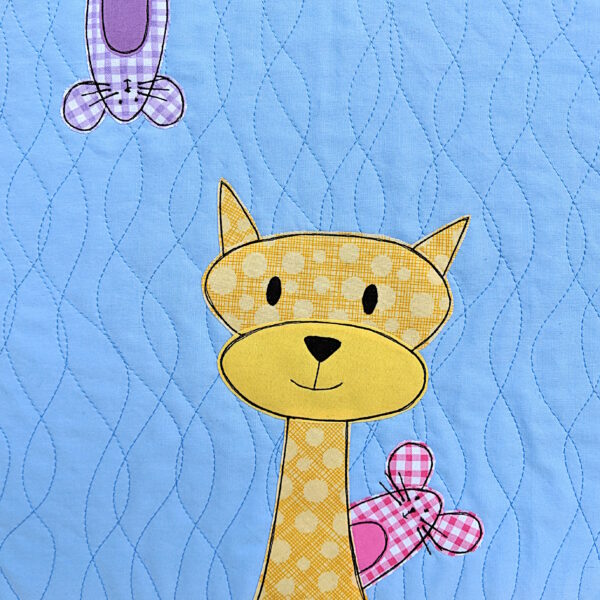
Or maybe you want to use the Peekaboo Mouse pattern to have a little mouse photobomb one of your other blocks.
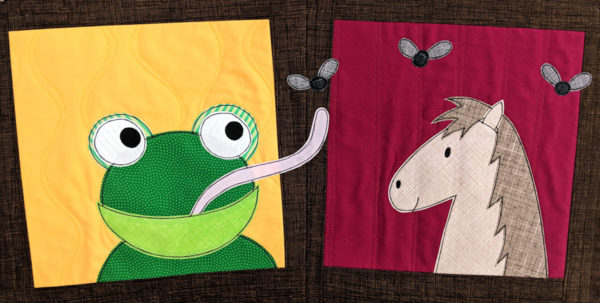
Or maybe you want to add something that will deliberately bust out of its 10 inch frame, like this frog flicking his tongue into a neighboring block.
It’s easy to play with your blocks like this – but you want to make sure it still fits in a 10-inch square, and since I advise you to start with an 11-inch block and then trim it down to 10 1/2 inches and sew it together so it finishes as 10 inch – you need to know where those 10-inch edges are.
I used to just use one of my square rulers to measure. I’d lay out the block, then check to make sure it all fits properly, then make adjustments (if needed) and measure again. It worked, but I wanted a way that let me see the edges AND move things around to adjust them at the same time.
So here’s what I do. I made a little tool that’s quick, easy, and free.
So there you go. How to squish two animals into one block – and know that they’re going to fit beautifully!
Have fun with this!

Here are links to all the posts showing how to applique with fusible adhesive – my favorite method. It’s fast and easy and (with the right materials) it holds up beautifully to rough use and repeated washing.
- How to Applique with Fusible Adhesive – a very basic intro
- How Durable is Applique with Fusible Adhesive?
- Fusible Applique the Easy Way – the way I currently work – use with any of my patterns that include SVG files
- How to Use a Light Box to Layer Your Applique – perfect placement every time
- How to Applique with Fusible Adhesive – photo tutorial – use with any of my patterns that do not include SVG files
- How to Applique with Fusible Adhesive – video tutorial – use with any of my patterns that do not include SVG files
- How to Window Cut Fusible Adhesive – if you’re worried about stiffness
Here are links to special posts about eyes.
- Easy Eye Options for Applique
- Using Fabric Markers and Paints for Small Eyes
- Free Embroidery Machine Files for Machine-Stitched Eyes
- How to Machine Stitch Eyes without an Embroidery Machine
- How to Minimize Show-Through on White Eyes
- How to Applique Dark Eyes on Dark Faces
- How to Add Catchlights to Eyes
- How to Change the Eyes on Your Applique Patterns (adding lashes or changing to sleepy or smiling eyes)
Here are links to some extra fun things you can do with your applique.
- How to Add a Baby Animal to Any Block
- How to Squish Two Animals into One Block
- How to Add Playful 3D Bits to Your Applique
- How to Add Soft 3D Pieces to your Quilt Block
- How to Add a Door (that Opens!) to Your Quilt Block
- How to Give Your Monster an Underbite
- Fake Trapunto (Stuffed) Applique
- Broderie Perse Applique
Other Applique Methods
Finished with this topic?
Return to the Let’s Make a Quilt main Table of Contents.
Move on to the lessons about outline stitching.


