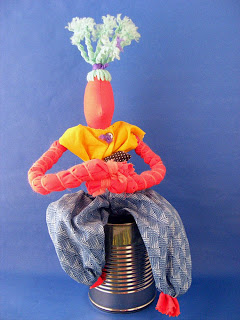
Jo informs me that this is a bird – not a monster. I told her that any bird big enough and smart enough to drive a car is totally a monster. Big birds (but not Big Bird, of course) scare me. 🙂
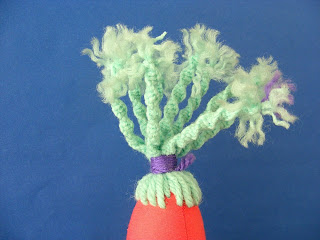
I made this guy years ago and I still love the macrame hair. Want to see it a little closer?
I gathered all the hair into a topknot and then knotted each four strands into a macrame twist. It’s so much fun! And it never takes as long as I think it’s going to.
Give macrame a try on your next project! I might even incorporate a bit of it into the monster quilt. . .
One of the first steps you’ll take as you move beyond the easiest of the easy patterns is to learn how to crochet standing legs. That one skill opens up all kinds of new pattern possibilities – and it’s one of my favorite body shapes.
When you crochet standing legs, you start by making each leg separately, then joining them together and continuing on up the body.
Joining the legs together, when you’re reading it from a pattern, can be difficult to picture.
So… help is on the way!
Let’s watch it in action, shall we?
Video: How to crochet the joining round for standing legs
In this video, I’ve recorded every step of that sometimes-tricky joining round. Have a look!
To watch this video in full-screen mode, click ‘play’, then click the rectangle in the lower right-hand corner.
I know. It’s a bit weird – but totally easy once you see it, right?
This method can leave a pesky hole between the legs. It’s super easy to stitch up using a scrap of yarn, but if you want to pull out that tapestry needle as little as possible, here’s a nifty variation on this method that will let you crochet standing legs with no hole. The downside is that you’ll need to tweak your stitch count a bit (adding in a couple of increases not in the pattern) but it’s a very minor adjustment.
I hope this video will give you the confidence to crochet standing legs and start making this fabulous amigurumi shape!
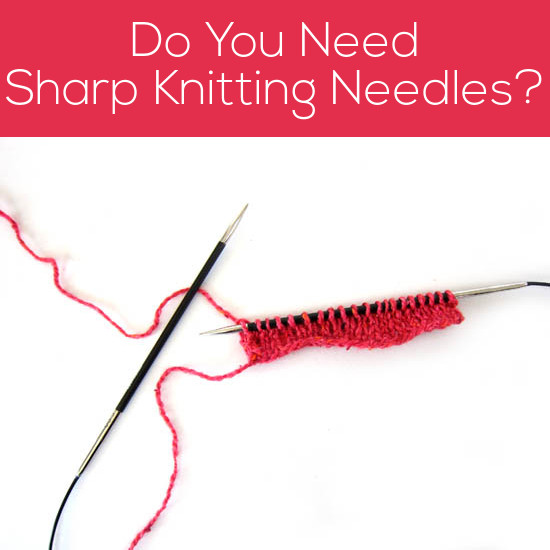
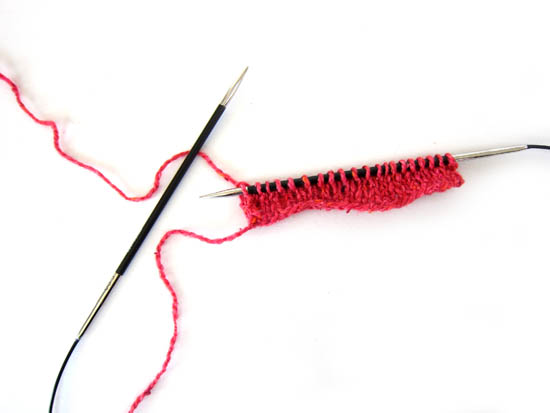
I’ll level with you. I don’t like sharp-tipped knitting needles.
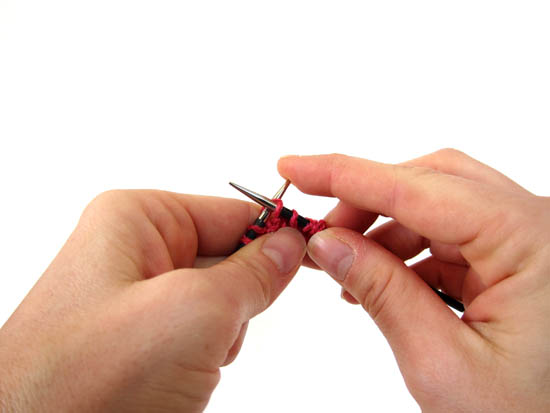
Do you know why? I’m a pusher:
That means that I push on the tip of the needle as part of executing my knitting stitch. A sharp tip means a major ouchie.
But, even I’ll admit: there are times when you need a sharp-tipped knitting needle.
When to use sharp-tipped knitting needles
Some folks love using super-pointy needles all of the time. These folks will tell you that every knitting project is the right time to use sharp-tipped needles.
But what about those of us who have a knitting style that makes using sharp-tipped needles painful? When is it really helpful to use a sharp needle?
Here are a few cases where I reach for my sharp tips:
when working with a yarn that’s fuzzy (for example, containing mohair)
when using a lace-weight yarn (the tips help you navigate a super-thin yarn)
on any pattern that calls for ‘big’ decreases (like k3tog, common in bobbles), since the tip helps you get through all those stitches at once
any other time I’m having difficulty manipulating the stitches, perhaps passing one stitch over another
Selecting a sharp-tipped needle
For those of us who don’t love pointy needles, selecting one for occasional use is a pickle. You want a nice, quality needle… but since it’s only going to come out of the cupboard infrequently, you also don’t want to pay too much.
A few that didn’t make the cut…
When I first started knitting, I made my sister-in-law a lace mohair cabled scarf. It was impossible to knit with my regular needles (do to the lace-weight and mohair combo), so I bought a pair of Addi Lace needles.
I absolutely adore Addis, but I sold this Lace circular on ebay the minute I was done with them. Why? The smell of brass as I was working (that was also left behind on my hands) was too much for me to bear.
I’ve also heard fabulous things about the Stiletto tip on Signature needles. Very pointy! But, these needles are an investment… and to get your money’s worth, these needles are best suited to those who like a sharp-tipped needle for everyday knitting.
Knitter’s Pride Karbonz
Just the other week, the perfect solution happened across my desk. Knitter’s Pride’s new line: Karbonz.
They meet my criteria for a lovely needle: they’ve got a good feel, a smooth join and they’re reasonably priced. And they’re available in circulars, double points and straights. At around $15, they’re a fabulously high-quality needle that’s not out of range for (my) occasional use.
I can’t say for sure whether sharp-tip-lovers will find their new favorite needle in these, but my suspicion is that they tick a lot of boxes. They’re very lightweight (made from carbon fiber), have more flexibility than other metal needles and are warm to the touch.
Downsides? At current, they’re only available in sizes 0 to 4 (but are available in the myriad of half sizes in that range, have a peek here to see the full line). And while the surface of the needle is slick (and certainly smoother than most wood and some aluminum needles), they’re not quite as slick as the nickel-plated Addis.
So, if you’re like me and need a sharp-tipped needle for occasional use that won’t break the bank, give Karbonz a try. And if you like sharp-tips and want a warm light-weight needle, then give them a try, too!
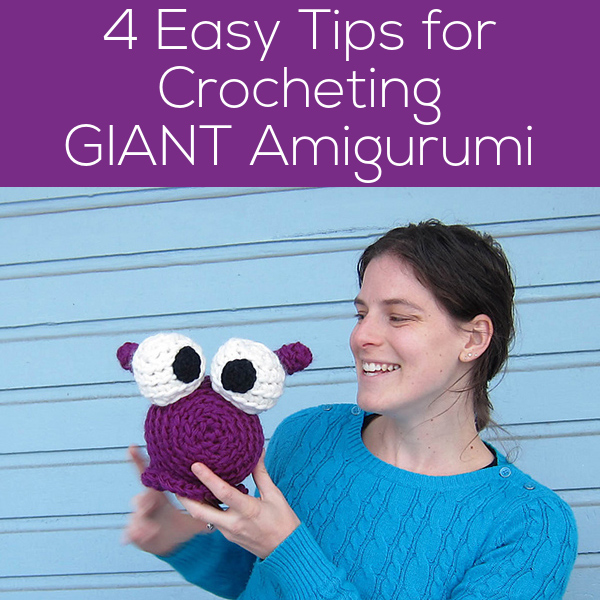
It’s easy to crochet a giant amigurumi by using a thicker yarn and a larger hook! The result is a super-large animal, with the same amount of crochet work!
Want to give it a try? Here are some tips.
Use multiple strands if a thicker yarn isn’t available
Super-bulky yarns can be pricey and have a limited selection of colors. So, if you can’t get the super-bulky yarn you’re looking for, try holding multiple strands of yarn together!
The same rules apply with giant amigurumi as small ones: you want a nice fabric without holes showing through.
It may feel funny using a giant hook, so just make sure you’re getting an even tension, and find the size that works! I like to start with a hook one size smaller than what the yarn band recommends, and then go up or down from there if needed.
Take breaks
Crocheting with very thick yarn can be hard on your wrists. Take more breaks than you usually do and give these wrist exercises a try.
Know that you may have to fudge attaching instructions a bit
You’ll be able to follow the crochet directions exactly, and get a giant amigurumi stuffed animal!
But. . . if your pattern specifies exact rounds (or suggestions) for attaching, you might need to take a little creative license.
For example, in crocheting my giant slug, the pattern recommends attaching the eyes to two rounds. Works great for a tiny slug… but it would have made this giant slug’s eyeballs look squashed. So I took some liberties, and attached them how they would look best (to 3 rounds, if you’re curious!)
Don’t be afraid… feel liberated!
Want more info?
Planet June has a great post with LOTS of nerdy detail about scaling crochet patterns – from itty bitty all the way up to giant amigurumi. Read it here.
You should always have fun crocheting… but especially for a jumbo project like this! Go stash-busting and throw together crazy colors. Make a giant animal! Have a blast!
Here are handy links to all the posts about crocheting stuffed animals in different sizes. . .
Everyone knows that a little Vicks Vapo-Rub smoothed onto a kid’s chest can help ease a cough and clear up a stuffy nose. But some kids (and some adults too) don’t like the sticky stuff smeared on their skin. And some grown-ups are concerned about using a petroleum jelly-based rub.
I recently had a major Mom-lightbulb-moment. I make rice bags for bedtime – usually scented with orange oil, cinnamon stick and cloves. I will sometimes put one on my “I don’t like sticky stuff on my skin” daughter’s chest to help ease a cough and soothe her to sleep when she’s sick. What if I make a special rice bag for sick times and scent it with the aromatics in Vicks VapoRub?
Awesome – if I do say so myself. Cue the chorus and trumpets please. 🙂
The pattern calls for 2 1/2 cups of rice. Before you put the rice in the bag, stir in 20 drops of eucalyptus oil and 20 drops of rosemary oil.
Put the rice in the bag and sew it closed. Ta daa!
The smell will be very strong at first – keep it stored in a ziplock bag to help preserve it. After a couple of months it will seem like it’s lost its scent, but microwaving will bring it right out again.
Microwave at 1 – 1 1/2 minutes (depends on the strength of your microwave and how hot you like it) and lay it on your child’s (or your) chest. The warmth will help soothe a cough, and the aromatics will help clear a stuffy head. No stickiness needed. 🙂
For extra comfort – sew up this rice bag cover.
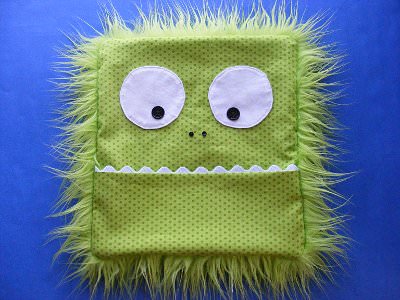
I designed it especially to fit the rice bag I linked to above. Sometimes having a special critter like this monster to help scare away a cold does as much good as the aromatics and the chicken soup. 🙂
Here’s how to make it. . .
Step 1 Cut 1 square of fabric or faux fur 10 1/2 inches square, for the back of the rice bag cover.
Step 2 For the lower jaw, cut two rectangles, each 4 3/4 inches tall and 10 1/2 inches wide. Cut a piece of white jumbo rickrack 10 1/2 inches long.
Step 3 For the top of the face, cut one rectangle 8 1/2 inches tall and 10 1/2 inches wide.
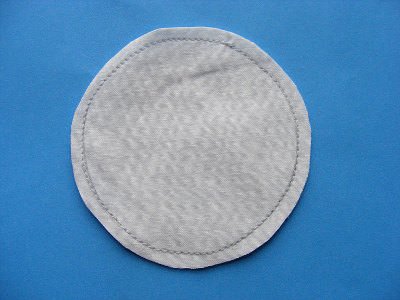
Step 4 Make the eyes. Trace a 3-inch circle on the back of one scrap of white fabric. (I used the inside of a roll of masking tape.) Layer that scrap and another scrap of white fabric right sides together. Sew around the circle, right on the line you drew. Sew all the way around. Trim away the excess fabric, leaving about 1/4 inch seam allowance all the way around. It doesn’t need to be exact.
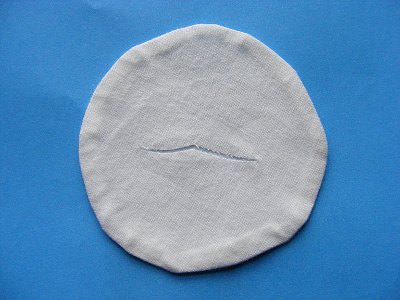
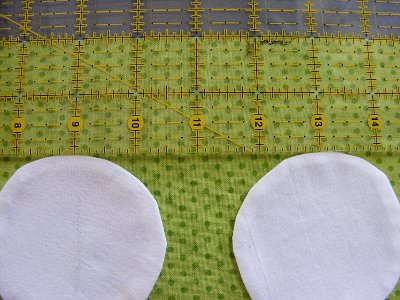
Pul the two layers of fabric apart slightly and cut a slit in the center of one of the layers. Turn the eye right side out through the slit, smooth out the curves, and press the eye flat.
You’ll need to add the rickrack teeth to the bottom of the face. Draw a line 1/8′′ from the long edge of one of the smaller rectangles, on the right side of the fabric.
Lay the rickrack on the right side of the fabric so the valleys line up with the line you drew. Stitch the rickrack in place along the 1/8′′
line.
Lay the second small rectangle over the first, right sides together, with the rickrack sandwiched between the layers. Stitch them
together using 1/4′′ seam allowance.
Flip the two rectangles right sides out and smooth them down where the rickrack comes out of the seam. Press. You can watch a video demonstrating the technique here.
Step 6 Hem the bottom edge of the larger rectangle for the monster’s face. Turn up the bottom edge of the rectangle 1/4 inch and press. Turn it up another 1/4 inch and press. Sew the seam in place. This video will help with that hem if you’ve never done it before.
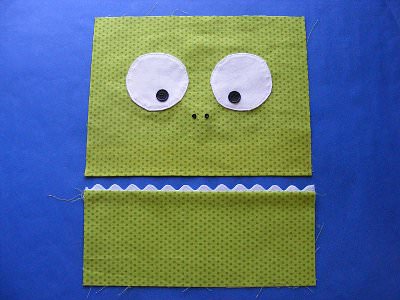
Step 7 Position the eyes on the rectangle so they’re centered, and the top edge of the eyes is 2 inches down from the raw edge at the top of the face rectangle. Stick them in place with a quick swipe of fabric glue stick. Sew around the edges of the circles with matching thread. This video will help if you have trouble sewing those curves.
Step 8 Add a couple of black buttons (I used 5/8″) to make pupils in the eyes, and a couple of tiny black buttons (I used 3/8″) to make nostrils below the eyes. You’re almost ready to sew all the pieces together!
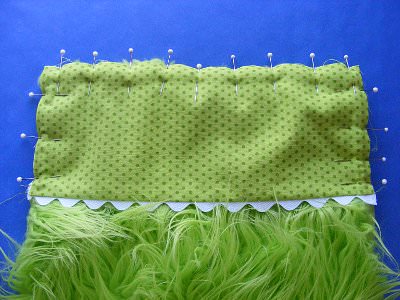
Step 9 Lay the back of the rice bag right side up on a flat surface. Layer the jaw rectangle over the fur so that the bottom edge of the jaw rectangle is lined up with the bottom edge of the fur square. Smooth all the fur to the inside, so it’s sandwiched between the two layers and pin or clip into place.
The bottom of the face is it the top of the photo here; I like to pin toward myself. See how all the fur is tucked inside the pinned edges? That’s what you want.
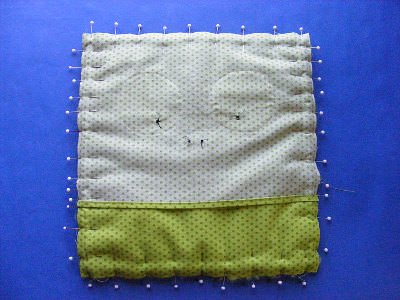
Step 10 Layer the rectangle with the eyes face down over the top of the fur. Smooth the fur to the inside and pin or clip into place. The bottom of the eye rectangle should overlap the top of the teeth rectangle.
Step 11 Sew all the way around the edge using 1/4 inch seam allowance.
Using 1/2′′ seam allowance, sew again up the two sides (not across the top and bottom). That will help reinforce the stress points at the sides of the “mouth.”
Turn the cover right side out and slip a warm rice bag inside!
Happy sewing! And to everyone fighting the cold and flu this season – get well soon!
For attaching a ruffle to an almost-finished piece, you’re going to start with an amigurumi that has been crocheted through the back loop only.
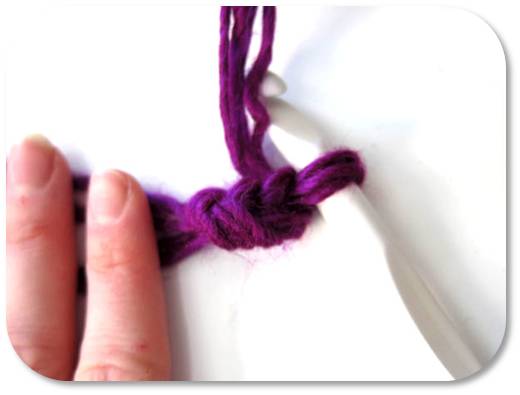
To form the new ruffle, we need to attach a new piece of yarn to begin crocheting with.
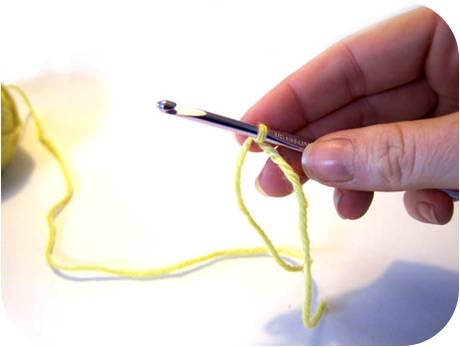
To begin, make a slip knot on your hook with the new length of yarn.
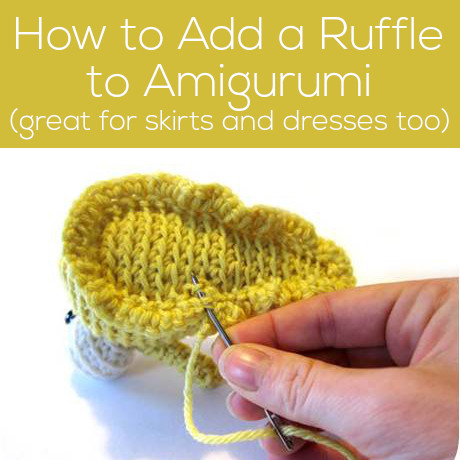
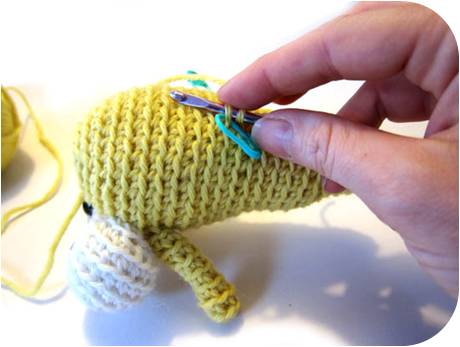
Next, single crochet into a stitch on your amigurumi. Specifically, insert your hook through the front loop of a stitch (the ridge that is visible on the piece), wrap the yarn around the hook and pull through one loop, wrap again and pull through both loops.
Now that you’ve attached the first stitch, you’ll crochet around, forming the base of your ruffle.
Which stitches you select is up to you. To form an evenly-shaped ruffle, you may want to use locking stitch markers to plan the shape before crocheting.
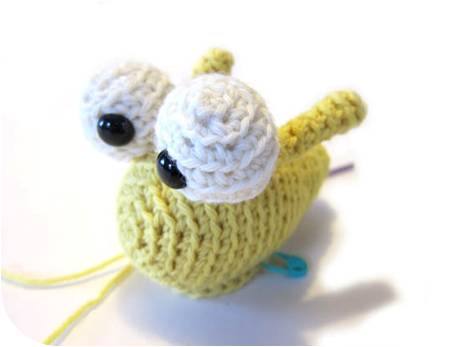
Once you have finished the foundation round, look at your piece. Does the round look even when your amigurumi is sitting?
If so, you’re ready to keep going! If not, this is a good time to unravel and repeat this step, as the ruffle is built on the stitches you form in this round.
Step 3: Ruffle!
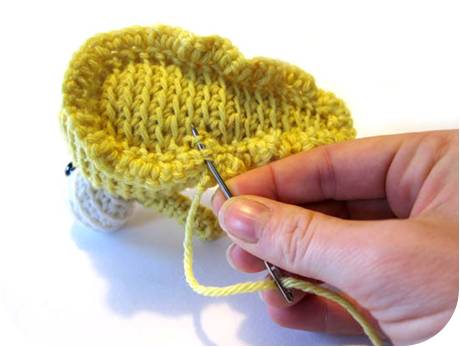
Once your foundation is set, start ruffling! To make a ruffle, you’ll increase around the first round you make (typically increasing in every stitch). For more ‘ruffle’, increase more stitches and for a less pronounced ruffle, increase with less frequency.
Fasten off, either when the instructions tell you to or when you’re ruffle is how you like it! Weave in ends.
And you’re done!
Don’t you feel like everything needs a ruffle, now?
Want a little tip? This is a great way to add extras to your amigurumi. You use the same technique to add a dress or skirt! Just crochet that foundation row right under the arms (for a dress) or around the waist (for a skirt). Easy peasy!
Here are handy links to all the posts about crocheting more advanced shapes. . .
Lots of people use fur to make stuffed animals – but did you know you can use it in quilts too?
Yes – you can!
Make shaggy dogs, fluffy cats, and furry monsters.
Or if you don’t want to make the whole critter furry, maybe just a few parts? Like some long, silky fur on a dog’s ears – or excessively shaggy eyebrows on a silly monster.
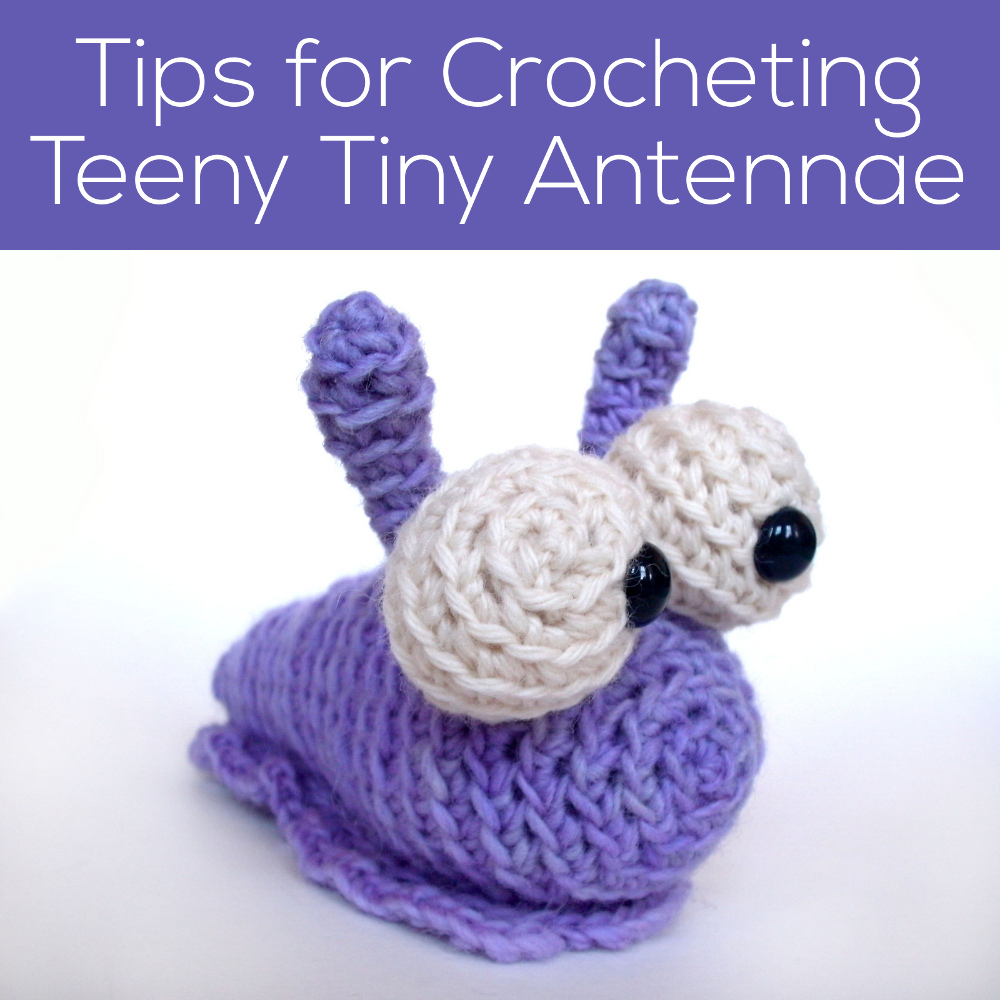
Do you need to crochet skinny parts for things like antennae and legs? If there’s one part of an amigurumi pattern that can make people feel cranky, that’s it. They’re tiny and sometimes they wind up inside out! Eep!
Today, I’ll show you how to make sure you’re crocheting right-side out and how to count the rounds without a stitch marker.
Crocheting skinny parts right-side out
When you’re crocheting a large piece, it actually doesn’t matter which side is out. If it’s wrong-side out, you just turn it around once you’re done. No biggie. (Read am I crocheting inside-out for more details)
However, the antennae of the slug (and legs of the ladybug and mosquito and fly) are so small, it’s important to crochet with the right-side out.
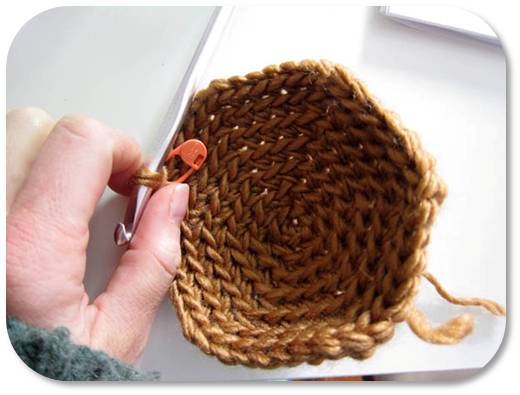
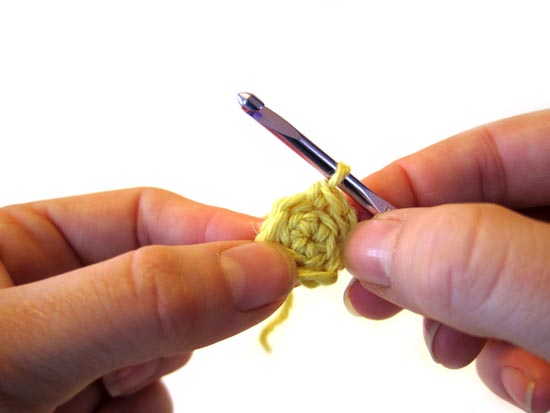
Let’s say your piece looks like this after round 2:
You can tell it’s inside-out because the pretty ridges (from the front loops) aren’t showing up on the outside. All you need to do is turn it right-side out!
Ta da!
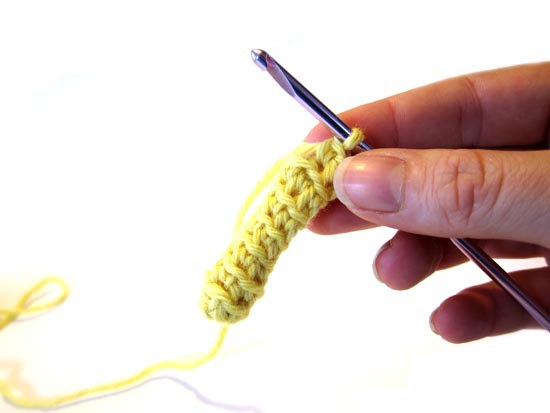
Now, keep your piece like this, and continue crocheting. It’ll be right-side out when you’re done!
Did you forget and now you have a long, inside-out tube? No worries! Thread the tail from starting your crochet onto a tapestry needle, poke it into your tube from the bottom and pull it out the top, then pull on the tail to turn your tube right side out. Easy peasy.
How to count rounds without a stitch marker
For parts as skinny as an antennae or a leg, you can crochet without a stitch marker! (shocking, I know!)
Here’s a little video to help you out: (to see full-screen, click play, then click the box in the lower right-hand corner)
Happy crocheting!
Hopefully, these two tips will have you crocheting skinny parts with ease!
Here are handy links to all the crochet troubleshooting posts. . .
There are a LOT of different methods for making half-square triangles. Some of them make a lot of blocks relatively quickly, but they have a lot of steps that don’t feel very intuitive to me. This method is fast, easy to understand (once you do it once you’ll never need to look at the instructions again), and makes a nice accurate block. That’s all I ask for. 🙂
Update – Ask and ye shall receive! Someone asked for a printable PDF with very basic instructions that she could follow along with away from her computer. What a great idea! I put together a handy dandy cheat sheet on just one page – with photos. 🙂 Here’s the link to download it.
One more thing. In this video I tell you to cut your initial squares 1 inch larger than the size of the finished block. Most instructions tell you to cut cut 7/8″ bigger and then sew with a scant quarter inch seam allowance. That makes me really nervous. How much smaller than 1/4 inch is a “scant” 1/4 inch seam? If I’m not scant enough my blocks will be just a smidge too small and then I’m SOL. No. I’d rather cut my initial squares 1/8″ bigger, sew with a real (measurable) 1/4 inch seam allowance, and then trim away the tiny bit of extra I end up with. It’s much less nerve-wracking – plus the math is easier. 🙂
The possibilities with just half-square triangles are incredible!