I’m moving right along on my version of the Noisy Farm quilt with sashing added, and I realized this is the perfect time to share a little tip with you about pinning long seams.
I’m not very bossy about pinning most of the time. Some people pin, some don’t, and I’m mostly a live and let live kind of person. 🙂
But when it comes to long seams (like the ones attaching those looong sashing strips to rows) you’ll find that pinning – and actually pinning in a very particular way – will save you a lot of headaches.
Here’s the problem. If you just slap a long strip on your strip of blocks and just start sewing without pinning – there’s a really good chance that when you get to the end of the long seam, one of those pieces is going to be significantly longer than the other. This happens even if you use a walking foot and even if you’re really careful about keeping your tension even. It just happens.
You know what keeps it from happening?
Pins. 🙂
I’ve got a specific method I use to pin longs seams. I call it Divide and Conquer.
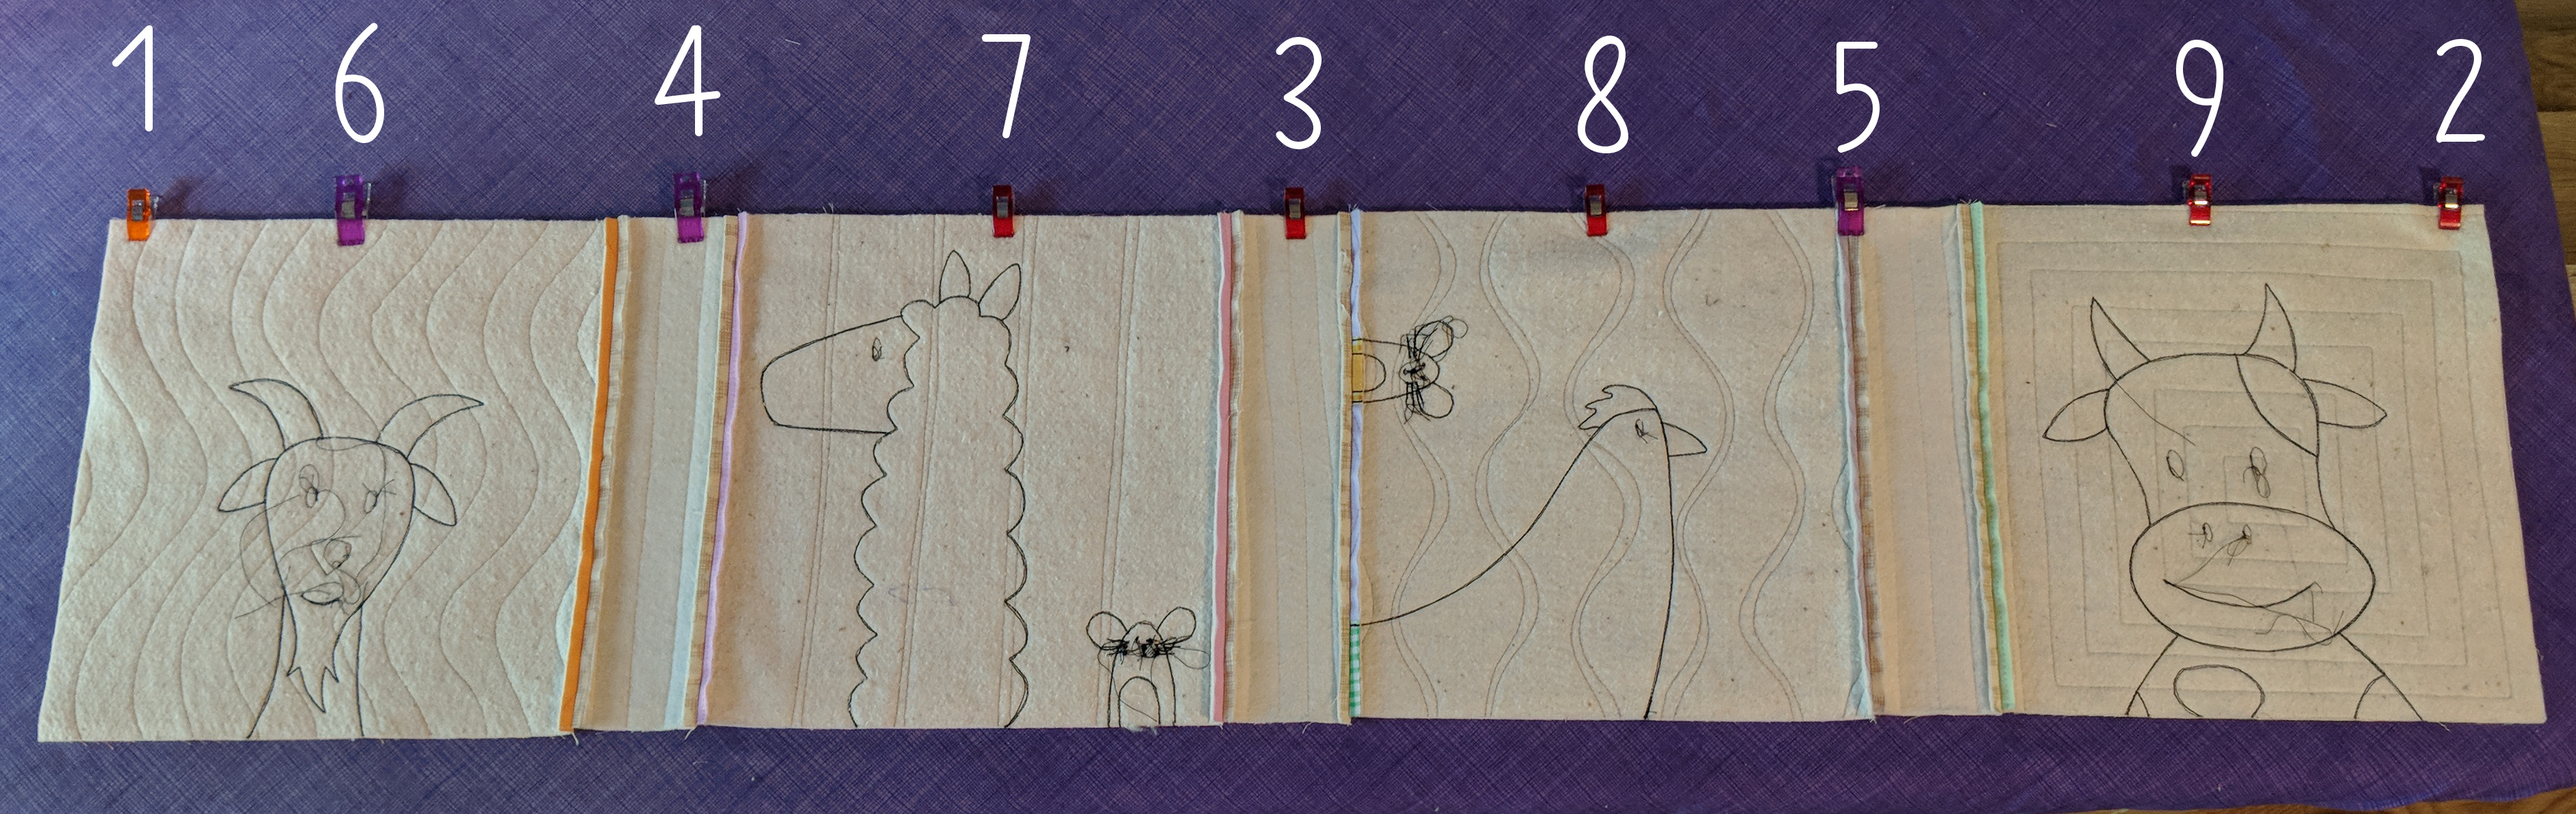
Here’s a seam I just pinned. (Actually clipped. When I pin already-quilted layers together I prefer to use sewing clips. They distort the fabric less.)
I loaded up a really large image size here so you can click on it to see it even bigger on your screen.
Those numbers show you the order in which I placed those clips.
First I start by clipping the ends – 1 and 2. That way I know that my ends are going to be perfectly lined up.
Next I want to divide that space in half (Divide and Conquer) and I place the clip right in the middle. That’s #3.
That leaves me with two large spaces – the one between 1 and 3 and the one between 3 and 2. I divide those spaces in half by adding clips 4 and 5.
Finally, I divide all the remaining spaces in half by placing clips 6, 7, 8 and 9.
It’s always the same – I start by securing the ends, then just keep dividing the remaining spaces in half over and over again until my clips are close enough together to take it to the machine.
If you’ve been here for any time at all, you’ve heard me go on and on about how important it is to download your pattern files and save them to your own computer, and to back up ALL your files. It’s in every pattern delivery email and I do a PSA on social media about once a month reminding people to back up their files.
Well – I got an email from someone last week saying she wants to back her files up – but doesn’t know how. In my experience, when one person asks a question it means there are a bunch of other people who really WANT to ask the same question but haven’t done it yet.
So I just made two new videos to help out the folks who are super comfortable with a needle and thread – and less comfortable moving around digital files.
Here’s the first one. It shows (in a LOT of detail) how to download the patterns you purchase – and two ways you can easily back up those files.
See? It SHOULD be as easy as clicking on the download button.
But sometimes things go wrong – and that’s what this video is about. I share easy fixes to a few of the most common download problems.
These videos now live on my FAQ page, so they’re easy to find if you ever need them.
Just to be clear – I’m ALWAYS happy to help anyone who’s having technical difficulties. But I usually step away from my computer on weekends, which means your email asking for help can sit unanswered in my inbox for a couple of days. I’m hoping these videos will help you try some easy fixes yourself when that happens. 🙂
I’ve gotten a lot of questions lately asking for suggestions for the background colors of the Noisy Farm quilt pattern.
The cover sample you see above is from before I had fabric bundles in my shop, and most of the fabrics I used are no longer available.
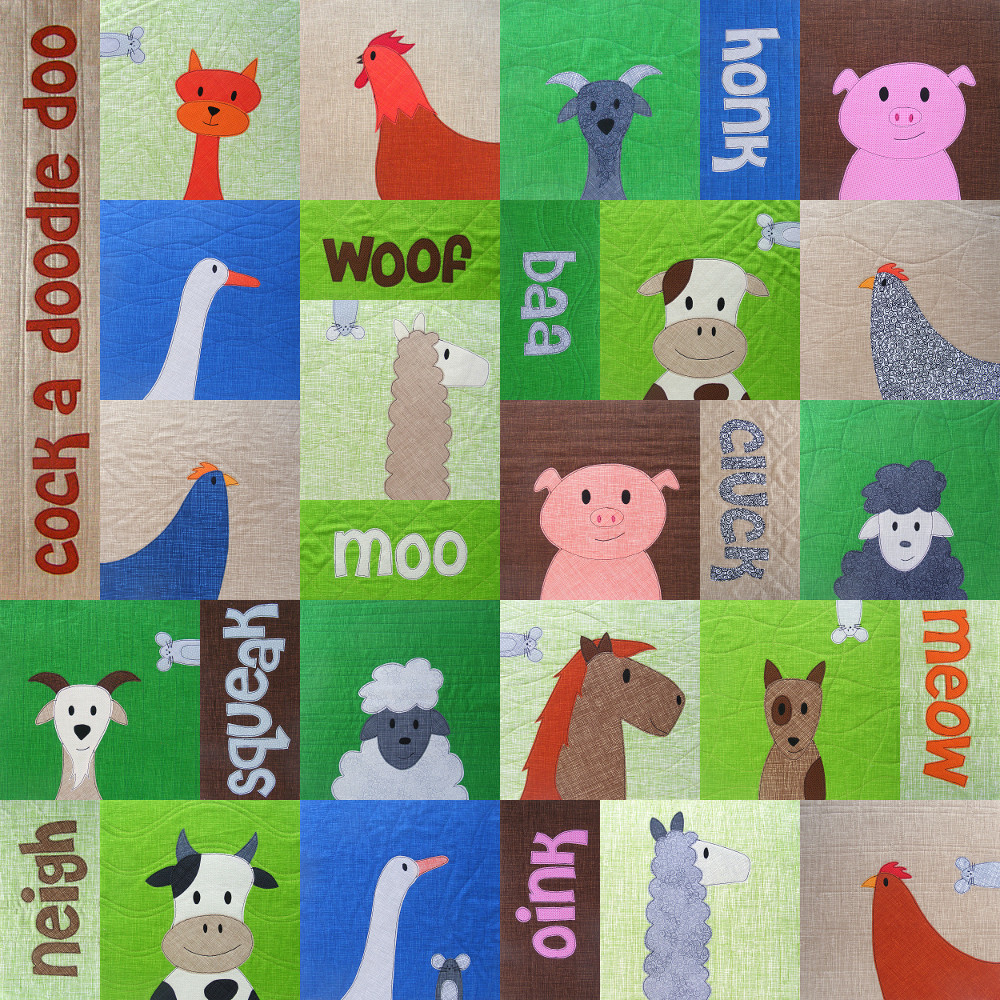
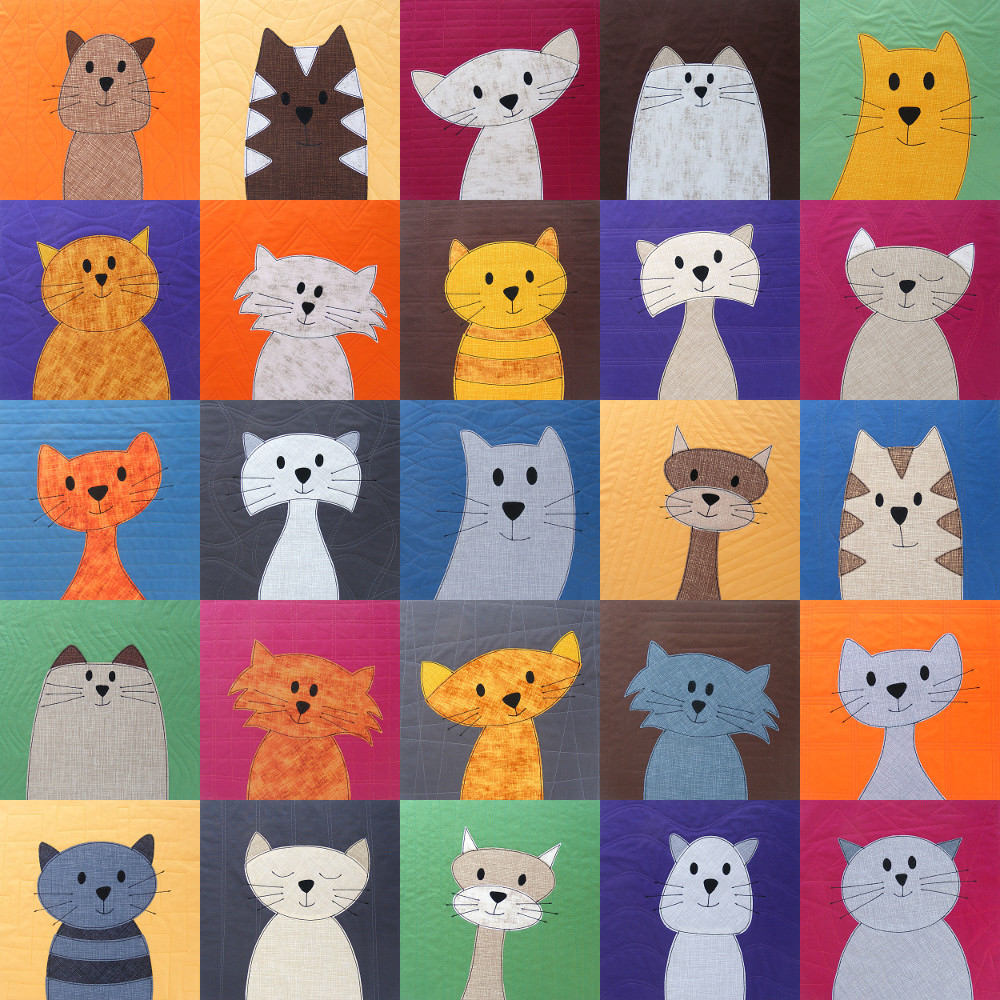
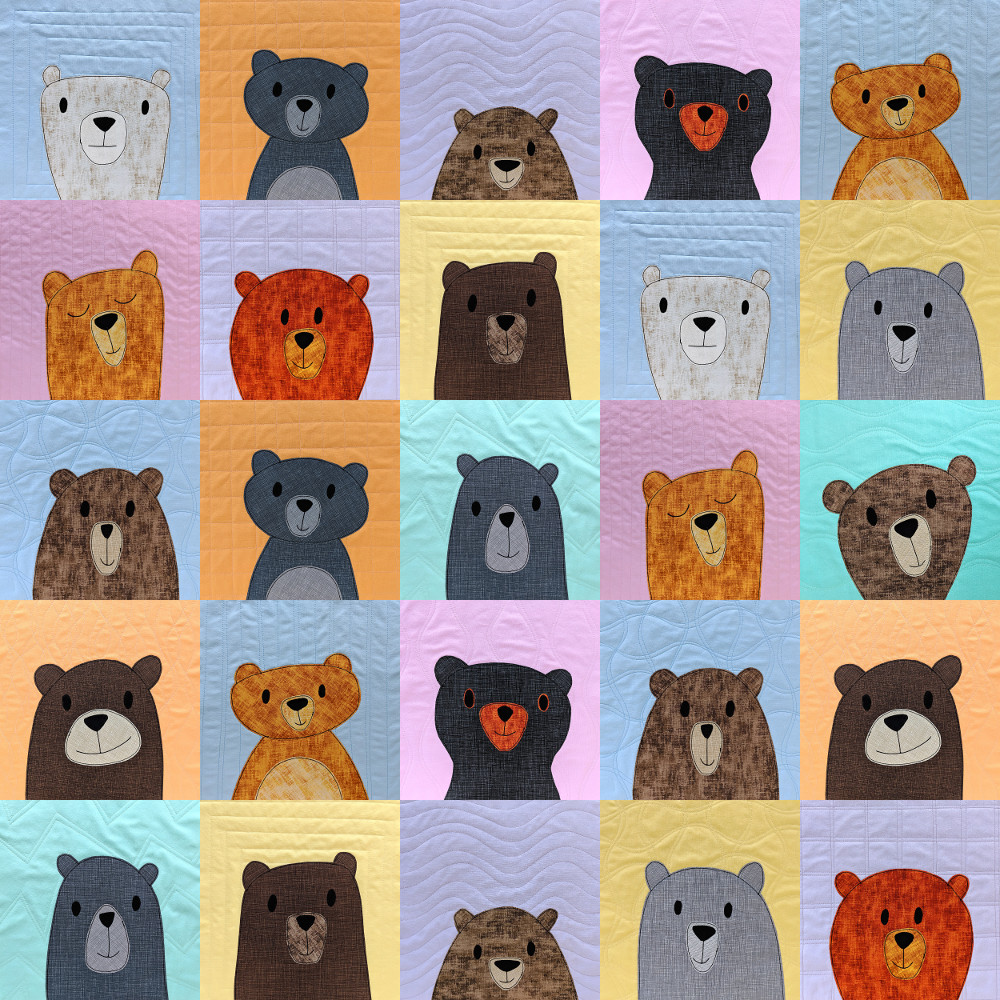
One of the things I love about the way I do fabric bundles now is that you can use any bundle for any quilt. Here’s an example of three quilts that all use the Warm Neutrals fat quarter bundle for the animals – but different bundles for the background colors.
Changing just the background colors really changes the whole feel of the quilt – and I love them all!
So when people ask for suggestions for background colors for the Noisy Farm pattern – I want to tell them they can use anything! Go totally bright with the Solid Rainbow! Go a little more subdued with Box of Crayons! Go baby sweet with Rainbow Sherbet! Go natural with Green Batiks! Want even more suggestions? Go to the Noisy Farm pattern listing and look at the additional photos. There are a bunch showing finished quilts that other people have made with different fabrics than my samples.
For my new version of the Noisy Farm quilt I used Rainbow Sherbet for the background blocks. I went totally wild with the animals and using the Gingham Play fat quarter bundle. Gingham always says “farm” to me and I can’t wait to make the animals in fantasy colors.
One more change – I made this one a silent farm. 🙂 I left off the half-blocks with animal sounds and added sashing. I get a lot of requests about adding sashing to a Quilt As You Go quilt. There’s a tutorial here showing how you can reset (almost) any of my quilt patterns with added sashing. I even did the math for you for all the sizes. 🙂
If you’ve made any of my quilt patterns using a different color scheme – please share! Seeing all the different versions of my patterns makes me Muppet-arms-flailing happy – and it’s a great resource for your fellow makers out there to see different options. 🙂
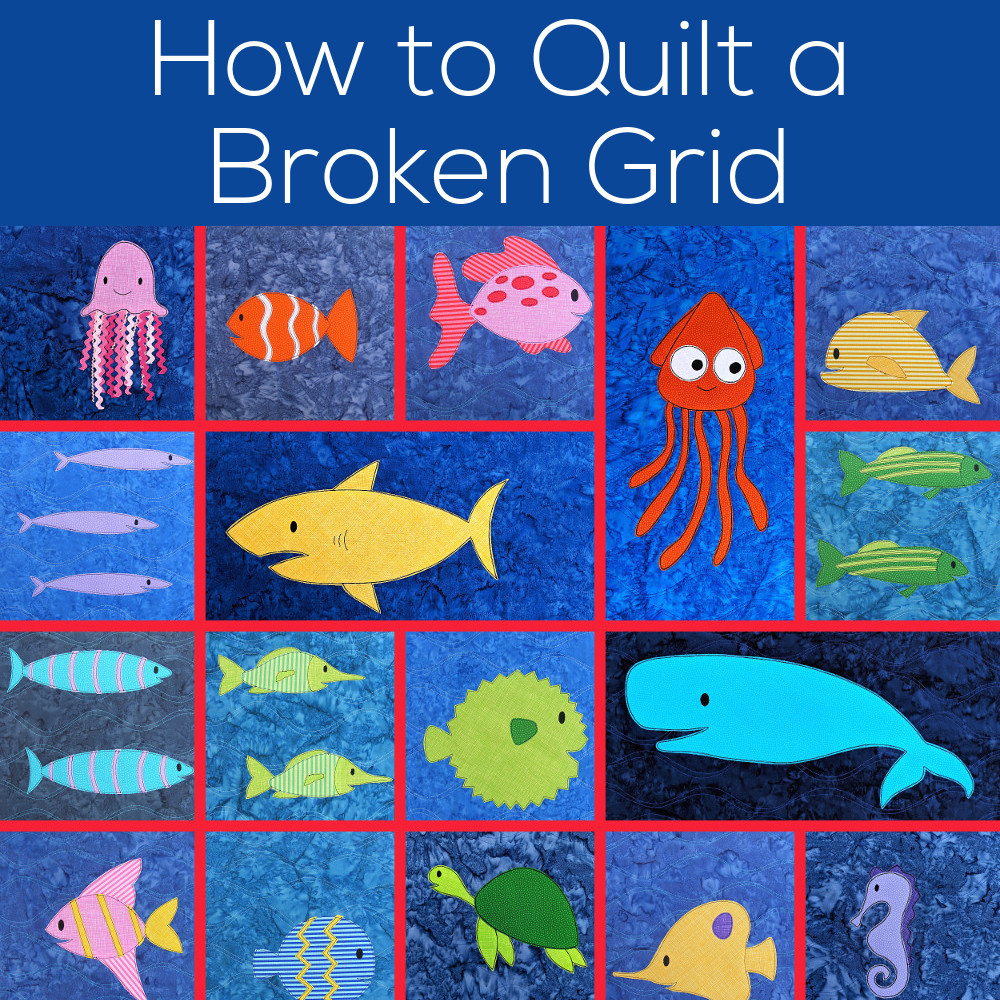
Some of my quilts have what I call a “broken grid” layout. You’ll also see it called an “alternate grid.”
Both of these terms refer to quilt layouts that aren’t the standard checkerboard-style grid, with all the seams running in straight, uninterrupted lines from edge to edge.
But I get a lot of questions about how, exactly, I quilt these quilts. Do I quilt around each square individually? Do I turn the corner to go around a block that’s interrupting my straight line?
Nope and nope. 🙂
At this point in the process I have my entire quilt sewn together and I want to do everything possible to avoid turning any corners while I’m quilting, because that means turning the entire mass of the quilt, and that is not fun.
So what do I do?
I hop over the block that’s blocking my way.
This video shows what I mean by that.
See?
Just hop right over those pesky blocks. 🙂
Do be sure to backstitch or knot – whatever technique you use to secure your threads – any time you have to stop or start quilting.
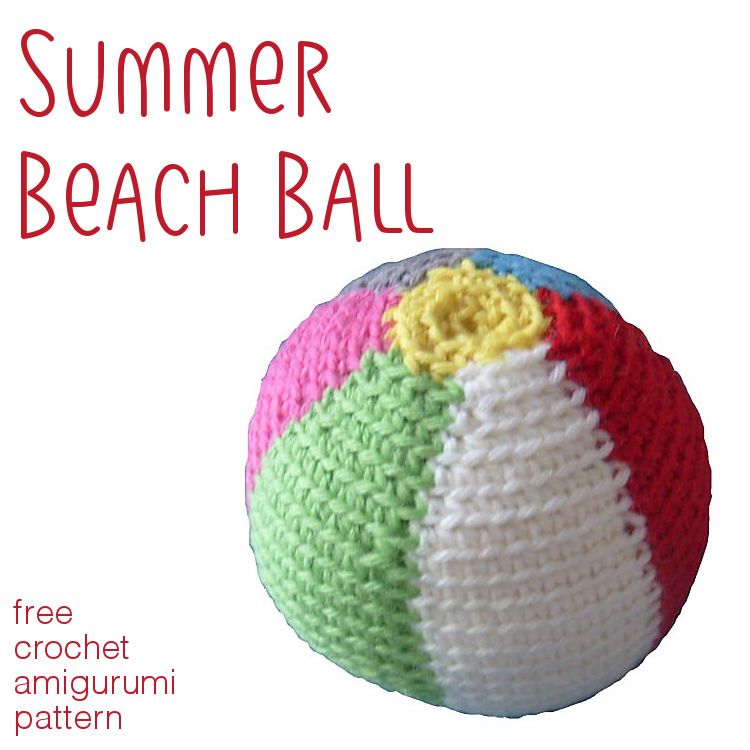
Get ready to have fun in the sun with this great stuffed beach ball! This beach ball measures about 4 inches tall when completed with worsted weight yarn – the perfect size for lots of different amigurumi softies. 🙂
To complete this pattern, you will need. . .
7 colors of worsted weight yarn (assign each a number, C1, C2, C3, etc.)
size H (5 mm) crochet hook – or size needed to get a good tight fabric with your chosen yarn
polyester stuffing
The skills you’ll need for just about any amigurumi are. . .
You can go through all those posts now, or just hop to them as you get to those points in the pattern – whatever works best for you!
Yarn
This pattern can be used with any weight yarn! Just use the hook recommended on the ball band, and adjust as needed (see ‘gauge notes’ below). For a bigger, human-sized beach ball, try a bulky weight yarn! Just keep in mind that you’ll use more yardage than recommended. The sample is crocheted in worsted weight yarn, and all yardage/hook recommendations are calculated based on the sample.
Materials
Size H crochet hook (or size needed to get a tight fabric)
7 colors of worsted weight yarn (fewer if you’d like to repeat colors)
a couple of handfuls of stuffing
Gauge Notes
This pattern doesn’t specify a gauge. It’s a stuffed ball, and you don’t need to be too picky about exact sizing. 🙂 The most important thing is that you use a hook size that creates a nice looking fabric for your yarn. If you use the recommended hook size, and your fabric looks very loose (so that stuffing would show through), then you will want to use a smaller hook. Other than that, no measuring required!
In case you’re curious about getting the exact gauge Stacey does, it’s 5 rounds=2 inches.
Stitch into the Back
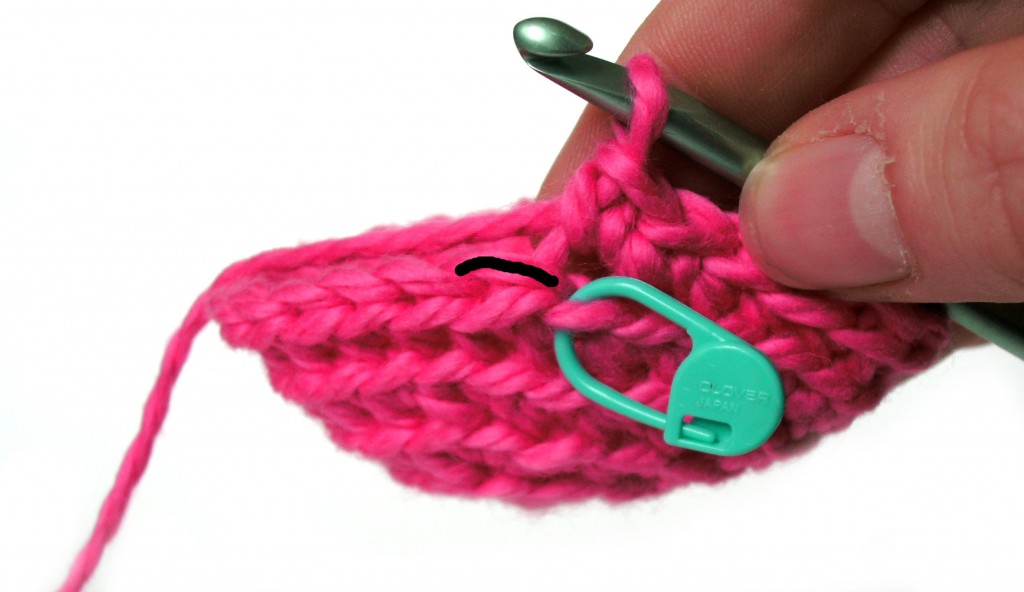
All stitches in this pattern are worked through the back loop only. Look at this picture.
See how one loop is highlighted in black? This is the back loop, and it’s what you’ll stitch into. Stitching into the back loop creates ridges on the right side of the piece.
Want to see crocheting through the back loop in action? Check out this blog post. It talks all about why Stacey crochets through the back loop and even has a handy dandy video showing how to find that loop. 🙂
Round 5 With C2 [sc twice in next st, sc in next 3 sts.] 6 times, each time using a different color C2-C7 (30)
Round 6 With C2 [sc twice in next st, sc in next 4 sts.] 6 times, each time using a different color C2-C7 (36)
Round 7 With C2 [sc twice in next st, sc in next 5 sts.] 6 times, each time using a different color C2-C7 (42)
Round 8 With C2 [sc twice in next st, sc in next 6 sts.] 6 times, each time using a different color C2-C7 (48)
Round 9 With C2 [sc twice in next st, sc in next 7 sts.] 6 times, each time using a different color C2-C7 (54)
Round 10 With C2 [sc twice in next st, sc in next 8 sts.] 6 times, each time using a different color C2-C7 (60)
Round 11-20 With C2, sc in next 10 sts. With C3, sc in next 10 sts. With C4, sc in next 10 sts. With C5, sc in next 10 sts. With C6, sc in next 10 sts. With C7, sc in next 10 sts. (60, 10 rounds)
Snap a photo and share it with us over in the Shiny Happy People group! If you share it on social media, tag with with #shinyhappyworld so I can see it. 🙂
It’s a bee… but he doesn’t sting! Make a cute little bumbler with this free crochet bee pattern!
This is Burnie. (His full name is Vanburn von Bumble Bee.) He’s 3” tall and 4.5” long when made with worsted weight yarn. He’s super quick and easy to stitch up!
The skills you’ll need for just about any amigurumi are. . .
You can go through all those posts now, or just hop to them as you get to those points in the pattern – whatever works best for you!
Yarn
This pattern can be used with any weight yarn! Just use the hook recommended on the ball band, and adjust as needed (see ‘gauge notes’ below). For a bigger, super-cuddly animal, try a bulky weight yarn! Just keep in mind that you’ll use more yardage than recommended. The sample is crocheted in worsted weight yarn, and all yardage/hook recommendations are calculated based on the sample.
Materials for this crochet bee pattern
Size H crochet hook (or size needed to get a tight fabric)
two 9 mm black animal eyes
tapestry needle
a bit of stuffing
three colors yarn – black, yellow and white
Find links to sources for all my favorite supplies here.
Gauge Notes
This pattern doesn’t specify a gauge. It’s a stuffed animal, and you don’t need to be too picky about exact sizing. The most important thing is that you use a hook size that creates a nice looking fabric for your yarn. If you use the recommended hook size, and your fabric looks very loose (so that stuffing would show through), then you will want to use a smaller hook. Other than that, no measuring required!
In case you’re curious about getting the exact gauge Stacey does, it’s 5 rounds=2 inches. Note that you will need to have this gauge for the yardage suggestions to provide an accurate estimation.
Stitch into the Back
All stitches in this pattern (that are worked in the round) are worked through the back loop only, unless otherwise directed. Look at this picture.
See how one loop is highlighted in black? This is the back loop, and it’s what you’ll stitch into. Stitching into the back loop creates ridges on the right side of the piece.
Want to see crocheting through the back loop in action? Check out this blog post. It talks all about why Stacey crochets through the back loop and even has a handy dandy video showing how to find that loop. 🙂
Here’s a side view so you can see that cute stinger!
I’m so glad he doesn’t sting. 🙂
Congratulations! Please post a photo over in the Shiny Happy People group! We’d love to see the adorable bumblebees you make with this free crochet bee pattern!
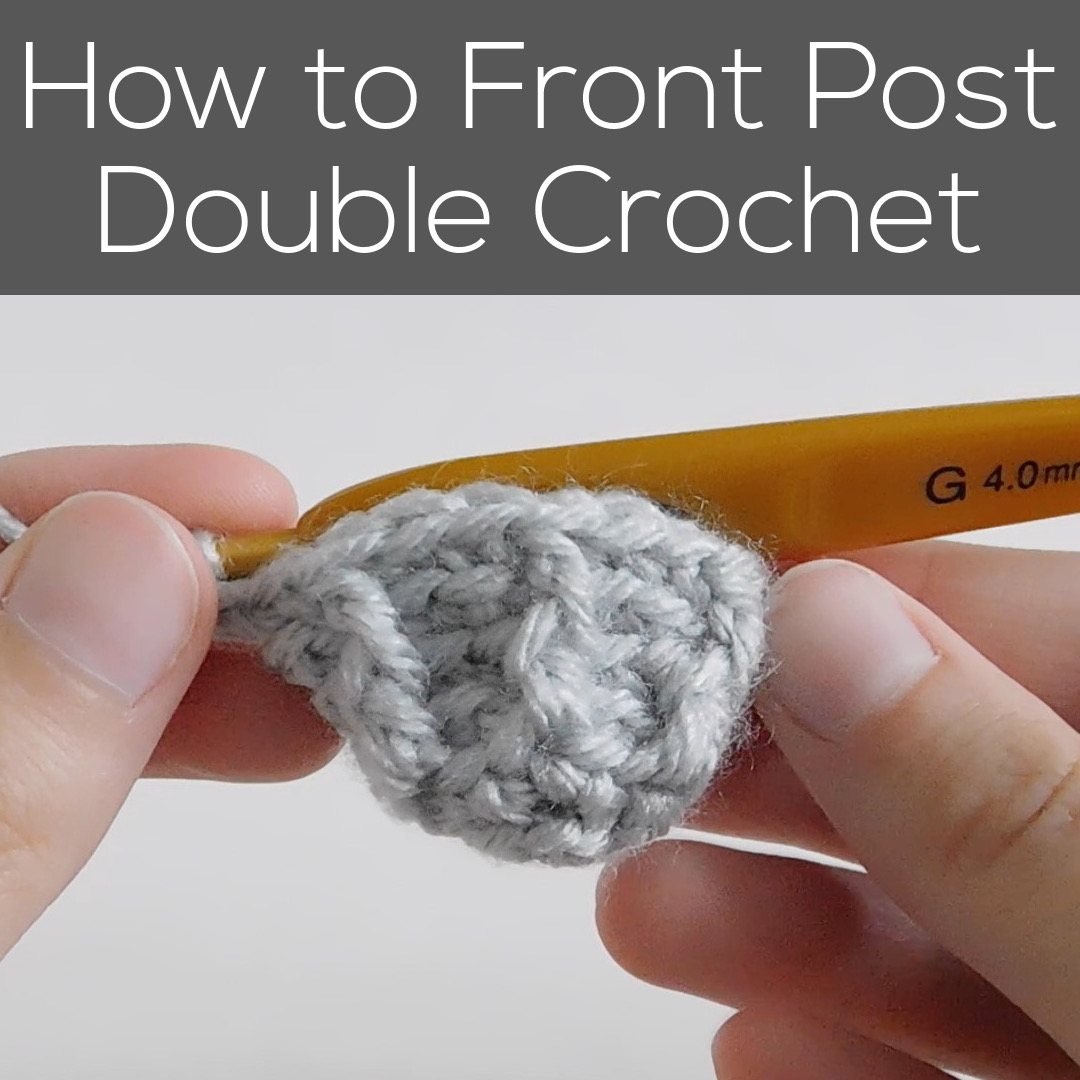
You can use front post double crochet on hats and scarves – but it can also be a handy skill for amigurumi too! You could use it to create textured seashells, fins on a fish’s fins or tail, veins in a leaf, the look of corduroy pants, a ribbed-looking hat – the possibilities are endless!
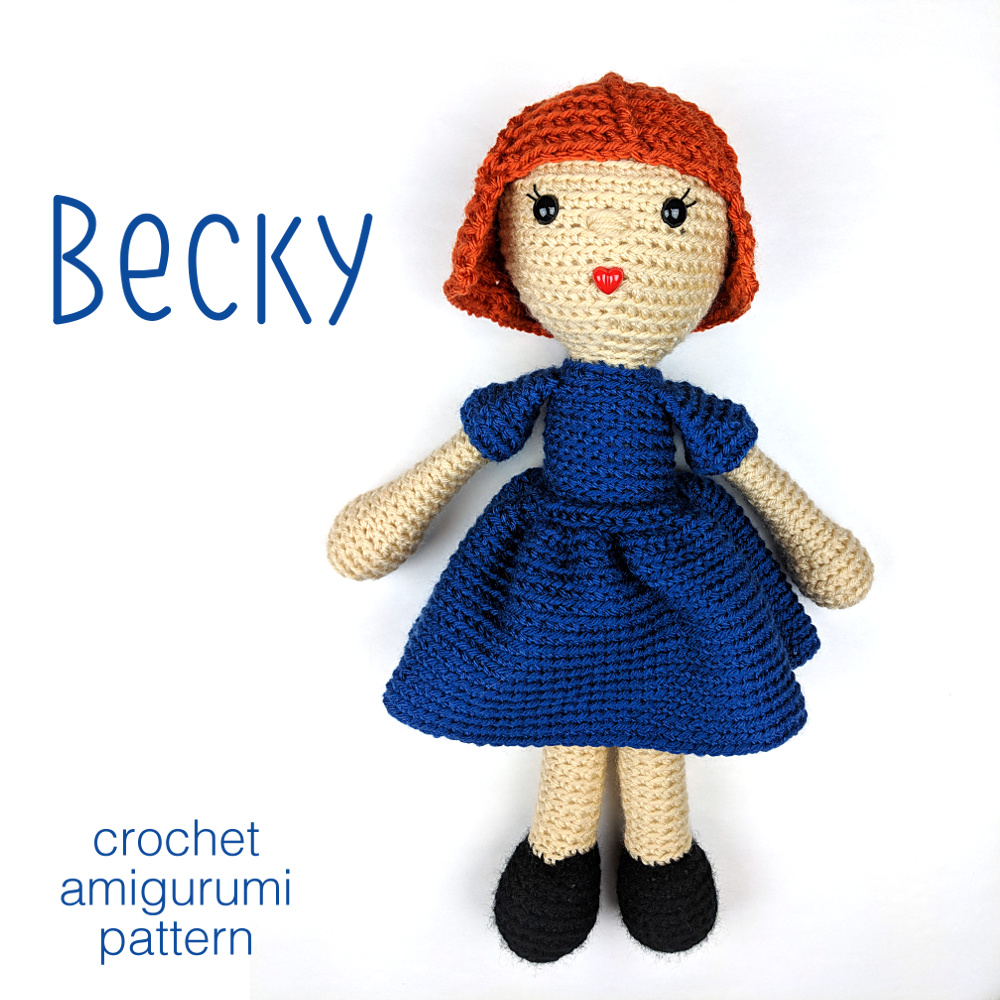
I used this stitch to add raised ridges on the hair on this doll.
Here’s a view of the hair before I attached it to the doll – shown from the top down so you can see the ridges. It adds a nice extra texture that I really like.
(I also really like that you don’t have to permanently attach the hair to the doll – make the same “wig” in a few different colors and lengths so kids can swap it out as they play. Fun!)
Did you know you can crochet one row below where you would normally crochet?
It’s a nifty little trick that can create a neat new texture on the surface of your fabric – but it can have an extra benefit for amigurumi.
It can make your shape bend!
In this terrific video, Stacey shows you how to do it.
Specifically, she shows how to single crochet in the front loop, one row below – but you can use the general idea to do lots of other stitches one row below.
Here’s how.
See how that makes the fabric bend? Isn’t that cool?
And crochet one row below is one of the skills you build on to be able to front post double crochet – the skill I used to create the ridged lines in this doll’s hair.
Crochet one row below. Pretty nifty – eh?
Here are handy links to all the posts about crocheting more advanced shapes. . .
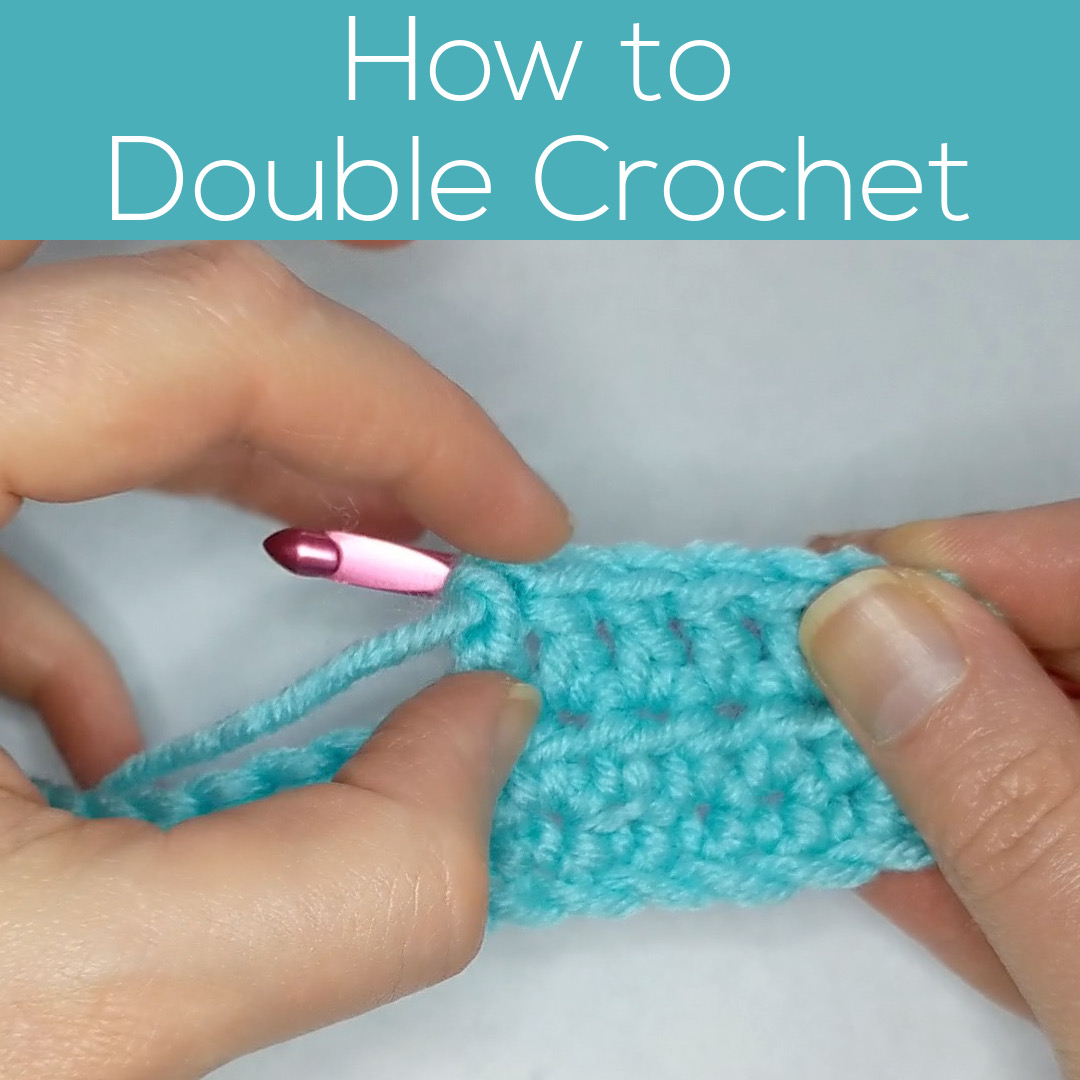
You may be wondering why you need to learn double crochet. After all, amigurumi are mostly single crochet. That gives the tightest fabric with the smallest holes for the stuffing to peek through.
But sometimes we need some slightly taller stitches (like on the convex side of a bendy piece) so we use half double crochet.
And sometimes we need something even taller, so we use double crochet.
In this video I show you a swatch where you can see (and compare height) between the three most basic crochet stitches – single, half-double, and double.
And, of course, I show you how to do it. 🙂
See how easy that is?
And how much taller it is than single crochet?
That height means bigger holes, so you’ll never see this in amigurumi bodies that need to be stuffed.
See? Even though amigurumi are mostly single crochet, there are lots of ways to slip in a little bit of double crochet for special touches.
Bonus – double crochet works great for scarves and hats. It’s a little more drapey than single crochet – and extra drapey if you go up a hook size from what the yarn label recommends. It gives scarves and slouchy hats just the right softness.
Here are handy links to all the posts teaching the basic crochet stitches. . .